
Knifemaking

Knifemaking is the building of a knife, which includes the blade, handle and other accouterments. Blades are made by either removing metal from a steel blank via a grinder – known as stock removal – and the forging to shape of hot steel into a blade in the process known as bladesmithing. Other parts, including bolsters, guards, pommels, etc., are needed to complete the finished knife.

Featured Knives – – Knife Collecting – – Tactical Knives – – Survival Knives

Keys To The Best Elk Antler Handles

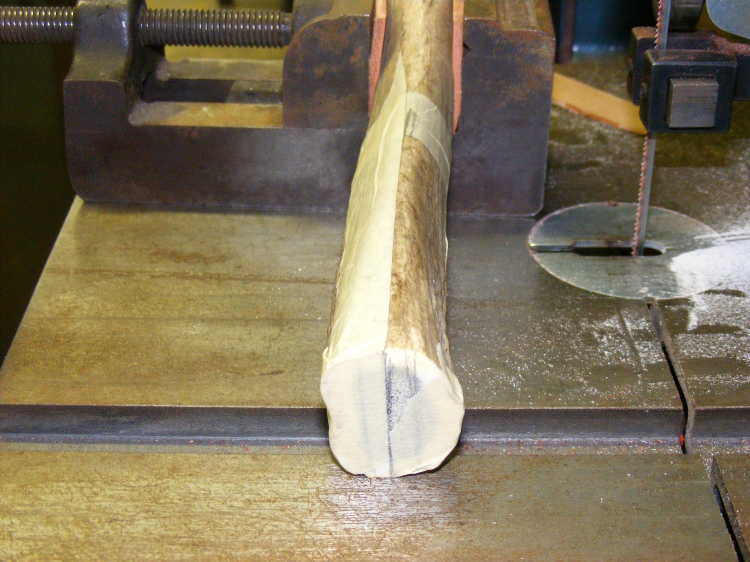
After cutting the antler section to size, cut it in half lengthwise to form slabs. Mark the centerline using masking tape along the antler’s top, bottom and ends. (photo courtesy of Joe Szilaski)


     By Joe Szilaski, BLADE® field editor

     1: I enjoyed reading and learned a lot from your story (page 52, July BLADE®) on using elk antler on hidden-tang knives. I have some nice elk antlers and would like to use them for the handle on a full-tang knife. You mentioned in your article that elk antler can be very porous in the center. What is the best way to go about cutting slabs from elk? (Johnny C., address n/a)

      An elk rack is quite massive. Each time I hold one of these magnificent specimens, my mind wanders off to great childhood memories. I grew up in Hungary where elk were plentiful, and I was fortunate that my godfather was the forest ranger. One of his responsibilities was monitoring the elk herds, and I saw many majestic bull elks, especially during full rut season.

     Elk antler can make an excellent handle for a full-tang knife. Before answering your question, I would like to tell BLADE readers what to look for when buying elk antlers for handles.

     Try to buy a “seasoned” rack; otherwise, you will need to store it for a few years before use. You cannot be 100 percent sure it is a seasoned rack unless the seller knows and is honest about it. The only way to be sure is to cut into the antler and see if the core is sort of gooey or oily feeling. If so, this means the antler is still green and you should wait at least two to three years before using it. Using green antler is not a good idea because the shrinkage will be much greater. This is the case with most natural materials.

     I look for an antler that feels heavy for its size. In other words, the heavier the antler, the more solid it should be. The heavier weight is a good indication the antler is less porous in the center and has a thicker outer wall. A lighter antler is usually more porous in the center and has a thinner outer wall.

     Of course, the thinner wall does not mean you cannot use the antler for scales. You can but it takes a little more work. As I mentioned in the July BLADE, you must remove the porous section and fill the void with wood or other solid material. 

     When working with a more solid antler, by the time you grind your scales to the desired thickness and size, there will not be much porous section left to worry about—and that you can saturate with extra-thin Super Glue® in order to make it solid. Most likely you will need to repeat the application of glue a few times. Make sure the glue has completely dried before applying another coat. 

     As far as the best way to cut your antler, I can tell you what has worked for me. WARNING: Be safety conscious if you use tools such as a power saw. 

     Before cutting it, I study the rack from different angles and determine which sections would be more suitable for hidden-tang knives or as slabs for full-tang knives. I hold the different parts of the antler to find the sections that feel most comfortable in my hand. From there, I mark with masking tape where each cut will be.

     After cutting the section to size, I cut it in half lengthwise to form slabs. I mark the centerline using masking tape along the top, bottom and ends of the antler (see photo above). 

     When positioning the antler into the vise, I use 10-ounce leather to line the vise jaws. The leather prevents damage to the antler and will result in a better grip because the soft leather will form to the antler’s irregular shape.

     I use a small precision drill block to check the angle of the antler in the vise. The goal is to have the centerline positioned perfectly vertical for cutting.

     Most of the time, I use a small wooden wedge to compensate for the irregularity of the antler and to help true up the centerline. If marked and cut correctly, the slabs should be similar in size and thickness, so not much effort will be required to grind or sand the scales flat.

     If the antler is small, I may use a wide-faced, sheet-metal locking pliers instead of a machinist’s vise and slowly push the antler on the band-saw blade to cut lengthwise.

     Only your imagination limits what you can make using elk antler. Dave Herman, my friend and ex-partner, made a knife and gave it to me as a present in 1989. It shows how creative you can be with elk antler. The handle is pieced together like a jigsaw puzzle. The top half is hidden-tang construction and the bottom half is slabs. I made a few sub-hilt fighters with similar “jigsaw handles.” It is a lot of fun but also a lot of fitting. As noted, you are limited only by your imagination—and maybe your patience.

     Send your questions for Wayne Goddard or Joe Szilaski to BLADE, POB 789, Ooltewah, TN 37363-0789 [email protected]. Include a self-addressed, stamped envelope with your name and address for a personal response from Wayne, or e-mail him at [email protected]. To contact Joe by e-mail, his e-mail address is [email protected]. If you wish, BLADE will not print your name with your question.
     To read more about how to make knives, the latest knives, knife trends and more, subscribe to BLADE. For subscription information, click on http://www.shopblade.com/product/blade-magazine-one-year-subscription-us/?r+ssfb281211#BL1SU


Dagger Design: Mastering Wire Wrapping The Handle

0

Wire wrapping the handle of a dagger is the finishing touch to the process, but requires a fine touch and patience.

Once the wire grooves and flutes are complete, the entire handle finished to its final state and the tang slot broached, insert the wires and lock them in tightly. As mentioned, 24-gauge wire looks good. If you want to use silver, Argentium or fine silver are both better choices than sterling, which tarnishes more quickly. Twenty-four-karat gold is terribly expensive but is the ultimate in luxury.

If you have Rolls-Royce taste but a Toyota budget, consider gold-filled wire as an alternative to pure gold. It’s brass at the core but at least 20 percent gold by thickness, and consequently much more durable than simple gold electroplate. It usually comes in 14k only. As a reference point, not long ago 12 feet of 24-gauge pure silver wire could be had for a little under $9. The same length of 24k gold in the same size was $1,050. The same length of gold fill was about $20. Save the 24k gold for times when you want to make a statement or your customer pays for the gold in advance.

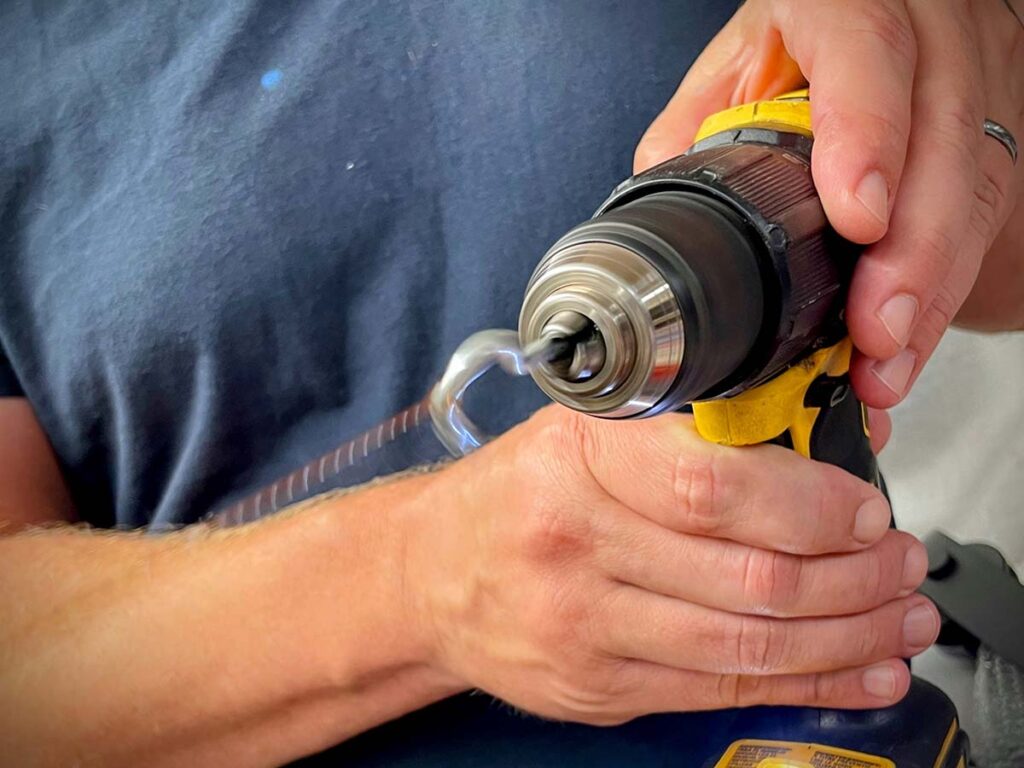
With a hook chucked in a hand drill, hook the resulting large loop, pull it tight and turn on the drill. Keep the tension constant—as you twist the wire it will pull you toward the vise.

Buy your wire dead-soft from your favorite supplier. You need about 20 percent more wire than twice the combined length of your wire grooves.

To twist the wire evenly, you must twist all of it at the same time. Clamp the two ends together tightly in a vise. With a hook chucked in a hand drill, hook the resulting large loop, pull it tight and turn on your drill. Keep the tension constant—as you twist it the wire will pull you toward the vise. If it breaks off at the vise, just re-clamp it and continue twisting. There’s no rule about how tightly the wire should be twisted, but tighter twists look better. If you aren’t sure it’s tight enough, twist it some more.

Annealing The Wire

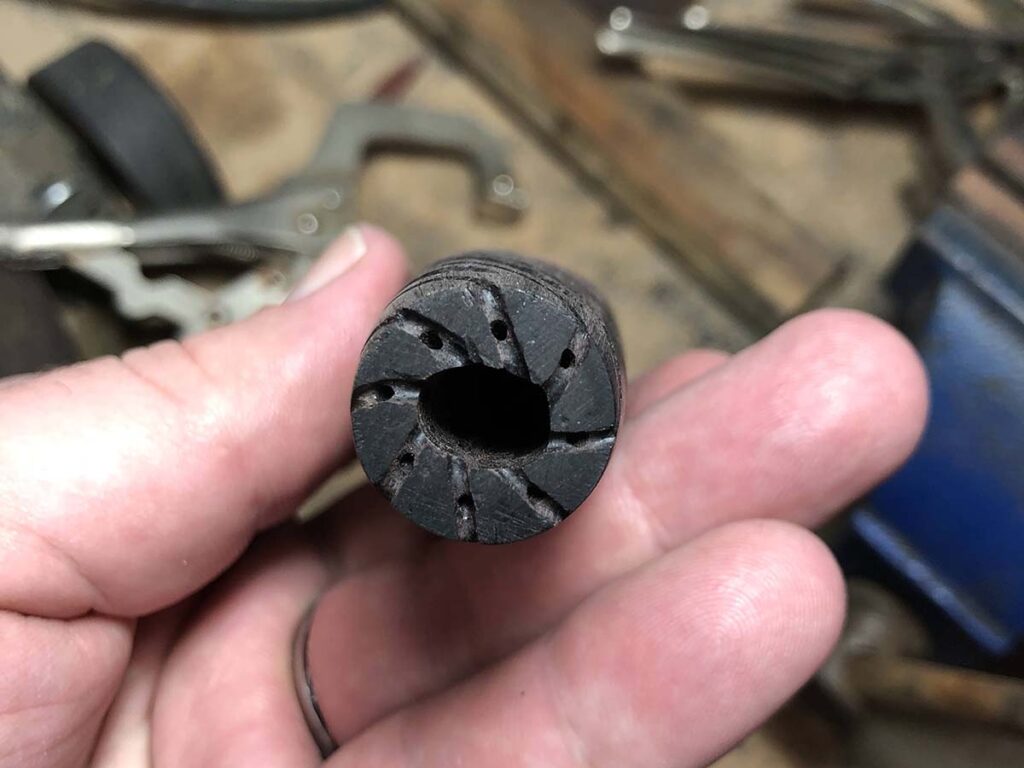
Drill diagonal holes inside your groove, starting halfway between the broached hole and the edge.

The next step isn’t required but will make things easier. Most metals, including gold and silver, work harden. After all of that twisting your wire will be hard and springy, and it’s much easier to install your wires if they’re dead soft.

To soften the wire back to its original state, you must anneal it. To do this, coil it tightly around a 2-inch piece of pipe or something similar, and tie up the coil. Using a propane torch, heat the coil evenly until it glows slightly. One trick to make sure you don’t melt it is to color your wire thoroughly with a Sharpie® marker. When the ink burns off, it’s time to stop.

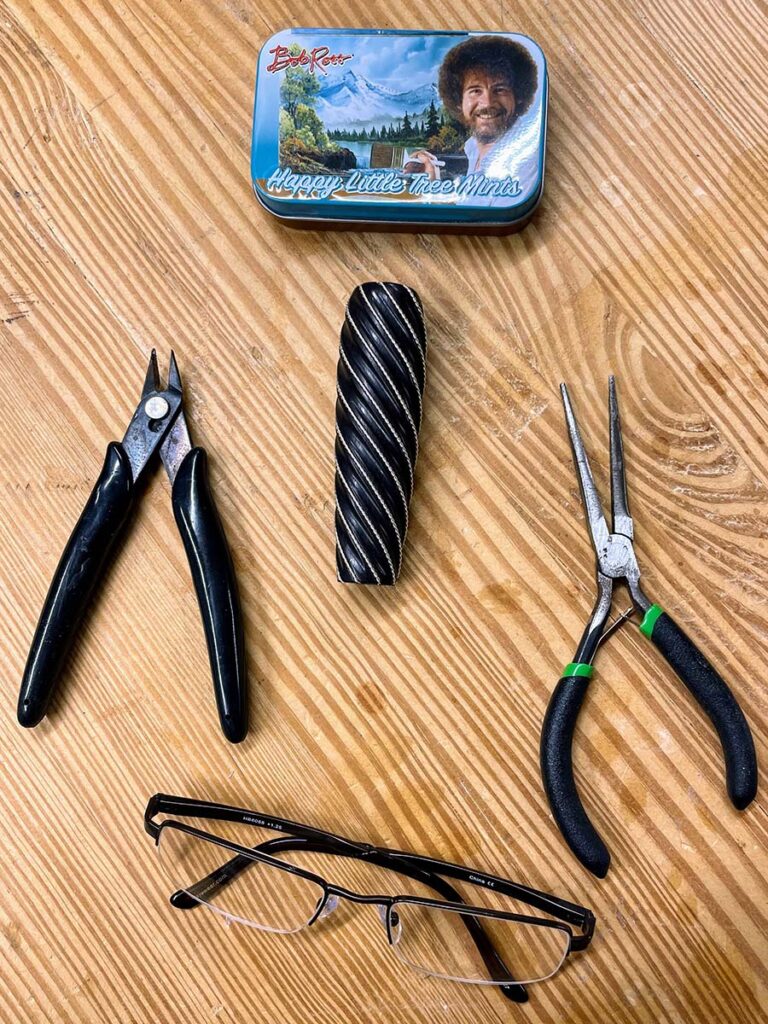
Don’t forget your essential tools—including your Bob Ross Happy Little Tree Mints.

Pick up the coil and drop it in water to cool it rapidly. It’s now dead-soft again but is likely discolored from oxidation. To remove the discoloration, let the coil sit in warm pickle solution that is available from any jewelry supply vendor. If you don’t want to go to the trouble of pickling, you’re better off dealing with the trouble of work-hardened wire.

Wire Installation

To install the wires, a little bit more work on the handle is necessary. Starting from the end points of your wire grooves, cut new grooves into both ends of your handle for at least half the distance between the outside of the handle and the tang slot. A Dremel or Foredom tool is best for this, but you can use a file also. If you use a file, go ahead and groove all the way to the tang slot—it’ll be easier that way and invisible on the assembled knife. These grooves need to be equal in depth to the diameter of the wire so that the handle will fit tight against the guard or pommel when the wire is installed and the knife is fully assembled. Cutting the line at an angle rather than perpendicular to the circumference will help when you pull things tight later.

Drill diagonal holes inside your groove, starting halfway between the broached hole and the edge. Drill at an angle toward the center so that the hole for the wire exits into the tang slot about a quarter inch from the top and bottom of the handle, in line with the end of your groove. Make the holes slightly larger than your wire diameter.

After the handle is fully assembled and the glue is set up, perform a final finish check. The wires should be tight and fully seated in the grooves.

You’re almost to the fun part. Cut your wires at least an inch longer than the length of the groove to give yourself some extra to work with. To install the wire, thread one end through the hole you just drilled into the tang slot, grab the end with some small pliers, and bend the end back up toward the handle end, locking it in. Though not strictly necessary, you can pin the wire with a toothpick in the hole and a drop of CA Glue or 5-minute epoxy for extra security. This can be cut off and sanded flush later. Pull the wire tight, seating it in your groove, and repeat the process to lock in the other end. This method guarantees that your wires are as tight as they can possibly be. The wires and glue and toothpicks should lay flush with or below the surface of the ends of the handle. Cut off the excess wire inside the tang slot to ensure the wire doesn’t interfere with the final fit-up of your knife.

Finish Check

After the handle is fully assembled and the glue is set up, perform a final finish check. The wires should be tight and fully seated in the grooves. You can lightly buff the wires for extra shine but use a light touch to avoid unintended polishing of the handle. Tarnished wires can easily be brightened up with a Sunshine® Polishing Cloth. Don’t forget to give yourself a pat on the back.

That’s A Wrap

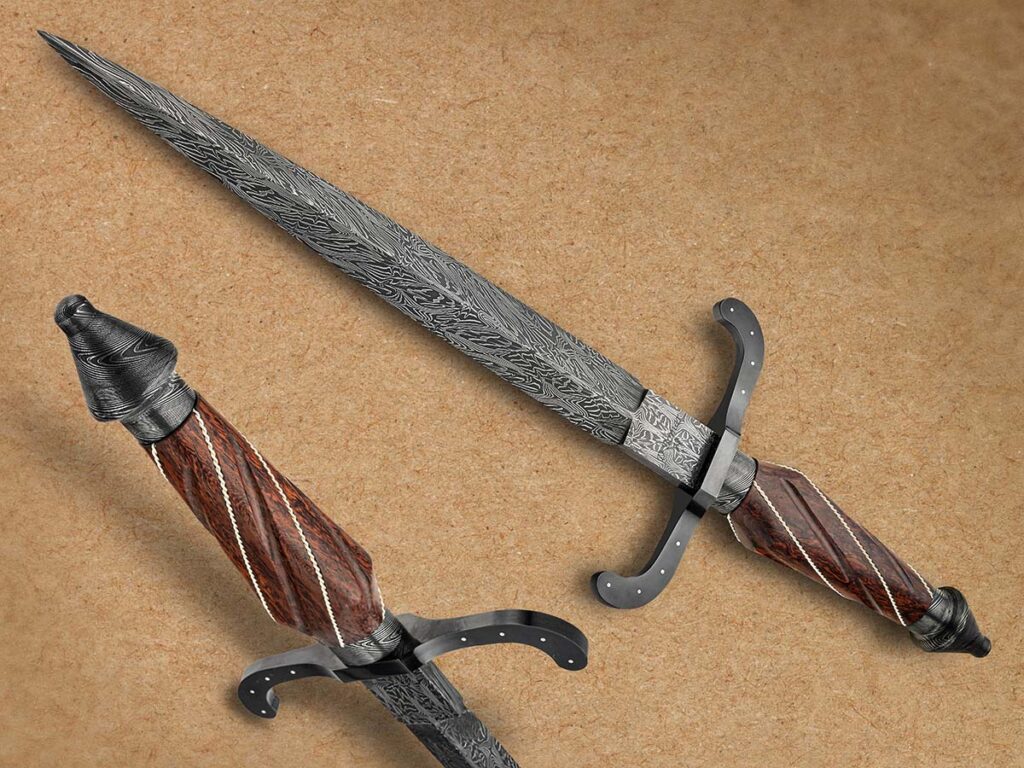
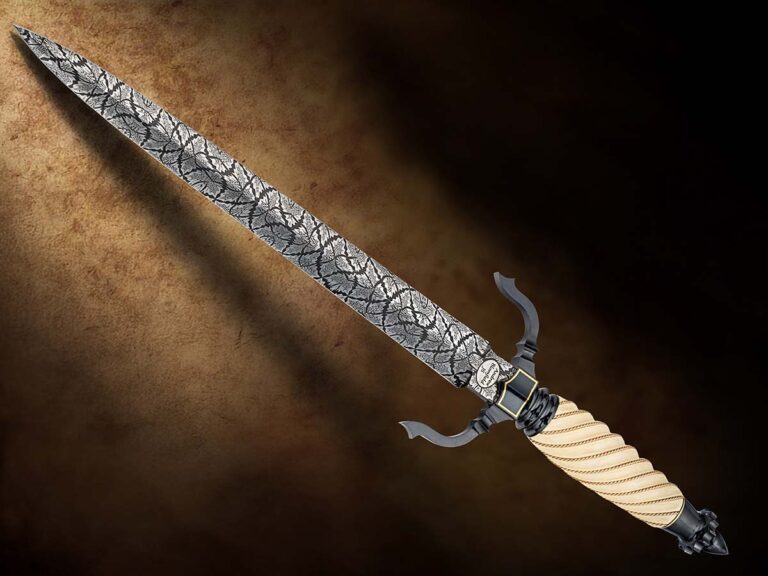
Silver wire wraps the rosewood grip of Duane Bomar’s dagger. The 10-inch blade is a damascus of 1084 carbon and 15N20 nickel-alloy steels. Overall length: 15 inches. (Jocelyn Frasier image)

Precision flutes and carefully inlaid twisted wires transform a utilitarian grip into a truly exemplary expression of craftsmanship. By selecting materials that balance luxury and performance, you anchor your design in both history and function. By following the instructions in this series, you’ll be able to master this exemplary style, and use the experience as foundation for future creativity.

Read More On Daggers:

Tools for Silver Wire Inlay by Joe Keeslar, Master Smith

0

Master Smith Joe Keeslar describes the tools needed for Silver Wire Inlay work on knife handles and sheaths.

Who Made the First Damascus?

The origins of damascus steel date to as early as 1500 BC.

The allure of damascus steel lies not only in its beauty and utility, but also in the mystique of its origins. Though its development began in ancient times, the word damascus has grown to encompass more than one method of steelmaking, and the earliest method is believed to date back to 1500 BC.

“Damascus steel today can mean at least three things,” explained blacksmith and steel authority Rick Furrer. “First, there’s pattern-welded steel where a bloom of steely irons is welded into a solid mass which then has a pattern. This is the oldest of damascus-steel-making technologies and one which most blacksmiths reproduce with layers of modern steel welded together.

“Second is crucible steel, where the material is fully melted in a container and then the resulting ingot is forged into a bar, which may or may not have a surface pattern. Third is overlaid or inlaid wire, gold, silver, copper or such into a base metal surface such as steel or silver to make a surface pattern. Some call this damascening or damascene.”

Those who have studied the origins of damascus tend to agree that pattern welding did happen first and that it occurred in the Far East, the Indian subcontinent, the Middle East, Indonesia and Europe. Crucible steel production is also referred to as wootz, and its beginning, for some, is easier to pinpoint.

“Some call crucible steel, or wootz, the original damascus, but pattern welding predates it by more than 1,000 years. Pattern welding was in Europe by 1100 BC in Greece and easily by 600 BC in Central Europe. It was very widely spread by 400 BC,” observed Furrer, who in 2011 participated in the filming of a Public Broadcasting System NOVA segment on the famed Viking swords from circa 800-1000 AD with the Ulfberht inscription. The extremely low slag content of the Viking blade steel may indicate a new development in steel processing in Europe, or that the Vikings were forging blades from imported crucible steel.

“The earliest examples of blades made from wootz steel date from around the first century BC,” related ABS master smith Kevin Cashen, “and the oldest examples of the material seem to come from India. While the Indians seem to have been the first to produce crucible steel, they were soon followed by other cultures in the Middle East such as the large production centers in what would now be Turkmenistan and Uzbekistan. Pattern welding is a trickier process to pinpoint, date or credit to a given culture as it is very old, and just about any people working iron would have produced welded blades on some level.”

Technological Advancements Of Demascus

As technology evolved, production methods improved and fueled the availability of high-quality blade steel. Performance and purpose have contributed to the growth of the industry and the changes in the scale of production through the centuries.

“All of these steel processes were driven by warfare and weapons technology,” noted ABS master smith Steve Schwarzer. “As soon as someone discovered a new method, everybody who wanted to survive jumped on that new method. The moment the local smith developed a method to heat steel to a totally liquid state and control the carbon, the need for wootz and pattern-welded blades fell to the wayside except for the very few who viewed it as art. When the Bessemer converter came into use [in the 1850s] and steel was produced in tonnage at any carbon level desired, there was no need to use the labor-intensive process of making one small piece of material at a time.”

The basic tools used by early makers of pattern-welded damascus were quite similar to those used by the modern bladesmith—hammers, anvils and forges. Dan Farr hammers hot steel in his shop. (Dan Farr image)

Nonetheless, the craftsmanship and performance of forged damascus is timeless. Modern damascus makers take advantage of improved technology and know-how. The ancient producers worked with basic tools and equipment during a process of both production and discovery. The early makers of pattern-welded damascus combined bloomery steel with varying properties, says Cashen, but the basic tools were quite similar to those used by the modern bladesmith—hammers, anvils and forges.

“One difference is possibly the absence of the fluxes we use today,” Kevin added. “The simple bloomery products of that time period, when worked in a charcoal fire, would weld much more easily and not require the oxygen barriers that we have become so accustomed to today.”

The early crucible process would have involved sealing some amounts of premade iron along with certain organic/carbon-bearing materials and fluxes into a clay crucible that would have been placed in a charcoal-fired furnace, which would usually have been fired by a bellows or natural air drafts.

“The clearest difference in either method now compared to then is the fuel we have at our convenience today,” Cashen commented. “Gas-fired forges and furnaces make the tasks much more convenient than the arduous, dirty labors at ancient charcoal fires.”

Staying True To The Steel’s Roots

Maybe it is true that the more things change the more they stay the same, particularly as it relates to damascus steel. Surviving examples of either pattern-welded or crucible damascus are impressive in their quality. Modern bladesmiths produce damascus and mosaic damascus/canned steel that simply defies description, the beauty of the patterns speaking for themselves.

One of the differences between the way damascus is made today as opposed to centuries ago is the use of flux—applied here to a twisted billet by Tim Britton. (Britton image)

Damascus also originally occupied a transitional period in human history. As the Bronze Age waned in Europe, basic iron blades began to appear and pattern welding followed. In the East, iron blades of piled construction were made and pattern welding may have taken place concurrently with it, both being phased out as the crucible process came along. Most experts agree that Europeans were introduced to crucible damascus/wootz during the Crusades.

“With the wootz made by high-temperature smelting in a crucible and forming a cake, bulat or ingot, this ingot was then formed in a very slow, methodical process to produce a beautiful pattern of iron-carbide ferrite and cementite banding,” Schwarzer commented. “This was called watered or damascus steel. It is thought Europeans encountered this material for the first time during the Crusades near Damascus, Syria. Then, this cast material was traded all over the world.”

ABS master smith Al Pendray is well known for his work in wootz steel. Along with John D. Verhoeven, he is listed by the U.S. Patent Office as one of the inventors of “a method of making a steel article having an external surface appearance and an internal microstructure resembling that present on an antique ‘Damascus’ steel sword or blade.” Pendray contends that the earliest crucible damascus was made in Persia and quickly got the attention of Westerners who came in contact with it. “Wootz is ultra-high carbon and will take a real clean edge,” he remarked. “With all the nonmetallic stuff and impurities floating to the top in the process, it’s also a super clean steel.”

But Why Call It Damascus?

As intriguing as the steel itself, the name damascus has a mysterious origin. While the obvious link is to the ancient capital of Syria, the answer to the source of the steel’s moniker is open to speculation.

“One such story maintains that only wootz can be called damascus steel because it was wootz that the Crusaders first encountered in the Middle East, with the town of Damascus being the trading hub for its distribution, thus lending it the name,” Cashen offered. “This theory ignores the fact that there were also damask cloths [with intricate patterns formed by weaving], and that the treatments on many materials involving carving, inlay or otherwise were worked with an intricate flowing or water-like pattern called damascene. It is also worthwhile to note that an old Arab term for water is damas, a coincidence that’s hard to ignore when you consider the number of cultures that refer to patterned steel as ‘watered’ or having ‘watering.’”

Speculating about the origin of the name is intriguing, but Cashen says it is what it is. “In any case, the number of centuries that any steel with a pattern in it has been called ‘damascus’ sort of renders all of these speculative picky semantics irrelevant,” he noted. “Languages evolve, and the word means what it does today. When this is taken into consideration, any steel possessing an induced pattern could be safely referred to as damascus, with pattern welding or crucible steel being the more specific types of patterned steel.”

According to Master Bladesmith Steve Schwarzer, modern steels are far superior to even the best of the ancient materials because of quality control and repeatability.

Finest Blades Ever

As with many highly prized skills, individual bladesmithing and the production of high-quality damascus steel in small quantities has been eclipsed by mass production, given the availability of modern equipment and technology. However, the steel still owes its lineage to the blacksmiths of ancient times. Additionally, today’s bladesmiths keep the tradition and the skill alive like no mass production process can.

“Modern steels are far superior to even the best of these ancient materials because of quality control and repeatability,” Schwarzer mused. “What modern steels don’t have are beauty and the visual fingerprint of the steel artist’s hand. The damascus blades being made in modern times are far superior to the ancient blades because the modern smith is using these very sophisticated steels and modern scientific techniques to produce the finest blades ever made.”

Using Children’s Modeling Clay to Design Mosaic Damascus

0

Most beginning bladesmiths can hardly wait to forge out their first damascus blades. Making damascus is challenging and exciting, especially when you advance enough to try and create the more complex designs. I still enjoy the challenge forging intricate mosaic damascus patterns, and especially figuring out how to make new ones.

I also enjoy teaching and passing down whatever knowledge I have collected over the decades. So, in 2008 I opened a knifemaking school in Pine Plains, New York. Most of my classes are based on the forging technique.

The most exciting thrill of teaching is watching a few of my students advance to become competent bladesmiths in their own right. I can honestly say I have met a lot of very nice, talented folks over the years at my school. Some just want to be hobbyist or part-time makers, and others hope to one day become full-time knifemakers.

Tips for making mosaic damascus
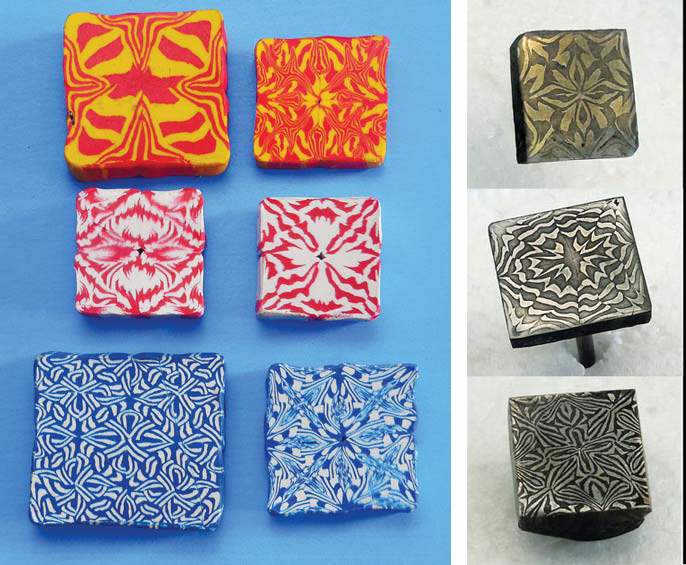
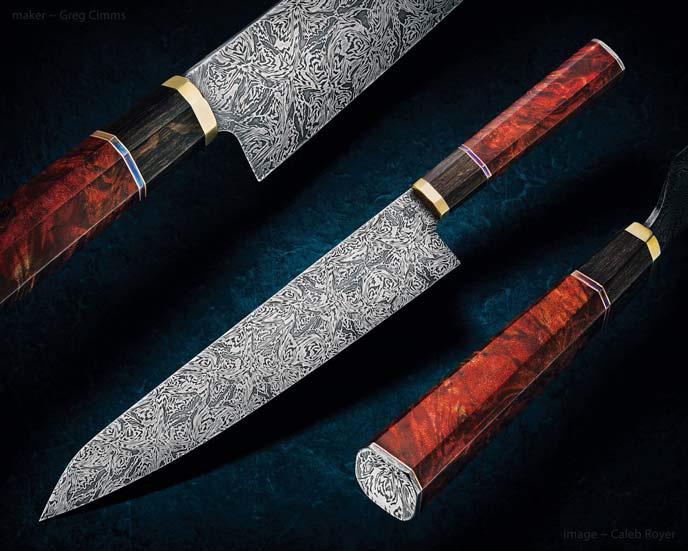
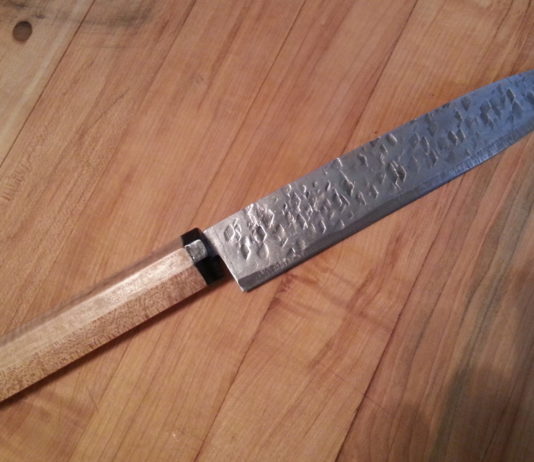
Greg Cimms forged the blade for his chef’s knife of multi-bar mosaic damascus in a pattern originally worked out in clay. (Caleb Royer image)

They are talented bladesmiths who have been doing incredible work so far. These gents have only been making knives a couple of years. They have learned the proper way to forge and forge weld and have made some nice damascus. I knew they were ready for the next challenge making more complex damascus. I decided it was time for me to hold a more advanced multi-bar mosaic damascus class for them.

The class was four days. On the first day we went down to the shop and I explained what multi-bar mosaic damascus was and how it is made. I also explained how powdered mosaic damascus is made, though it is a completely different process.

The Problem: “Shooting in the Dark” with Mosaic Damascus Designs

While we were sitting around the table I gave everyone a box of different colored clays. Some thought I was making a joke with the clay until I showed them some of the damascus patterns I had made. Some of those clay designs I made in the early 1990s.

how to make mosaic damascus knives
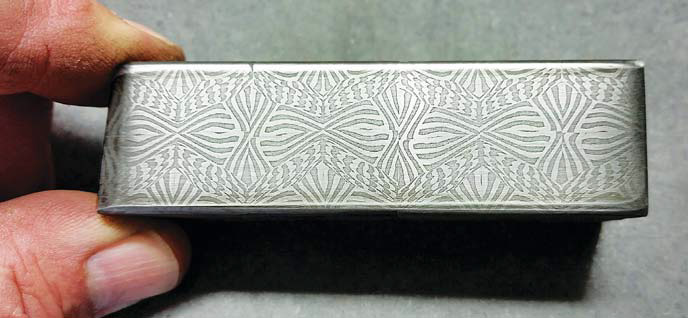
Bill Greulich followed the same steps he used to develop his pattern in clay to forge his first billet of multi-bar mosaic damascus.

Back then I was working in an art foundry full time pushing a lot of hours, so I had very limited time to forge my knives and tomahawks, never mind work out new damascus patterns. At night I would work out damascus designs on paper. The weekends were often spent working hard at the forge making damascus from the paper designs.

Unfortunately, many times when I finished the mosaic damascus billet, even though some did turn out to be nice patterns, they were not quite what I wanted. Basically, when you work out designs on paper, at least for me, I felt I was shooting in the dark without night vision. I knew I had to find some answer or solution to my problem.

The Solution: Kids’ Modeling Clay

While I was thinking what would be the best solution, the answer was right in front of me. I was working on a sculpture using red and yellow wax, and that is when it occurred to me. I started cutting off a few slices of red and yellow wax and made a billet out of it. I folded, twisted and so on as I would do with steel. While the wax was not so pliable in the cold form, it still gave me the idea of what I had to do.

Mosaic Damascus knife
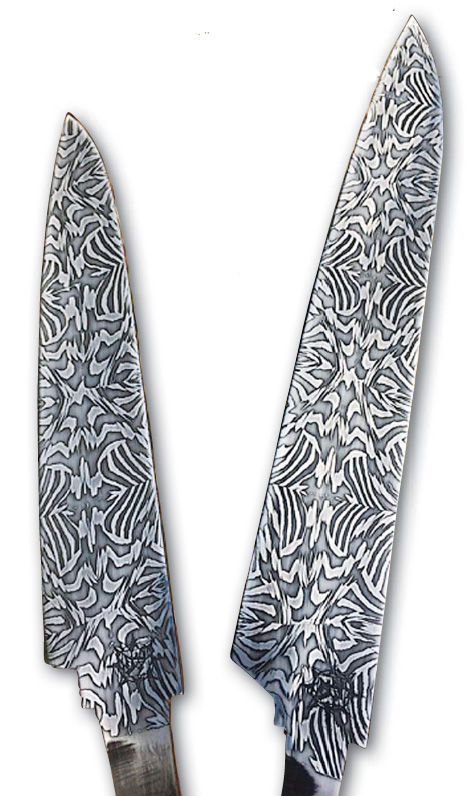
Greg Cimms forged these two blades from a billet he designed and made in the author’s Advanced Damascus class.

The next day during lunch break I ran out to the arts and craft s store and bought two boxes of multi-colored clay, the kind kids used to play with or use at school. I was very excited for my new finding and anxious to see how well it would work.

I made my first multi-bar mosaic clay billet that turned out better than expected in allowing me to preview the mosaic damascus designs. Making clay damascus does not mean you will like every pattern you create, but it is still a lot more efficient and easier on the pocketbook than forging all day long to find out the design is not what you wanted.

I could hardly wait to show my wife Lori that I had found the solution to my problem. Over the years, I probably came up with more designs in clay than I would ever be able to forge out in steel.

A Shortcut with a Long History

That is how I got started making clay damascus. I shared this technique with fellow makers. Actually, similar techniques have been done in glass beads for hundreds of years. I have many books on Indian trade beads in beautiful designs.

As kids we used to play with marbles that also had beautiful designs in them. It just never occurred to me to incorporate any of this into my knives.

Making Clay Billets

On the first day of class I demonstrated making a clay billet and explained, step by step, what to do and what to watch for.

Next I showed the group how to take the same starting multi-bar billets, and, by using different arrangements and folds, create two or three different mosaic damascus designs.

As the students started working out their designs in clay, I asked them to write down every step they took: how many layers they started with, how many times they cut the billet, how many times they folded it, in which direction they folded, in which direction they forged, and so on. This written reference is very important if you want to recreate the design in steel.

I got such a kick out of watching grownups having fun with clay, showing off to each other the designs they had created. It reminded me of back when I started making clay mosaic damascus and how excited I was.

That day everyone seemed on a diet because no matter how often I said “Lunchtime!” no one was hungry. Finally, Lori came home from work and we had dinner. At the table the only conversation was which of their designs they would choose to forge out on the second day of class.

Secrets Of The Shop: Steve Schwarzer & Bob Terzuola

0

Schwarzer’s blister busters and Terzuola’s effective efficiencies.

Editor’s Note: Jim Hammond has been a full-time knifemaker since 1977 and a member of the Knifemakers Guild since 1978. He was the first maker to work with CRKT and has many well-known designs to his name. This is the first of an ongoing column in which he uncovers the tightly held secrets of master knifemakers.

Welcome to Secrets of the Shop, where we dive deep into specific techniques and tips highlighted in the work of premier makers and knife smiths. While trade secrets often imply guarded formulas, for knifemakers, they are keystone discoveries that hone processes and perfect craftsmanship. This column seeks to turn these unrevealed secrets into shared solutions.

Popping Blisters

A veteran ABS master smith and BLADE® Magazine Cutlery Hall of Fame® member, Steve Schwarzer is probably best known for his pioneering work in the canister method of forging mosaic damascus. He is considered one of the finest instructors and ambassadors of the forged blade and of mosaic damascus, teaching at seminars and hammer-ins on the subjects for decades in Europe, South Africa, the USA and elsewhere.

During welding, a cold shut—a spot of incomplete merging of steel—can produce a trapped-gas bubble known as a blister. The spots where these void occur heat at different rates than the surrounding material and turn black. Often caused by worn and cupped dies, these blisters typically form along the billet’s perimeter.

Steve’s solution to addressing blisters is as follows:

  • Release the Gas: Punch a hole directly into the blister.
  • Flux and Forge: Drop borax into the hole and use a small rounding hammer to forge the area, pressing air out of the seam to recreate a uniform weld.
  • Refinement: Check the surface for flatness. Steve utilizes belt and stone surface grinders to achieve trued flats and maximize uniform contact.

To prevent blisters, Steve welds the edges of a billet before the center using a radiused fullering die. Going this route is less prone to create blisters than a flat die, though more apt to distortion. This technique was vital when Steve and Neil Kamimura created a million-layer billet that was folded rather than stacked, requiring the resolution of numerous small cold shuts.

Mosaic On A Budget

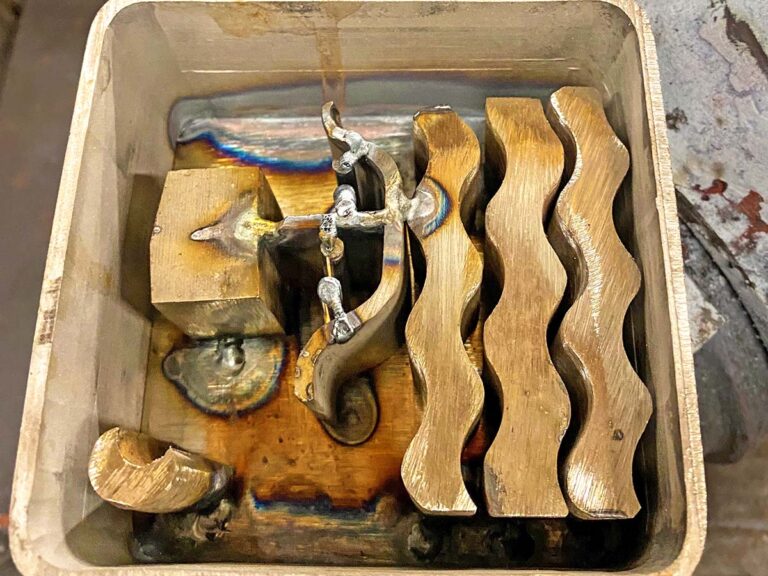
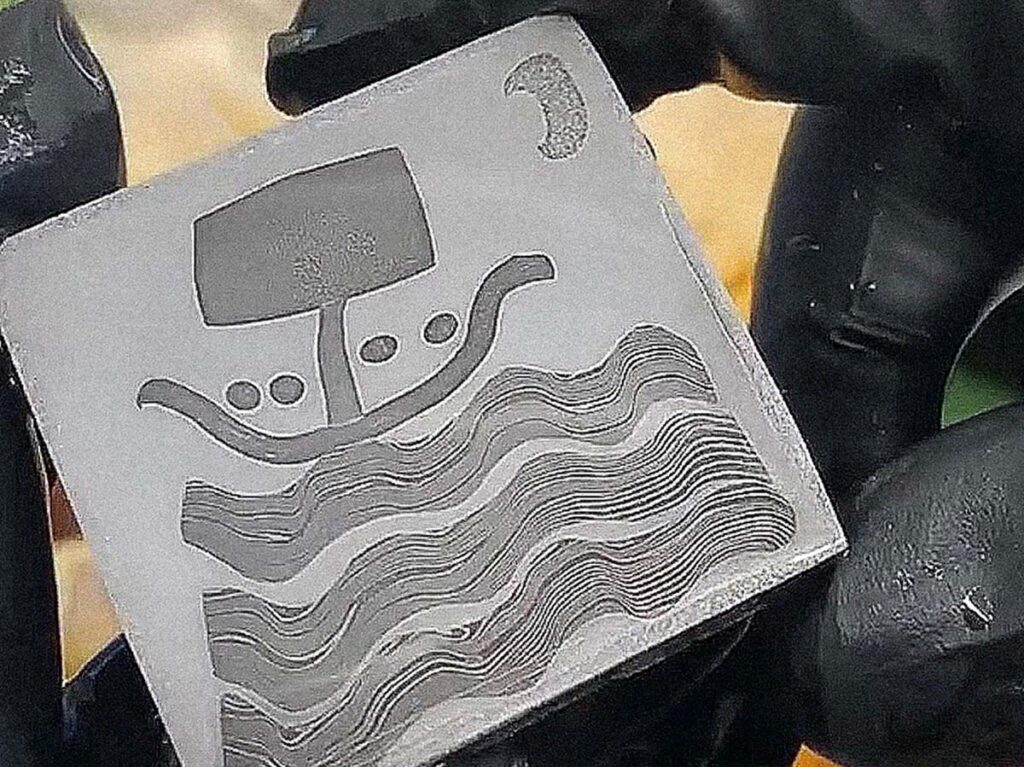
Schwarzer uses what he calls a “tiling” process with his canister damascus, sawing off the end to expose the image, and forge-welding them side-by-side to maximize the visual impact across the blade’s surface. (Steve Schwarzer image)

While CNC and EDM equipment can create intricate designs, a more affordable approach involves the sintering process of canister welding damascus, a method originated by Steve and Daryl Meier.

Steve’s canister process is as follows:

  • Composition: A square canister is preferred to maintain the image’s shape using flat dies. Content determines the pattern—solid metals form the primary image, while powder fill creates the background.
  • Preparation: Both ends must be welded shut to exclude oxygen.
  • Release Agents: To free the billet from the canister, Steve uses white spray paint; the titanium dioxide acts as an immediate release agent, oxidizing upon heating. Other options include White Out and stainless-steel foil.
  • Sintering: Steve recommends a soak time of at least 30-plus minutes. Expect a size reduction of roughly 30 percent as micro-spaces between particles collapse.

To expose the end-grain imagery, Steve uses what he calls a “tiling” technique. Band sawing sliced off the billet exposes the faces of the pattern. Then, forge-welding them side-by-side, he maximizes the visual impact across the blade’s surface. Note flat grinds are customary with this process, as deep grinding can distort the integrity of the imagery, especially with twisted materials.

For New Makers

Steve offers two foundational tips for those entering the craft. First bit of advice Schwarzer makes is to, “Avoid unknown materials, even if they’re free.” Without knowing the composition of “mystery steel,” you can never accurately repeat your results. He also suggests makers define their own path, saying, “Don’t chase anybody else’s dreams. Chase your own.”

Cutting Coupons

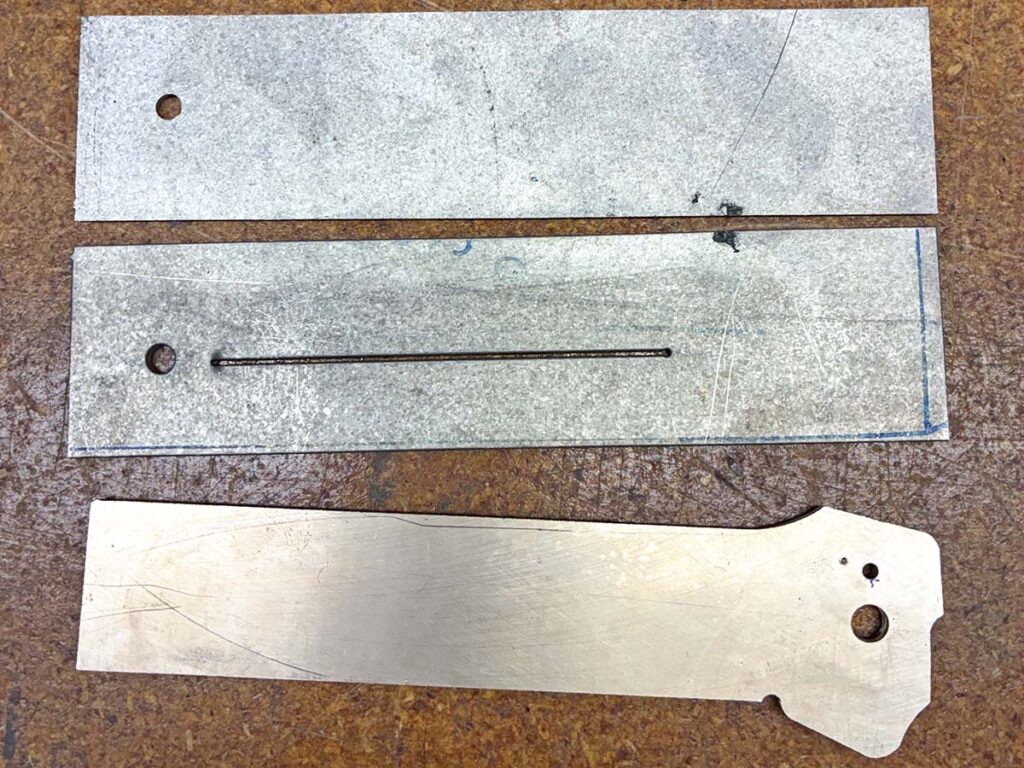
Bob Terzuola was a pioneer in using lasers and waterjets in his manufacturing process. Among the efficiencies he incorporated in using these tools was cutting what he calls “coupons.” These are simply uniform blade blanks and liner sections. Keeping a load of these on hand speeds up the manufacturing process, while maintaining the integrity of the knife. (Bob Terzuola image)

Known as the “Godfather” of the tactical folding knife, Bob Terzuola has been a full-time maker since 1980 and was inducted into the Cutlery Hall of Fame in 2023. His longevity in the craft stems from a blend of old-school design and modernized production efficiency. Terzuola was a pioneer in the mid-’80s, becoming the first maker to utilize laser cutting for components. Today, he uses waterjet cutting to create generic rectangular blade blanks and liner sections, which he calls “coupons.”

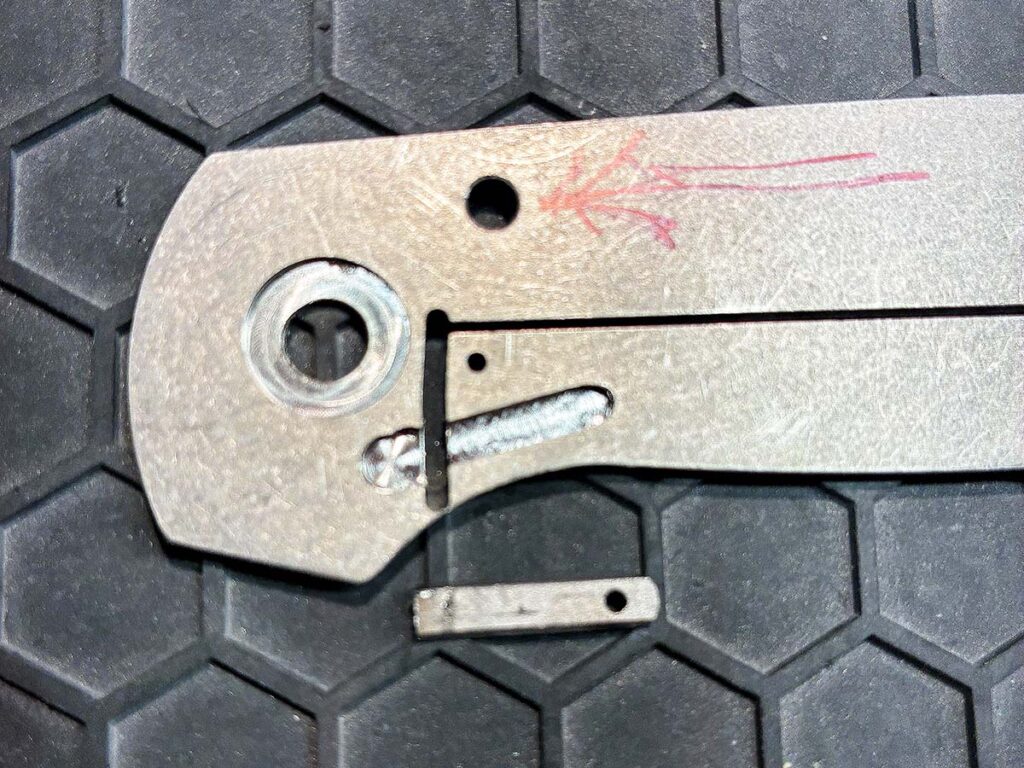
For the blade blanks, Terzuola profiles the rear area with the lock face, thumb ran and pivot/stop pin holes (roughed to 80 percent diameter). The rest remains rectangular, allowing him to incorporate any pattern with minimal grinding. Bob has his CPM 154 stainless steel blanks commercially surface ground to 0.135-inch before heat-treating them himself to HRC 59. For the liners—0.080-inch titanium in our discussion—the coupons are left square, containing only the pivot hole and the horizontal slot for the locking spring arm.

Notably, Terzuola grinds his blades after they are hardened. He argues grinding annealed steel can lead to warping during heat treat and causes the belt to gouge material. Grinding hardened steel, by contrast, is like slicing meat with a razor blade rather than digging dirt from a hole. Despite these modern efficiencies, he said he remains a “pencil-and-paper guy,” eschewing CAD for hand-drawn patterns to maintain design commonality.

Finishing Simplified

Despite modern efficiencies Terzuola has incorporated into his manufacturing process, he remains traditional in his designs. That is, he avoids CAD, instead using pencil and paper to hand-draw all of his knives. (Bob Terzuola image)

Bob’s finishing process for CPM 154 is remarkably lean. He utilizes a 90-durometer smooth-face rubber contact wheel and a simple two-belt sequence. First, he does a rough grind with an 80-grit ceramic belt, then finishes with a 3M Trizact A16 (1,200-grit) belt.
He specifically avoids 60-grit belts, noting that their mesh size is twice as large as 80-grit, creating scratches that are twice as deep and significantly harder to clean up. To ensure blade-lock longevity, he now uses a heat-treated 440-C stainless steel insert in the titanium spring arm. This provides a steel-on-steel lockup, eliminating the wear issues common with titanium.

For New Makers

Terzuola encourages beginners to find their own niche and not get locked into a single model. He emphasizes mastering the fundamentals with hand tools: learn to tap holes, use files and sharpen twist drills. He and I agreed, new makers should also gain proficiency with mills, lathes and surface grinders to be old-school efficient rather than purely CNC-reliant.

Read More:

Remembering Hawaiian Knifemaker Keith Derrick Ouye

Remembering a dedicated craftsman of the Fujisaka lineage known for his tactical precision and collaborative artistry.

Keith Derrick Ouye, award-winning knifemaker of Honolulu, Hawaii, passed away on October 5. He was 80.

A stocky, happy guy well-liked by both knife enthusiasts and his knifemaking peers, Keith primarily made tactical knives, though he also built hunting knives to sell at local gun shows. In addition, he made fancy folders, often with fine engraving by Bruce Shaw, C.J. Cai or Lisa Tomlin. Keith exhibited his work at the BLADE Show and other top knife events over the years. Like many Hawaiian knifemakers, he was a student of BLADE Magazine Cutlery Hall-of-Fame® member Stanley Fujisaka.

Born in South Hilo, Hawaii, Keith lived in Hawaii Kai on the island of Oahu. “I spend most of my day working on my knives,” he wrote in his mini-bio on the Arizona Custom Knives website. “With assistance and guidance from Stan Fujisaka, I started to make fixed blades in early 2004. By the end of 2004, I also started making folders. I began making knives full-time in 2005.”

Keith was a big believer in sole authorship, noting “except for the screws, dowels, standoffs and pivots, I fabricate the rest of the knife myself.”

Remembering Others The Knife Industry Has Lost:

Advertisement

Must Read Articles

Read this before you make a knife

Knifemaking 101 – Read This Before You Make a Knife

  by Wayne Goddard My experience has taught me that there's nothing like digging in and getting started. I've often said the hardest part of the...
how to forge damascus steel

How to Forge Damascus

Advertisement
Advertisement