Knife Show Success: Pricing, Conduct & Collector Trust

0

Selling knives takes more than a sharp edge—professionalism, fair pricing and trust are key to long-term success on the show floor.

How you conduct yourself and your knifemaking business when you’re on the selling floor of a knife show is critical. If word comes down the aisle there is a well-known collector in the room, don’t go over and interrupt the business between the collector and crafter by waving your work in front of them, or stepping into the customer’s space.

I’ve seen this too many times over the years. Such crafters are an embarrassment to all who draw from the same collector pool. Stay in your space, behave in a professional manner and wait for the customer to come to you.

The last thing any craft needs is for a crafter to double his prices when a particular collector approaches. As a result, the collector immediately assumes all crafters are a pack of thieves, taking advantage of him. Those who are at the top of their trade will tell you what a bad move this is for any crafter. Such things travel through the collector network worldwide in hours.

Pricing Custom Knives

Sales are the toughest part of the business. Pricing their work is difficult for all crafters. To take some of the mystery out of trying to maintain control of my cash-poor studio, I’ve always gone by the following simple formula.

Work out the minimum amount per month you must earn to eat and pay your bills. Whether you’re paying all or a portion of your bills, it’s the same. How much is the total amount? You can’t drop below netting the figure from your studio. If you spend more than you make, your approach is not working and you need to change something.
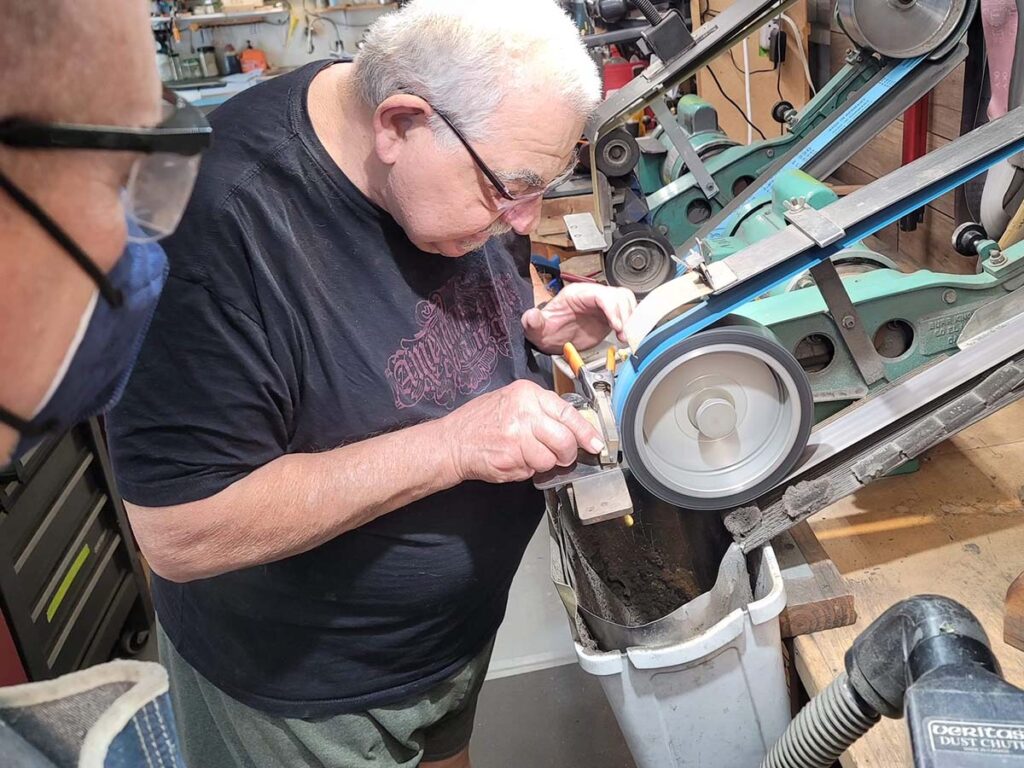
Doing things by hand takes time, especially when you start trying to extend your boundaries. BLADE Magazine Cutlery Hall-of-Fame® member Bob Terzuola has been extending his boundaries a long time, including at the belt grinder. Collector Chris Schluter watches at left.

I triple my base material and labor figures. This must cover everything and very often doesn’t work out as hoped. Throw in costly materials and things soon get out of balance, not to mention foundry fees and shipping.

Paying Yourself

Pay yourself. It doesn’t matter if it’s only a little bit, there is still the psychological impact of being paid something for your efforts. Don’t work for free. No one likes not being rewarded for his efforts.

I’ve been on a schedule of seven 10-hour days a week for most of my career. If I don’t work those kinds of hours the pieces won’t get done, and the bills won’t get paid. There has never been a lot of time for doing Alaska kinds of things, be it hiking or fishing, or just sitting and doing nothing. If I’m home, I had better be in my studio working. Welcome to the world of the full-time crafter. Your family is in the wings, waiting for you to finish up so everyone can go out for pizza.

Most of the time, workers in fast food restaurants make more per hour than crafters. That’s a basic fact. Doing things by hand takes time, especially when you start trying to extend your boundaries.

Developing Your Talent As A Smith
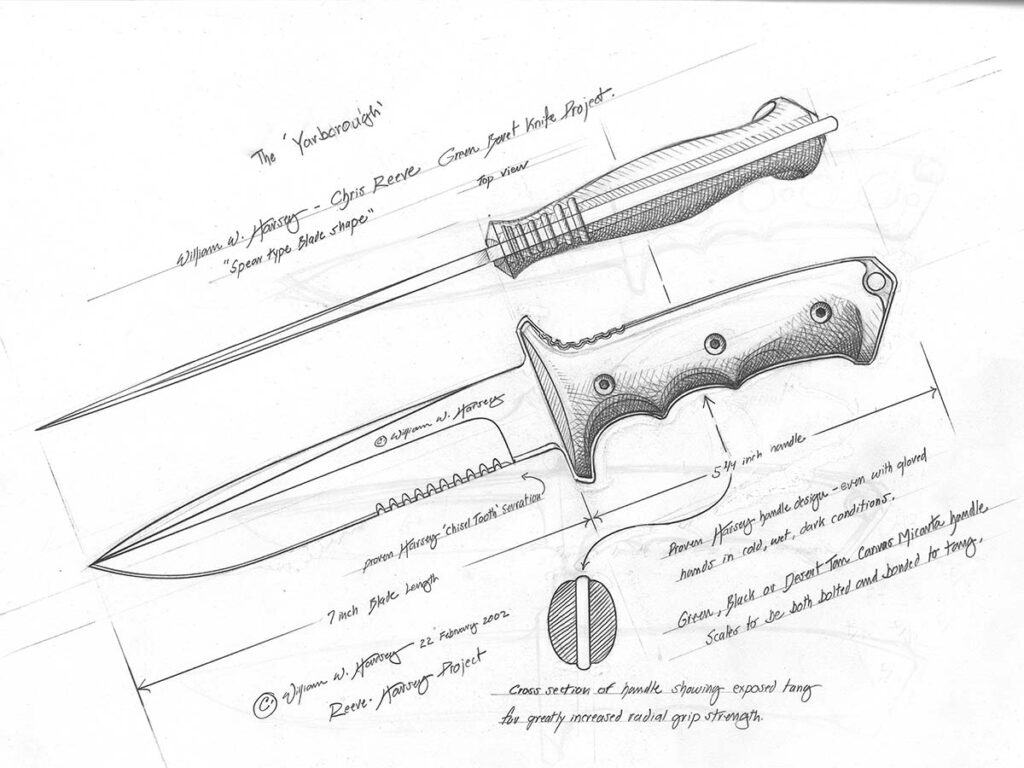
There are very talented people who can’t freehand a drawing of something in their imagination, but give them a clear idea and they can do it with a dedication to detail few ever achieve. Cutlery Hall-of-Famer Bill Harsey’s drawing in 2002 of the “Yarborough” for the Reeve-Harsey Green Beret Knife Project reflects his prodigious artistic talent. (image courtesy of Bill Harsey)

The artisan/crafter who drops the Saturday mall hobby artist status to get into the shows of a size to make the dream of becoming a full-time working artisan/crafter possible must make some adjustments. You will encounter a couple of stumbling blocks along the way. They are big ones and never really go away completely, no matter how much experience you might have.

One is talent—you can’t have enough of it. But the strings attached to it require endless dedication to sometimes crazy rules. There are very talented people who can’t freehand a drawing of something in their imagination, but give them a clear idea and they can do it with a dedication to detail few ever achieve.

Most people with raw talent show it early in life, from the 10-year-old piano protégé and 11-year-old symphonic composer to the ones who talk of space as something tangible to them, to the hands of a 12-year-old who carves hardwoods like the elders around him. They say the spirits of a great carver have moved into his hands. (That’s what I need.)

What do you do if you don’t come loaded down with the skills necessary to get your ideas on paper where you can see them? You don’t have the ability yet to create new and innovative ideas but really like crafting.

Get a pack of white paper, some pink erasers and a pencil sharpener that attaches to your table or bench. Have sufficient light; don’t work in the dark. Try and get the bulk of your idea down the first time, then let it sit and simmer while you look at the rough and try to come up with a direction to take your drawing to next.
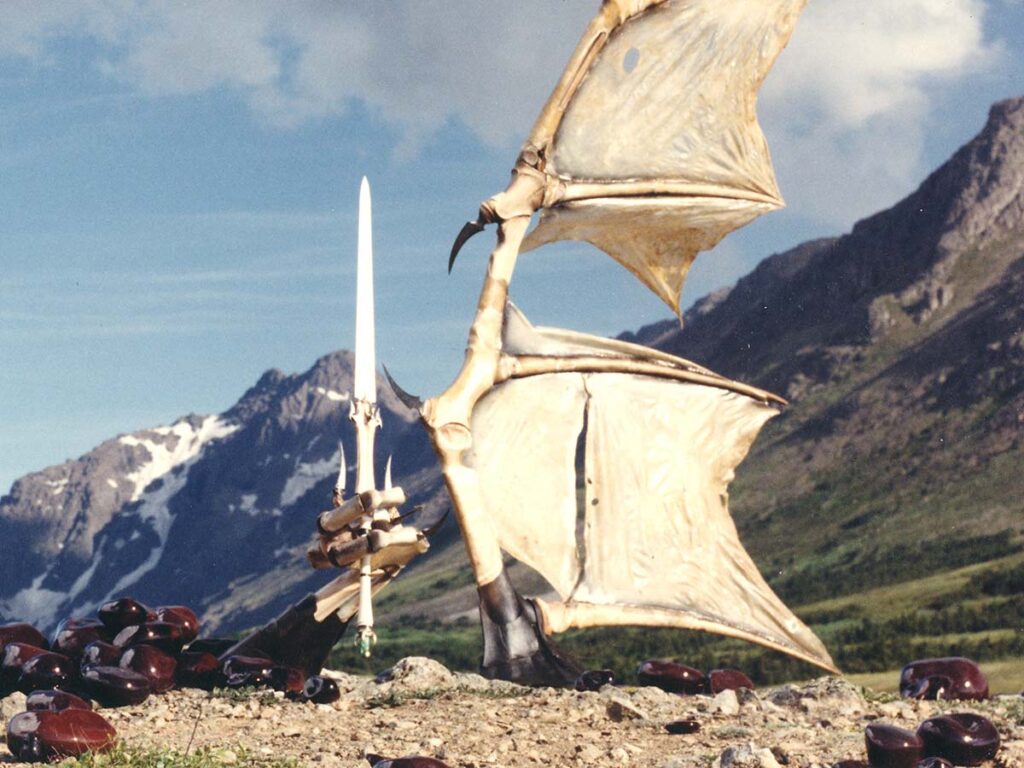
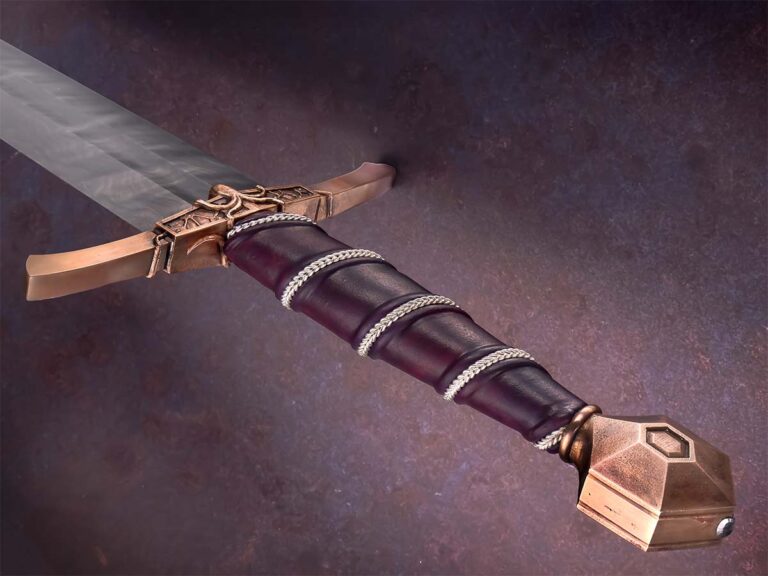
For a project that may take months or years to complete, be sure you cover the bases as much as you think is possible. One of the author’s longer-term projects is his famed Chugach Dragon. Commissioned to make a sword “capable of slaying a dragon,” he not only built the sword, he also made a "dragon" from whalebones and caribou hides. (Weyer International image)
For a project that may take months or years to complete, be sure you cover the bases as much as you think is possible. One of the author’s longer-term projects is his famed Chugach Dragon. Commissioned to make a sword “capable of slaying a dragon,” he not only built the sword, he also made a “dragon” from whalebones and caribou hides. (Weyer International image)

Work with small thumbnail-size sketches. They can be quick and you can do a number till you find something that appeals to you in a short time. Scan it and blow it up to the size it needs to be when finished. Instant gratification art!

Don’t design far beyond your skill sets; keep them in mind when you begin drawing.

I look on my sketches as my guidelines for the final finished piece. I work out the design issues on paper until I’m satisfied. I don’t begin anything until I have a possible route to take to achieve the end product I want. I’m not locked into it but I know there is at least one way that my chances are good, or there’s a reasonable risk, of me pulling something off. When you’re working on something that may take months or years to complete, make sure you have covered the bases as much as you think is possible.

Skills come from continual practice. You don’t have to be Picasso to make a raku* tea bowl. It may not be your original idea but the joy available just in doing the more mundane tasks is tangible. Being able to do raku means you have acquired a new skill set that will tweak your craft view a bit, that will give you the view from another craft’s perspective.

The more skills you can master, the broader your creative strokes can be. It’s not necessary that you learn every technique to the level of a master, only that you can do it without issue the few times it is required.
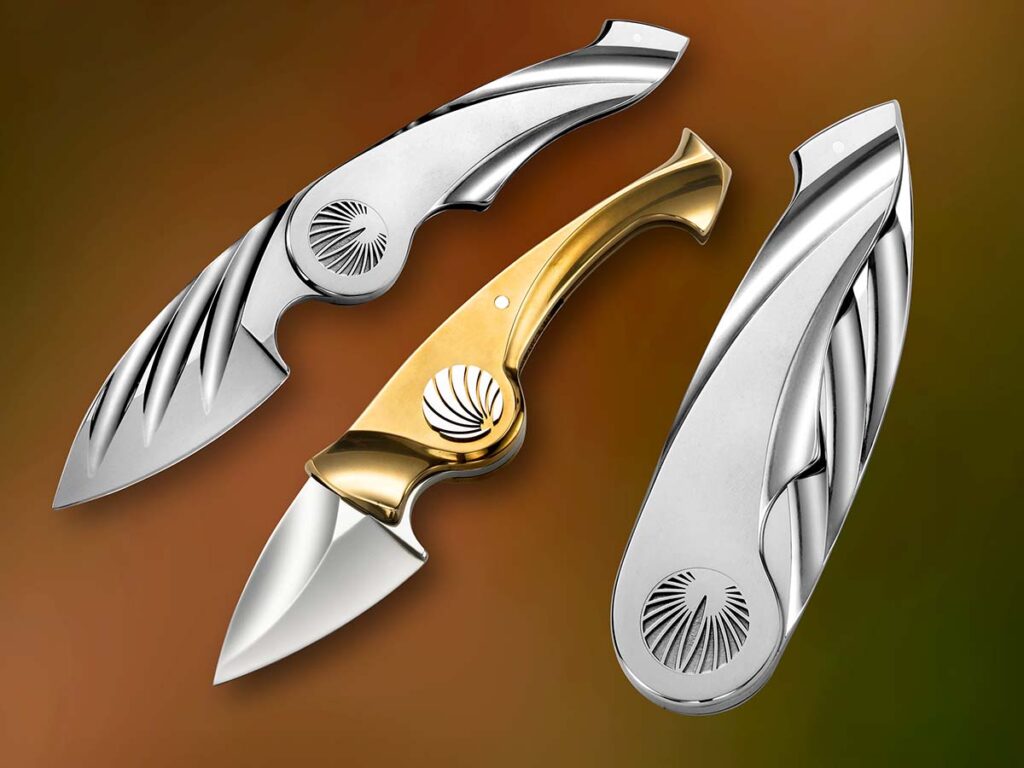
Ray Appleton’s IQ folders are famous for being difficult to figure out how to open and close, but one (though not one of those shown below) he put on the author’s table at a Solvang Knife Show may have been the most difficult ever.

Sales Presentation

A good idea poorly presented has no positive aspects. Keep it under the table until you work out the kinks at some later date.

Twenty years ago, celebrated knifemaker Ray Appleton came to the Solvang Knife Show. He is well known for his IQ folders, so named because it takes some thinking to work out how they open and close.

He didn’t have an exhibitor table, so he didn’t have anything to sell. He laid a small, leather-slip-covered folder on my table and stepped away. Ray was very tall, so he walked over by the show entrance and stood there to watch what happened. Someone had spotted him putting the knife down and was at my table immediately. The person asked for permission to look at it, which I gave, as Ray had asked.

The man fiddled with the folder for five minutes, then handed it off to someone else. It went through the hands of at least 20 people in an hour. Then Ray came back over to my table. He picked the knife up and slipped it in his denim shirt pocket.

“Did anyone open it?”

“Not as far as I could tell,” I said.

“Neither can I,” he said with the usual twinkle of the jokester in his eye, a man who saw enough humor in life to drive from central Colorado to Solvang on the California coast just to play a 20-minute joke. Ray was someone who knew the joys available in life for an eternal prankster.

The point here is don’t send customers photos of unfinished projects. Their imaginations aren’t usually up to your level, so it is easy for them to misinterpret something by a large margin. When you show up with the final, they will be expecting something different.

*Editor’s Note: Raku is a low-fire process of making pottery.

More On Knife Marketing:

Knife Blade Repair: Bringing Old Blades Back To Life

0

Practice the proper steps with the proper equipment and, most important, be safe and knife blade repair is a snap.

I have been fortunate enough to make not just one but two side hustles out of my knife hobby. First is the obvious—writing for BLADE® Magazine. Second is running a knife-and-tool sharpening service out of my garage, serving folks in my community and metro area with full-service sharpening on most cutting tools found in the home, workshop and garage. I have always had a strong interest in sharpening in general and have been practicing the skill for about as long as I have been into knives in general.

While I sharpen many knives and scissors, I also repair damaged knife blades. Those repairs include—but are not limited to—straightening bent blade tips, fixing severely damaged cutting edges, and regrinding new blade tips from broken ones. While sharpening is something I still enjoy very much and to a degree it remains fun work for me, it’s these minor repairs at customer request that I love doing. You can too provided you have the proper equipment and the desire to learn.

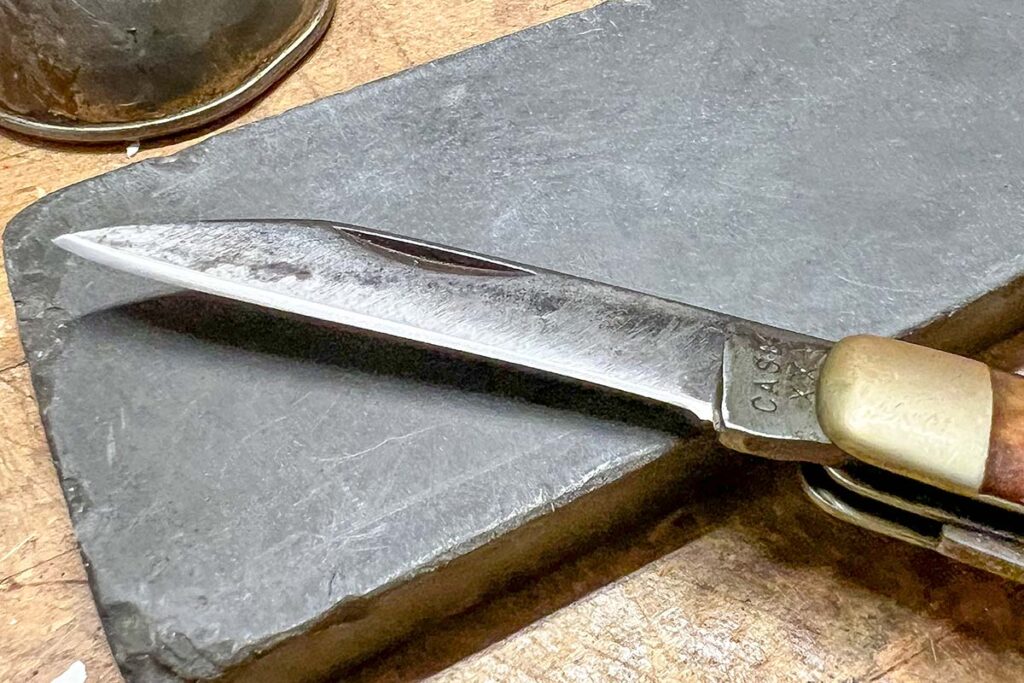
Knife with sharpening stone
In knife blade repair, carbon steel blades make the steps easy as they sharpen up quicker than stainless blades.

Before we get into the thick of blade repair, let’s discuss equipment. I run four Work Sharp Ken Onion Elite sharpening machines—I keep one as a backup or deploy it as backup should I need to augment what I’m already running—plus a 1×30 single-speed belt sander, a “Harbor Freight special.” I do all my sharpening on this equipment.

I have used the Ken Onion Elite since the start of my sharpening service almost 10 years ago. I started out with just one Work Sharp. I added a second one awhile after that. The 1×30 came about from trying to revive a few totally dull butcher knives. In the process, I realized I needed another machine that would be in charge of hogging off material to get a quick starter edge that the Work Sharp machines could sculpt into a razor-sharp edge.

Profiling the blade
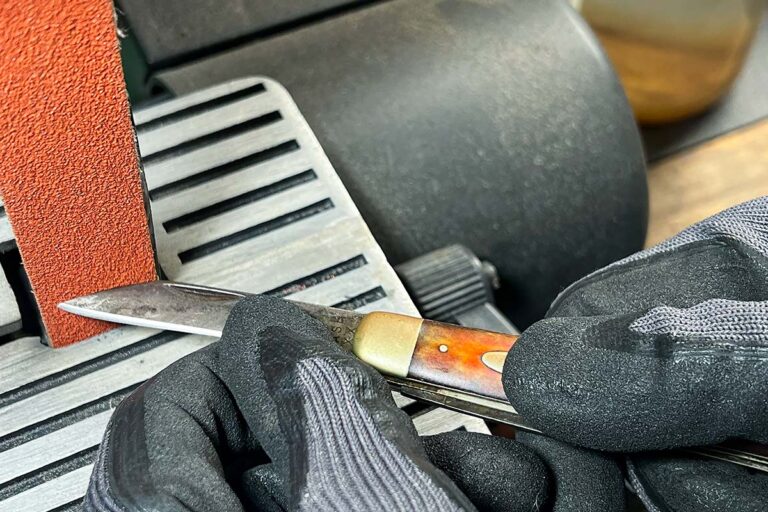
After profiling the basic shape of the new tip, the author uses the X65 belt of the Work Sharp Ken Onion Elite sharpener to further massage and fine tune it, as well as blend in the appearance of the blade spine at the tip to match the rest of the spine. 

Keep in mind that the Ken Onion Elite is not just a sharpener but also a variable-speed miniature belt sander as well, especially when you turn the unit around 180 degrees and work off the platen side. You can easily work on plastic, PVC, metal and wood. This is also how I regrind new blade tips, as well as fixing blade damage caused by hitting something solid and chipping the edge out. We will dive more into specifics in a bit. It’s important to note here that to do blade repairs of any sort successfully, you must have some sort of variable-speed, motorized, belt-sander-type machine.  

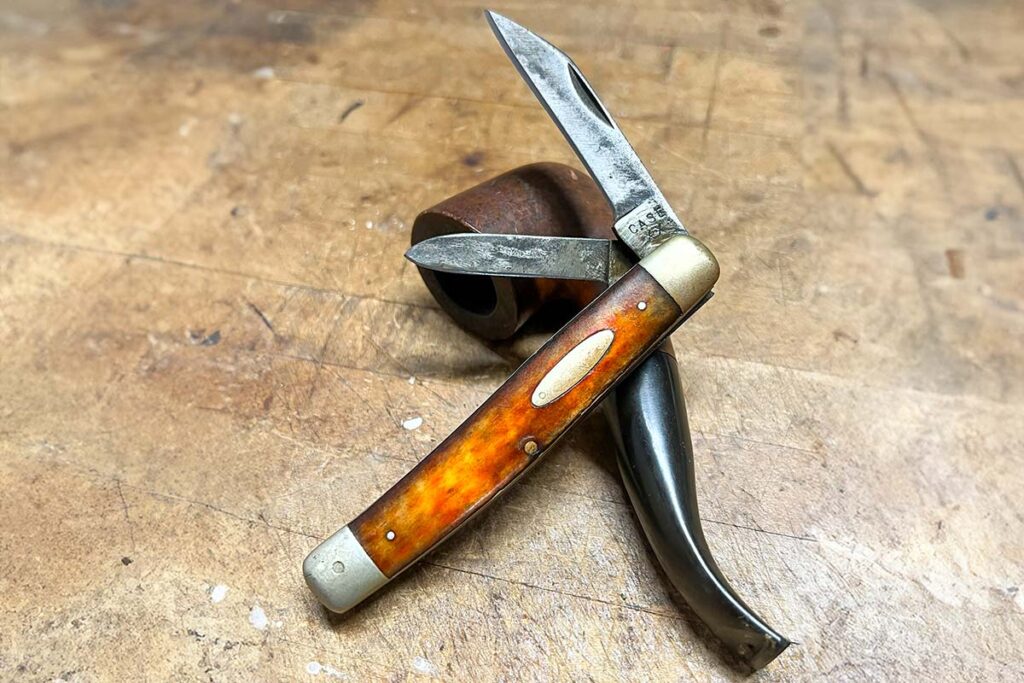
DEMO KNIFEThe demo knife is one a coworker on my day job gave me to refurbish. It is a vintage, carbon steel Case jackknife that saw a lot of use in a previous life. The blades were extremely worn down. Both tips were broken off. The main blade was resharpened so much that the cutting edge was a bit on the curved side. Both blades also had some dings in the edge as well. The owner wanted me to rehab the blades by regrinding new tips and sharpening them. I will take you through step by step on what I did and how it was done. WARNING! Please exercise caution when working with power tools such as belt sanders. Should you attempt such a task as outlined in this story, neither I nor BLADE is liable for any injuries that might occur as a result. 

Heat Management

Whenever executing such repairs on a knife blade, remember to not let the blade heat up or you can ruin the steel’s heat treat. Always keep a jar filled with water within arm’s reach of your machine and dunk the blade into the water every few seconds to keep it cool. Doing so will ensure that you will not overheat the steel. If working on a larger blade such as a machete, I recommend using a spray bottle filled with water. The blade is simply too long to dunk into a jar, so spraying it down every so often will help.  Something else that will help is to have a pair of cut-resistant gloves on hand and always wear them when handling the blade. The gloves usually have a textured coating on the gripping surfaces for the fingers and palms. This will help you hold the blade securely as well as keep your hands and fingers safe from accidental cuts. The gloves usually are inexpensive, less than $10, so there’s no excuse to not have a pair.

Where To Start Repairing A Blade

WARNING! Whenever faced with a blade-tip-rehab task, remember to sharpen the blade last. Why? Because you will be holding the blade as you regrind the new tip. This applies even if you’re wearing cut-proof work gloves.

Blade Tip

When regrinding tips, I always start with my 1×30 sander with an 80-grit Norton Blaze SG belt. It is the orange belt specifically engineered for knifemaking and removing steel. The 1×30 hogs off material and rough shapes the new blade tip.

Knife blade repair shaping the blade
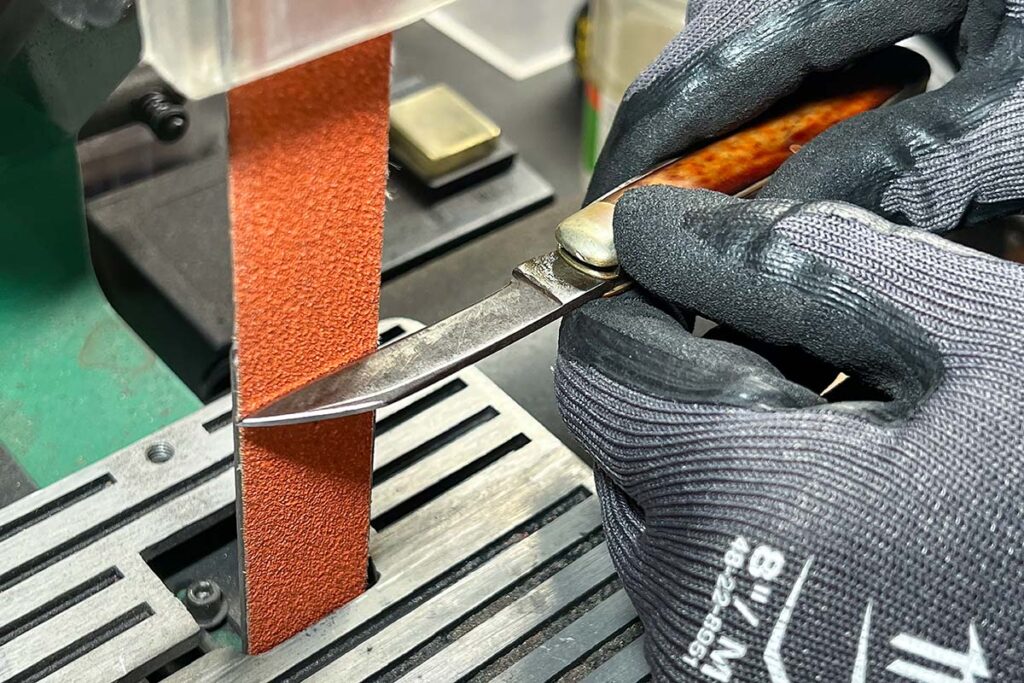
The author reshapes the new tip on the pen blade using the 1×30 belt sander with an 80-grit Norton Blaze SG belt. 

I start by visualizing where the new tip is going to lie. I start at the uppermost point of the broken-off tip, usually on the blade spine side. I start grinding at that point and remove material to where eventually a new tip is created. As I grind it down, I also pay attention to the visual “flow” of the new tip and how it transitions to the rest of the blade spine. I may have to round off the harsh angle to blend it back into the spine. A lot of this is done by eye, making everything blend right in. The goal is to make the new blade tip look as though nothing happened.

Blade Shaping

After roughing out the new tip with the 1×30 belt sander, I begin to dial in the final shape of the new tip with the Ken Onion Elite. I have much more control at this juncture due to the less aggressive belt grit and the slower belt speed. I can finesse the new tip on, keeping a close eye on the evenness of the ground-down portion, making it parallel with the rest of the untouched blade spine.

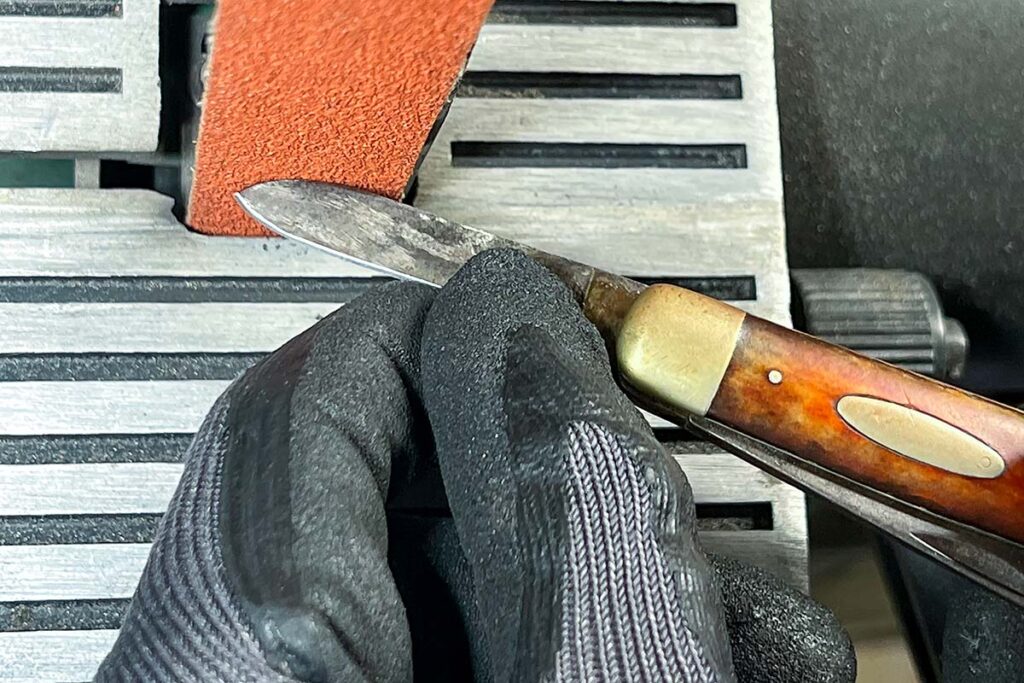
chamfering the edges
The author carefully knocks off the sharp edge at the corner created by rough grinding the new tip.

Finish

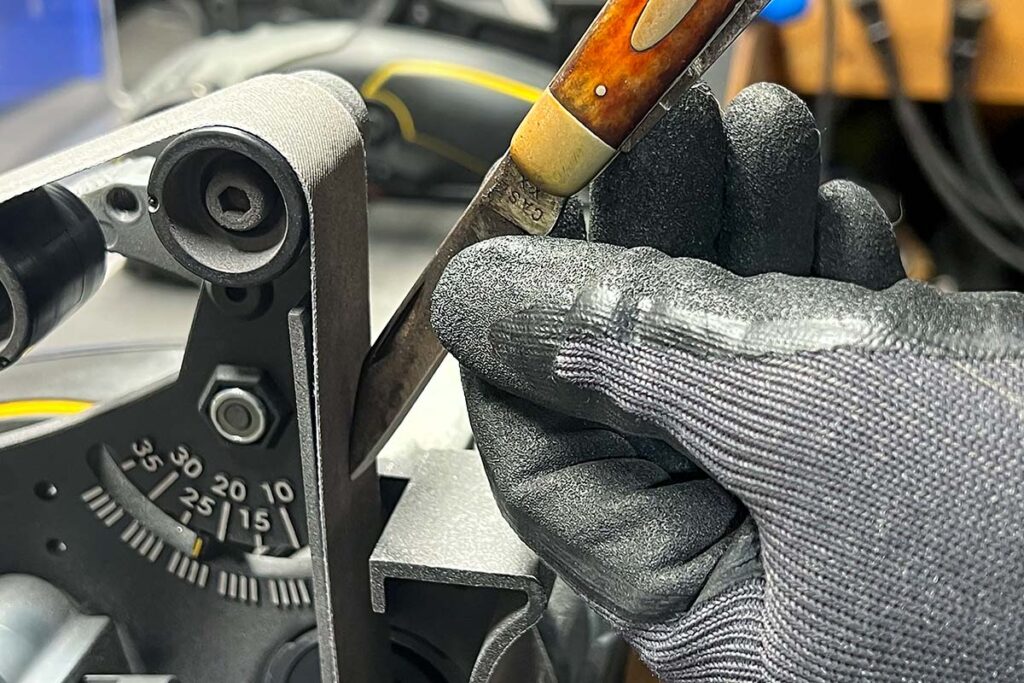
After tweaking the new tip to final shape, I concentrate on the finished appearance of the ground portion by holding the knife almost vertical and sanding only on the ground portion, blending it in visually and removing the coarse-grit scratches with the 80-grit belt on the 1×30.

Chamfering And

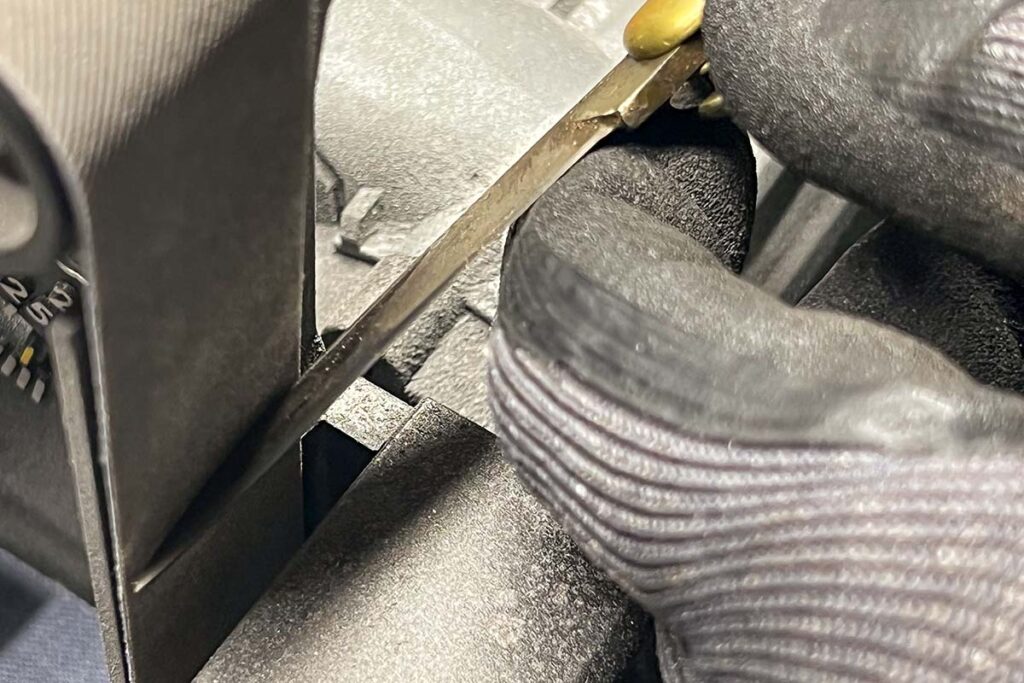
When everything is blended in visually, the last step is to chamfer the ground portion and remove the crisp corners made by all the sanding. You’ve seen how blade spines have a small, rounded corner on both sides? You are essentially doing that here. Hold the blade at an angle and lightly touch the blade spine to the belt to cut the crisp corner down. Remember: you can always cut more later if needed. The key is to use a light touch and stop only when the corners are smooth to the touch and you don’t detect crisp edges. The result is a new blade tip that is highly functional but doesn’t look “factory,” though it will be awfully close.

Fixing An Uneven Blade

The main blade of the demo knife was worn away unevenly due to years of manual sharpening, so I straightened that out as well. Like the shaping of the new tip, I did the bulk of the straightening of the cutting edge on my 1×30 belt sander. I used a light touch on the belt—I cannot stress enough that it’s easier to grind cautiously—eyeing the straightness of the new cutting edge. Grind a bit then dunk the blade in water to keep it on the cool side.

Straightening the edge
After grinding the new tip on the main blade, the author uses the 1×30 belt sander to straighten the uneven cutting edge by evening it out back to straight. The 80-grit belt eats off material in a hurry. At this juncture the author eyeballs what is to be straight.  

Once I attained an even edge, it was time to grind the new edge. Straightening out the edge will cause a wide flat spot on it, so you have to grind the spot away evenly on both sides. Work diligently and carefully, and don’t forget to dunk the blade in water. With the smaller of the two blades, I repeated the same steps to even out the edge as there were some imperfections I wanted to remove also. As a result, I wound up starting a new edge on the small blade as well.

Once I ground the starter edges, I progressed to the Work Sharp machines to carefully sculpt the new final edges. This is the step where you bring the blades to life. The carbon steel blades make the steps easy as they sharpen up quicker than stainless blades. After the final sharpening of both blades, the result is a vintage pocketknife with a new lease on life sporting new tips and fresh cutting edges. 

Final Cut

Sharpening—transforming a cutting tool from dull to razor sharp in a few minutes—is very therapeutic. Toss in creating new blade tips on top of that and the combination is undeniably very satisfying. If you carefully follow these steps, you too can renew any knife blade with a broken tip. And it doesn’t have to be a pocketknife. I’ve ground new tips on tactical folders and karambits, too. Just follow the same steps outlined here. In fact, larger knives are probably easier because there is more to hold onto while working on them. If you have the equipment and the desire to renew and rehab knife blades, give it a try.

Final repaired knife
The end result is a demo knife with two sharp points and two sharp edges.

It is also possible to use a regular belt sander like mine to do all the shaping steps. Be sure to have an assortment of belts of various grits at your disposal. You will want to change to the finer grits to finesse your work. I recommend using only a 1×30 given the size and width of belt. Again, you can find an inexpensive 1×30 at Harbor Freight Tools for around $50. Who knows, you might even find some other uses for it outside of blade repair.

Knife blade repair can be very satisfying. And because you are working with knives as well as power tools, please exercise the utmost caution and pay attention to what you are doing to prevent serious injury.

Have fun and good luck!

Hone Your Knife Sharpening Knowledge:

Knifemaker to Watch: Phil Jacob

knifemaking phil jacob
Phil Jacob

Phil Jacob took home the Best New Maker award from BLADE Show 2017, which is as good as it gets for someone getting started in knifemaking. The achievement is also good news for knife collectors looking for a guiding light for their collections. “Best New Maker” translates to “best new opportunity” for ROIs on investment.

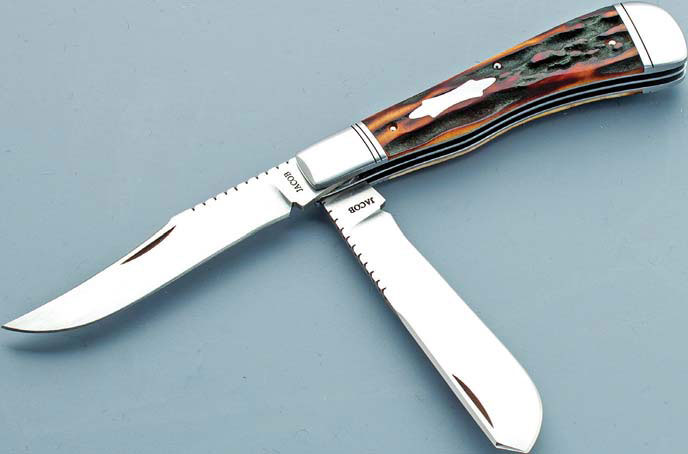
Jacob, who calls Kansas home, specializes in slip joint folders. The addition of exotic handle materials and attention to detail offset any cliches about this traditional style. Just take a look at the double-bladed trapper that made waves at BLADE Show.

best new maker blade show 2017

Specs:

  • Blade lengths: 3.125”
  • Blade steel: CPM 154 stainless
  • Handle: Stag dyed amber
  • Folding mechanism: Slip joint
  • Weight: 5.1 oz
  • Closed length: 4.5”
  • Maker’s list price for a similar knife: $875 to $1,100

Jacob maintains a healthy social media presence, which is another benefit to collectors interested in a commission or a resale. His Facebook page is full of status updates and photos. 

He’s not big on the video front yet, but here’s a sample:

And here are some photos of his recent work.

Best of all, you can meet him at this year’s BLADE Show. Get tickets here.

How To: Custom Knife Sales And Marketing

1

Get the ins and out of custom knife marketing and learn how to improve profits from a maker with years of experience slinging blades.

The most difficult part for crafters is turning themselves into efficient sales and marketing people when they’d rather be throwing pots, building furniture, making knives, blowing glass, sewing moccasins and parkas and the myriads of other craft items people make. Marketing and sales present two different issues; both are necessary for the business to succeed.

Yes, it is a business.

The minute you start working for yourself, full or part time, you no longer have the umbrella of the company you’ve worked for. Now all the financial decisions are on you. Steel or groceries? Both require you to show a profit to draw money from to maintain your materials supply, pay the electric and gas bills, and get your kid’s braces. Paying these expenses is up to your fledgling business. If you have other money coming in from your spouse working, etc., stay out of it. The business needs to support itself. Don’t cut back on the family dog’s food because you need some paint brushes. So, it’s up to you to make it work.

Custom Knife Marketing

Shows are crucial to a knifemaker’s success but involve an investment of money. Table fees can easily be over a thousand dollars each. Add another table as the author often does for his huge pieces and things get expensive quick. Add a plane ticket to that, the cost of the hotel and food, and you’re close to $5,000 per show.

Marketing is about getting your name and your work out there for people to see. This is not an overnight happening. It is something you will need to pay attention to throughout your whole career if you want to maintain a public image that helps you sell.

The best venue for your work is shows, books and magazines specific to your genre.

Show promoters take out large ads in magazines. These usually list the names of the crafters participating. Name recognition is important, especially if you wish to draw collectors.

Advertising

For a show I did at the Hyatt Regency in Beverly Hills, the gallery that was representing four of us took out a full-page ad in the magazine that was putting on the show. Those magazines are kept and float around doctor and dental office waiting rooms for years. I had a small ad in Alaska Magazine that I was still getting inquiries from 10 years after the ad was pulled. I worked out the ad wasn’t bringing in enough money to pay for itself, even after 10 years.

Be aware of how much advertising costs you against how much real return you get from it. Maybe it’s better to save those monthly charges and put them toward doing actual shows where people have a face to put with a name.

Photos

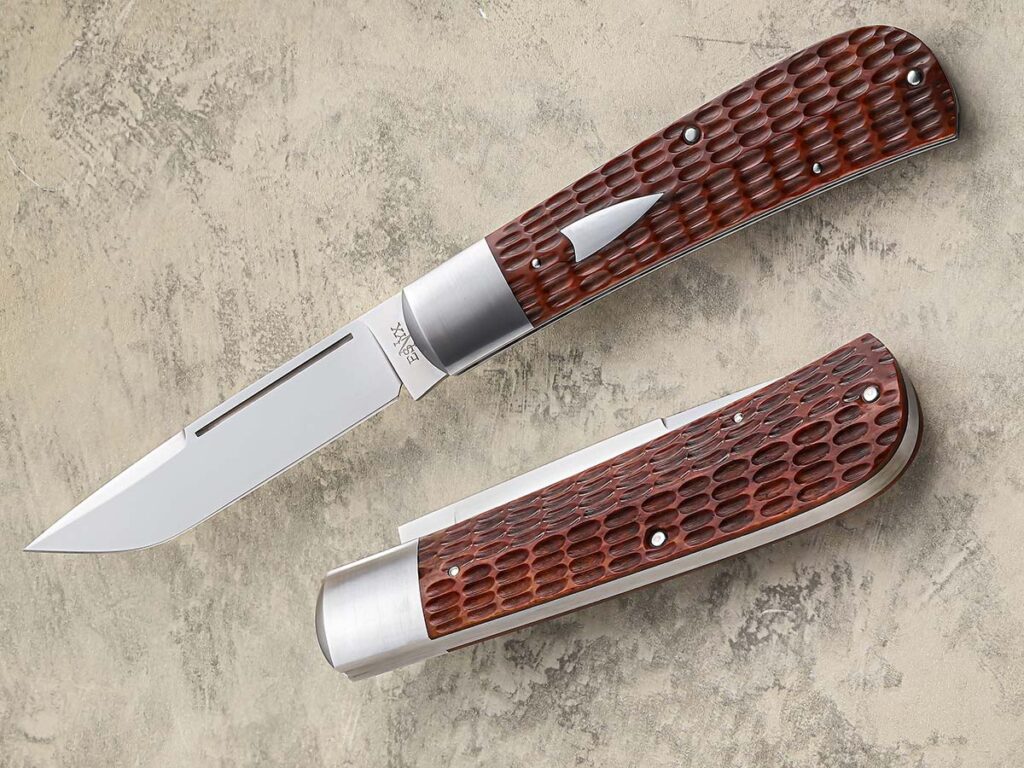
The rules for good photos are simple: it’s about your work, not the killer props it’s set up with. A top example of an uncluttered image is this one by Mitchell Cohen of an Evan Nicolaides slipjoint. (Cohen image)

Magazines don’t usually send out letters asking you to send them photos of your knives. You need to send them on your own. Don’t inundate them with dozens of photos. Make your choices very carefully. Check with the publication to see what form or format photos need to be in. These need to be high quality and/or high resolution for the magazines to print them or put them on electronic media.

If you’re not a photographer find someone who is, because these photos are the only way the public can see your work, other than shows. So be sure to have them taken or take them yourself. I have taken my own photos for the past 35 years. The rules for good photos are simple. Remember, it’s about your work, not the killer props it’s set up with.

Beware the dangers of Photoshop. The item has to look as good in real time as it does in the photo the magazine prints. If there are flaws, don’t let the customer be the one to point them out. (There is nothing wrong with selling something that isn’t up to your usual standard as long as you’re up front with the customer, and the selling price reflects these issues.)

Knife Shows

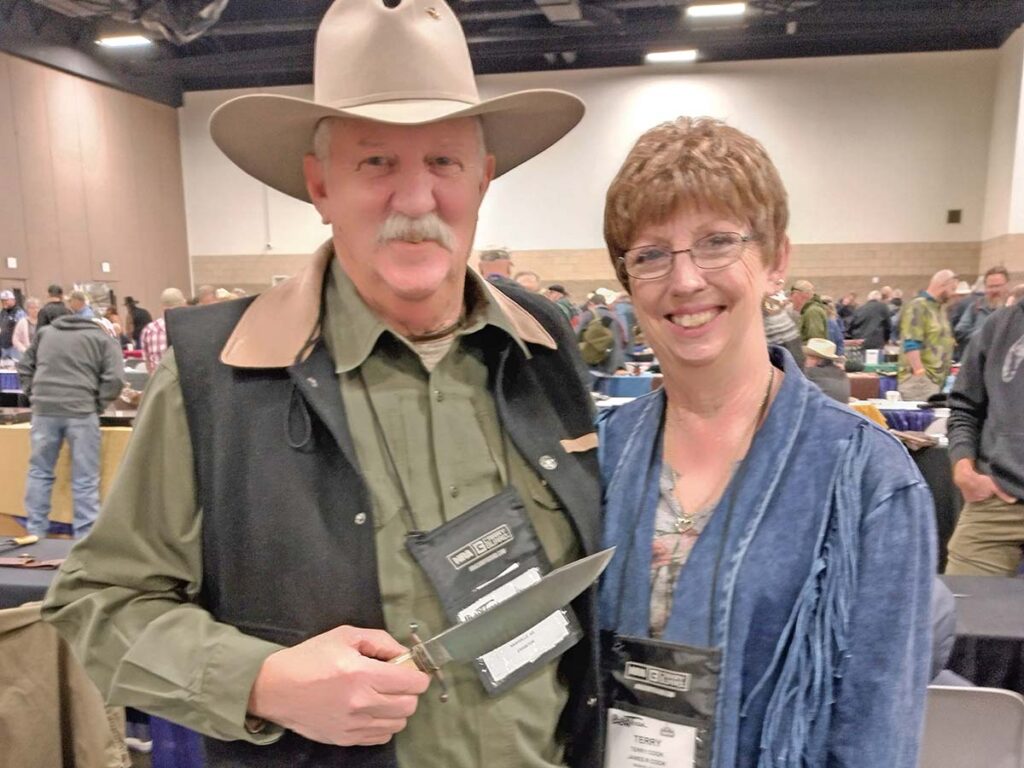
Your spouse is good to have with you at shows for both physical and emotional support. ABS master smith James Cook enjoyed the support of his wife Terry at a past BLADE Show Texas.

Shows can be good, just pick them wisely. If you can sell everything you need to sell by doing only local venues, that’s good. In Alaska I’d be fortunate to sell one piece a year after my prices went up to cover my costs in the late 1980s. I had to do shows to meet the people who would form my future collector base.

On average a well-known show is expensive for most people. Table fees can easily be over a thousand dollars each. Due to the sizes of some of my pieces, I always must have at least two tables because some of the bigger ones are too long to fit on one table. Add a plane ticket to that, the cost of the hotel and food, and you’re close to $5,000. If you’re doing a show in Manhattan, more if you plan on marketing in Europe or Asia.

I have done a lot of shows. I have never done one I could drive to. There’s always a plane ticket involved, the shortest flight being Anchorage, Alaska to Seattle. After that, things can get expensive. Overweight, oversize, extra, etc., those all have costs attached to them. I have traveled with as many as five large aluminum boxes (with snap-off wheels). It does no good if I reach my destination but don’t have anything to sell, so keeping my work safe in transit is very important.

This is a partial list of where I have attended shows, some annually for many years: Manhattan; Meadowlands; Atlanta; Las Vegas; Jersey City; Miami; Orlando; Dallas; St. Louis; Dallas; Denver; Nashville; Scottsdale; San Diego; Anaheim; Santa Barbara; Solvang; San Francisco; Seattle; Tokyo; Milan; Paris; Munich; Solingen; Helsinki; Belgium; and Memphis.

Every year I have attended four or five shows globally traveling from Anchorage. Now I need $20,000 just to cover basic show costs. Multiply that by three and that is where your profit starts. From the beginning I know I have to do at least $60,000 to cover the basic costs of being in business. It is closer to $7,500 in months when my materials are drawing a lot of money from my account.

The one common denominator in all shows is how tired you are when you arrive, and how tired you are when you finally get back home. There is a lot of stress in doing this. A mistake you shouldn’t make is thinking it can be used as a family holiday. This usually ends up with the kids up in your room with a movie menu for the TV, and your spouse right next to you waiting for the sales to show up. It’s better to leave the children at home.

Rolling With The Market

Ron Lake once said, “Some people keep making the same weak design every year, they just make it better. In the end it will always be a weak design.” Avoid this pitfall by looking at your work realistically. Just because it is bright and shiny doesn’t make it craft or art.

Your spouse is good to have with you for both physical and emotional support. When things aren’t selling because someone just plugged the Suez Canal for the umpteenth time, and that’s 10,000 miles away from you, there is no snappy comeback. When 9/11 took place it killed the New York Show, which was the most profitable show I attended annually. You could roll bowling balls down the aisles the following year. You have just been had by chance and circumstance, two things you have no control over as a speculation-oriented crafter. (A speculation crafter—that’s me—is one who builds something hoping to find a customer when it is finished.)

Moving Forward

If it isn’t selling, make it better next time. The customer is out there, you just need to get this little beauty in front of them. Long-time knife artisan and BLADE Magazine Cutlery Hall-of-Fame® member Ron Lake once said, “Some people keep making the same weak design every year, they just make it better. In the end it will always be a weak design.” Avoid this pitfall by looking at your work realistically. Just because it is bright and shiny doesn’t make it craft or art. The quality of the work and the attendant aesthetics are what customers look to before digging in their pockets.

More On Knife Marketing:

Learn the History of KA-BAR Knives with Video Series

Each Tuesday in April, KA-BAR will release a video documenting a piece of its storied 120-year history. What, you thought it started with the USMC knife in the ’40s? You’d be wrong.

The KA-BAR website will host the videos, but you can also catch the installments on YouTube. Here is the first episode.

Beyond the marketing value of such a series, these episodes should serve as a history lesson for knife collectors. Often, the provenance of a knife, or a line of knives, is tied to its value or collectibility. And there are few companies with the kind of history that KA-BAR brings to the table.

Lansky Folding Tapered Diamond Rod Sharpener Vs. Serrated Blades

0

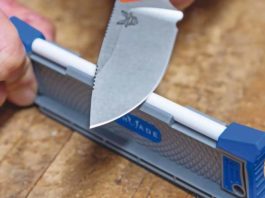
The author tries out the Lansky Folding Tapered Diamond Rod Sharpener.

Over the years I’ve written a number of articles on sharpening. I have also taught countless sharpening classes covering everything from knives, saws to Forstner bits. Sometimes you need a special tool to get the job done. In the case of serrated edges, you need a dedicated sharpening tool. This time it’s the Folding Tapered Diamond Rod by Lansky. I will cover the basics of sharpening a serrated blade as well.

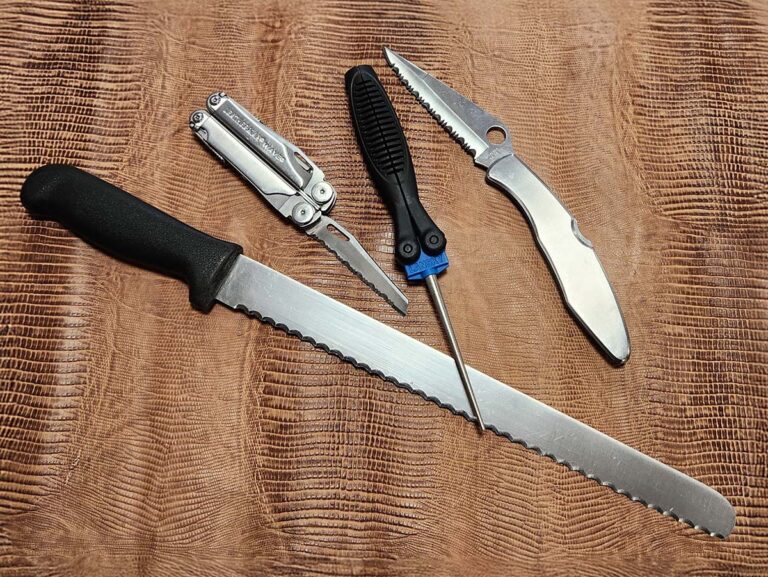
The two serrated blades I carry most is the one on my Leatherman Wave and my Spyderco Police. I am a property maintenance man and the Wave is like my right arm. The Police sends chills down the spines of people when I open it. Let’s get to sharpening them.

Keep It Simple

First off, there are those who would like to complicate sharpening by making it seem more than it is. At its core, sharpening is simply polishing two surfaces that meet at an edge. In the case of a serrated blade, the edge has a series of gullets (channels) and teeth. The different contours on a serrated edge require a sharpening tool that can accommodate such a surface.

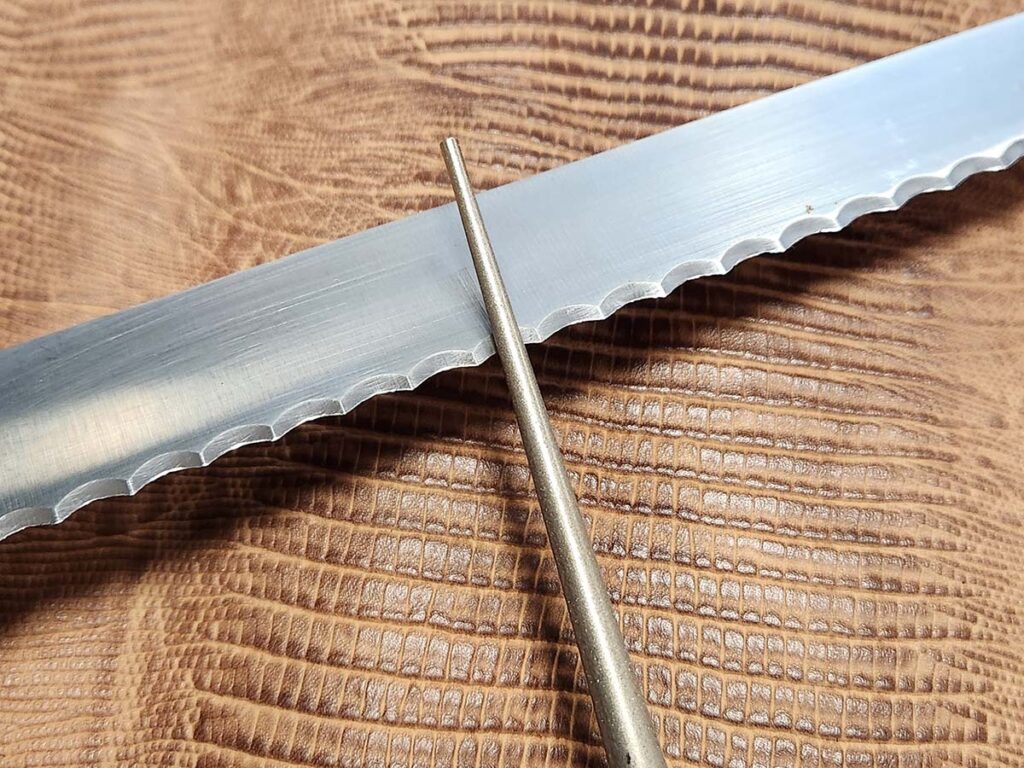
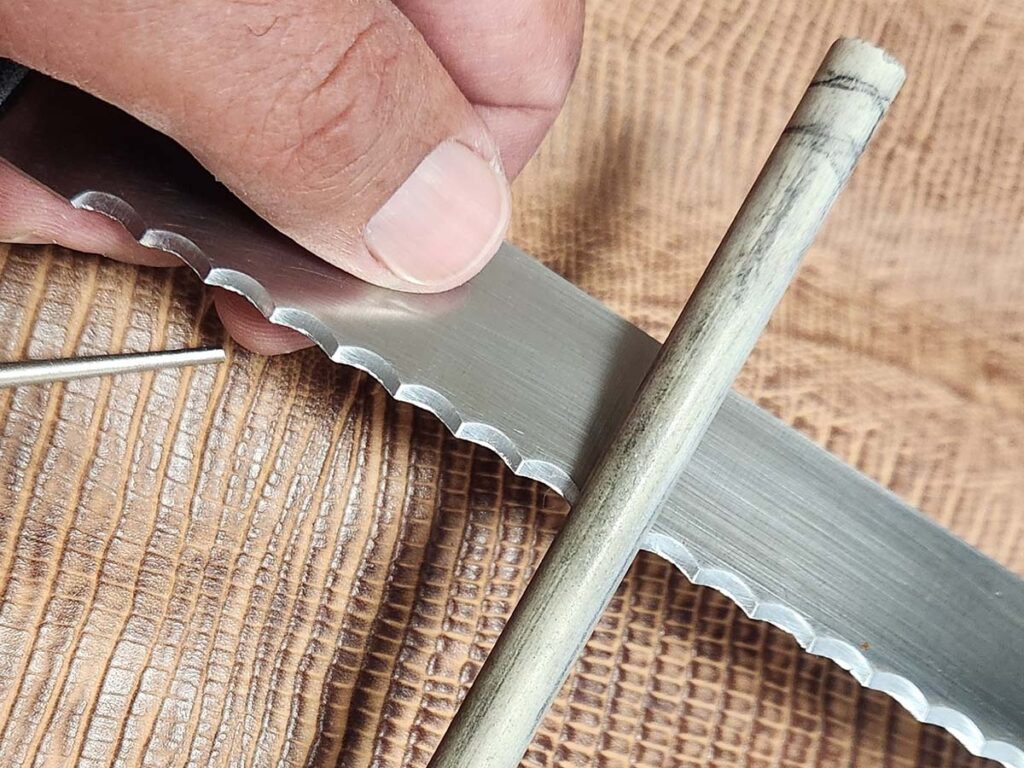
Sometimes when sharpening a serration with a broad diameter, the author follows the secondary bevel across the edge instead of pushing the sharpener into the blade.

Another feature of serrated edges is that a number of them are formed with a chisel-style grind. By chisel-style grind, I mean the secondary bevel to the edge is on one side only. Since serration patterns vary, you need a sharpener that will accommodate different sizes of teeth and gullets. A common form is the use of a cone. A cone-shaped sharpener should match the size of a serration somewhere along the cone.

Sharp Specs

Lansky has taken a tapered diamond impregnated rod and created a foldable handle that acts like a case for the rod. The style is not uncommon except Lansky takes the ergonomics a step further by making the injection-molded handle contoured for a more solid grip.

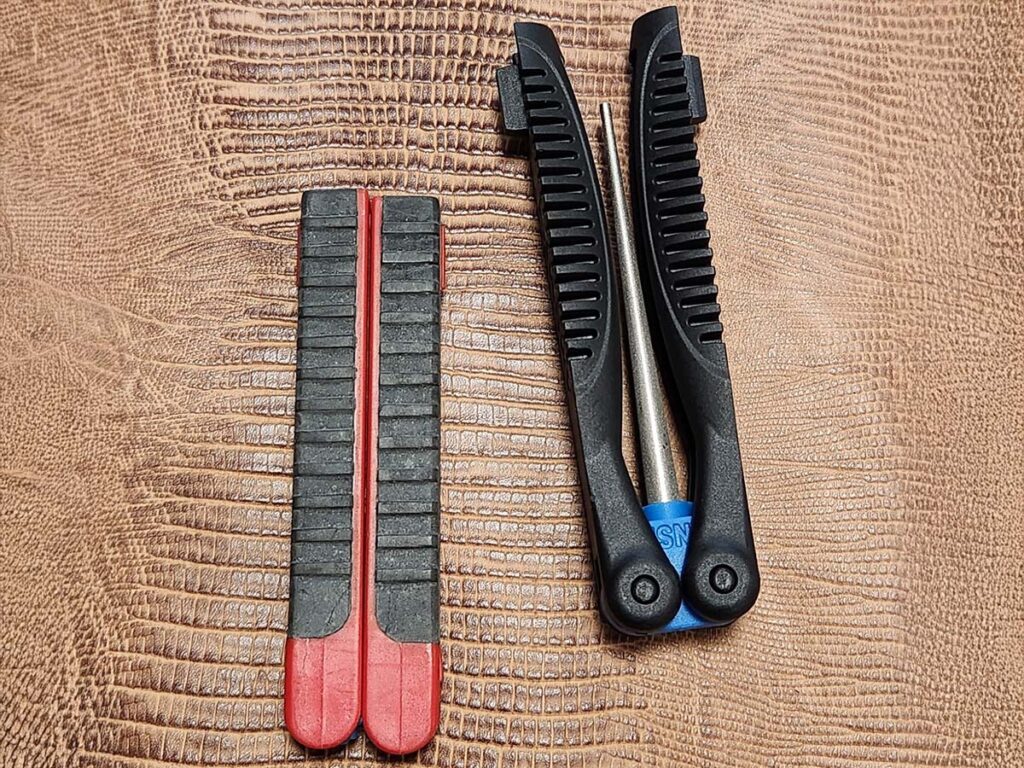
The author’s older Lansky folding sharpener (left) does not have a large enough diameter for some bigger serrations. Meanwhile, the new Lansky model (right) has a larger tip diameter than the older one, making it impossible to use on smaller serrations.

The diamond coating is electrostatic-plated to the rod, which is better than using an epoxy as some others do. Lansky uses a 600-grit coating. It is not an aggressive grit, though on the other hand you don’t want a grit that is too aggressive for serrations. If you get too aggressive of a grit, then a mistake can ruin the blade. The one issue I find with the Lansky is the tip of the cone is a bit large for some serrations. Other than that, I plan to get a lot of work out of this sharpener for years to come.

The Method

First, brace the blade you are sharpening against a stable surface. Position the blade’s secondary bevels up. I tend to prefer the dynamic style of sharpening in these cases, so I move the sharpener, not the blade. Match the angle of the secondary bevel when placing the rod in the serration.

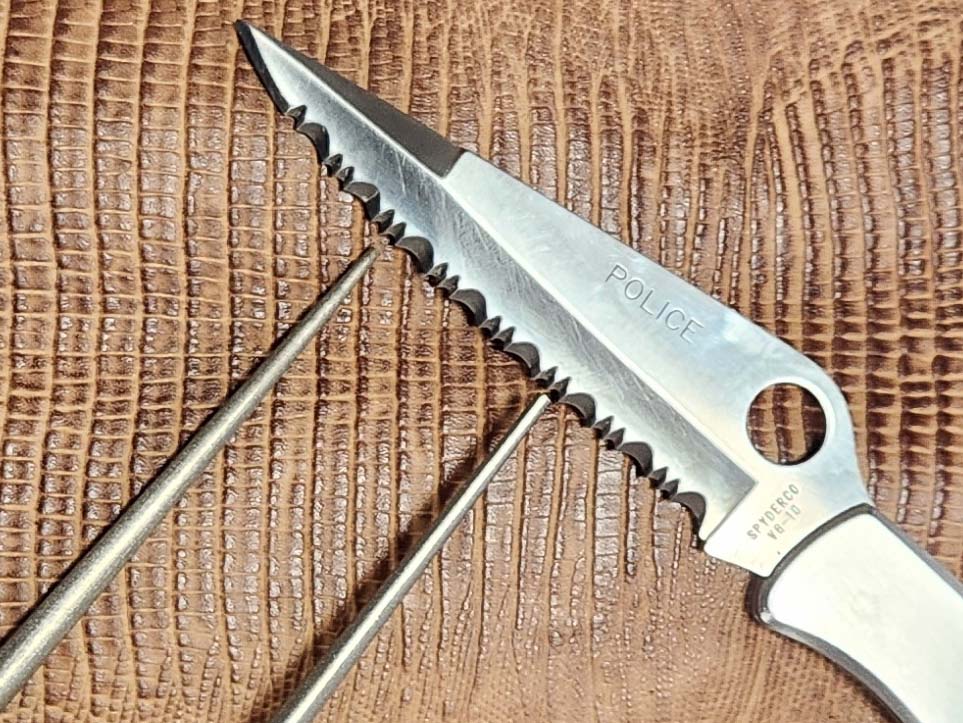
There is often more than one way to do something. Here the author uses a ceramic sharpening rod whose diameter closely matches the serration.

Position the rod a bit before the diameter of the cone that matches the serration being worked on. You don’t want to start your sharpening stroke at the beginning of the cone as that will change the shape of the gullet. The intent is to remove as little material as necessary. If you start sharpening close to the beginning of the cone, you will cut into the gullet. Keep close to the diameter of the gullet and take short passes.

When finished, I check all the teeth to make sure they are still pointed. Then I briefly strop the opposite side of the blade with a compound-loaded leather strop. Just a couple of passes will remove the burr. Lansky lays out the static method in the directions, which means you move the blade along the rod. Try both methods and see which one works best for you. Everyone has their own preference. In the end it is more important to get good results.

Parting Cuts

Serrations shine when it comes to cutting fibrous materials such as cord, rope and nylon straps. At my shooting range, when I score a bunch of cardboard for backers, I usually use my serrated knife to cut the cardboard down to size.

A downside to the new Lansky folding sharpener is that it isn’t as compact as the older Lansky design (right).

It is best to maintain serrated edges. With a plain edge you can let it go then sit down with it and bring it back to life easy enough. Serrated edges I find it best to stay on top of and regularly give them some upkeep. Wearing down the tips off the teeth and blowing out the gullets just makes more work and creates more chance you will mess up the serrations.

If you don’t own a good quality serrated knife because you are concerned about sharpening it, then buy a cheap one and practice your technique. Lastly, if you own just one serrated knife outside your kitchen bread knife, make it the rescue knife in your car.

Lansky Folding Tapered Diamond Rod Sharpener
Abrasive: Diamond-coated rod
Rod length: 3.5”
Rod thickness: 1/16” at tip, ¼” at base
Grit: 600
Handle: Nylon
Sharp stuff: Sharpens serrated blades, fishhooks, gut hooks and more; the rod folds into the handle for protection and ease of carry
Weight: .2 oz.
Closed length: 5”
Open Length: 9”
Country of origin: USA
MSRP: $19.95

More Sharpening Articles:

Rare Bob Loveless Customized Guns Up For Auction

Three highly coveted firearms modified by the Cutlery Hall of Fame® legend—including his “de-fanged” Colt Commanders—head to Rock Island Auction.

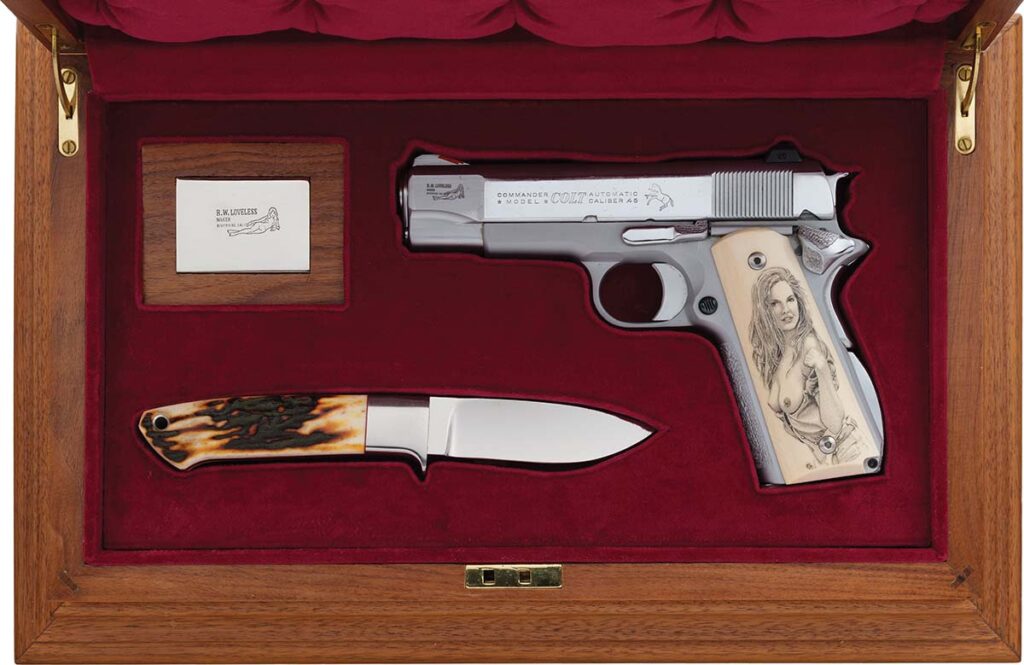
Bob Loveless Colt "Old Smoothie" Lightweight Commander semi-automatic pistol with scrimshawed ivory grips, drop-point Loveless Knife and sheath.
Bob Loveless Colt “Old Smoothie” Lightweight Commander semi-automatic pistol with scrimshawed ivory grips, drop-point Loveless Knife and sheath. Rock Island Auction image

While the late Bob Loveless secured his legacy as a titan of the cutlery world, the BLADE Magazine Cutlery Hall of Fame® member also brought his legendary eye for utility to the firearms world. His knives remain some of the most desirable, coveted custom creations on the planet, but a rare trio of his personal, customized handguns are now heading to the auction block at Rock Island Auction in the company’s June 27 American Sale (now live online). The selection highlights how the master craftsman applied his famous Bauhaus-inspired design ethos to custom gunsmithing.

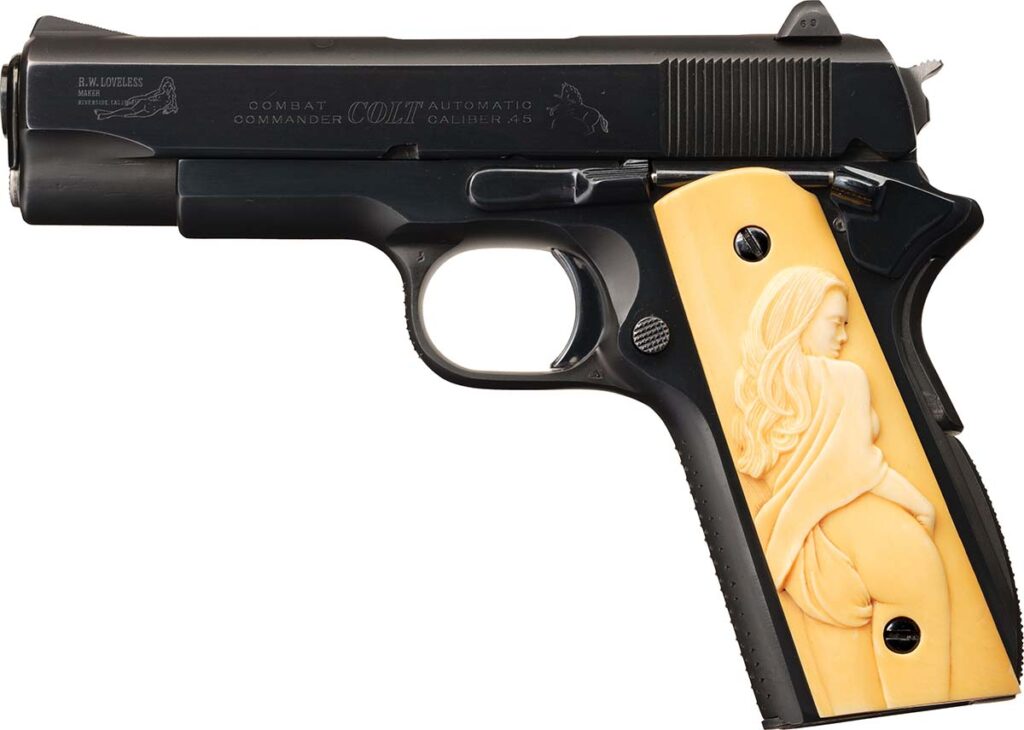
Bob Loveless Colt "Old Smoothie" Combat Commander semi-automatic pistol with relief carved ivory grips.
Bob Loveless Colt “Old Smoothie” Combat Commander semi-automatic pistol with relief carved ivory grips. Rock Island Auction image

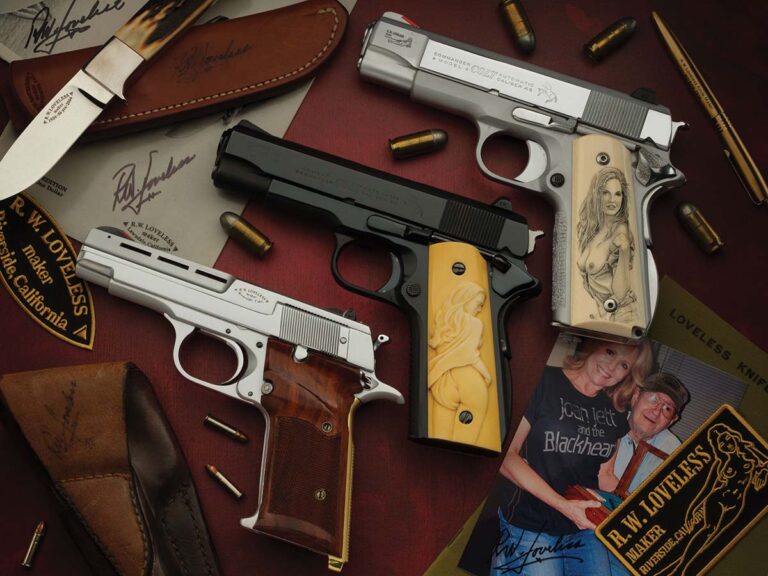
The lineup features two Colt Commander pistols that Loveless thoroughly “de-fanged,” a signature modification process where he systematically bobbed the hammers, radiused the frames and smoothed away every sharp edge that could gouge a shooter’s hand. The first is a c. 1980 Lightweight Commander, featuring his electro-penciled initials, custom Browning cuts on the slide, and smooth ivory grips scrimshawed with nude artistry. This rare piece is housed in a custom hardwood case alongside a matching 2004 Loveless drop-point hunting knife. It is joined by a scarcer steel-framed Combat Commander variant, a platform Loveless rarely altered because he felt the extra weight defeated the purpose of a carry gun, making this particular build exceptionally rare.

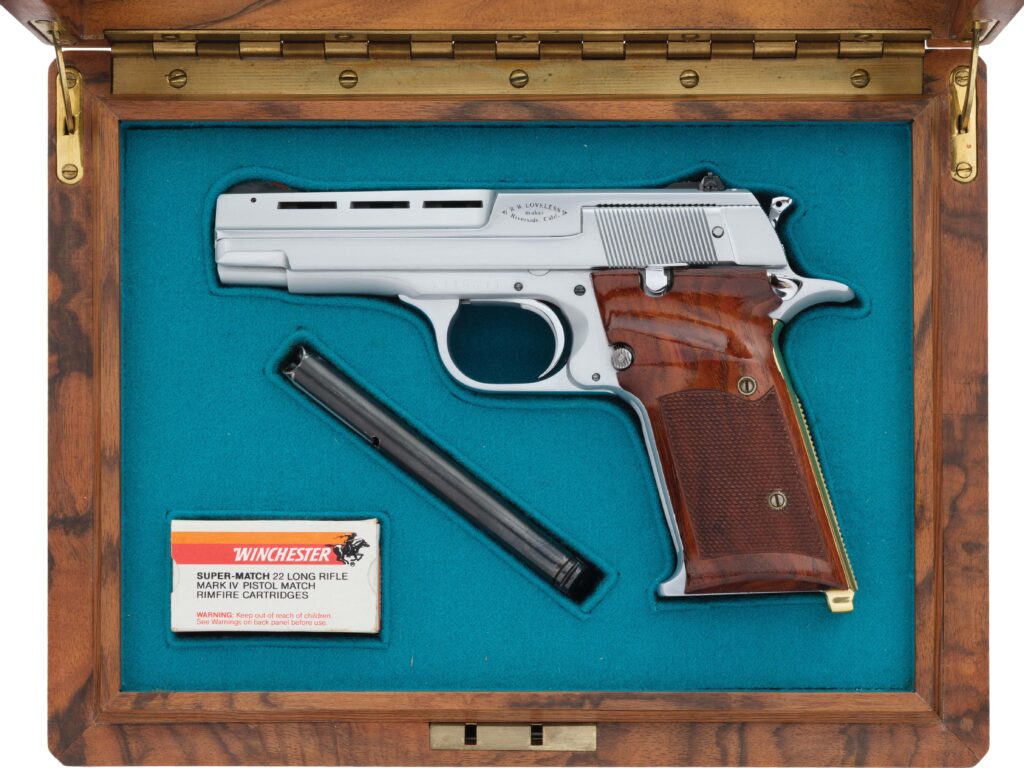
Bob Loveless Smith & Wesson Model 41 semi-automatic pistol with case and signed photographs.
Bob Loveless Smith & Wesson Model 41 semi-automatic pistol with case and signed photographs. Rock Island Auction image

Rounding out the trio is an extensively reworked Smith & Wesson Model 41 target pistol, believed to be one of only 70 ever built by Loveless. This highly modified rimfire pistol features a shortened barrel with a custom vented rib, an exposed hammer conversion, a checked gold-washed backstrap with a lanyard loop, and his personal initials electro-penciled on the slide. Complete with signed photographs of Loveless, a custom leather holster and a glass-topped display case, the group offers collectors a rare look at how one of the greatest knifemakers of all time refined factory firearms into high art.

Read More On Bob Loveless:

Advertisement

Must Read Articles

Read this before you make a knife

Knifemaking 101 – Read This Before You Make a Knife

  by Wayne Goddard My experience has taught me that there's nothing like digging in and getting started. I've often said the hardest part of the...
how to forge damascus steel

How to Forge Damascus

Advertisement
Advertisement