
Knifemaking

Knifemaking is the building of a knife, which includes the blade, handle and other accouterments. Blades are made by either removing metal from a steel blank via a grinder – known as stock removal – and the forging to shape of hot steel into a blade in the process known as bladesmithing. Other parts, including bolsters, guards, pommels, etc., are needed to complete the finished knife.

Featured Knives – – Knife Collecting – – Tactical Knives – – Survival Knives

How To: Dellana Dots Opening System

0

Dellana tells how she created and makes the Dellana Dots opening assist system—without a lathe.

Editor’s note: Full-time knifemaker Dellana created her Dellana Dots blade-opening assist system in 1994. The system consists of one or more elements raised above the surface of the blade to provide a gripping surface when opening a folding knife. Dellana Dots can be made using different techniques depending on your skill set. They can be any shape, from round to geometric to even gem set. There can be any number or shape of the Dots. Dellana most frequently makes them as round beads. In this tutorial, she shows how she does it.

Dellana Dots were invented for the same reason many things have been invented—a desperate need to solve a problem!

In 1994 I was a very new knifemaker studying under the mentorship of the great ABS master smith, Jim Schmidt. I was working on my second lockback folding knife, one of my own design. All was going well until I realized that the blade sat too far into the knife when closed because of the thickness of the handle scales. Due to my inexperience, I had not considered the scales’ thickness. It was evident that it would be very difficult for the knife to be opened without effort and annoyance.
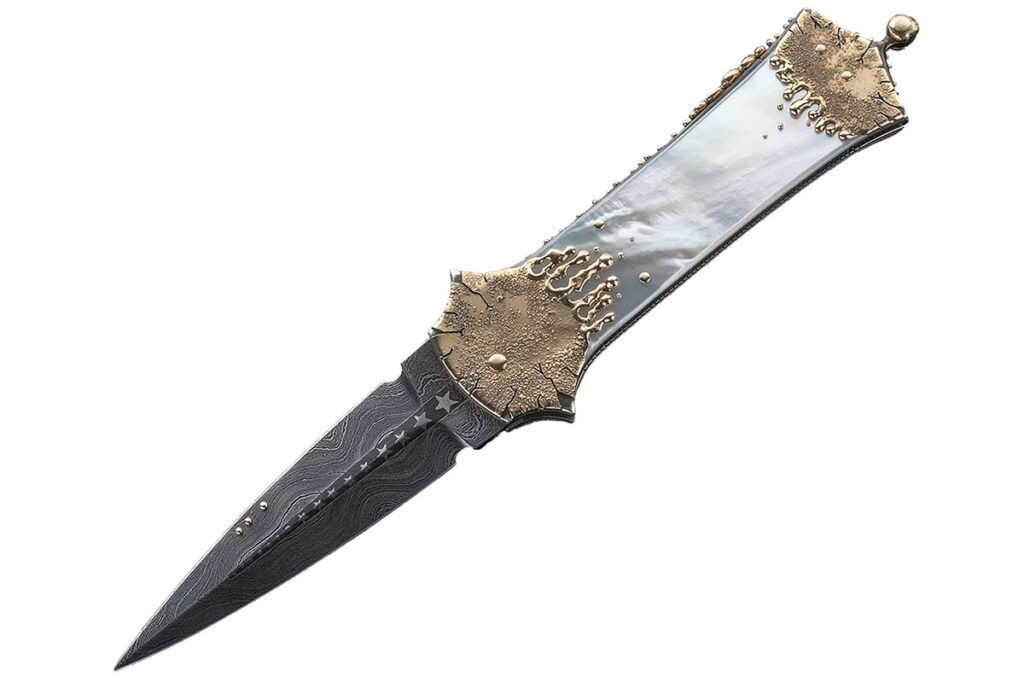
Three Dellana Dots
Three Dellana Dots blend in perfectly on the blade of Dellana’s Magick lockback folding dagger in her Meltdown knife series.

What to do?

The obvious solution was the commonly used nail nick, the ditch grooved into the blade for a thumbnail to try to grab ahold of. I have always disliked the functionality—who else has broken or bent back a fingernail when trying to use one?—or the look of nail nicks. One of them would definitely not be visually appealing with the rest of the design of my knife, and that was unacceptable to me. So, I used my 17 years of experience as a goldsmith to figure out an acceptable solution.

I had used raised beads on many of my jewelry designs as decorative elements and thought that a raised bead might give enough surface area for a fingernail to grip—but how was I to attach the bead to the blade’s surface? The soldering that I would normally do would not work in this situation due to the blade needing to be heat treated. I thought that drilling through the blade and riveting might work if I could leave enough of one side of the rivet high enough above the blade surface to get a good grip.

I had never seen anything like it done on a blade before and wondered if there was some unwritten rule against that sort of thing. I decided to take the knife to Jim, explain the problem and my solution, and see what he thought.

Dellana and Jim Schmidt
The author with her mentor, the late, great ABS master smith Jim Schmidt.

Jim was a man of few words and his silence after I explained the issue was a bit nerve wracking for me. After what seemed an interminable amount of time he said, “That’s a great idea and I’m going to steal it. But I’ll call them ‘Dellana Dots.’” And that’s exactly what he did.

And there you have the story of how the Dellana Dots came to be. They have proven to be a popular solution for many makers of folding knives ever since.

Materials & Tools

I most often use an asymmetrical three Dellana Dot system because I find that configuration visually appealing with most of my designs. Here’s how I do it.

First are the materials and tools. You’ll need:
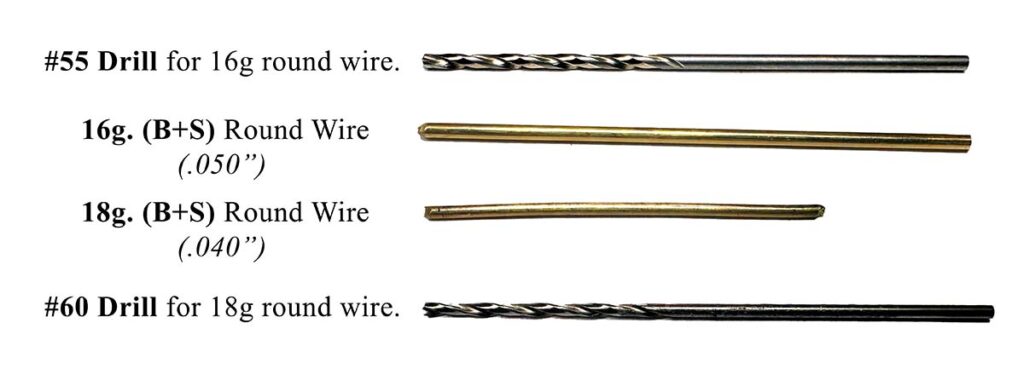
Materials to make the dots
The materials and tools you’ll need.
  • Pin stock (B&S Gauge): 16g. (.050”) 14k yellow gold round wire and 18g. (.040”) 14k yellow gold round wire.
  • Drills: #55 (16 gauge) and #60 (18 gauge).

Getting Started

Pro tip: Preparation is the key to creating anything efficiently and well. The more thorough the prep, the easier, faster and better the final process and end result will be.

Step 1: Mark and drill the holes for the Dellana Dots’ round wires before grinding the bevels (Images 2 and 3).
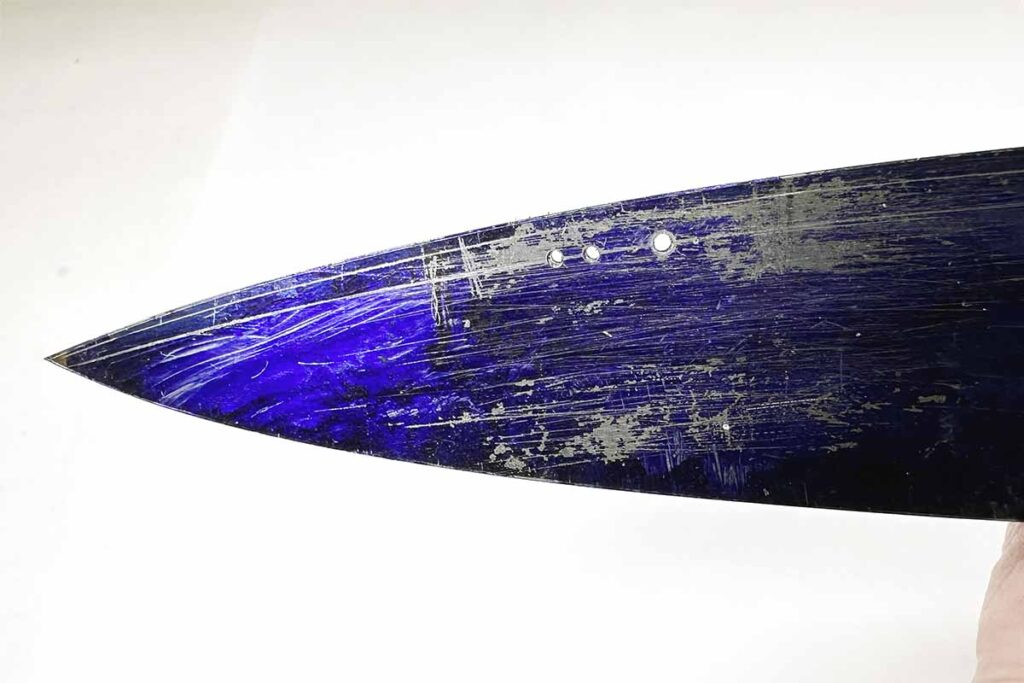
Holes drilled into the blade
The holes have been drilled in the blade.

Special Note A: If you grind the blade bevels before heat treatment, countersink the holes so the spheres sit down below the surface of the blade to avoid anything catching on them.

Special Note B: If you grind the blade bevels after heat treatment, drill the holes prior to heat treating and use diamond drills (dental burrs) to countersink the holes after grinding.

I countersink the holes on the front side (where the spheres will be) deeper than on the back (riveting) side. This allows the balled end of the wire to sit below the surface of the blade bevel to keep it from snagging on anything.

Step 2: Finish the blade. Make sure the blade is fileworked, etched (if damascus), blued and polished prior to riveting the Dellana Dots in place.

Step 3: Double check that the wire fits through the drilled holes.

Step 4: Melt the ends of the wires to form spheres. I use a Smith Little Torch with propane and oxygen. This takes a bit of practice to know the correct heat and timing needed to form a smooth, round, symmetrical ball. As always, practicing first can be very helpful.

Step 5: Check the size and fit of the balled ends in the countersunk holes. Make sure that the previously drilled and countersunk holes in the blade allow the balled ends of the wires to sit down into them. This will ensure that nothing can become snagged under the spheres.

Step 6: Polish the balled ends of the wires. Doing this now will result in a better final appearance as well as save time. If you wait until after the Dellana Dots are set, it is difficult to get the dark oxide created during the melting process polished off the balled ends without affecting the blade finish. (Don’t ask me how I know this.)

Prep Blade For Riveting

Cover the back side of the blade
Cover the back side of the blade with the tape locating the holes over the wires.
  • Insert the wires through the blade, ensuring the balled ends protrude on the blade’s front side.
  • Cut off the wires on the back side of the blade not flush with the blade. Leave a little excess to file to the appropriate height for riveting.
  • Make two sections of three layers of masking or painter’s tape big enough to cover the entire blade.
  • Put one section of the tape over the front side of the blade covering the balled ends of the Dellana Dots. This will protect them during riveting and reduce clean up time.
  • Mark the hole locations on the second section of tape (for the back side of the blade). Make holes through the tape with a hole punch for the wires to go through.
  • Cover the back side of the blade with the tape locating the holes over the wires. This will protect the blade when filing and sanding the wires to the correct height.

Prep Dots For Riveting

Peel off the third layer of tape, leaving two layers of tape on the blade.
Peel off the third layer of tape, leaving two layers of tape on the blade. This leaves the perfect height of wire to form the rivet head.

Pro Tip: To get the correct height of wire for a perfect rivet head every time:

  • File the wire down flush with the three layers of tape;
  • Sand to 800 grit;
  • Remove any burr, and;
  • Peel off the third layer of tape, leaving two layers of tape on the blade. This leaves the perfect height of wire to form the rivet head while still protecting the blade during hammering and clean-up.
  • Rivet The Dots

Rivet The Dots

Hammer around the edges of each filed, sanded wire on the back side of the blade to spread, dome and secure the head of the rivet.
  • I use the ball side of a chasing hammer to rivet the wires;
  • Place the balled heads of the tape-covered Dellana Dots (the front side of the blade) on a polished steel anvil. Hammer around the edges of each filed, sanded wire on the back side of the blade to spread, dome and secure the head of the rivet.

Polish The Rivets

Polish the hammered heads of the wires, removing any sharp edges as you do. The author uses a small wheel with White Diamond-type compound and her Foredom hand piece for the task.
  • Leave the tape on the blade to minimize the polishing compound mess and cleanup time and effort;
  • Polish the hammered heads of the wires, removing any sharp edges as you go. I use a small wheel with White Diamond-type compound and my Foredom hand piece to do this.

Polish The Dots
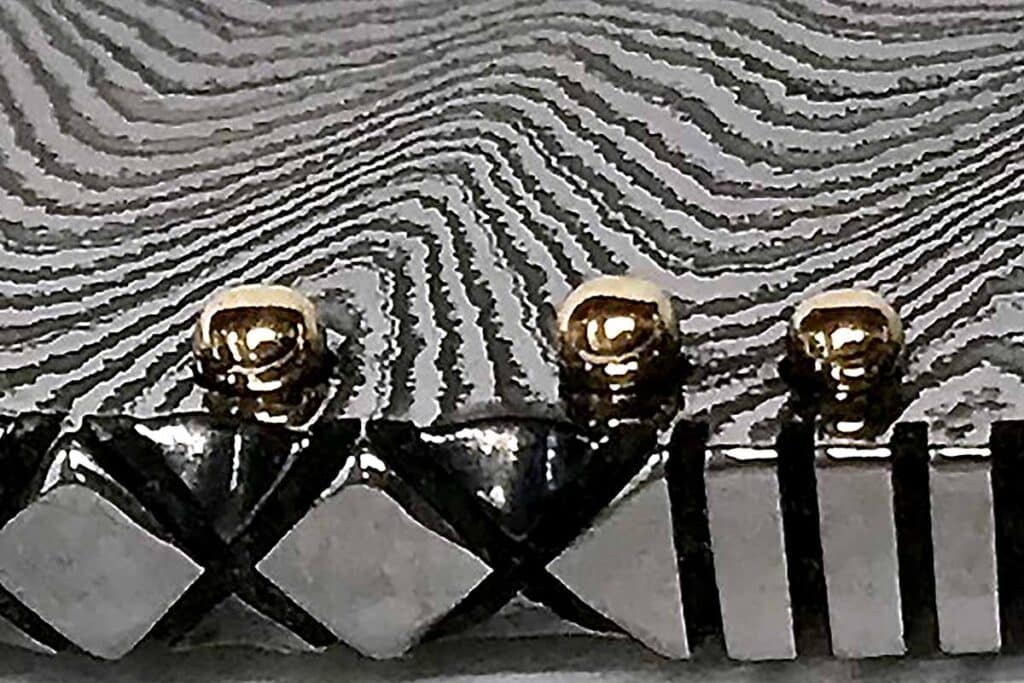
The finished rivet heads as they should appear on the back side of the blade  and a closeup of the finished Dellana Dots.
The finished rivet heads as they should appear on the back side of the blade and a closeup of the finished Dellana Dots.
  • Carefully remove the tape from both sides of the blade. Save the front-side tape until after you’ve ensured that the balled ends on the front haven’t been deformed and don’t need reshaping and re-polishing. If they do need reshaping and re-polishing, use a hole punch to cut away the tape around the balls and reapply the tape. This will minimize any polishing compound mess and save time in the long run.
    Clean the polishing compound from around the rivets and, if necessary, the Dellana Dots as well.Pro Tip: I cut down a welder’s acid brush so the bristles are really short and stiff. This works perfectly for cleaning the small, hard-to-reach areas. Then:
  • Clean the whole blade with lacquer thinner;
  • Wax the blade, and;
  • The riveted side of the Dellana Dots should be very smooth and only slightly domed above the surface, with no sharp edges.
  • And that’s how you make Dellana Dots without a lathe!

More On Knifemaking:

What Do Judges Look At In Custom Knife Competitions?

0

Know some of the criteria judges use to evaluate custom knives.

Artistic impression, technical merit, fit and finish, walk and talk: What are the standards and where are the attributes that lead to a judge’s conclusion when awards are on the line at a custom knife show? It goes without saying that sometimes the difference between a winner and runner-up is as thin as the edge of a sharpened blade.

Those who judge knife competitions are obviously obliged to employ their experience, skill, years of involvement with the industry and discerning subjectivity. As a result, looking at the criteria that some veteran judges employ helps observers develop a deeper perspective on the competition among the best custom makers in the business. Moreover, if you’re a collector, knowing what judges look for should help you improve your collection; if you’re a knifemaker, it should help you make better knives—or at least knives that are more likely to win judging competitions.

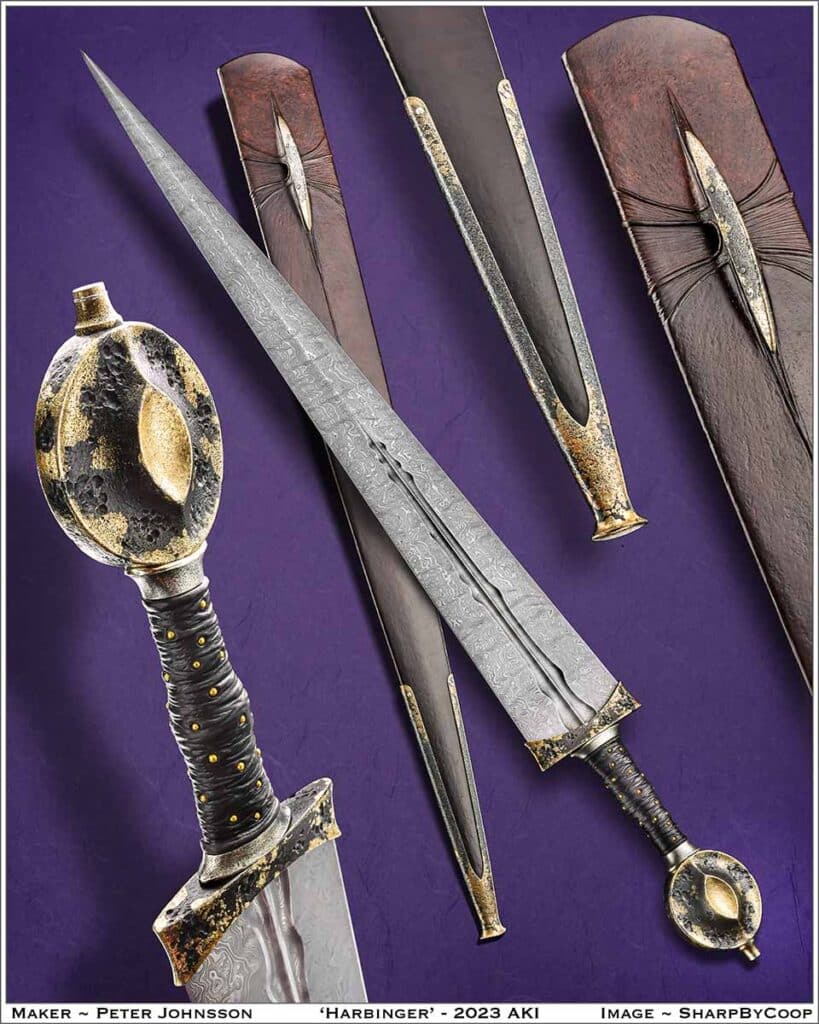
Peter Johnsson's Harbinger
It’s not unusual for a knife to win a category based simply on how hard it is to make—and when you make it as superbly as Peter Johnsson does with the Harbinger, so much the better. (SharpByCoop image)

“I use the four F’s,” advised longtime purveyor Les Robertson, “fit, finish, flow and function. Fit is the overall look of the knife, focusing on how well the guard/bolster fits the blade and guard. How well does the material fit up against the guard and spacers? If a full tang or tapered tang, how well does the handle material fit to the tang?” When it comes to finish, Les primarily looks for consistency and degree of difficulty.

“No matter what type of finish, is it consistent from the tip to the end of the knife? It can have no spots, scratches or other inconsistencies,” he explained. “The degree of difficulty comes in the form of the type of finish. A mirror finish is much more complex than a tumble or bead blast finish. I give bonus points for two-tone finishes, such as a mirror finish on the hollow of the blade and satin for the flat of the blade.”

Finishing up with flow and function, Robertson commented, “Flow—does the knife transition smoothly from one end to the other? Sometimes art knives become more about the art. The embellishments can take away from the basic design the knife was built on. Function: will the knife do what the design intended it to do? While there is always room for improvement on standard designs, the maker should temper the changes and base them on reality. Often, the design borders on or moves into the fantasy realm.”

Robertson adds that the first thing he notices when judging is whether the knife fits the category entered. Hunters, for instance, do not generally feature 10-inch bowie-style blades. Common errors or flaws, he observes, can usually be found in grind line symmetry in the choil area, whether a folder or fixed blade.

Complexity

Jared Oeser has been a custom knifemaker for 13 years and finds himself most familiar with folders. “Folders tend to be, more often than not, the more complicated knives to make,” he began. “Fit and finish are big factors, especially on a folder, and every detail has to be taken into account along with how hard the knife is to make. Adding a lockback feature or multiple blades makes the knife more complicated, and I have seen knives win in categories—even best in show—that might have a tiny flaw but win on the sheer complexity of the knife, just how hard it was to make.”

Oeser likes to take a broad view in the beginning, looking over each of the knives in a particular competition and moving from there. “In a process of elimination, I take some away and then give an overview of the ones that stand out with their level of detail, refinement and craftsmanship,” he said. “I try to leave style aside because everybody has a style of their own. But I do want to see that they have accomplished what they intended to do within their own style. It may not be to my taste, but if they have nailed it, that’s great! What does the entire package look like?”

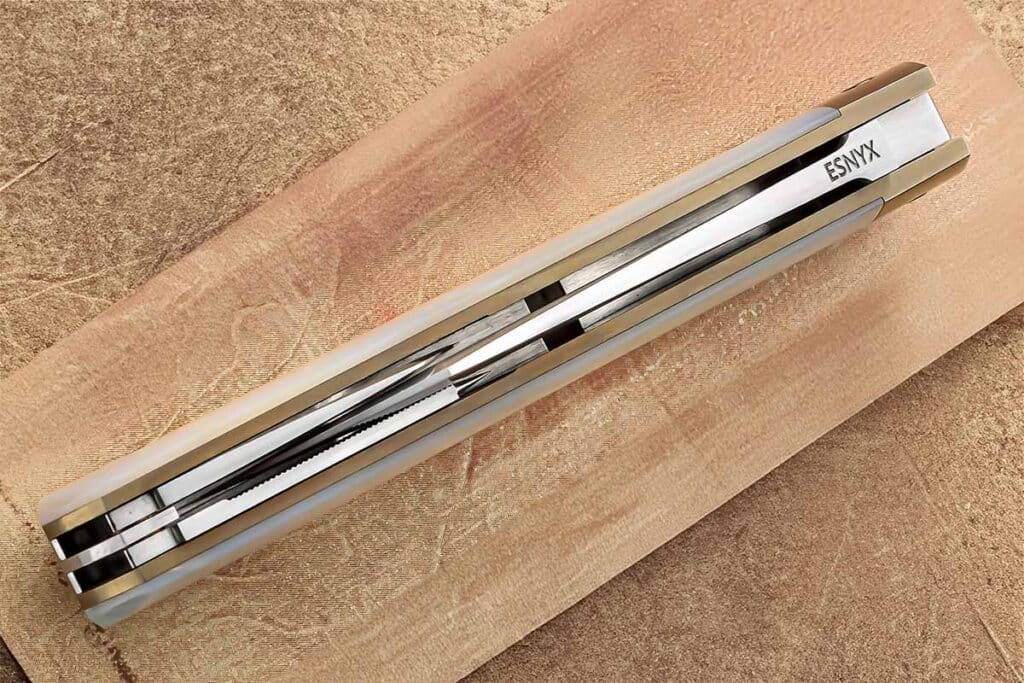
Top-down views of knives can reveal the good or the bad.
Top-down views of knives can reveal the good or the bad. Here it’s the good with the proper spacing between the closed blades on an Evan Nicolaides sportsman’s knives. (SharpByCoop image)

After judging for the first time at BLADE Show Texas in 2022, Jared has seen some entries that immediately fall out of contention. “There are automatic disqualifications if knives have massive flaws,” he related. “I was judging a competition with [ABS master smith] Jim Rodebaugh once, and there was a big bowie with the nut on the end of the pommel way off center. Jim put that knife down and said, ‘Well, that’s out.’”

Scale & Proportion

Scale and proportion are critical elements in the overall presentation of a custom knife, and these ideals apply to both fixed blades and folders, according to Jim Berkenfield of Forged in Thread, an apparel company that contributes revenues back to the knife industry. “I typically examine a knife from the tip of the blade to the handle,” he said, “but that’s just me. Right away your eye will pick up on common errors such as disproportionate size between blade and handle, major flaws in fit and finish, or any sort of material or structural flaw. In my opinion, line and flow are extremely important in both fixed blades and folders, yet as in most judging this is a subjective characteristic of a knife. Really, it’s no different than admiring a fine piece of sculpture or artwork and saying ‘I like that’ or ‘I don’t like that.’”

Fit and finish factor into the award-winning formula in virtually every judge’s point of view. Visual appeal and quality construction go hand in hand. “That’s extremely important in judging knives,” Berkenfield added, “because judges are always looking for perfection in whatever the category may be. Smooth transitions between materials, perfectly centered blades, and smooth locking mechanisms are all vital characteristics of a winning knife.

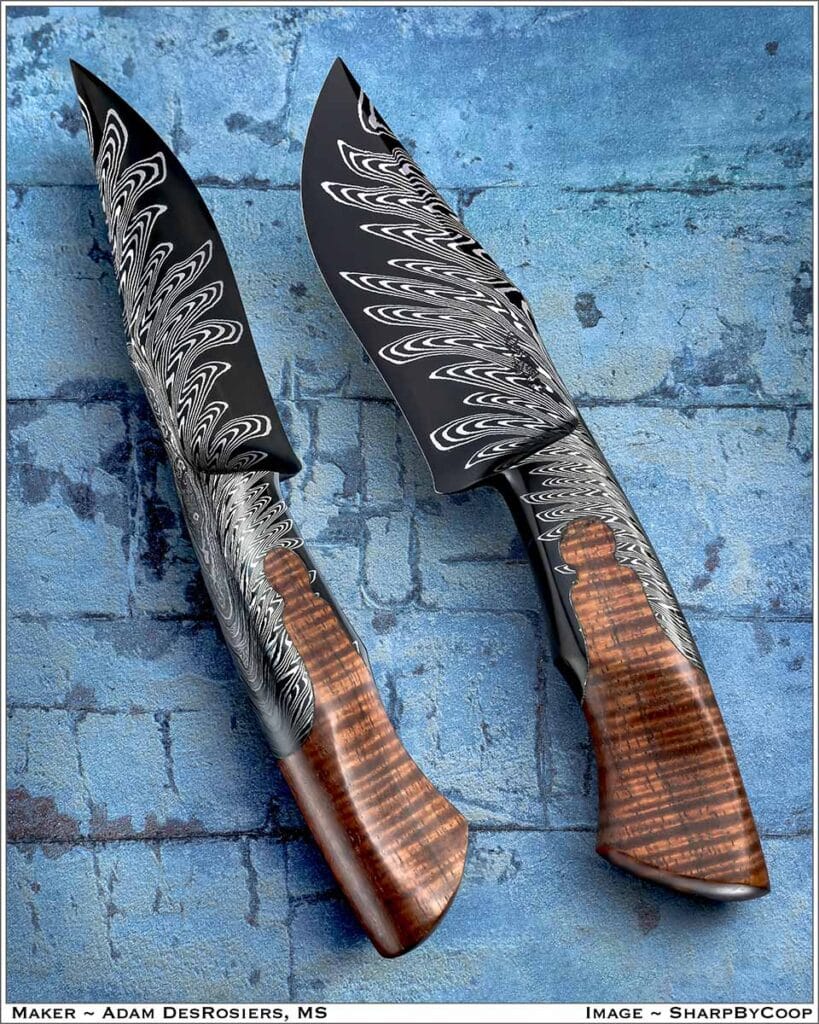
Flow is when the knife’s shape transitions smoothly from one end to the other.
Flow is when the knife’s shape transitions smoothly from one end to the other. ABS master smith Adam DesRosiers nails the concept with his damascus keyhole hunter. (SharpByCoop image)

“In categories that I have judged, the judging teams quickly have been able to reduce the submissions to the top one, two or three knives almost at a glance. Occasionally a piece can be overlooked by a judge based upon the fact that it’s a knife that doesn’t fit [his/her] general aesthetic or knowledge set, and therefore [he/she has] a hard time appreciating it. Obviously, this is one of the reasons that judging is done by a panel and not by an individual judge.”

When it comes down to a pair of high-quality knives, Berkenfield seeks a closer examination of each piece, sometimes with a magnifying glass if necessary. Bad welds and asymmetry in damascus steel can make or break a winning knife.

“A piece of advice I have given to a lot of aspiring and up-and-coming makers is to try and find a way to distinguish your work from the multitude of other incredible knifemakers out there,” Jim concluded. “I tell them to imagine a table with 100 knives on it and one of their knives somewhere in the mix. They should be able to quickly scan the table and identify their knife from all the others. This is easier said than done and sometimes is accomplished with a completely unique design or simply by a small detail that identifies a knife as their own.”

Half The Equation

After making custom knives for eight years, Pennsylvanian Jim Vandeveld sees the judging aspect of his involvement weighted heavily on fit and finish, and his perspective on the topic is pretty specific. “Fit and finish are absolutely critical, and honestly, to me encompass more than 50 percent of a knife’s virtue,” he explained. “Polishing, edge breaking, hand satining, etching, buffing, etc., all must flow just as the design must flow. Inspecting it is purely visual and deficiencies are often glaringly obvious. For me, light usually tells the story. How a finished surface catches the light will often show most imperfections.”

Common errors or flaws can usually be found in the grind line symmetry
Common errors or flaws can usually be found in the grind line symmetry in the choil area. Carl Colson matches the plunge cuts quite well on his Loveless reproduction. (SharpByCoop image)

For Vandeveld, the judging experience begins at first sight—literally. “I think the way the knife is perceived visually at a distance is very important,” he commented. “I personally look for balance, flow and symmetry. These are broad spectrum visual cues that tend to draw me in to take a closer look at a piece. When judging a knife, all views must be taken into account. Lateral, top down, down the point, and more, all propose a different perspective and opportunity for detail to be found or missed. The same is true for folding knives.”

Vandeveld’s judging eye gravitates toward high quality, but common and recurring errors in the knifemaking process do surface. “I think the most common flaws that pop up within custom knives tend to be both visual—related to plunge and grind symmetry as well as faceting on handles and other components, straight-line fit-ups as far as gaps and locations, finishing with etching, sandblasting and polishing—as well as ergonomic hot spots and unbroken edges. These tend to be more subjective based on the maker’s style, but when judging a knife, how it fits in the hand is just as important as the aesthetic in my opinion.”

Set Of Standards

Most judges would probably agree that the devil—or the delight—is in the details when it comes to evaluating the entries in a custom knife competition. It’s way more than a beauty contest. Accessories such as sheaths or pocket clips are not necessarily required. As more than one judge has said, “I’m judging the knife and not the sheath.”

The sheer weight of the knife may even come into play for some, while others make it only a minor consideration. Walk and talk in folding knives certainly demonstrates the proficiency of the folder maker’s tolerances, centerline and spacing, and ease of opening. The list goes on.

One thing is certain—in judging the merits of a custom knife, an experienced individual learns to apply a set of standards to which all makers aspire.

More On Knifemaking:

Daniel O’Connor Goes With The Flow On His Black Widow

A sushi knife that developed a taste for Texas brisket.

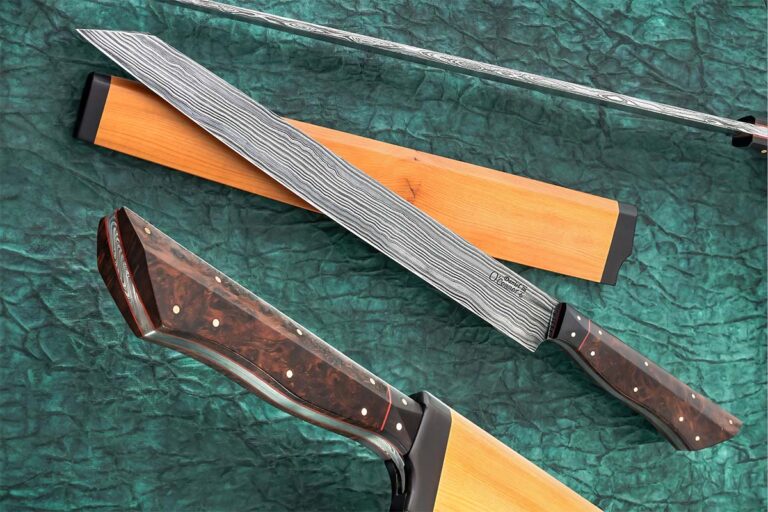
You might say Daniel O’Connor’s Black Widow leads a double life. It started as a sushi knife but when one of Daniel’s Texas pals said it looked like it would make a great brisket knife, O’Connor went with the flow, telling
his friend, “It’s about whatever you want it to be.”

OConnor Mug

Based on a kiritsuke yanagi-ba sushi knife, Black Widow features a damascus of 150 layers of 1084 carbon and 15N20 nickel-alloy steels. Daniel forged the steels in a square and then forged them flat, perpendicular to the original stack. This resulted in the edges of the layers showing up in more or less straight lines, what Japanese swordsmiths call masame hada.

The accompanying image of the knife’s butt shows how the layers distorted when forged on edge. Daniel indicated he will use the pattern in the future.

Black Widow Specs
Blade length: 12”
Blade grind: A double urashi—double bevel w/a slight hollow on each side
Handle: Bocote burl w/red fiber liners
Bolster: Bog oak
Overall length: 17”
Sheath: Irish yew and bog oak
Maker’s price for a similar knife and sheath: $1,500

Check Out More Cool Custom Knives:

2024 BLADE University: Classes That Keep You Sharp

Get your bachelor’s of state-of-the-art degree at the 11th Annual BLADE University.

The state-of-the-art in all things knife, including the latest in mosaic damascus steel, knife and handle design, and how to sharpen, make a lockback whittler, run a knife business and more will be the focus of the 11th Annual BLADE University.

Held in conjunction with the 43rd Annual BLADE Show June 7-9 at the Cobb Galleria Centre in Atlanta, BLADE University will be sponsored by Work Sharp. Classes begin Thursday, June 6, and will run through Friday, June 7, and Saturday, June 8.

While most courses will be taught in the Cobb Galleria, some also will convene under the tent in The Courtyard, aka the parking lot of the show’s host hotel, the Renaissance Atlanta Waverly.

BLADE University gathers some of the world’s best knifemakers, bladesmiths and other cutlery and steel professionals to teach a wide range of subjects for the knife user, knifemaker, knife hobbyist, knife entrepreneur, knife designer, and knife aficionado and novice alike. If you love knives or are just beginning to, BLADE University has a topic for you. The complete course schedule, with subjects, teachers, times and venues:


Buy Knives, Don’t Wait In Ticket Lines! Get Your 2024 BLADE Show Tickets!


THURSDAY, JUNE 6

  • The Art of Selling at a BLADE Show, Tom Krein, 4 to 5 p.m., Room 104—A long-time maker of custom utilitarian fixed blades and folders, Tom Krein will outline exactly what a knifemaker who is serious about selling knives should do and how he/she should behave behind a knife show exhibitor table. Proper table etiquette and sales and customer relations strategies are just some of the subjects Tom will cover. The class will be held the day before the BLADE Show begins so attendees can put some of Tom’s recommendations into practice during the main event Friday through Sunday.

FRIDAY, JUNE 7

Metal and Wood Fitting Techniques
ABS journeyman smith Henning Wilkinson makes impeccable keyhole knife handles like this one. Join him for his class Metal and Wood Fitting Techniques for Keyhole Handles Friday at 2 p.m. (Eric Eggly/PointSeven knife image)
  • Fundamentals of Grinding, AmeriBrade and guest grinders, 8 to 9:30 a.m., The Courtyard—AmeriBrade and guest makers will provide a general overview on grinds, techniques and different equipment. The class will be interactive and the team will answer questions and demonstrate suggestions for common issues.
  • How to Run a Small Successful Knifemaking Business, Bob Kramer, 10 to 11:30 a.m., Room 103—Learn the do’s and don’ts of making the most out of your knifemaking business. ABS master smith Bob Kramer has 30 years of experience and says he’s still learning!
  • Thermal Cycle Steel for High Performance, Larrin Thomas, 10:30 to 11:30 a.m., Room 104—There are many different recommendations for how to heat treat steel after forging, but what is best? Can normalizing and grain-refining cycles really improve properties when compared with steel from the factory? Should stock-removal makers bother with thermal cycling? How do you thermal cycle stainless steels after forging them? Is it thermocycling or thermal cycling? Join Larrin Thomas, designer of CPM MagnaCut stainless steel, creator of the website Knife Steel Nerds, and author of Knife Engineering: Steel, Heat Treating, and Geometry, as he answers these questions and more.
  • Symmetrical Quillon Dagger 101, Neels Van Den Berg, 1 to 2 p.m., Room 107—Join ABS master smith Neels Van Den Berg from Black Dragon Forge for a discussion and walkthrough of making a symmetrical quillon dagger. He will cover design, proportions, aesthetics, materials, fluting and finally the entire manufacturing process, sharing useful tips and tricks to save you time, money and frustration.
  • Intro to Power Forging, panel of forging authorities, 1:30 to 2:30 p.m., Room 103—Bring your forging questions to our group of expert panelists including Logan Gillihan, Will Stelter, Salem Straub, Charlie Ellis and Brian House.
  • Metal and Wood Fitting Techniques for Keyhole Handles, Henning Wilkinson, 2 to 3 p.m., Room 113—An ABS journeyman smith and member of the Knifemakers’ Guild of South Africa, Henning Wilkinson will outline the correct techniques for fitting metal and wood in the construction of the keyhole integral knife handle. Henning will show you how to eliminate the gaps between materials that results in the proper fit and finish collectors and those who judge knife competitions look for in an award-winning keyhole-handle knife.
  • Hands on Sharpening, the team at Work Sharp, 3:30 to 4:30 p.m., Room 113—What happens when a knife gets dull? How do you know when to sharpen it? Bring your own knife or borrow a demo model and learn the progression of shaping a bevel, sharpening and edge maintenance from the team at Work Sharp. You will get hands-on practice and experience sharpening your blade using a variety of sharpeners and abrasives, from whetstones to belts.
  • Originality: Experimentation, Innovation and Ingenuity, Lucas Cao, 4:30 to 5:30 p.m., Room 107—Why are some people more creative than others? Can creativity be learned? Lucas Cao, founder of Squid Industries, explores tools and techniques that anyone can apply to become more original.

Raise Your Knifemaking IQ! Enroll in a BLADE University Class


SATURDAY, JUNE 7

Lockback whittler class at Blade University
Tim Robertson won Best Locking Folder at BLADE Show West ’22 for his lockback whittler and will cover how to make this most difficult pocketknife of all to build in his class Saturday at 9:45 a.m. (SharpByCoop image)
  • Elevating Your Handle Appearance: Spine Filework, Handle Shapes and Pin Placement, Kyle Daily, 8:30 to 9:30 a.m., Room 113—Enhance the appearance of your knife with distinctive features that go far beyond standard production models. Knifemaker Kyle Daily from KHDaily Knives guides you through the intricate art of filework on the spine, while also sharing insights into handle design and the pin placement on your handle. Discover Kyle’s preferred files and specialized equipment for crafting his five most popular filework patterns, ensuring your knife not only looks exceptional but also feels comfortable and functional. From laying out your pattern to a step-by-step tutorial, this class provides the essential knowledge to achieve a professional and eye-catching finish. A Q&A session at the end will ensure you leave with the skills and knowledge to take your knifemaking to the next level.
  • Insert Welding with Bob Kramer, 9:30 to 11 a.m., Room 104—Understand how to forge weld inserts with high precision and control to create realistic depictions of animals and patterns in this BLADE University offering. This will be an exclusive opportunity to experience the technique that Bob Kramer created with fellow ABS master smith Tom Ferry and shared with the masses.
  • How to Make the Most Difficult Pocketknife, Tim Robertson, 9:45 to 10:45 a.m., Room 107—An award-winning maker of slipjoints and a charter member of the South Texas Slipjoint Cartel, Tim Robertson will address perhaps the most difficult pocketknife to build: the lockback whittler. He will outline what makes the classic slipjoint/lockback folder so demanding to make, with a major focus on backspring design and function, the two areas of the knife that work against each other. He also will cover the correct sequence of parts preparation and the proper order of construction steps that reduces mistakes and helps ensure a successfully completed knife.
  • The Process Is the Product, TJ Schwarz, 11 a.m. to 12 p.m., Room 113—TJ Schwarz is the founder of Schwarz Knives, an Idaho-based manufacturer of premium outdoor fixed blades. He has over a decade of freelance knife design experience with many models in circulation, a patent, and two BLADE Show awards to show for it. Schwarz will share his insights on how to create a successful knife business, including the key point of understanding actually what it is that you’re selling.
  • Let the Pros Critique Your Knife, 2:15 to 3:15 p.m., Room 114—Award-winning knifemakers David Carver, Enrique Pena and Luke Swenson and ABS master smiths Bob Kramer and Jim Rodebaugh will share decades of knowledge and experience to critique the knife you made. They will go over every square inch of it and tell you what’s good, what’s not and how to make it better. Bring one knife only. Questions from attendees will be entertained throughout.
  • Hands on Sharpening, the team at Work Sharp, 2:15 to 3:15 p.m., Room 113—What happens when a knife gets dull? How do you know when to sharpen it? Bring your own knife or borrow a demo model and learn the progression of shaping a bevel, sharpening and edge maintenance from the team at Work Sharp at this BLADE University class. You will get hands-on practice and experience sharpening your blade using a variety of sharpeners and abrasives, from whetstones to belts.
  • Making Scissors in a Knife Workshop, Grace Horne, 2:30 to 3:30 p.m., Room 107—Have you ever thought about making scissors but don’t know where to start? If you’re curious about scissors or just want to expand your knowledge, this session is for you. Whether you want to have a go at restoring old scissors or forging your own from scratch, the basic information is the same—and it’s notoriously poorly documented. Dr. Grace Horne will give a whirlwind tour through the early history of scissors, describe methods of producing the blanks, give inside information on the twist and the curve, and highlight critical areas to consider. Most importantly, she will describe her method of scissors making that requires no specialized tools or equipment.
  • Pattern Welding Panel, 4 to 5 p.m., Room 104—Salem Straub, Mareko Maumasi, Charlie Ellis, Josh Prince and Will Stelter will explain how they created their collaborative Consortium billet, including each of the steps that went into creating this wild mosaic billet, and then open up to general questions about damascus forging and pattern development.

Check Out Previous Custom Award Winners:

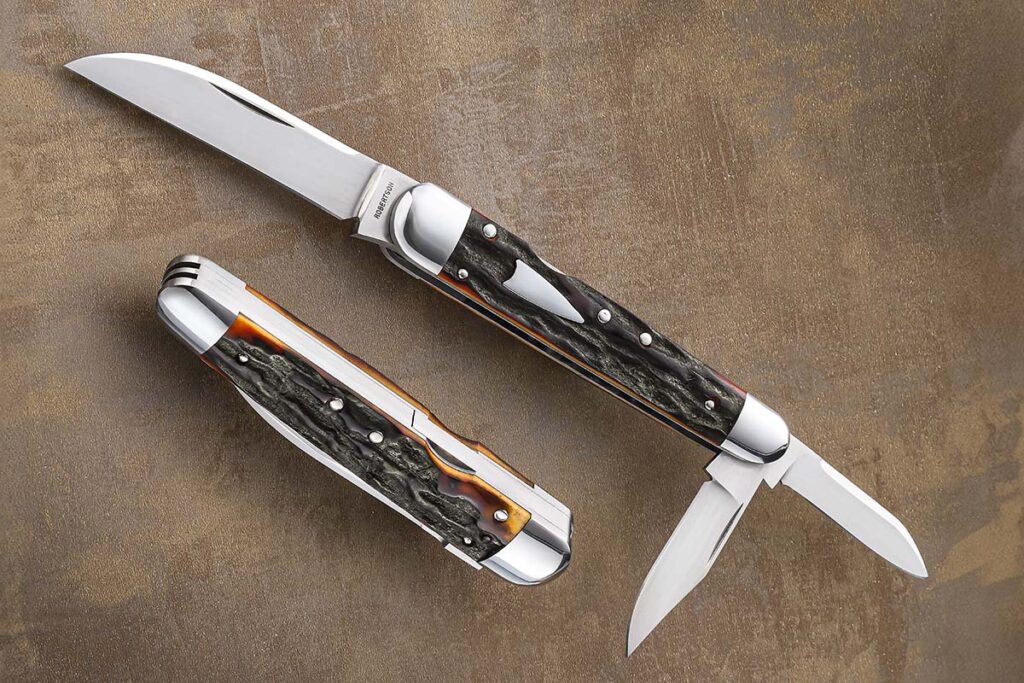
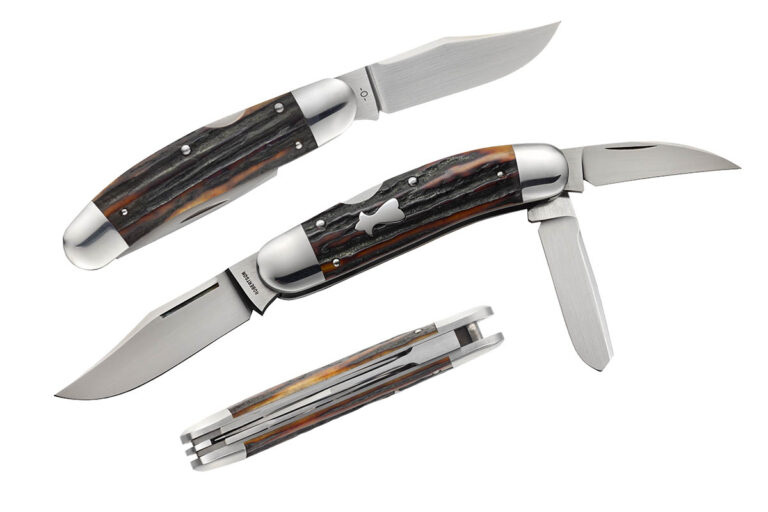
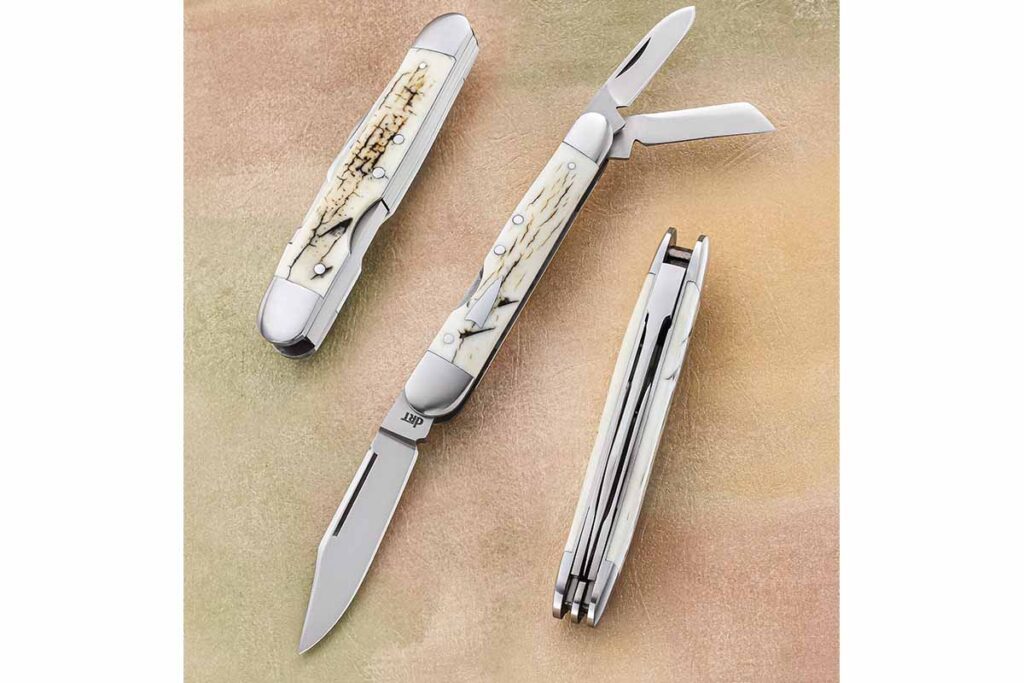
The Tony Test: Lockback Whittlers

Tony Bose said if you can make a lockback whittler, you have arrived as a knifemaker.

While the whittler is a classic pocketknife pattern that dates back at least to the 1850s, a variation on the theme incorporating both the lockback and slip joint mechanisms offers a challenge to the custom knifemaker and a delight to the owner of this intriguing style.

Custom knifemaker David Taber explains his take on the whittler as a three-blade knife with the main blade on one end and two secondary blades on the other. Simple as that. However, from definition to completed construction it’s a bit more complicated, particularly when the lockback mechanism is thrown into the mix.

“The whittler as originally designed was very functional in that the larger main blade is used for making larger cuts and the two smaller blades are for more detailed cutting,” Taber advised. “The knife is necessarily thin by design with the two small blades nestled on either side of the main blade in the closed position, which makes for a slim, pocket-friendly knife.”

Taber’s rendering of the lockback whittler features hollow-ground blades of CPM 154 stainless steel and a mammoth ivory bark handle. The main locking blade length is 3 inches and his price for a comparable piece would be $2,100. He attributes an early interest in the lockback whittler to comments made by BLADE Magazine Cutlery Hall-Of-Fame® member Tony Bose in a 2008 issue of BLADE® relating to the skill level required to make one.

BLADE Magazine Cutlery Hall-Of-Fame® member Tony Bose (Kerry Hampton image)

“I was intrigued and called Tony,” David remembered. “That single conversation started a lasting friendship and started me collecting and eventually making knives. In later years he challenged me to make a lockback whittler and shared his pattern with me. He said, ‘If you can make one of these, David, you will have arrived.’”

Taber took on the task with gusto and through personal experience describes the challenge. “The difficulty, in my opinion, lies in centering the main locking blade in the closed position between the two slip-joint blades at the opposite end without rubbing during function. Equally difficult is balancing the two springs that operate the two slip joints on the one end and the underside of the lockbar on the other end. Think of it like a sophisticated teeter-totter,” he explained. “Care must also be taken to maintain the length, particularly the end that controls the lock tab. It has been my experience that to shorten it even the slightest amount will increase the load deflection rate and thereby make the lock tab not function properly.”

David Taber’s lockback whittler sports hollow-ground blades of CPM 154 stainless steel, stainless bolsters and a mammoth ivory bark handle. His price for a similar knife: $2,100. (SharpByCoop knife image)

The level of difficulty in making the lockback whittler contributes to its collectability, Taber says, which in turn makes the design rarer in the marketplace. “The typical collector of the lockback whittler is usually aware of the skill required to make such a knife and achieves great satisfaction from owning one,” he reasoned.

MOST DIFFICULT?

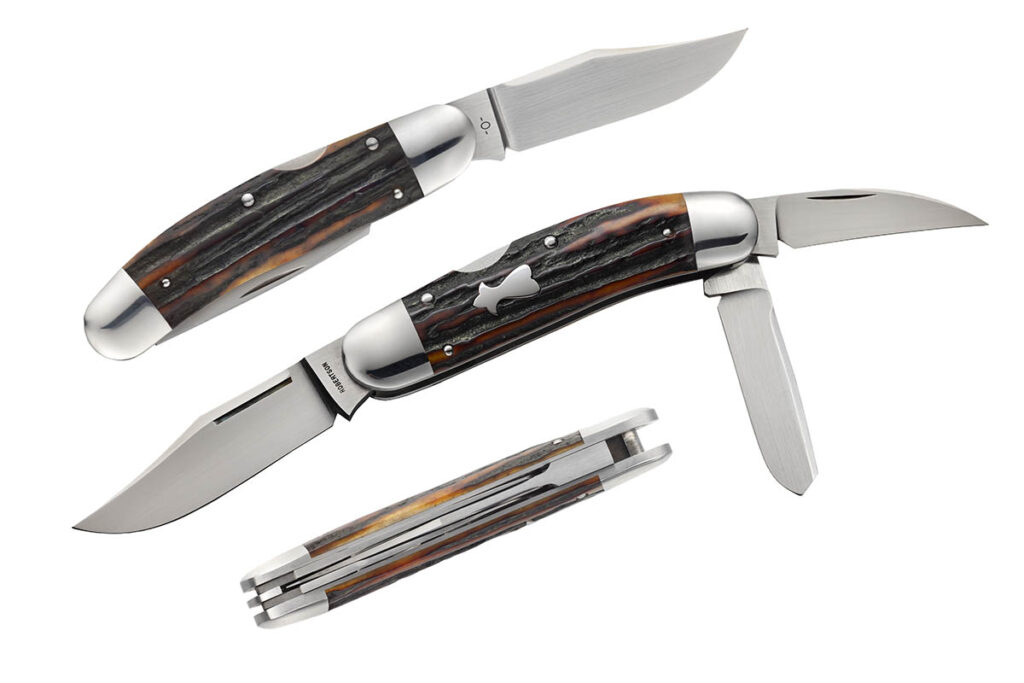
Knifemaker Luke Swenson shares a connection to Bose with Taber. The Case-Bose collaboration effort introduced Swenson to the design. “The blade configuration and the smaller blades being half the thickness of the main blade set it apart from other patterns,” he commented.  “Some whittlers have a ‘catch bit’ or a piece of liner material to hold the blades apart at one end so the main blade clears, and some have a tapered wedge, commonly called a splitback. In the case of the lockback whittler, there is a full spacer that rests between the rear slip-joint blades. Also, in a lockback whittler the small blades and spacer are exactly one-third the thickness of the main blade. The main blade locks, and I believe this is for safety and allows for harder use.”

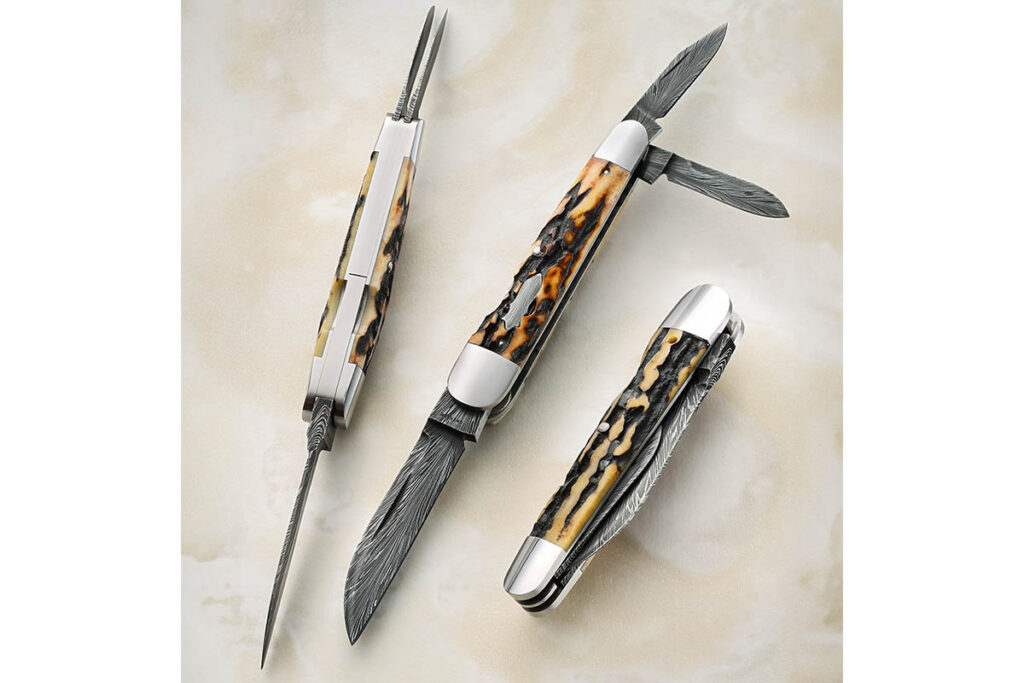
Swenson’s lockback whittler features a hollow-ground 2.8-inch blade of feather damascus forged by Mike Tyre. The fittings are 416 stainless steel and the handle is natural stag. Luke’s price for a similar piece is around $3,000. He describes the lockback whittler as “the most difficult pattern to build, even more so than a six-blade. I believe it isn’t just the combining of elements, but the springs are somewhat tricky in that you have to be paying attention—one false move, or even one over-aggressive pass on your grinder, and you’ll be making new springs. Grinding the small blades isn’t easy and requires a developed feel for getting them right. Very challenging! But if it’s right, the results are magic.”

Feather damascus forged by Mike Tyre comprises the hollow-ground blades of a lockback whittler by Luke Swenson (inset)in natural stag and integral bolsters and liners of 416 stainless. Closed length: 4 inches. Luke’s price for a similar knife: $3,000. (SharpByCoop knife image)

According to Luke, the construction of the slip joint and the lockback are completely different, at least in the opening stages. Putting the two mechanisms together with tiny parts, delicate springs and narrow tolerances tests the skills of the knifemaker in an extraordinary way. “The blades have to sit in the handle to make their tips sit in the handle,” he concluded, “and yet the nail nicks have to be accessible. That takes time and patience to get right.”

Renowned custom knifemaker Wolfgang Loerchner happened past Swenson’s table at the East Coast Custom Knife Show some time back and asked if Luke could make a lockback whittler. “This was in the March of that year, and we agreed on a BLADE Show delivery in June,” Luke laughed. “Keep in mind I’m an unknown maker, and starstruck doesn’t quite describe what I was feeling. I said, ‘Sure, I can get one built.’”

From there, Swenson went to “The Maestro,” Cutlery Hall-Of-Famer Bill Ruple. “He was quite amused and laughed, a little more than was polite I thought, but he agreed to help me through the process,” Luke recalled. “Like all my slip-joint making, anything I learned to do right was in Bill Ruple’s shop. He was key. I don’t believe I would have made the deadline if he hadn’t helped me. I’d send him pictures, and he’d say, ‘remake this and fit it like this instead.’”

The bottom line for the Swenson lockback whittler is its tremendous appeal. “It is a sleek, streamlined beauty,” he offered. “Like anything Tony Bose decided to do, it is elegant and feels comfortable in the hand.”

COMPLEX SIMPLICITY

When knifemaker Tim Robertson envisions his next lockback whittler project, he knows what he’s getting into. “What truly makes the lockback whittler so difficult to build is the way the springs operate,” he noted. “The slip joint is a standard arch spring pushing down on the blade tang while also lifting up at an equal force on the rear of the lockbar, keeping the blade firmly in position. Too much load on either end loosens the opposite end. In a nutshell, the springs have to be balanced between lockbar function and slip-joint function.”

According to Tim Robertson, “The lockback whittler is appealing due to the complexity of the multiple parts and simplicity of design and operation.” Note the spacer that separates the two smaller blades Robertson mentions in the story at the bottom of the closed knife at right. (Mitchell Cohen knife image)

Robertson has become well known for his lockback whittler proficiency, and two recent examples have won awards. His winners of Best Locking Folder at BLADE Show West 2022 and the 2023 Knifemakers’ Guild Best Multiblade Folder both sport CPM 154 stainless blade steel, 416 stainless frames and stag handles. His prices for similar knives would be about $2,500 each.

With a simple explanation for his foray into lockback whittlers, Robertson remarked, “I just wanted to see if I could do it. The lockback whittler is appealing due to the complexity of the multiple parts and simplicity of design and operation.”

Defining the whittler as a knife with three blades and two springs, Tim commented, “The most common types are the splitback variety with a tapered spacer separating the two pen blades. The reason for the tapered spacer is to allow clearance for the blade to fold into the handle without having to have the main blade thickness increased, and then offset ground for the clearance so that one pen blade falls on each side of the main blade.”

SIDE-BY-SIDE KNIVES

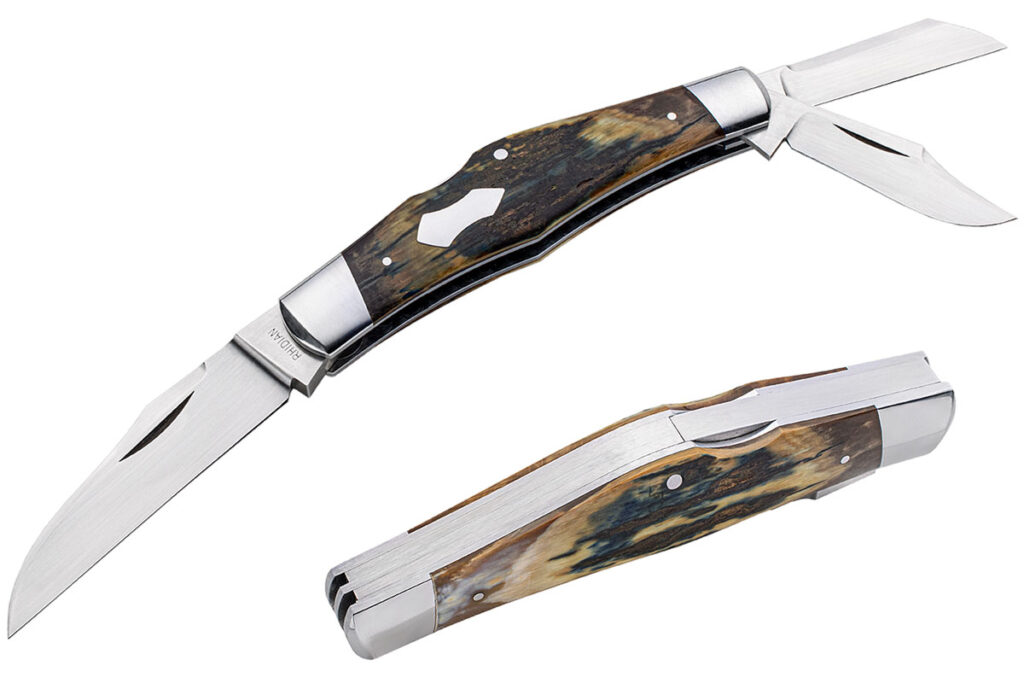
Knifemaker Rhidian Gatrill consulted friend and historian Neal Punchard on the origin of the lockback whittler. In response, Rhidian learned that the earliest examples of it were probably made in Sheffield, England, a major center of European cutlery, and later by German and American cutlers.

“It is a premium pattern and difficult to make, so not many companies took on the challenge,” Gatrill explained. “Some of the early Sheffield multiblade sportsman knives and a few rare jackknives had lockback main blades and slip-joint blades, but they are basically two knives side by side. There’s nothing quite like the lockback whittler. There are a few other pocketknives that have locking main blades and slip-joint secondary blades, but they’re not lockback knives. The electrician knives, for example, have a [locking liner] on the screwdriver blade. And there are pen-blade-release knives where the small secondary pen blade gets pushed in to unlock the main blade.”

Rhidian Gatrill’s Lockback Rhiddler captured Best Folder in the custom category at last year’s BLADE Show West. The cleverly named lockback whittler features a locking 2 7/8-inch flat-ground wharncliffe and 2-inch hollow-ground slip-joint clip and coping blades of CPM 154 stainless steel. His price for a similar knife: $2,600. (Jocelyn Frasier knife image)

Motivation to make the challenging pattern was easy for Gatrill, who won Best Folder at BLADE Show West 2023 for his lockback whittler cleverly named Lockback Rhiddler. “I like interesting mechanisms and figuring out how to make them work,” he related. “I wanted to challenge myself and see how hard it was to make. Plus, I was attending my first knife show ever, which was the Oregon Knife Collectors Association show in Eugene, Oregon, and I wanted to take something that would possibly win an award. That knife ended up winning Best Folder and Best of Show.”

Looking for examples of lockback whittlers that were striking in appearance and function, Rhidian did some research and recalls, “Like most pocketknife makers, I admire the knives of Tony Bose, Bill Ruple, Ken Erickson and other masters that came before me. I traced photos of their knives and read forum posts that give a few tips, and I asked a few questions from other maker friends that have made lockback whittlers.”

That research led to an opportunity to present a lockback whittler interpretation that resonated with the collector community. “I believe knife collectors like them for their rarity, complexity of mechanism, and interesting function of combining the lockback blade with the slip-joint blades,” Rhidian concluded. “They also look cool with the thick tang on the main blade that steps down thinner and tapers to a point. A locking blade is always a little safer than a slip joint technically, so there’s that for the user. Not many custom makers have made them, and those who do don’t make many!”

Read More

Cool Custom: Brian Brown’s Taka v2s

Not one of his everyday builds, the Taka v2s by Brian Brown features a notable blade, handle and lock.

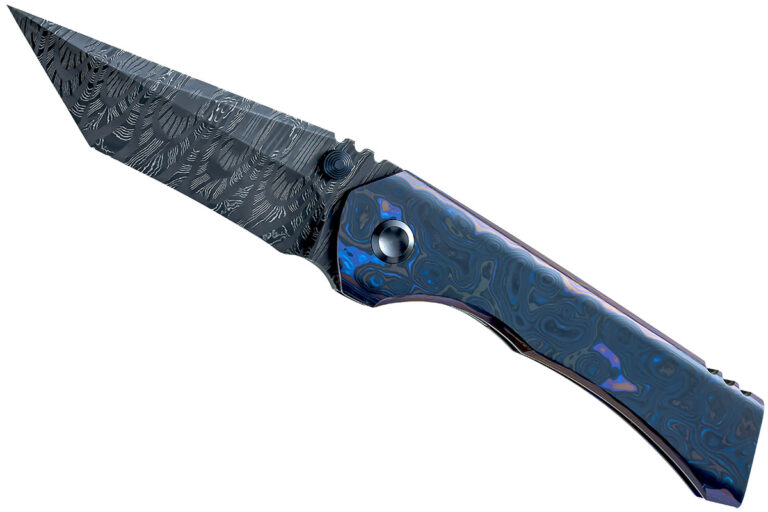
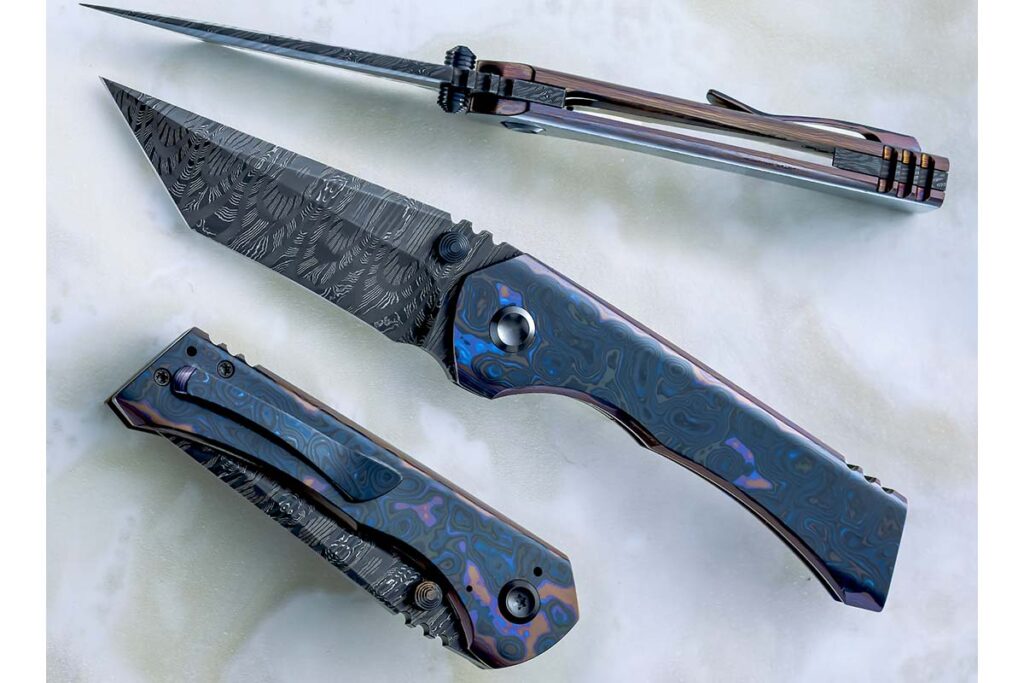
Brian Brown likes a good, pointy tanto.

“It’s kind of a straight hollow grind all the way from the choil to the tip in a climbing grind,” he explained of the blade on his Taka v2s dress tactical folder. Grinding it that way helped him keep the blade extremely thin from the recurve edge to the tip. “You’ve got to be really careful [at the edge] because that’s gonna be the lowest spot where it gets thinnest the fastest—and I’ve burned through them before,” he noted.

taka v2s
Brian Brown said he had to be careful grinding/removing the top layer of the Black Top Timascus™ handle material by Alpha Knife Supply or he would expose too much of the titanium and change the color—somewhat visible here on the spine. The 3.125-inch blade is FireClone 2 forged by Mike Norris, which Brian lauded as some of the best stainless damascus anywhere. Closed length: 4.375 inches. (SharpByCoop knife image)

Only the second one he’s done, the folder’s linerlock-like inset lock enabled him to use the fancy handle material paired with a straight, solid piece of Grade 5 titanium for the lockbar. There are several more steps involved but the upshot is the scales are symmetrical as with a linerlock—a symmetry Brian prefers to that of a framelock. Plus, the inset lock results in a thinner handle than with a linerlock because the lock side must be relieved to make room for the lockbar.

Check Out More Cool Custom Knives:

Jantz Knife Supply: Providing Everything Required To Make Knives

0

Jantz is a crucial source for many who fashion knives.

For 58 years Jantz Knife Supply has met the needs of cutlery craftsmen of all stripes, from green behind the ears to on up in years, with everything needed to make knives. This includes specialty steels, handle components, sheath materials, hand tools and sanding supplies, as well as the heavy equipment for knifemaking.

What started as a small mom-and-pop gun supply outfit founded by Ken and Venice Jantz in 1966 is no less than a U.S.-based juggernaut in today’s cutlery industry. The Jantzes haven’t left their humble beginnings behind, though, so no customer job is too small for the venerable knifemaking supply company in the heartland of America, Davis, Oklahoma.

Ken Jantz
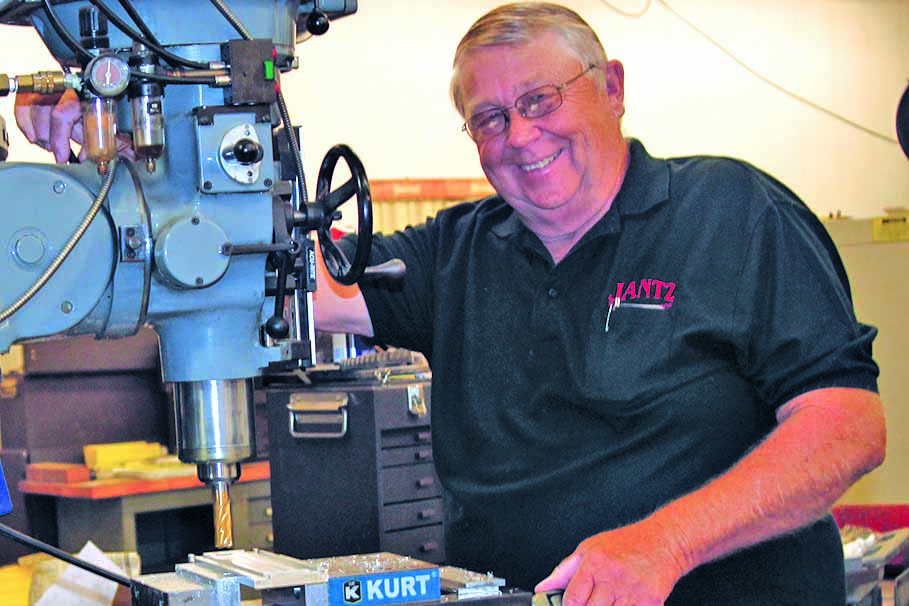
Company co-founder Ken Jantz works on a prototype for a new hollow-grinding fixture at the company facility.

Shanna Kemp oversees the marketing, financial and human resources for Jantz. She probably knows as well as anyone about the many specialty and other items available to the company’s legion of customers.
“Our goal is to provide everything knifemakers could need for their project,” she begins, “whether you’re a beginner looking for a new hobby or a custom knifemaker stocking your shop to get ready for the BLADE Show. One thing we really love is creating fixtures and tools to make knifemaking more accessible for every skill level.”

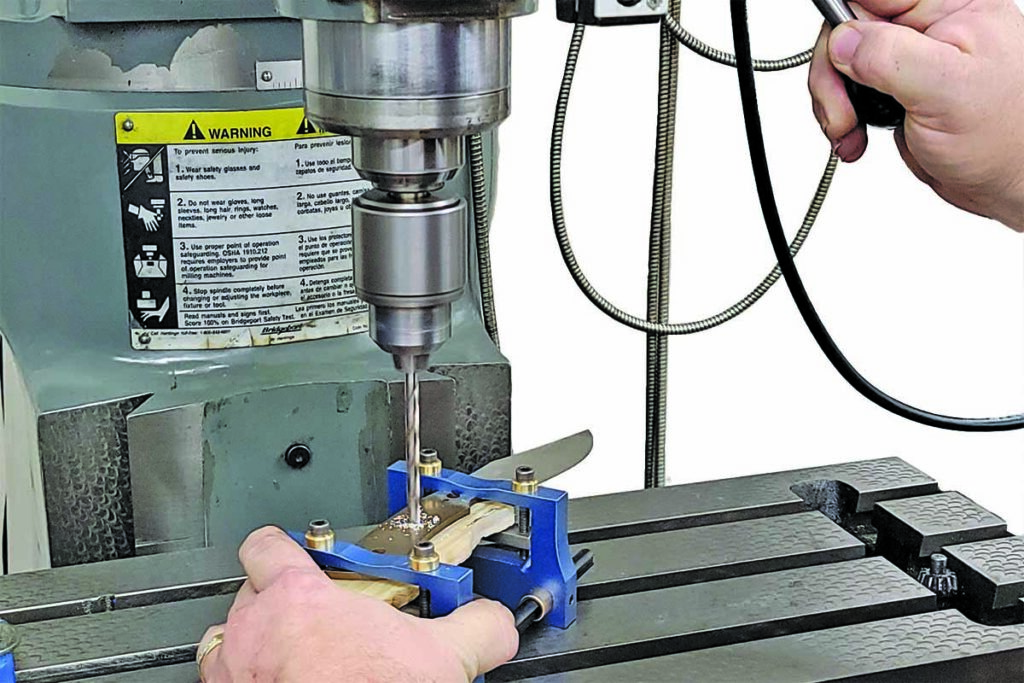
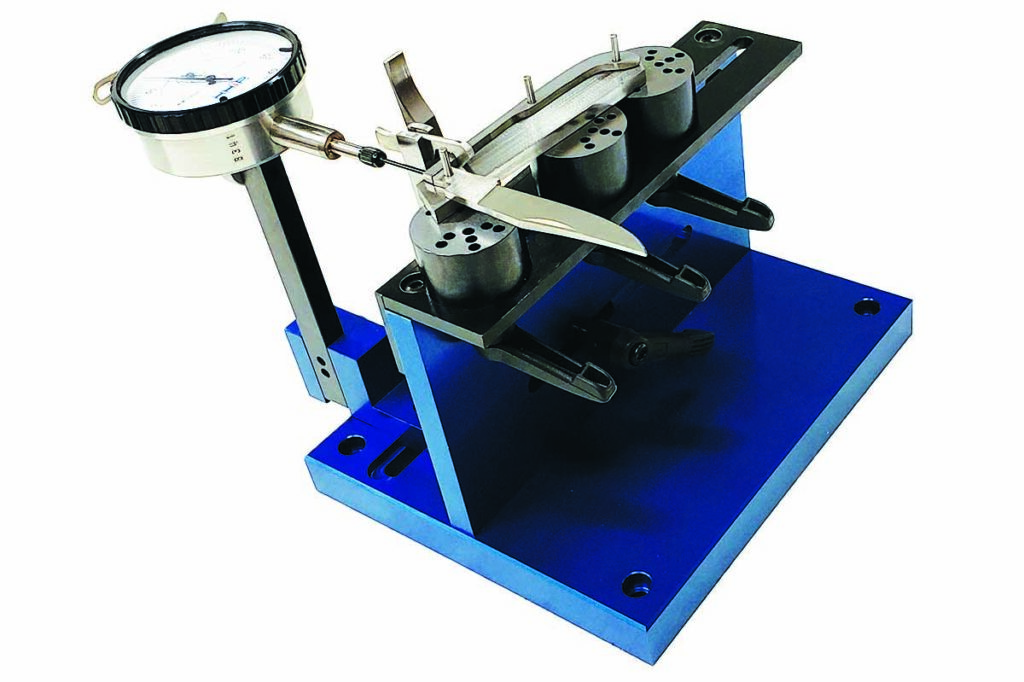
One of the company’s most popular new fixtures is the PDJ Knife Vise. “It’s handy for all levels of knifemakers as it allows you to drill perfectly perpendicular holes through your handle material” regardless of the material’s texture or unevenness, Shanna explains.
Jantz stocks an abundance of parts for assembling and enhancing knives of all types. “Our most popular products are our Corby rivets, Loveless bolts and metal round and bar stock,” Shanna enumerates. “Our customers love the quality of our materials as we source directly from reputable mills with consistent quality and do our cutting and machining in house. One of our other popular products is our handcrafted mosaic pins. Each pin design is meticulously hand assembled right here in Davis, Oklahoma.”

Jantz Steel Stock

JS750 perpendicular vise with drill press
Jantz offers a range of knifemaking equipment. An example is the JS750 perpendicular vise with drill press.

An outstanding blade is the heart of any knife and Jantz offers all kinds of stainless and high carbon steels. “We carry a variety of knifemaking steels to suit both forging and stock removal,” she states. “1095 and 80CrV2 are very popular carbon steels and CPM 154 is our most popular stainless steel.” She added that the damascus forged by Brad Vice’s Alabama Damascus is very popular because of the quality and solid price point for the company’s patterned-welded steel.

“For Jantz, steel and other metals have always had a long lead time since we source from a variety of mills in the U.S., Germany, Sweden, Brazil and others,” Shanna observes. “We have strong relationships with our suppliers, and they have worked with us to keep material moving forward even when lead times began to exceed a year.”

Jantz Knife Supply warehouse
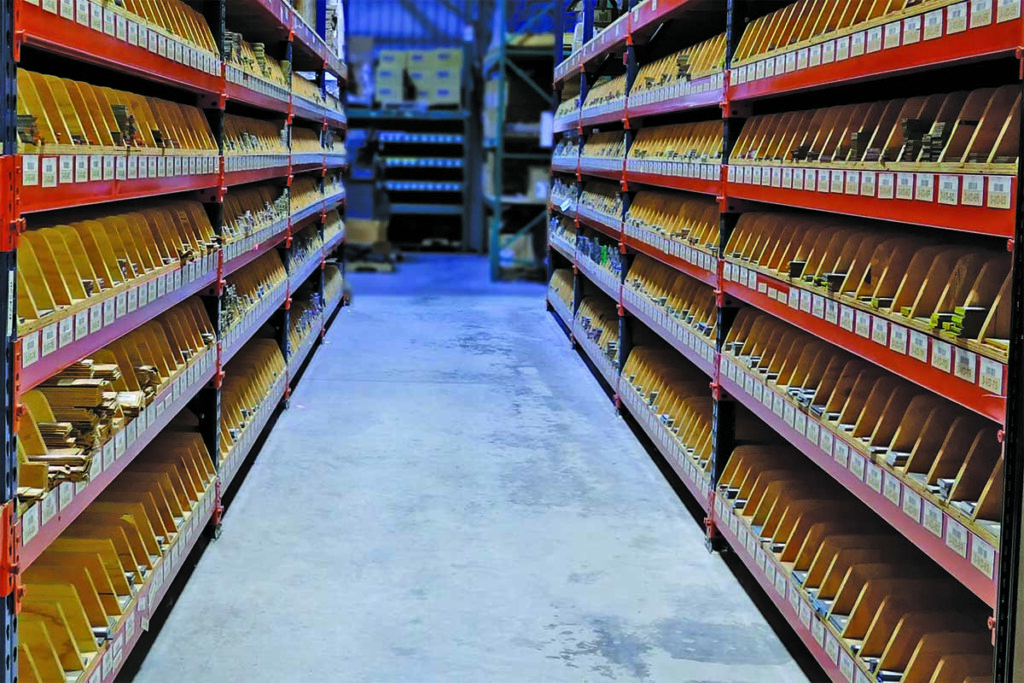
No matter the material, component or tool for knifemaking, Jantz probably has it somewhere in one of its well-stocked aisles.

Fixed blades will never go out of style, Shanna opines, and the Jantz business model caters to the mindset that drives the knives’ popularity. “We find that fixed-blade makers tend to use both stock removal and forging in their blade design and development,” she states. “The television series Forged in Fire certainly increased the popularity of forging, but we still see about the same divide between stock removal and forging. Fixed blades designed for hunting and survival are top sellers for our custom knifemakers as well as our hobbyists. There’s something special about using a knife in the field during hunting season that you made yourself that really resonates with the knifemaking crowd.”

When it comes to heat-treating ovens, Jantz recommends Paragon kilns above all others. “Not only do they make a quality oven,” Shanna assesses, “but they have a variety of ovens designed for beginners to pros. Their customer service is top notch and Burt Flanagan, who represents Paragon’s knifemaking ovens, is a custom knifemaker, so he truly understands what knifemakers need.”

Jantz-Made Blades

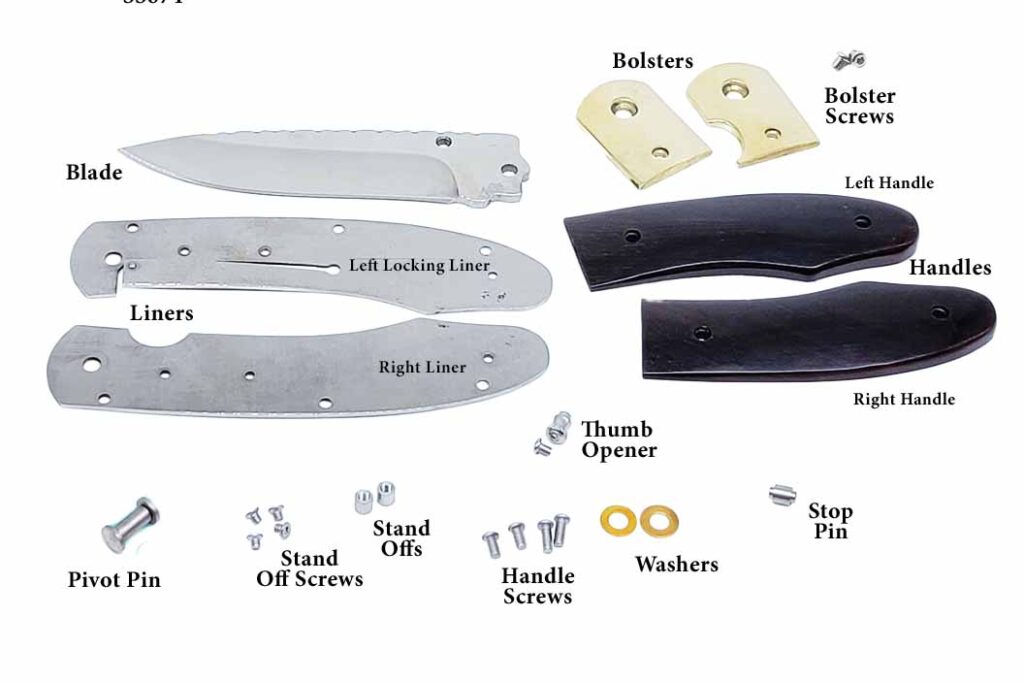
Knife assembly kit
Knife assembly kits such as the Caballero are a great way to learn the ins-and-outs of folding knives. Jantz offers over a dozen knife genres, from traditional slip joints to modern tactical fare.

For those wanting to get their feet wet in the cutlery world, Jantz offers a cornucopia of pre-made blades for virtually any niche of the market, including household cutlery. According to Shanna, many custom makers order beautiful stainless damascus in various patterns from Damasteel for their kitchen knives. “Our Jantz-made line of household cutlery is especially popular with customers,” she adds. “Our santoku, cook’s and paring blades are favorites of makers using pre-shaped blades for project knifemaking. All the Jantz-made blades are manufactured in our facility.”

Jantz offers an abundance of both knife blades and knife kits. These are designed not only for the novice and hobbyist, but for those who want to tailor special knives for sale. The Jantz website offers links aplenty to a wide range of genres in both folders and fixed blades. Need a fixed-blade hunter in damascus? No problem. Like a kit to learn the ins-and-outs of folding knives? There are over a dozen styles available, from traditional slip joints to modern tactical fare.

JS500 for slip joints
Providing fixtures such as the JS500 for slip joints that make knifemaking more accessible to hobbyists and makers of all levels is a specialty at Jantz Supply.

If there is an innovation on the horizon, Jantz Supply will be on top of it. “One of the many things we love about the knifemaking community is how open and sharing makers are with each other,” Shanna observes. “Want to learn something [another knifemaker] is doing? Just ask. You will rarely find someone not willing to share.”

That spirit and willingness to help is what has made Jantz an important part of the cutlery industry for going on six decades now.

More On Knifemaking:

Advertisement

Must Read Articles

Read this before you make a knife

Knifemaking 101 – Read This Before You Make a Knife

  by Wayne Goddard My experience has taught me that there's nothing like digging in and getting started. I've often said the hardest part of the...
how to forge damascus steel

How to Forge Damascus

Advertisement
Advertisement