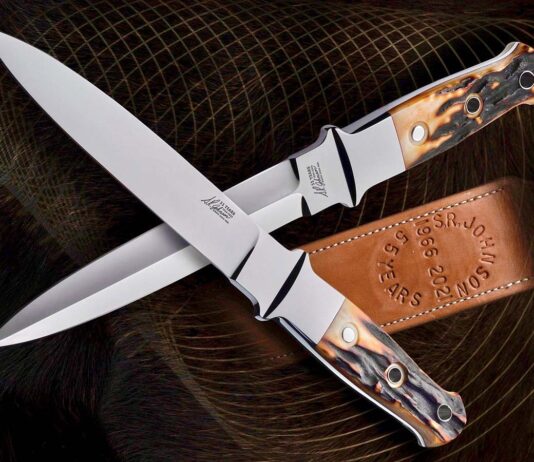
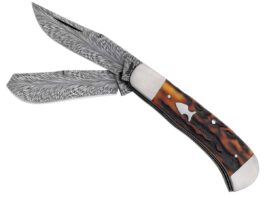
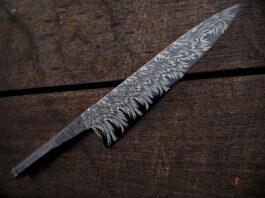
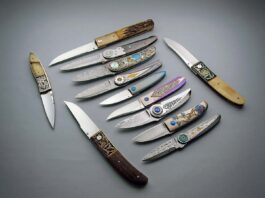
Knifemaking is the building of a knife, which includes the blade, handle and other accouterments. Blades are made by either removing metal from a steel blank via a grinder – known as stock removal – and the forging to shape of hot steel into a blade in the process known as bladesmithing. Other parts, including bolsters, guards, pommels, etc., are needed to complete the finished knife.
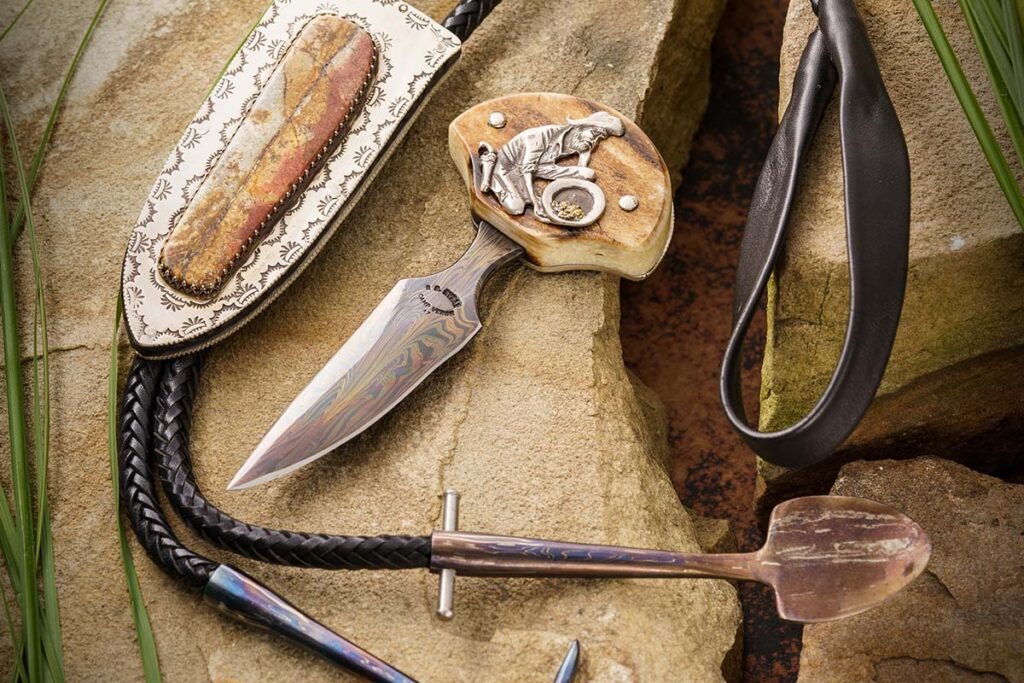
Sourced from Geronimo country Rybar’s Prospector dagger and bolo combo prove pure gold.
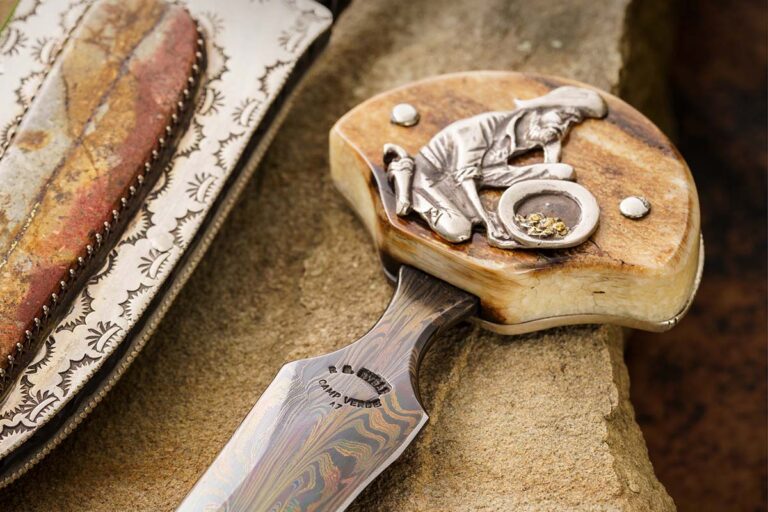
The Prospector by Ray Rybar is a push dagger/bolo combo that bespeaks not only his talent as an ABS master smith but also the array of beautiful, valuable ore in and around his home in Camp Verde, Arizona.
Ray lives in the middle of an Apache reservation where he owns three or four gold mine claims. Camp Verde was the headquarters of U.S. Army Gen. George Crook during the Army’s pursuit and eventual defeat of Geronimo and his Chiricahua Apache band in 1886. Navajos live in the area as well.
Also from near one of his claims, the rock for the inlay has a naturally occurring “stringer” of gold down the center. A local Apache weaved the beautiful leather bolo strap, and Ray forged the shovel and pick of carbon steel and heat colored them. (Eric Eggly/PointSeven images)
Ray teaches various forging and other classes. On occasion he takes his students out to forage for blade and other materials in and around his claims. There they find not only gold every so often but also iron/nickel meteorite, samples of Fe3 and Fe4 iron, ore that can be developed into copper, silver and more. He teaches his students how to convert the iron ore into high-carbon steel. He saves up the leftover steel forged by his students and also rocks he finds and slices with a slab saw for his knives and sheaths. The results can be spectacular—of which The Prospector is a most representative example.
Prospector Specs Knife name: The Prospector Maker: ABS master smith Ray Rybar Knife type: Push dagger/bolo Blade length: 4” Blade material: Damascus forged from iron ore converted to high carbon steel and also iron/nickel meteorite Handle: Ancient walrus ivory w/silver pins and backing Handle inlay: Prospector is solid silver and his tray contains real gold nuggets Sheath: Silver front and back and ebony center w/silver pins; decorated with various marks/designs made with stamps Ray cut from carbon steel and based on those used by the local Apaches and Navajos Sheath inlay: Rock containing quartz, feldspar and a stringer of gold Bolo strap: Leather weaved by a local Apache Maker’s price for a similar push dagger/bolo: $6,500
These classic custom daggers dare the steal the show.
The custom dagger is enjoying a renaissance, in no small part because it is a style that takes so much talent to do properly. Double grinds, fluted handles and a high level of fit and finish are just three of the things a maker likely will have to do well at one time or another in making a dagger. And if he or she nails the dagger build, it’s a crucial step on the way to the next level.
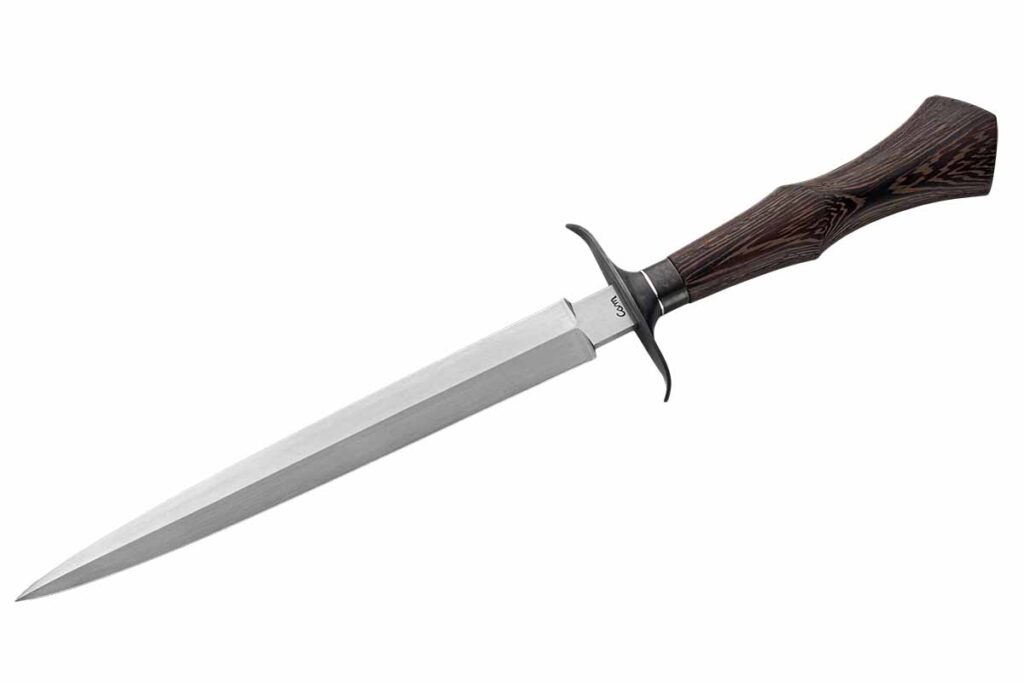
Camille Sennegon: Wenge Wood Handle
A masterfully sculpted wenge wood handle and a 9-inch blade of 1095 carbon steel sandwich the stainless steel crossguard of a custom dagger by ABS journeyman smith Camille Sennegon. Overall length: 15 inches. (Jocelyn Frasier image)
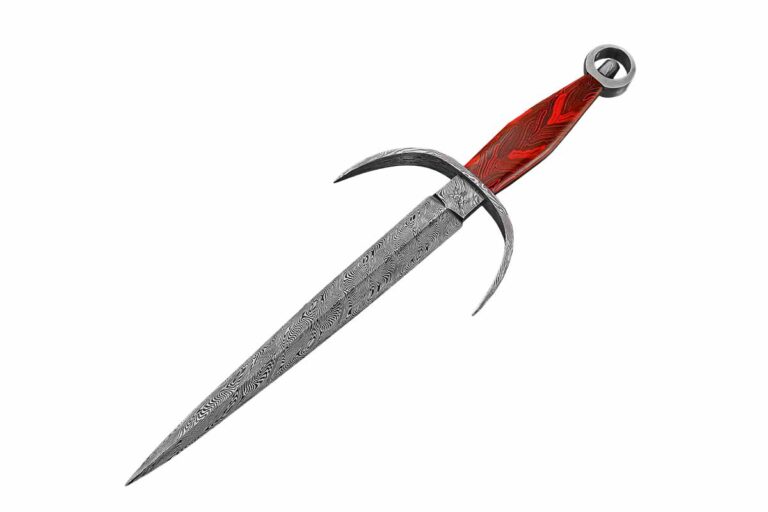
James Bishop: Death Watch Dagger
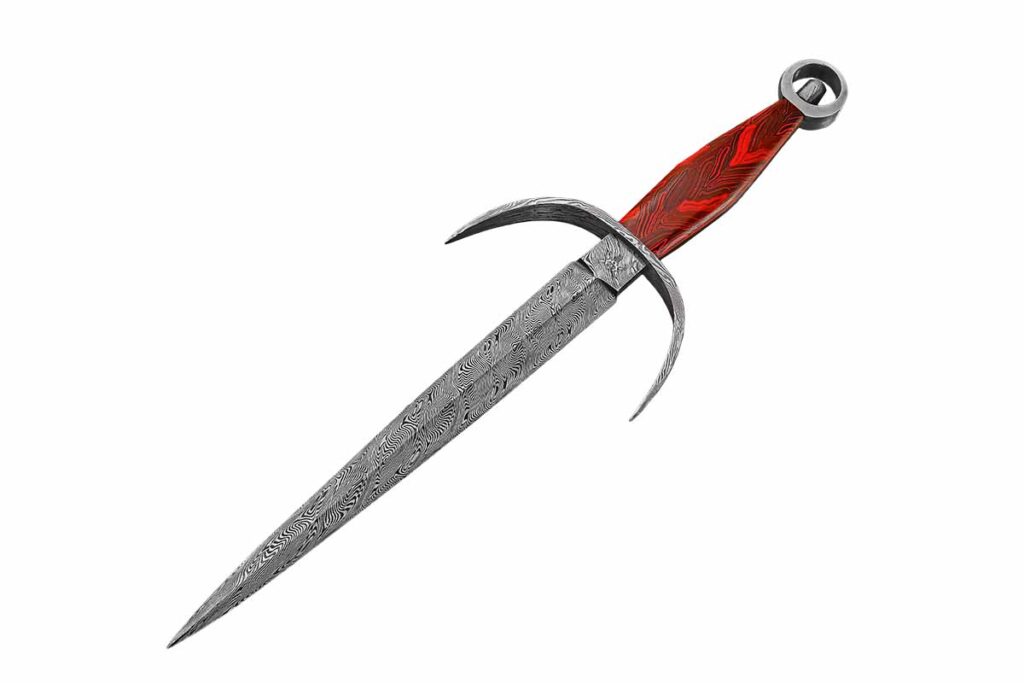
A dramatically upswept guard and 11.5-inch blade, both of twist damascus, and a handle of “damascus pattern” G-10 carry the load for the Death Watch Dagger by James Bishop of Sausage Man Forge. Grind: Flat double edge. Overall length: 19.2 inches. (Rod Hoare image)
Mike Tyre: Quillon Dagger
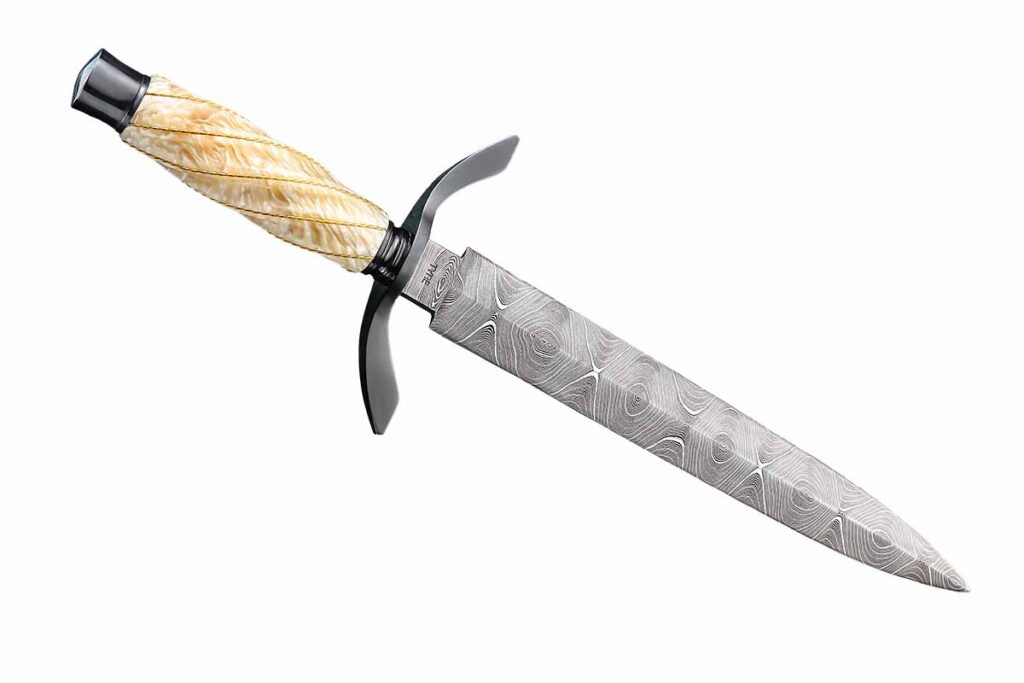
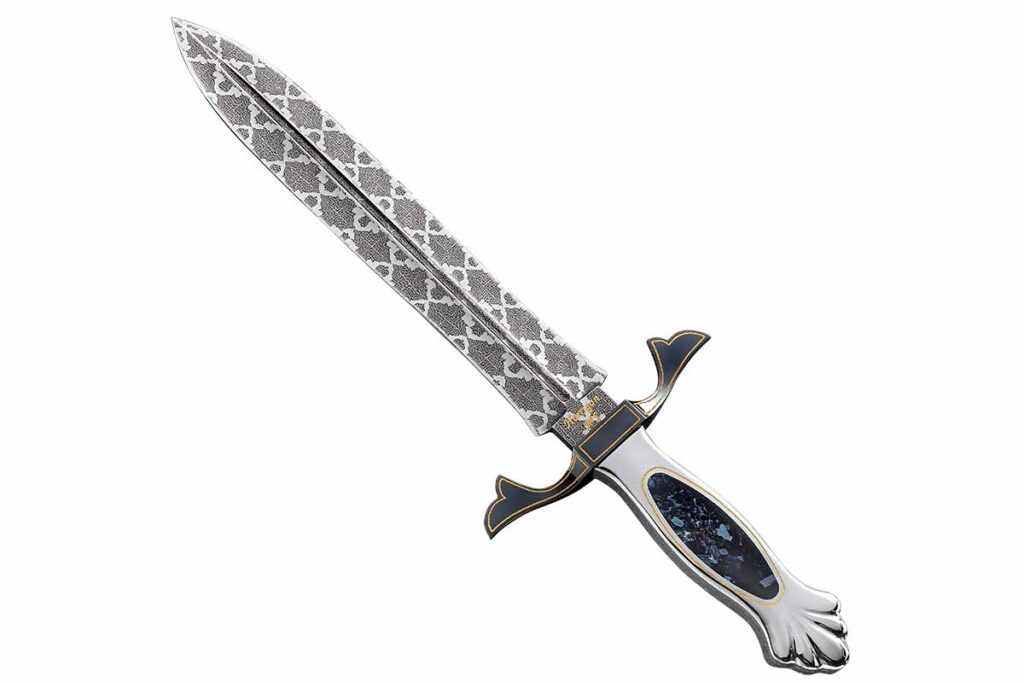
ABS journeyman smith Mike Tyre’s quillon dagger boasts a 10.5-inch blade of double-flat-ground damascus in O1 and L6 tool steels, and a fluted musk ox handle with 12k-gold wire inlays. The knife features takedown construction and a guard of gun-blued mild steel. Overall length: 15.5 inches. Mike’s price for a similar knife: $4,800. (SharpByCoop image)
Andrea Lisch: Blackwood Handle
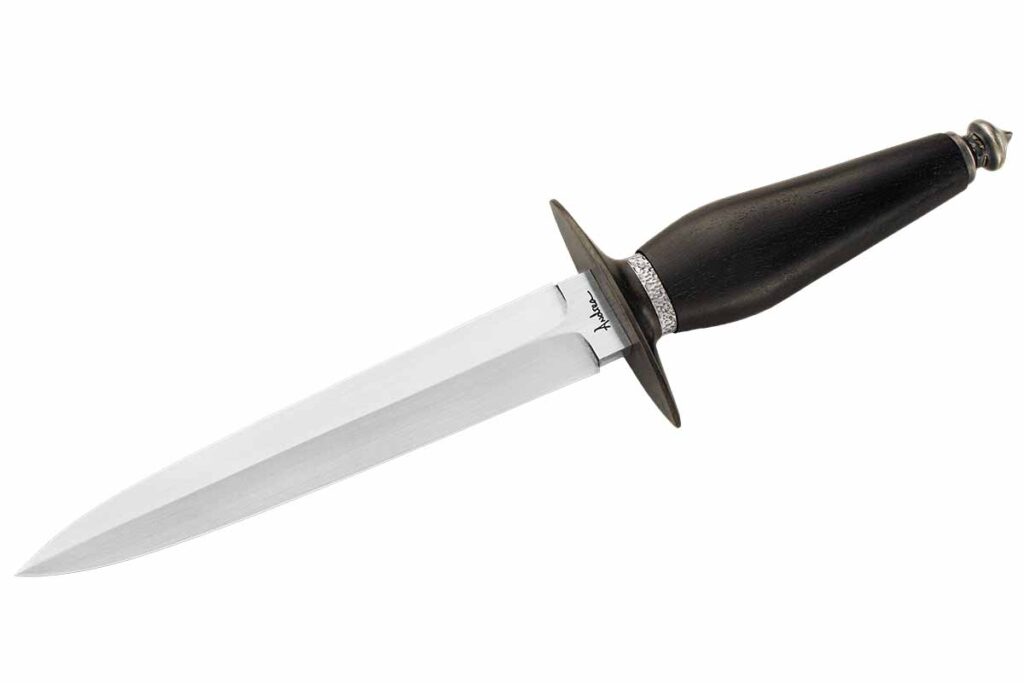
A 7.5-inch blade of 5160 carbon steel, a blackwood handle with stippled stainless steel spacers, and an O1 tool steel guard complete a dagger by Andrea Lisch. It is one of five test knives that earned her the rank of ABS journeyman smith during BLADE Show 2023. (Jocelyn Frasier image)
Roger Green: Will & Finck-Style Push Dagger
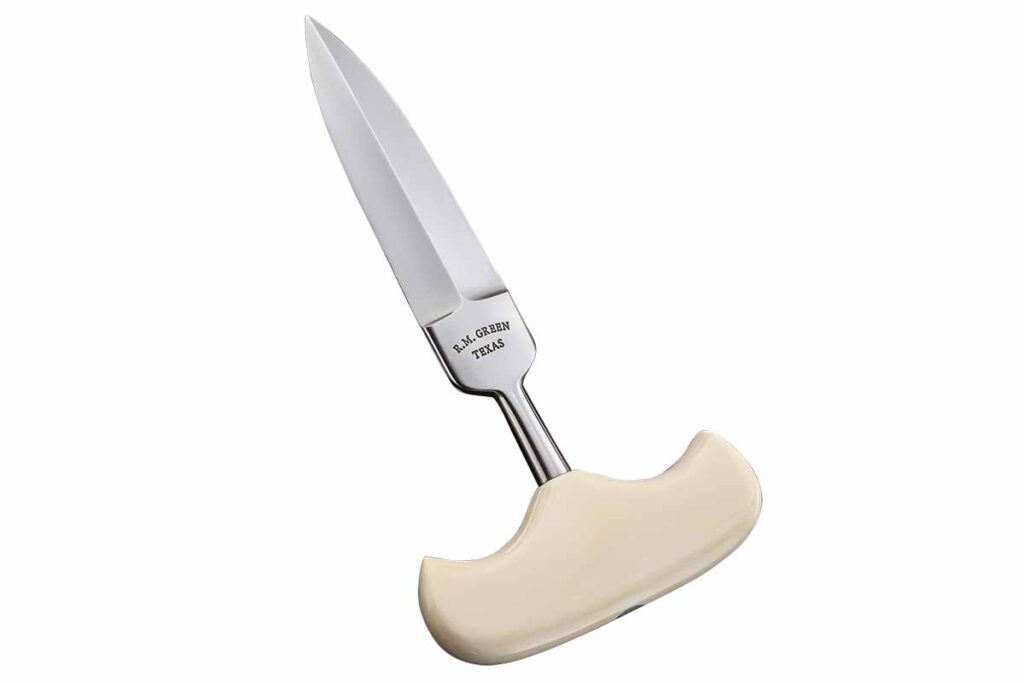
Based on a 19th-century Will & Finck-style push dagger, Roger Green’s repro has a 6.75-inch blade of hollow-ground 440C stainless steel and an ivorite handle. The sheath (not shown) is nickel silver with a Will & Finck 1872 patented belt clasp. Roger’s price for a similar knife and sheath: $3,500. (SharpByCoop image)
John Horrigan: Art Dagger
A 10-inch blade in hollow-ground quilt-pattern damascus, a 416 stainless steel handle with petersite inlay, and a guard of hot-blued 1045 carbon steel top off ABS master smith John Horrigan’s art dagger. Overall length: 14.5 inches. John’s price for a similar knife: $10,200. (SharpByCoop image)
Tony Docherty: Skeleton-Style Dagger
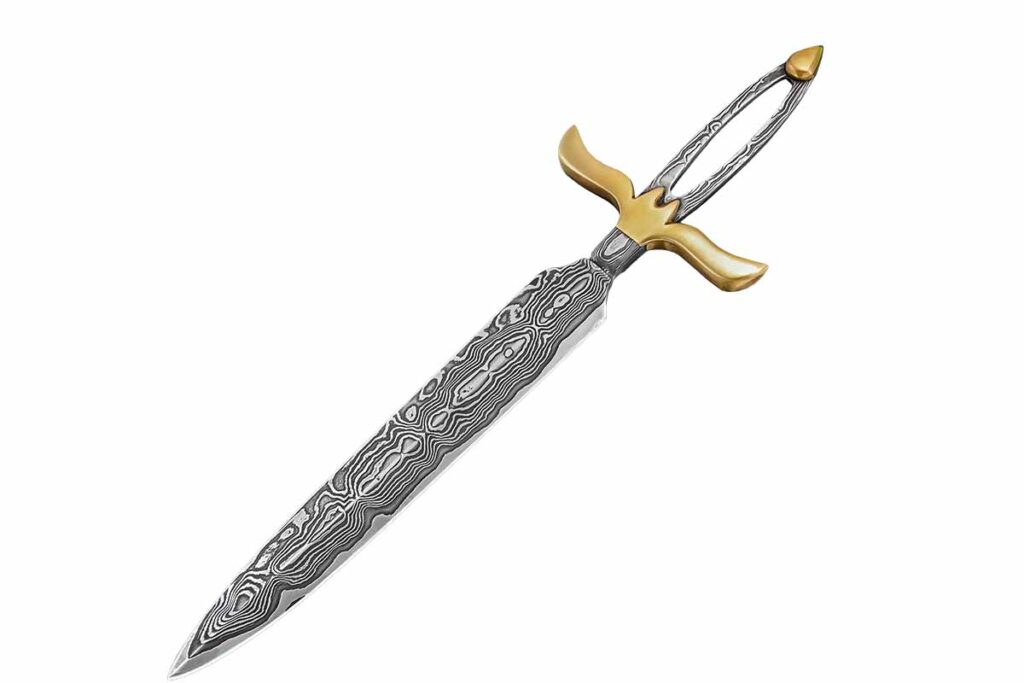
Tony Docherty’s skeleton-style custom dagger sports a 9.25-inch damascus blade, a damascus handle and a brass guard and pommel. Blade grind: Double bevel. Overall length: 14.7 inches. (Rod Hoare image)
Carter’s training at the elbow of a Japanese master smith shows in his shop.
Ever since I was a young boy I have been fascinated with blades,” ABS master smith Murray Carter writes. “Why some blades would cut and others would not was a mystery to me that I felt compelled to solve.
“A chance encounter at age 15 with a karate instructor began my love affair with Japan. A trip to Japan, when I was 18 years old, led to an unexpected encounter with an amazing man, Sensei Yasuyuki Sakemoto, who I would come to learn was the 16th-generation Yoshimoto bladesmith and whose family custom forged samurai swords for some of Japan’s most influential feudal lords. My relationship with Sensei Sakemoto led to a unique six-year apprenticeship, and upon its completion, I was asked to continue on in the 420-year-old family bladesmithing tradition as the 17th-generation Yoshimoto bladesmith.”
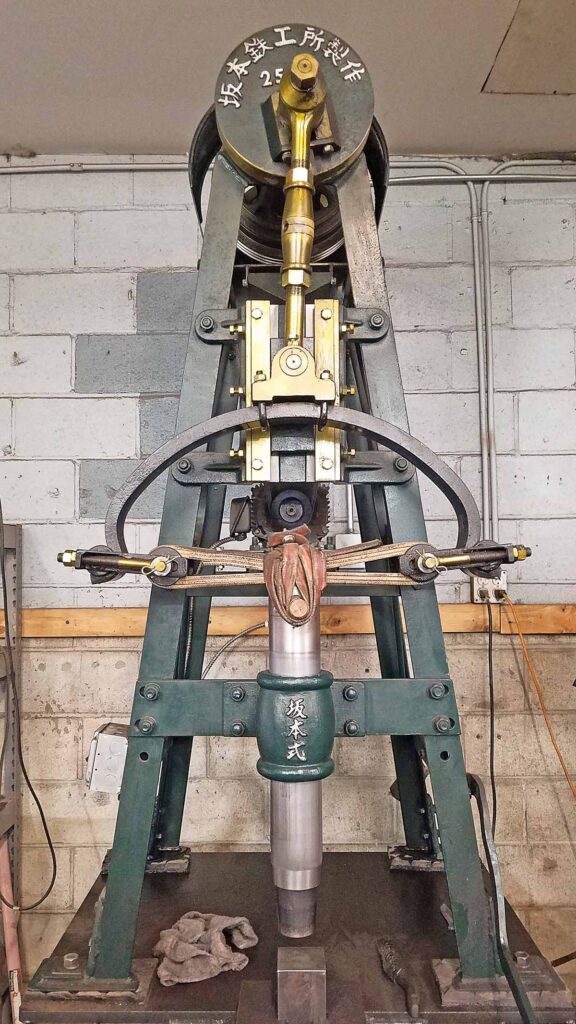
Murray’s forging hammer is a 25-kilogram version of a Sakamoto-Shiki Japanese spring hammer. Japanese laminated steel is heated in a solid fuel forge and forged under the spring hammer with 800 to 1,000 individual hammer blows to achieve a blade that is very close to its final shape and thickness, and with extreme grain refinement.
Murray was off to the races. “I worked as a village bladesmith for 12 more years, constantly availing myself to other industry experts to glean what I could, and spent many long hours in the forge putting my newfound skills and knowledge to practice. I introduced my handforged Japanese kitchen knives to the Western market in June 1997 and achieved the ABS master smith rating in June 2001. In 2005, I moved to Oregon and have been busy plying my trade ever since.”
His shop is steeped in Japanese knifemaking history and his equipment reflects it. He begins with his forging hammer. “The Sakamoto-Shiki Japanese Spring Hammer is a 25-kilogram version,” Murray notes. “This particular hammer is the last-ever spring hammer to be manufactured by Sakamoto Ironworks in Tosayamadacho on the island of Shikoku, Japan. Blades are forged both hot and cold under this spring hammer. The 25-kilogram ram strikes the steel with enough kinetic energy to actually heat up the steel as it is being forged. One of our spring hammers has forged over 40,000 blades to date without breakage or malfunction.”
Next up is his rotating waterstone. “Keeping with traditional Japanese bladesmithing methods, handforged blades are quenched fully thick and then blade geometry is ground by hand on the rotating Japanese waterstone,” he explains. “When purchasing stones from Japan was no longer possible, Radiac Abrasives, Inc., from Salem, Illinois, stepped up and fabricated this stone for us.”
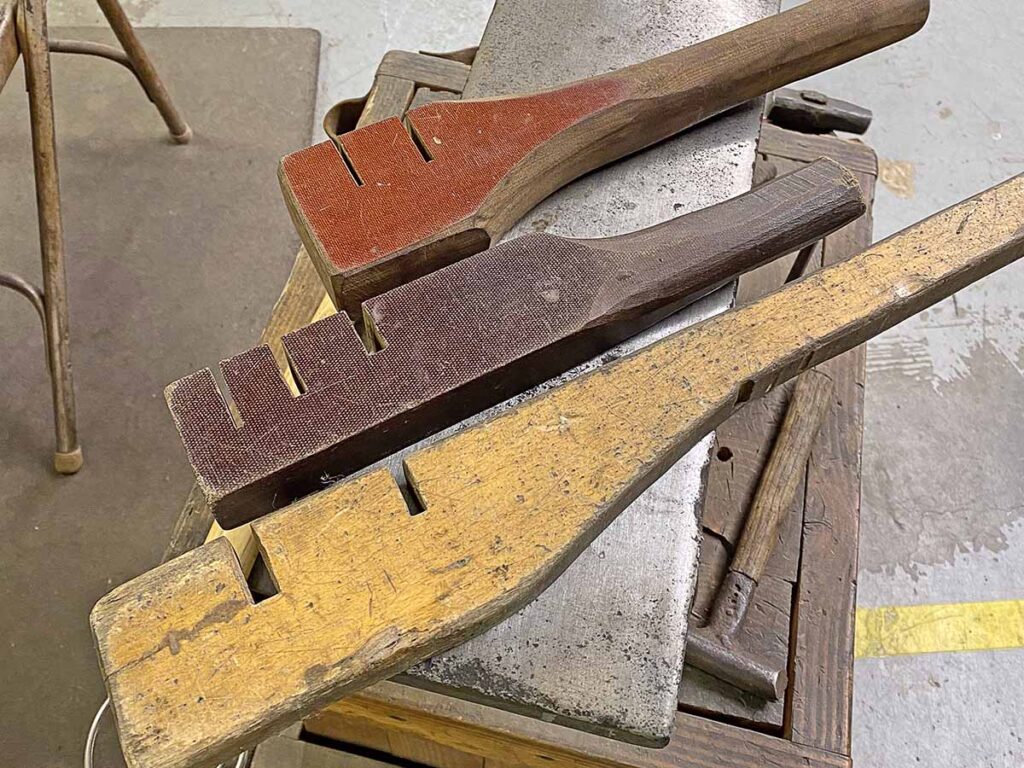
The mage-bou custom made ‘bending stick’ with slots of varying thicknesses is used to straighten hardened laminated blades. It can be made from most any hard material, including oak or Micarta®.
Murray’s forging hammer bears little resemblance to American fare. “The Japanese tagane hammer is made by brazing a carbide bit into a regular hammer,” he writes. “This is a specialized tool skillfully used to straighten bent homogenous steel knives after hardening. It is hammered into the concave side of an unwanted curve in a blade, and the carbide bit penetrates the surface of the metal and moves a tiny bit of steel in either direction, perpendicular to the length of the bit. Handforged saw blades before the days of disposable saw blades used this straightening technique heavily.”
For further blade straightening Carter uses a simple yet effective tool. “The mage-bou custom made ‘bending stick’ with slots of varying thicknesses is used to straighten hardened laminated blades,” he observes. “The bent blade is forced true via the lever and fulcrum effect. Care must be taken not to snap a stiffer blade by applying too much force.”
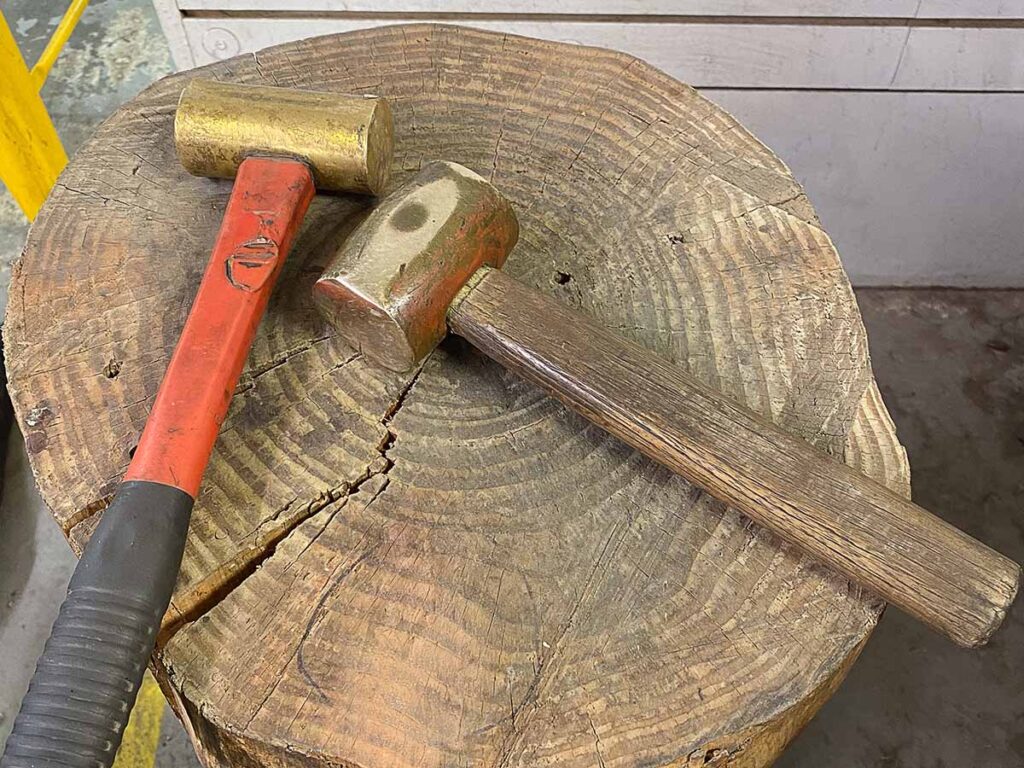
The brass hammer and wood stump are used to fine tune the straightening of blades after heat treatment. The convex side of a curve is placed face-up on the stump and judiciously hammered with the brass hammer.
Sometimes it just takes experience and a good eye in lieu of hi-tech. “The brass hammer and wood stump are used to fine tune the straightening of blades after heat treatment,” Murray notes. “It’s probably the most-used workstation at Carter Cutlery. The convex side of a curve is placed face-up on the stump and judiciously hammered with the brass hammer. Examining by eye the effects on the blade after each single hammer blow is the most effective way to do it.”
A week after BLADE Magazine Cutlery Hall-Of-Fame® member Bob Loveless died at age 81 on Sept. 2, 2010, Los Angeles Times reporter Valerie J. Nelson wrote a lengthy story on the man who sold his first knife to the Abercrombie & Fitch sporting outfitter for $14 more than 55 years earlier.
Nelson wrote that Loveless “made some of the world’s most coveted sporting cutlery by refining knife design to high art.” These succinct words convey a glimpse of the influence this giant in the cutlery industry wielded during his lifetime. In this 50th anniversary year for BLADE®, his legacy stands tall among those who have dedicated their lives in building the knife industry to what it is today.
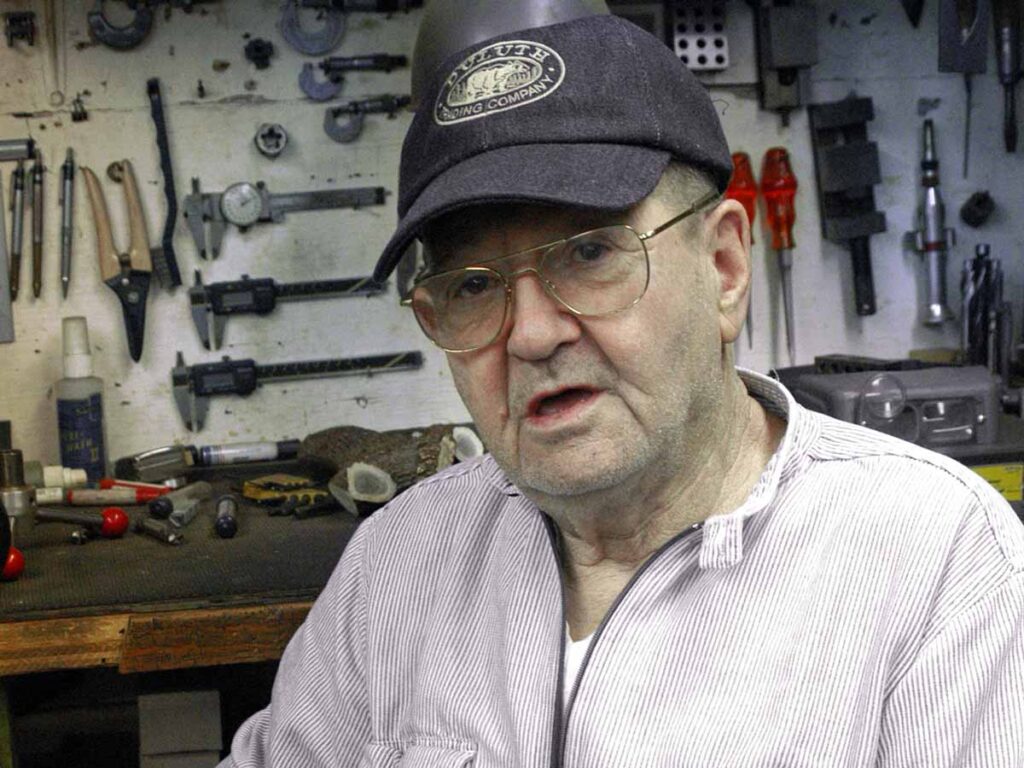
Bob Loveless in his shop in October 2006. (image courtesy of Aaron Merritt, grandson of Jim Merritt)
Truth is, there’s scarcely an aspect, nook or cranny of the knife business that Robert Waldorf Loveless did not touch during his lifetime. He was forthright, sometimes gruff and always prone to speak his mind. During an interview for BLADE, he once asked this writer what the tapping noise was that he heard in the background. When I responded that it was the keys clicking as I was taking notes while we talked, he bluntly asked, “Can’t you remember anything? Why can’t you just listen?”
Loveless’ Defining Designs
No matter. Loveless was articulate, extremely intelligent and deep down passionate about art in knives. Cutlery Hall-Of-Famer Bruce Voyles knew Loveless and respected him for what he was.
“The thing about Loveless is he made a knife with eye appeal,” Bruce observed. “It was different, and a lot of people don’t understand why, but it was [his use of the] natural French curve. It was the design appeal.”
True enough, Loveless was a master of design. He had actually studied briefly at the Institute of Design in Chicago in the 1950s, and was a student of the Bauhaus Movement, a cultural and artistic design wave that peaked in the mid-1930s, something of a North Star, a muse if you will. Its dictum: Form Follows Function.
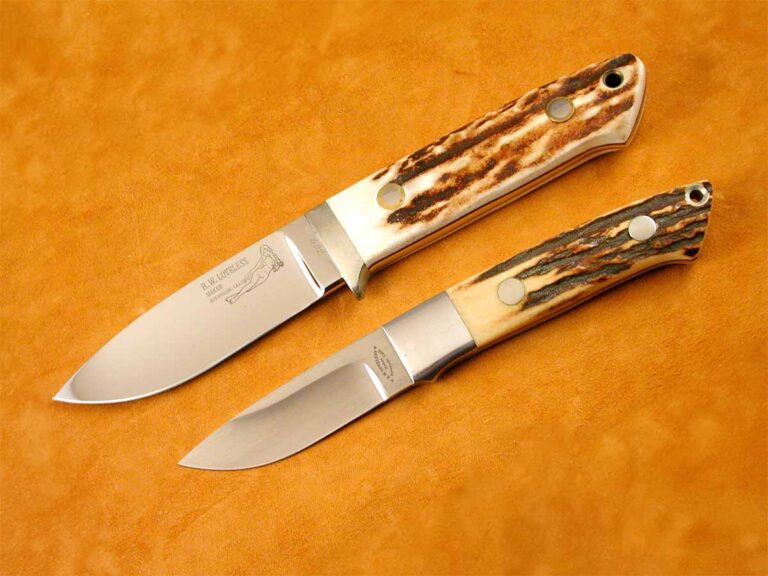
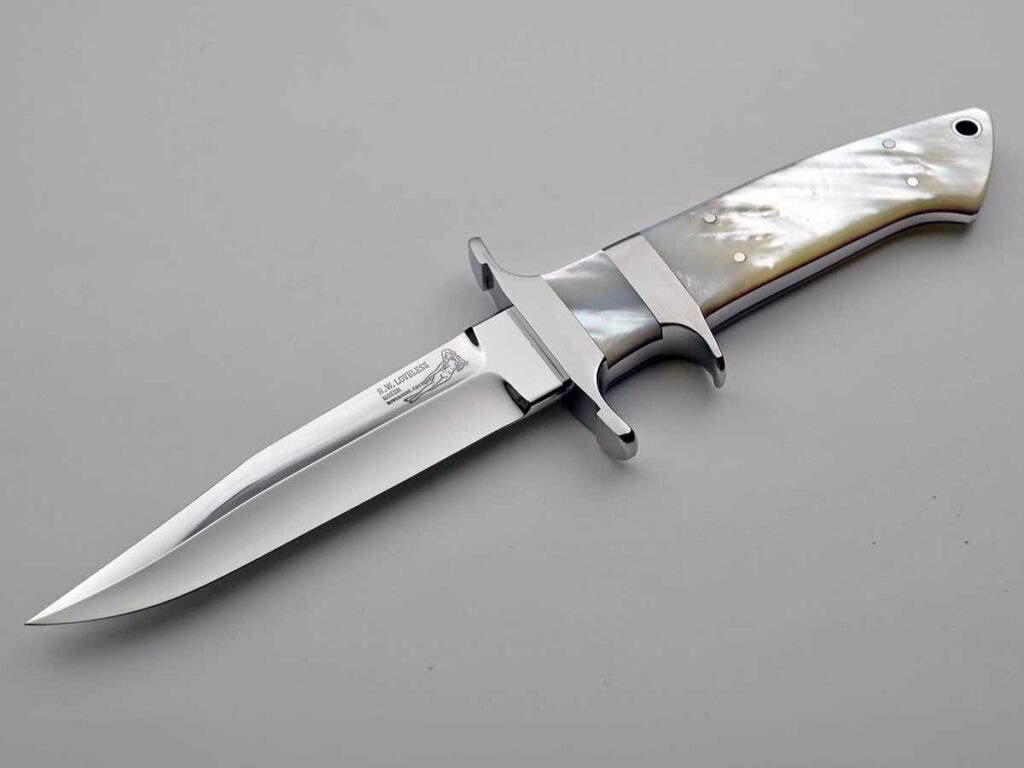
Another of Loveless’s favorite designs is the sub-hilt, radiant in one of Bob’s Baby Bear fighters with mother-of-pearl scales, Naked Lady logo and Riverside, California, stamp. (Exquisiteknives.com image)
Longtime Loveless authority John Denton told reporter Nelson, “He is pretty much the Picasso of the knife world and the father of 20th century knifemaking. His design is what made him famous.”
Dave Ellis, proprietor of Exquisiteknives.com, agrees.
“Going back to the 1950s, Loveless has been instrumental in perfecting some of the more common traits found in contemporary knives,” he related. “The dropped hunter is probably Bob’s most emulated design, although the Archer chute, sub-hilt fighter and more show that Bob did not rest on his laurels. When a smaller, carry-sized fighter was called for, Loveless came up with the New York Special.”
Denton recalled the Loveless willingness to revive and reintroduce design and construction concepts that caught hold in modern times and energized new frontiers of imagination and artistry.
“He was not the first to use the tapered tang,” John explained, “but he found out about it from an old knife made in the 1850s that was given to him by Billy DuPont of the DuPont family. Loveless brought it back into the modern world with the tapered tang taking the weight out of the knife. Bob said, ‘It has to look so good you want to pick it up and feel so good you don’t want to put it down.’”
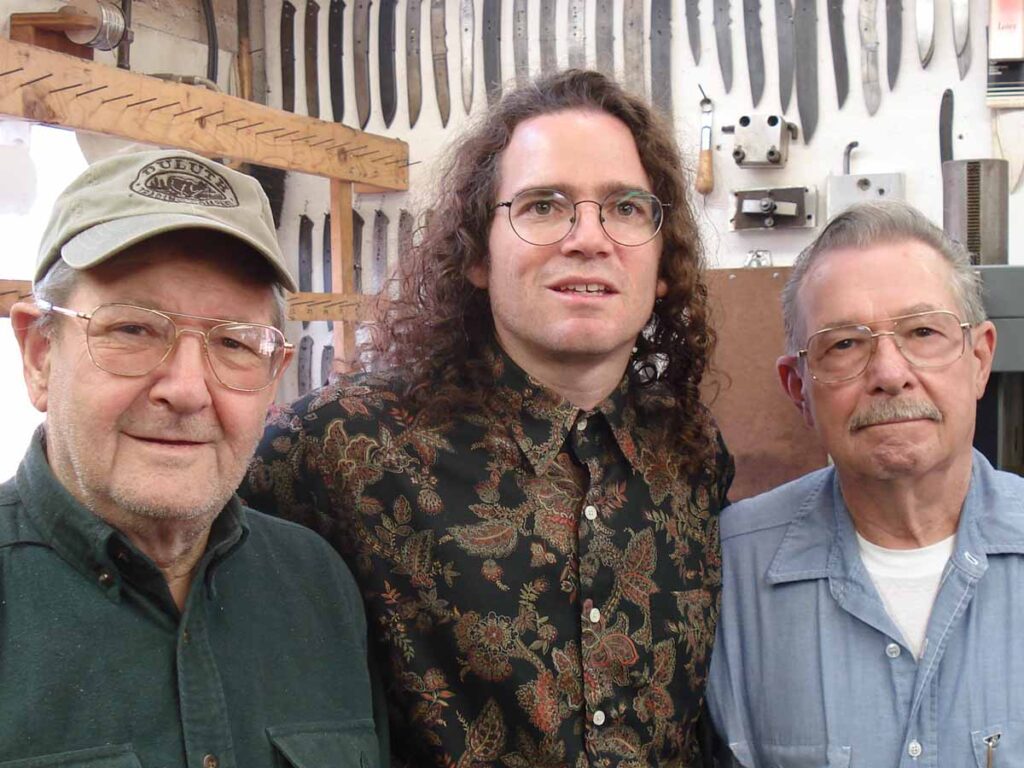
From left, Bob Loveless, John Denton and Jim Merritt in the Loveless shop in Riverside, California.
According to Denton, Loveless also brought the brass wrap handle, hidden pin, two-tone pins and half tang into play.
Design achievement crowns Bob’s career, but there was so much more to him—so much that attempting to compile a summary of his contributions would require more space than this publication might allot in another half-century.
Voyles commented, “I always liked him because he could sum up a complex subject in a sentence. He and I visited one time and I would throw out topic after topic, and he would snap back a quick response. When you left him you knew you left somebody that was phenomenally intelligent on a variety of topics, but that doesn’t mean he had social graces.”
One of Bruce’s favorite Loveless memories was Bob’s rationale during the controversy that raged within the Knifemakers’ Guild as to what truly defined a handmade knife. Loveless liked Jack Daniel’s, so Voyles and Cutlery Hall-Of-Famer Dan Delavan bought a 1.75-liter bottle of Gentleman Jack whiskey (Single Barrel wasn’t available at the time) and presented it to Loveless at his home in Riverside, California.
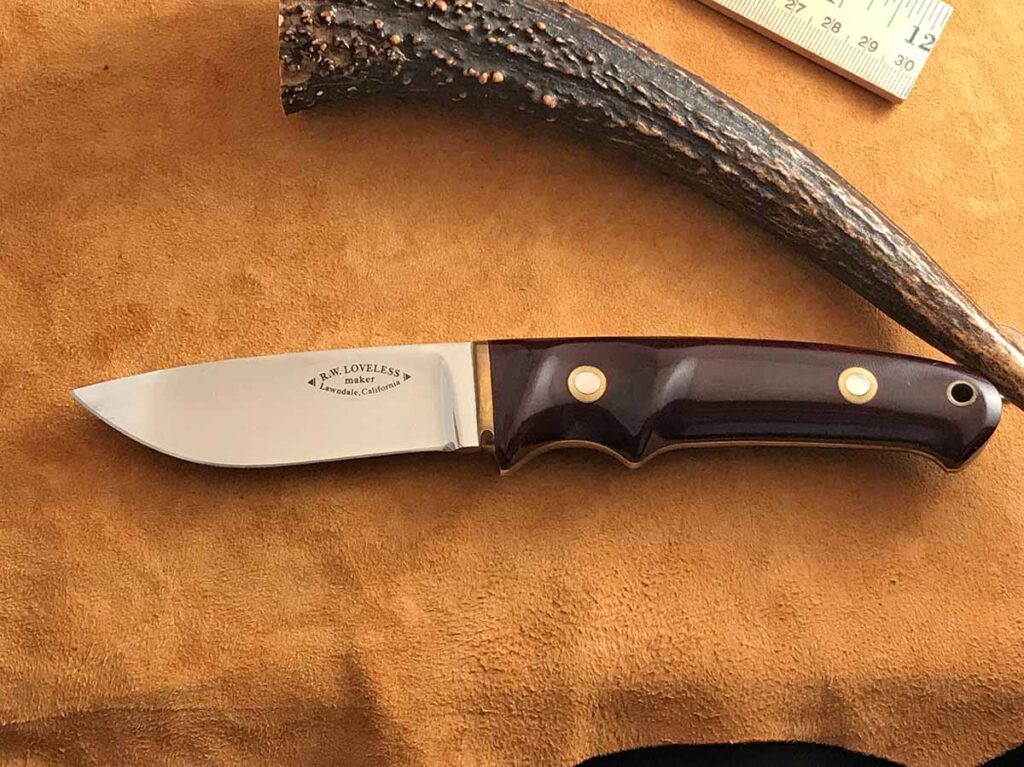
In an arrangement between Loveless and Schrade’s Uncle Henry Baer facilitated by A.G. Russell, Loveless sent this actual prototype to Schrade to copy and make the Schrade Loveless collaboration in the early 1970s. It has no guard, an “improved handle,” and a more pronounced belly than most of the Loveless dropped hunters of later years. The handle is burgundy Micarta®. As John Denton observed, the knife “has a magical feel from the ol’ man.” (Denton image)
“I said to him, ‘I hope you will accept this gift in the spirit in which it is intended,’” Bruce smiled. “He laughed and put the bottle on his shelf. Then we sat down and asked him what he believed to be the definition of a handmade knife. We videotaped his answer. He said, ‘I wish I had a machine that I could dump handle material, steel and pins into, and then a knife would come out the other end, boxed and ready to send to somebody. So, make your knives any way you want to. The marketplace will sort you out soon enough.’”
Simple, straightforward and wise.
Bob’s Impact On The Industry
Loveless played a pivotal role in the genesis of knifemakers’ organizations. He was a founding member of the Knifemakers’ Guild and a pioneer with the California Knifemaker’s Association. He was a staunch supporter of knife shows, bringing people to the events just with his mere presence. According to Ellis, Bob regularly attended the Guild Show, BLADE Show, Solvang Show, California Custom Knife Show and Phil Lobred’s Art Knife Invitational
Loveless also brought along younger knifemakers, working with them and offering advice. A few include Jim Merritt, D.F. Kressler, Yoshihito Aida, Cutlery Hall-Of-Famer D’ Holder and Steve Johnson. Bob’s style and artistic interpretation live on in part with the work of these incredible craftsmen.
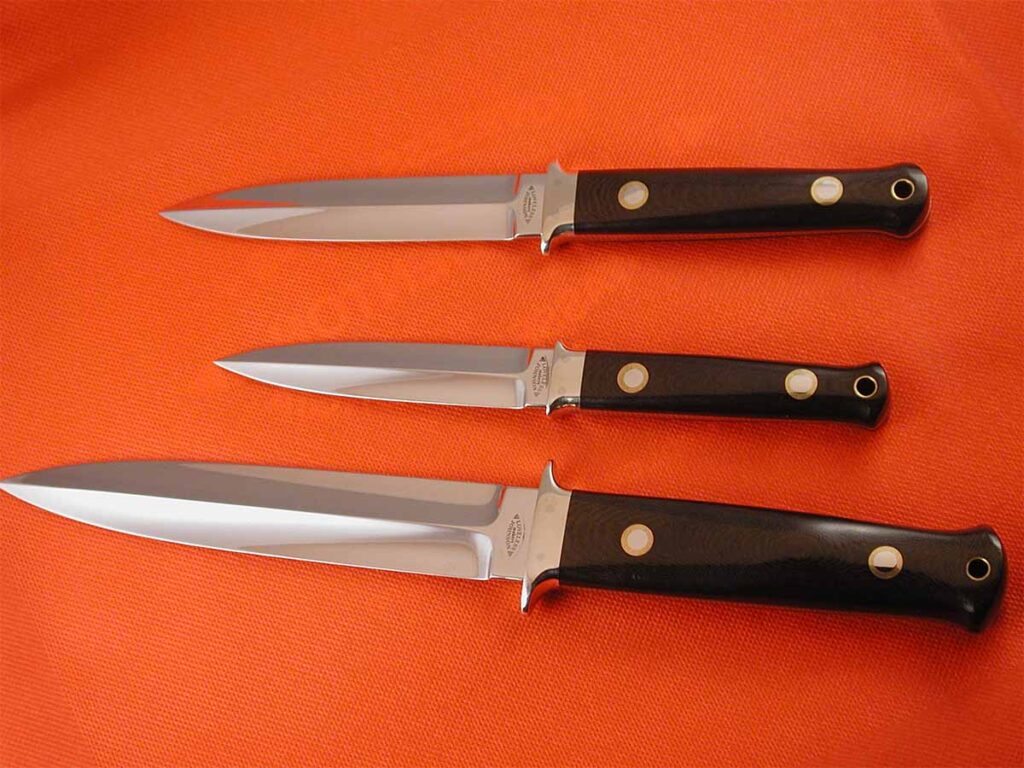
Steve Johnson worked in the Loveless shop in the early ’70s and remembers Bob fondly. “He was a true friend to those who were genuine and sincere with him,” Steve noted. Of this rare set of Loveless-Johnson daggers John Denton wrote simply, “Three really great knives.” (Denton image)
“Many a maker is in debt to Bob Loveless for the support, counsel, corrections and guidance that he gave,” Johnson said. “He was a true friend to those who were genuine and sincere with him, and the relationship that they had with him. Bob, as we know, was outspoken and quick to correct what he felt was not right or smart, which led to some loving him and others not, a bit like Ed Henry—love or hate—but both were so very good to me personally!”
Materials Maven
Loveless was an innovator in the aspect of materials as well, including 154CM stainless steel and the introduction of ATS-34 from Japan, while also popularizing Micarta® as a handle material.
Ellis commented, “Loveless pioneered the use of many of the common steels used today, especially 154CM. The shop was able to purchase such quantities that Bob could pretty much order what he wanted. The favorite handle material of the Loveless shop was green Micarta.”
Johnson remembered, “There was a stack of 154CM steel lying in the driveway at 4319 W 187th Street [the address of the Loveless shop] the day I first walked in. Bob mentioned that he was excited to get some blades done and heat treated right off. Green canvas Micarta was set in stone as the best handle material in Bob’s view. It’s still right up there on top and is used by many a maker. It’s because of Bob’s legacy that this happens.”
Global Influence
A lasting dimension of the Loveless legacy was his bridge to Japan, as well as his overtures in the European markets.
“Bob was deified to the extent that every Japanese knifemaker included his designs among their offerings,” Ellis explained. “Bob was an icon in Japan, and to this day many of the top makers in Asia have Loveless designs in their repertoires.”
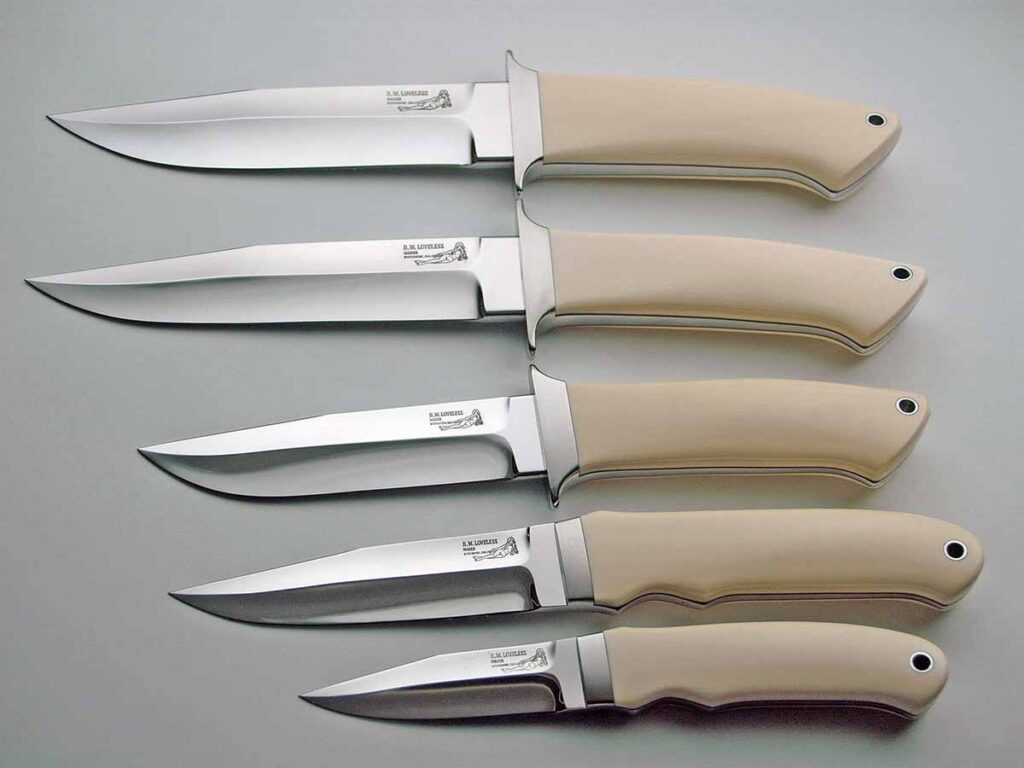
Five Loveless fixed blades sport the no bolt/no pin look in ivory handles. (Exquisiteknives.com image)
Voyles commented, “Bob went over there and showed the Japanese how to make good knives. I went to Japan in 1981 or ’82, and in every factory I went to there was a picture of Bob Loveless and the factory owner. The thing was that Bob’s wife, Yoshiko, was Japanese, so he didn’t have a problem with the language barrier, and he went to Japan to show them how to make knives that appeal to Americans.”
Loveless used his connections to make things happen, and Voyles credits him with the evolution of the folding knife among Japanese manufacturers, as well as a surge in the Japanese collector market.
“Bob didn’t make folders and the Japanese wanted folders,” Bruce recalled. “He had worked on a design with Jess Horn, and Bob put Jess and Japanese collectors in touch with each other. Horn also had a series of folders that he patterned after the old Remington Bullets. When Japanese collectors discovered that, their market for vintage Remingtons went straight through the roof. Loveless sowed the seeds in the 1990s for the collectibility of vintage knives in Japan.”
Collecting Loveless
Today, a Loveless knife is a collectible phenomenon in its own right. Name the year, name the mark on the blade, name the style and the materials, it will sell for astonishing dollars. Denton has noted some models made in the 1970s that sold for $400 then and have reached the rarefied air of $100,000 or more in recent years. The power of Loveless pricing simply takes your breath away.
Bruce is quick to add that Loveless was professionally unselfish. “If you wanted to make a style of his knife in your factory, that was OK,” Bruce noted. “Just ask him.”
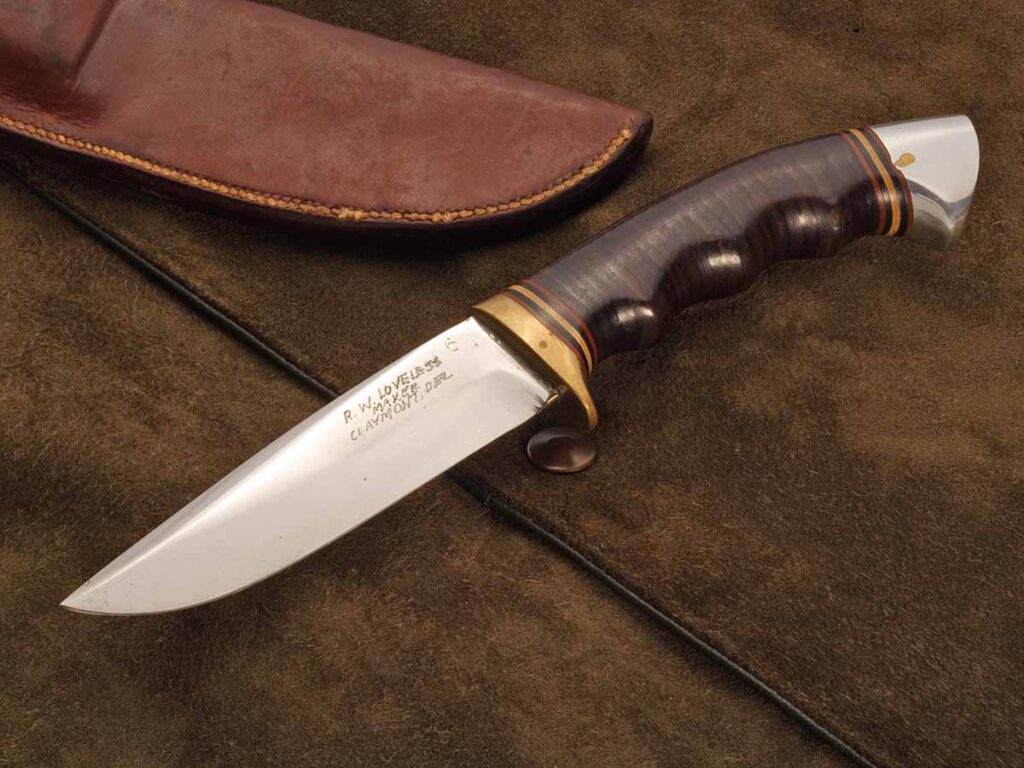
Circa 1955, Loveless sold his first knife to Abercrombie & Fitch for $14 (adjusted for inflation, almost $160 in today’s money). Loveless made this early model for A&F in his shop in Claymont, Delaware.
The pervasive Loveless influence stretched far and wide, from the custom knife shop to the factory.
“His designs for and collaborations with Schrade, Gerber, Lone Wolf and others, and the factory knife market in general, were significant,” Ellis recalled. “Early on the astute factories were taken by Loveless designs and made limited editions in dropped hunters and others. These days factory collaborations are quite common, and you can thank Bob Loveless if you want to give credit where it is due.”
When Sports Illustrated called Loveless for an interview in 1980 and the magazine published his words in the same edition that featured tennis superstar Bjorn Borg on the cover, the impact on the entire knife universe was transcendent. When asked why so many people considered his knives “better” than those of others, he mused, “A knife is an extension of your experience. And I’ve had more experiences than most people. There’s more character running in my veins.”
For those who knew Bob, just the knowing was an unforgettable experience. His contributions to his present and to the futures of others in the knife industry remains incalculable. And so, the longevity of a man does not reside in his years on Earth, but in the perpetual remembrance of his ideas, his workmanship and his innovative perspective on the world.
Therefore, it can be said that when Loveless left us he did not go gentle into that good night. He did not fade away. He didn’t drop the mic. He handed it to those with the foresight and the intestinal fortitude for the days to come. Now, what do we say and do? Loveless might grouse. He might gripe. But he just might also manage a grin.
A clutch player in the knifemaker’s shop, the tire hammer gives more control than other D.I.Y. power hammers.
Like a variable-speed hand drill, your backyard power hammer should be able to run slowly, at full speed or in between, depending on the task. The simplest way to guarantee it does this is to use a slipping clutch.
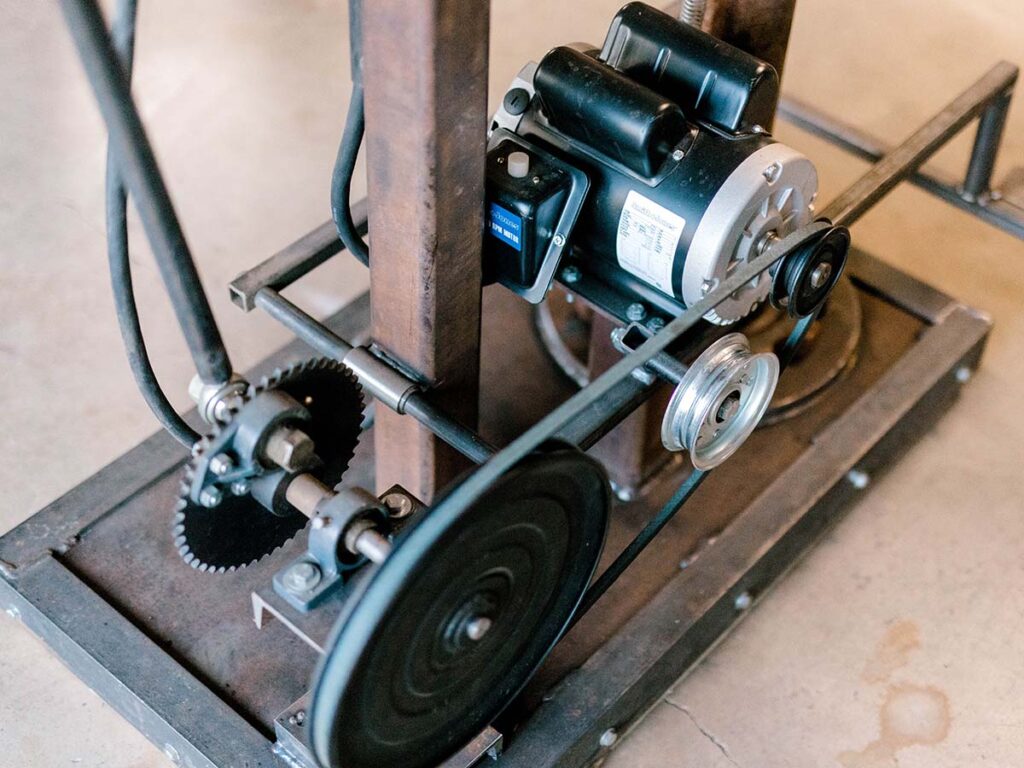
There are two main designs of slipping clutch. One uses a slack belt, a flywheel and pulleys. The drive pulley rotates within a slack belt. The foot pedal linkage pushes an idler wheel into the slack belt, increasing the belt tension to the point that the belt begins to turn the pulley on the flywheel.
The author modified the spring-arm-to-pitman attachment to make it adjustable. Depending on which attachment point is used, the leverage of the stroke changes.
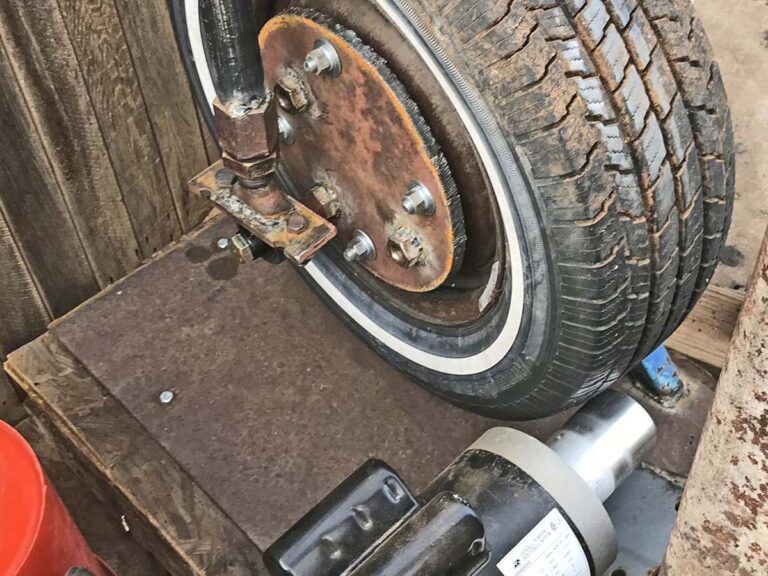
Another design uses a tire clutch, where the foot pedal linkage pushes a drive wheel into an automobile tire, with the hub of the tire serving as the flywheel. The most common “tire hammer” design uses a similar clutch but turned the other way and connected to a linkage. Your available parts will dictate your design.
Why A Clutch
A function of the clutch is to reduce the RPM of the motor speed to get the hammer rate of beats per minute (BPM) into a safe and useful range. You want the hammer rate to generally end up between 150 and 250 BPM, though many variables change with each hammer. In general, a heavier tup (aka hammer head assembly) requires a slower BPM, whereas a lighter hammer can have a higher BPM. You do not want your hammer running faster than you can control it, nor so fast that the inherent forces tear it apart. My hammer uses a 24-inch tire and a 3-inch drive wheel for an 8:1 reduction of a 1750 RPM motor, yielding a calculated 218 BPM at full speed. Your hammer will run differently depending on your motor RPM, your drive and driven wheel diameters, and the hammer’s overall design. I rarely run my hammer full speed during general forging work, and the tire clutch gives good speed control. Full speed works acceptably well for drawing out damascus billets or breaking down large stock.
My tire clutch has an integral flywheel bolted to the hub. On the flywheel I welded several different nuts for attaching the pitman arm (for more on the pitman arm, see part three last issue). Each nut is a different distance from the center of the hub. This allows me to vary the length of the stroke, in my case between 6.5, 7 and 7.5 inches, based on where I connect the arm to the flywheel. Coupled with an adjustable-length pitman arm, this setup allows a degree of tuning to get the hammer hitting in a way that transfers the power directly to the workpiece with efficiency, yet in a way that doesn’t place undue stress on the hammer itself.
Choosing A Motor For Your Tire Hammer
As for motors, the size may vary a bit depending on the overall tup weight of your hammer. For most homebuilt hammer sizes, a 1 or 1.5 HP motor is plenty. My 40-pound hammer uses a 1.5 HP motor running on 110v and does not trip a standard 15-amp breaker, suggesting that 1.5 HP is more than plenty for a 40-pound head. Whether the motor runs on 110v or 220v will depend on your shop setup and what you have available, but you’d be best served either way with a motor that runs in the 1700 RPM range, not one that runs in the 3400 RPM range. There’s no need to go three phase or variable speed unless you’re already set up for either.
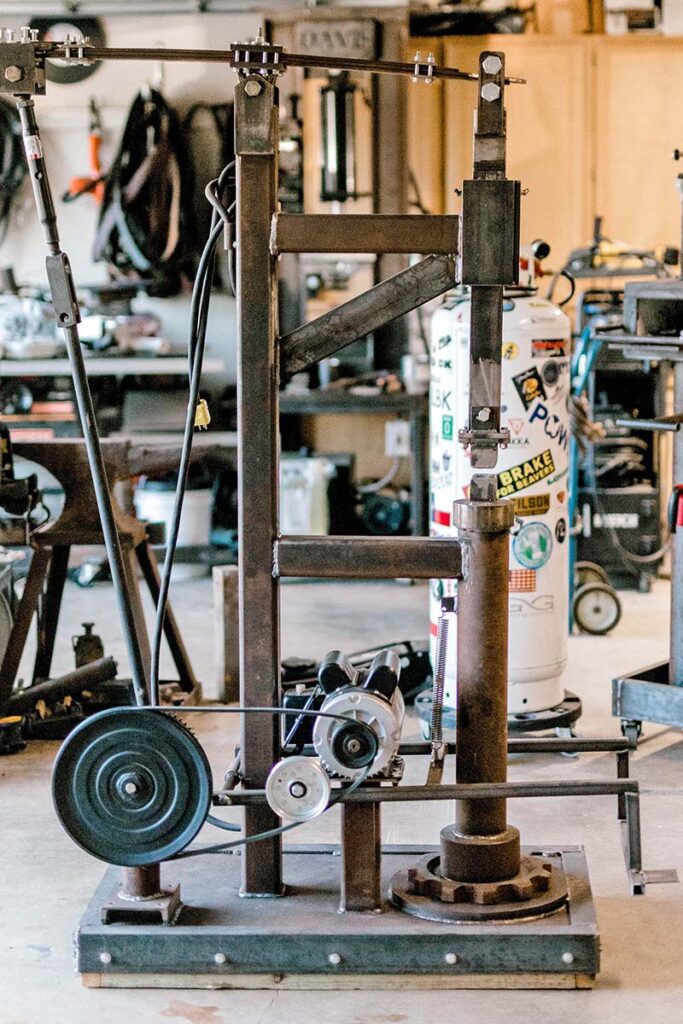
Doug Davis’ homemade hammer uses a series of pulleys and an idler. When you step on the treadle, the idler tightens the belt and engages the hammer.
You will need an on/off switch for your motor. To run the hammer, turn the motor on, then use the foot pedal linkage to engage the clutch.
Sourcing Dies
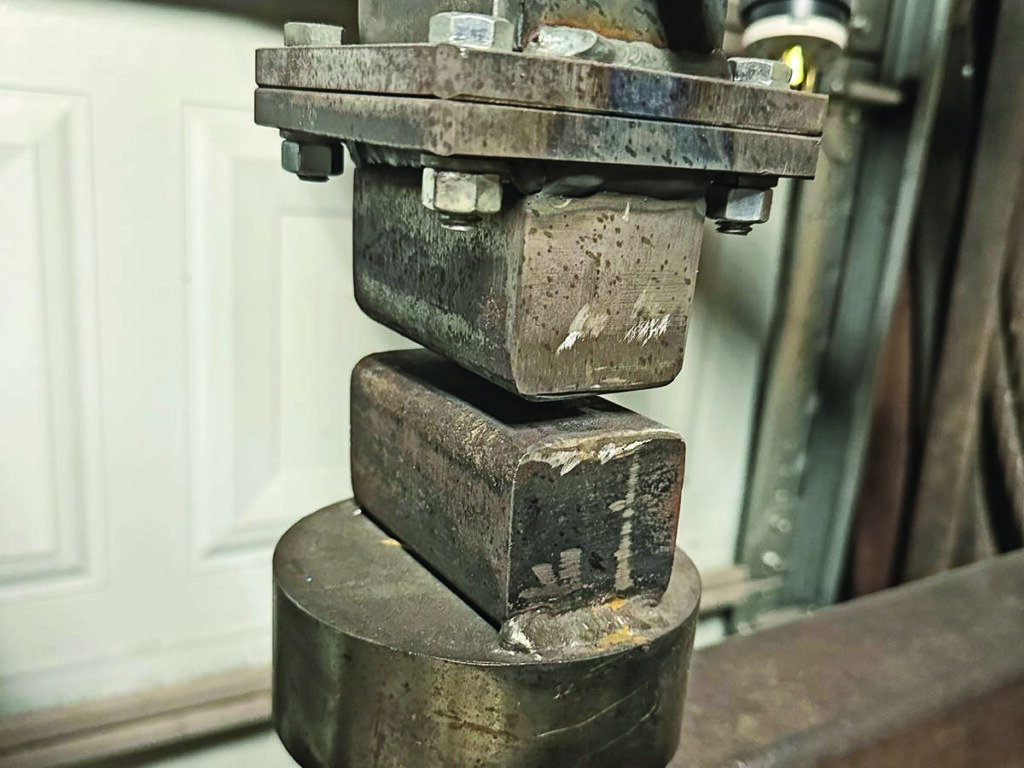
Most power hammers have a set of dies in between the anvil and the hammer shaft. Dies may be built in a variety of shapes and sizes, depending on how you want your hammer to move the metal. Two basic die designs are flat and crowned. Flat dies move the metal somewhat equally in all four directions, while crowned dies will draw out the length of your workpiece perpendicular to the crown on the dies. Some smiths design their hammers to accommodate various top or bottom tools, or spring swages as well.
The die attachment on Doug Davis’ power hammer is more robust on the ram-to-die connection, but time will tell how the bottom-die direct-weld works out. (Erik Greiner image)
On my personal hammer, the dies are built out of 1.5-inch square 4140 steel bar stock, heat treated and ground essentially flat, with slightly radiused corners. Some hammers are set up with dies that are interchangeable but mine is not. Full disclosure: My die attachment is one point of weakness in my design. I ultimately welded my bottom die plate straight to the anvil, and I’ve had to reinforce the top die connection and re-weld it several times. Perhaps a more skilled welder could have done better!
Creative Necessity
I can’t emphasize enough the creativity necessary to build a functioning power hammer from scrap. It’s one thing to watch a YouTube video and think, “It must be nice to have a power hammer.” It’s another thing entirely to watch the same video and try to discern how the rocker arm connects to the center post, or how the tire clutch axle is set up.
At the time of my hammer build, there was an online gallery hosted in Czechoslovakia that had hundreds of pictures of various homebuilt and factory built hammers. I couldn’t have built mine without those examples. I don’t speak Czech but the pictures tell the story well.
Known for his custom kitchen knives, here are the tools Dmitriy Popov relies upon to craft his creations.
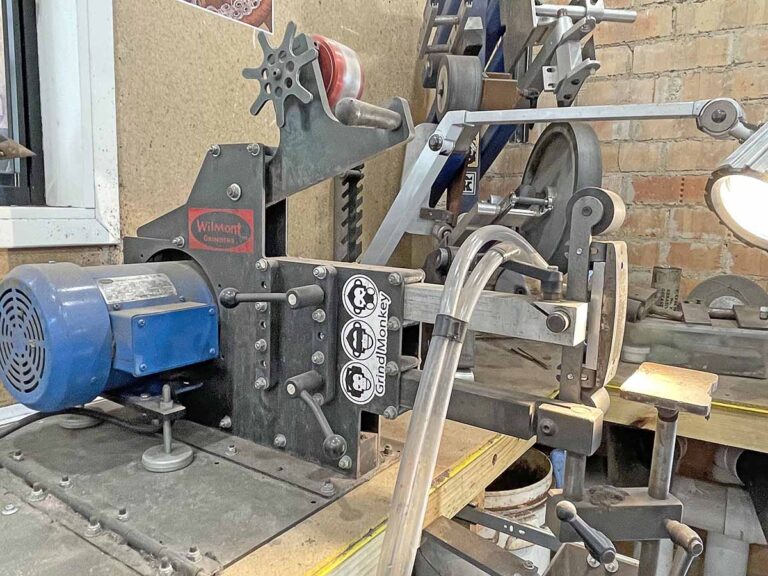
“I am not going to score any originality points for naming my belt grinder as the most important tool in the shop,” Dmitriy Popov begins with a smile. “I have had the pleasure of using a wide variety of grinders and the Wilmont TAG 101 is my favorite. Chris Williams, who builds it, is a knifemaker himself and it shows in the product. Also, Chris is only a message away in case you may need anything, not that you have to worry about it too much the way this machine is built.
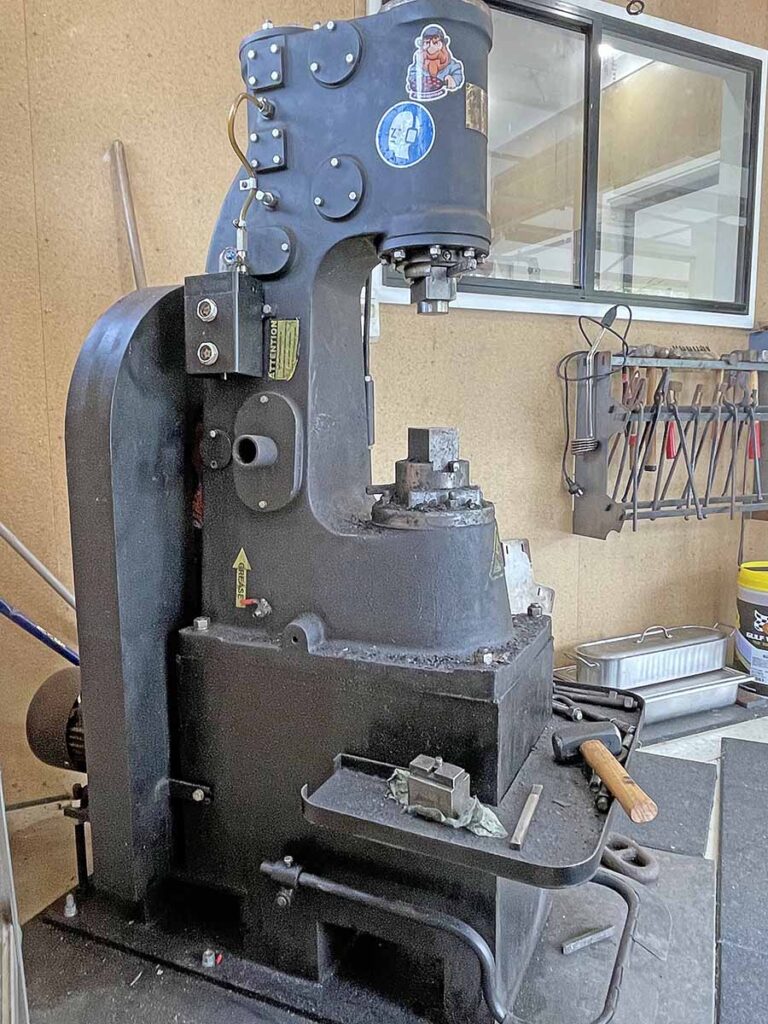
Popov’s 15-kilogram Anyang power hammer “gets the job done in no time.”
“I have a large variety of tooling accessories that I use with the grinder—radius platens, flat platens, rotary plates, large and small wheels, as well as a surface-grinding attachment. I run the grinder off a dedicated Genesis VFD [Variable Frequency Drive], which enables me to control the speed.
“Next up is my Toolmex 1-horsepower disk sander,” Dmitriy continues. “It took me a little while to get to know this machine and to incorporate it into my workflow—but these days I would struggle to make a knife without it. My sander is hooked up to yet another VFD, which is shared between the disk sander and my second belt grinder through a switch. I can slow it right down and change the rotation direction.
“I primarily use a disk sander for two purposes. First, to thin out the knife behind the edge. I do this very carefully with the aid of water cooling in order not to generate any heat that would negatively impact heat treatment. Secondly, I use it to shape facets on my knife handles, which are mostly wa [Japanese-style octagonal] handles these days.”
His power hammer is a real game-changer.
“I used to hate forging as tendinitis in my elbow would flare right up and would take weeks to settle,” he explains. Before Popov moved his shop to a rural area, getting a power hammer was not an option due to the noise level it generates. “Needless to say is how much easier, quicker and more pleasurable my forging experience is now,” he writes. “The hammer is only a 15-kilogram Anyang but it gets the job done in no time.”
Dmitriy does his own heat treating with a Paragon KM24 Pro Heat Treat oven. “Quite a high-ticket item this one,” he notes, “a three-zone 415V/3P/15A unit which reaches temperatures of 1,100° C/2,012 F° in just 15 minutes. It has super precise temperature control front to back, which is so crucial for me in order to be able to squeeze out the most of each steel I work with.
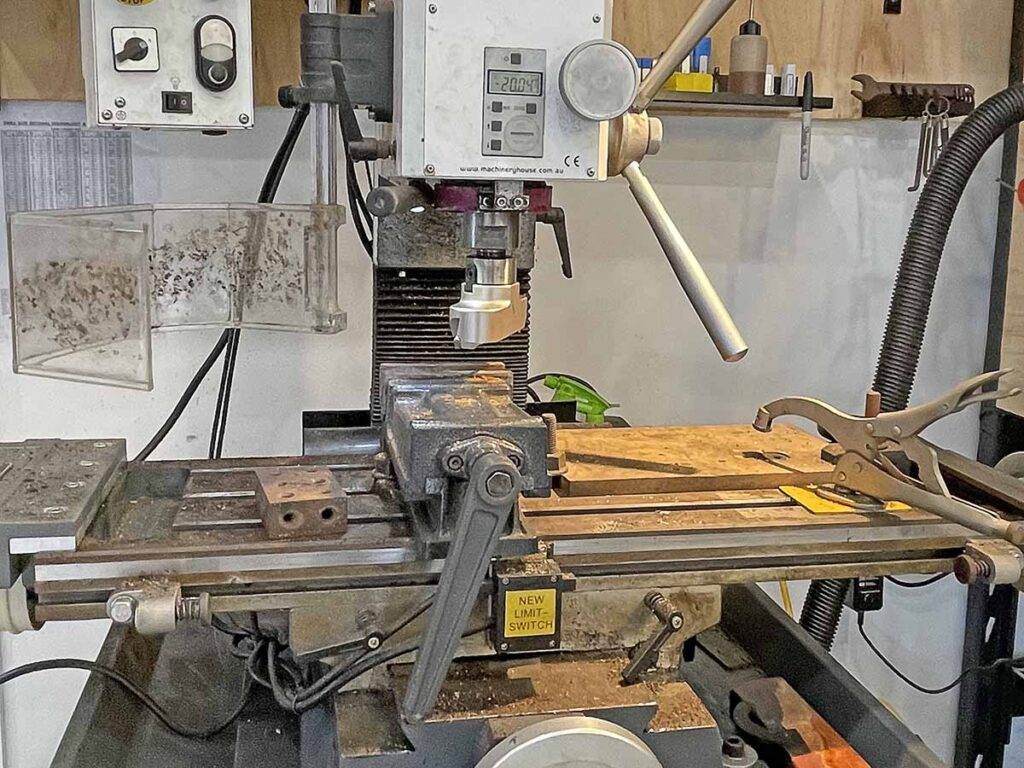
When selecting his milling machine, Dmitriy wanted something solid and with enough vertical clearance. As a result, he opted for the Optimum MH28V. He also fitted it out with an Optimum DRO (Digital Readout at top left) and a motorized slide table.
“My milling machine is definitely underutilized in my workshop. When selecting the mill, I wanted something solid and with enough vertical clearance. The Optimum MH28V fit the bill. Machine and tooling is not cheap and I use it only for a couple operations, but it is a real time saver.”
Last but not least, Dmitriy expounds the virtues of his large workbenches.
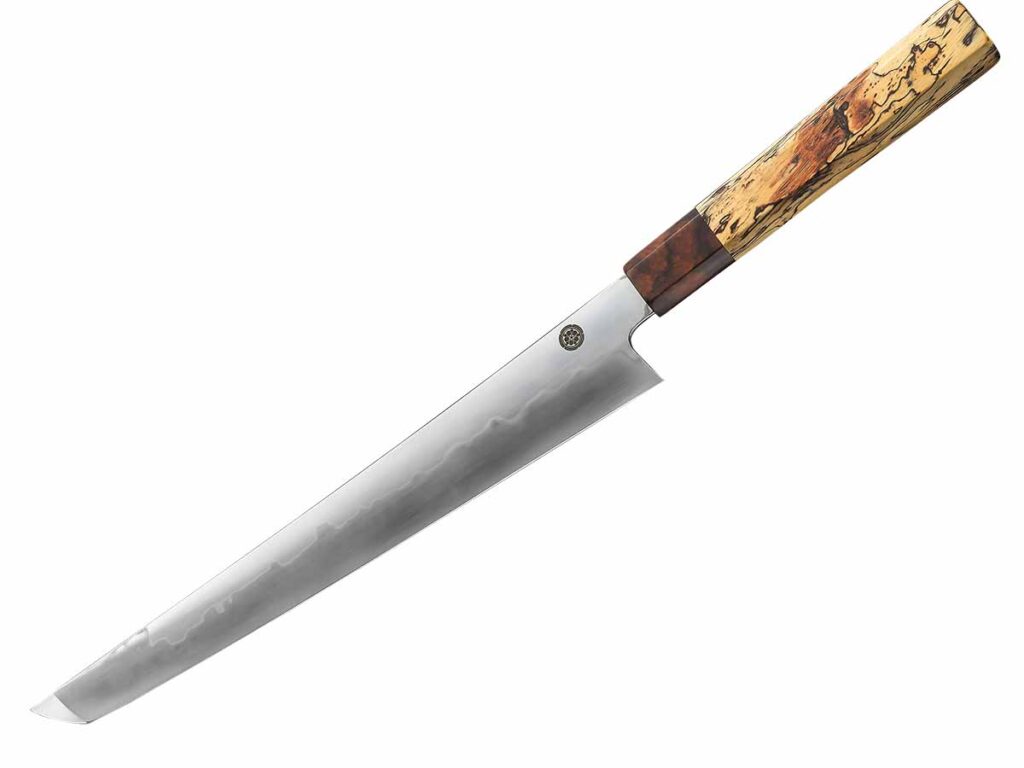
Dmitriy Popov specializes in custom kitchen knives such as his Honyaki Sujihiki Sakimaru in an 11.8-inch blade of differentially heat-treated W2 tool steel with hamon. The handle is stabilized spalted tamarind and ironwood. (SharpByCoop knife image)
“This seems simple but if you make knives, you know that you will end up using any horizontal surface available to you. I would say that one-third of my workshop floorspace (page 45) is taken up with workbenches which allow me to work on multiple projects at the same time, and stay organized and productive. I found that yellow-tongue flooring panel is a great workbench surface, and frames can either be built from timber or, alternatively, metal warehouse framing can be purchased from any hardware shop or Costco.”
The Appalachian spring helve hammer, including springs, hammer head/tup and more.
Some people find great joy in precision and following rules and plans. For those of you who do, this is probably not your power hammer series. I enjoy the creativity of making a thing from scratch. It’s not the precision that turns my crank, it’s that eureka moment of, “It works!”
In this installment I’ll talk through the process of building a junkyard hammer in the Appalachian style. Junkyard refers to the DIY-type build made with what you can find. Appalachian refers to a common design that uses a spring helve. The most popular earlier Appalachian hammer designs were called the “Rusty” and the “Dusty.”
Rocker-Arm Springs
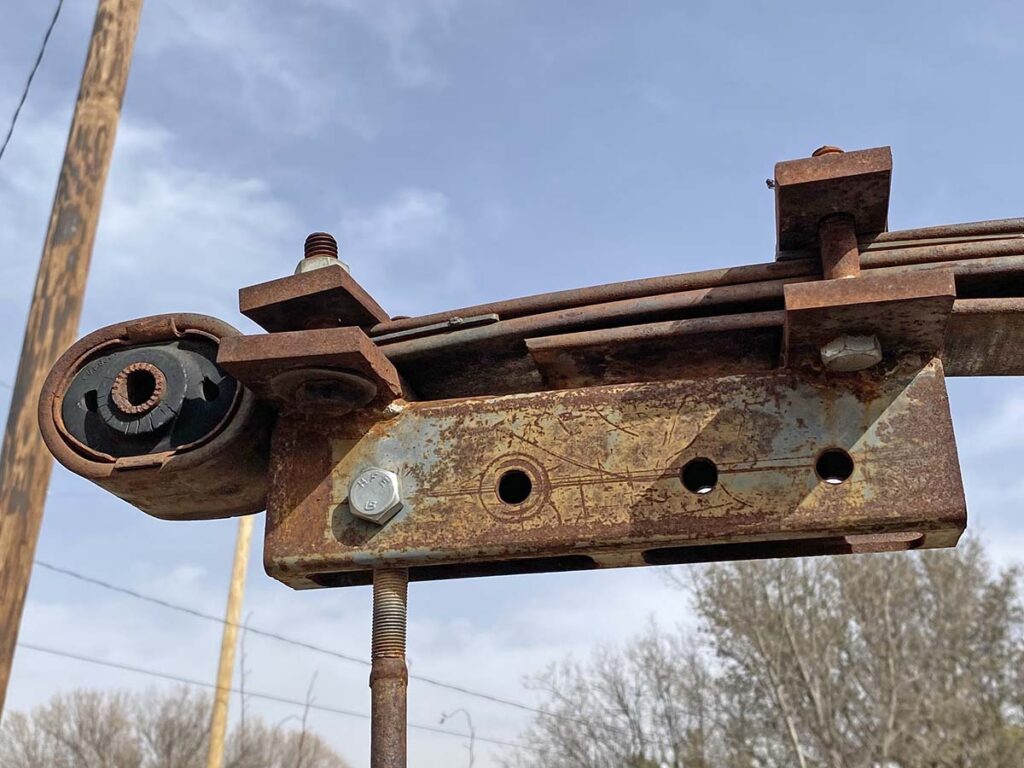
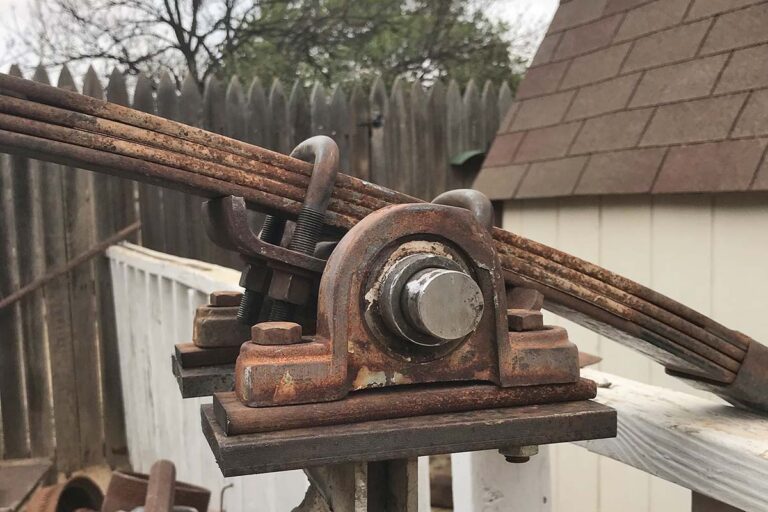
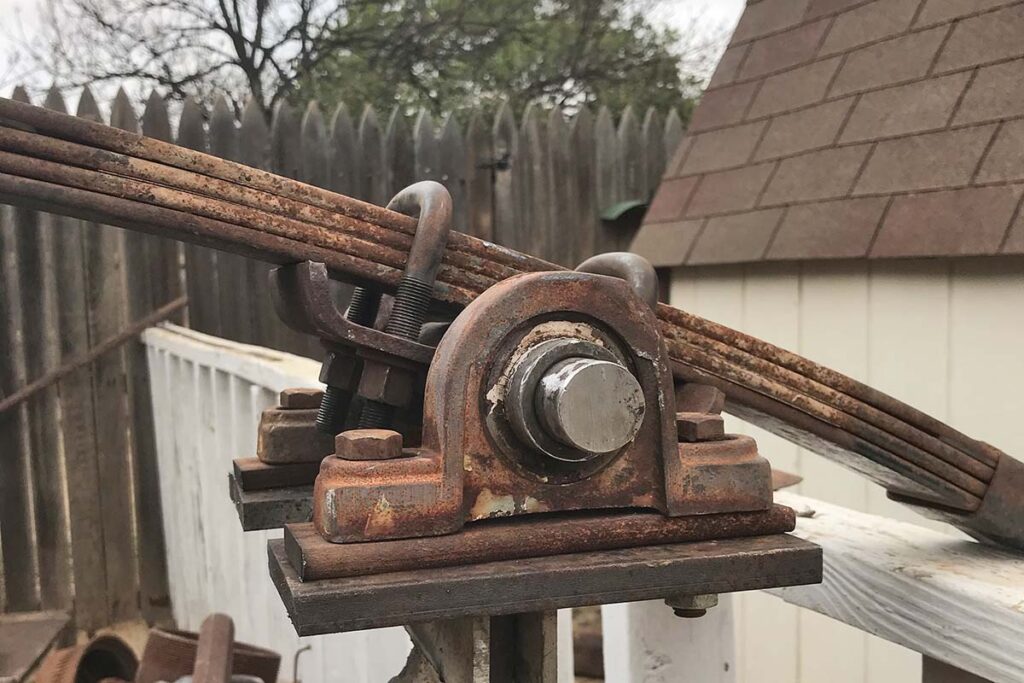
I used a set of leaf springs for my rocker arm. The arm is also called a helve. When it comes to selecting your springs, if you have several to choose from, choose a sufficiently stiff set. If you have the choice between sets that are more curved vs. those that are straighter, choose the straighter ones. If you have the choice between sets that are longer or shorter in overall length, either one will work, but you’ll have to consider whichever length you choose as you lay out the distance between the center post, the anvil and the drive wheel. The length of your spring pack coupled with your stroke length will impact the speed at which your hammer will safely run. The spring action and whip action of the spring set during cycling increase head speed at contact, which improves performance.
The author used a set of leaf springs for the rocker arm of his power hammer. The arm is also called a helve.
Your spring set needs to swivel or rock on top of your center post. I built my hammer with the springs riding on top of the shaft, and the shaft riding in pillow block bearings. Others are built with flange bearings, and others with the shaft above the springs. Any configuration is fine provided you have the clearance you need for the springs to rock back and forth as the hammer operates.
Your spring set will need a swivel on the end where it connects to the pitman arm (the rod that connects the spring arm to the drive wheel). Like the top pivot, there are as many different designs as there are guys building hammers.
The end of the spring set near the hammer head needs to be connected in a way where the arc of the spring travel is converted into direct linear up and down energy. Again, there are multiple ways to accomplish this. I went with a set of rollers on the hammer head, and the spring rides in and out on the rollers as it arcs up and down. I have seen designs with toggle linkage as well.
Hammer Head And Tup
The entire assembly that makes up the hammer head is called the tup. When a smith says he has a 25-pound power hammer, he’s referring to the tup weight. You are looking for a tup weight that is roughly 1/10 of your anvil weight. I built my hammer with a piece of 2-inch-solid-square stock long enough to make a 40-pound tup. For heads that weigh less, you can use a piece of solid stock for the contact area, and tubing or pipe to make up the extra length you need. While a solid anvil is critical to the function of the hammer, the hammer head itself only needs to be solid on the striking end to properly transfer the force.
The DIY spring helve hammer built freestyle by Doug Davis of Lubbock, Texas, is shown in both instances here from the pulley side.
The tup rides up and down in a set of guides. You’re converting an arcing spring movement into a linear up-and-down hammer movement. One consideration is that your guides need to account for lateral movement in all four directions. The simplest way is for the guide to completely enclose the hammer shaft. Contact surfaces between the hammer head and guide should be lubricated, and steel on steel is not advised. Bearing surfaces should be made of UMHW (Ultra High Molecular Weight Polyethylene) plastic or of bronze. These surfaces benefit from a degree of adjustability to make sure that the hammer head is aligned properly with the anvil.
I used set screws and a UMHW plastic cutting board on my hammer, with lithium grease as well. My hammer runs well with fresh grease and less well without. I grease the hammer shaft at the beginning of every forging session. The vertical position and length of your guides should accommodate the various stroke lengths of your hammer. You don’t want the hammer head hitting the bottom of the guide on the upstroke, nor the spring connector hitting the top of the guide on the downstroke.
Pitman Arm
A stiff arm connects the spring pack to the rotating wheel, converting the rotary action of the flywheel to a straight up-and-down rocking motion. This arm is called a pitman arm. It is adjustable for length, as the dimension will ultimately be changed as you tune your hammer by trial and error, or as you adjust your hammer to accommodate varying thicknesses of stock, or the use of swages, or top and bottom tools. I used a toggle linkage on the top and for the bottom of the arm I used large bolts welded to a piece of plate, which I then bolted to the hub of the tire used for a clutch. This is another area where your available parts and mechanical experience will dictate your design.