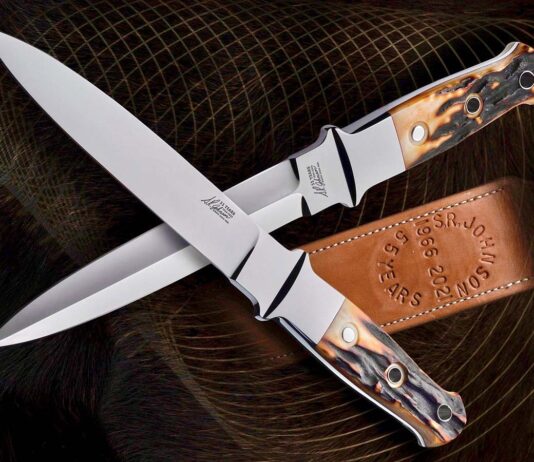
Knifemaking is the building of a knife, which includes the blade, handle and other accouterments. Blades are made by either removing metal from a steel blank via a grinder – known as stock removal – and the forging to shape of hot steel into a blade in the process known as bladesmithing. Other parts, including bolsters, guards, pommels, etc., are needed to complete the finished knife.
So, you’re going to build a power hammer… now’s the time to consider where to get your parts.
The first thing you’ll have to decide is which style of power hammer you will build. There are as many designs as there are folks who build hammers, but they fall into two basic categories: helve hammers and linkage hammers.
Power Hammer Styles
Linkage Hammer
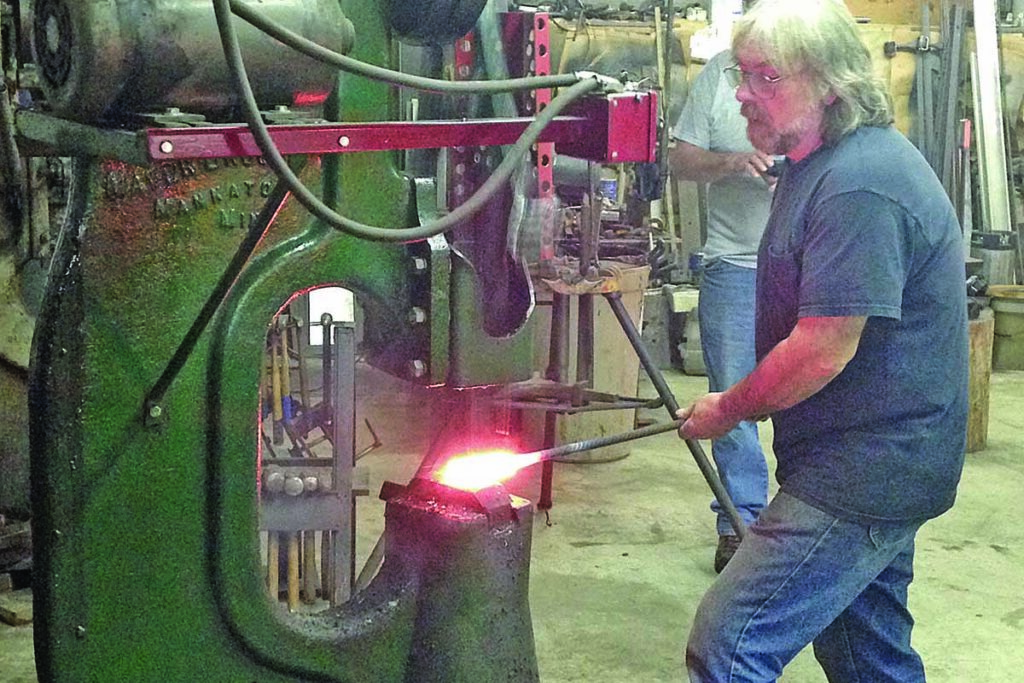
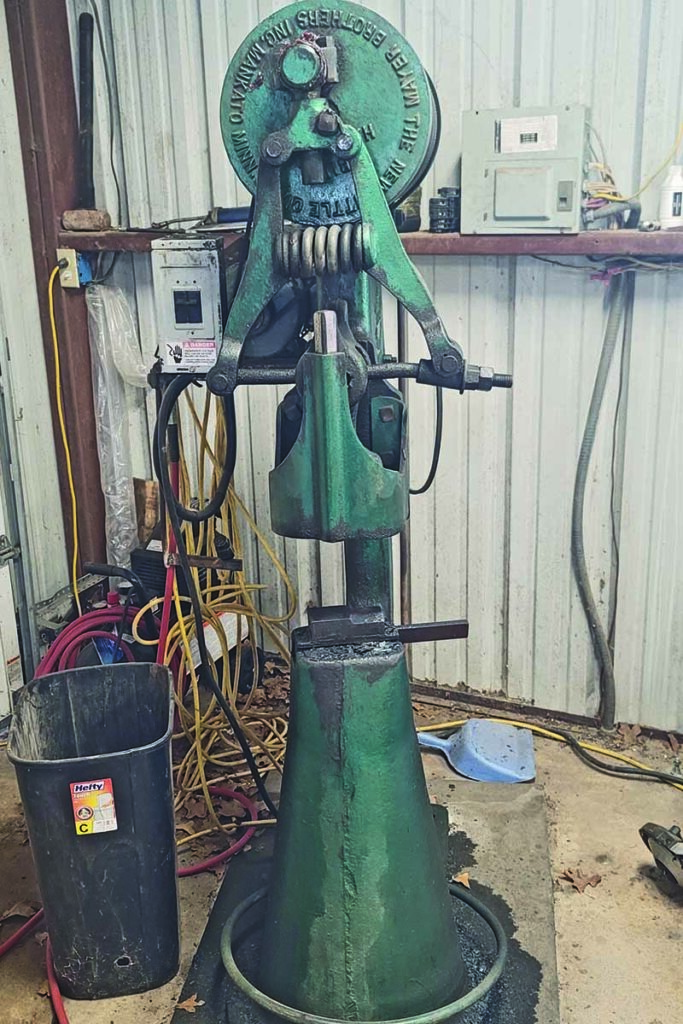
At the basic level, a helve hammer has an arm that moves up and down on a fulcrum to move the hammer head up and down. A linkage hammer uses a wheel, tire or disk that rotates and uses the rotation to move the hammer head up and down. The Little Giant power hammer design uses a linkage, as does the commonly home-built tire hammer.
The Little Giant power hammer design uses a linkage, as does the commonly home-built tire hammer. ABS master smith/BLADE® field editor Joe Szilaski pounds away with his 50-pound Little Giant. (Lori Szilaski image)
Helve Hammer
I chose to build an Appalachian-style spring helve hammer because I had access to a variety of leaf springs, and because the design is more intuitive and less mechanically precise. I figured correctly that I could build a helve hammer design from scratch, but that a tire hammer had some engineering points that would be difficult for me to figure out. If you have access to uniform steel sizes or must buy your steel, I suggest a tire hammer. I had good scrap steel and didn’t want to buy much.
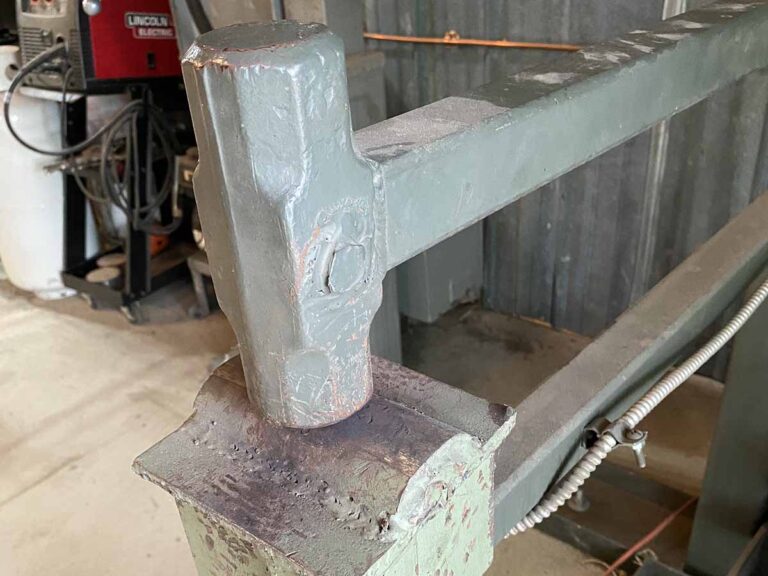
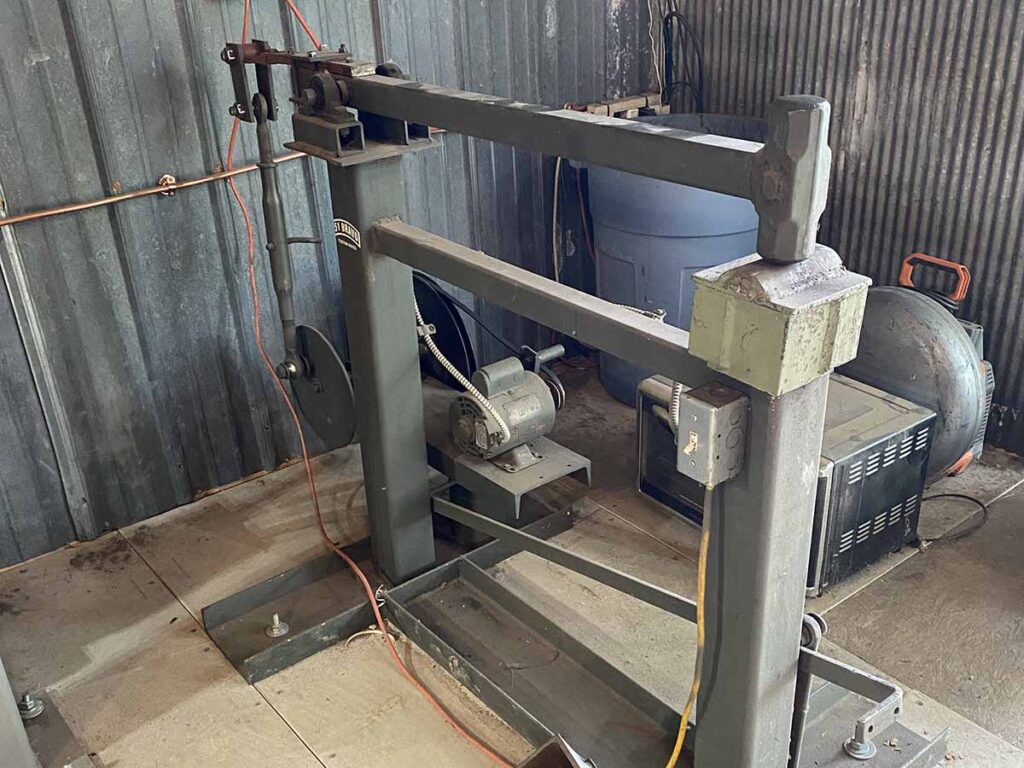
I’m focusing on the upright, heavier, more efficient metal-moving machines. Even so, it’s worth mentioning the smaller, simpler but less efficient helve hammers. I came across a good example in the shop of Shawn Moulenbelt, a Michigan bladesmith who was on season seven of Forged in Fire. His hammer used various sizes of hollow square tubing, a sledgehammer head and a half-horsepower motor. He used a slack belt clutch and interchangeable die plates. His hammer was built by Rusty Glovebox on YouTube and is a solid DIY (do-it-yourself) design.
Bladesmith Shawn Moulenbelt’s helve hammer uses various sizes of hollow square tubing, a sledgehammer head and a half-horsepower motor. On the upside, these hammers are quick and fairly straightforward to build. On the downside, they’re not all that great at their one job: moving metal. Even so, a similar light use-DIY power hammer is much more efficient than your arm, and much less likely to get tired.
On the upside, helve hammers are quick and fairly straightforward to build. On the downside, they’re not all that great at their one job: moving metal. Even so, a similar light use-DIY power hammer is much more efficient than your arm, and much less likely to get tired. In my mind, if you have the time and skill to build a small hammer, you can just as easily build a bigger one. Even so, the small helve hammers may be just the ticket for your shop.
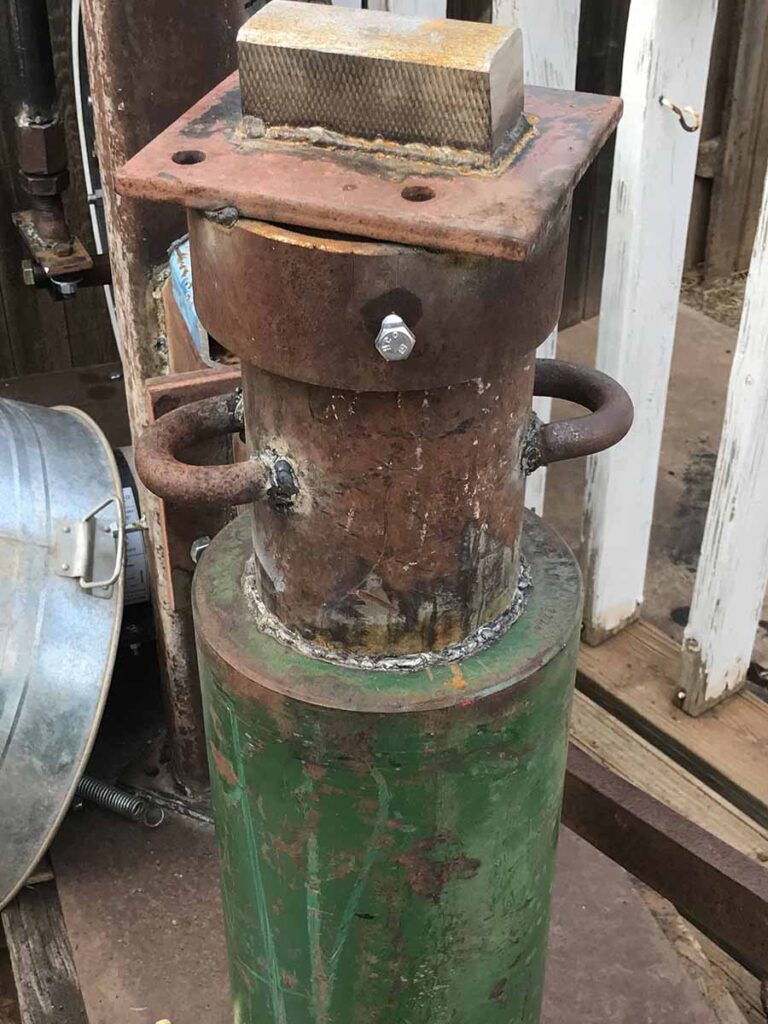
The author’s home-built hammer combines a 5-inch piece of round stock with a heavy sleeve from a “mud pump” to make an anvil that weighs around 400 pounds.
Resourcing An Anvil
There are many different things that can make a suitable anvil for a power hammer and many more things that cannot. What you are looking for in an anvil is a solid piece of steel that weighs anywhere from 150 to 600-800 pounds, which can be difficult to acquire.
Sometimes you can find solid square or round bar steel. Some folks recommend railroad axles. Others suggest forklift tines welded together. I’ve seen sections of a 2-inch square bar welded together into a solid 6×6. I’ve seen pieces of 1-inch plate welded where the hammer strikes the ends. Whatever you can find needs to be solid or able to be welded into a solid, single, massive piece, and your welder has to have the power to stick it all together. My hammer is built on a 32-inch piece of 5-inch round bar welded inside a mud pump sleeve that has a 5-inch bore. The total weight of my anvil is around 400 pounds.
What Not To Use
Don’t be tempted to think you can get a piece of something hollow like pipe or square tubing and fill it up and make a suitable anvil. Each stroke of your hammer pounds the steel in-between the hammer head and your anvil, pushing your anvil toward the ground. If you have any movement, vibration or give in your anvil, the force is absorbed by the movement and not efficiently transferred to your workpiece.
Anvil To Hammer Head Ratio
When you finally locate this difficult-to-find thing, it won’t likely be the size or shape you want. My anvil was round, which doesn’t easily weld to square tubing, for example. I had to deal with it. As noted, my anvil was around 400 pounds total weight. Yours may be more or less. You should design your hammer with a minimum 1:10 head-to-anvil ratio. Since I had a 400-pound anvil, I built a 40-pound head. If all you can find is a 200-pound hunk of steel for your anvil, you should stick to a 20-pound head or so. Design your hammer around your anvil, as the anvil is the hardest part to find. Alternatively, find the weight you need for the anvil and use the tire hammer plans.
Another consideration is the base for your hammer. I’d recommend the thickest steel plate you can find, mounted on the firmest foundation you can muster. If I could have built on 1-inch plate and bolted it to a 24-inch-deep concrete pad set into a concrete shop floor, I’d have done it. I had to make do with what I could find in my “free” scrapyard, and deal with the limitations of my shop setting.
Power Hammer Center Post
For any hammer you need a center post. The post should be heavy enough to withstand the extreme forces involved in rocking a spring arm or linkage with a heavy hammer on one end. I used a piece of 4-inch tubing with half-inch walls. Others have used thinner-walled but larger cross-section square or rectangular tubing, heavy walled pipe or sections of I beam. The tire hammer plans call for a 6-foot-long piece of quarter-inch wall and 5-inch square tubing.
Final Cut
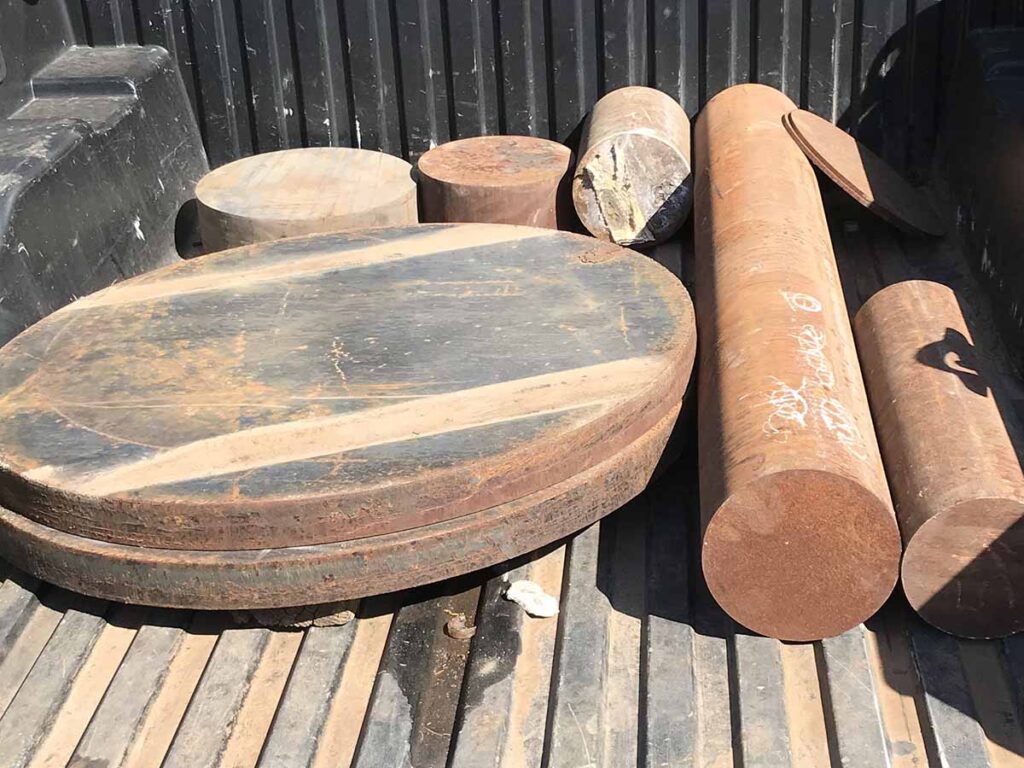
Another consideration is the base for your hammer. The author scored some 2-inch-thick, 30-inch-round, 300-pound base plates out of the “drop” pile at a local steel distributor, along with several other potential anvils.
My power hammer has become an essential tool in my shop, to the point that I sometimes wonder how I ever lived without it. I have only begun to explore its full potential. I built it for my appearance on Forged in Fire, where I was fortunate to make the final. I was able to come home and use my hammer to build my final edged piece for FIF. I lost the contest but ultimately still have a power hammer, and I can still take pride in the fact I built it myself from little more than a pile of junk.
It may take you a few months to gather all the primary parts, or you may get lucky and find them all in one place. Next month’s article will focus on building considerations for a spring helve hammer, and later we’ll discuss the Clay Spencer DIY tire hammer.
The award-winning knifemaker and designer passed at 82 after a life filled with adventure and craftsmanship.
Award-winning knifemaker and knife designer Grant Hawk of Hawk Knives passed away peacefully at his Idaho City, Idaho, residence on November 8. He was 82.
Born in Boise, Idaho, on Feb. 15, 1941, to Woodrow Allen “Kelly” Stroud and Dortha Bunce, Grant’s life was a remarkable journey of adventure, resilience and creativity. His early years were spent as a cowboy in Boise, where his connection with the outdoors and love for craftsmanship began. The 1960s saw Grant moving to California to make camper trailers, but he quickly became entangled in the revolutionary spirit of the era, leading to a brush with the law. This encounter prompted a pivotal decision in his life: to adopt a new identity and retreat to the Idaho mountains.
In his seclusion, living in a teepee, Grant’s interest in gold prospecting blossomed. This pursuit marked his gradual reintegration into society and laid the groundwork for his future endeavors. It was during this period of reflection and growth that he discovered his true calling in knifemaking.
Alongside his son, Gavin, Grant embarked on a remarkable journey in the world of craftsmanship. Together they forged a path in knifemaking, combining adventurous spirit with Grant’s innate skill and creativity. Their collaboration led to the creation of distinctive and innovative knife designs, earning acclaim in the knifemaking community.
His final accomplishment was completing his autobiography, which he delivered to the printer just two days before his passing. On the night of his death, he was in good spirits and feeling well, but unexpectedly fell ill and passed away gracefully within 15 minutes.
Grant’s life was a tapestry of diverse experiences, from cowboy to gold prospector, and finally to a revered knifemaker. His legacy lives on through his son Gavin and their shared creations, which continue to inspire and captivate knife enthusiasts around the world.
Grant’s story is a testament to the power of resilience, adaptation and the pursuit of passion. His memory will be cherished by his family, friends, and all who knew him as a man who carved his path, much like the knives he so skillfully crafted.
I think almost every smith wishes at some point he or she had a power hammer.
It’s loud, powerful and moves metal quickly. It’s also the key to improving the production speed of forging and making damascus steel, and speed without sacrificing quality quickly translates into increased revenue and more fun.
It’s under such conditions that the smith turns to the Internet and begins to look for a hammer. Quickly he or she discovers several things.
First are stories of people who got incredible deals on a hammer stored in a barn somewhere. These are like hunting stories of novices killing giant whitetail bucks, or fishing stories of a kid catching a 12-pound largemouth bass. The stories are true but it’s not likely to happen to you that way. If you’re one of the lucky ones who find a running Little Giant 50-pound power hammer for $200 at a garage sale, I don’t like you and I don’t want to hear your story. LOL!
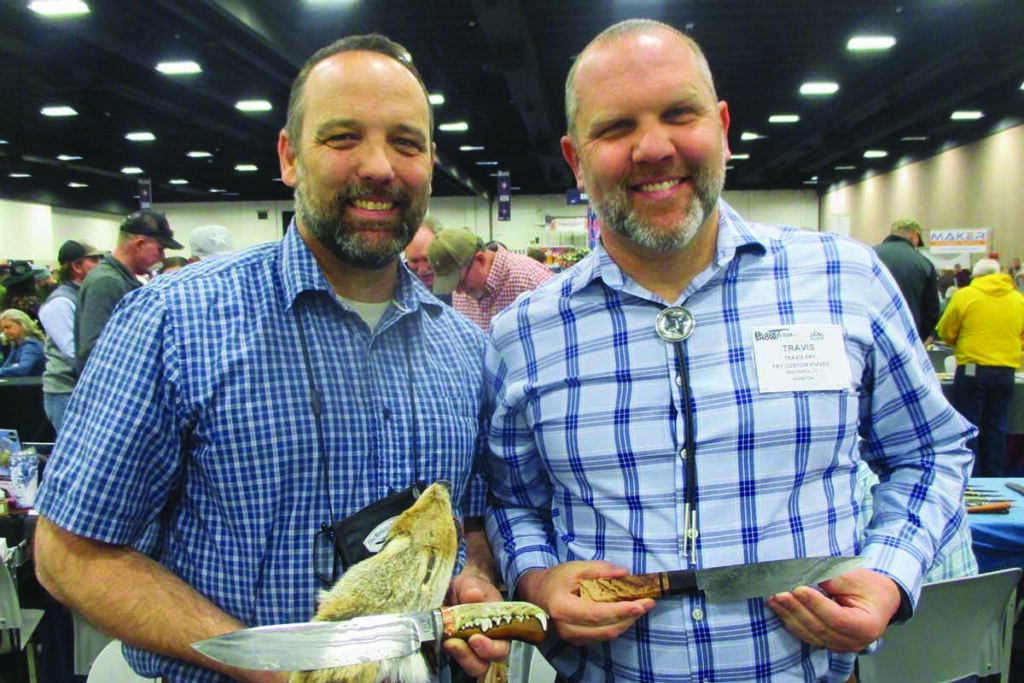
According to the author—at left with his brother/fellow maker Travis Fry at BLADE Show Texas—a good power hammer improves forging production speed without sacrificing quality. His sub-hilt fighter features “Trashcan” canister damascus. (SharpByCoop knife image)
The next thing the smith discovers is there are running hammers to be had in the world, and they’re expensive. Along with just about everything else, the prices of hammers have increased the past few years. The odds of finding a working used hammer in your area are slim, even if you are willing to pay retail.
Whether you’re looking at the new production hammers or rebuilt old ones the price tag is steep, sometimes even $5,000 or $10,000. That’s a lot of knives and for many folks, there’s no way to justify the cost. On the other hand, if you can swing it, there are many high-quality production hammers on the market that will serve you well.
Meanwhile, desperate for a tool that seems just out of reach, the smith turns again to the Internet and searches “how to build a power hammer.”
This 50-pound Little Giant was manufactured in 1917 and is a clean-running example of what’s available on the used hammer market. (James Rodriguez image)
My D.I.Y. Power Hammer
I competed on the History Channel’s Forged in Fire in May 2018 (season five, episode 26, Qinglong Ji). I thought about several ways to prepare for the show.
One was to practice various smithing techniques. I forged quite a few blades and practiced my forge welding. Another way to prepare is to work on equipment. I built a new forge out of castable refractory suitable for forge welding. I also decided to build a power hammer.
I figured that if I made the final round on the show, I’d sure like to have a power hammer to use in the final build. If I were eliminated in the first two rounds I’d be disappointed, but in the end, I’d still have a tool that few smiths get to have.
Consequently, I spent five weekends in April and May building a spring helve power hammer, a style often called an Appalachian or Rusty hammer. Because I had a friend with an epic scrapyard, I was able to build the hammer for under $250. I did end up trading a few knives to my friend for the metal as well.
I spent about 50 hours of work building my hammer over the course of a month. I could have built roughly $2,000 worth of knives during that time, maybe more. Between the time I spent and the knives I traded, I estimate I have roughly $3,500 in my hammer. For that price, I could have purchased a running and functional hammer. The reason for me to take the DIY path was cash outlay—I had more time than money.
D.I.Y. Power Hammer Considerations
I believe strongly that in order to successfully build a power hammer, you need several things.
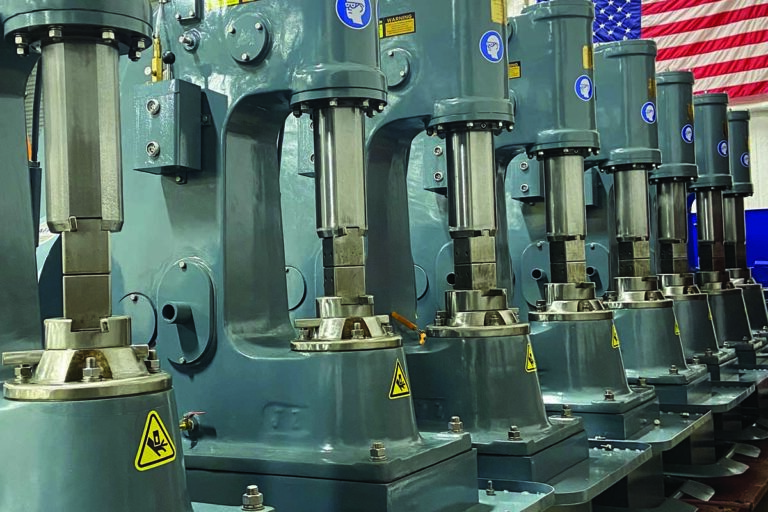
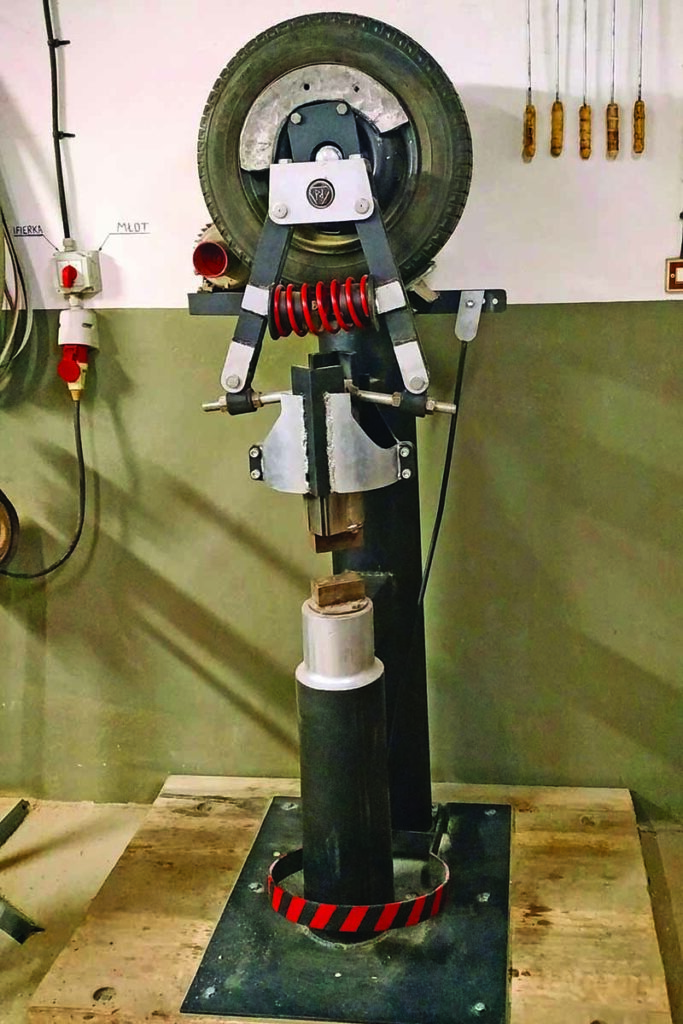
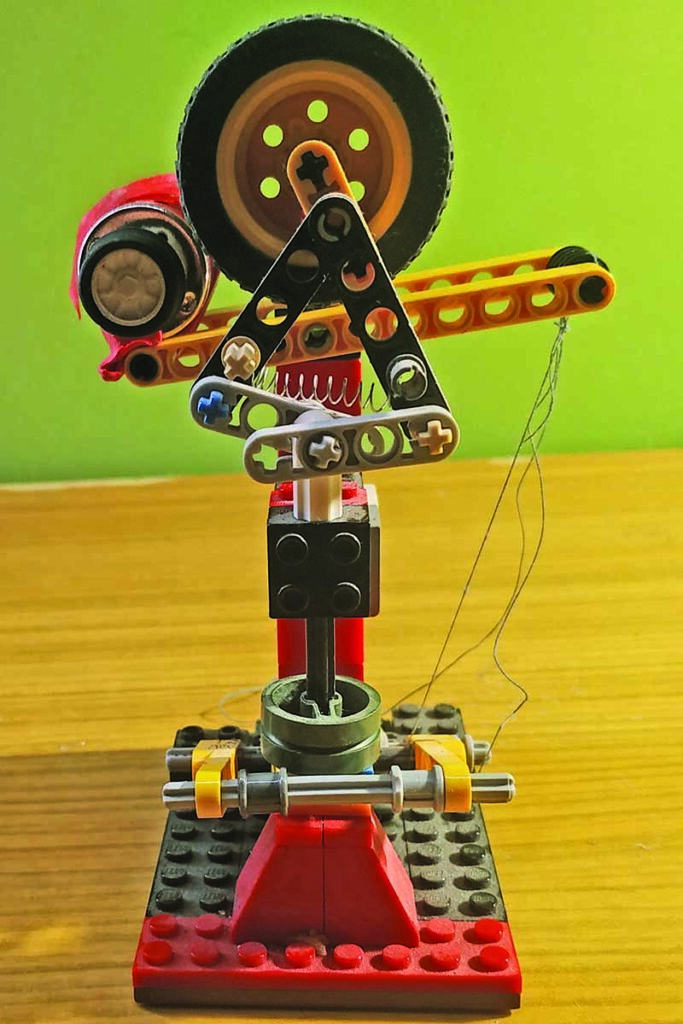
Poland’s Piotr Delega, who goes by SteelCraft on YouTube, built his own hammer. He’s a great fabricator with engineering skills and a completely stocked machine shop. He started with a fully functioning LEGO model, created a 3D software model, and then built this fine functioning hammer.
Mechanical Inclination
The first is to be mechanically inclined. Building a hammer from scrap is exactly like building a racecar from a tub of LEGOs, and nothing at all like building the same from a boxed LEGO set. In a set, there are step-by-step instructions with pictures and perfectly shaped pieces that fit together. If you build a hammer from scrap, there are no plans, instructions or pictures. You’ll have to sort through materials looking for a piece that fits or that will serve the purpose you need, just like when you dig through the LEGO tub looking for four matching wheels.
If you don’t have the necessary experience in mechanical design and fabrication, if you can’t visualize and then build, if you can’t anticipate future problems before you weld everything together, you may be better with a tire hammer or purchasing a complete hammer.
Welding Ability
Second, you need to be able to weld, and you need a welding machine with high enough amperage to weld thick steel. An import 110v wire feed doesn’t have the power to weld the sizes of steel that you’ll need to build a hammer. I used a 220v 180-amp class wire feed, and it was underpowered for some of the heaviest welds on my hammer, requiring multiple passes to get adequate penetration. It’s not what I’d recommend, but it’s what I had.
Regarding your welding method, stick or MIG or flux core wire feed is up to you, as all can do the job if the machine is powerful enough and you have the skills. SPECIAL NOTE: If you don’t have confidence you can weld steel well enough for the weld to hold up under extreme stresses, then you should buy a hammer.
This is the fully operational LEGO toy power hammer made by Piotr Delega. He built a 3D software model based on it and used the model as the game plan from which to construct the full-size functioning hammer shown above.
The Right Shop
Next, you’re thinking of building a machine that is loud and heavy. If you work out of a one-car garage or live in an apartment, it just won’t work. If you are a member of a homeowner’s association (HOA) or live in a city with zealous code enforcement officers, good luck.
If you have employees and need OSHA approval or insurance for your shop, you should buy a hammer instead of trying to make one. If you have touchy neighbors who already don’t like the fact that you forge in the backyard because they’re irritated by your two-hour hand-hammer-and-anvil sessions on Saturday afternoons, good luck. I’m fortunate enough to have neighbors who think my hobby is cool, a city with weak code enforcement, and I have a shop in my backyard.
With a proper base plate and a heavy anvil, you’re building a tool that could easily weigh 1,500 pounds. If you work in sales, oilfield, church or some other vocation where you move every few years, you need to think about how you’re going to move your hammer should the need arise. I built mine with several bolt-together joints so I can break it down into parts of a few hundred pounds each that can be lifted with an engine hoist.
Materials Source
Finally, a good source of scrap metal is a must if you want to build your hammer economically. If you have to go buy steel at retail, you’ll end up spending as much as a new hammer costs. If you can score your steel for cheap to free, you’re good to build.
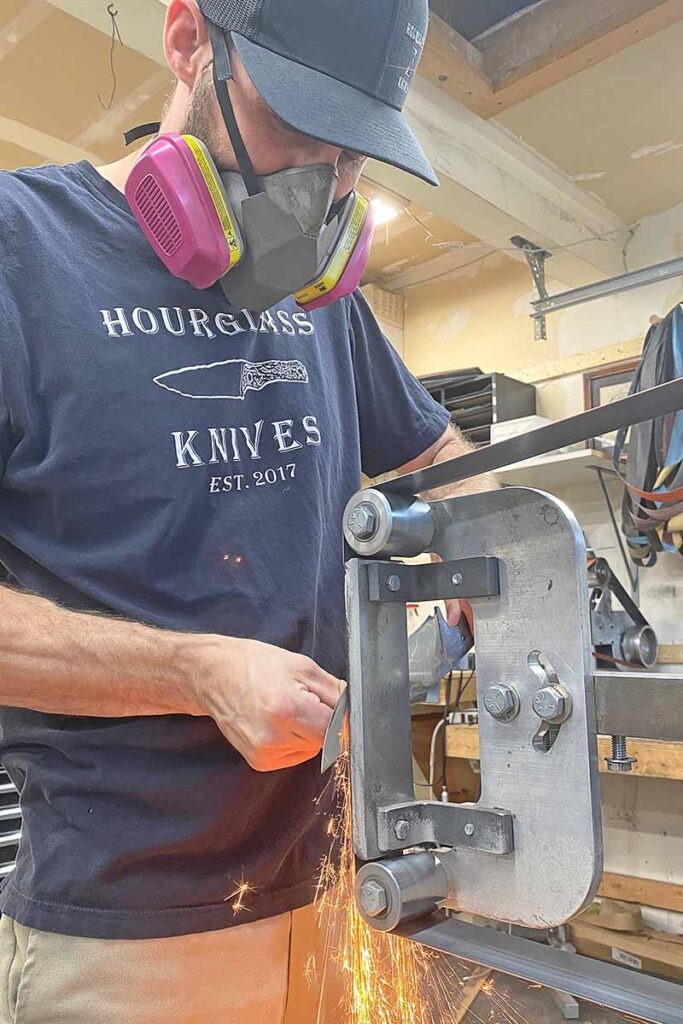
Tony Cetani has left his mark in the kitchen knife niche grinding it out at Hourglass Knives.
When asked why he makes knives, Anthony “Tony” Cetani of Hourglass Knives grinned and states, “It’s cheaper to make them than buy them.” It was while recovering from knee surgery that he got the idea to make one. “After weeks of reading forums and watching YouTube videos I bought a single-burner forge, a 4×36-inch belt sander, a set of files, a hacksaw and a bar of 1084, and in March 2017 made my first knife,” he recalls.
Tony Cetani specializes in such kitchen knives as his Honesuki. It features a 9-inch blade of Riptide cu-mai copper damascus from Baker Forge & Tool and an amboyna burl handle with cu-mai pins and liners. (Baker Forge & Tool knife image)
“It took me a few years to figure out what my niche in the knife world was going to be,” Cetani continues. “With so many amazing makers and designs I wanted to try and set myself apart. In late 2020 I made my first kitchen knife and fell in love. I started with some traditional Japanese styles and put my own spin on them. I love a knife where everything flows together and there are no straight lines in the profile. Though I love making all types of knives, kitchen knives have become a huge part of what sets Hourglass Knives apart.”
In seven short years, Tony has made his mark in the custom knife realm.
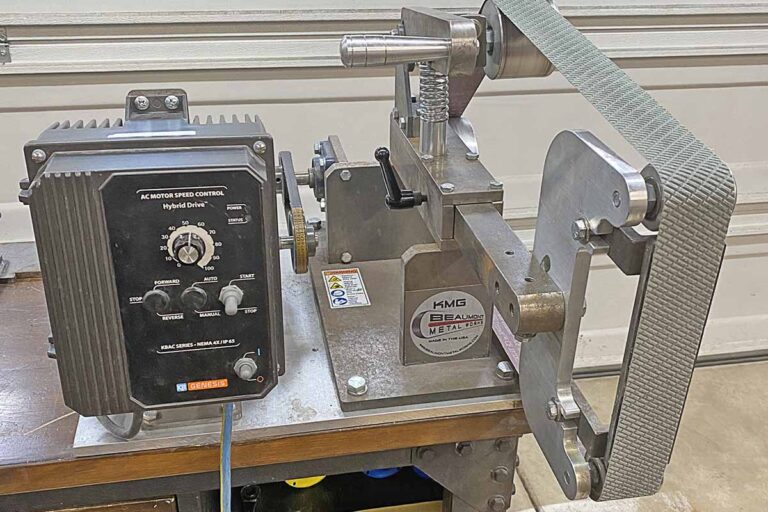
“My grinders are my most-used machines in the shop,” he offers. “Whether I’m grinding bevels, contouring handles, getting in tight corners with my small wheels, sharpening a pencil, or chasing scratches on a finished blade that I end up ruining, I use my KMG grinders for everything. Both of these machines have been invaluable to me. Having 1.5-inch tooling-arm slots gives me a ton of different options for attachments and fixtures. Switching belts is quick and easy with no tracking issues. Beaumont makes a tough and very reliable machine.”
From grinding bevels to chasing scratches on a finished blade or what have you, Tony uses his KMG grinders for most everything. This is his classic variable speed model. (In his rush to have the picture taken of him grinding for the story, Tony forgot to don his safety glasses.)
Cetani lauds his Foredom SR flexible shaft rotary tool. “There’s a few rotary tools out there I’ve tried but the Foredom has been my favorite. It has tons of different attachments, bits, accessories and the hand pieces can fit most rotary tool bits,” he explains. “The Foredom has given me the ability to do fine detail work on plunge lines, spines, tangs and the like that no other tool can. This rotary tool has helped my finish work immensely.”
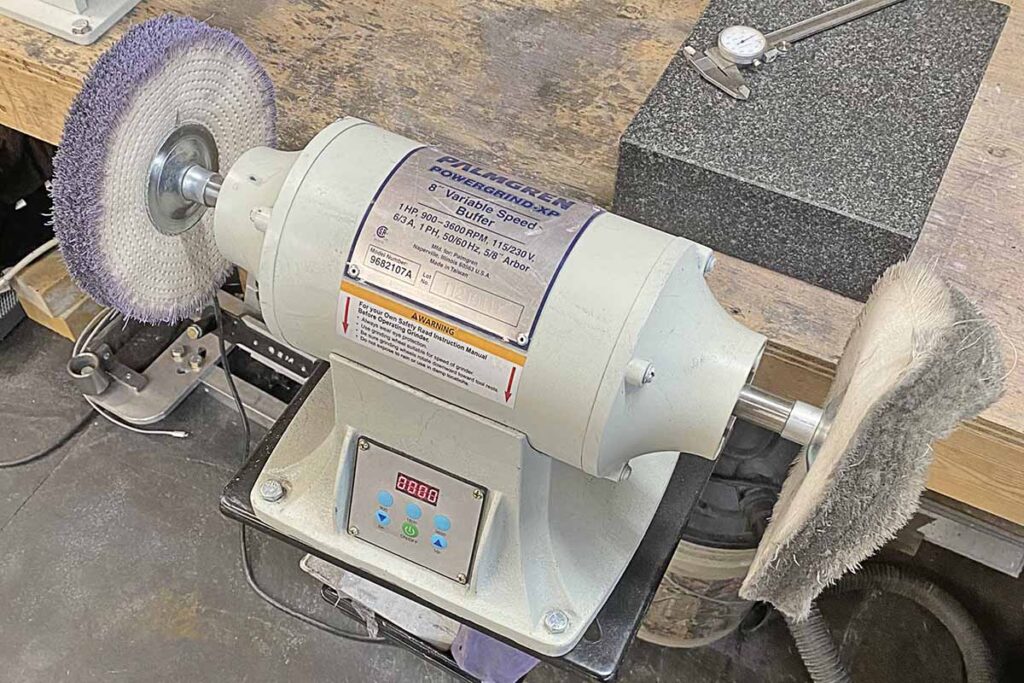
For his exquisite knife grips, Tony shares his key to success. “The Palmgren Powergrind-XP 8-inch, 1-horsepower, variable-speed buffer has changed my handle game. For years I ran a 3600-rpm buffer and was really happy with my results,” he reports. “I only use buffing compound when finishing my handles, and the change I saw after using the Palmgren variable speed buffer was phenomenal. Starting at 3600 and being able to drop it down slowly to 900 rpm really helps bring the most out of the wood. Being able to adjust speeds when buffing oxides off or polishing steels has been huge as well. The variable speed buffer is the one tool I wish I would have bought early on in knifemaking.”
The Palmgren Powergrind-XP 8-inch, 1-horsepower, variable-speed buffer has changed Cetani’s handle game. “I only use buffing compound when finishing my handles,” he notes, “and the change I saw after using the Palmgren variable speed buffer was phenomenal.”
For sanding Cetani uses a Edward Braun hand-sanding fixture. “I always disliked hand sanding because of the amount of times I stabbed and/or cut myself. When I first saw Edward Braun had a few hand-sanding fixtures for sale,” he recalls, “I knew I needed one. The fixture makes it fast and easy to secure your knife and start hand sanding. Adjusting the clamp is quick and allows for multiple holds for the specific knife you are working on. Since buying one I still don’t like hand sanding but I haven’t hurt myself!”
These beauties look as good to the eye as they feel in the hand.
Synthetics have made great strides in knife handles and rightfully so. They can be tough, ergonomic and attractive. But there’s something about the innate beauty and warm feel of natural handle materials that synthetics, try as they will, probably will never duplicate—not that they won’t keep trying.
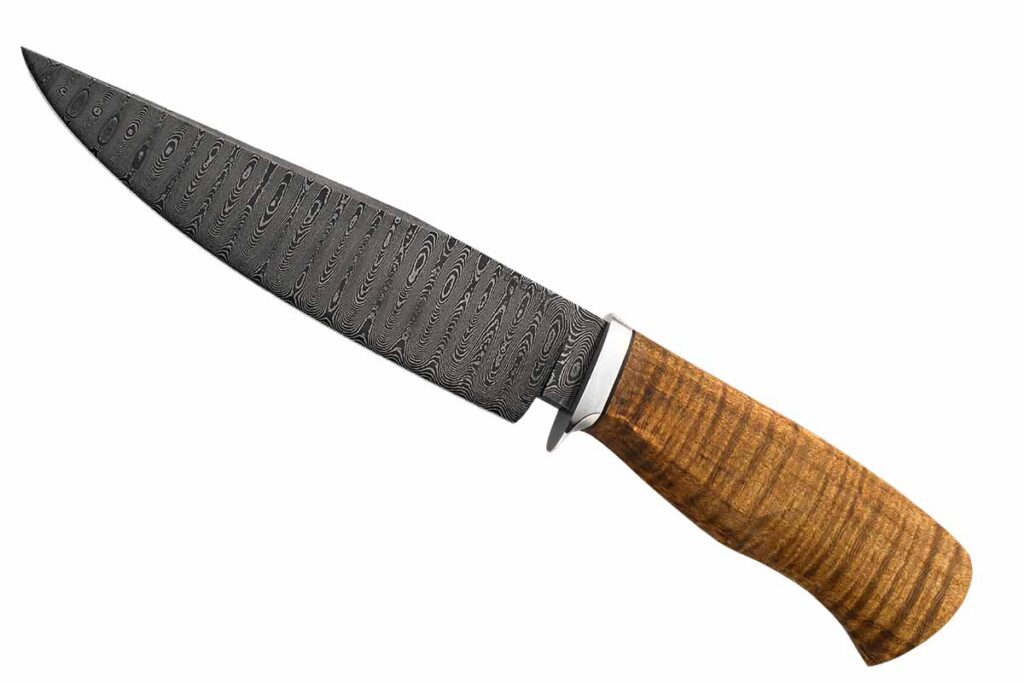
Michael Deibert: Curly Maple
A curly maple handle on the steering end of a 6-inch ladder-pattern damascus blade gives ABS journeyman smith Michael Deibert’s hunter a rich natural look. The guard is stainless steel. (Jocelyn Frasier image)
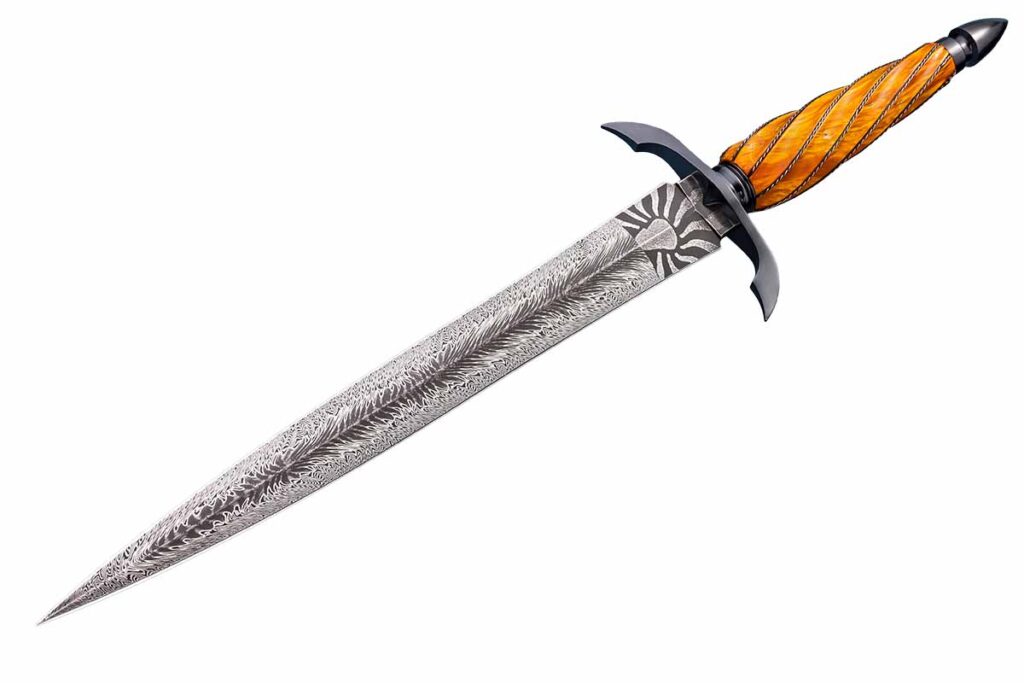
Denis Tyrell: Maple Burl
A maple burl handle fluted and wire wrapped and a 10-inch blade of spectacular Ocean Sunset damascus forged in a collaboration with Rick Hall top off Denis Tyrell’s dagger. Overall length: 16 inches. (SharpByCoop image)
Anthony Stovall: Sambar Stag
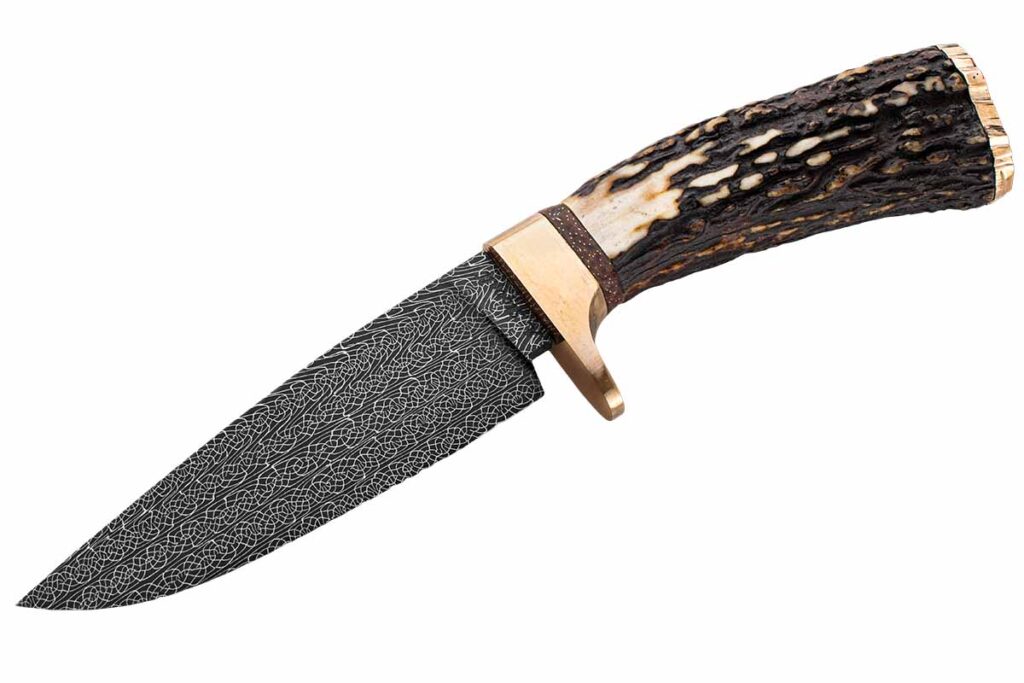
Anthony Stovall opts for a Sambar stag handle and a bronze guard and buttcap for his hunter in a blade of Robert Eggerling damascus. Overall length: 9 inches. (Jocelyn Frasier image)
Scott Gallagher: Biggs Jasper
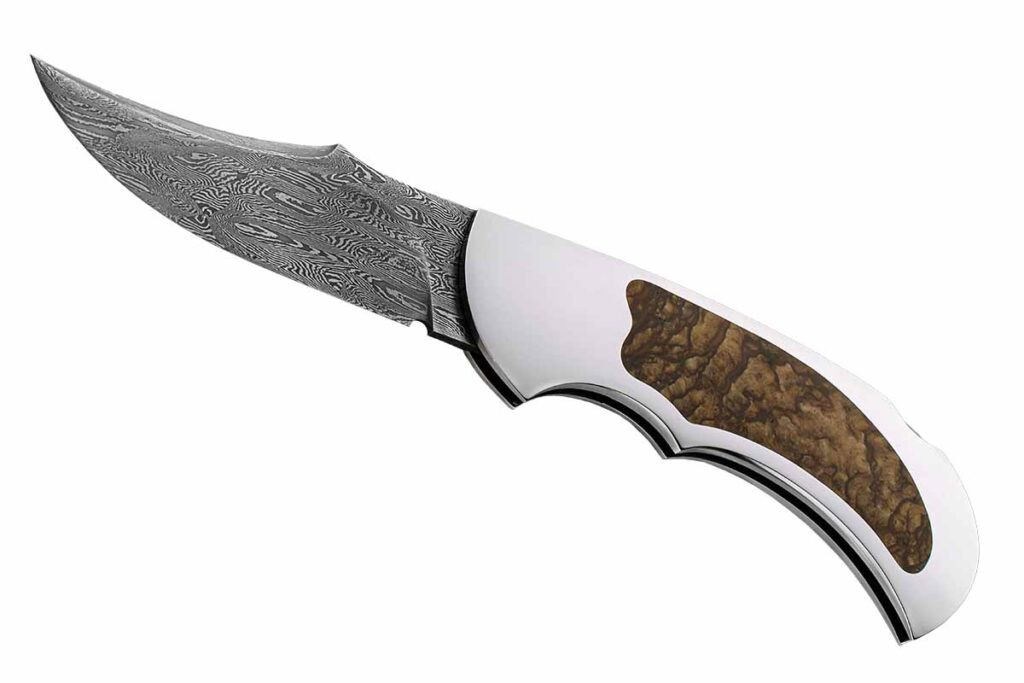
ABS master smith Scott Gallagher goes what for him is a different route with the Escalante, a lockback folder in a mirror-polished frame of 416 stainless steel and inlay of Biggs jasper stone. Blade and closed lengths: 3 and 4.5 inches. (Jocelyn Frasier image)
Frank Edwards: Mother-Of-Pearl
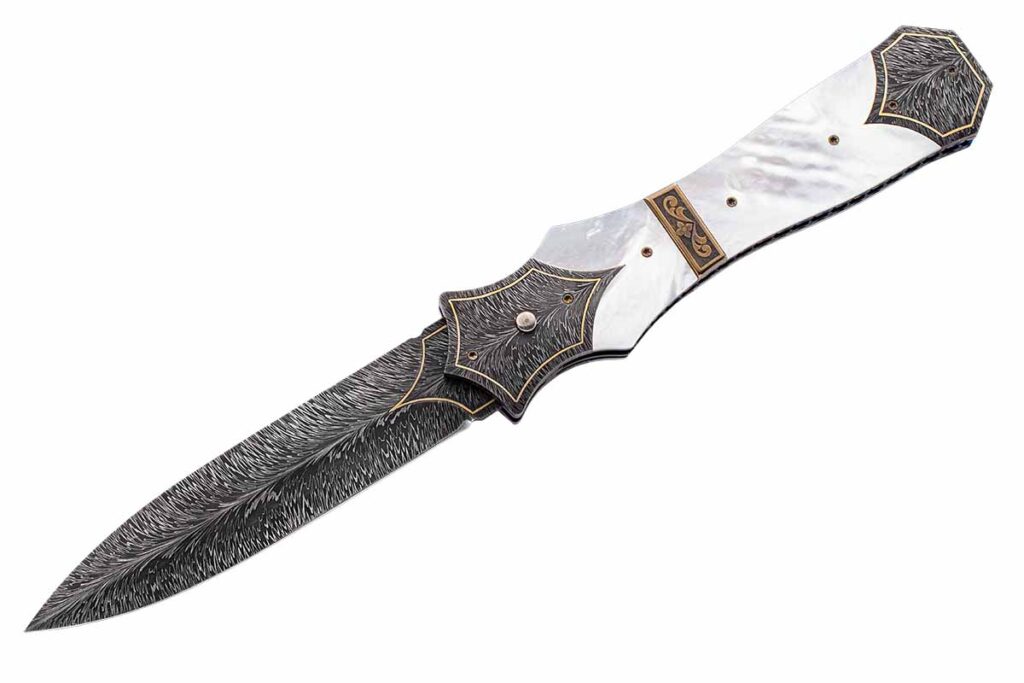
A handle of mother-of-pearl with 24k-gold borders and nitro-blued liners and a 4-inch blade of feather damascus highlight an automatic folding dagger by Frank Edwards. Closed length: 5 inches. (Jocelyn Frasier image)
Jim Perkins: Stabilized Maple
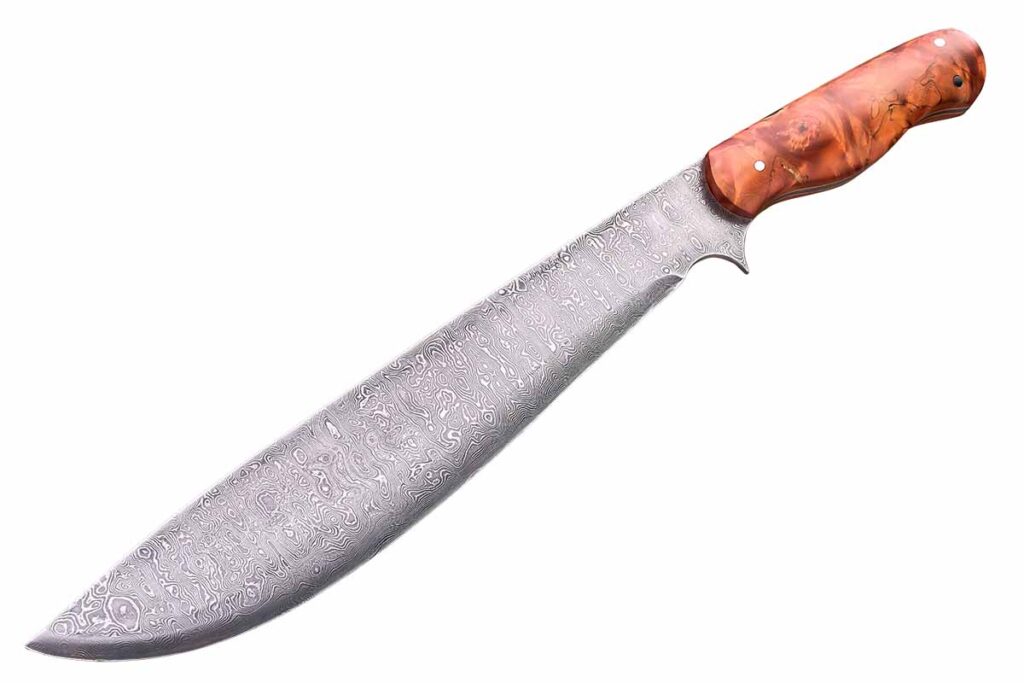
An orange stabilized maple handle and a 9-inch blade of a damascus of 272 layers of 1095 carbon and 15N20 nickel-alloy steels complete a Filipino barong by Jim Perkins based on one his wife used as a child. Overall length: 13.5 inches. Blade grind: convex. (SharpByCoop image)
Casey Vilensky: Koa Wood & Mammoth Tooth
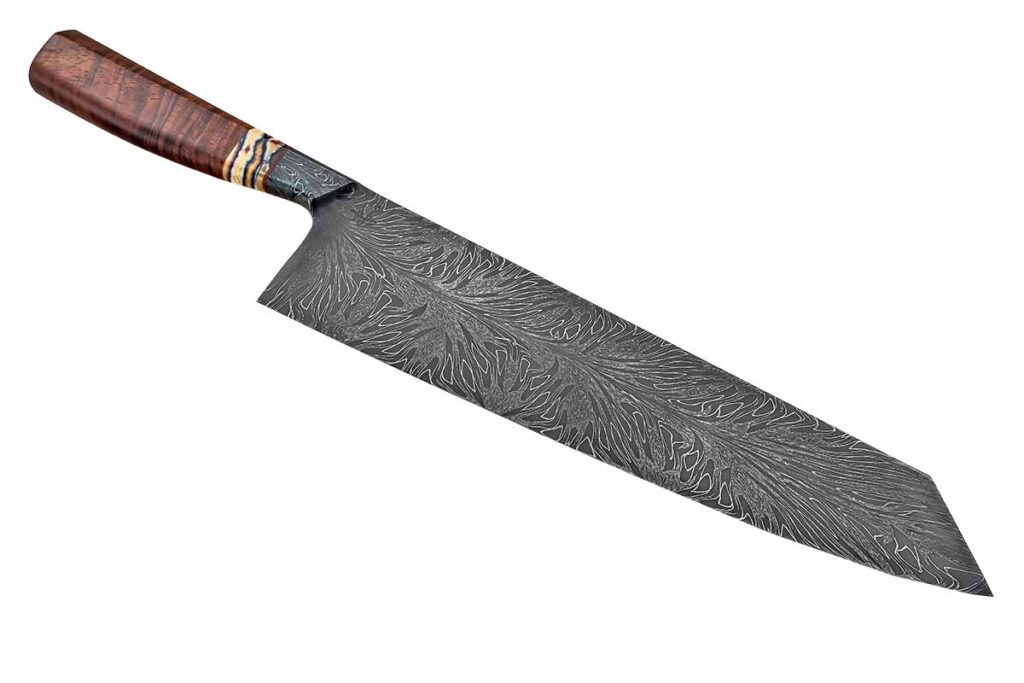
Koa wood and a mammoth tooth bolster complete the handle of Casey Vilensky’s gyuto. The 12.5-inch blade is carbon damascus. Casey’s list price for a similar knife: $4,000. (SharpByCoop image)
Learn what the latest BLADE Show custom knife award is all about.
Some people are familiar with “Mack Daddy,” the 1992 Sir Mix-a-lot album with the smash hit “Baby Got Back.” On the other end of the cultural spectrum is the Mack truck, the reliable American long-haul vehicle revered by truckers and country songs. Knife enthusiasts may also be familiar with the Bobby Darin’s classic Mack the Knife: “O the shark, babe, has such teeth, dear …” Just now coming into the knife culture is the idea of a “M.A.C.K” knife, which stands for “machine assisted custom knife.”
Custom, Production And M.A.CKnives
Savvy BLADE® readers know the difference between a “custom” and a “production” knife. A custom knife is made by a craftsman using a combination of skill, experience and tools. The maker grinds the blade, polishes it, installs a handle and fittings, and so forth. Custom knives are often made one at a time or in small batches. Sometimes portions of the process are outsourced, such as waterjetting blade profiles or using a professional heat treater. In general, the maker’s name is prominently featured on the blade, such as Tom Overeynder, Gary Langley, etc. The price of custom knives can be quite high, particularly as the complexity of the knife and the magnitude of the maker’s reputation increases.
By contrast, a production knife is made in bulk using modern or traditional manufacturing techniques. Blades are made by the hundreds or thousands, ground and polished by machines, and assembled in a factory or large production shop. In general, the name of the company is prominently featured, like Case, Benchmade, White River Knife & Tool, etc. Sometimes a production knife will feature the name of the designer, such as the various CRKT production knives that have BLADE Magazine Cutlery Hall-Of-Fame® member Ken Onion’s name. Production knives may be expensive but are generally more affordable than custom knives of similar materials and construction.
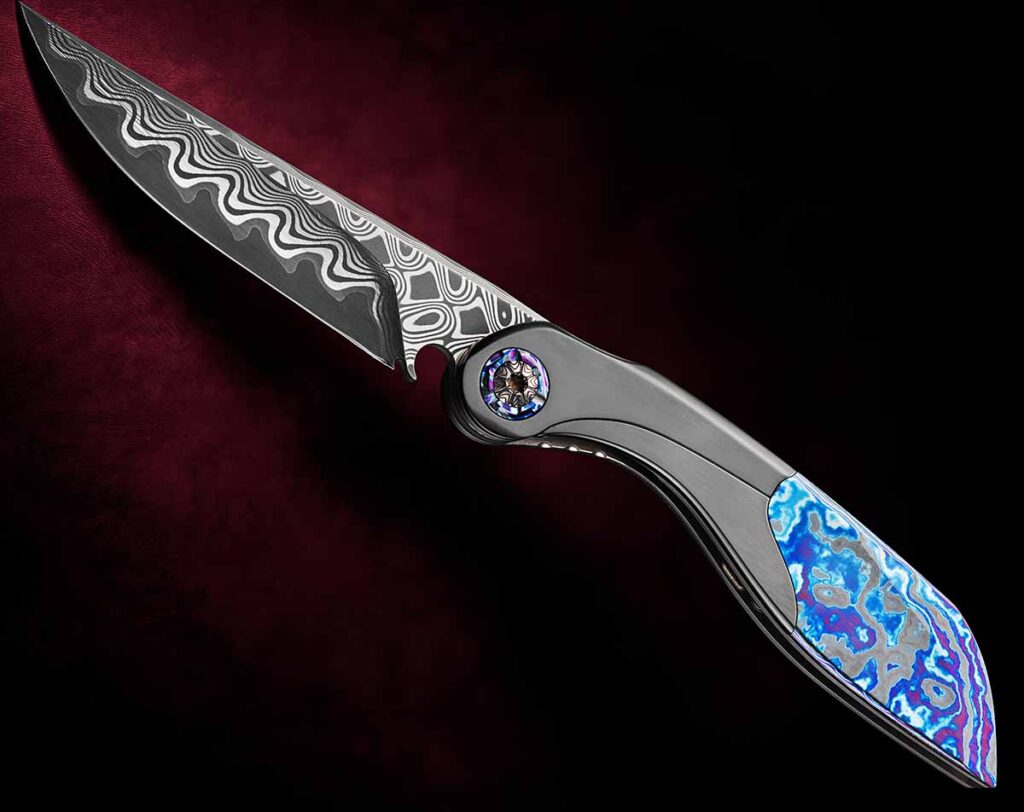
Princeton Wong has a five-axis waterjet in his machine shop, so he makes everything but the screws. An example of his work is this award-winning knife from the 2021 International Custom Cutlery Exposition, now known as BLADE Show Texas. (Caleb Royer image)
In between custom and production is a vast world described by the umbrella term mid-tech. It describes knives that use both production and custom techniques or methods in varying proportions. Some would say that any knife that has production techniques like waterjet is a mid-tech, while others would argue that as long as a person does the final assembly and fit up, a knife can be called a custom.
It takes talent, practice, education and skill to make a knife by hand. Many makers of such knives have no problem with using machines like a band saw, 2×72 belt grinder, manual mill or pantograph. At some level, almost every modern handmade, aka custom, knife is “machine assisted.” At the same time, the industry recognizes that when it’s primarily the maker’s dexterity and artistic vision that makes the knife, the label of custom or even “handmade” applies.
It also takes talent, practice, education and skill to program a series of CNC (Computer Numerically Controlled) waterjets, grinders and mills to make a knife by machine. Custom guys often make “polished turds” and “boat anchors” at the beginning. Beginner machine guys break tooling and crash expensive machines. In neither case does a person wake up one Tuesday and immediately become a competent knifemaker.
Think about the amount of variability in custom/handmade knifemaking. Each steel, each belt, each grinder speed, each brand of sandpaper, and every variable changes the process. If you heat treat your own steel, you must master temperature control, soak time, quench speed, decarb, warpage and tempering, and must use a different formula for each steel. After dealing with all that, is making a knife by machine any easier?
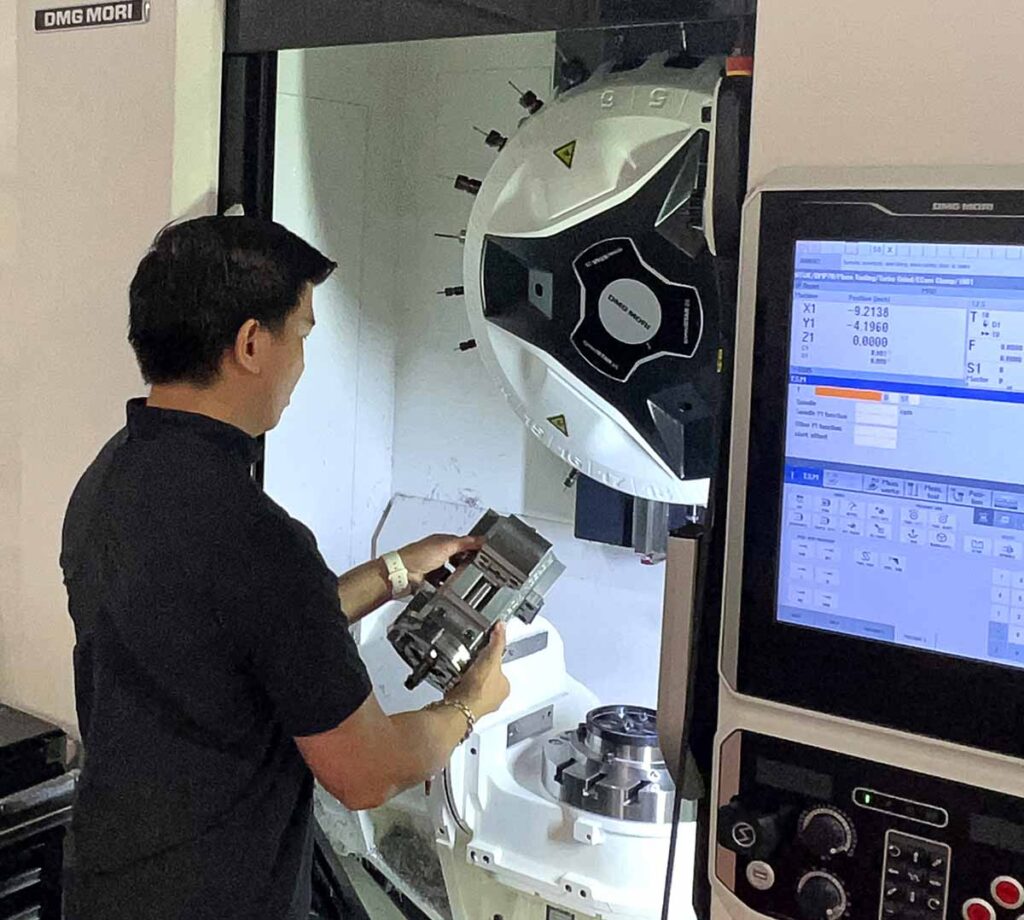
Princeton Wong operates the CNC mill. It can cut complex 3D shapes in metal and handle material.
Not according to M.A.C.K. knifemaker Princeton Wong. In CNC you deal with the geometry and composition of various cutting tools, plus the speeds and feeds at which you apply them. You must figure out fixturing to hold your workpiece, and how to work the tool in a way that leaves the desired surface finish. “It’s the same idea as using different belts or different files for each task,” Princeton explains, “but the variables are infinitely more complex. And then on top of that, you still have to learn and master all of the different hand-finishing techniques.”
So how does the knife industry show respect to the skills and talent of the makers who artfully combine programming with handwork? How do you showcase the ability of a maker who can run both a HAAS CNC mill and a belt grinder?
Defining M.A.C.K. Knives
BLADE Show 2023 included for the first time an award category for M.A.C.K. knives. According to the category rules:
The knife must be of the folding/locking, non-slip-joint, EDC variety that is first and foremost a cutting tool. It must be functional, beautiful and have great ergonomics, yet still have practical applications and uses. It must consist of both at least one handmade feature—such as hand-ground blades, hand-contoured scales, manually machined parts, etc.—and of automated features such as waterjet-cut liners/scales, CNC’d handles, etc. The judges will assume that the knife’s parts that are not handmade are made through a machine-aided process.
What background education and experience does it take to make a quality M.A.C.K. knife? Just like with any other skill set, the path is quite diverse. Take Princeton for example. Knifemaking for him growing up was a passion.
“As an Asian kid into martial arts, I’ve always had a love for bladed implements,” he notes.
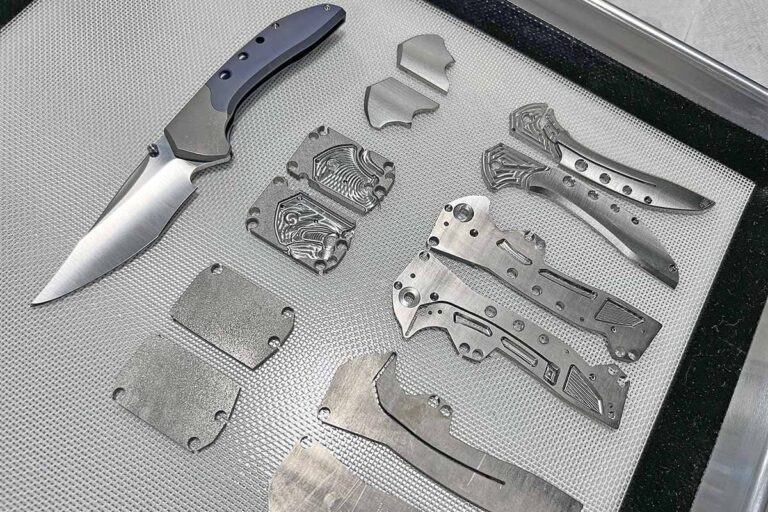
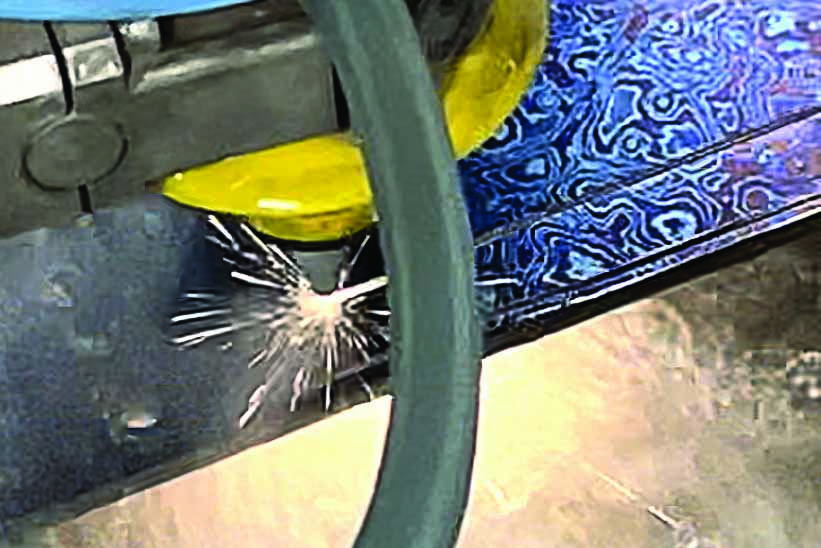
A waterjet machine uses a high-pressure stream of water and abrasives to cut profiles in flat stock. Princeton Wong uses his waterjet here to cut Timascus™ for folder handles.
He bought a Sherline mill after high school that had been converted to CNC, and learned by trial and error from there.
“After years of fiddling with stuff, breaking endmills and crappy software, I finally started figuring it out,” he observes. But for Princeton, learning wasn’t all trial and error. He studied mechanical engineering and graphic design in college. He had jobs in print, web, graphics and fabrication. Eventually, he started his own machine shop serving automotive and architectural clients. In 2018 he decided to use his machining skills to make knives.
“I didn’t know the knife industry or knife people but had a machine shop, so I gave it a shot,” he recalls. “I didn’t own a ‘real’ belt grinder until I was two years into making knives. I had a 4×36 from Lowe’s but was able to do very close work on the CNCs. By focusing on an intentionally machined look, I was able to get by.”
Princeton has a five-axis waterjet in his machine shop, so he makes “everything but the screws.” Earlier in his progress, he would bandsaw blanks and then fixture them in his CNC mill.
“I never had a need to outsource, but most people don’t have 70 amps of 480-volt three-phase electricity to run a $100,000 waterjet,” he says.
A waterjet cuts steel and other plates into shapes, “but it doesn’t make knives.” It’s a highly efficient profile-cutting tool.
Bridging The Gap Between Custom And Production
Most people don’t take Wong’s path and start out as fully equipped and capable machinists when they begin making knives.
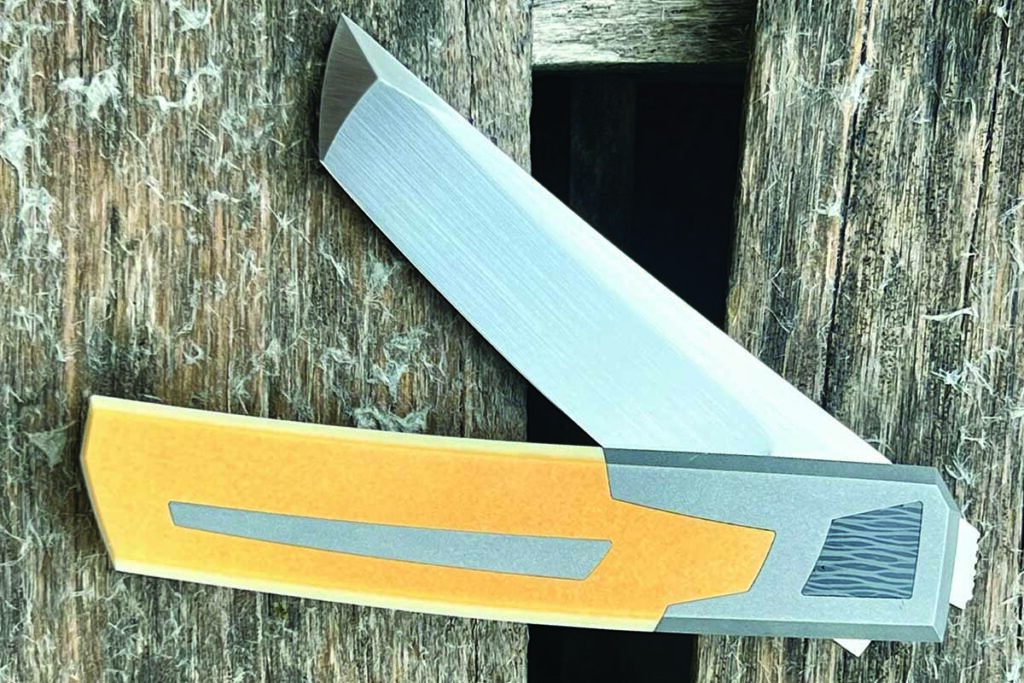
Consider the precise fitting and complex geometry of the joints on Jared Oeser’s “Tachi” folder. Integral bolsters and Westinghouse Micarta® come together quite well.
M.A.C.K. knifemaker Jared Oeser started like many makers, with a mentor, a few tools and a new hobby. As a homebuilder, his business took a hit in the 2011 recession. Faced with spare time, he took up knifemaking. After a few fixed blades he moved fairly quickly into slip joints, merging modern materials into traditional designs at a time when that was a new thing. He continues to push the limits and bridge the gap between traditional designs and the “modern” folding knives.
About five years ago a friend needed a place to store a CNC mill. Oeser agreed to store it in exchange for lessons and use of the machine in the meantime. By the time the friend needed the machine back Oeser was hooked and bought his machine shortly thereafter.
After five years, he considers himself not good enough to make a knife completely on the machine. Coding for CNC is quite a different skill set, far beyond traditional knifemaking.
“I don’t want to go 100 percent machine,” Jared says. “I like the hand work, and I’ve gone about as far as I want toward machine-made. Everybody kind of finds their ‘spot,’ but the key is to disclose it, to say it. Don’t say ‘mine’s handmade’ if you’re afraid to say how you did it. At the end of the day, you’ve got to be good at hand work and have a skill set to make a quality knife.”
Handmade Vs Machine Assisted Knives
So what’s the difference between a “custom/handmade” and a “machine assisted” knife?
Wong suggested that a machine assisted knife should have a bit more precision than the typical custom knife. Because you can machine to exact tolerances and fit, there’s less room for error. He also suggested that the maker should try to push the boundaries of the machine’s capabilities. Just like there are a few knifemaking operations that can only be done by hand, such as Wolfgang Loerchner’s amazing hand-filed creations, there are also machinable features that people wouldn’t realistically try by hand. Creativity isn’t limited to hand tools.
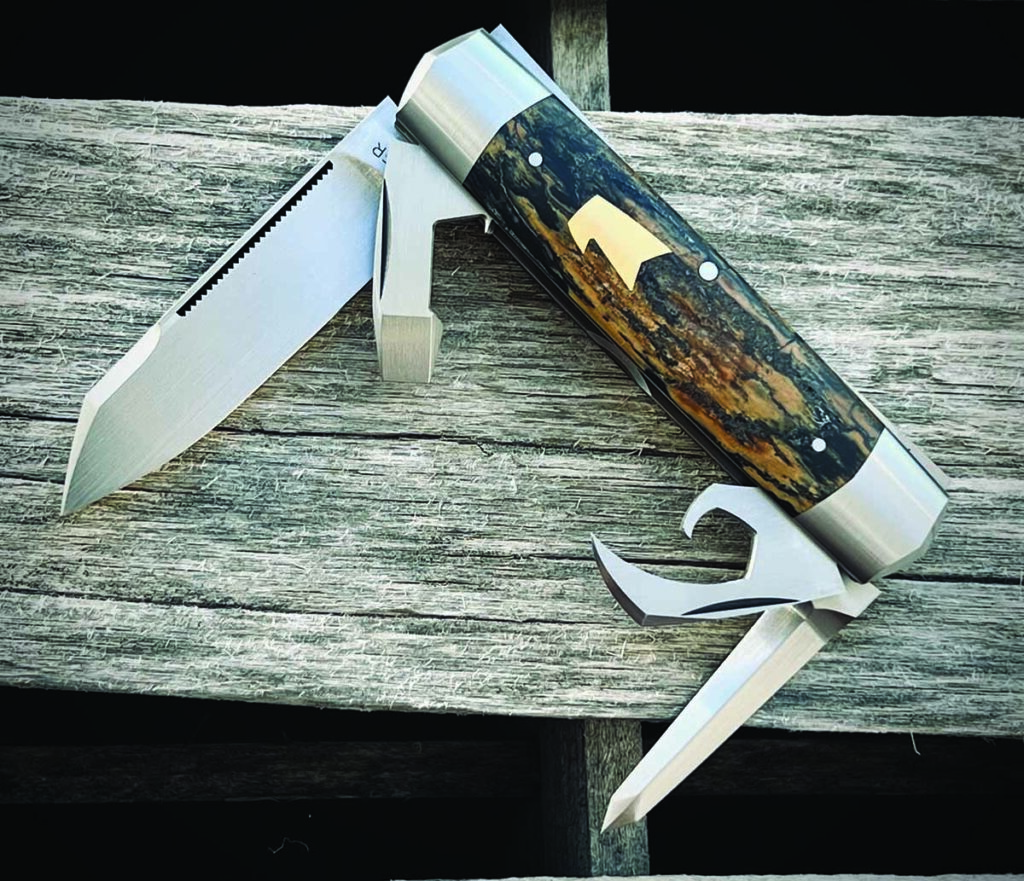
Jared Oeser’s “Eagle” is a four-blade slip joint. This one has mammoth ivory handles and a 14k-gold shield, combining modern techniques with traditional materials.
According to Oeser, “Among the makers and collectors I know, we’re OK with whatever a knife is, as long as you honestly disclose how you built the knife.”
He considers his knives machine assisted. On a slip joint, he uses a HAAS CNC mill to cut out the shapes of the liners, the shield inlay pocket, and to profile the blade and spring. Even though he uses a CNC mill that is squarely in the “machine assisted” category, using it primarily to cut profiles is pretty much the same thing as a waterjet.
Taking The Plunge Into M.A.C.K.
As a mostly one-off knifemaker myself, I was curious what it takes to build a knife that falls squarely into the M.A.C.K. category.
After talking with some M.A.C.K. makers, I found the process seems to typically begin with waterjet cutting. Either the maker has used a waterjet before and has his or her own CAD (Computer Aided Design) files, or the contracted machine shop will have a CAD expert on staff. Experienced CAD folks can work from a drawing or PDF for things as simple as profiles, and may use modeling software for contours and handles.
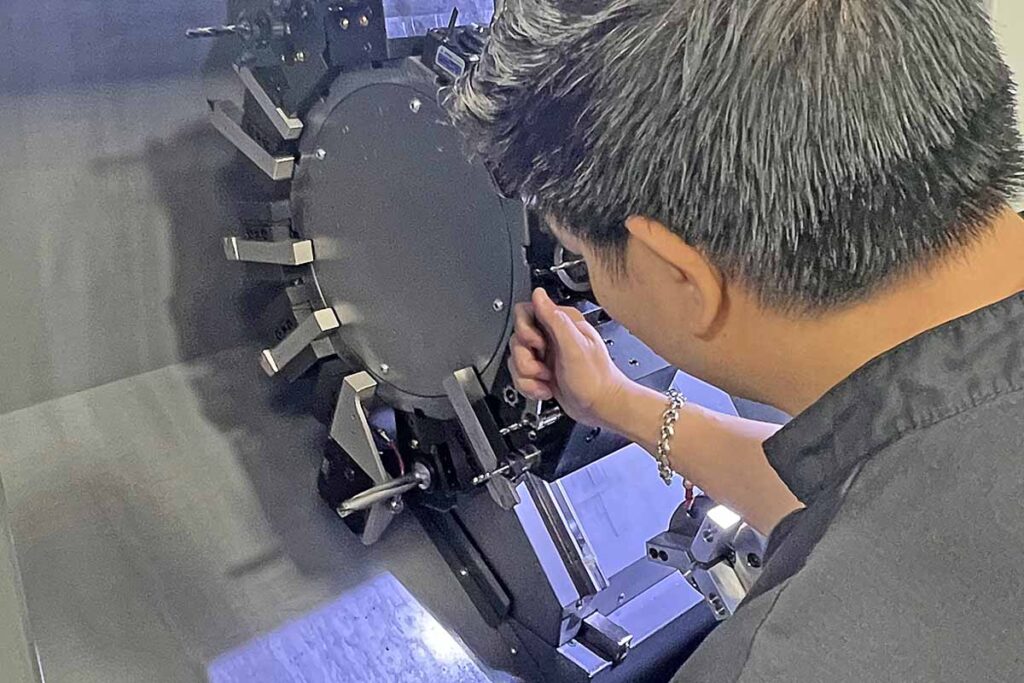
Princeton Wong checks the tooling on a CNC lathe. The lathe cuts precise round stock, such as screws and folder pivots.
Typically the liners are cut and the holes spotted, or are occasionally fully drilled and tapped. Pocket clips and backspacers come pre-cut. Handle profiles and contours are cut with a ball end mill, leaving a fairly clean finish. Sometimes this finish by itself is sufficient, while other times more hand polishing is necessary to achieve the final effect. Blades are typically delivered cut to contour, and the maker often does the bevel grinding by jig or by hand on a traditional belt grinder. Other times the blades come with machined bevels at varying degrees of surface finish. Once again, it’s up to the maker to decide if the machined finish is sufficient or if further hand work is necessary.
If you’ve ever used waterjet or milled parts, you know that the edge finishes are not precise. If you’ve had holes spotted but not drilled, you still have to drill and tap the holes. All in all, even in a knife that comes to you in a bag from a machine shop, there’s more to a cleanly finished M.A.C.K. knife than just assembly. If you want to be a winner in the M.A.C.K. category, you’ve got to have the hand finishing techniques down pat.
If you want a firsthand look at a quality M.A.C.K. knife, check out the applicable tables at a BLADE Show. Whether you prefer the events in Atlanta, Texas or Utah, there’s no doubt that “M.A.C.K. is back in town.”
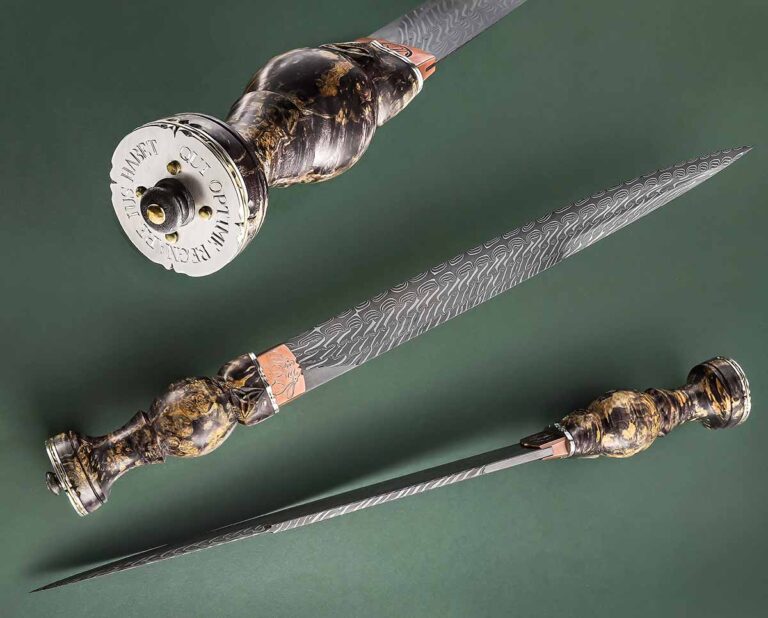
A bonnie blade to be sure, Kemper makes a statement with his Scottish dirk.
Derick Kemper celebrates his Scottish heritage with his sprawling reproduction of a Scottish dirk. It’s overstated to salute the legend and lore of his Scottish Highlander ancestors who fought so valiantly for their independence from Great Britain, beginning with the Jacobite rising of 1745.
The edge of the stunning damascus blade is a simple twist pattern of W2 carbon and 15N20 nickel alloy steels. The three bars above it are Derick’s version of Robert Eggerling’s paisley pattern—a modified twist of 203E carbon steel for the bright section and W2 and 15N20 as well.
The habaki has Derick’s Damselfly Forge stamp of two damselflies and his initials in the middle engraved on one side, and the white rose of Scotland’s “Bonnie Prince Charlie” (1720-1788) on the other.
Derick Kemper
The chess-piece-like handle is oversized as well, with the pommel engraved in Latin, Qui Optime Regnare Ius Habet. The English translation is “Who hath best right to reign,” a slogan that appeared on the flags and accouterments of many of the Highlanders in the 18th century.