
Knifemaking

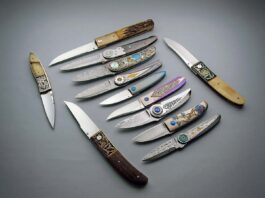
Knifemaking is the building of a knife, which includes the blade, handle and other accouterments. Blades are made by either removing metal from a steel blank via a grinder – known as stock removal – and the forging to shape of hot steel into a blade in the process known as bladesmithing. Other parts, including bolsters, guards, pommels, etc., are needed to complete the finished knife.

Featured Knives – – Knife Collecting – – Tactical Knives – – Survival Knives

Hallmark Of The Hamon

0

For Ages, The Hamon Has Fascinated Makers And Knife Users Alike. Finicky, Beautiful, And Historic, The Hamon Continues To Wow.

It stretches much if not most of the blade’s length, and when it appears it’s accompanied by an air of mystery, of the exotic. Its contours are created by the knifemaker, and it has always served as a focal point for function and aesthetics. But exactly what is it?

For ages, the hamon has fascinated craftsmen and cutlery users alike.

“Technically, the hamon is the differentiation line between the hardened martensitic edge and the ‘not hardened’ body of the blade,” explained ABS master smith Brion Tomberlin. “The term temper line has been around for years, and, in my opinion, is not correct. Temper refers to drawing back the hardness of the hard martensite after quenching to reduce brittleness and impart toughness. So, a hamon is not a line where temper starts and stops.”

Elaborated knifemaker Joel Mercier, “Tempering refers to the action of heating a quenched steel to a given temperature to remove the brittleness induced by the newly formed martensite, the hard steel molecules created when a steel is quenched. Untempered martensite is very hard but also brittle as glass. It is possible to temper various zones of a blade at different temperatures.”

The hamon is an indicator of the hardening difference between the edge and the softer areas of a blade. These areas are not developed during the making of the steel itself, and a hamon may be formed with stock removal or forged steel.

The hamon comes to life in the quenching process. By achieving different cooling rates, makers form various quantities of martensite, hence a varied hardening of the steel. The faster the steel cools, the higher the percentage of martensite.

The appearance of the hamon denotes a harder edge and a tougher spine in the blade, allowing for flexibility while preserving sharpness and cutting ability. “The hamon,” related knifemaker Johnny Raymer, “is the visual representation of the transition zone between the hardness levels in a differentially heat treated blade. A temper line is often visible within a hamon and is the boundary in which the most drastic change in hardness occurs.”

Along with the functional aspect of the hamon, there is an artful attractiveness. Raymer explains that the hamon extends beyond the temper line itself to the further reaches of the blade during the blending of hardness levels. Most often this is seen toward the edge, yielding a smoky appearance and becoming the hamon’s most artistic component.

How Do You Make A Hamon

Developing a hamon depends on controlling the cooling of the steel as necessary. The rate of cooling is typically determined with the use of clay or another suitable material.

“First, you need to consider your steel selection,” Tomberlin advised. “You need a steel that is low alloy and has a low manganese content. Manganese promotes deep hardening, and the more manganese you have in the steel, the less hamon formation will occur. The most common modern steels that fill the bill are 1095, W1, W2, and 1075, and before the steel is quenched a coating of clay of some sort is applied to the surface that you intend to be less hard. The clay slows down the cooling process in that area.”

Order: 210218_Joel_Mercier_001 Maker: Joel Mercier Email: [email protected] Phone: +1 08196905635 Knife Info: Maple sap sprout themed fighter W2 steel blade, wrought guard and buttcap, copper fittings and curly maple.

Once a blade has been forged or stock removed, Tomberlin takes it to a 120-grit finish that will allow the clay to stick. He thoroughly cleans the blade to remove any oils and then applies the clay. He prefers satanite refractory mortar and learned to use it from now-retired ABS master smith Don Fogg years ago. However, fireplace mortar or certain types of cement, Rutland for example, will also work.

When a light coating of clay is applied, the maker can manipulate the pattern of the hamon. For quenching, Tomberlin uses Park’s 50 oil. Water is an alternative but it takes practice and may produce cracks. “It isn’t for the faint of heart,” he commented.

After quenching, a quick grind at 120 grit will reveal the hamon. Telltale signs that the process has gone awry include the absence of activity—a consequence of the blade being too hot at the moment of quenching. If the hamon runs off the edge of the blade or falls below the pattern of the clay, it indicates that the clay coating was too thick or the blade was not hot enough to perfect the process.

A fine example of a Tomberlin hamon is seen in his chef’s knife with a seven-inch W-2 blade, exhibition thuya wood burl handle, G-10 spacers, and silicon bronze accent. The hamon is subtle yet striking and reaches toward the blade edge in a stunning display.

Raymer adds that the temper line is the boundary of differential hardening, but also notes that it may be more visible in some cases than others. 

“It is almost always unbroken, but as far as being clear and well defined, that is not always the case,” he observed. “Depending on the etching or polishing process you can get multiple results for the visual aspect of the hamon, as well as multiple temper lines depending on the hardened areas.

“Etching for a stark contrast with dark smoked or bled-out areas in the ashi* region of the hamon is very popular. But the hamon can also be given a frosted appearance with etching or simply polishing to give it a subtle ebb and flow that is only seen as the hamon catches light.

“As far as a well-shaped pattern, the hamon is very controllable by the artist crafting the blade,” Johnny maintained. “It could be as systematic or symmetrical or as organic and free as the craftsman desires. The most important objective, as with many aspects of knifemaking, is symmetry from one side of the blade to the next.”

Raymer reveals his skills with the creative hamon achieved on a 5.25-inch blade fashioned from 1095 steel accompanied by a magnificent 11-layer handle consisting of brass, G-10 spacers, Tasmanian blackwood and black ash burl. The overall length is 10 inches, and the knife is accompanied by a sheath in seven or eight-ounce leather with a multi-directional belt attachment.

Those who work in stock removal and wishing to try the hamon technique can take heart. “Forged blades and stock removal knives have the same potential for hamon activity in my opinion,” Johnny stated. “All knives become stock removal at some point. The heat treatment is the same for me in a stock removal knife as well as a forged knife.”

Mercier calls the maker’s manipulation of the hamon the most interesting part of the process. “I have yet to ‘crack the hamon code,’” he advised. “There are many variables at play here, all of which will dictate where and how the hamon will show. The geometry of the blade, the steel used, the type and thickness of the clay, the temperature of the steel, the type and temperature of the quenchant, a vertical or horizontal quench, and more.

“I don’t believe there are better shapes for a hamon. As for the location, I would say it depends on the type of blade and how crucial the hamon is. For example, a hamon is more of a question of aesthetics on a kitchen knife than it is on a weapon. A hamon done properly will show three zones very clearly—high, medium and low martensite areas—and it won’t get too close to the edge of the blade.”

Mercier showcases his hamon technique with a fighter sporting a W2 steel blade, wrought iron guard and buttcap, copper fittings, and curly maple handle. The hamon is well defined and distinctive, clearly marking the effects of the differential quenching process.

“A hamon has nothing to do with forging steel,” Joel agreed. “It all happens during quenching, no matter whether the blade is forged or done by stock removal. If the wavy line of the hamon drops down below or into the blade edge, it means that area will be softer and will compromise the edge performance. Many things can be responsible for this, such as a quenching temperature that is too low, clay that is too thick or too low on the blade, or a quenchant that is too slow. I believe the most common mistake new makers do is using too much clay.”

 The Visual Beauty Of The Hamon

In the end, the development of the hamon primarily adds another dimension to the visual presentation of the knife. It certainly denotes a maker’s skill and attention to the need for a tough spine and an edge that maintains its sharpness without being too brittle.

The 1084 carbon steel blade of Adam Mille’s fighter comes complete with hamon. The handle is quilted big leaf maple burl. Overall length: 11.5 inches. (SharpByCoop image)

“Hamons themselves are just an aspect of art,” Raymer reasoned. “The process of differential hardening is beneficial in creating a blade that can take more impact like those seen in fighting knives or choppers, but still performs cutting tasks proficiently. This hardening method allows the knife to spring and/or bend without shattering and without reducing edge performance.”

The hamon, therefore, is representative of the highest performance in blade steel, a visual cue to the user to have confidence in the knife’s ability to undertake the task at hand.

*Ashi refers to the area of a hamon’s lines or shapes that descend toward the edge, and are created by thin strips of clay applied during the coating process.

Read More

Forged In Fame

0

Inspiration And Guidance From Jerry Fisk Has Helped Forged In Fire Champion Ricardo Vilar Continue His Rise To Steel Stardom.

It’s hard enough to make it to top bladesmith status in the USA but even harder if you are from another country. Brazilian bladesmith Ricardo Vilar is one of those who worked hard, persisted like hell, and has been rewarded with both high accolades and fame for his efforts.

Starting with humble beginnings and a love for knives at an early age, Ricardo resides in the USA now and is living the dream.

“Growing up in the countryside of Brazil, for some reason I always loved knives,” he recalls. “At that age as Boy Scouts, we were allowed to use knives—and more, the knife was part of the uniform—so I was able to carry one on my belt. But my family wasn’t wealthy enough for me to be able to buy the knives I wanted, so making my own was a natural progression.

Ricardo’s love for carrying belt knives as a Boy Scout in his youth carries over into his stag hunter in damascus. (Image courtesy of @digitalbladesmith)

“I started with stock removal because 30 years ago in Brazil it was very difficult to find a blacksmith, and impossible to find a bladesmith. They were people considered rare and with ‘magical’ knowledge. I started following other makers who were ahead of my knowledge. But something really interesting I would like to say, at that age at least in Brazil, the sharing of information wasn’t very popular. Also, remember, we had no Internet, so my progress was really slow.”

Inspiration From A Legend

Ricardo knew if he was going to progress at a more rapid pace, he had to go outside Brazil to get help. He did so by reaching out to one of America’s most famous and lauded bladesmiths: Jerry Fisk. He invited Jerry to Brazil, offering to pay his expenses.

“I asked Jerry if he would stay at my home because we had no money to pay for a nice hotel room,” Ricardo states. “He accepted my offer and with his help we were able to set up a better workshop, which was the turning point for my knifemaking in Brazil. We have become great friends ever since.”

Jerry remembers his first visit to Ricardo’s home country and the South American bladesmith’s sacrifice to get him there.

“I met Ricardo in the fall of 2001,” he said. “He and some other makers wanted to get someone to come to Brazil to help them start looking around at what the world was doing in the knife business. Ricardo sold his car to get the funds together to have me flown there.”

This flowing bowie by Ricardo Vilar shows the design influence of his mentor, Jerry Fisk and also Ricardo’s own creative approach to knife construction.

The American and Brazilian immediately bonded.

“I realized right off how good he was as a businessperson,” Jerry said. “And the fact that he had a really good sense of humor started things off with a bang. Though neither of us spoke the other’s language well, we both managed to come up with enough jokes and pranks that it made learning and sharing cultures fun together.

“On the first trip—others followed—we would stay up till 1 to 3 in the morning talking about how the world worked regarding knives. On the first trip I helped Ricardo and other Brazilian bladesmiths form a knifemakers’ group, with the rules being a blend of both The Knifemakers’ Guild and the American Bladesmith Society bylaws mixed in with what would work for them. We worked on forging carbon steel but, more important at the time, we went down to the junkyard, gathered up all kinds of materials, made gas forges and made damascus. We were using vacuum cleaners, hair dryers, anything that would work.”

Jerry’s impact on Ricardo has been immeasurable. “If you pay attention to my designs, it is clear to see Jerry’s influence,” he said. “I like the style and the functionality of his knives and this is what I like to pay attention to when I design a knife.”

Forging In The USA

The next few years Ricardo’s hard work began to pay off. In 2005, he became the first-ever ABS journeyman smith from South America. The same year he began working with the Brazilian Army Jungle War Instruction Center designing and producing knives for the military. “I still have my little company in Brazil which makes knives for law enforcement, firefighters, first responders and the like,” he notes.

In 2017 he was faced with the biggest decision of his life. “I had been visiting Arkansas since 2003, more specifically the Nashville area—yes, there is a Nashville, Arkansas,” he smiled. Such a move would allow him to be closer to Fisk’s home as well as the cutlery action in the United States. The Vilars also were keenly attracted to the Razorback State’s splendid beauty. “When my family and I decided to immigrate to the U.S., we felt like the Arkansas area would be awesome for us to be connected with nature,” Ricardo explains, “so Nashville, Arkansas, was our top option.”

“His success in knives is quite simple, really,” Jerry Fisk says of Ricardo. “Work your butt off doing the best you can do until you get done what the client deserves. Repeat next week, but better.”

Once situated stateside, Ricardo and his knifemaking blossomed, propelling him to new heights. Not only did he start winning awards for his work the world over, he had an opportunity to collaborate with Jerry. The two friends were recruited to produce limited edition knives for the Arkansas Game and Fish Foundation. As the foundation’s press release states, “The Arkansas Game and Fish Foundation was proud to work with Ricardo Vilar in establishing the first-of-its-kind limited edition knife collection. The Foundation chose Mr. Vilar for his outstanding craftsmanship and love of the outdoors. We tasked him with making and testing a blade that not only would meet the demands of use in the field, but could also be displayed in the board/trophy room. With several of the board members owning a custom Vilar knife already, they knew he would make something they would all be proud to own.”

Ricardo also enjoyed the publicity of appearing on, and winning, an episode of the popular Forged in Fire television series in March of last year. “It was an awesome experience and I need to tell you, it is not as easy as you might think,” he relates. “I made a very interesting African weapon called an ikakalaka. I made two instead of one and I had the difficult job of deciding which one I was going to compete with.” Ricardo won the competition with ease and most likely would have done so with either sword.

Fisk shares Ricardo’s secret to making it in the knife world.

“His success in knives is quite simple, really. Work your butt off doing the best you can do until you get done what the client deserves. Repeat next week, but better. Be honest enough that the client knows he can play poker over the telephone with you and get a fair hand. Then after all that, have the sale come in at 10 percent below market price,” Jerry advises. “I have had Ricardo help me set up for the cutting competitions that I work with simply because his knives cut very well. Yes, Renata, his wife, often engraves and does gold inlay, but the knives will also cut well.”

Ricardo’s story is one of hard work, dogged determination, taking chances—and winning.

Read More

San-Mai: Steel Trinity

0

The Three-Layer Construction Of San-Mai Results In Sharp, Durable, Beautiful Blades

San-mai is an ancient blade construction technique that originated in Japan around 1300 A.D. Those who continue to use the technique harken back to those early days of craftsmanship and take pride in their finished product, a combination of the old and new that presents a dazzling aesthetic in three layers combining tensile strength and edge holding in a working knife blade.

“San-mai is a Japanese term describing a knife composed of three layers of steel that are forge welded together and ideally unite some different properties of the used steels within one knife,” explained Benjamin Kamon of Korneuberg, Austria. “Or, it serves another purpose as, for example, to ‘save up’ rare high-carbon steel used in the middle for the edge, which is what I believe started it originally.”

Jeremy Bartlett of Parkersburg, West Virginia, agrees. “Traditionally, two softer metal outer jackets and one high carbon core steel for the edge are used,” he said. “The main reason to use san-mai is so you have a soft steel jacket and a high-carbon core cutting edge. This will make the knife very durable with a great edge.”

The san-mai process is similar to the layering of damascus, a.k.a. pattern-welded steel, but retains a methodology all its own. In damascus, the layering and relayering of component steels typically result in numerous layers in the billet, while the object of damascus forging is often to create a pattern in the steel itself, along with the enhancement of blade performance.

“San-mai ends up taking much less time to make [than damascus],” added Noah Vachon of Mistissini, Quebec, Canada. “For one thing, you’re starting with fewer layers—three instead of 15 or 20 in my case. That’s fewer surfaces to grind clean when prepping the billet material. Also, unlike making pattern-welded steel, there’s no need to restack or further manipulate the billet. One thing that is a bit trickier is the core material has to be kept centered. I try to work a blade evenly from both sides when forging san-mai. With damascus, this is less of an issue.”

How To Make A Knife With The San-Mai Technique

Curt Zimmerman of Longview, Texas, uses two methods of san-mai construction. “I make it with a laminate billet and sandwich my core material between it, or I will use a canister. For the core I use 1084 because it is the most forgiving steel that I have been using as far as heat treating and workability. For the jacket or laminate billets I use 1080, 15N20 and pure nickel shim material because it is readily available and easy to work with. For the material in canister, anything from chainsaw chains to fishhooks, ball bearings, scrap damascus or other stuff lying around the shop will work. I like this because it’s great to experiment with.”

 The texture on the san-mai blade of Benjamin Kamon’s chef’s knife is what he calls denty. “The technical term would probably be tsuchime,” Benjamin noted. “The denty serves the purpose of benefiting food release as the texture in the blade will produce small air pockets between the blade and foods that like to stick.” (SharpByCoop image)

Zimmerman showcases his san-mai talent in a beautiful fixed-blade fighter with a ball-bearing san-mai blade and an ancient walrus ivory handle. With inch lengths of nine for the blade and 14.5 overall, the fighter flaunts contrast between light and dark. The san-mai blade’s distinctive pattern and the integrity of the cutting edge are well defined.

“The most visible sign of a well-made san-mai is the center core showing equally on both sides,” Zimmerman observed. “I’ve only been building knives for about a year, and it has become a true passion of mine.”

Vachon is familiar with 1084 and 1095 carbon steels for the core of his san-mai blades and intends to branch out to 26C3 and White Paper #1. “I try to choose materials that play well with each other,” he commented, “that is, that bond easily and move at comparable rates when worked.

“I’ve been using 410 stainless for the jacket. It stays bright when etched, which gives a nice visual contrast with the darker core, and the carbon migration that goes on where the layers meet can be very attractive. A stainless jacket with a carbon core is sort of the best of both worlds in terms of function. Antique wrought iron is also a fascinating and beautiful jacket material that tells a great story.”

When Noah completed a breathtaking chef’s knife with a 10.25-inch blade and overall length of 16.2 inches, he knew he had done something special—a tour de force in his cutlery journey. 

“This knife is the culmination of all the skills I’ve learned during my career as a maker, with a cherry on top,” he related, “everything I learned from cabinetmaking and lutherie*, as well as the years studying ergonomics as an industrial designer.” The knife combines the san-mai blade of antique wrought iron and 15N20 and 1095 core with a handle of stabilized redwood burl and denim. A copper Micarta® bolster completes the package.

“This knife was forged from my first- ever house-made billet of wrought-iron san-mai,” Vachon recalled. “The iron is from a piece I brought home from the New England School of Metalwork in Maine. The outer layer visible near the spine is the wrought iron. It’s full of impurities from the way it was manufactured over 100 years ago, and that gives it loads of character. The next layer that looks brighter than the rest is the 15N20. It has nickel in it and that prevents it from etching darkly. The layer at the edge is the core material. Having five layers would usually be referred to as go-mai I suppose, but it’s the same idea.”

Kamon identifies a departure from the time-honored in his san-mai construction. “The biggest difference to traditional san-mai is probably that my outside layers are made from stainless steel instead of mild steel, which is mostly used in traditional san-mai,” he noted. “The advantage of stainless steel is exactly that. It’s stainless but with that comes also the visual advantage of a strong contrast after etching the finished blade as the stainless steel stays silver, shining while the cutting layer gets very dark. The cutting layer is from a tungsten-alloyed high carbon steel called 1.2519 that is not stainless, and the reason for its etching quite strongly in an acid such as instant coffee or ferric chloride.”

Benjamin’s chef’s knife with a 10-inch blade of seven-layer stainless steel with the 1.2519 cutting edge presents a dazzling effect. At 15 inches overall, this issue’s cover knife features a handle of ringed gidgee wood and a bolster of dark gray titanium. 

“Behind the edge is the darkly etched cutting layer,” he related. “After that is the nickel layer that prevents carbon from diffusing into the outer jacket layers of the blade. After the nickel there is a thin layer of high-carbon manganese-alloyed steel. This steel only serves a visual purpose and produces a slightly cloudy and dark faded effect in the stainless steel jacket. Last but not least, there is the outer layer of stainless steel in a shiny silver color.

  “My years spent learning to forge and my countless failures have eventually led to this first—but not last—house-forged wrought iron san-mai blade,” noted maker Noah Vachon. “It’s long and tall, thick at the ricasso and thin at the tip, and feels just right. (Caleb Royer knife image)

“The texture on the blade is what I call denty, my brand for it. The technical term would probably be tsuchime. The denty serves the purpose of benefiting food release as the texture in the blade will produce small air pockets between the blade and foods that like to stick. It also makes a given blade lighter in weight compared to the same blade without texture.”

Delam Safeguards

One of the biggest challenges in constructing san-mai is the potential delamination of the steels—when the layers literally start separating from each other—during the forging process. Bartlett has devised techniques to help guard against that.

“When delamination happens, not only is the structure and durability of the blade compromised,” Jeremy reasoned, “but now you also have a void where contaminants can enter and cause the blade to rust from the inside out. The key to not having any delaminations in your san-mai billet is to take your time and make sure your mating surfaces are clean. Also, you need to make sure that you have no oxygen getting into your billet while heating in the forge. Check for small pin holes in your MIG welds all around the billet. I’ve tried using flux core to weld around the billet, but now I use only MIG wire with argon/CO2 gas. The last thing is to make sure that you don’t try and draw the billet out too much at one time. The jacket [sides] material and the core material will want to move at different rates because of the different makeup of the steels.”

Bartlett’s 15.25-inch fighter with a 9.25-inch blade of 416 stainless clad around a 1095 core, and a handle of curly koa wood with black G-10 spacer presents a highly contrasted look.

“You can see a total of three distinct areas on the blade,” he said. “The black area down to the edge is the core steel. Moving toward the spine, the next area will be the carbon migration area. This is where during the forging process some carbon leaves the core steel and migrates to the low carbon stainless jacket. This leaves a distinct crystal-like line between the two layers. The carbon leaving the core steel only affects the area where it meets with the stainless. No carbon is leaving the edge, where you need all of it for a good blade. The third area of the blade is the stainless jacket material. This area will be shiny and mostly free of any effect from the etching process. You will sometimes see, as in this case, a ghost hamon that will follow the peaks and valleys of the san-mai pattern in the blade.”

What Does San-Mai Look Like?

The look of high quality san-mai is readily apparent. The finest san-mai exhibits core steel that is centered in the billet along with the presence of the carbon migration line in the blade. In poorly made san-mai, the jacket steel approaches the edge of the blade too closely. After sharpening a few times, the soft jacket steel may run directly into the cutting edge, rendering the blade less than useful.

The watchful eye, the practiced hand and the awareness of control in each stage of construction will bring san-mai to life and perpetuate this centuries-old artistry of form and function beautifully.

*Lutherie is the construction and repair of stringed instruments that have a neck and a sound box.

Hunting Knife Sheaths: The Constant Companion

The Correct Sheath Is Pivotal To The Complete Hunting Knife Package. A Good Sheath Can Keep Your Knives Safe And Sharp For Decades.

The Correct Sheath Is Pivotal To The Complete Hunting Knife Package. A Good Sheath Can Keep Your Knives Safe And Sharp For Decades.

For the hunter in the field, a dependable and durable hunting knife is indispensable equipment, and it follows that the sheath that holds the knife must be equally up to the task.

Secure carry, protection for the blade and handle, easy access, and the ability to stand up to the elements and hard use are essential. While there is a variety of sheaths available and each one contributes something to the equation, the sheathmakers themselves have come to eye-opening conclusions as to the making and deployment of the correct sheath for the hunting knife. Personal preference is still a prime mover, but the basics make the difference between cooperation and catastrophe in the field.

“The best style for a hunting knife sheath is whatever the hunter wants,” explained veteran sheathmaker Paul Long. “Personal preference is very important. However, the knife that would best be described as a hunter would be best suited in a deep seat pouch with a loop that would carry relatively high on the belt. In most cases the deep pouch would preclude the need for a retention strap. For a double-guard hunter, a drop-loop belt sheath would probably be best with a snap strap for secure retention.”

Depending on the style of the knife, the guard often dictates the best pouch configuration. “I favor the pouch-type sheath, and the hunting knife generally has a single guard as opposed to a double guard,” related sheathmaker Paul Lebatard, who also has found success with his custom knives through the years. “I make a lot of doubles, too. You would have to make a snap-type sheath with a keeper strap, but on hunting knives with single guards the pouch type is always best.”

Three different styles of pouch sheaths by Kenny Rowe, from left: regular pouch, plain leather; strap pouch, floral hand carved; and full flap pouch, full coverage gator. (Kenny Rowe image)

A sheathmaker for over 50 years, Chris Kravitt zeroes in on the personal preference perspective. “First and foremost, it’s a matter of the configuration of the knife, and then if more than one style will work it becomes a matter of personal preference,” he observed. “My preference is to go with the pouch because it is easier to draw and resheathe the knife without worrying about straps.”

At the same time, Kravitt acknowledges varying hunting knife construction and its influence in sheath form and function. “If a knife has a double guard, it isn’t going to work on a pouch sheath, and if you have a knife with an integral handle, possibly,” he said. “Certain things don’t lend themselves to the traditional style, like when the blade is the widest part of the knife or there is no bolster or ricasso extending beyond the edge.”

Kenny Rowe, owner of Rowe’s Leather in Hope, Arkansas, adds another option on the hunting knife sheath. “Ninety percent of these sheaths would be the pouch type because they cover most of the knife, and with the guard you can make a welt where the knife has some resistance coming in and out,” he noted. “Some sheaths will have a lid that has a snap on it, and that is as secure as you can get with the flap snapping over the front of the sheath.”

The consensus with the pouch sheath makes sense for all the reasons that the hunter encounters in the field. For its toughness and the ability to shape and mold the sheath as desired during the construction process, cowhide reigns supreme among sheath materials. Most sheathmakers use 7-to-9-ounce* vegetable-tanned cowhide.

Style Of Sheaths

The use of exotics such as ostrich, stingray, alligator, crocodile or other hides is a continuing option, though for the most part they are used as accents, often in the form of inlays, rather than adding any performance-related component to the sheath.

“Exotics are very useful in sheathmaking but primarily for aesthetics,” Long explained. “Elephant and shark are two that are tough enough to withstand very hard use and are usually built as an overlay on a vegetable-tanned base sheath. I work with various snakes, lizards, ostrich and many others.”

Ultimately, Chris Kravitt—here working on a sheath in his shop—stands by the individual perspective. “First and foremost,” he begins, “it’s a matter of the configuration of the knife, and then if more than one style will work it becomes a matter of personal preference.” (Chris Kravitt image)

As Kravitt noted, “The basic sheath is going to be cowhide 99 percent of the time, but for overlays and inlays my favorite is stingray, which is near bulletproof but more expensive and harder to work with—but great stuff. Ostrich leg or shin is very nice, and Malaysian horned frog has a very nice texture to it. Snakeskin is not very durable, but it’s fine when the knife and sheath are for show since it won’t hold up with regular use.”

Tooling and carving also provide style points and may be pleasing to the eye. However, neither actually contributes to the performance of the sheath in field use. “I occasionally do some tooling with stamps, but carving is a talent I don’t have,” Lebatard remarked. “Still, on almost every sheath I’ll put something in keeping with the theme of the knife, like a small deer. Someone might place an order and specify that they just want a bare, plain sheath, or they may want just their initials on it. That’s a good thing about leather. When it is wet it can be molded and stamped, and when it dries it will hold that impression.”

Tanning And Steel

Vegetable tanning is essential when the blade meets the sheath leather for an extended period. In contrast to chrome-tanned leather, a vegetable-tanned leather is not known to corrode or stain a blade left in the sheath for any length of time. That old admonition to store the knife itself separately from the sheath will then get a longer look.

“A lot of people say not to store knives in the sheaths, but as long as the sheath is made of good vegetable-tanned leather, I’ve never had a problem,” Lebatard noted. “I made a knife for a friend a few years ago and he didn’t want a sheath. He was going to get someone else to make the sheath for him. Several years later, he brought the knife to me and he had had it in a chrome-tanned leather sheath. It was nearly rusted through. The chrome-tanned leather is very corrosive.”

Kravitt has had similar experiences. “I hear so many people say not to store knives in leather sheaths, but I have kept knives in sheaths for years and never had a problem,” he recalled. “My sheaths are all vegetable tanned as opposed to chrome tanned. Chrome-tanned leather may have salts and other things in it.”

Drainage And Inserts

Waterproofing is another essential element, and in the construction itself there are questions surrounding drainage holes and inserts as well.

Most sheathmakers shy away from inserts since contact with the blade may dull the edge. After all, the welt and/or strap should suffice for a snug fit. Inserts in and of themselves may be judged to provide some measure of redundancy, but contribute little to the overall stability of the lockup or in protecting the knife itself. Long says, “Even the best inserts, being rigid, will do more harm to a blade than top grain leather.”

The different decorations Kenny Rowe offers with his sheaths include, from left: smooth; border tooled; basket weave; acorn and oak leaf hand carving; exotic skin overlay (gator); exotic skin inlay (beaver tail); and exotic skin full coverage (ostrich leg). (Kenny Rowe image)

At first glance it might appear that a drainage hole is a good idea to help maintain cleanliness and prevent the buildup of moisture or debris within the sheath. Not so fast!

“I do not ordinarily put a drain hole in my sheaths,” Long asserted. “Nor do I do any waterproofing of the interior of the sheath. Rather, I depend on the normal intelligence of my client to not go swimming with their sheath, and to at least try to clean the blood and guts off the blade before reinsertion.” 

Rowe agrees. “I don’t see any sense in it,” he commented. “I can count on one hand the number of sheaths I’ve made with drain holes in them, and I’ve been making sheaths for 35 years at least. The only time I would expect someone to have their sheath in really wet conditions would be if they accidentally rolled into a deep river or their boat sank. I wouldn’t expect someone to haul off into neck deep water with their hunting gear on. For debris, it’s easy enough to take a wire with a little hook in the end and just rake the sheath out, or blow it out with air, or stand it upside down and shake it or tap it on a table.”

Kravitt, on the other hand, will utilize a drain hole and an insert from time to time. Often, the insert itself is fashioned from leather to avoid additional friction against the knife edge. The employment of the drain hole is in direct response to the future use of the gear in the field.

“If I know the sheath will be used in harsher conditions, I think it should have a drain hole,” he remarked, “not just for draining moisture, but also removing debris—especially when the user has spent a lot of time in the woods.”

Sheathmakers do tend to rely on the owner of the product and of the hunting knife to exercise responsibility in the field. “Explain to the client, if they are a novice, about the ‘care and feeding of a leather sheath,’” Long smiled.

How To Care For A Hunting Sheath

The well-crafted sheath is the constant companion of the hunting knife, either in the field or a collector’s cabinet, and the best measure of the sheath’s contribution is its role in that partnership. For the sheath to function properly, owners must remember the fundamentals of hunting knife care. Keep both the knife and sheath clean. Wipe away moisture and other fluids. Maintain the surfaces as needed. Don’t put the knife away wet and expect the sheath to do more than expected.

Adhering to best practices will ensure long life for both the hunting knife and its all-important sheath.

*According to the Montana Leather Co. website (montanaleather.com), leather thickness is typically measured in ounces. For instance, an ounce of leather is equal to 1/64 inch. As a result, 7-to-9 ounce leather will be in the 1/8 inch range, give or take a few millimeters.

Read More

Hall-Of-Frame Handles

Frame Handles Remain Just As Useful In Making A Knife Today As It Was Centuries Ago.

Frame handle construction for knives has been around for centuries. Historical examples of many Eastern styles like the kard, khyber and yataghan often feature ornamented frame handles. Nineteenth-century knives attributed to James Black and some of the early American bowies also had frame handle construction. Though it’s been around a long time, the frame handle remains a viable modern construction method for today’s custom knifemakers.

There are many ways to crack the nut/skin the cat on frame handle construction. This article will walk through the frame handle process and point out particular problems and potential solutions for those who wish to pursue building a frame handled knife.

Why You Should Build A Frame Handle

Frame handle construction is best defined as using a wrap-around “frame” to conceal the tang of a hidden tang knife. The first question many people ask regarding a frame handle construction is, “Why would you want to do it that way?”

My first thought goes back to the earlier days of the internet when forums were at their peak, and fine makers like ABS master smith Bruce Bump took the time to document “work in progress” (WIP) threads. Bruce had a fine frame handle WIP on the KnifeDogs.com forum in 2013, and the consensus at the time was that you build a frame handle for quite a few reasons, though the first one is “because you can!”

An exploded view shows an ABS journeyman smith Karl Andersen frame handle construction knife before assembly. (Karl Andersen image)

A frame handle is a much more complex build process than your standard full- or stick-tang knife. However, in addition to the show of skill by the maker, frame handle construction has a few distinct advantages that make the complexity worth the effort:

1. A frame handle allows for the look of a full tang, but with the guard-fitting techniques of a stick tang. For a forged stick-tang-knife design that needs a guard, a frame handle allows the use of full-tang-style handle construction;

2. A frame handle is a good way to use scales or slabs on a stick-tang knife. If you have a good set of stag or mammoth slabs, or if you have stabilized wood slabs that might be too fragile for through-tang construction, the frame handle allows you to use the materials on a stick-tang knife; and;

3. The use of a frame handle gives the maker another area to embellish the knife. Some frames are great for engraving, while others may highlight a damascus pattern. Either way, the frame makes the embellishment stand out in ways that are harder to accomplish on a full-tang knife.

How To Build A Frame Handle

At a basic level, the frame of a frame handle is a piece of material, usually metal, that wraps around a stick tang and mimics the look of a full-tang knife. This presents some challenges that have resulted in a few different creative solutions.  

•Challenge 1: The tang must fit inside the frame. Some makers insist on precision so there are no gaps and the fit is tight. Others concede that the handle will be held together with mechanical fasteners and sealed with epoxy, so a precise fit between the frame and the tang is not necessary.

•Challenge 2: All parts of the handle must be securely fastened together. I sat through a class with ABS master smith Mike Williams in which he admonished the students, “Don’t trust in the magic of chemistry” by putting your faith only in the strength of glue. Likewise, veteran bladesmith Jerry Fisk challenges makers to think ahead to what their knives might be like in 100 or 1,000 years, and recommends a mechanical connection that won’t fail over time.

One way to address this challenge is to use pins. If you pin the scales to the frame, pin the completed handle assembly to the tang and follow up with glue, there’s no opportunity for failure. Some choose to make all the pins visible as an artistic element, while others take advantage of hidden pins for all but the one through the tang. Another way is to use a threaded fastener. 

Bladesmith Salem Straub recently illustrated the technique on a frame handle WIP on his Instagram feed. Salem used a threaded fastener in an internal slot in the frame to mechanically lock all the parts together tightly. The handle material is relieved on the inside to accommodate the fastener.

Another way to use a threaded connection is to thread the end of the tang and use a fastener on the handle butt. An advantage of this approach is that the fastener itself can become part of the embellishment.

•Challenge 3 is the complex fit-up between all of the knife’s elements. Frame handle construction naturally doesn’t excuse a poor guard fit, but it also provides other places for gaps and misalignment. Once again, there are several potential solutions to alignment problems.

One is the use of alignment pins to make sure everything is secure. Pins on the end of the frame go through any spacers and into holes in the back of the guard so that each part indexes the same during assembly. Some makers, including Bruce Bump in the aforementioned epic WIP, advocate for leaving metal tabs on the end of the frame and fitting the tabs into similar holes on the back of the guard

. In both cases, there’s a mechanical connection that prevents the guard, spacers and frame from rotating out of alignment around the center axis of the handle. Either way, when you build a frame handle, the construction will require you to assemble and disassemble the knife repeatedly, so you’ll need some mechanical way to keep things lined up.

Another fit-up challenge is the overall requirement for clean-fitting joints with no gaps. It sounds simpler than it is, but two surfaces that are dead flat will join together without a gap. The challenge of a multi-piece frame handle with a guard and a few spacers is that you are creating a multitude of surface joints, and every single surface must be dead flat.

At a minimum, you’ll have a joint between the guard and frame, and also between the frame sides and the handle material. Any bump or wiggle on any surface and you’ll have a gap in the final product. Flatness comes in degrees. You can get a fairly flat surface on a platen, flatter on a disk, and still flatter on a surface plate or surface grinder. You have to make the joints as flat as you can with the tools you have available if you want a gap-free fit.   

I tend to prefer the look of a tapered tang on a full-tang knife, so I’ve started tapering the frame of my frame handles as well. Others stick with a full thickness frame, where the thickness closely matches that of the blade at the ricasso. Some add spacers between the tang and handle material, while others choose to go with the frame and handle slabs only.  

ABS master smith Mike Quesenberry used frame-handle construction on his dog-bone bowie. (Eric Eggly/PointSeven image)

Another fit challenge is presented by the frame itself. In order to adequately finish the visible surface of the frame, whether by simple polishing, bluing or etching, or by engraving, the frame must be 100 percent at final-grit finish prior to final glue up. 

Many makers learned to make a full-tang knife by finishing the front edge of the scales, gluing the knife together, shaping the scales down to the exposed tang, and then polishing the handle and the tang at the same time. That method will not work for a frame handle that needs to be blued or etched. Personally, I tend to use dummy pins to fit the entire handle assembly together, then grind the scales down to the frame. In his recent Instagram example, Salem Straub used small screws to hold the handle material to the frame.  

With regard to the relationship between the handle material and the frame itself, some choose to leave the material slightly proud of the frame for a “museum” or “heirloom” fit. Others prefer the material to fit flush to the tang. Less commonly, some makers round the frame and leave it slightly proud of the material. Whichever you choose, it is important that the fit be maintained consistently all the way around the frame, from the joint at the guard on the top all the way down to the joint at the guard on the bottom.

Once the profile is set, I polish the handle and the frame together down to final grit, and then apply any surface finish to the frame itself. Once all parts are 100 percent complete, they can be glued together as a final step.

When To Make A Frame Handle

So when should you try making a frame handle? In my mind, if you can make clean full- and stick-tang knives, you could be up to the challenge. If you have slabs of exceptional handle material that deserve more than a simple full-tang knife, a frame handle is a way to step up and put the materials on full display. If you have a knife in mind where the frame and guard need to be blued, damascus or engraved, a frame handle is the way to go.

A frame handle knife has its advantages, but the complexity of the construction presents plenty of challenges. As a skilled maker, you may choose to rise to the challenge of a frame handle just to show that you can.

Heirlooms Of Time

Many Top Knifemakers Are Keeping Historic Styles And Methods Of Making Knives Alive Today.

Historical perspective is a relevant component in just about any undertaking. In the realm of cut, incorporating an appreciation of the past into the work of today brings another dimension to the custom knifemaker’s statement.

Interest in the knifemaking of a bygone era offers a window into the true artistry required to reproduce the knives of yesteryear, particularly with the absence of modern conveniences in the shop. Along with the interest in the historical knife, several custom makers bring famous designs, styles and patterns to life once again in tribute to those who have gone before.

The idea of the period piece blends old and new. “I’ve been making knives seriously since about 2002 when I took a class with the American Bladesmith Society in Washington, Arkansas,” related ABS master smith Lin Rhea. “Joe Keeslar and Greg Neely lit a fire under me and got me on my way. Since then the town of Washington has been like a second home, and I’ve even added to the personal connection between me and the area by interest in one of the town’s historical residents who was also a knifemaker. His name was James Black.”

A resident of Prattsville, Arkansas, Lin gained an appreciation for Black’s distinctive body of work*, using contrasting materials and techniques to create a bold, attractive look. “I’m grateful to get to know Mr. Black by studying his work,” Lin continued. “This intense study

Lin Rhea’s reproduction of the Carrigan Knife is based on a dress bowie James Black is thought to have made in the early 1830s in Washington, Arkansas. The original Carrigan includes a black walnut handle with coin silver pins and trim. The blade is about 6 inches long and the overall length is approximately 10.25 inches. (Whetstone Studio image)

led me to try to recreate one of his knives, the Carrigan Knife. The original knife, a guardless coffin-handled bowie, was made by Mr. Black in the early 1830s in Washington, Arkansas. I chose the Carrigan as my first attempt because of its less intimidating size; however, as is often the case I found it to be just as intimidating once I started into the project.”

The original Carrigan includes a black walnut handle providing a nice contrasting background to the coin silver pins and trim. The blade is about six inches long, and the overall length is approximately 10.25 inches. The full tang is virtually covered entirely by the walnut scales and the silver wrap.

When Rhea undertook his homage to Black and the Carrigan, he chose stabilized walnut, which he harvested himself several years ago, and trim in sterling silver. He forged the blade from 80CrV2 carbon steel and included at least 30 separate parts while attempting the same techniques used by Black nearly two centuries ago in fastening and assembling the finished knife.

“There is so much to be said about not only this knife but also Black’s work,” Lin concluded. “He was able to create a knife design utilizing only three materials yet impacting the knife world as few others could. His ability to arrange these materials into a functional, long-lasting, beautiful tool is only enhanced by the knowledge that he also built in other qualities like moisture resistance, logical assemblage and ergonomics. All of this was done in a historic setting without modern equipment and epoxies. In my opinion, his design is ingenious.”

Gold Rush Knives

Recently inducted into the BLADE Magazine Cutlery Hall of Fame® knifemaker Jim Sornberger has assimilated his gold and silversmith skill sets into custom knifemaking while helping introduce the modern world to the classic design, luster, and embellishment of the Gold Rush era and boomtown San Francisco of the mid-19th century.

 BLADE Magazine Cutlery Hall-Of-Fame® member Jim Sornberger’s interpretations of the Michael Price San Francisco/small dress bowie have won awards at various venues, including Best of Show at the 2019 International Custom Cutlery Exhibition in Fort Worth, Texas. This one features a blade in Vegas Forge stainless barstock AEBL and 412 stainless steels and san-mai damascus with a solid core. The guard and wrap handle are in Mike Sakmar mokumé barstock. Jim’s price for a similar knife: $3,500. (SharpByCoop image)
Jim Sornberger’s interpretations of the Michael Price San Francisco/small dress bowie have won awards at various venues, including Best of Show at the 2019 International Custom Cutlery Exhibition in Fort Worth, Texas. Jim’s price for a similar knife: $3,500. (SharpByCoop image)

“I’ve been making knives since 1975 with the help of the late Les Berryman, an early Guild member, and with some guidance from Bob Loveless, Herman Schneider and Barry Wood,” Jim recalled. “The last three signed for me to join The Knifemakers’ Guild.”

For Sornberger, the style, embellishment and decoration of the canes, jewelry and knives of the Gold Rush era are most appealing. “San Francisco from 1850 to 1904, the Gold Rush period, was one of the wealthiest cities in the world, attracting some of the greatest artists, jewelers, carvers, and engravers to ply their trade to a wealthy clientele. The work done in that period,” he opined, “rivals the best ever done.”

In the knifemaking genre, Michael Price and Will & Finck were among the most successful and prolific of the Gold Rush. Their work remains emblematic of the great migration to settle the American West, and the riches and ruin that were found with the experience.

“Price was Irish, and both cutlery firms hired workers who were English, German and possibly Scottish,” Sornberger explained. “Their dress knives are probably the most embellished American knives made in the 1800s-1900s. The dress knives had two common handles: an interesting, modified coffin shape and a more rounded, subtle taper shape. The blade shapes are spear-point dagger and San Francisco clip spear point.”

Sornberger is recognized as an authority on original San Francisco knives, as well as the magnificent gold quartz that was used so well by Gold Rush artisans. His modern interpretations of the Michael Price San Francisco/small dress bowie have won awards at various venues, including Best of Show at the 2019 International Custom Cutlery Exhibition in Fort Worth, Texas.

Jim’s dress fixed-blade bowie in the accompanying picture was made with Vegas Forge stainless barstock AEBL and 412 stainless steels, and san-mai damascus steel with a solid core. The guard and wrap handle are in Mike Sakmar mokumé barstock. Jim’s made such handles in gold and silver and nickel silver, also. The inlays are tortoise celluloid and California native gold/gold quartz.

According to Sornberger, the biggest challenge in his stunning creation was grinding the blade to show the distinctive pattern of the shell and the hardened core. The san-mai laminated blade was etched with ferric chloride, rinsed and color set with WD-40®.

The Frog Knife

“The style of Michael Price’s work is a really good canvas with flowing lines, and there is a lot you can do with it,” observed ABS master smith Jon Christensen, who is in his 22nd year of making knives. “I wouldn’t call my San Francisco-style knives replicas. I do like to keep to the original form and honor the style of the maker, though.”

The Frog Knife by Jon Christensen is a San Francisco-style dress bowie with a back story. “I had seen the Poppy Knife that Michael Price made and thought I would do my version,” he related. “I took the knife to the BLADE Show, and it didn’t find its owner. Then, the handle got ruined, and I just took the opportunity to rehandle it with the frogs and lily pads.” Overall length: 10 inches. (SharpByCoop image)

One of Christensen’s most evocative pieces to date is referred to simply as the Frog Knife. However, the piece is far from simple, and Jon manages to convey the spirit of the Michael Price style while also imprinting some of his own personality.

“I built the feathered damascus for the blade with 1080 and 15N20,” he advised. “It’s a canister damascus. I forged the bamboo leaves and placed them in the can, welded it up, reduced it, and feather cut it so it would produce feather-cutting smears and leaves, and form branches to look like a little grove of bamboo leaves.”

The 10-inch knife has a 5.5-inch blade and a frame and sheath incorporating 410 stainless steel. Christensen utilized the “canvas” of the handle to the fullest, carving the mammoth ivory into a pleasing vignette of frogs and lily pads.

“The handle has something of a back story,” he smiled. “I had seen the Poppy Knife that Michael Price made and thought I would do my version. I took the knife to the BLADE Show and it didn’t find its owner. Then, the handle got ruined, and I just took the opportunity to rehandle it with the frogs and lily pads.”

Christensen got his start making stock removal knives after a career as a horticulturist. He learned to forge while working with ABS master smith Ed Caffrey and visited with knifemaker Rick Eaton and ABS master smiths Shane Taylor and Wade Colter. Jon also makes San Francisco folding knives and enjoys swordmaking. Plans for the future include more period pieces.

Kimball Style

ABS master smith Josh Smith owes his little league baseball coach, ABS master smith Rick Dunkerley, credit with getting him started making knives about 30 years ago. From the beginning, Josh has appreciated the thought process and craftsmanship of custom makers from a bygone era.

“There’s something special about reproducing something that was built nearly 200 years ago,” he reasoned. “It’s easy to get lost in your thoughts while working on these knives, wondering what the makers were thinking about at the time. Was the knife going into battle? Was a rich man just wanting something unique? Was the maker just trying to be different and impress people? Were function and effectiveness of use the only factors that mattered? It’s really cool to think about.”

 Josh Smith’s dog-bone-handle dagger is a reproduction of a knife owned by Loring Kimball of Vicksburg, Mississippi, in the mid-1800s. The grip gets its name from its shape. “I never pretend to exactly reproduce these knives,” Josh noted. “I always put my own spin on the knife, trying to bring some of my style into it.” Overall length: 14.25 inches. (Eric Eggly/PointSeven image)
Josh Smith’s dog-bone-handle dagger is a reproduction of a knife owned by Loring Kimball of Vicksburg, Mississippi, in the mid-1800s. The grip gets its name from its shape. Overall length: 14.25 inches. (Eric Eggly/PointSeven image)

Josh has found the opportunity to consider historical context with a dagger in the distinctive dog-bone handle, recalling the mid-1800s when a gentleman named Loring Kimball of Vicksburg, Mississippi, owned several similar original pieces that were probably made by at least two different knifemakers in the New Orleans area. Knives in what many refer to as the Kimball style have been reproduced by a number of modern makers, mostly bladesmiths.

“The distinctive characteristic of the dog bone is clearly the shape of the handle,” Smith said, “but to me it’s more than that. The large domed pins and the flat facets on the handle provide such a neat look. One of the original Kimball daggers from the 1830s had silver wrapped around the butt of the handle and a small, thin silver guard. I never pretend to exactly reproduce these knives. I always put my own spin on the knife, trying to bring some of my style into it.”

Smith’s dog-bone dagger is fashioned from his own ladder pattern “W’s” damascus blade, African blackwood handle and 18k-gold pins and liners. The 9.5-inch blade is forged from 1080 carbon and 15N20 nickel-alloy steels, while a gold collar stretches over the back of the blade and bears the engraved name of the maker. Overall length: 14.25 inches.

“This particular knife was heavily influenced by Tim Hancock,” Josh said. “I feel Tim, Harvey Dean and James Batson are the three men who led the way in bringing these knives back to prominence, and Tim had the most influence on my construction of these knives. I love period pieces and definitely plan on doing more. There are so many incredible weapons from the past that would be fun to recreate.”

*While a number of top industry authorities attribute such original 19th-century pieces as the Carrigan Knife, Bowie No. 1 and others to Black, no knives with Black’s mark are known to exist.

Read More

Knifemaking: How To Build A Railroad Spike Jig

0

Building A Railroad Spike Jig Takes Time But Is Worth The Effort

Building the Railroad Spike Jig

Forged Knifemaking
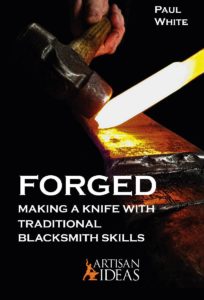
This article is an excerpt from Forged: Making A Knife With Traditional Blacksmith Skills available at ShopBlade.com.

Counter-bending begins with the counter-bending jig. These are made by forging a steel bar .75-1 inch square and about five inches long into a “bottom swage” device. This looks something like a cradle. It can be placed into your anvil’s hardy hole or locked in a vise.

You don’t necessarily need to weld the hardy stud on the bottom, just lock it in the vise. A banana would fit nicely into this cradle. File a groove into the top-right edge to “catch” the point. I use railroad spikes to make this jig. As you make more knives you may choose to change that radius depending upon factors between you, your tools, and your steel.

Bending With The Railroad Spike Counter-Bending Jig

Place the counter-bending jig in the hardy hole or vise. Place the blade bar in the forge at the most convenient position for extraction and quick placement on the jig. Heat to orange.  Place the bar on its spine, with the choil and cutting edge looking up and the point at the groove. Keep the bar at the center of the jig.

Note the “air” between the billet and the spike. The blade is almost resting at the bottom of the jig. The next blow will force it completely into the concavity of the railroad spike jig.

NOTE: Blacksmiths will refer to shaping tools like this railroad spike jig as a swage. Sometimes as a bottom swage. Swages (sometimes called ‘swedges’) are concave in shape. Fullers, on the other hand, which are also shaping tools, are convex.

With the round hammer face strike the bar in the center. This will take one to several heats and hits depending on how hot the bar is and how hard you hit it. Rarely will it take one heat and one hit. Usually it takes many. Do not hit it any more than necessary. We want the entire blade in the concavity of the jig. When it’s there, stop.

NOTE: Remember that straightening blows are much lighter than forging blows. Straightening blows are just hard enough to bring the blade back to straight and flat.

Then, put the blade back into the forge, take a heat, and do the swage business again. Steel, when hot, is extremely malleable (like soft clay) and can be told what shape to take.

You can purchase Paul White’s Forged: Making a Knife With Traditional Blacksmith Skills here.

Advertisement

Must Read Articles

Read this before you make a knife

Knifemaking 101 – Read This Before You Make a Knife

  by Wayne Goddard My experience has taught me that there's nothing like digging in and getting started. I've often said the hardest part of the...
how to forge damascus steel

How to Forge Damascus

Advertisement
Advertisement