



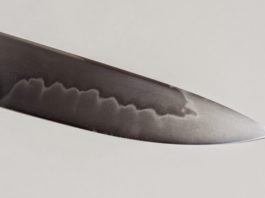
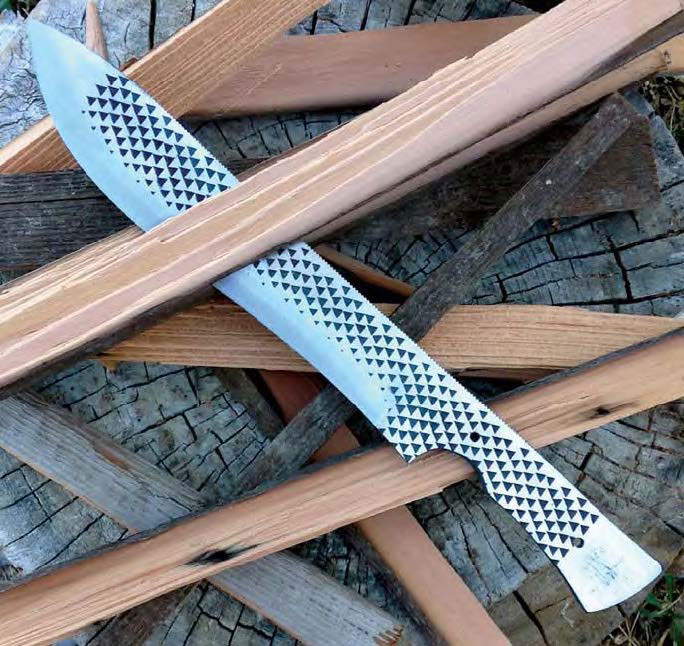
Hot bluing process
Knifemakers: Tell BLADE About Your Knife Shop Accidents


In light of the devastating fire allegedly started by an amateur knifemaker, BLADE doesn’t want anyone else to learn bladesmithing trial-by-fire style, literally.
That’s why we want to hear about your accidents in your knife shops. There’s no shame, and you can remain anonymous if you’d like. The point is prevent someone else from making the same mistake.
The focus here is on safety. Preventative tips are welcome, too.
Your contributions will be used in an upcoming BLADE feature. Thank you!
World’s Hottest Knives in April BLADE®
The steel that changed knives forever, the hottest custom makers’ hottest knives, how to build an emergency shelter, Chad Nichols’ MokuTi knife material, how to recognize future knife collectibles, these and much more highlight the new April BLADE®, on most newsstands NOW.
Bill Moran’s introduction of damascus steel at the 1973 Knifemakers’ Guild Show 40 yaers ago this year is the focus of “Steel That Changed Knives Forever.” Find out from those who were there what that was like and from others how the introduction transformed the industry and continues to do so today.
If you were stranded in the woods and needed to build an emergency shelter in a short amount of time, could you do it? James Ayres shows you how in “Shelter From The Storm.”
The custom knives most in demand change at any given moment. Get the latest installment of how they’re changing and what they are in “On The Boil!” The cover knife made by Jim Burke and designed by Tashi Bharucha is one of them.
If somebody asked you what factory knives you should collect now for the future, what would be your answer? See if it gibes with those who know in “Knife Pros Reveal What To Collect.”
There’s much more—a profile of knifemaker Will Zermeno, Ray Kirk’s giveaway knife for the upcoming Arkansas Custom Knife Show, the latest in mid-tech knives, how to clean hunting knives, part two of Ed Fowler’s step-by-step how-to on sheep horn knife handles, a test of Joel Worley’s “Woodsman” brut de forge knife and much more, all in the April BLADE.
For subscription information to BLADE click on  www.shopblade.com/blade-magazine-one-year-subscription-us?lid=ssfbbl013113
History of the Japanese Knifemakers Guild
In this clip (1 of 5 in a series), Murray Carter and his guest talk with Okayasu Kazuo in October, 2010, at his knife shop in Tokyo. Kazuo played a critical role in the Japanese Knifemakers Guild since its founding in 1978.
How Individual Makers Can Tap New Markets
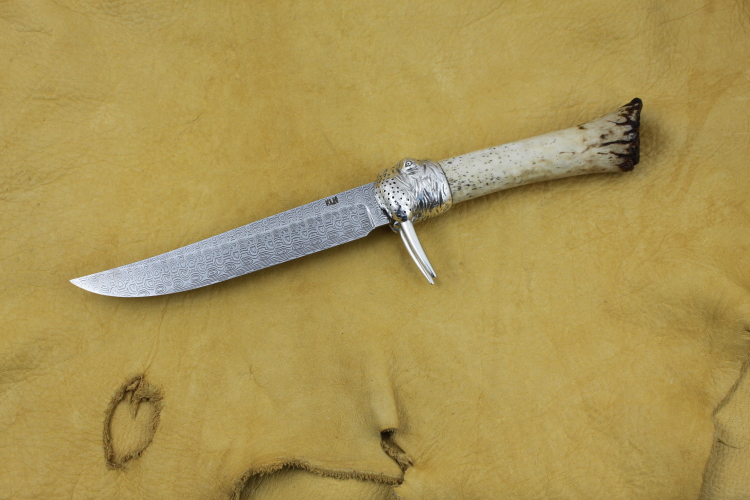
In the November BLADE®, “Unsheathed” outlined the Custom Knife Collectors Association/Jerry Fisk Cutlery Challenge and its potential for tapping new knife markets. Since then, maker Kevin Hoffman’s “I Am The Walrus” art knife placing fourth in the Art Kudos International Juried Art Competition & Exhibition is instructive in showing how individual makers can enter their knives in art competitions and, thus, expose their work to new markets as well.
Why is exploring new markets important to custom knife enthusiasts, makers and others in the industry? For one thing, new markets mean more exposure to new buyers/collectors, and thus more potential demand for custom knives—and such increased demand translates into more value placed on all custom knives.
Over 400 artists from 23 countries entered 1,251 individual works in the Art Kudos competition. From these, 157 artists were chosen. Of them, a mere 10 won awards, including Hoffman (http://www.artkudos.com/2011/awards.html).
Kevin subscribes to several art publications—including ARTnews and professional artist and metalsmith magazines—and belongs to the Society of North American Goldsmiths (SNAG), all of which publish “calls for artists” and art competition announcements. “There are lots of other art publications that you can find on the newsstand,” he added. “There are dozens of art competitions all over the world at any given time, and it’s a matter of finding ones that you qualify for or that your work will fit the criteria for, and entering. I chose this one because I thought my work might be a good fit.”
He added that the Art Kudos competitions, which are conducted on the Internet, have a very user-friendly application process, including an on-line submission procedure. “Each competition has their own entry process, although it’s becoming easier with the advent of digital photography and the Internet, and a lot of the entries are now made on-line and the competitions accept digital images,” he observed. Unlike some competitions that require submission of the actual knife, Art Kudos allowed Kevin to submit a digital image of the knife and keep the real item for simultaneous exhibit and possible sale at knife shows. “I knew the Art Kudos competition would overlap with the Knifemakers’ Guild Show, and I wanted to be able to exhibit the knife at the Guild Show, too,” he explained.
This is not to say, given the proper venue and exposure, Hoffman rejects competitions that require keeping the knife for extended periods. “Very often, new competitions or new competitions in new areas are for a period of time, even years, and are more of an exercise in the education of a new audience rather than being good sales venues,” he observed. “Nevertheless, I think it’s important to explore new markets that haven’t seen this type of work before.”
Hoffman stated it is better to find a competition that fits the maker’s designs than for the maker to design a knife for a specific competition. “You have to find the competition that your work fits the criteria and style of,” he stressed. “In the art world, it doesn’t make sense to make work specifically for a given competition because the deadlines are usually too short for that, and short deadlines aren’t conducive to producing truly good work. You have to choose competitions that your body of work fits into. Some competitions only want paintings, others only want 3-D works, some only photography, some only allow sculpture but not jewelry, or vice versa. Some competitions are open only to artists from a certain region.
“As for what type of knives to enter, it probably depends on the type of competition and on the preferences of the person doing the judging. In general, I’d say the more [artistic] knives probably have better prospects, although I’ve had some luck with utilitarian knives as well. You just have to read the rules and, if there are specific categories, submit only in the one that your work fits the criteria for. For instance, don’t try to enter a competition that is accepting entries only for two-dimensional works unless you’re entering a painting of a knife.”
He added there is often a small entry fee. It is used to pay the person or people doing the judging, and, if any are given, to pay for the prizes for the winners.
PICTURE CAPTION
Kevin Hoffman’s “I Am The Walrus” placed fourth in the Art Kudos competition, and features a damascus blade and walrus-oosic handle. He sculpted the walrus-head-and-tusks guard from wax and then lost-wax cast it in 7.5 ounces of sterling silver. Contact Hoffman at 912-920-3579 [email protected]. He will write a chapter on lost wax casting in the second edition of Krause/F+W Media’s upcoming book, How To Make Knives. (photo courtesy of Kevin Hoffman)
To subscribe to BLADE, click on http://www.shopblade.com/category/magazine-issues
Knifemaking: How to Make Temper Lines
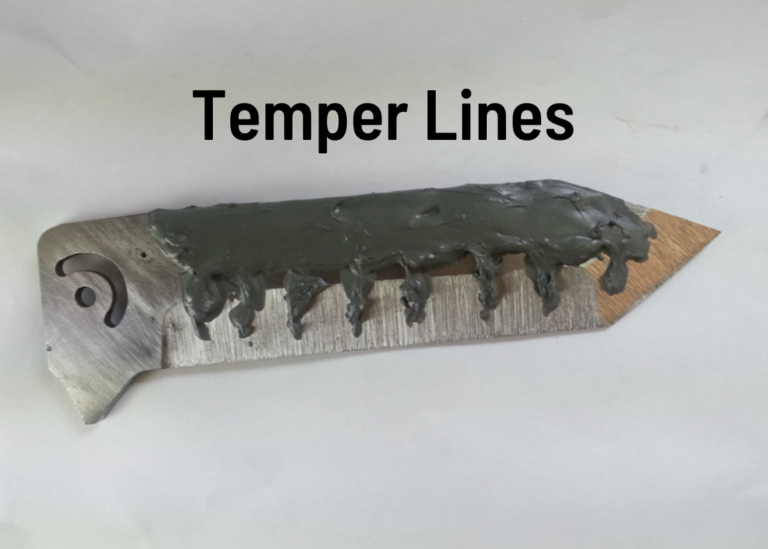
Temper lines—aka hamons—are a very exciting part of knifemaking, and I would like to share with you how I produce cool temper lines on folders. -Wally Hayes
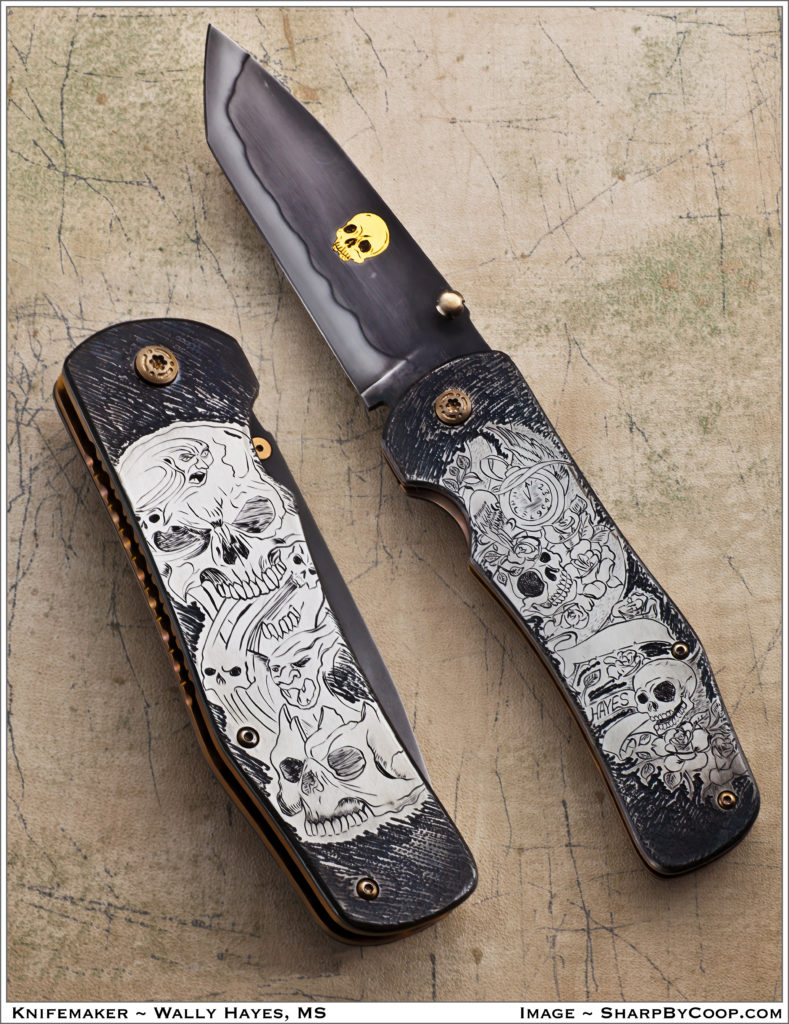
The latest folder exhibiting a handsome temper line—aka a hamon—by the author (inset) is this skull-encrusted model. (SharpByCoop knife image)
STEEL and CLAY
First you need to select your type of steel. You can use 1084 carbon steel or high-carbon damascus, but I prefer W2 tool steel. I get mine from New Jersey Steel Baron because I can get it surface ground to whatever thickness I need.
The W2 is low in manganese, enabling you to create wild temper lines. I grind the blade leaving the edge about the thickness of a dime. The thickness helps prevent your blade from warping in the quench and also helps hold the heat, giving you time to get the blade into the quenching oil.
The clay I use is a stove furnace cement used to repair fireplaces and chimneys. I get mine at the hardware store and it comes in a small tub or a tube like the tubes of silicone used with a squeeze gun for calking.
APPLYING the CLAY
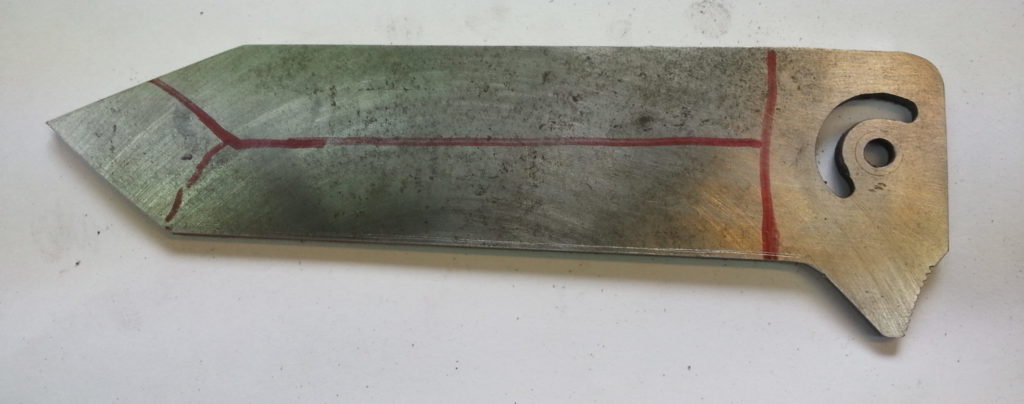
To apply the clay I use a sharpened Popsicle® stick, being careful not to put any clay where the ball bearing in the liner will travel on the tang of the blade. Also, do not put any clay near the pivot hole as you want that area to become fully hard when quenched.
I like a very exaggerated temper line with big waves. You can achieve this by placing short lines of clay every half inch down the blade. Do not carry the clay line all the way to the edge as you want the edge fully hard.
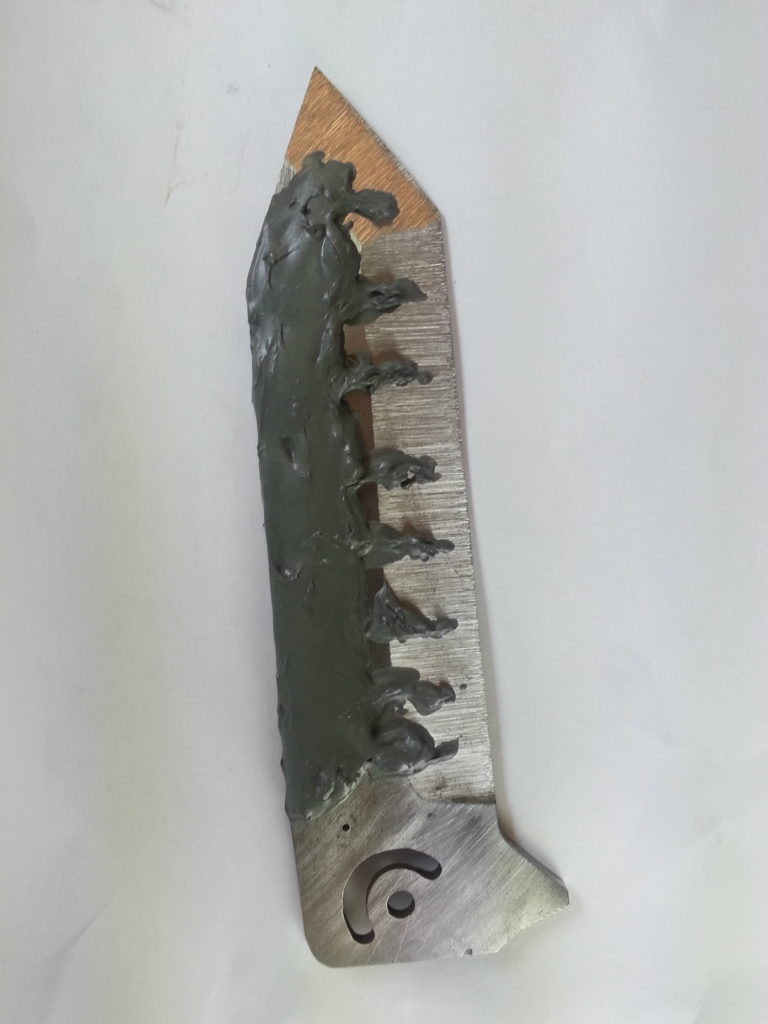
I put the clay on the blade about an eighth of an inch thick. This seems to work very well. Let the clay dry for about four hours before you heat treat it. To heat treat the blade I use a propane forge. I place a coat hanger through the pivot hole and twist it around the tang of the folder to give me something to hold onto.
HEAT and QUENCH
Gently heat the blade near the opening of the forge for a minute before placing it into the forge edge up. Watch the blade come up to temperature, placing the tang near the hottest part of your fire. The tang is the thickest area of the blade and slowest part to get up to critical temperature. Heat the blade until a magnet does not stick to it. I use a cow magnet on the end of a pipe and keep testing the blade as it heats up to temperature.
When a magnet does not stick to high carbon steel the steel is at critical temperature, at which point the blade should be removed from the forge and quenched in oil. For steel, I use a fast-quench oil such as the kind from Parker or Fensoil. I have also done many successful quenches in vegetable oil.
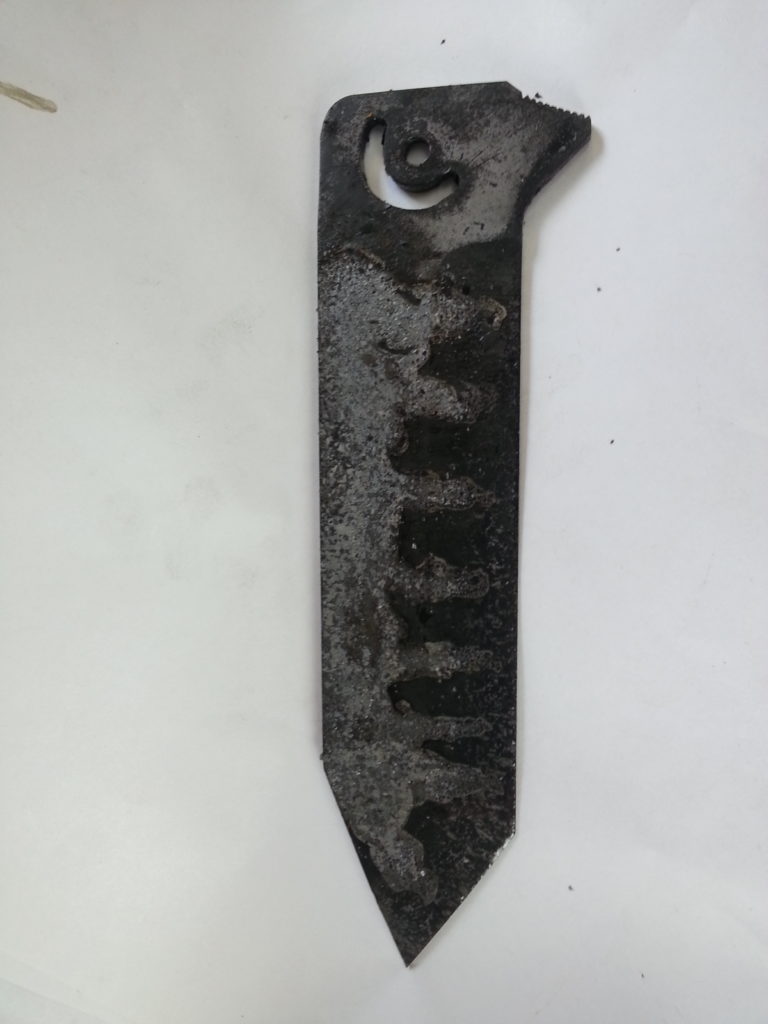
I quench the blade and then leave it submerged for two minutes before removing it. Once its out, I clean the blade with a paper towel. I then put the blade in the toaster oven for one hour at 385°F.
WARP CHECK, GRIND and POLISH
After the blade is cool I check it for straightness on a flat piece of steel. I use a set of parallels for this. If the blade is warped, I clamp it to a slightly curved piece of thick steel, and press the warp out with the twist clamp. Then I place the clamped blade in the toaster oven for another hour’s worth of temper at 350°F. This works really well and is less stressful to the blade when compared to trying to straighten it another way.
Once the blade is straight it is time to finish grind and polish it up to 2,000 grit. I do the final polishing by hand to ensure every scratch has been removed. After this I sharpen the edge and make sure it is also polished carefully. Finally, I use sand paper backed up by a thick piece of leather and sand very slowly so I don’t cut myself.
The ETCH
Next up: Etch the blade to bring out the temper line. Clean the blade with acetone. Wear latex gloves to protect your hands and to keep oils from your hands off the clean blade. To etch the blade I use ferric chloride diluted four-to-one with distilled water—that is, four parts water to one part ferric chloride. Hang the blade with a cotton string tied through the pivot hole and place it in the acid for 15 seconds. Remove the blade from the acid and spray it with Windex®. This neutralizes the acid and stops the etching. Dry the blade and coat it with WD-40®. Rub a little bit of polishing compound onto the blade to remove some of the residue from the etching. I use Flitz or Peek polishing paste with a paper towel and some WD-40. Polish lightly and be very mindful of the sharp edge. Clean the blade with WD-40 and wipe off any excess oil.
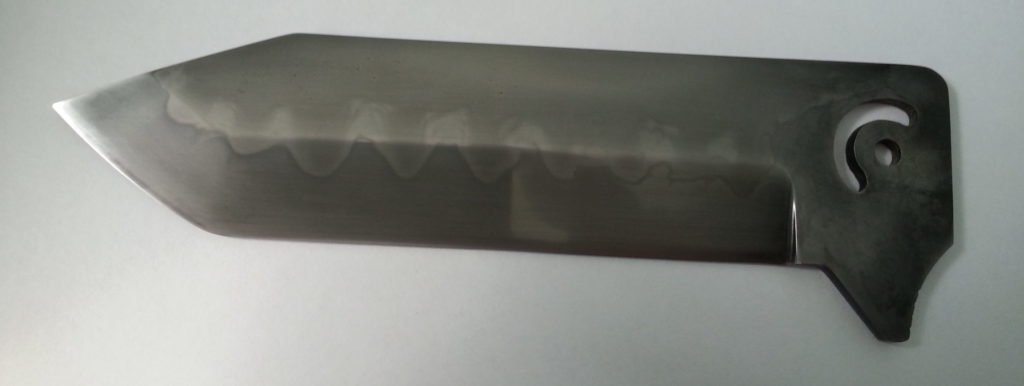
To get the temper line white, go over the blade lightly with a piece of 3,000-grit-or-higher sandpaper.
I hope this gives some insight into the fun world of temper lines and more people will experiment with this fun process.
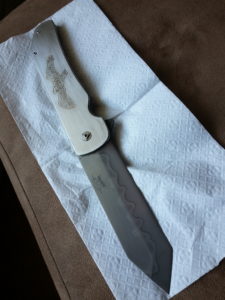
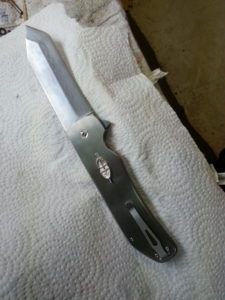
Above: The blade of the author’s finished folder exhibits a temper line with big waves—just the way he likes it.
For more information contact Wally Hayes, 9960,9th Concession, RR#1, Essex, ON, CanadaN8M-2X5 226-787-4289.
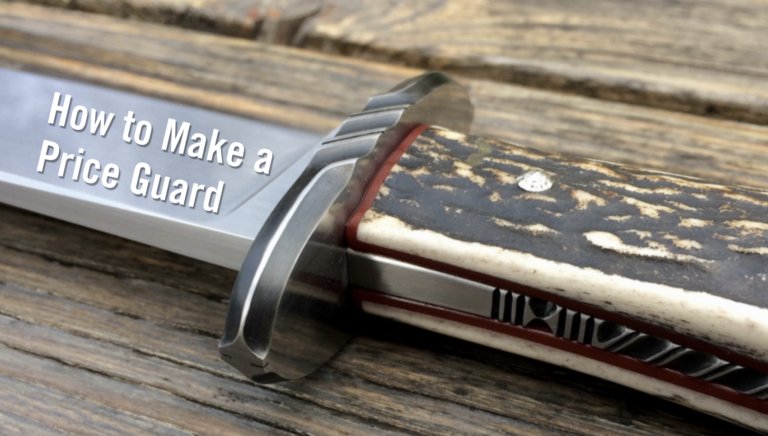
How to Make the Price Guard
BY JORDAN LAMOTHE
The author fashions it in the style of the classic 19th-century maker
In 2017 I received a commission for a piece in the style of Michael Price, a mid-19th-century knifemaker whose knives are stamped “M. Price San Francisco.” The customer sent me an image of the knife I should use as my template: a spear-point bowie with elk antler scales and Price’s iconic “peanut”-shaped handle. However, he also asked me to add some filework and make it my own. This was not intended to be a replica of the historic piece.
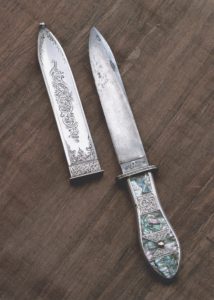
The Price knife whose shape I was to imitate was symmetrical and quite simple, but I found myself a bit baffled by the guard, struggling to answer the question, “How did he attach it?” From the single-side-view photograph I had, several explanations would have been possible: It might have been a frame handle, or the guard might have been slid on from the blade end and soldered in place; or perhaps the image was just an optical illusion, and the swell in the handle was narrow enough so that the guard could slide on from the tang.
Lacking access to the knife or to photos showing the guard/handle juncture, I voiced my confusion on the American Bladesmith Society internet forum. ABS master smith Lin Rhea responded promptly with the expertise of one who has extensively studied and taught 19th-century blacksmithing and knifemaking techniques.
Lin wrote that the knife had a full tapered tang and that Price likely “slid the guard on from the back and forged the tang wider.” Lin added that the shape of the handle would allow the guard to slide back far enough so I could still finish the blade, and the blade would have been hardened after forging the tang to shape.
The practice of passing one piece through another and subsequent forging to form a captive part is common in the traditional joinery found in ornamental and architectural blacksmithing. However, it seems to have been largely forgotten in the knifemaking realm. Meanwhile, I have always fitted the guard after heat treatment and final grinding. It struck me as a new way of thinking about the knifemaking process, one I was eager to try. With Lin’s excellent instructions, all I had to do was execute the design, carefully thinking through the order of operations.
FORGE, GRIND and SAND
Forging the Price-style knife was barely different from forging a hidden-tang blade—I just left the tang really beefy. I forged the blade shape and bevels and shouldered the tang ever so slightly. I left the tang as close to the stock thickness as I could for its entire length so I would have plenty of material to forge it wider and taper it later.
After forging I ground the blade to its final dimensions, knowing that any grinding would be more difficult after the guard was attached, and tapered the tang slightly on all four sides. Though I left the bevels of the blade with a 600-grit belt finish, I knew any part of the blade that contacted the guard must be finished as close to the final polish as possible. Any material removed in final polishing would affect the guard fit, so I hand-sanded the ricasso. I also sanded the edges of the tang from the shoulders back about 1 inch—any sanding beyond that would have been lost when forging the tang. In anticipation of the particular fit I wanted between the handle liners and the tang, I slightly rounded the tang’s edges. At that point, every surface contacting the guard was exactly the way I wanted it in the finished knife, and I was ready to fit the guard itself.
FITTING the GUARD
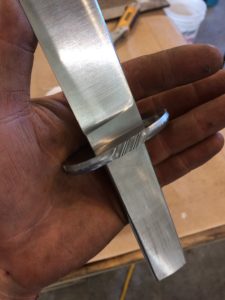
Fitting a guard for a full tang is only slightly more difficult than fitting one for a hidden tang. As always there must be no gaps between the face of the guard and the ricasso, or beneath the blade shoulders. The added challenge is that there must also be no gaps between the back side of the guard and the edges of the tang (the flats of the tang can be drafted slightly, because the handle scales will cover the transition). I used mild steel for the guard, which would be selectively blued to highlight my filework and would withstand the high heat of forging the tang. I also shaped the guard and added filework. Though these processes wouldn’t affect any of the fitting tolerances, they would have been much slower with the guard in place. I then sanded both guard faces to their final grit finish (Figure 1).
BACK to the FORGE
After spending hours grinding, filing and sanding, I was ready for the nerve-wracking challenge of putting my hard work back in the forge. At the time I made the knife, I used a coal forge almost exclusively—it was the perfect heat source for this kind of forging.
In order to protect the carefully finished guard and blade, it was important to have a very isolated heat on the tang, which also allowed me to hold the blade in a gloved hand while forging to avoid galling the soft metal with tongs. A torch could also have provided such control, but a gas forge would have made it difficult. I kept my coal fire very contained so that I had a small area of intense heat to use.
To forge the peanut shape into the handle I first drew the taper in profile, keeping the thickness consistent, and then used the cross-pien on my hammer to forge the swell. Once the profile was adequate, I refined the tapers in the thickness of the tang with the face of my hammer, making sure to keep them flat or a little convex. Any “sway” in the flats of the tang would result in gaps underneath the handle scales that could not be removed by grinding (Figure 2). I then ground the forged tang to its final dimensions and drilled the pinholes. The blade was ready for hardening (Figure 3).
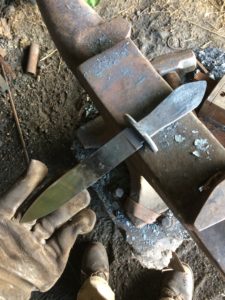
I hardened the knife using my heat-treating oven as I do on most of my knives. Nonetheless, in retrospect, heating it in the forge might have resulted in less scale to clean off the blade due to the more-neutral atmosphere. After hardening and tempering I used a torch to soften the tang, which would enable me to add the desired filework.
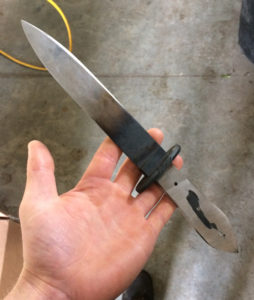
FINISHING
To finish the hardened and tempered blade, all surfaces on the knife and guard had to be re-sanded to remove oxidation. The setup sanding that I did prior to forging the tang enabled me to sand only small amounts of material off critical places—such as the ricasso and guard face—to minimize the changes to the guard fit. Though not flawless, the final guard transitions were very clean on both the front and back faces (Figures 4 and 5).
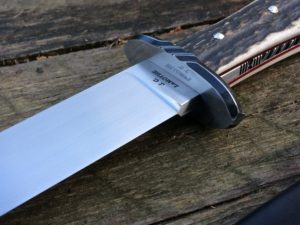
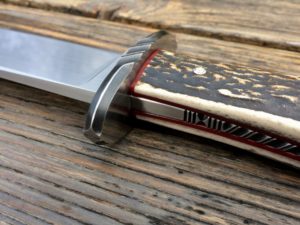
From this point forward, finishing the Michael Price-style knife was a fairly typical progression of fitting the handle materials and shaping them to meet the tang, making sure to properly mask the carefully sanded faces. After shaping the handle, I added the filework to the tang, bluing and polishing as my design required. After every piece had received its final finish, I glued them all together with epoxy and added three piened nickel-silver pins to complete the knife (Figure 6).
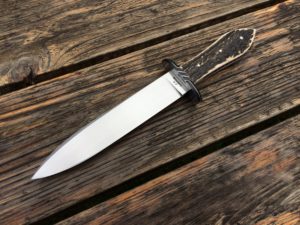
LEARNING & RE-LEARNING
The process of making a knife such as this requires more forethought and planning than most techniques that involve fitting a guard after all the forging is complete. It is also considerably more difficult to meet the high standards of fit and finish that are to be expected on today’s handmade knives. Working from a drawing helped to keep all aspects of the knife consistent with my desired result. Even so, reasoning out the order of polishing was still crucial, because each step limited access to certain places on the knife.
Such an inflexible order of operations begs the question, “Why use this process at all in our modern day and age?” If form, fit and finish are the primary goals, then using frame-handle construction would, indeed, give more reliable results for a knife of this shape. Additionally, it would be impossible to use this guard technique on any asymmetrical handles that flare directly after the guard.
From a practical standpoint, one answer is that forging the tang after slotting the guard is an expedient way to make a symmetrical handle without the meticulous and time-intensive machining that frame-handle construction requires.
Perhaps more importantly, however, practicing historical techniques shows attention to the history of knifemaking and adds a depth of craftsmanship to any given piece. It is a process of learning and re-learning that can yield different perspectives on what is possible in knifemaking, enriching the craftsperson and adding to the vitality of the craft.
For more information contact Jordan LaMothe, Dept. BL12, 1317 Count Rte. 31, Granville, NY 12832 518-368-5147 [email protected], jordanlamothe.com.
Must Read Articles

Knifemaking 101 – Read This Before You Make a Knife
by Wayne Goddard
My experience has taught me that there's nothing like digging in and getting started. I've often said the hardest part of the...


