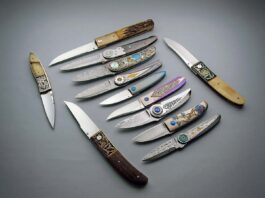

Knifemaking

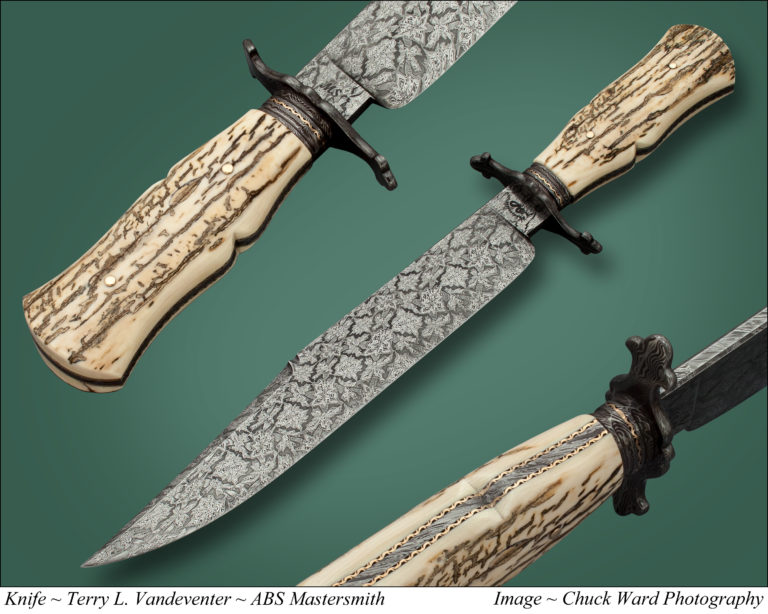
Knifemaking is the building of a knife, which includes the blade, handle and other accouterments. Blades are made by either removing metal from a steel blank via a grinder – known as stock removal – and the forging to shape of hot steel into a blade in the process known as bladesmithing. Other parts, including bolsters, guards, pommels, etc., are needed to complete the finished knife.

Featured Knives – – Knife Collecting – – Tactical Knives – – Survival Knives

Stainless Damascus: Challenges In Forging

0

Stainless damascus knives look fantastic and resist rust in the process, but present the knifemaker with a host of challenges.

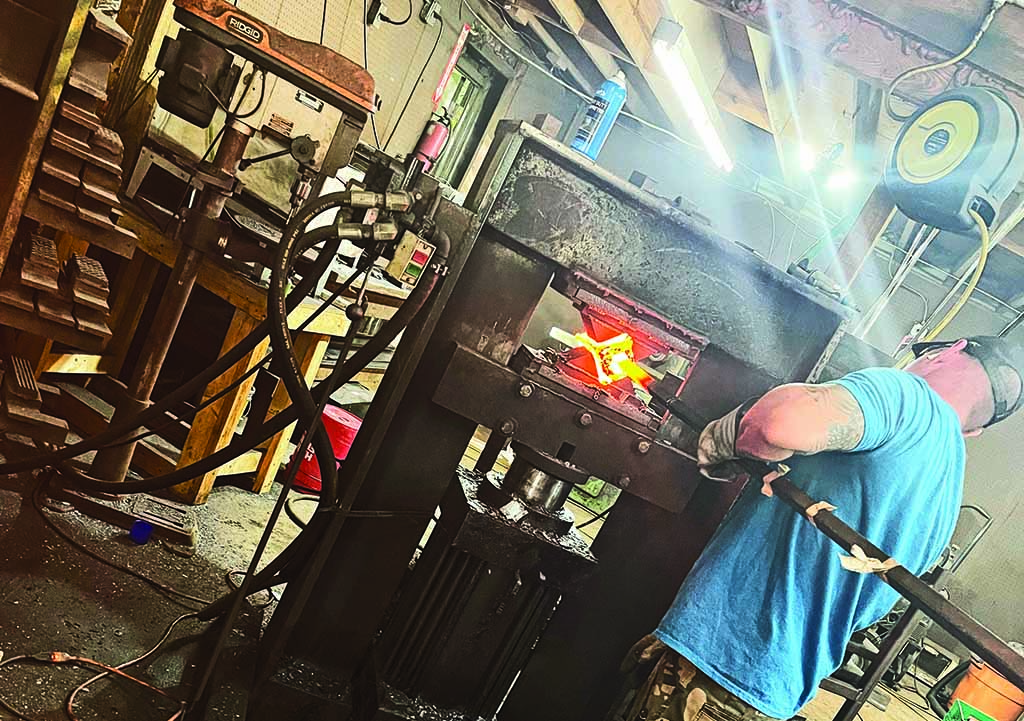
It’s not easy forging stainless steel. It’s harder still to forge damascus patterns out of it. Nonetheless, those who specialize in forging stainless damascus for sale to both factory and custom knifemakers, who spend their days before a power hammer turning out billet after billet, say the material is as hot as ever. Meanwhile, they’ve developed a couple of tricks to keep the welds sure, the patterns crisp and the innovation marching forward.

“There’s just things that I’ve been able to do now that I thought I wouldn’t have been able to do when I first started,” said Mike Norris, a smith of stainless damascus since the mid-1990s. “For instance, I actually make Turkish twist damascus in stainless.”

Norris runs a one-man operation in his Kentucky shop. In a moment when he wasn’t moving between his forge and Blanchard grinder, he explained part of the process. “When you forge carbon steel, you can use flux. You can just stack the layers up and flux ’em and stick it in a fire and make it weld like that. With stainless, you have to have a controlled atmosphere around the billet,” he explained. “Flux doesn’t work on it.”

Stainless Damascus Forging Process

If the weld in a carbon damascus billet doesn’t take, a smith may have an opportunity to get another whack at it. No so with stainless damascus. There’s one shot and if it doesn’t fuse, the billet heads to the scrap pile. Moreover, no oxygen can touch the stainless steel during the process. While other smiths build a can, fitting metal in some kind of container, fusing it shut and then launching into forging, Norris uses stainless foil.

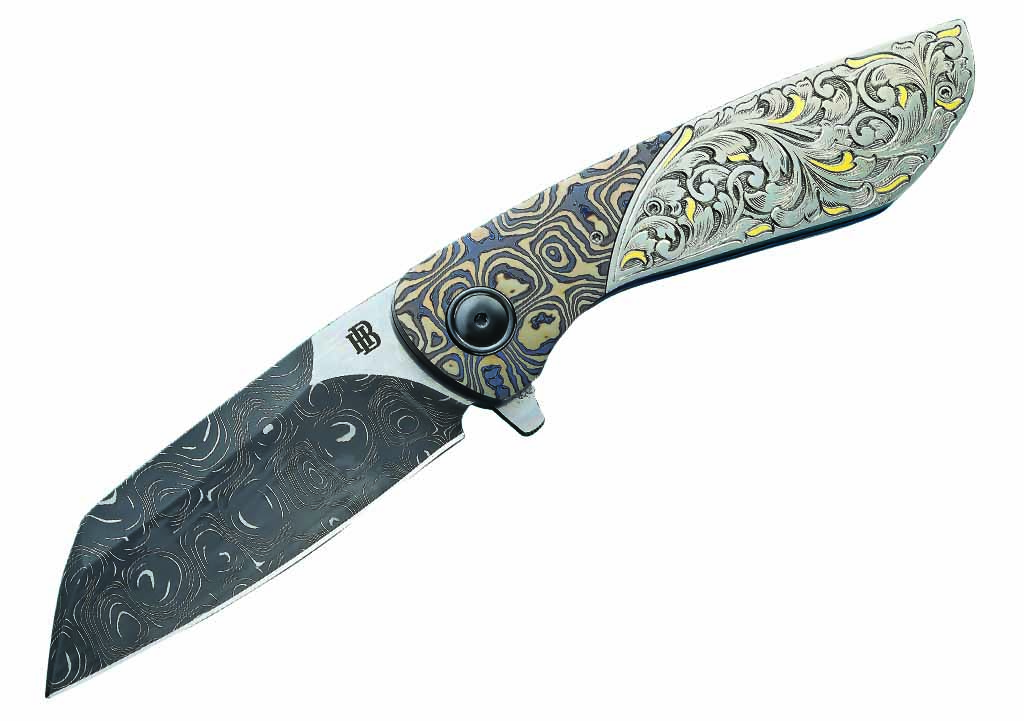
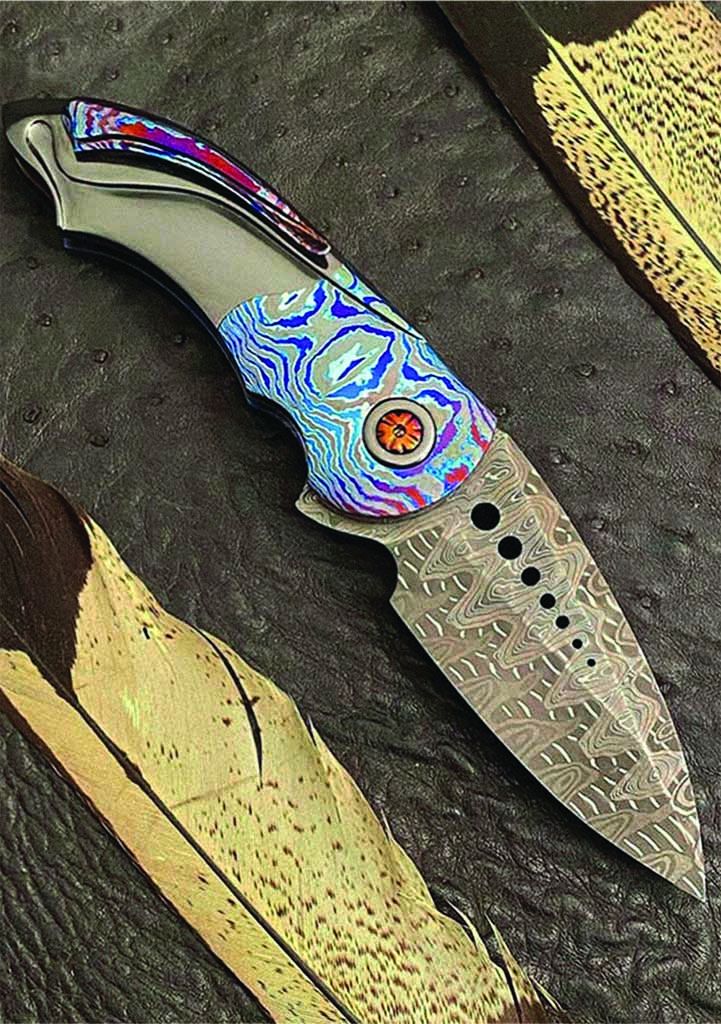
Herucus Blomerus outfits his HB 18 PHIRI folder in a blade of Intrepid stainless damascus forged by Chad Nichols Damascus. (SharpByCoop image)

Stainless damascus is as popular as ever, Norris says. His patterns most in demand are Fire Clone and Hornet’s Nest, and he typically forges them from 19C27 and 302 stainless and D2 tool steels. In the past few years, he said he’s seen many makers grind blades from san-mai, a blade material with a core of hard steel sandwiched by softer ones.

Tired of seeing a core sit off center on a finished knife, lopsided between two outer layers, Norris developed straight-core san-mai. He’ll cut a damascus billet in half, sandwich it between sides of an XHP stainless, and forge weld it all together. The result keeps the core centered and the pattern undistorted. That way when the maker takes the steel to the grinder, the core is “gonna be there every time,” he said.

All that effort helps the end-user rest easy, Norris opined. Instead of worrying about caring for a carbon blade, a stainless damascus one has the corrosion resistance and can look good doing so. One other benefit, Norris said: it can hold its contrast. The knife Norris has taken bowhunting for about two decades—made with one of his early billets of stainless damascus—looks almost as good as the day he made it. “And,” he exclaimed, “I’ve skinned a lot of deer with it!”

Experimenting With Stainless Damascus

Forging stainless damascus requires a willingness to go off map. It’s not the land of 1080 carbon steel.

Fire Clone stainless damascus by Mike Norris is the blade steel for a Jonas Iglesias folder. (Image courtesy of Mike Norris)

Chad Nichols of Chad Nichols Damascus can typically devote time to experiment in December, when business slows down somewhat and he and his shop of five have a little extra time. Plus, the summer temperatures in his Mississippi-based locale can sometimes get downright hellish.

Chad’s shop turns out a range of knife materials, including titanium damascus, Mokuti, carbon damascus and stainless damascus. Boomerang and Wave Pool have been damascus patterns popular with his customers, as have the san-mai-type billets.

According to Chad, damascus essentially breaks down into two basic patterns: raindrop and ladder. Lately, though, he’s been trying out new types of steel. He’s been forging san-mai billets with unusual core steels. Hearing recently that CPM MagnaCut, a 4V-type of steel, might be the next hot blade material, he started using it as the core.

Tempest by Brian Nadeau offers up a blade of stainless damascus in NitroV by Vegas Forge. The frame is titanium, zirconium and AKS Timascus™. (SharpByCoop image)

And just how do you go about working with a new steel?

“Guess,” Nichols blurted, laughing. “Start off with a pretty good educated guess and go from there. I mean, it still is steel, each one has a characteristic, but you just got to kind of baby step it until you figure it out. Then take notes.”

Once he’s figured a steel out, it’s smooth sailing—mostly.

“The first time, yeah, but after that, it’s just like anything else. I’ve been doing it for almost 20 years and if there’s one thing, it will take you to school,” he said. “Each one of them moves different, takes the heat different. There’s some steels you have to be super careful about not overheating them like by 20 degrees.”

Yes, sir, some like it hot.

Pattern Making

According to Jesse Harber, president of Vegas Forge, it was just seven years ago that the average consumer didn’t know what damascus was. Now, they see it on Forged in Fire and know.

Chad Nichols Damascus has been trying out new types of material combinations lately, including forging san-mai billets with unusual core steels. (Chad Nichols Damascus image)

The vast majority of Vegas Forge’s business is stainless damascus. Because it works with mosaic damascus—building patterns in a can, sealing it and applying the heat—Vegas can also put, say, a proprietary logo straight into the steel. Out of the 16 patterns Vegas Forge offers, Herringbone and Spirograph are the hot ones. They are patterns born out of some serious development.

A few years ago, “we modified from MIG welding to TIG welding, which gave the can a lot tighter seals, so there’s no holes in it,” Harber said. “And we advanced the system that we used, actually worked with some engineers out of California, a couple of good old Russian boys. That’s probably the biggest advancement we’ve made.”

The thing they try to prevent? A bad weld, something that would become all too apparent if the billet was milled and the steel started peeling apart.

The Hybrid stainless damascus pattern by Mike Norris is the blade material for a folder by Alister Bastian. (Mike Norris Damascus image)

After forging the stock down to an inch thick, “from there, we’ll use the rolling mill to roll it out. It takes a lot more time to do it that way but the pattern stays crisp,” Harber noted. “It doesn’t blend or blur the layers together from all the impact.”

Amidst all the innovation, the “crazy wizardry” of pattern development, Vegas Forge has expanded outside the knife industry. It also supplies round stock to jewelry makers for men’s rings, for instance.

As it turns out, plenty of people appreciate the ease-of-care and mesmerizing patterns from a good piece of damascus made from stainless steel.

Stropping: What It Is And How It’s Accomplished

0

What is the purpose of stropping? Is it the same as sharpening a knife? We’ll answer those questions and more as we explore how to put the finishing touches on a blade.

Forged Knifemaking
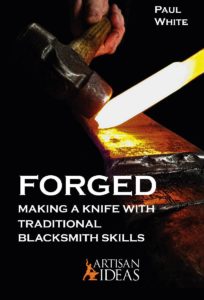
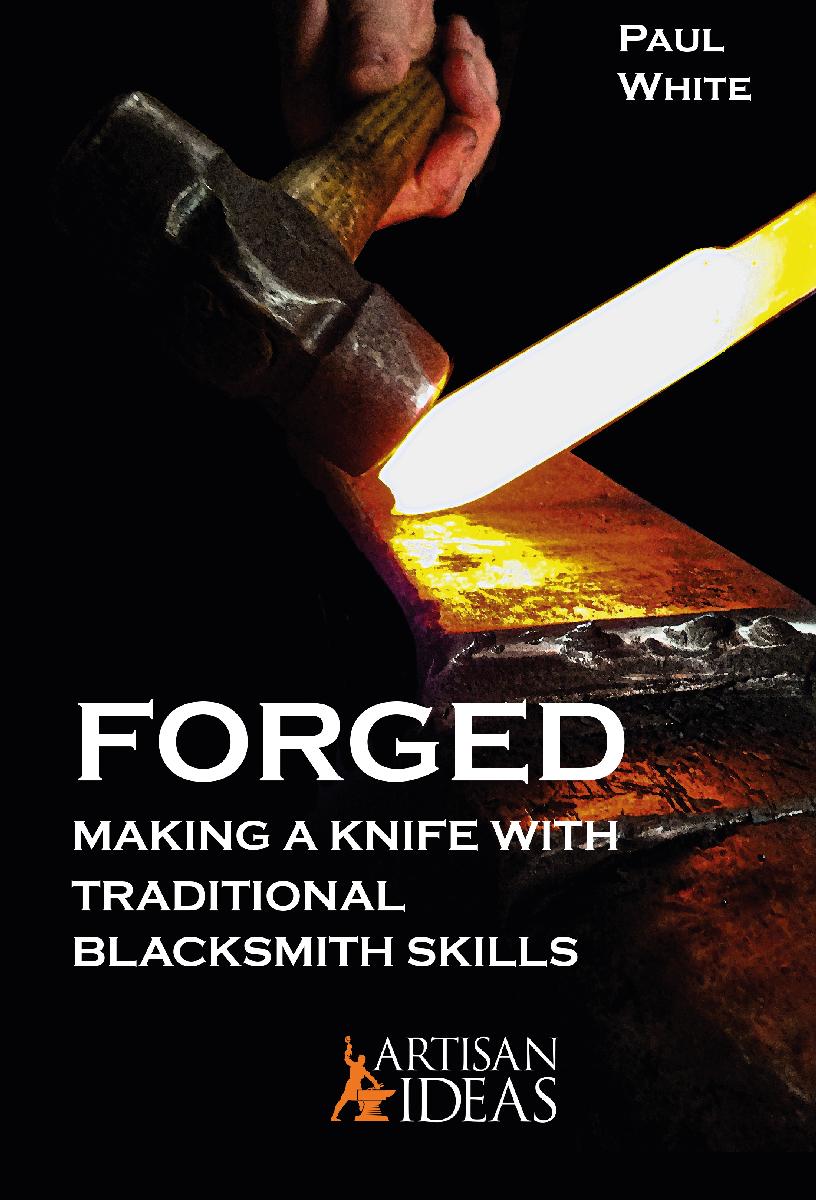
This article is an excerpt from Forged: Making A Knife With Traditional Blacksmith Skills available at ShopBlade.com.

Burr is a term used to describe the turned-over edge of a freshly sharpened blade. The burr can be seen as an ultra-thin, wire-like structure at the edge. When sharpening you are bringing one edge surface closer to the other edge surface with alternating and even strokes, left-right-right-left against an abrasive such as a sharpening stone or metal grade sandpaper or strop. By alternating sides you simultaneosly remove surface material from both of the sides forming that burr. Sharpen back-and-forth, one side and then the other, and the burr appears.

What Sharpening Does To A Blade

At first the two opposite sides are divided by the blade’s edge thickness and there is no burr. This is seen as that paper thin shiny line from tip to choil. As one side is brought closer to its opposite side (i.e. sharpened), one side or the other will eventually meet the other and the thin shiny line will disappear.

At that point there isn’t enough mass to support the edge against the hard-abrasive surface, and the super-thin edge rolls/curves over in the opposite direction, forming the burr. The burr can be seen with the unaided eye and felt with your thumb. The objective at this point is to switch and sharpen the edge from the other direction with a yet finer grit abrasive. This maneuver makes an even smaller and thinner burr on the opposite edge. After you sharpen several times like this in opposite directions, with finer and finer grit paper, the burr will be reduced microscopically and be difficult to see or feel but will still be there. This final use of fine grits of abrasive is considered, and is called, a hone.

What Stropping Does

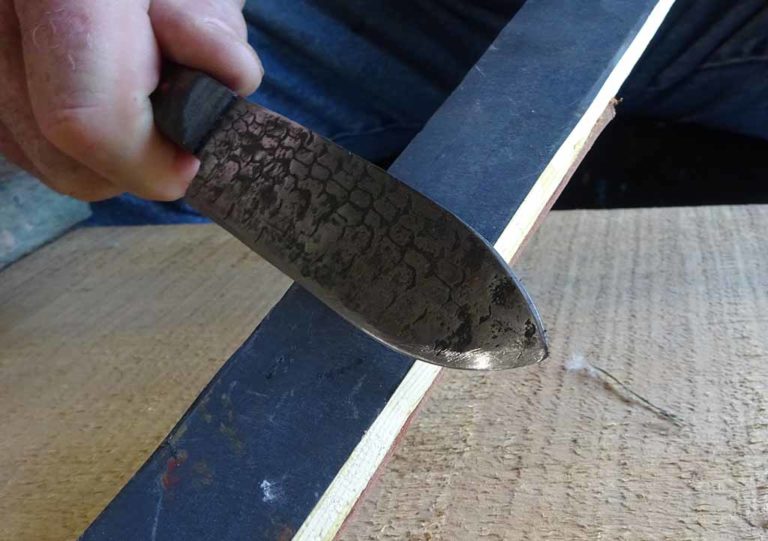
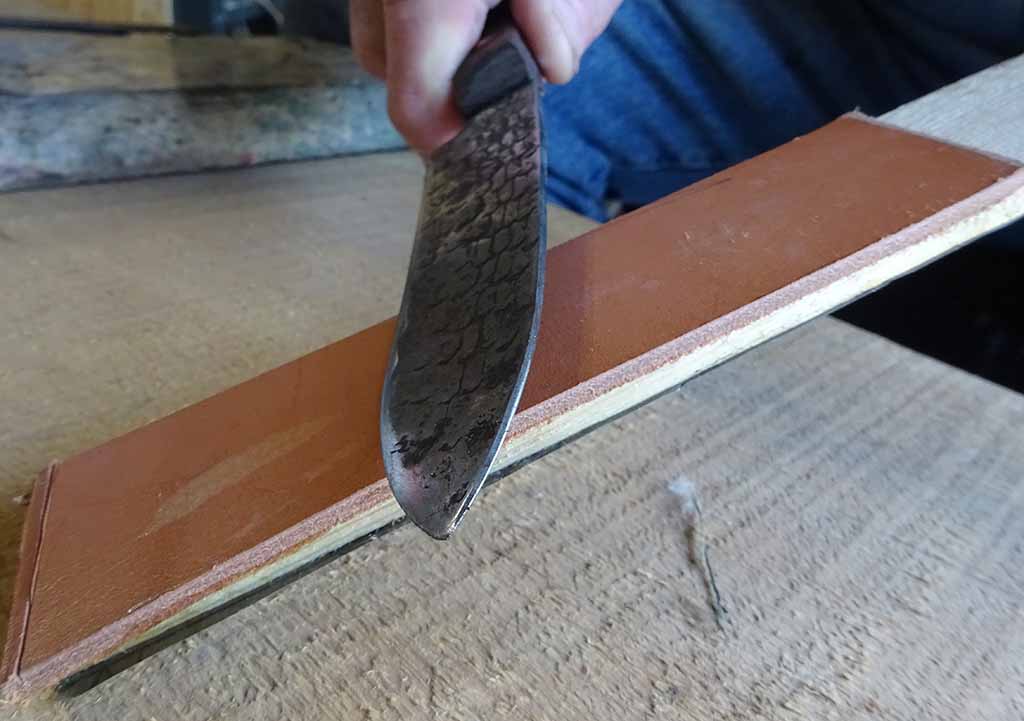
At this point switch from a superfine hone-grit paper (1500 plus grit) to a leather strap, belt, or section of a belt, called a strop. The fine sandpaper hones, and the leather strops. Strop with the same back and forth motion, strop the blade’s edge against the leather. This action bends the now unseen burr back and forth against the leather and the burr finally breaks free. The edge thickness is now just paper thin or less. So “paper thin” doesn’t sound like the edge would bear up during use, being this thin, right on the very pinnacle of the blade’s edge—but it does.

With removal of the burr the edge acquires maximum sharpness and can be re-honed repeatedly without subjecting the blade to recurring sharpening cycles with lower grit sandpaper. This maintains the thin-and-sharp element of your blade.

Choosing A Strop

Make your strop from a strip of leather belt (10-inches long) glued to a bit of yardstick or lath material. Glue a strip of 800-1500 grit wet-n-dry sandpaper to the other side for a hone.

The same exact motion is used on the leather side of the strop stick. When the smith is “into” the motion it is similar to a continuous figure-8 movement. Most of the time the leather is enough to restore the blade’s edge without using the sandpaper side of the stick.

How To Strop

Stropping is a low-angle slap and slide motion. The leather actually sharpens the microstructure of the blade’s edge. It 1) bends the burr back to a sharp edge or 2) bends it back and forth till it breaks, like bending a wire coat hanger back-and-forth, revealing a new raw edge. Visualize a barber in an old-west, cowboy movie slappin’-n-slidin’ his straight razor on a big leather strop. Slap-n-slide your Frontier blade on the 800 to 1500 grit black W/D sandpaper 10 to 15 times then on the leather the same number of swipes. When your edge dulls you can often just strop with the leather, forgoing the hone altogether, in the restoration of a keen cutting edge.

After stropping, if your knife edge isn’t near razor sharp, go back to your wet-n-dry-sharpening action with the higher numbered sandpaper grits (400, 600, 800) then strop again.

Testing The Edge

Feel the edge with your thumb, perpendicular to the edge. Never run your thumb or fingers vertically up or down the blade. It will cut. With time you’ll be able to tell in an instant various level of sharpness with just your thumb. With time you will feel the burr and know the angle of any blade with just a touch of your thumb.

Another sharpness indicator is the use of an old leather belt or scrap of leather. Almost any “sharp” knife can cut a sheet of paper but stiff leather is the true challenge. First, use a knife of known sharpness. Cut a bit from the leather. Note the force needed to peel off a few pieces of leather. Use the same piece of leather on subsequent blade edges you sharpen in the future. By comparison, the quality of those blades’ sharpness can be gauged.

This article is an excerpt from Forged: Making A Knife With Traditional Blacksmith Skills available at ShopBlade.com.

Get More Knife Sharpening Info:

Who Made the First Damascus?

The origins of damascus steel date to as early as 1500 BC.

The allure of damascus steel lies not only in its beauty and utility, but also in the mystique of its origins. Though its development began in ancient times, the word damascus has grown to encompass more than one method of steelmaking, and the earliest method is believed to date back to 1500 BC.

“Damascus steel today can mean at least three things,” explained blacksmith and steel authority Rick Furrer. “First, there’s pattern-welded steel where a bloom of steely irons is welded into a solid mass which then has a pattern. This is the oldest of damascus-steel-making technologies and one which most blacksmiths reproduce with layers of modern steel welded together.

“Second is crucible steel, where the material is fully melted in a container and then the resulting ingot is forged into a bar, which may or may not have a surface pattern. Third is overlaid or inlaid wire, gold, silver, copper or such into a base metal surface such as steel or silver to make a surface pattern. Some call this damascening or damascene.”

Those who have studied the origins of damascus tend to agree that pattern welding did happen first and that it occurred in the Far East, the Indian subcontinent, the Middle East, Indonesia and Europe. Crucible steel production is also referred to as wootz, and its beginning, for some, is easier to pinpoint.

“Some call crucible steel, or wootz, the original damascus, but pattern welding predates it by more than 1,000 years. Pattern welding was in Europe by 1100 BC in Greece and easily by 600 BC in Central Europe. It was very widely spread by 400 BC,” observed Furrer, who in 2011 participated in the filming of a Public Broadcasting System NOVA segment on the famed Viking swords from circa 800-1000 AD with the Ulfberht inscription. The extremely low slag content of the Viking blade steel may indicate a new development in steel processing in Europe, or that the Vikings were forging blades from imported crucible steel.

“The earliest examples of blades made from wootz steel date from around the first century BC,” related ABS master smith Kevin Cashen, “and the oldest examples of the material seem to come from India. While the Indians seem to have been the first to produce crucible steel, they were soon followed by other cultures in the Middle East such as the large production centers in what would now be Turkmenistan and Uzbekistan. Pattern welding is a trickier process to pinpoint, date or credit to a given culture as it is very old, and just about any people working iron would have produced welded blades on some level.”

Technological Advancements Of Demascus

As technology evolved, production methods improved and fueled the availability of high-quality blade steel. Performance and purpose have contributed to the growth of the industry and the changes in the scale of production through the centuries.

“All of these steel processes were driven by warfare and weapons technology,” noted ABS master smith Steve Schwarzer. “As soon as someone discovered a new method, everybody who wanted to survive jumped on that new method. The moment the local smith developed a method to heat steel to a totally liquid state and control the carbon, the need for wootz and pattern-welded blades fell to the wayside except for the very few who viewed it as art. When the Bessemer converter came into use [in the 1850s] and steel was produced in tonnage at any carbon level desired, there was no need to use the labor-intensive process of making one small piece of material at a time.”

The basic tools used by early makers of pattern-welded damascus were quite similar to those used by the modern bladesmith—hammers, anvils and forges. Dan Farr hammers hot steel in his shop. (Dan Farr image)

Nonetheless, the craftsmanship and performance of forged damascus is timeless. Modern damascus makers take advantage of improved technology and know-how. The ancient producers worked with basic tools and equipment during a process of both production and discovery. The early makers of pattern-welded damascus combined bloomery steel with varying properties, says Cashen, but the basic tools were quite similar to those used by the modern bladesmith—hammers, anvils and forges.

“One difference is possibly the absence of the fluxes we use today,” Kevin added. “The simple bloomery products of that time period, when worked in a charcoal fire, would weld much more easily and not require the oxygen barriers that we have become so accustomed to today.”

The early crucible process would have involved sealing some amounts of premade iron along with certain organic/carbon-bearing materials and fluxes into a clay crucible that would have been placed in a charcoal-fired furnace, which would usually have been fired by a bellows or natural air drafts.

“The clearest difference in either method now compared to then is the fuel we have at our convenience today,” Cashen commented. “Gas-fired forges and furnaces make the tasks much more convenient than the arduous, dirty labors at ancient charcoal fires.”

Staying True To The Steel’s Roots

Maybe it is true that the more things change the more they stay the same, particularly as it relates to damascus steel. Surviving examples of either pattern-welded or crucible damascus are impressive in their quality. Modern bladesmiths produce damascus and mosaic damascus/canned steel that simply defies description, the beauty of the patterns speaking for themselves.

One of the differences between the way damascus is made today as opposed to centuries ago is the use of flux—applied here to a twisted billet by Tim Britton. (Britton image)

Damascus also originally occupied a transitional period in human history. As the Bronze Age waned in Europe, basic iron blades began to appear and pattern welding followed. In the East, iron blades of piled construction were made and pattern welding may have taken place concurrently with it, both being phased out as the crucible process came along. Most experts agree that Europeans were introduced to crucible damascus/wootz during the Crusades.

“With the wootz made by high-temperature smelting in a crucible and forming a cake, bulat or ingot, this ingot was then formed in a very slow, methodical process to produce a beautiful pattern of iron-carbide ferrite and cementite banding,” Schwarzer commented. “This was called watered or damascus steel. It is thought Europeans encountered this material for the first time during the Crusades near Damascus, Syria. Then, this cast material was traded all over the world.”

ABS master smith Al Pendray is well known for his work in wootz steel. Along with John D. Verhoeven, he is listed by the U.S. Patent Office as one of the inventors of “a method of making a steel article having an external surface appearance and an internal microstructure resembling that present on an antique ‘Damascus’ steel sword or blade.” Pendray contends that the earliest crucible damascus was made in Persia and quickly got the attention of Westerners who came in contact with it. “Wootz is ultra-high carbon and will take a real clean edge,” he remarked. “With all the nonmetallic stuff and impurities floating to the top in the process, it’s also a super clean steel.”

But Why Call It Damascus?

As intriguing as the steel itself, the name damascus has a mysterious origin. While the obvious link is to the ancient capital of Syria, the answer to the source of the steel’s moniker is open to speculation.

“One such story maintains that only wootz can be called damascus steel because it was wootz that the Crusaders first encountered in the Middle East, with the town of Damascus being the trading hub for its distribution, thus lending it the name,” Cashen offered. “This theory ignores the fact that there were also damask cloths [with intricate patterns formed by weaving], and that the treatments on many materials involving carving, inlay or otherwise were worked with an intricate flowing or water-like pattern called damascene. It is also worthwhile to note that an old Arab term for water is damas, a coincidence that’s hard to ignore when you consider the number of cultures that refer to patterned steel as ‘watered’ or having ‘watering.’”

Speculating about the origin of the name is intriguing, but Cashen says it is what it is. “In any case, the number of centuries that any steel with a pattern in it has been called ‘damascus’ sort of renders all of these speculative picky semantics irrelevant,” he noted. “Languages evolve, and the word means what it does today. When this is taken into consideration, any steel possessing an induced pattern could be safely referred to as damascus, with pattern welding or crucible steel being the more specific types of patterned steel.”

According to Master Bladesmith Steve Schwarzer, modern steels are far superior to even the best of the ancient materials because of quality control and repeatability.

Finest Blades Ever

As with many highly prized skills, individual bladesmithing and the production of high-quality damascus steel in small quantities has been eclipsed by mass production, given the availability of modern equipment and technology. However, the steel still owes its lineage to the blacksmiths of ancient times. Additionally, today’s bladesmiths keep the tradition and the skill alive like no mass production process can.

“Modern steels are far superior to even the best of these ancient materials because of quality control and repeatability,” Schwarzer mused. “What modern steels don’t have are beauty and the visual fingerprint of the steel artist’s hand. The damascus blades being made in modern times are far superior to the ancient blades because the modern smith is using these very sophisticated steels and modern scientific techniques to produce the finest blades ever made.”

DIY Engraving Vise or Block

0

The bowling ball vise makes knife handle work easy and inexpensive

As the old adage goes, “necessity is the mother of invention,” but whoever thought of making an engraving vise out of a bowling ball deserves a medal!

The engraver’s vise, which has a rotating base so the craftsman can position his work at any angle, has been around for many years. Small versions are affordable but one big enough to accept a large knife handle can cost in the $600-to-$700 range.

Enter the bowling ball vise.

American Bladesmith Society Master Smith Don Hethcoat has made several bowling ball vises, including one for fellow ABS master smith Joe Keeslar. Both makers find the vise particularly useful for inlaying gold and silver wire into knife handles. “I learned about the vise in 1988,” Hethcoat recalls. “I wish I could take credit for creating it, but I first saw it being used by Firearm Engravers Guild member John Barraclough.”

“The first and only bowling ball vise that I ever had was a gift from Don Hethcoat many years ago,” Keeslar says. “In my Kentucky shop I use an engraving ball for my silver wire inlay work, but for my shop and demonstrations in France I use a bowling ball vise. I could not afford to buy a second engraver’s ball for my shop abroad.”

Used bowling balls are cheap, and beyond that the biggest expense to making a bowling ball vise is adding a machinist’s vise on top of the modified sphere. The cost for these items is a fraction of what an engraver’s vise costs, and the rest of the materials to complete the vise are very affordable. Indeed, they can be found around your shop, home or at your local scrap yard.

IMPROVISING WELCOME!

While the basics of making Hethcoat’s bowling ball vise are outlined in the below photo, there’s no reason you can’t add your own personal touches or substitutions. For instance, Don uses a piece of round pipe for the base of his vise, but Joe has a different way of skinning the cat. “My bowling ball sits in a lawn mower tire with the rim removed,” Keeslar notes. “It’s best to have a tire with rim diameter of about 6 inches. If no used tire is available, a new one can be found at a Harbor Freight store.”

There are other differences between the two makers’ vises. Hethcoat uses a bench-mount machinist’s vise mounted to the top of his modified bowling ball, while Keeslar prefers a low-profile drill-press vise commonly used for drilling and milling. Both vises work fine and your choice may be determined by factors such as your height in relation to your workbench or the configuration of the vise jaws that suit you best.

The jaws of the vise will need to be padded to keep from marring the knife handle. Here again, choose your preferred padding material. Thick leather will work as well as high-density foam—or take a look around your shop and use your imagination.

ROLL on a BUDGET

As a long-time instructor on how to make knives, Keeslar says beginning students may not have the money for expensive equipment, so he uses his bowling ball vise as an example of how they can get started without a huge investment.

“I personally use an engraver’s ball for my silver wire inlay, but the bowling ball vise is very inexpensive to make and affordable to use,” Joe observes. “When doing demos here in the U.S. [and abroad], I use the bowling ball vise to demonstrate to my students an easy way to get started in doing wire inlay. I also show them how to make the stabbing chisels and the like. So much of what is needed to produce knives is expensive and this is one activity that one can do for a small investment.”

It’s all about saving money. The extra cash you save by making a bowling ball vise can be poured into better handle materials—everything from wood to wire. This translates into a more upscale knife for your own satisfaction or, if you sell your wares, a higher price you can get from a customer. You’re a winner either way!

6 Easy Steps to Make the Bowling Ball Vise

According to ABS master smith Don Hethcoat, “Bowling balls make the perfect vise for knifemakers doing inlays and similar close work where you need both stability and flexibility. You can buy an old bowling ball at a flea market or thrift store for two or three dollars.”

In his own words, here are Don’s six steps:

1) “Saw off about one-third of the bowling ball, getting rid of the old finger holes. I used a metal band saw but you may have other means”;

2) “Drill five holes in the flat top of the ball, one at each corner of a square with one in the middle using a half-inch drill bit, then chisel out a cavity in the center of the ball”;

3) “Fill the opened cavity almost to the top with lead shot to add weight, then seal the shot to the top of the hole with automotive Bondo® filler”;

4) “Make a round cover for the flat top of the ball using metal, wood or Formica®. Mount your vise on top of this. Mine is a machinist’s vise using its mounting system”;

5) “Make a base and you’re almost done. I used a round piece of 8-inch pipe cut to 2.5 inches in depth. Fill the pipe with Bondo, cover it with Saran™ Wrap and push the bottom part of the ball into it to make an impression. Clean up the excess Bondo [or, you can use the lawn mower tired described by Joe Keeslar in the story]”;

6) “Cut a round piece of suede to fit inside the round cavity so the ball can rotate freely. That’s basically it! Feel free to modify the vise to fit your own scenario.”

Custom-Made Chef Knife: The Kitchen Integral

0

One-piece custom-made chef’s knives embody strength, balance, line and flow and more

By Mike Haskew

As it does in other aspects of custom knives, integral construction, with blade bolster, tang and pommel forged from a single piece of steel, has its application in the kitchen. ­The high-performance chef ’s knives that result from such a construction provide an excellent opportunity for skilled knifemakers to showcase their abilities. Function is always at the forefront. After all, First and foremost, all knives must cut. So, chopping, slicing and dicing ability, comfort in the user’s hand, edge-holding properties, and easy maintenance and upkeep are prerequisites. To step it up, consider chef ’s knives that blend the basics in their efforts to raise the game. Good looks are indeed a bonus, and the featured models deliver with delicious damascus, tantalizing handles and overall presentation that will keep you in the kitchen just for the sheer pleasure of manipulating them.

FORM & FUNCTION TO CONSIDER FOR CUSTOM CHEF KNIVES

When Gabe Mabry of Norwood, North Carolina, cooked up a kitchen stunner with a 300-layer ladder-pattern damascus blade forged in partnership with Steve Grosvenor, he took the principles of form and function to heart.

“­There’s something about an integral chef ’s knife,” he said. “Forging it connects bladesmiths to their forebears. With all the modern technology, there’s only one way I can think of to manufacture an integral chef ’s knife—and that’s to forge it to shape. A well-executed integral will have impeccable balance and design flow that seems intuitive. Conversely, much toil went into the shape.”

 Mabry’s piece was constructed for a specific client order. ­ The damascus is forged from a combination of 80CrV2, 52100 and CruForge V carbon and 15N20 nickel-alloy steels. ­ e handle of ancient walrus ivory is tapered with a slight curve and accented with the owner’s initial in the butt.

“­The construction of an integral is a labor of love,” Gabe commented. “However, all the work and care of setting up the bolster makes the handle assembly simpler to a degree, with the inclusion of up to an inch of metal in the bolster. ­ is inch of material can be subtracted from the handle material, increasing the options in handle materials. Integral knife construction adds multiple steps and a degree of difficulty as well.”

While the fundamentals of any good working knife must be incorporated into the integral, the construction itself doesn’t apparently add or detract from the user’s experience. Balance, edge, comfort and dexterity, durability and cleanup still matter. And the last attribute is perhaps one where an integral has an advantage.

Above: A stacked billet is ready for more forging in Gabe Mabry’s shop. (Gabe Mabry image)

“An integral knife has its benefits,” offered Charlie Ellis of Eagle Crest Forge in Asheville, North Carolina. “And when done well it is very strong, with a minimal number of joints to become problems with material movement or becoming a possible breeding ground for bacteria. Also, it minimizes potential issues with wood movement. Having the joint positioned where there is the least chance of movement and using stable material is a wise choice.”

The HEXAGRAL CUSTOM MADE CHEF KNIFE

Ellis created a beautiful integral chef’s knife with a 10-inch damascus blade of 1095 spring and 15N20 nickel-alloy steels in a radial laddered W’s pattern, and an “S” grind for less resistance in the cut and better food release. The handle is African blackwood with silicon bronze and G-10 fittings. “It’s big but light for its size and balanced perfectly for a pinch grip,” Ellis explained.

The knife is fashioned in a distinctive style Charlie calls the hexagral. “I call this design the hexagral as a nod to my friend [and ABS master smith] Haley DesRosiers, who makes octagonal-shaped integrals she calls octagrals. With the hexagral, the integral bolster is shaped in a hexagon, both in cross-section and, quite challengingly so, on the faces.

“Compared to typical hidden-tang construction that is limited by the spine thickness, an integral can have a truly robust tang. Also, with this knife, the tang runs through to be bolted and capped on the end so that if for some reason the ep- oxy failed, there is a mechanical connection keeping it tight.

“So,” he continued, “while there are some practical bonuses to an integral, I would have to say that what draws me to them, and why I choose to make them the most, is their artistic potential. Seeing the pattern condensed in the bolster and then flowing out into the blade is always one of my favorite parts. Between that and the sculptural aspect of the transition between the blade and handle, there are so many interesting possibilities. I al- ways get excited with each new integral I create.”

Brent Stubblefield of Join or Die Knives in Richmond, Virginia, finds the challenge of integral construction one of the most appealing aspects of the undertaking. “Integral-construction chef’s knives are special because the production meth- od cannot be counterfeited,” he reasoned. “Standard stock removal processes can- not be used to make them, and machining processes, while an art unto themselves, cannot produce the flowing patterns that a forged damascus blade can.”

Brent Stubblefield’s chef’s knife features an “S” grind with hollow ground “cheeks,” while the cutting edge is flat ground up to about one-half inch above the edge to assist in food release. Depending on the pattern, Brent’s price for a similar knife ranges from $850 to $1,500. (Caleb Royer image)

For Stubblefield, the integral’s functional advantage lies in the flow of the handle, its uniqueness and strength rather than any perceived upgrade in edge performance. Integral construction, he says, should provide a blank canvas for the maker to use any shape or geometry desired. In this case, the style does not inherently improve edge geometry but al- lows for infinite possibilities.

“Larger stock must be used for integral construction,” he explained. “I usually use at least 1-inch round stock and, when making damascus, I leave the stock at 1 inch by 2 inches, plus the desired length. There must be enough thickness to leave material for the bolster and tang as well as drawing them out, and there must be enough blade material to draw the heel back toward the handle. In considering integral. hidden-tang-with-guard and full-tang knives, each has its pros and cons Quality material plus excellent fit and finish bring those differences down to the level of nuance. The standout advantage of the integral is the strength of the seamless connection of blade and bolster.”  

“A WELL-EXECUTED INTEGRAL WILL HAVE IMPECCABLE BALANCE AND DESIGN FLOW THAT SEEMS INTUITIVE.” -GABE MABRY

Brent’s chef’s knife has an 80-layer ladder pattern damascus blade forged from 1084 carbon and 15N20 nickel-alloy steels. The blade features an “S grind with hollow ground cheeks while the cutting edge is flat ground up to about one-half inch above the edge to assist in food release. The Virginia maple burl handle is fashioned in the style of French Sabatier chef’s knives with extra wood at the end to help balance the longer blade. A G-l10 spacer provides a subtle accent.

“Integral knives have fewer seams when built in a hidden- tang fashion, he added. “There are no inside corners where handle or bolster material terminates. So, the integral may be easier to keep clean and free of food particles. Although we do our best to seal our handle material to the tang with epoxy, there is always a possibility of liquid intrusion, So, the more seams around the tang, the more chances of infiltration. I’m building knives with the intention for multiple lifetimes of use, so I prefer any advantage for longevity.”

ADDED STEEL MASS

Jason Ellard of Coningham, Tasmania Australia, built a mosaic integral chef’s knife with an 8.86-inch blade of feathered damascus in 1084 and 1SN20 steels, spalted sassafras burl handle with a domed pin and twist damascus inlay, and an accompanying sheath in frame construction and nickel-silver and twist damascus to match the spacer. Overall length: 14.76 inches.

Jason Ellard’s mosaic integral chef’s knife boasts an 8.86-inch blade of feathered damascus in 1084 and 15N20 steels. Overall length: 14.76 inches. Jason’s price for a similar custom made chef knife: $7,000. (SharpByCoop image)

“The forward angle of the bolster- blade transition allows for easier stone sharpening,” remarked Jason. “Handle spacers are made from nickel-silver and twist damascus with broken edges for a nice feel. The handle also has proven edges, which help with stopping a hard ridge at the transition if the wood ever swells or shrinks. I carved out a recess to allow the bolster to fit inside the sheath, and the stand is ringed gidgee with damascus pegs raising the back portion and a nickel-silver plate under the front section. The sheath pin has a twist damascus inlay and its own designated holder on the stand. Lastly, I created a mosaic damascus logo plate pinned onto the base of the stand.”

Ellard approaches integral construction with a full understanding of its difficulty. “It takes a lot of skill in every aspect of creating it,” he observed, “and even more so to do it well. The forging, grinding, symmetry, handle fitting, and hand finishing are all a lot more difficult to do than other constructions, and it’s a major staple of a skilled maker to do this with a high level of quality. I person- ally just enjoy making integral knives a lot more. I find it more pleasing to the eye, and I enjoy the added challenges in creating them, allowing me to show what my skills are capable of.”

The stand for Jason El- lard’s chef’s knife is ringed gidgee with damascus pegs raising the back portion and a nickel-silver plate under the front section. The sheath pin has a twist damascus inlay and its own designated holder on the stand. Jason created a mosaic damascus logo plate pinned onto the base of the stand. (SharpbyCoop Image)

According to Jason, the added steel mass of the integral will always make the knife more solid and heavier than other types. Performance is a key attribute, though other kitchen knives are comparable in many ways. “The performance shouldn’t be affected negatively or positively as long as the knife is made correctly,” he noted. “The lack of a hard 90-degree at the ricasso in a hidden-tang knife can make cleaning a lot more difficult. It also makes it easier for debris or moisture to get into the handle. With the integral construction moving the seam further back, it takes these issues away very well. I’ve also found it easier to get a tight fit against an integral bolster than a hidden- tang ricasso.”

Integral construction in a chef’s knife adds another dimension to the artistry that is custom knifemaking. In fact, an appreciation of the skill and execution of the integral may actually push the chef to new heights of culinary creation.


Knifemaking: How to Make Temper Lines

0

Temper lines—aka hamons—are a very exciting part of knifemaking, and I would like to share with you how I produce cool temper lines on folders. -Wally Hayes


The latest folder exhibiting a handsome temper line—aka a hamon—by the author (inset) is this skull-encrusted model. (SharpByCoop knife image)

STEEL and CLAY

First you need to select your type of steel. You can use 1084 carbon steel or high-carbon damascus, but I prefer W2 tool steel. I get mine from New Jersey Steel Baron because I can get it surface ground to whatever thickness I need.

The W2 is low in manganese, enabling you to create wild temper lines. I grind the blade leaving the edge about the thickness of a dime. The thickness helps prevent your blade from warping in the quench and also helps hold the heat, giving you time to get the blade into the quenching oil.

The clay I use is a stove furnace cement used to repair fireplaces and chimneys. I get mine at the hardware store and it comes in a small tub or a tube like the tubes of silicone used with a squeeze gun for calking.

APPLYING the CLAY

To apply the clay I use a sharpened Popsicle® stick, being careful not to put any clay where the ball bearing in the liner will travel on the tang of the blade. Also, do not put any clay near the pivot hole as you want that area to become fully hard when quenched.

I like a very exaggerated temper line with big waves. You can achieve this by placing short lines of clay every half inch down the blade. Do not carry the clay line all the way to the edge as you want the edge fully hard.

1) The author likes very exaggerated temper lines with big waves. You can achieve this by placing short lines of clay every half inch down the blade.

I put the clay on the blade about an eighth of an inch thick. This seems to work very well. Let the clay dry for about four hours before you heat treat it. To heat treat the blade I use a propane forge. I place a coat hanger through the pivot hole and twist it around the tang of the folder to give me something to hold onto. 


HEAT and QUENCH

Gently heat the blade near the opening of the forge for a minute before placing it into the forge edge up. Watch the blade come up to temperature, placing the tang near the hottest part of your fire. The tang is the thickest area of the blade and slowest part to get up to critical temperature. Heat the blade until a magnet does not stick to it. I use a cow magnet on the end of a pipe and keep testing the blade as it heats up to temperature.

When a magnet does not stick to high carbon steel the steel is at critical temperature, at which point the blade should be removed from the forge and quenched in oil. For steel, I use a fast-quench oil such as the kind from Parker or Fensoil. I have also done many successful quenches in vegetable oil.

2) Here is the blade after quenching. The author uses a fast-quench oil such as the kind from Parker or Fensoil. He also has done many successful quenches in vegetable oil.

I quench the blade and then leave it submerged for two minutes before removing it. Once its out, I clean the blade with a paper towel. I then put the blade in the toaster oven for one hour at 385°F.

WARP CHECK, GRIND and POLISH

After the blade is cool I check it for straightness on a flat piece of steel. I use a set of parallels for this. If the blade is warped, I clamp it to a slightly curved piece of thick steel, and press the warp out with the twist clamp. Then I place the clamped blade in the toaster oven for another hour’s worth of temper at 350°F. This works really well and is less stressful to the blade when compared to trying to straighten it another way.

3) The red marks served as guides for the finish-ground blade.

Once the blade is straight it is time to finish grind and polish it up to 2,000 grit. I do the final polishing by hand to ensure every scratch has been removed. After this I sharpen the edge and make sure it is also polished carefully. Finally, I use sand paper backed up by a thick piece of leather and sand very slowly so I don’t cut myself.

The ETCH

Next up: Etch the blade to bring out the temper line. Clean the blade with acetone. Wear latex gloves to protect your hands and to keep oils from your hands off the clean blade. To etch the blade I use ferric chloride diluted four-to-one with distilled water—that is, four parts water to one part ferric chloride. Hang the blade with a cotton string tied through the pivot hole and place it in the acid for 15 seconds. Remove the blade from the acid and spray it with Windex®. This neutralizes the acid and stops the etching. Dry the blade and coat it with WD-40®. Rub a little bit of polishing compound onto the blade to remove some of the residue from the etching. I use Flitz or Peek polishing paste with a paper towel and some WD-40. Polish lightly and be very mindful of the sharp edge. Clean the blade with WD-40 and wipe off any excess oil.

4) Here is how the blade appears after polishing and etching. The temper line is now visible.

To get the temper line white, go over the blade lightly with a piece of 3,000-grit-or-higher sandpaper.

I hope this gives some insight into the fun world of temper lines and more people will experiment with this fun process.

Above: The blade of the author’s finished folder exhibits a temper line with big waves—just the way he likes it.

For more information contact Wally Hayes, 9960,9th Concession, RR#1, Essex, ON, CanadaN8M-2X5 226-787-4289.

How to Do Plug Welds on Knives

0

Plug Welds the David Lisch Way

The ABS Master Smith shows how he puts a plug weld in a damascus blade

On this and the following pages, I will show you how to do a plug weld. Firstly, this is not a new technique. That being said, I would like to think that the way I am using it here is new—or at least it is new to my knives. I’m not showing how I made the damascus pattern as it would take way too many photos. Perhaps I will show that in another story.

The Moon Fighter is one of two knives I have made in this style. The first one was the Sun Fighter. The Sun Fighter was the first time I made a knife using the plug weld technique. I took an order for a knife like the Sun Fighter. Since the resulting knife was slightly different, therefore I named it the Moon Fighter.

HOW DAVE DOES IT

In Photo 1, I am cutting an oval hole into a forged integral blade. I forged the blade from a billet of my Star Night Damascus (Photo 2). It is important that the hole be an oval shape so it will be round once it is forged (Photo 3).

3: It is important that the hole be an oval shape so it will be round once forged.

Blade thickness is just over 3/8 inch. This will give me room to forge the blade once I make the plug weld. Photo 4 shows the end of the moon billet. I will shape the square into the oval to the make the plug for the “moon.”

In Photo 5 you can see that the plug is ready for insertion into the hole. It is close to the right size but just a bit big. I put a slight taper on the edge of the plug so it can “find” the hole. The plug is an eighth inch thicker than the blade. This will allow the plug to expand and weld into the blade.

Above Photos 6 and 7: The hammer is a blur as the author pounds the plug into the hole in the hot steel.

With any process there is a learning curve. I learned that to get a really tight fit with the plug, it works best to put a dull red heat on the blade. Place the tapered plug into place and hammer it into the dull red blade (Photos 6 and 7). In Photo 8 the plug is in place. It is 1/16 inch proud on both sides of the blade. Back into the fire to a dull red and add flux.

In Photo 9 I have made the first weld. The moon is still visible. In Photo 10 the moon is still a bit cooler than the blade and is getting a bit bigger. Now is the time for some heat. Photo 11 shows work at the power hammer for some drawing down of thickness and adding length to the blade. It also makes the oval moon round and very hard to see.

In Photo 12 I am forging the blade close to its final shape. In Photo 13 I am drawing out the tip, adding more length to the blade. The moon is very close to being round. After a few final taps under the power hammer (Photo 14), I will finish tuning up the profile by hand.

NO SET FORMULA

I do not have a set formula for this process. It is by gut feeling. I can see how much the steel moves when I forge it. The first time I tried it I put a round hole into the blade and wound up with an oval, so it made sense to start with an oval hole if I wanted to wind up with a round one.

With the Sun Fighter the blade was 480-layer damascus and the “sun” was a very tight W’s-pattern damascus. Once I made the initial weld, the blade was still over 3/8-inch thick at that juncture. I ground in sunrays on both sides then forged up the rays and the sun to its round shape. On the Moon Fighter I wanted the backdrop to resemble shooting stars. This took some trial and error and a lot more time than I thought it would to get a pattern I liked.

The result of the plug weld made to resemble the moon is plainly evident in the center of the damascus blade of the Moon Fighter by ABS master smith David Lisch (inset). (SharpByCoop knife photo)

NO LIMIT

There is no limit to the cool new things that can be done with damascus. I have heard folks say it has all been done before. Well, I don’t believe it. I think new and exciting things are happening in little knife shops all over the world, and the only way to keep things moving forward is to try new stuff and share the new things with everyone we can.

Please feel free to try this process. There are so many different things that can be done with it. When you come up with something new, share it so we continue to advance the art of damascus and knifemaking. Or, buy a damascus knife from your favorite maker and watch for that sparkle in his eye as he thinks to himself, “Cool, now I get to make another knife.”

Advertisement

Must Read Articles

Read this before you make a knife

Knifemaking 101 – Read This Before You Make a Knife

  by Wayne Goddard My experience has taught me that there's nothing like digging in and getting started. I've often said the hardest part of the...
how to forge damascus steel

How to Forge Damascus

Advertisement
Advertisement