
Knifemaking

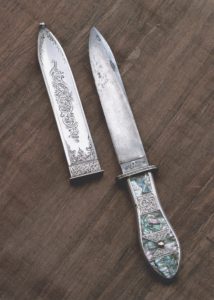
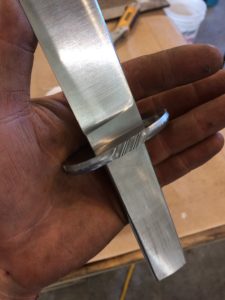
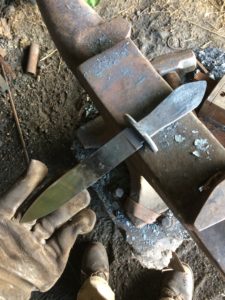
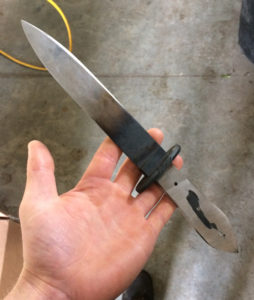
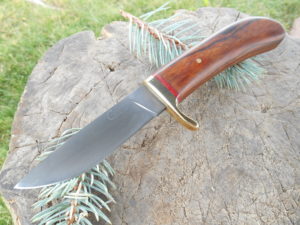
Knifemaking is the building of a knife, which includes the blade, handle and other accouterments. Blades are made by either removing metal from a steel blank via a grinder – known as stock removal – and the forging to shape of hot steel into a blade in the process known as bladesmithing. Other parts, including bolsters, guards, pommels, etc., are needed to complete the finished knife.

Featured Knives – – Knife Collecting – – Tactical Knives – – Survival Knives

How to Make a Sushi Knife

0

By Wally Hayes

Sushi knives are light, thin, very sharp and a blast to make. Here’s how I make them from start to finish.

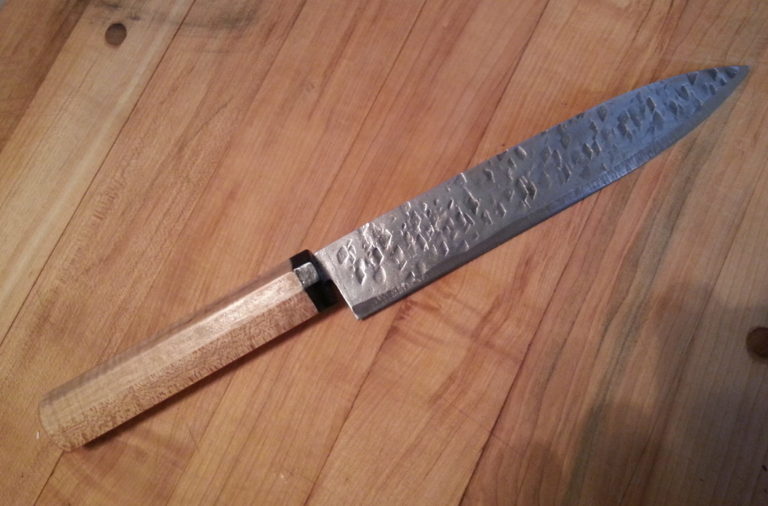
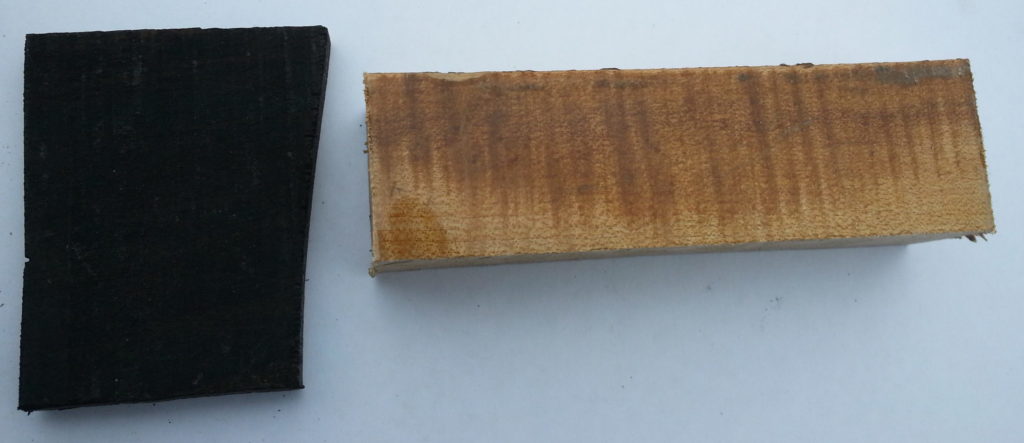
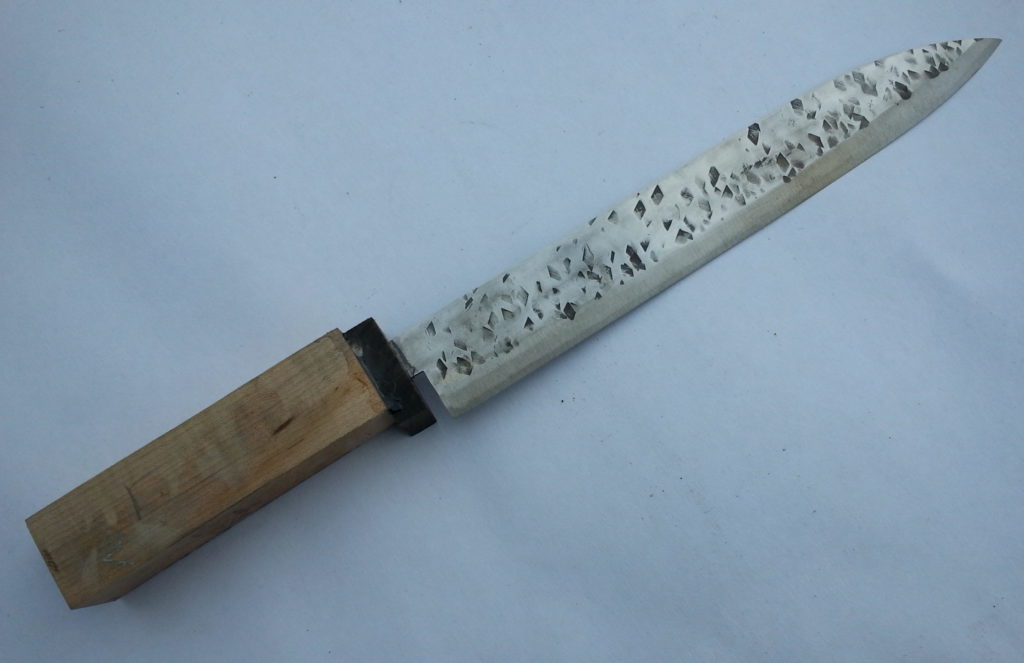
The sushi knife started out as a 90-thousandths-inch thick bar of 15N20 carbon steel and maple and ebony slabs.

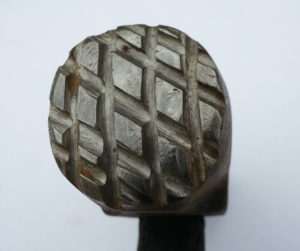
For blade material I use 90-thousandths-inch thick 15N20 carbon steel from New Jersey Steel Baron. First, I cut the blade to shape, around 7 inches long. The tang is about 4 inches. I take one of my old hammers and cut a cross hatch into the face using a side grinder with a cut-off wheel.

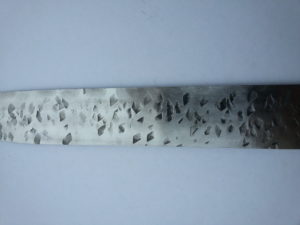
Then I heat up the blade in my forge and hammer a textured finish into the steel. This takes about five heats and is lots of fun! I put dents into both sides of the blade and then make sure it is straight. The reason for the texturing on the surface of the steel is to create air pockets so food does not stick to the blade.


If you want to push the forging experience, forge in the bevel on one side for your edge. Use a regular hammer. It will be a chisel-ground blade, so don’t hit the edge with your texturing hammer. Hammer an eighth of an inch back from the edge.


NORMALIZING

The next step is to normalize the blade. Heat it to critical temperature—a steel blade reaches critical temperature when a magnet does not stick to it—then let it air cool. After you heat the blade to critical temperature, quench it in warm Fensoil or Parker Oil, both of which are fast-quench oils made for heat treating steel. Vegetable oil also will work.

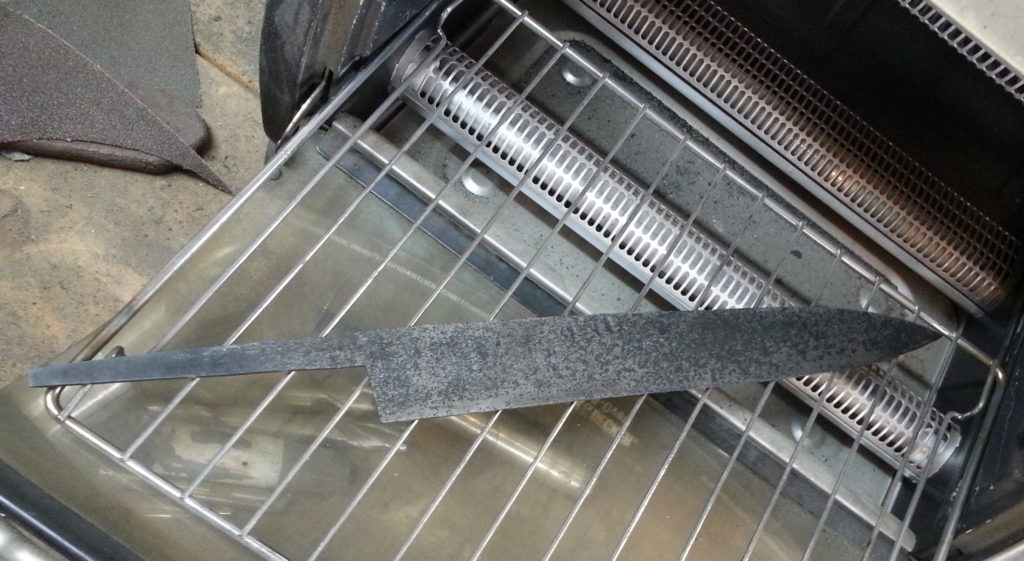
Clean the blade after it cools and place it in a toaster oven heated to 375°F for one hour. Look at the blade and see if it is straight. If it is bowed, secure it to a scrap piece of steel with a metal clamp and press the warp out, then return it all clamped up to the toaster oven. Temper it for another hour. This works really well.

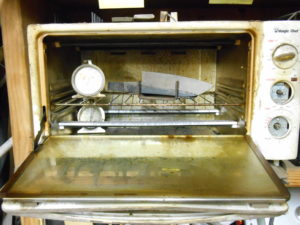
After hardening, the blade it goes into the toaster oven to temper.

To remove all scale and the black from the blade, place it in a plastic container with vinegar for one day. Rinse with water and baking soda and wash the blade. Scrub it with a paper towel. From there I use a little wire-wheel brush on my drill press to brush off everything and make it all silver and bright. Next I sand the blade on a medium Scotch-Brite™ belt to round the top edges and smooth out the blade surface.

After tempering, the author places the unfinished knife in a container filled with vinegar for about a day to remove all the scale and the black from the blade.

This is the time to grind in your edge. Don’t get the blade too hot during grinding or you may remove the hardness. When the blade gets hot, dunk it in water to cool it. I chisel grind it on the right side so I can get paper-thin cuts with it.


The HANDLE

Time to make the handle. Use whatever material you like. I like cocobolo and ebony best as they are very easy to finish. I used maple and ebony for the handle of the knife for this project.

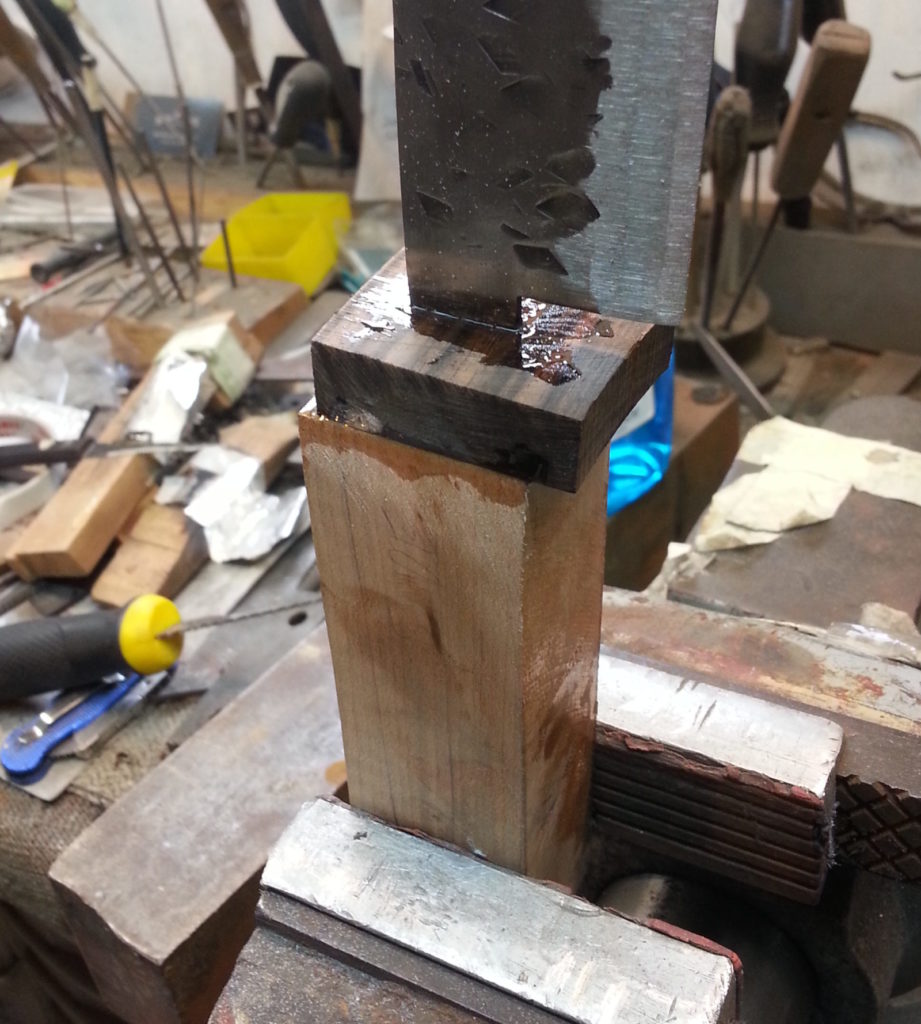
I make the handle in two parts. The front spacer is ebony about a half-inch thick. Sand the sides and ends of the blocks of wood on a disc sander. Disc sanders seem to work better than belt sanders to get a flat surface. Use a 1/16-inch drill bit to drill the front spacer and then use a small saw to open it up to fit the tang. The longer handle section can be drilled out and fitted easily. I grind down a drywall saw to fit into the hole to make a slot—this works great. Use epoxy to glue the parts together.

Glue the parts together with epoxy and let dry. The author said he uses many coats of glue for the finish.

When the glue dries, I sand the handle into an octagon shape and then hand sand it to 600 grit.

After the glue has dried, the author will sand and buff the handle. Cocobolo can be finished on a fine Scotch-Brite™ belt and then buffed and oiled.

For the maple handle I used many coats of Krazy® Glue for the finish. I paint the coats on then sand and buff. Cocobolo can be finished on a fine Scotch-Brite belt and then buffed and oiled. I use a food-friendly oil like walnut oil. To sharpen the blade use a 7,000-grit Japanese water stone.

Try this project—you’ll like it. It is really a fun knife to make.

Fit and Finish 101: How to know it when you see it on a knife

By Pat Covert

Fit and finish is bandied about so often in cutlery circles it’s almost become one word, pronounced something like fittenfinnish. A newbie collector who hangs around seasoned custom knifemakers, purveyors and collectors soon learns the “fit-and-finish thing” is a mighty nice trait for the knives in his or her stable to have.

All that being said, is fit and finish the key to a knife being all it can be, or does a knife exhibiting it simply look nicer and cost more? Or does the answer lie somewhere in between? We recruited a panel of authorities to help sort through it all, including purveyors Neil Ostroff of True North Knives, Dave Ellis of Exquisite Knives, Dan Delavan of Plaza Cutlery, and seasoned custom maker Tim Britton.

We started by asking our authorities how they define fit and finish. Britton, who makes highly finished customs, said, “There should be no adhesive or solder showing anywhere. No gaps in inappropriate places. Metal-to-metal joints should be indiscernible. And no visible scratches or grind marks, period. One thing custom knifemakers should be able to do well,” he observes “is finish metal.”

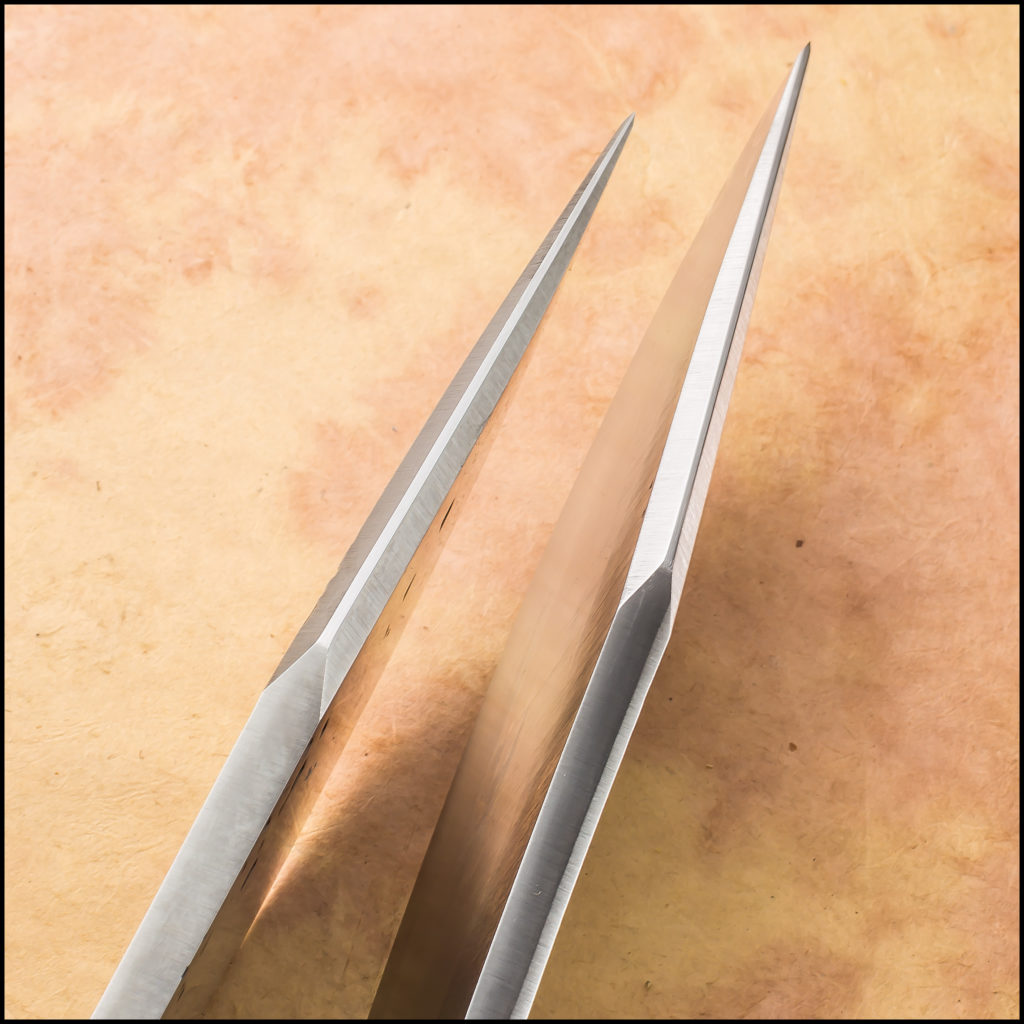
Having the grinds match on each side of the blade as on Marcus Lin’s Andalusian bowie is an indication of fine fit and finish.

In addition to being a purveyor, Ellis also is a retired ABS master smith and knows fit and finish from the maker’s point of view as well. “I define fit and finish of a custom knife to mean is it overall appealing to the eye,” he begins, “are there any obvious gaps in guard or handle fitting, is it a design that will truly work?” Ellis stressed that good, sound design is a factor. “The first thing I look for is the overall appearance. Is the design clean? Is there an organic flow? How does it feel in the hand in different grips? Then I look at the finer details such as guard fit, blade finish, handle design and comfort,” he explains. “As an ABS master smith I also look at things like edge geometry, tapered tangs and plunge cuts. All of these should be [executed properly] in a piece with excellent fit and finish.”

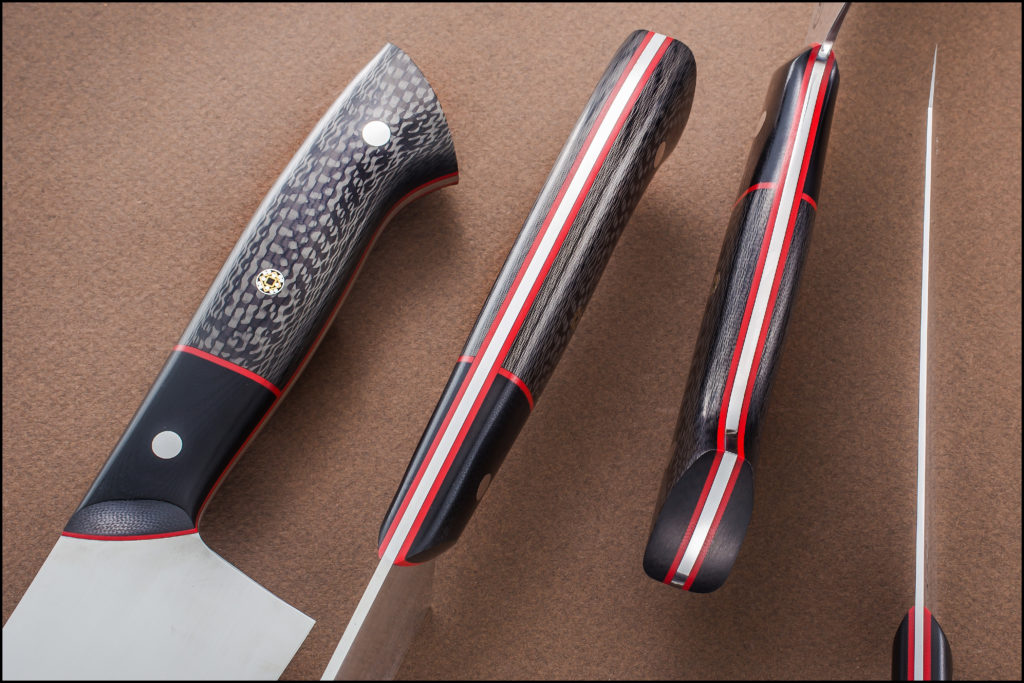
Equality of all aspects on both sides of the knife is one sign of top fit and finish. Greg Cimms achieves it on his kitchen knives.

“Fit and finish is a standard required for all knives,” Ostroff says. “It used to be almost exclusively for custom knives—which are at a higher price level—but more and more the buyers are demanding the same standard for a factory or mid-tech knife which will sell for a remarkably lower price. Fit and finish is generally a well-centered blade—in the case of a folder—no blade play in either direction, flush-fitting bolsters, and a blade finish as the maker intended. By this I mean one cannot expect a stonewashed blade, or handle, not to have scratches. Recently the matter of the strength of the detent has become an issue—again, another subjective item.”

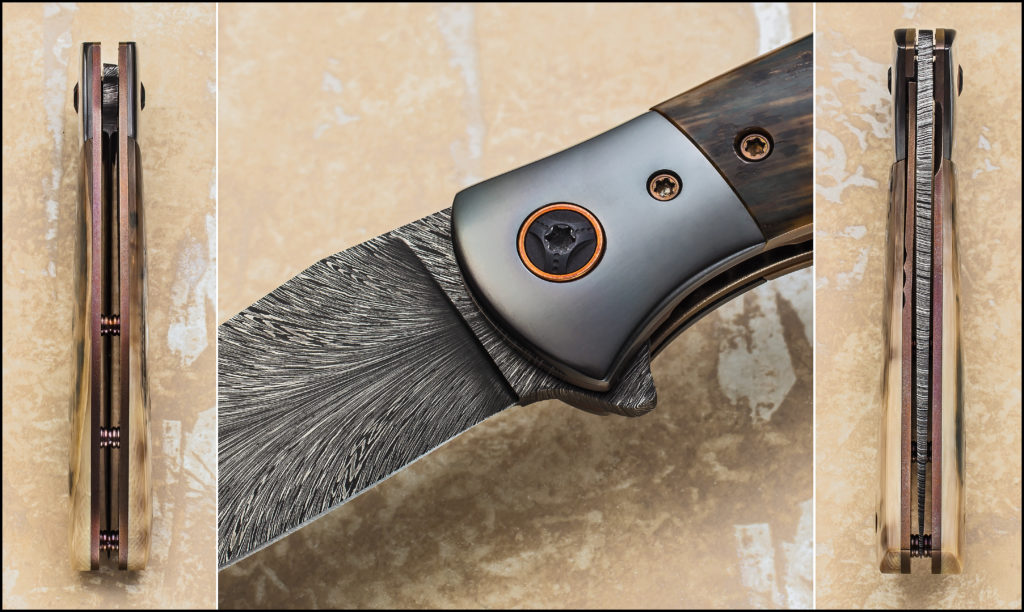
The late Bruce Bingenheimer centered the blade of his folder in the closed position (right), splitting the gold anodized standoffs right down the middle. Note the symmetry between each side of the knife (left) and the slick fit between bolster and handle material (center).

“The criteria for fit and finish depend on the expectations of the buyer,” Delavan qualifies. “Plaza Cutlery also believes design as well as craftsmanship is important. Most important is the design. It has to make sense to me. Any guards should be clean with no gaps, bevels should be the same and no 2-inch glitches. Also, handles have to be clean to the tang or guard with no gaps.”

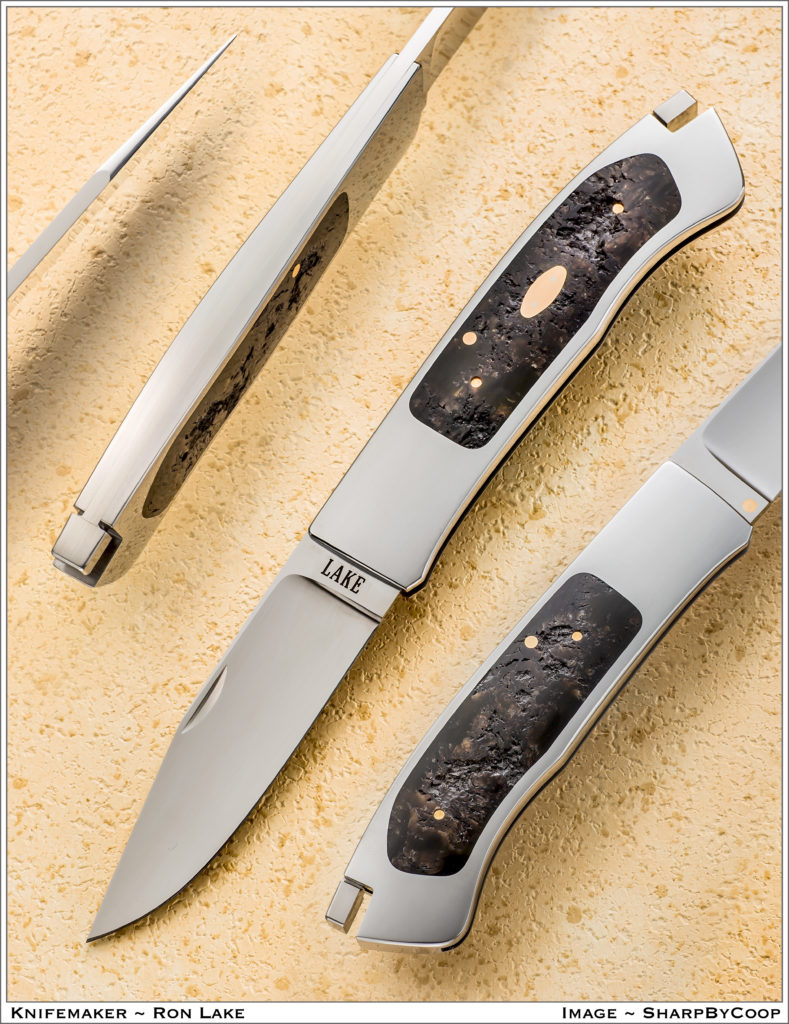
According to Tim Britton, metal-to-metal joints should be indiscernible. Note the partial knife image second from left. The seam between the blade and backspring of BLADE Magazine Cutlery Hall-Of-Fame® member Ron Lake’s tail-lock interframe is invisible.


PERFORMANCE

Does fit and finish affect a knife’s performance? “Poor fit and finish will really show when a knife is put to hard use,” Ellis advises, pointing out potential problems such as hot spots from badly designed and finished handles, guards or buttcaps with sharp edges, bad edge geometry that might cause the blade to dull quicker and be difficult to remove from the sheath, and so on.

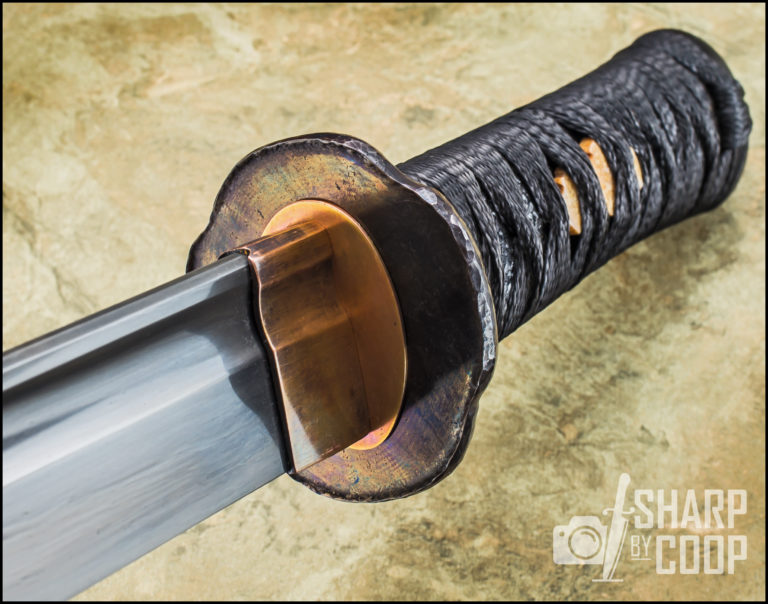
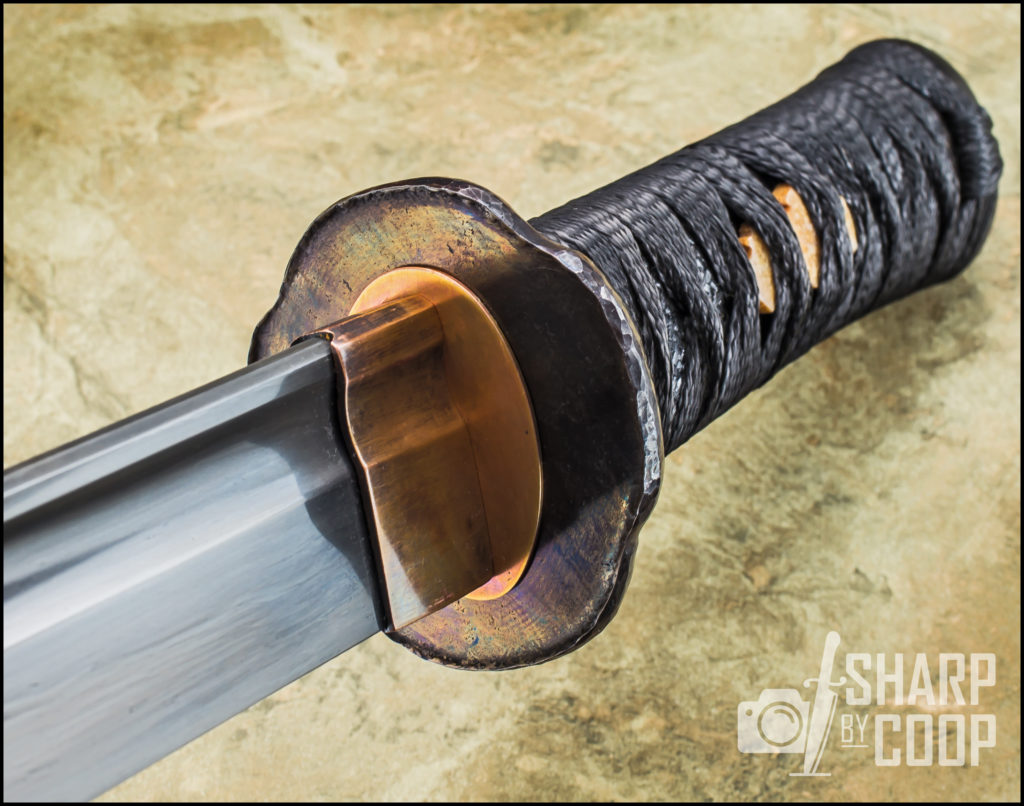
David Mirabile achieves a nice, tight fit between the habaki (collar) and tsuba (guard) of his Asian-style piece.

Britton’s take was interesting, to say the least.

“One of my first knives was made in 1972. It was ugly and poorly finished,” he recalls. “[BLADE Magazine Cutlery Hall-Of-Fame® member] Frank Centofante helped me sell the knife to a hunting guide from Montana. The guide later wrote to me wanting four more just like it. The knife skinned and dressed three elk before needing sharpening. Steel was Latrobe D2 and Paul Bos did the heat treat. Fit and finish had little or nothing to do with function. Quality of steel, heat treat, grind and sharpening angle were much more relevant.”

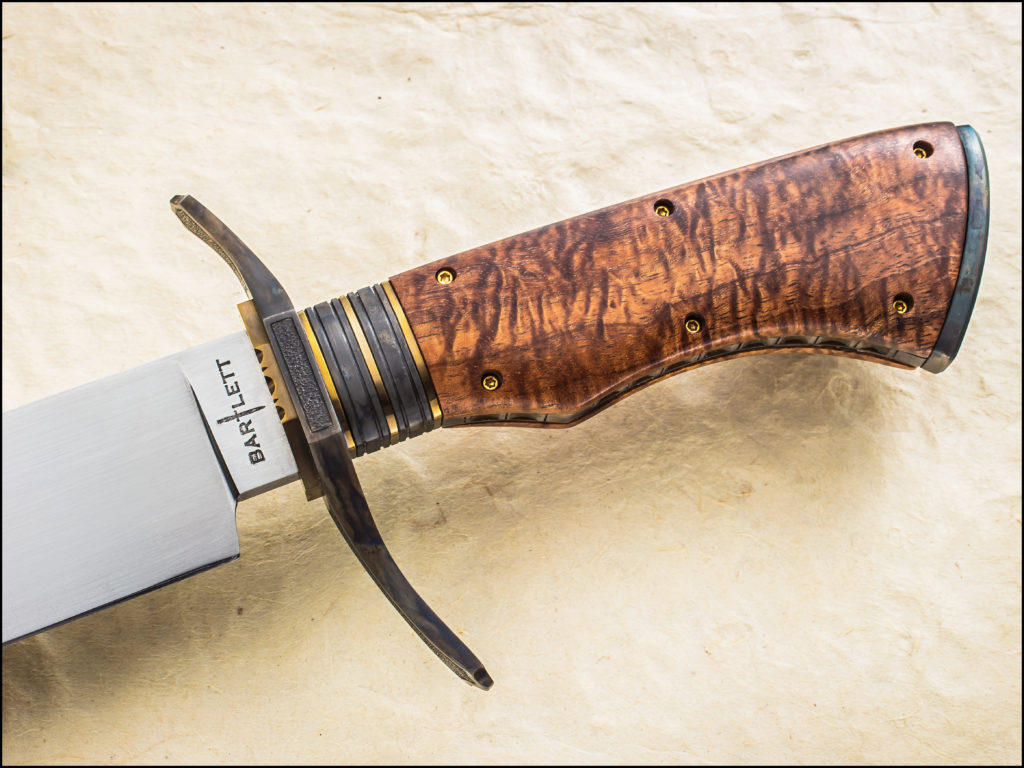
Mark Bartlett gets the bolster of case-hardened mild steel and gold-anodized titanium spacers to meld seamlessly with the curly koa handle of his fixed fighter.

“A good finished knife just has a better feel, but a lot of people will not use it,” Delavan notes. “A knife with a lot of cosmetic issues can still be a good tool, and there are makers that don’t worry about those details. Most makers say a knife is meant to be used, not to sit in a safe.” Ostroff tends to agree. “Performance is not typically an issue [with fit and finish]. For example, a knife with an off-centered blade will still function as well as one that is centered—but the customer has the right to get what he or she wants, so we do whatever it takes to make them happy.”

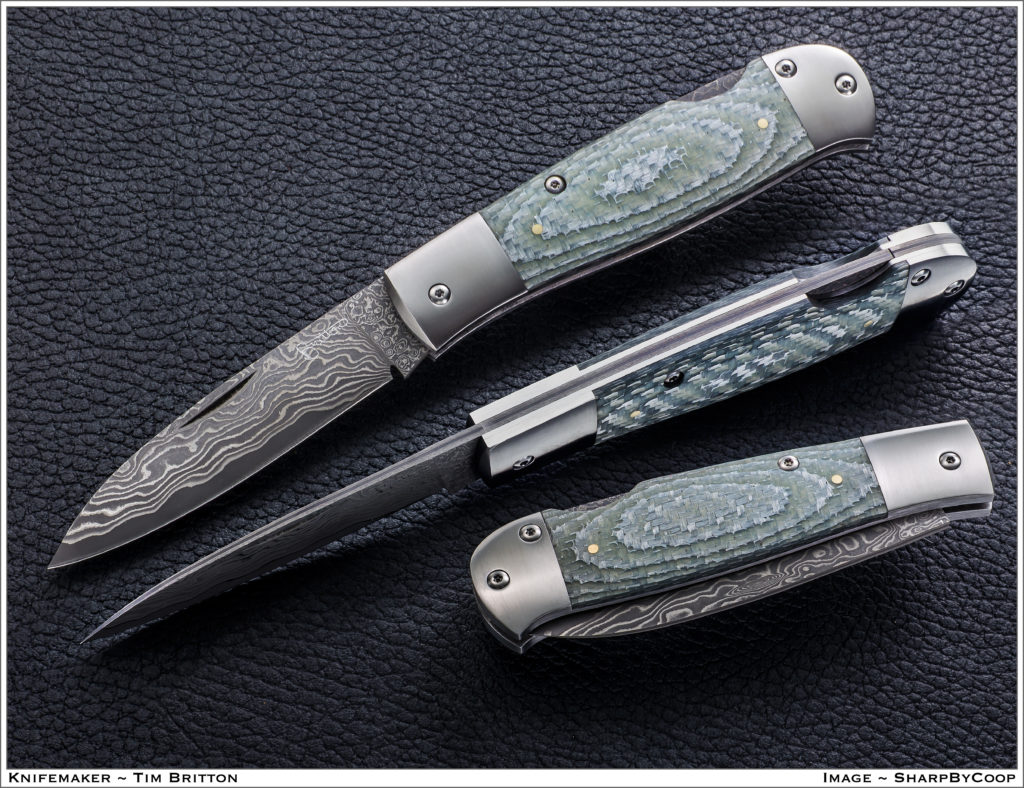
Top fit and finish includes the knife exhibiting no visible scratches or grind marks. Tim Britton’s lockback follows this dictate. As Tim noted, “One thing custom knifemakers should be able to do well is finish metal.”


F&F: OVERRATED?

Are there cases where fit and finish is overrated? In other words, are there knives that perform very well even though they may not have the polish of an expensive model but have excellent heat treat, blade geometry, comfort and a more affordable price?”

“Fit and finish is not overrated when trying to satisfy the buyer,” Ostroff opines, “but taking out the collector/safe-queen members of our community, all knives are meant to cut, and all will do so if built to industry standards.”

“I have seen a few knives that performed well with poor fit and finish,” Ellis says. “Usually if a maker takes the time to finish their piece to tight tolerances, they also have taken the time to be sure that the piece has a credible heat treat, edge geometry and an overall good feeling in the hand.” Adds Delevan, “Many of the small production companies do a good job. Fit and finish is good, not perfect, but you have an excellent tool at a more affordable price.”

Note how each grind, bolster and slab mirrors its opposite on the Fenix fixed-blade hunter by Evgeny Khokhlov.


WHAT do YOU WANT?

Our authorities made excellent points for and against performance being a factor in fit and finish. Though there were several substantive points about design, in this writer’s opinion it isn’t really a fit-and-finish issue. Design is, of course, very important because no matter how well a knife is made, if the design is poor so will be the performance. From an aesthetic standpoint fit and finish is everything, but, as Delavan points out, many collector-grade knives become safe queens, never seeing action in the field.

A good analogy here would be comparing a Bark River Knives fixed blade to a comparably sized one made by ESEE Knives. Both companies have a huge, extremely dedicated following. Bark River’s fare is finely finished while the ESEE knives are more roughly done, but the latter are half the price or more of the former, depending on materials. Will both knives perform well? You better believe it. Both have stellar performance records. It really depends on whether you want to pay extra for a nicely finished knife or a rough finished one. Beauty is in the eye of the beholder and both do their job in spades.

Bottom line is you have some very good options available—and choices make the world of knives go around!

Note the tight fit with no gaps between the color-case-hardened bolster, stainless steel spacers and stabilized ringed gidgee handle of Steve Filicietti’s bowie.

Knifemaking: Frame Handle Construction

KNIFE SHOP BY JASON FRY

Are you up to the challenge of frame handle construction?

Frame handle construction for knives has been around for centuries. Historical examples of many Eastern styles like the kard, khyber and yataghan often feature ornamented frame handles. Nineteenth-century knives attributed to James Black and some of the early American bowies also had frame handle construction. Though it’s been around a long time, the frame handle remains a viable modern construction method for today’s custom knifemakers.

There are many ways to crack the nut/skin the cat on frame handle construction. This article will walk through the frame handle process and point out particular problems and potential solutions for those who wish to pursue building a frame handled knife.

3 REASONS WHY

Frame handle construction is best defined as using a wrap-around “frame” to conceal the tang of a hidden tang knife. The first question many people ask regarding a frame handle construction is, “Why would you want to do it that way?”

My first thought goes back to the earlier days of the internet when forums were at their peak, and fine makers like ABS master smith Bruce Bump took the time to document “work in progress” (WIP) threads. Bruce had a fine frame handle WIP on the KnifeDogs.com forum in 2013, and the consensus at the time was that you build a frame handle for quite a few reasons, though the first one is “because you can!”

The author used frame handle construction for his hunter in a blade of 33-layer damascus, a wrought iron guard and scales taken from a fence post made in 1912 from bois d’arc wood, aka osage orange. The spacers are World War II practice bomb material. (Cory Martin knife image)

A frame handle is a much more complex build process than your standard full- or stick-tang knife. However, in addition to the show of skill by the maker, frame handle construction has a few distinct advantages that make the complexity worth the effort:

  • A frame handle allows for the look of a full tang, but with the guard-fitting techniques of a stick tang. For a forged stick-tang-knife design that needs a guard, a frame handle allows the use of full-tang-style handle construction;
  • A frame handle is a good way to use scales or slabs on a stick-tang knife. If you have a good set of stag or mammoth slabs, or if you have stabilized wood slabs that might be too fragile for through-tang construction, the frame handle allows you to use the materials on a stick-tang knife; and;
  • The use of a frame handle gives the maker another area to embellish the knife. Some frames are great for engraving, while others may highlight a damascus pattern. Either way, the frame makes the embellishment stand out in ways that are harder to accomplish on a full-tang knife.

HOW to DO IT

At a basic level, the frame of a frame handle is a piece of material, usually metal, that wraps around a stick tang and mimics the look of a full-tang knife. This presents some challenges that have resulted in a few different creative solutions. 

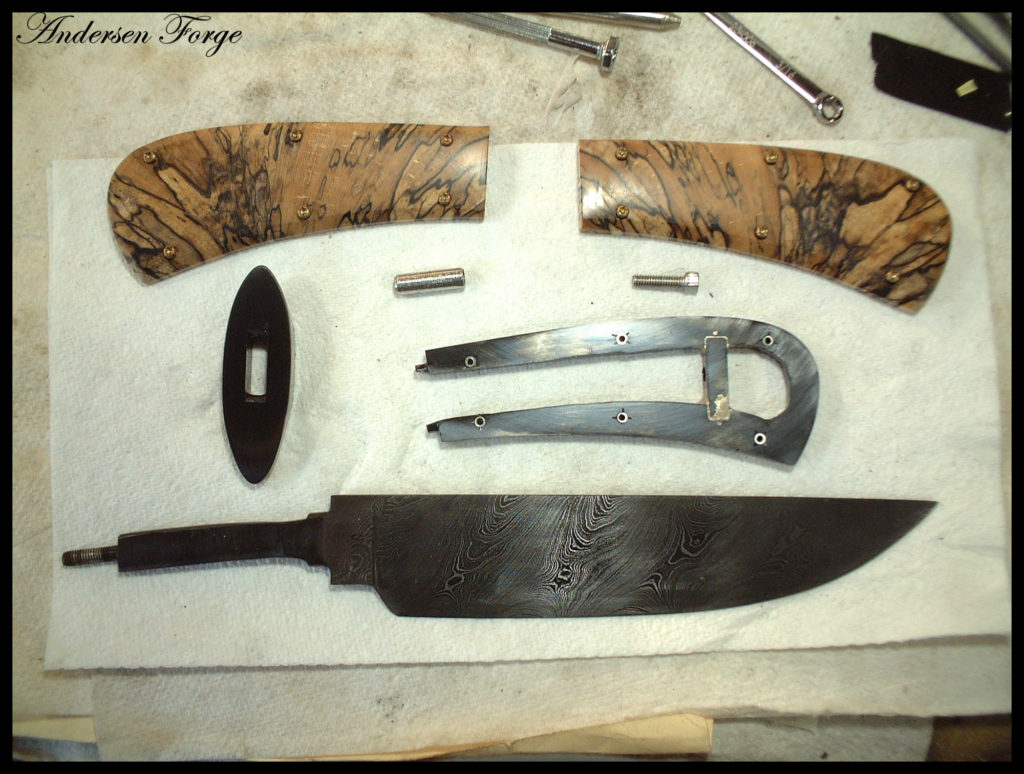
An exploded view shows an ABS journeyman smith Karl Andersen frame handle construction knife before assembly. (Karl Andersen image)
  • Challenge 1: The tang must fit inside the frame. Some makers insist on precision so there are no gaps and the fit is tight. Others concede that the handle will be held together with mechanical fasteners and sealed with epoxy, so a precise fit between the frame and the tang is not necessary.
  • Challenge 2: All parts of the handle must be securely fastened together. I sat through a class with ABS master smith Mike Williams in which he admonished the students, “Don’t trust in the magic of chemistry” by putting your faith only in the strength of glue. Likewise, veteran bladesmith Jerry Fisk challenges makers to think ahead to what their knives might be like in 100 or 1,000 years, and recommends a mechanical connection that won’t fail over time.

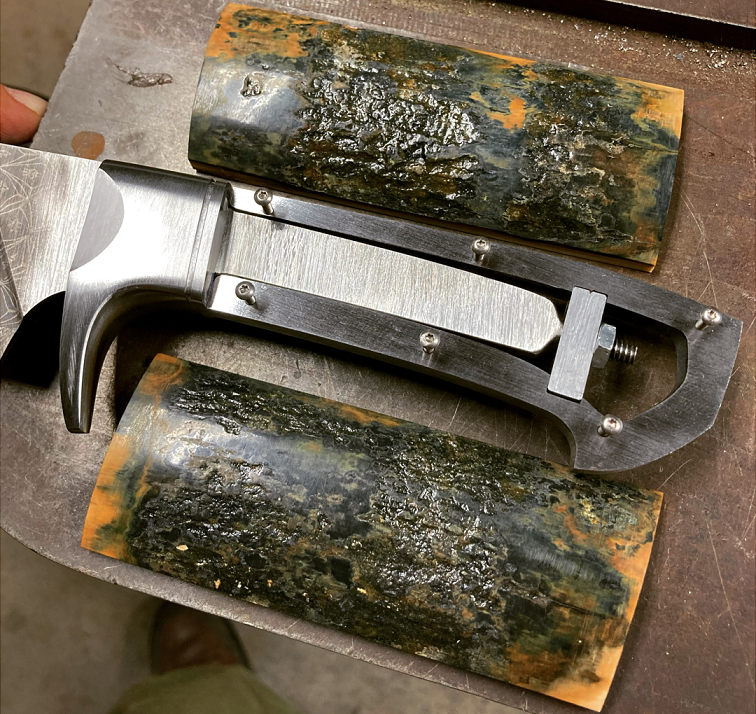
One way to address this challenge is to use pins. If you pin the scales to the frame, pin the completed handle assembly to the tang and follow up with glue, there’s no opportunity for failure. Some choose to make all the pins visible as an artistic element, while others take advantage of hidden pins for all but the one through the tang. Another way is to use a threaded fastener. Bladesmith Salem Straub recently illustrated the technique on a frame handle WIP on his Instagram feed. Salem used a threaded fastener in an internal slot in the frame to mechanically lock all the parts together tightly (Image 1). The handle material is relieved on the inside to accommodate the fastener.

Another way to use a threaded connection is to thread the end of the tang and use a fastener on the handle butt. An advantage of this approach is that the fastener itself can become part of the embellishment.

  • Challenge 3 is the complex fit-up between all of the knife’s elements. Frame handle construction naturally doesn’t excuse a poor guard fit, but it also provides other places for gaps and misalignment. Once again, there are several potential solutions to alignment problems.

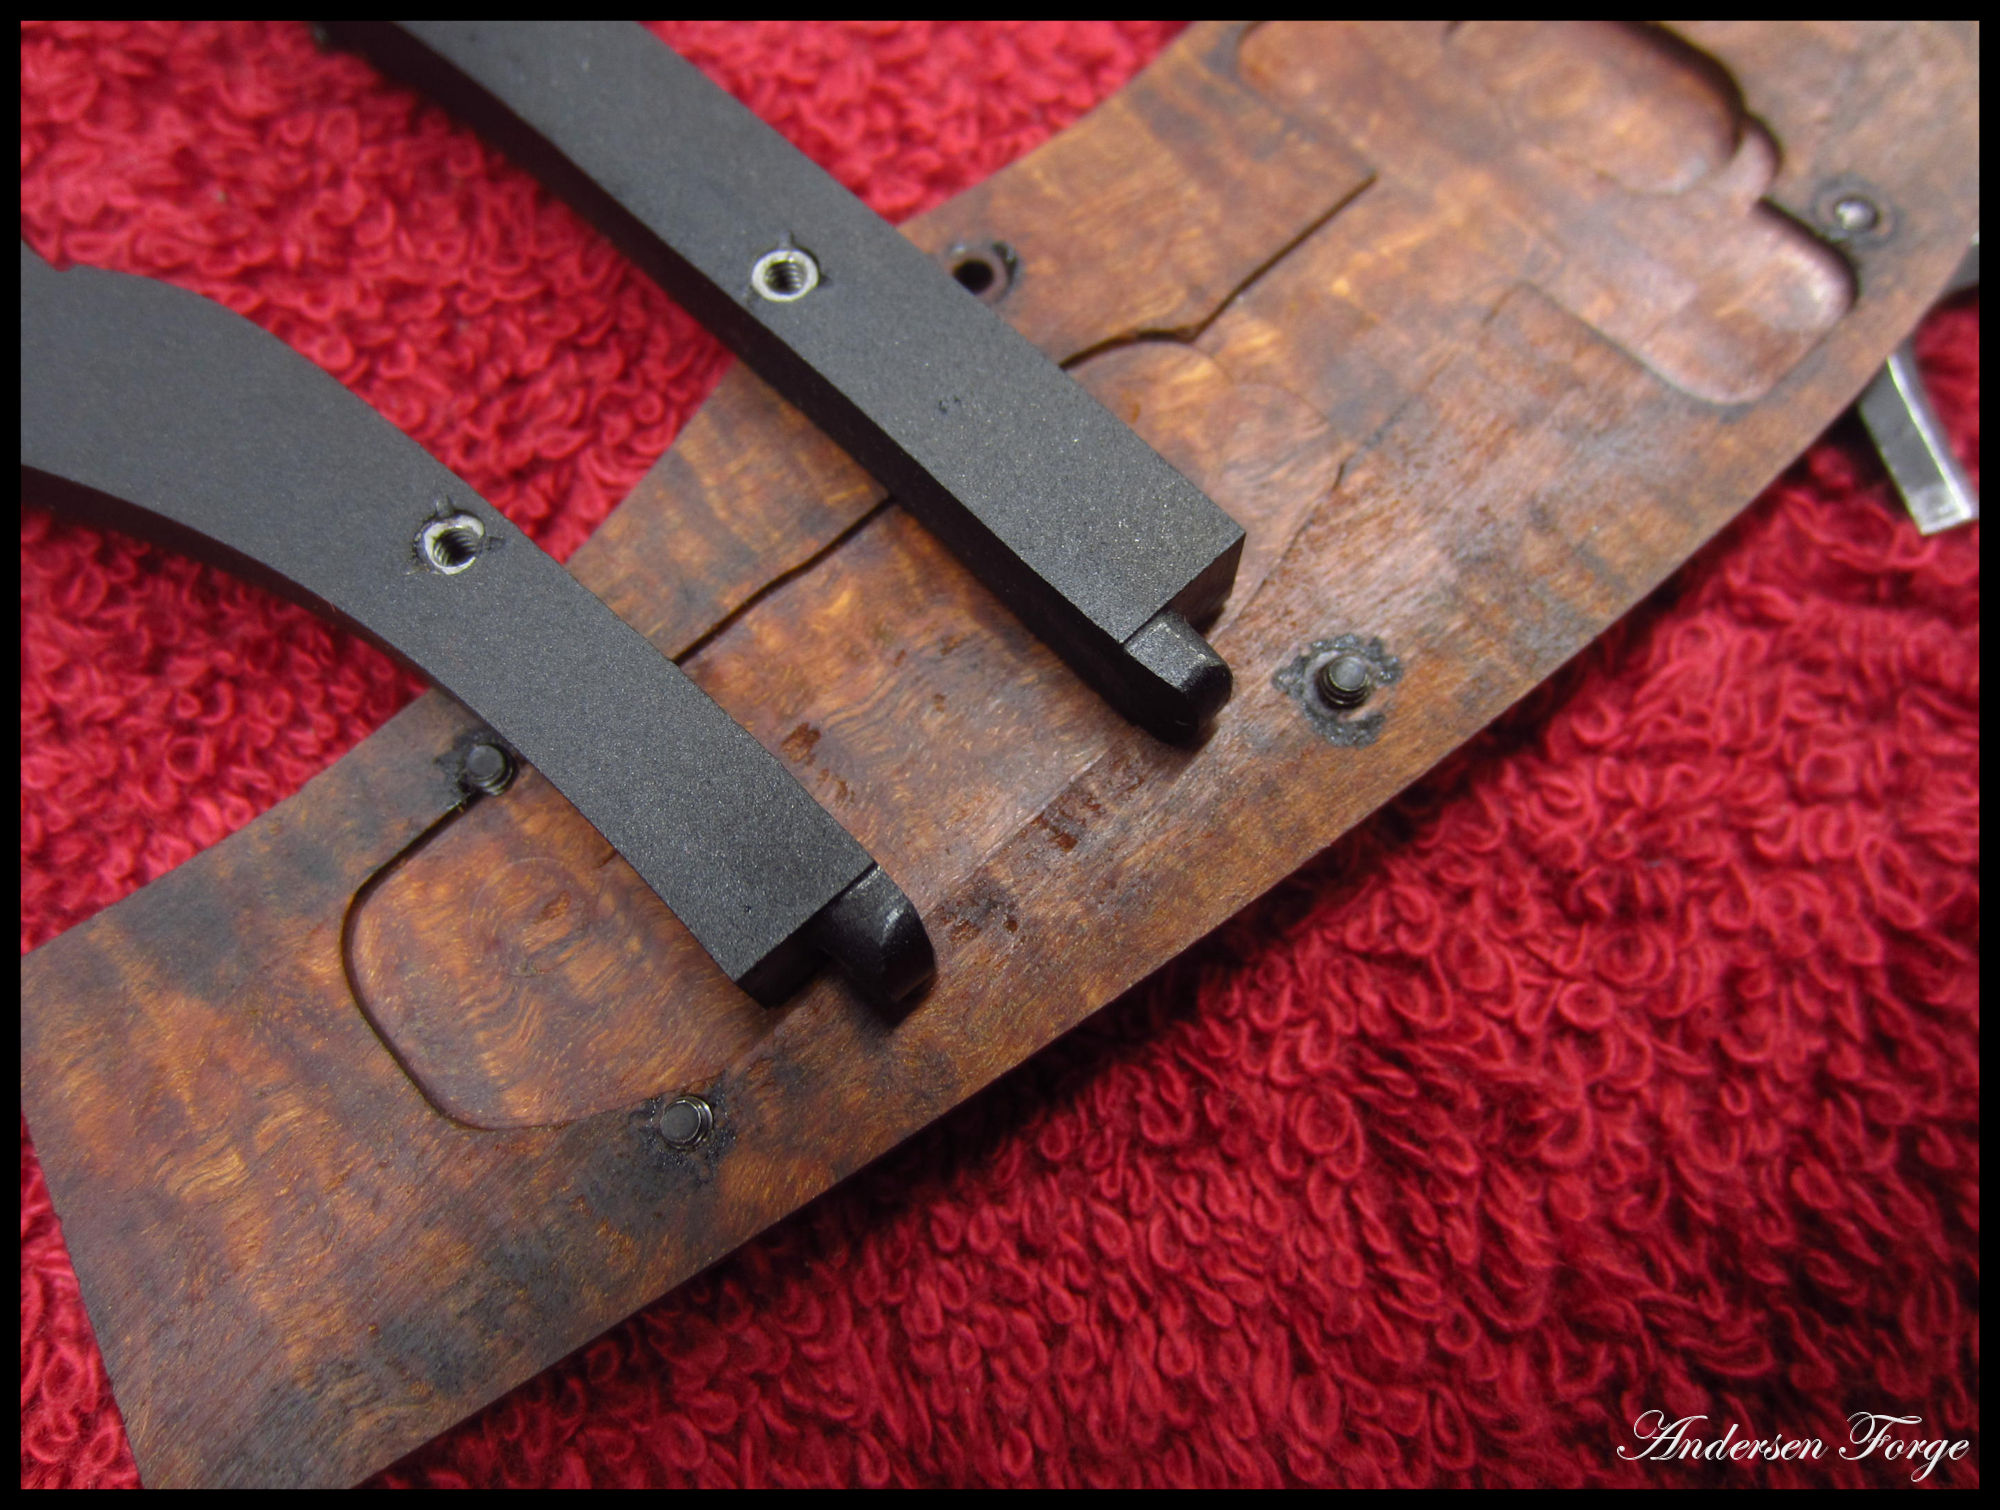
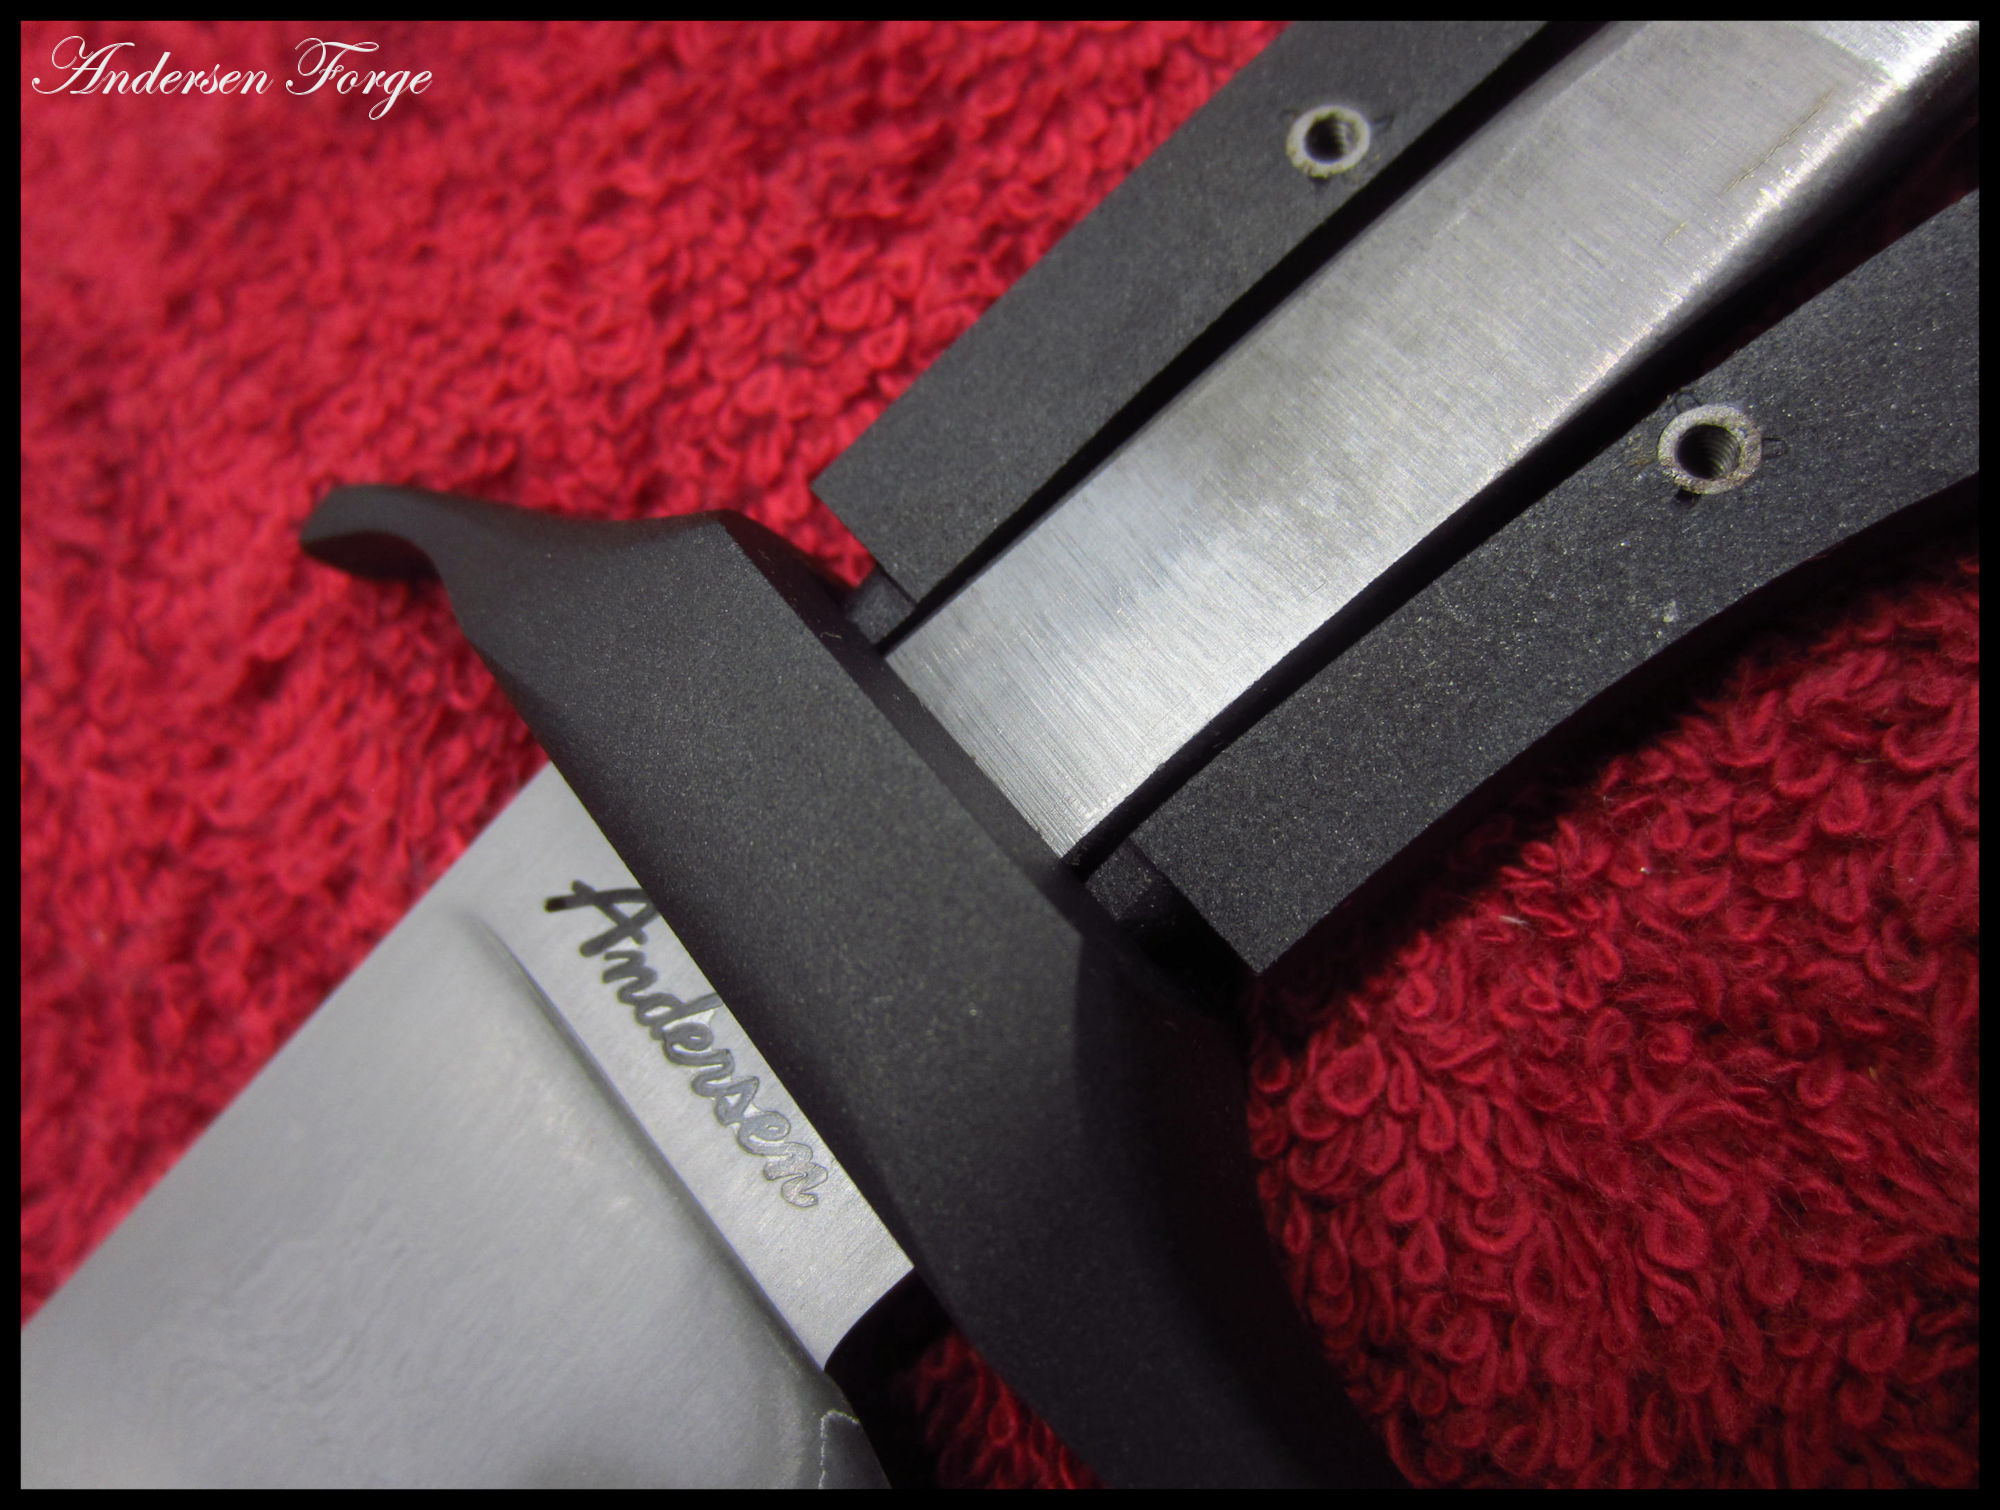
One is the use of alignment pins to make sure everything is secure. Pins on the end of the frame go through any spacers and into holes in the back of the guard so that each part indexes the same during assembly. Some makers, including Bruce Bump in the aforementioned epic WIP, advocate for leaving metal tabs on the end of the frame and fitting the tabs into similar holes on the back of the guard (Images 2 and 3). In both cases, there’s a mechanical connection that prevents the guard, spacers and frame from rotating out of alignment around the center axis of the handle. Either way, when you build a frame handle, the construction will require you to assemble and disassemble the knife repeatedly, so you’ll need some mechanical way to keep things lined up.

Above: Some makers advocate for leaving metal tabs on the end of the frame and fitting the tabs into similar holes on the back of the guard. In both cases, there’s a mechanical connection that prevents the guard, spacers and frame from rotating out of alignment around the center axis of the handle. (Karl Andersen images)

Another fit-up challenge is the overall requirement for clean-fitting joints with no gaps. It sounds simpler than it is, but two surfaces that are dead flat will join together without a gap. The challenge of a multi-piece frame handle with a guard and a few spacers is that you are creating a multitude of surface joints, and every single surface must be dead flat. At a minimum, you’ll have a joint between the guard and frame, and also between the frame sides and the handle material. Any bump or wiggle on any surface and you’ll have a gap in the final product. Flatness comes in degrees. You can get a fairly flat surface on a platen, flatter on a disk, and still flatter on a surface plate or surface grinder. You have to make the joints as flat as you can with the tools you have available if you want a gap-free fit.  

I tend to prefer the look of a tapered tang on a full-tang knife, so I’ve started tapering the frame of my frame handles as well. Others stick with a full thickness frame, where the thickness closely matches that of the blade at the ricasso. Some add spacers between the tang and handle material, while others choose to go with the frame and handle slabs only. 

Another fit challenge is presented by the frame itself. In order to adequately finish the visible surface of the frame, whether by simple polishing, bluing or etching, or by engraving, the frame must be 100 percent at final-grit finish prior to final glue up. Many makers learned to make a full-tang knife by finishing the front edge of the scales, gluing the knife together, shaping the scales down to the exposed tang, and then polishing the handle and the tang at the same time. That method will not work for a frame handle that needs to be blued or etched. Personally, I tend to use dummy pins to fit the entire handle assembly together, then grind the scales down to the frame. In his recent Instagram example, Salem Straub used small screws to hold the handle material to the frame. 

With regard to the relationship between the handle material and the frame itself, whichever method you choose, it is important that the fit be maintained consistently all the way around the frame. (Jason Fry image)

With regard to the relationship between the handle material and the frame itself, some choose to leave the material slightly proud of the frame for a “museum” or “heirloom” fit. Others prefer the material to fit flush to the tang. Less commonly, some makers round the frame and leave it slightly proud of the material. Whichever you choose, it is important that the fit be maintained consistently all the way around the frame, from the joint at the guard on the top all the way down to the joint at the guard on the bottom.
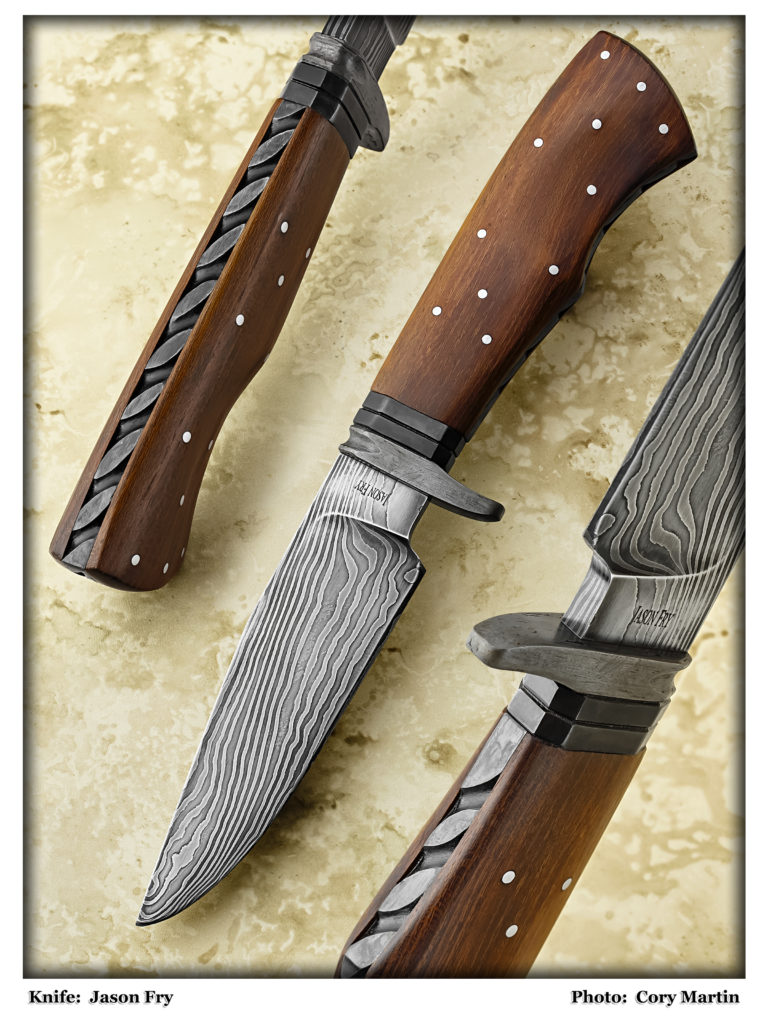
Once the profile is set, I polish the handle and the frame together down to final grit, and then apply any surface finish to the frame itself. Once all parts are 100 percent complete, they can be glued together as a final step.

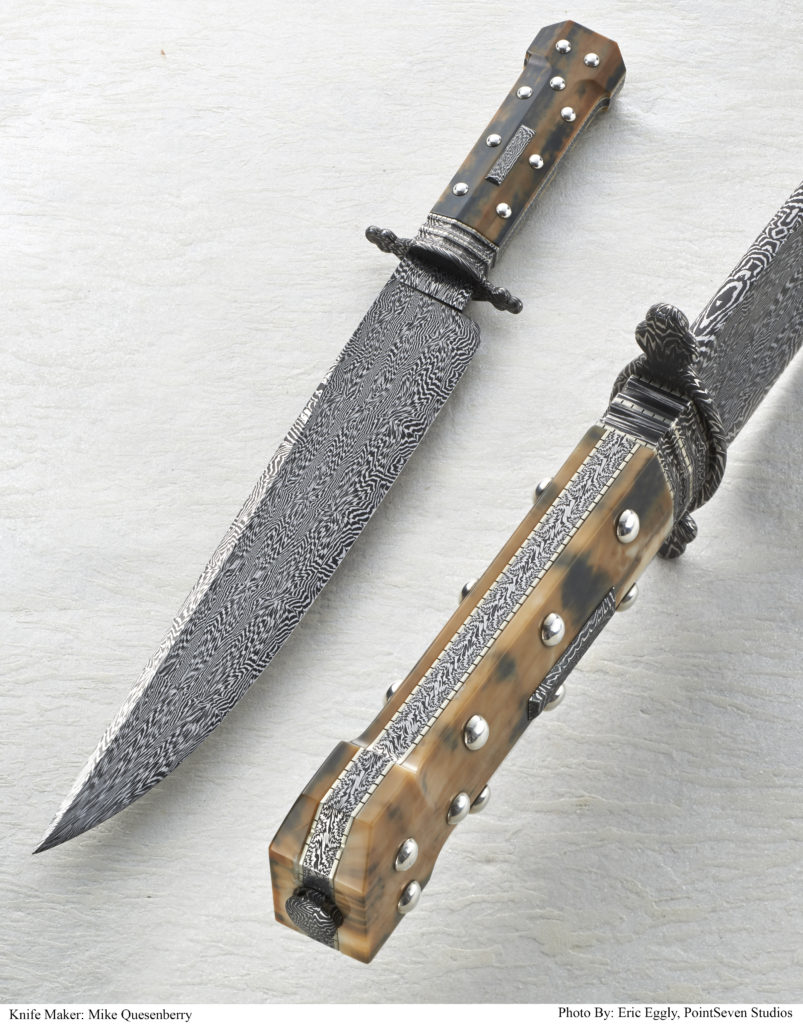
ABS master smith Mike Quesenberry used frame-handle construction on his dog-bone bowie. (Eric Eggly/PointSeven image)

WHEN to DO it

So when should you try making a frame handle? In my mind, if you can make clean full- and stick-tang knives, you could be up to the challenge. If you have slabs of exceptional handle material that deserve more than a simple full-tang knife, a frame handle is a way to step up and put the materials on full display. If you have a knife in mind where the frame and guard need to be blued, damascus or engraved, a frame handle is the way to go.

A frame handle knife has its advantages, but the complexity of the construction presents plenty of challenges. As a skilled maker, you may choose to rise to the challenge of a frame handle just to show that you can.

For more information on frame handle construction contact the author at [email protected].

The Author

A voting member of The Knifemakers’ Guild and president of the Texas Knifemakers’ Guild, Jason Fry also is the author of the most entertaining new book, Knifemaking Hacks: 384 Tips To Make Knives Like The Pros.  For information on how to buy your copy visit https://www.gundigeststore.com/product/knifemaking-hacks-384-tips-to-make-knives-like-the-pros/.

Making Knives By Smelting Bog Iron

0

Making Knives the Old-Old-Fashioned Way

Many knifemakers use today’s best stainless steel money can buy. Other, more do-it-yourself types may scrounge a scrap yard for car springs or ball bearings. Still others go further because all that metal came from somewhere. What if a knifemaker went back to the beginning—starting with the iron pulled from the ground?

In recent years, some smiths have started from square one, pulling raw material from their surroundings to create metal from scratch—just like mankind did for thousands of years. Since the beginning of the Iron Age circa 1200 B.C., man has turned to the iron found in bogs. There, thanks to springs and bacteria, the iron forms into a spongy iron-bearing hydroxide mineral called a goethite.

This renewable source of iron was so important that even the first iron works in America, Saugus Iron Works in Massachusetts, gathered its raw material from nearby bogs. But to turn bog iron into a knife? It’s not a project for the faint of heart.

“You have to prepare hundreds of pounds of charcoal; find, harvest and prepare the ore, build the smelter and then monitor and feed the fire for hours just to produce the bloom,” ABS master smith Kevin Cashen notes. “Then the real heavy work begins of forging it down into a piece of steel that is historically interesting but nowhere near the quality product you get from your modern steel supplier.”

Making knives out of bog metal
Take a peek inside the furnace at the end of the smelt during the Matherton Forge Iron Age Challenge. (Todd Combs image)

And then there’s the problem of smiths not knowing exactly how the ancients smelted iron.

Darrell Markewitz is a Canadian artisanal blacksmith and historical interpreter of the Vikings who settled in Vineland. He says he is “concentrating on rediscovering lost historic smelting methods.”

For example, he had to make intelligent guesses as to how Vikings tracked time during the smelting process, and how the ancients designed bellows because no bellows from that time exists today.

Sourcing Bog Iron For Making Knives

Relatively speaking, Jarkko Niskanen had it easy when he harvested iron out of a bog in Finland. From a boat, the 26-year-old blacksmith simply felt along the bottom of a bog for spongy chunks of material. Markewitz found himself kneeling over a rivulet running through a Canadian bog, feeling for deposits of iron.

Cashen indicates his home state of Michigan is filled with iron. However, only a small portion is bog iron, small chunks of concentrated iron deposited by bacteria on the slow-moving side of streams running through the bog.

“I have found entire cliff faces in the wilds of Michigan’s Upper Peninsula that a magnet will stick to, and huge sections of magnetic black sands on the shores of Lake Superior,” he observes. “But bog iron requires special conditions. I have found some scant deposits locally but not enough to work with regularly.”

There are different kinds of bog iron. All require the same kind of process to turn out a metal. Some types of bog iron react slightly different than others in the smelter, reducing to a smaller amount of usable material, for example. The end result is the same, however: a lump of relatively pure iron.

Once the smith harvested the bog iron, then he cleaned and dried it. Niskanen put his bog iron in a fi re to dry the pieces, and then broke them up until they were small and uniform.
Making Knives Like The Vikings

The process all happens in the bloomery furnace, in what looks like a chimney with an air pipe going into the side to pump in oxygen. It’s a design going back at least as far as Viking times.
“In operating a ‘short-shaft ,’ direct process bloomery furnace, higher air volumes have proven to produce larger, more dense iron blooms—in fact, blooms most like those few found in the archaeology,” Markewitz states.

As the temperatures rise and charcoal continues to be shoveled in, a chemical reaction takes place inside the furnace.

Making knives furnace
As the temperatures rise and charcoal continues to be shoveled in, a chemical reaction takes place inside the furnace. (images courtesy of Jarkko Niskanen)

“The ore is always an oxide,” Markewitz continues. “The smelting furnace is a reduction process removing the oxygen from the ore.”

Charcoal produces carbon monoxide, which reacts with the oxidized iron. As oxygen leaves, the iron particles are left behind and fall to the bottom of the furnace. At the interior temperatures, typically something around 2012-2192°F or more, the heavier iron particles are slightly “sticky” and sinter together has they fall, Markewitz adds.

However, bog iron is also filled with non-iron materials, such as ash and sand. In the furnace, the latter liquefy and fall to the bottom of the furnace where they create a greenish-black glass, or slag, in the shape of a bowl.

Forging slag
If all goes well after hours of running the furnace, a ball of iron that is fragmented and filled with pockets of slag, but iron nonetheless, will result in the bottom of the smelter. (image courtesy of Jarkko Niskanen)

“The top surface of this bowl is closer to the hot area of the furnace [at the blast level and] so remains a liquid,” Markewitz explains. “If too much of this slag is produced, its interior level can rise up to block the air blast. Before this happens, ideally you want to let some slag run out [by tapping the furnace].”

If all goes well after hours of running the furnace, a ball of iron that is fragmented and filled with pockets of slag, but iron nonetheless, will result in the bottom of the smelter. However, what if the metal workers make the furnace too hot? Then, instead of iron, cast iron may be the result—unusable for forging.

Bog iron metal
The pieces of iron begin to take shape after the first forge welding. (image courtesy of Jarkko Niskanen)

“If the iron particles are made too hot, they liquefy. As a liquid, iron will frantically absorb carbon—so fast, in fact, that the iron almost certainly shifts into a too high-carbon cast iron,” Markewitz states. “This material cannot be forged, and is so hot it usually melts through the bottom slag bowl and collects at the ground level of the furnace … The real truth is that it takes skill and experience not to get high carbon cast iron.”

Most smelts are a community effort. Cashen says his most satisfying smelt was in 2009, one he dubbed “The Matherton Forge Iron Age Challenge.” The goal was to smelt and forge an iron sword in three days as a public demonstration. When Markewitz reenacts Viking smelts, he does it with a team of three other people.

Bog iron slag
Another view of the piece of iron shows pockets of slag. (image courtesy of Jarkko Niskanen)

Niskanen took photos of the smelts, which he published online. For ancient metal workers, team effort was out of necessity. After all, bellows are hard to operate for hours at a time to feed a hungry furnace. To keep time, Markewitz’s team chanted, sang songs and focused on heartbeats—possibly historical timekeepers.

“The effective pumping rate was one stroke per second, alternating between the two chambers. Individuals varied on their stroke force [delivery pressure], but averaged 60-to-75 strokes per minute. This was without interruption over the course of the entire firing sequence extending roughly five hours,” he stresses. “We found that to maintain the needed consistency, we needed four individuals working in roughly 10-minute shifts. This labor force needed to be at least semiskilled to the task. This is a requirement totally separate to the needs of feeding and operating the furnace itself.”

Every few minutes, another person would shovel more charcoal into the furnace. Niskanen said he also added crushed limestone to his furnace to enhance the smelting process.

Forging bog knives
At The Matherton Forge Iron Age Challenge, ABS master smith Kevin Cashen extracts the bloom from the smelter. (Karen Cashen image)

Making Bog Knives

The metal worker is not done once the iron is pulled from the furnace.

“To actually form a solid working bar, the sponge needs to be compressed at welding heat to collapse the voids, squeeze out any glass slag and fuse to a solid block,” Markewitz explains.

While every bloom is different, the smith needs to fold, weld and hammer the metal until it’s a unified—and, hopefully, homogeneous—metal bar.

Bog iron knives
A kukri made from the bloom at The Matherton Forge Iron Age Challenge II rests atop the smelter that produced the blade material for it. (Kevin R. Cashen image)

“And every bloom is a bit different in terms of just how solid it might be at the start, how much slag needs to be ejected, and in what the actual starting carbon content might be,” Markewitz notes.

Then, finally, the bladesmith can practice his craft. For Niskanen, it was only natural to use the iron for a traditional knife. He made a puukko, an ancient Finnish knife (pictured at top of this article).

“Since the Iron Age, the knife has been used as a multifunctional tool in everyday life,” he opines. “And for a hunter it is, and always has been, one of those items you can’t go without into the wilderness.”

Niskanen was there from the beginning, when the knife was only a lump of iron oxide resting on the bottom of a Finnish bog, “It makes the blade really personal,” he says.
Markewitz used his iron as a decorative part of the knife.

“For the modern designs, I use the bloom iron specifically to highlight its unique texture,” he observes. “Blades like [my Hector’s Bane model] have bloom-iron exterior slabs forge welded to a carbon steel core. As with other inset-styled blades, it is this modern alloy core that is forming the actual cutting edge.”

He did it that way because iron blades don’t perform as well as blades of modern steel.
During the Iron Age, Markewitz says iron knives were so soft that users carried a small sharpening stone with them because they had to constantly hone the edges. Nonetheless, some knives no doubt performed better than others.

Making knives bog iron ore
Cashen forges a seax (aka sax) blade from the bloom produced at The Matherton Forge Iron Age Challenge. (F. Page Steinhardt image)

In a 2013 study published in The World of Iron London, archaeo-metallurgists Quanyu Wang and Peter Crew compared the performance between three knives made from bog iron. Their paper, titled “Three ores, three irons and three knives,” found that the performance of the knives probably was determined by the skill of the smith and the trace elements in the blade, such as phosphorus, which is known for making iron stronger and harder in trace amounts.

However, phosphorous also can make the metal brittle in cold weather. They compared three bog-iron knives by examining the microstructure of the blades and using the knives to butcher a pig.

Wang and Crew concluded their study by writing, “The quality of bloomer iron depends very much on the smelting and refining techniques used, which may not always be recognizable from the structure and composition of the final metal.”

These smiths have more furnaces to build, iron to smelt and possibly blades to make.

“I have studied older bloomery steel, as well as modern smelted materials under the microscope, and tested the properties, and am quite impressed with the smelting skills of the ancients,” Cashen concludes. “Modern academics had only their best guesses about this process until people started actually doing it again, and then we learned how little we actually knew. We are fumbling our way through a process that our ancestors had completely mastered, developed to its highest levels and then discarded in favor of newer and better processes of making steel.”

Tips for Making Knives: Forging During the Summer

  1. Hydrate
  2. Limit Heat Exposure
  3. Dress Appropriately
  4. Sweat the Load
  5. Divide the Labor

Like most forgers, I try to build a stockpile of damascus and different sized blades in the winter months when the temperature is below 50 degrees F. Sometimes, because of where you live, it might not drop below 70 degrees F. Hot is hot no matter where you forge, and there will be a time when you have to forge no matter how high the temperature is.

Here are some helpful hints to get you through the hot times.

Hydrate

Tips for forging knives
Keep a squirt bottle nearby for a cooling spritz when you need it.

“Pre-hydrate” the day before you are going to forge. Also, drink plenty of water during forging and afterward. I use a squirt bottle to spray myself during forging to add extra cooling. Staying hydrated should keep those nasty headaches away.

Limit Heat Exposure

Forge a knife
Take frequent water breaks while sitting in a cool breeze if at all possible.

If you are lucky enough to have a second person that knows how to forge helping you, take turns doing the work. This limits the amount of time one person has to stand by the hot forge. After your turn, get away from the heat and drink fluids.

Usually I’ll pull a chair close to the door to catch any breeze that might be blowing. I place a fan to blow across the cooling chair if the temperature’s above 90 degrees F. Some have a gas forge that can be moved outside, which is better for the radiating heat, though a strong wind can mess with the fire.

The main point here is to limit the time you are exposed to the forge heat.

Dress Appropriately

How to forge knives
The author eschews long sleeves while hammering a hot billet.

I do away with such coverings as aprons, arm covers and/or long sleeves. I haven’t gone to shorts because there would be a piece of hot something rolling down my leg and into my work boots. No amount of stomping around gets it out. I stick with jeans.

Sweat the Load

A towel or rag that helps keep the sweat from getting in your eyes is a good idea. Your shirt will be soaking wet after a few minutes, so don’t count on it as a sweat sponge.

Divide the Labor

Knife forging safety
The author eschews long sleeves while hammering a hot billet.

When welding damascus on very hot days, one day I do just the first weld to seal the billet. Then the next day, I stretch the billet. The following day, I cut and restack the billet for layer count.

I follow this pattern till I have the billet the way I want it. This takes a lot longer but it doesn’t wear you out at the end of the day.

Then again, sometimes I just work through the heat and sit in my truck with the air conditioning on high. An extra shirt also helps to keep sweat off your vehicle seat.

Keep on Forging

So remember: Drink fluids, limit your time being by the hot forge, stay as cool as possible—and keep forging!

Ancient Bog Oak: Knife Handles Thousands of Years in the Making

As noted in Monty Python and the Holy Grail, “strange women lying in ponds distributing swords is no basis for a system of government.” On the other hand, oaken logs lounging in bogs for a couple of millennia transform into something of a “holy grail” for knifemakers.

The oxygen-poor, acid-rich bog environment changes humble woods such as oak into something dark and infused with history. And it’s in no small part because of this that makers have turned to the material for knife handles.

Knives seem to have a long relationship with bog oak, a prized and precious wood pulled from bogs after thousands of years.

For instance, take the Scottish sgian dubh, the small utility fixed blade sheathed in the sock of a Highlander in traditional Scottish garb. Translated from Gaelic, sgian dubh means black knife, which some think is a reference to the dark bog oak from which the handles of a number of sgian dubhs were carved.

Just as oxygen-poor and acid-rich bogs transform wood, some makers have gone beyond traditional sgian dubhs and use the handle material to hearken back to more mysterious and historic times.

Black Betty

Because it takes ages to form, bog oak is a finite resource. ABS journeyman smith Mike Deibert, who makes knives on the weekends and evenings when he’s not working as an elementary school teacher, waited five years after he bought a piece of bog oak for the right knife to come along.

Ancient Bog Wood Knives
Mike Deibert (inset) uses 5,400-year-old bog oak for the handle of his Black Betty Bowie. Blade length and steel: 10 inches and bold-feather-pattern damascus. (SharpByCoop knife image)

The large, handle-sized piece of the material came already stabilized. Deibert has most of his natural handle materials stabilized so they’re not subject to fluctuation in humidity and are more predictable to work. Even before he decided to use the bog oak, the project was going to be a special one.

“The Black Betty Bowie was created in September of 2019,” Deibert explained. “I designed it for a client who wanted to present it as a gift to an individual who was responsible for raising hundreds of thousands of dollars for cancer research. I wanted to come up with a special work of art that even a non-knife enthusiast couldn’t help but appreciate.”

Deibert started with a bold-featherpattern-damascus design by working out the pattern on paper. When he saw the finished billet, the contrast thrilled him. Besides its tight grain and chocolate color, the wood, billed as a 5,400-year-old relic pulled from a bog in Ukraine, gave the blade historical gravitas.

“When I saw how incredible the dark plume billowed down the center of the blade, I knew I had to put together a guard and handle that complemented this intense feature,” he began. “Originally, I had drawn the knife with a piece of ironwood burl in mind for the handle and a satin-finished steel guard. But, with a very dark portion over most of the blade, I decided to go with all-dark furnishing as a complement.

“This wood, once growing and living thousands of years ago, is now preserved and on display as a handle on the world’s oldest tool. There’s a story in it, and it makes me proud to be able to keep that story going.”

Baba Yaga

What kind of knife would Baba Yaga, a mysterious and terrifying old woman in Slavic folklore, wield as a war blade? That’s the question Connecticut knifemaker Matt Berry pondered as he read through Katabasis, a novel in which the wicked witch swoops in for an appearance.

“Babayaga’s Warknife” began with a blade Berry had put aside after beginning it in 2016.

Ancient bog wood knives
One of the highlights of the Babayaga Warknife by Matt Berry (inset) is the pommel. Berry carved the bog oak to fit into the bronze pommel and ferrule, which he created by casting them via the lost-wax method. The oak for Berry’s handle entered a bog about 5,300 years ago and helped set the knife’s tone. (SharpByCoop photo)

“I started with the pommel carving, which was meant to be Baba Yaga’s face. The rest of the handle just kind of fell into place as I worked forward from the pommel,” he recalled. “I worked on it as time and inspiration allowed and finished it in the spring of 2019.”

One of the highlights of the knife is the pommel. Berry carved the bog oak to fit into the bronze pommel and ferrule, which he created by casting them via the lost-wax method. The oak for Berry’s handle entered a bog about 5,300 years ago and helped set the knife’s tone.

“I wanted something European even if bog oak was never used in the 1200s,” Berry said. “Bog oak is quite expensive. It’s right up there with burl in price and will sometimes cost more. There’s not a lot of it around and the supply is finite. I get most of mine from an English furniture company that digs up and dries its own logs and then makes high-end furniture. I’m buying the company’s scraps.”

Like anything that has sat around for a few millennia, bog wood has its quirks. According to Berry, it can be as temperamental as Baba Yaga herself.

“The grain isn’t tight, and it’s kind of mushy and chippy at the same time,” he warned. “Th at makes it very frustrating to carve. It drills and sands fairly normally but it can be prone to splitting.”

Dagger of Firsts

Brant Cochran of Gray Flame Forge works in the insurance industry but, when he can, he’s in his shop. When he created his 10.5-inch dagger with a blade of W2 tool steel and a bog oak handle, it was a project of firsts.

He took three months to slowly build the dagger, in part because it was his first time making a dagger of that length. While he wanted to make a large knife, the quintessential bowie didn’t appeal to a man whose interests in edged tools were whetted when, as a youngster, he saw an arming sword at his grandparents’ house.

Ancient Bog Oak Handled Knife
The bog oak for the handle of the dagger by Brant Cochran (shown inset in the process of assembling the takedown piece) is 3,300 years old. The 10.5-inch blade is W2 tool steel with a double hamon. Overall length: 17.5 inches. His list price to make a similar knife: $800. (SharpByCoop knife image)

The dagger was the first time he had made a knife with a cross guard, a pommel, takedown construction and a bog oak handle. He initially had planned on making the handle from ironwood. Then, after some African blackwood got “screwed up,” Cochran turned to a piece of bog oak.

“I’d never used it before,” he stated. “I was already doing all these new things—why not try a new material as well? That was part of it. But I was interested in bog wood because it has a historical element to it. It had spent 3,300-plus years sitting in a bog.”

His impressions? The bog oak worked a heck of a lot better than ironwood.

Furthermore, it was almost the perfect carving wood. He created a subtle ridge running down the length of the handle. The wood wasn’t soft enough for the subtle feature to get “completely washed out,” nor was it hard enough that it required extra effort to eliminate the sharp edges. The dagger of “firsts” became a springboard to future projects.

“I would work really hard on one piece as I was trying to build up my skills,” Cochran said. “Then I would bring it to master smiths I knew and respected to get it critiqued. A picture is not going to show you every little detail you need to figure out how to make a quality knife.

“Your edge might have good retention but if your handle’s too thick or just very uncomfortable, you might not pick that up. And, by speaking to the master smiths and having them show you what those details are, you can then train your own eye to do it as you move forward.”

Perfect Complement

For Anders Högström, bog oak is a relic from an ancient time and a perfect complement for his Valdez ceremonial dagger.

A full-time knifemaker who lives in southern Sweden, Högström is also a hobby chef when he’s not crafting knives. One vein of his work is to build knives of cultures that are combined or are long-ancient ones that persisted for years.

Ancient bog wood
One-thousand-year-old bog oak and ancient walrus ivory comprise the handle of the Valdez ceremonial dagger by Anders Högström (inset). The 3-inch blade is 1050 carbon steel with hamon. The custom leather sheath is by Balatoni. Högström’s price for a similar knife and sheath: $2,500. (SharpByCoop knife image)

According to Högström, “My main direction of design is that of a marriage between the Nordic and Japanese.”

He uses a lot of one-off casting and hamons. For his short-bladed ceremonial knife, he went with a model he imagined could have been used by an ancient American Indian culture, such as the Inca or Maya.

“The ceremonials I make are a sort of homage to what would have been used by a high priest, shaman or someone of similar standing at a ceremony of importance,” he explained.

Högström indicated bog oak pairs well with other materials. For the Valdez, he “married” the 1,200-year-old material with ancient walrus ivory left raw in the handle butt to provide texture. The bog oak, he said, carried a “meaningful weight”—almost as if the material were an artifact of an older time.

Ancient bog wood knife handles
Anders Högström used bog oak for the stand for his cutlass. As he noted, “The stand is made from an old piece of bog oak that was likely a beam from a ship—the ax marks are intact and are all on the top surface—and it comes from the area where I live, named Blekinge here in the south of Sweden, that has been in the ship building business for centuries.” (image courtesy of Anders Högström)

“Something ancient that has been left to decay—but, as nature would have it, something happened in the process, and the original material got to evolve into something else—much like the fossil walrus ivory in the handle that was colored by minerals in the ground and because of the thousands of years it stayed there,” he mused.

Högström pointed out that some pieces of bog oak must be stabilized because they might be soft and the pores of the wood must be filled.

It depends on the project. However, for his ceremonial dagger, he said the unstabilized wood was “easy to work and medium soft.” He chose a fine-steel-wool finish to get into the wood’s grain, thus bringing out the most character. This was followed by a couple of coats of wax to protect the surface.

When customers learn of the bog oak’s history and the stories it evokes, Högström said they often react with “both amazement and amusement, as well as a certain reverence.”

Knifemaking: ABS Master Smith J.D. Smith’s 4 Principles

0
  1. A personal approach and style.
  2. An object of art or music should give you a sense of life, an idea what it’s like to be in the artist’s shoes.
  3. Technical control.
  4. An endless flow of ideas.


J.D. Smith: Dancing in the Shop

J.D. Smith and I were neighbors for three years and, as it was a short walk, would frequently wander down to the Massachusetts College of Art and Design (MassArt) together, sometimes for class, sometimes just to work.

Boston’s a very diverse city, and it wasn’t uncommon for him to stop and start speaking Russian or Spanish with various friends along the way before getting to class and beginning to speak Korean with a student.

Neither was it unusual for J.D. to dance around the shop, especially while making damascus. Dance, music, sculpture: They all have a flow to them, and some people simply love to incorporate and live with all three. J.D. dances through the music, the work, and the awards. I was with him at the 2013 Oregon Knife Show when I watched him win four awards, and his study at home was littered with many more.

Two of the pieces were collaborations: one a hunting knife with now American Bladesmith Society master smith (MS) and past apprentice Zack Jonas, the second a precious metal and stone-laden sword crafted with the talented Joseph Shnayder, J.D.’s partner at AmeRRuss Blade Arts.

It was also at the Oregon show that BLADE Magazine Cutlery Hall-Of-Fame® member Wayne Goddard gifted J.D. his MS stamp, something I don’t think J.D. will ever forget.

J.D. received the MS stamp in 1998, along the way winning the B.R. Hughes Award for the best knife submitted by an MS applicant at the BLADE Show. This made J.D. the first black MS, though he tries not to dwell on this because he feels it detracts from the bladesmithing.

“The field should be blind to age, sex, and race,” he noted. “The focus should be on the work.”

Developing A Style

In 1991, J.D. walked into Joe Wood’s office, who at the time was head of the MassArt sculpture department. J.D. told Joe that the school’s officials couldn’t say they were teaching the most up-to-date metals program without teaching damascus. Joe agreed and offered J.D. a guest teaching position. In 1996, George Greenimire offered J.D. a regular class to teach.

As a teacher, J.D. would encourage students to do what he thought they were naturally inclined to do without controlling their sense of design, or discouraging them from pushing their limits. The goal isn’t to replicate other people’s work, but, if you can understand what you’re attracted to, you will have an easier time designing your own work and, hopefully, developing your own style.

JD Smith Master Smith
Another collaboration with Joseph Shnayder, this arresting art knife features a 6-inch blade of J.D.’s explosion damascus in 1084 carbon and 15N20 nickel-alloy steels. The handle is carved African blackwood, highly detailed silver work and gemstone settings. The quillons are carved in the shape of claws. Overall length: 12 inches. (SharpByCoop image)

“If there’s a table with 500 different knives on it,” he observed, “someone should be able to pick out your work with ease.”

When I asked him how he started to develop his style, he mentioned it being “cobbled together from Don Fogg, Wayne Goddard, Jimmy Fikes, and Wayne Valachovic—Valachovic especially for folders—Bill McHenry and Jim Schmidt.”

Bill and J.D. had become good friends over the years, and J.D. credits much of his knowledge of folders to him. Bill passed away in 2019 and is greatly missed by many inside and outside the knifemaking community.

Knifemaking: ABS Master Smith J.D. Smith’s 4 Principles of Superior Art

Over the years, J.D. has developed his Four Principles of Superior Art:

  1. A personal approach and style.
  2. An object of art or music should give you a sense of life, an idea what it’s like to be in the artist’s shoes.
  3. Technical control.
  4. An endless flow of ideas.
Tips for Making a Knife
The author collaborated with J.D. on this stylish fixed blade in damascus, a carved handle, and stunning wooden sheath. (SharpByCoop image)

Further explaining his sense of style, he said, “Style is every technique that you use as part of your personal toolbox, and the things you choose not to use. That equals your style. As an artist progresses, he starts to limit his options. It shows a level of maturity. You use four or five techniques, and you develop your style off the permeation of those techniques.”


Advertisement

Must Read Articles

Read this before you make a knife

Knifemaking 101 – Read This Before You Make a Knife

  by Wayne Goddard My experience has taught me that there's nothing like digging in and getting started. I've often said the hardest part of the...
how to forge damascus steel

How to Forge Damascus

Advertisement
Advertisement