
Knifemaking

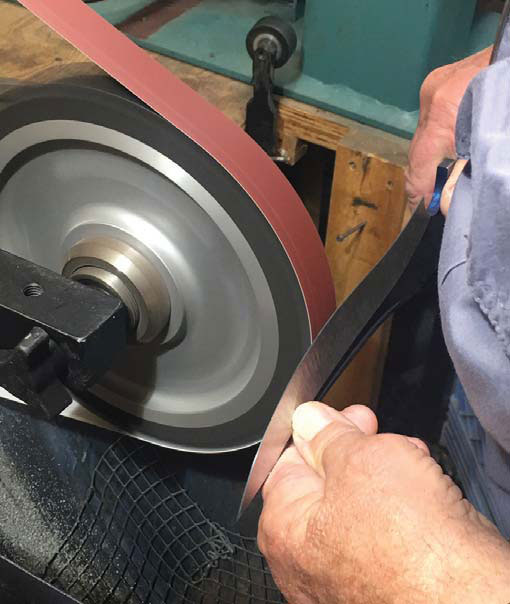
Knifemaking is the building of a knife, which includes the blade, handle and other accouterments. Blades are made by either removing metal from a steel blank via a grinder – known as stock removal – and the forging to shape of hot steel into a blade in the process known as bladesmithing. Other parts, including bolsters, guards, pommels, etc., are needed to complete the finished knife.

Featured Knives – – Knife Collecting – – Tactical Knives – – Survival Knives

Meet The Living Legends Who Make Knives

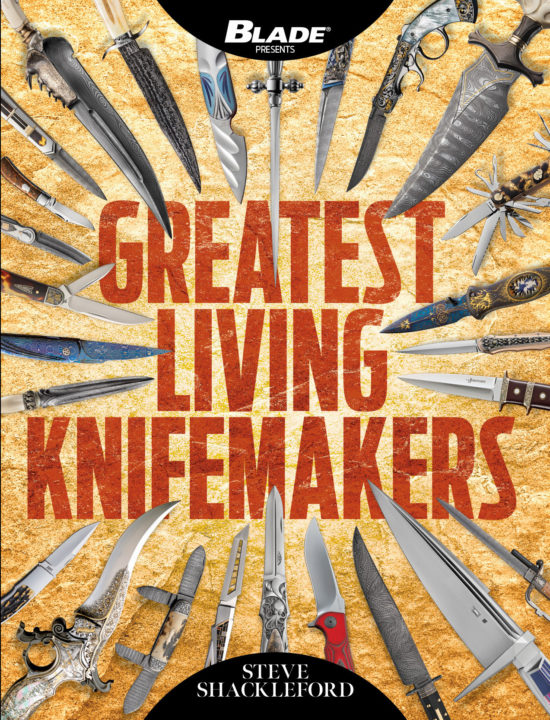
A new book from the publishers of BLADE magazine, Greatest Living Knifemakers, celebrates today’s legends who make knives in ways that most can only dream about. They make knives that can easily fetch tens of thousands of dollars, and even more. 

Given all that talent, how does a book like this come together? Who gets to decide who is counting among the “Greatest Living Knifemakers” anyway? If you’re someone looking to collect or make knives, you’ll enjoy this interview with the editor of the book, Steve Shackleford, who is also a member of the BLADE Magazine Cutlery Hall of Fame®.

Many talented people make knives of outstanding quality. How did you go about choosing who should appear in this book?

Steve Shackleford Make Knives
Steve Shackleford

The hardest part was choosing who NOT to include. I’ve been covering the knife industry for BLADE®, the world’s No. 1 knife publication, since 1985, so I’ve had the privilege of seeing and handling some of the world’s greatest knives, and meeting some of the world’s greatest knifemakers.

As a result, some of the makers I picked peaked years ago and don’t even make that many knives anymore. On the other hand, some are peaking now. However, at some point in their careers each has made knives that are among the world’s best.

In addition, each has either made knives and/or introduced designs, techniques, folding mechanisms, damascus or other steels and other materials, etc., that in turn have set a standard or inspired other makers in the way they make knives.

And, of course, to qualify as per the book’s title, each must be living, though Tony Bose passed away after the book was finished. We decided to include him as a tribute to his fantastic slip joints and the overall impact he had on the knife industry, which was and remains monumental.

Book Make Knives
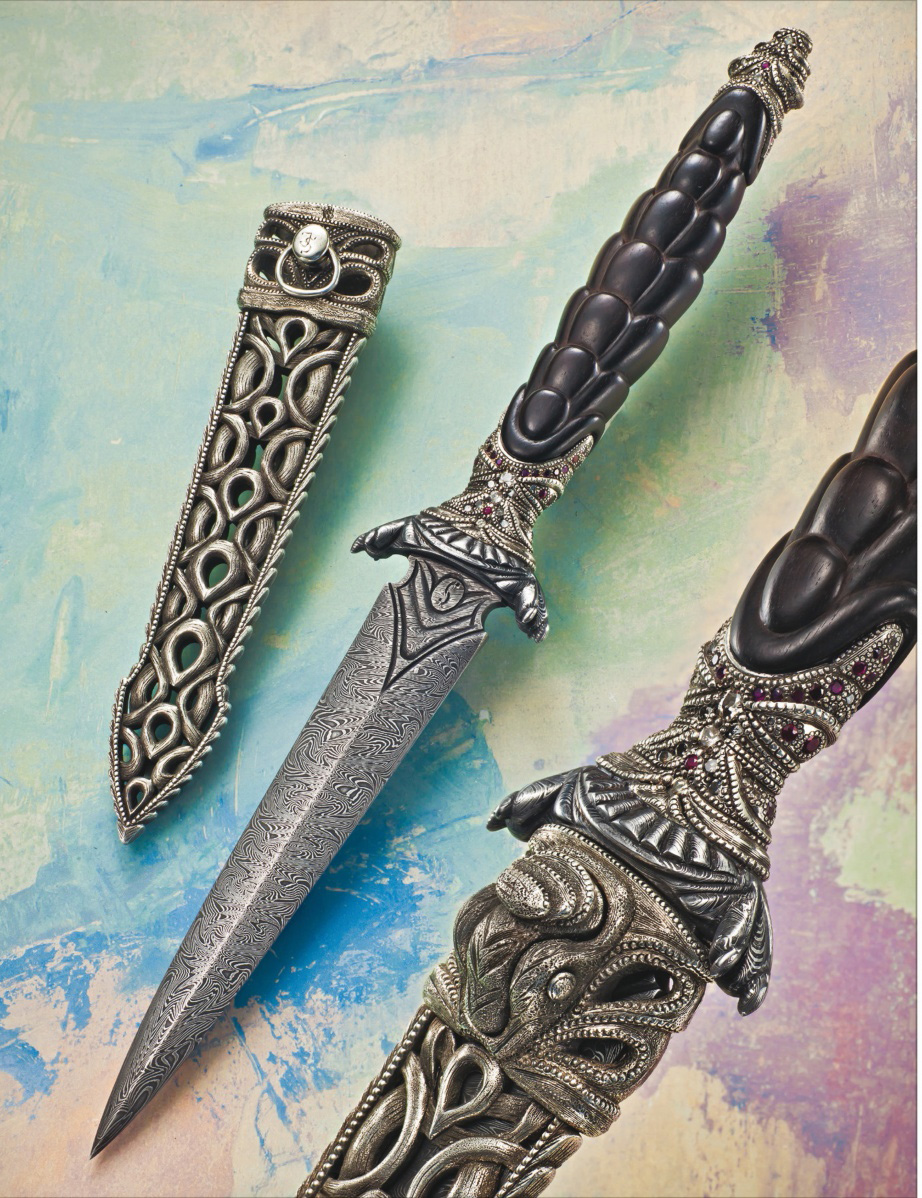
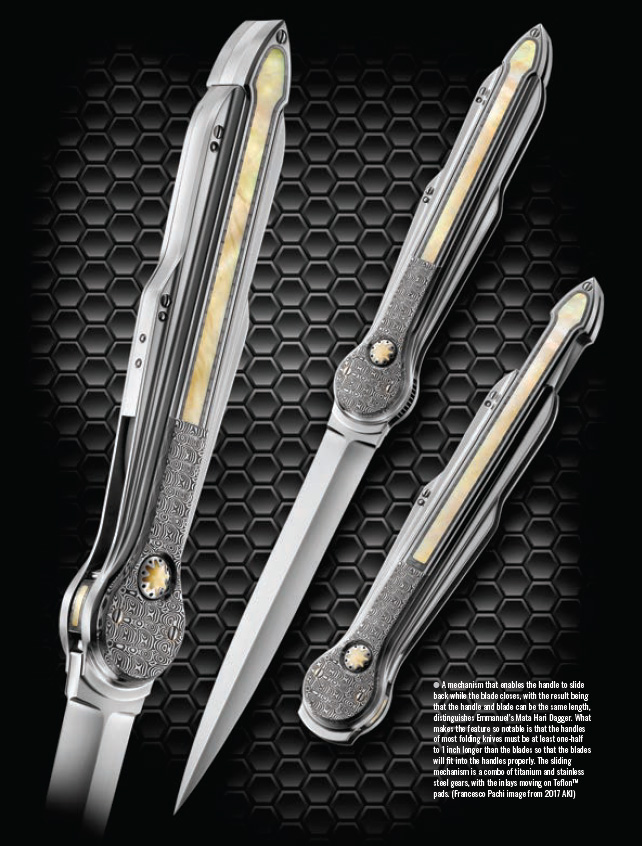
A mechanism that enables the handle to slide back while the blade closes, with the result being that the handle and blade can be the same length, distinguishes Emmanuel’s Mata Hari Dagger. What makes the feature so notable is that the handles of most folding knives must be at least one-half to 1 inch longer than the blades so that the blades will fit into the handles properly. The sliding mechanism is a combo of titanium and stainless steel gears, with the inlays moving on Teflon™ pads. (Francesco Pachi image from 2017 AKI)

What makes a knifemaker “great”?

Some of that is covered in my first answer above but there are other things as well. They must have a lifelong dedication to making knives, which all of those profiled have exhibited, as well as a passion to make knives for much more than just the money.

It’s kind of hard to explain unless you’ve followed knives for a long time, but, in a nutshell, most great knifemakers make knives because they sweat the load, they agonize over the details, and they don’t provide just a “product”—they produce a knife that almost always acts, looks and feels like it’s the best knife that maker makes. There’s much more but that’s part of it.

Are there any names that couldn’t make it into the book due to space limitations?

As noted above, yes, many make knives worthy of inclusion. However, I won’t name names here in case we decide to do a second volume of the book.

Making Make Knives
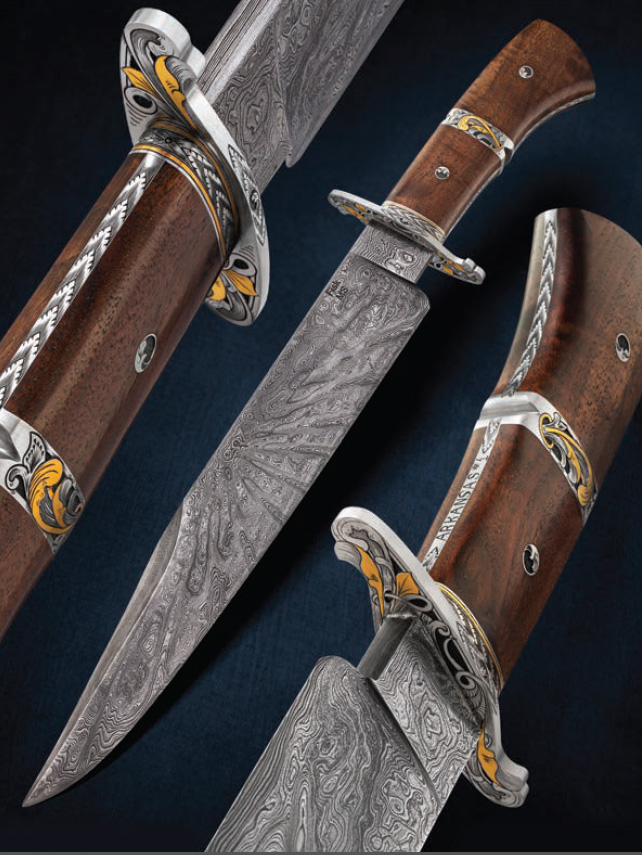
The Razorback State is the theme for Jerry Fisk’s Arkansas #1. The 11-inch blade has a Dog Star-pattern damascus with 1836 layers to represent the year Arkansas became a state. The blade also has steel welded into it from the Statue of Liberty. The walnut handle is from the official James Black walnut from the cemetery where Black is buried in Historic Washington Arkansas. Some believe Black made a bowie knife for James Bowie. The mountings are fully engraved and carved, including deep relief scrollwork and 24k-gold inlay—all by Jerry. (Whetstone Studio image)

Are the names ranked or is this just a collection of noteworthy knifemakers?

Since they are all great and, as John Wayne’s character once said of two great gunfighters in the movie Rio Bravo, “I’d hate to have to live on the difference,” I decided to list them all in alphabetical order—with the exception of R.J. Martin.

His profile appears first in the book because it is the only profile written by the maker himself. I did not ask him to write it, he volunteered to do it. I was so taken by the quality of his writing and the information he provided on what being a great knifemaker is really like that it was a no-brainer to include it.

In my opinion, it’s one of the best ways for the reader to truly appreciate what it’s like to be a great knifemaker—done from a great knifemaker’s point of view. I think it’s the best profile in the book, hands down.

Make Knives Best
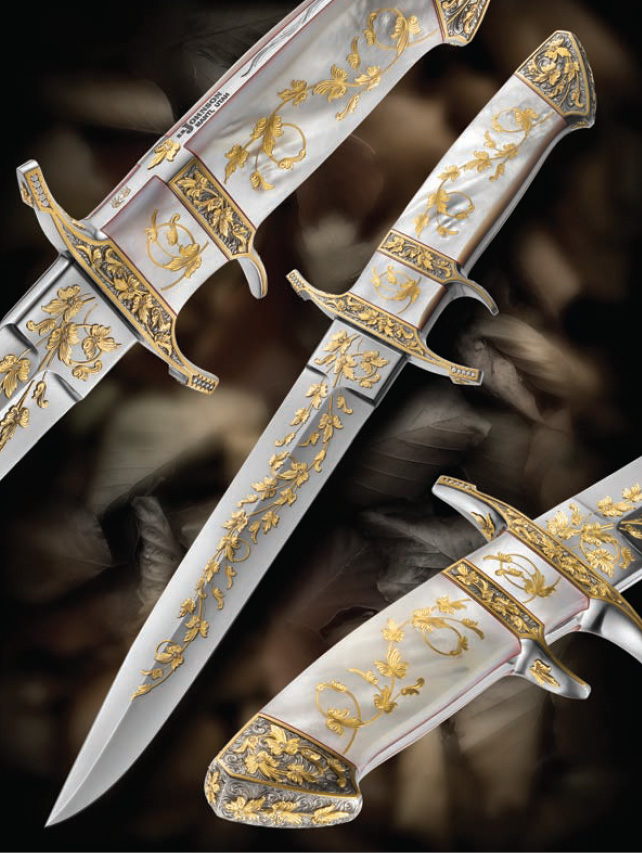
Steve Johnson’s spectacular repro of a Loveless Big Bear sub-hilt fighter is highlighted by Barry Lee Hands engraving that includes 24k-gold inlays and overlays set with diamonds and gilded mother-of-pearl. The knife is made from one block of 5/8-inch thick, 4-inch-wide and 16-inch long CPM 154 stainless steel. The blade is a quarter-inch thick and 8.5 inches long. Overall length: 14 inches. Steve made it for the 2015 Art Knife Invitational. (Francesco Pachi image)

Do great knifemakers have a peak or a golden era within their careers, or are they great throughout their careers?

As with most all great talents, they do indeed seem to peak at certain times. Some peak for longer periods than others and some even seem to have more than one peak. Some may burn out early and then something happens to help them regain their mojo.

However, in most cases the great ones maintain varying levels of greatness throughout their careers, and I think that’s the case with all of those featured in the book.

Is there a list of the knifemakers featured in this book posted somewhere for people to check out?

Yep, right here.

What’s a standout knife for you that’s featured in this book?

I wouldn’t touch that one with a 10-foot blade, other than to say they all stand out.


Greatest Living Knifemakers is available here directly from the publisher.

Tsuba Time: Make a Guard for a Japanese Sword

Wally Hayes Japanese style sword
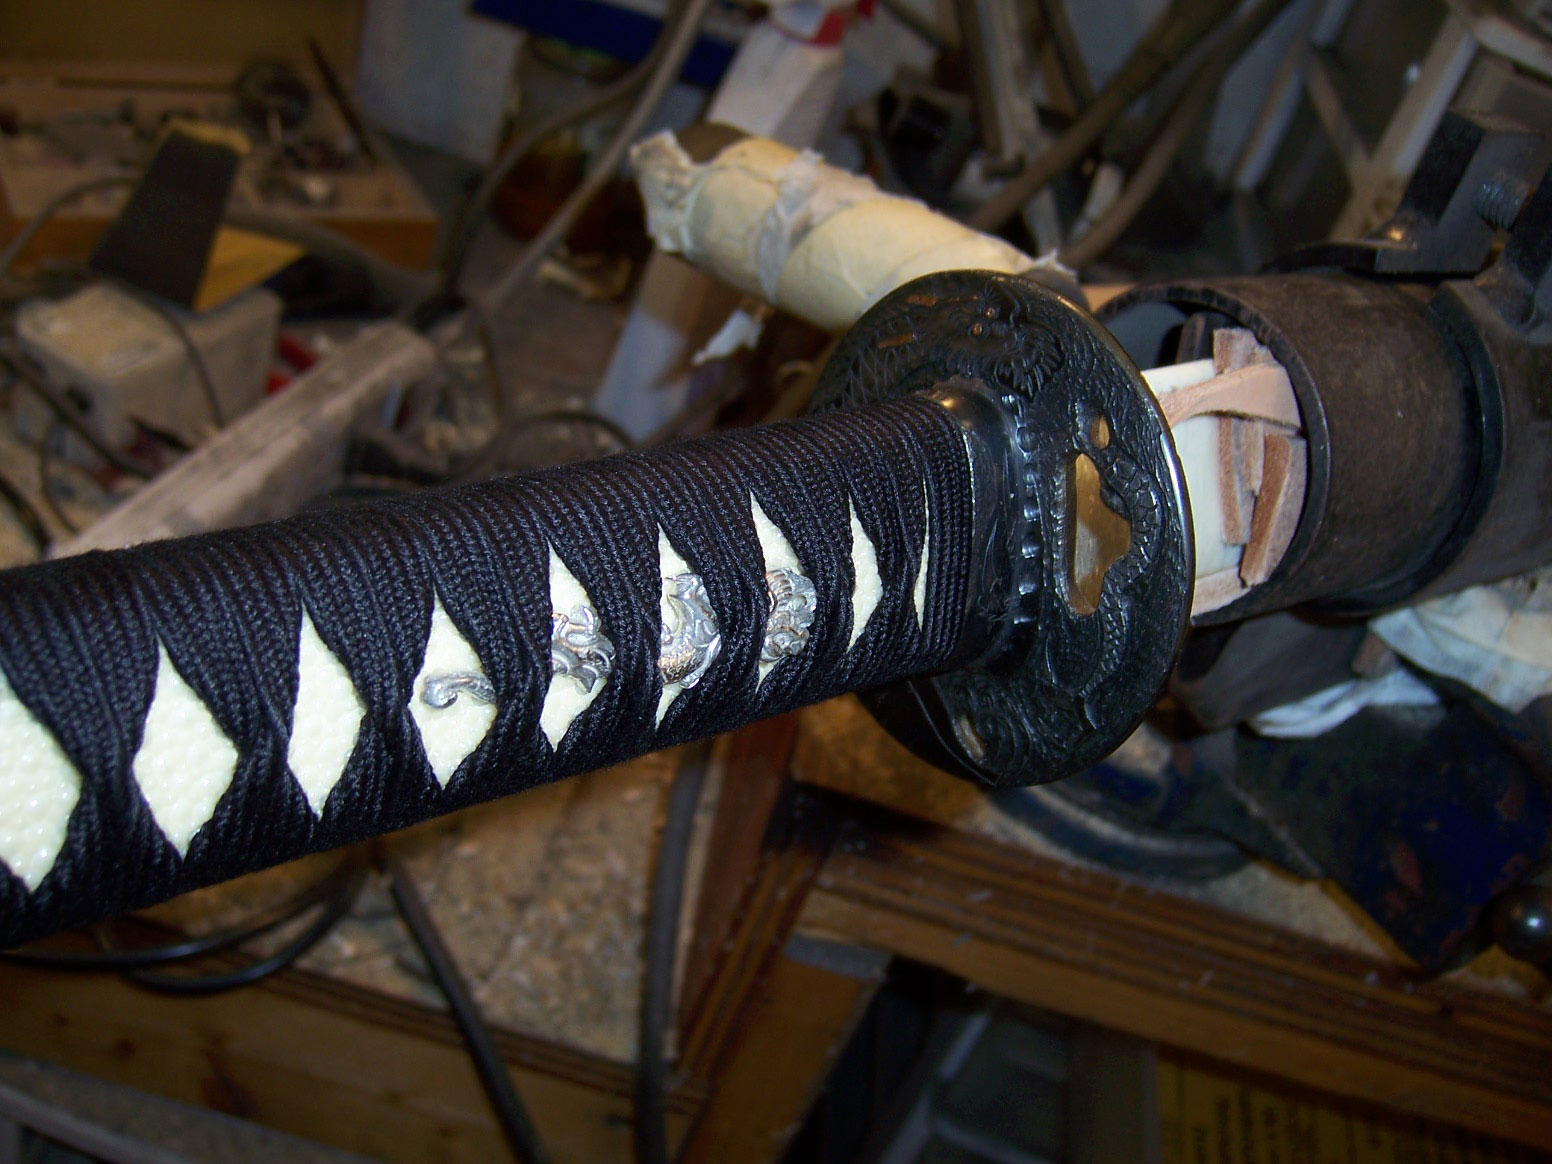
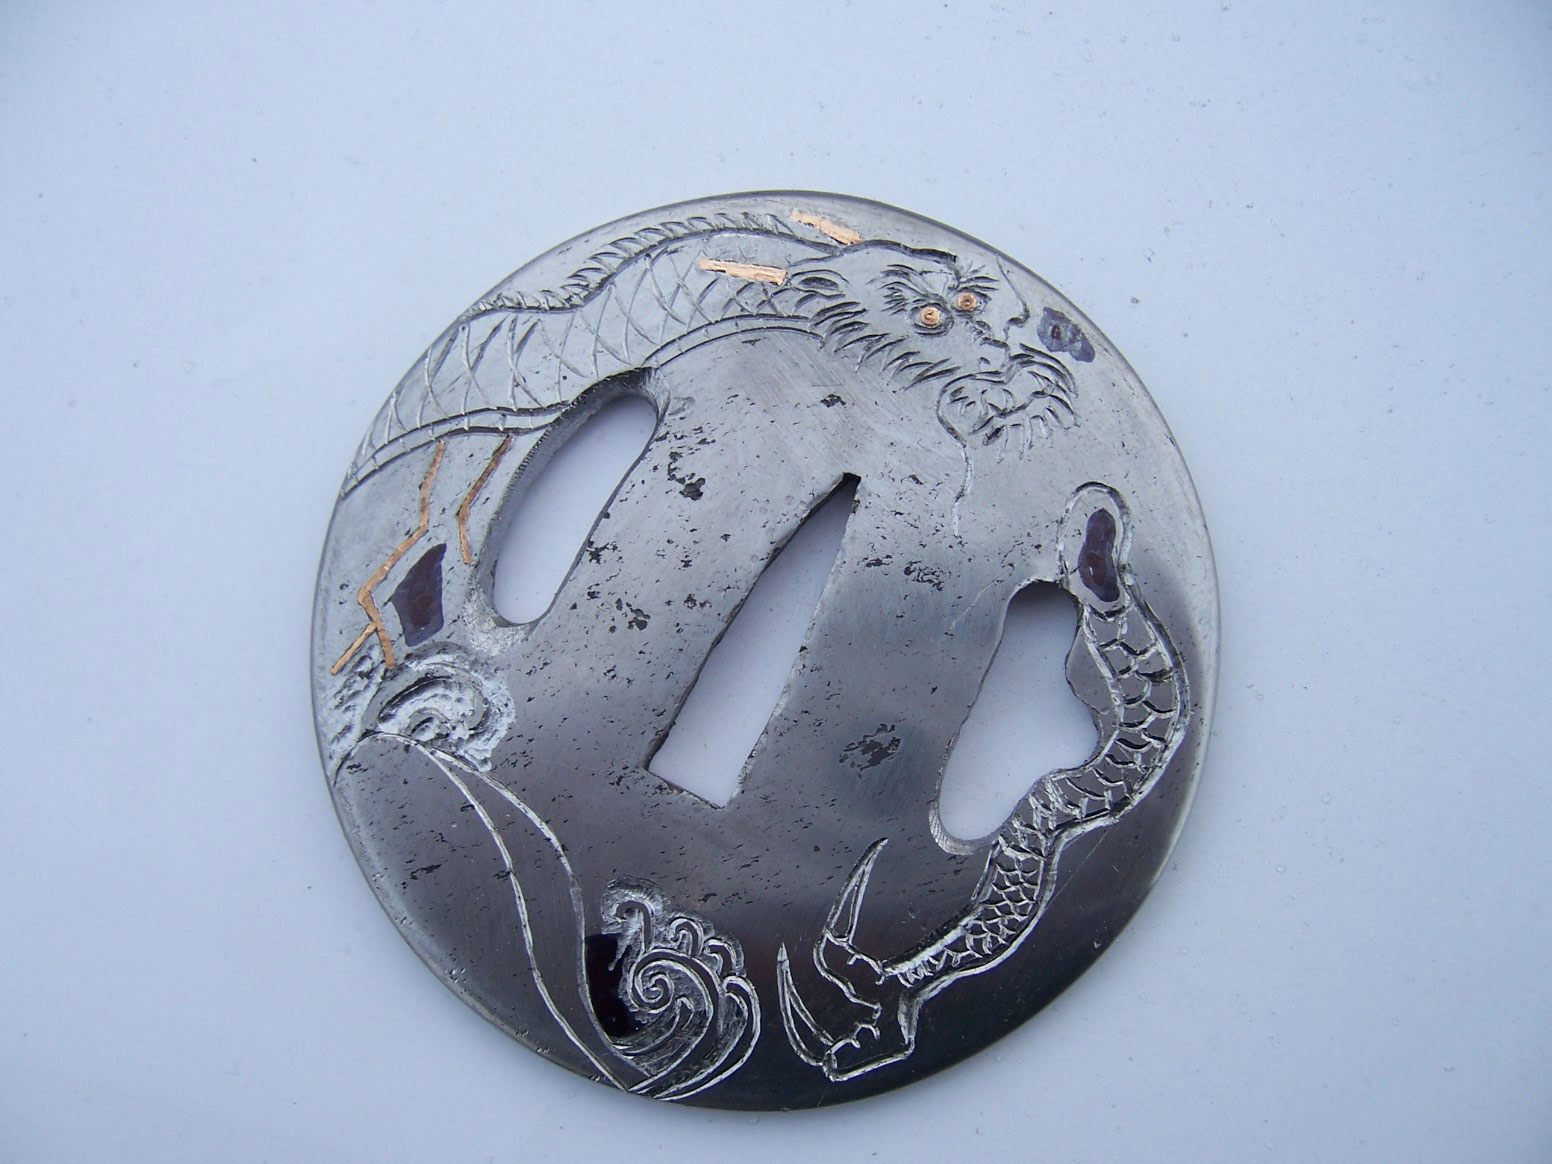
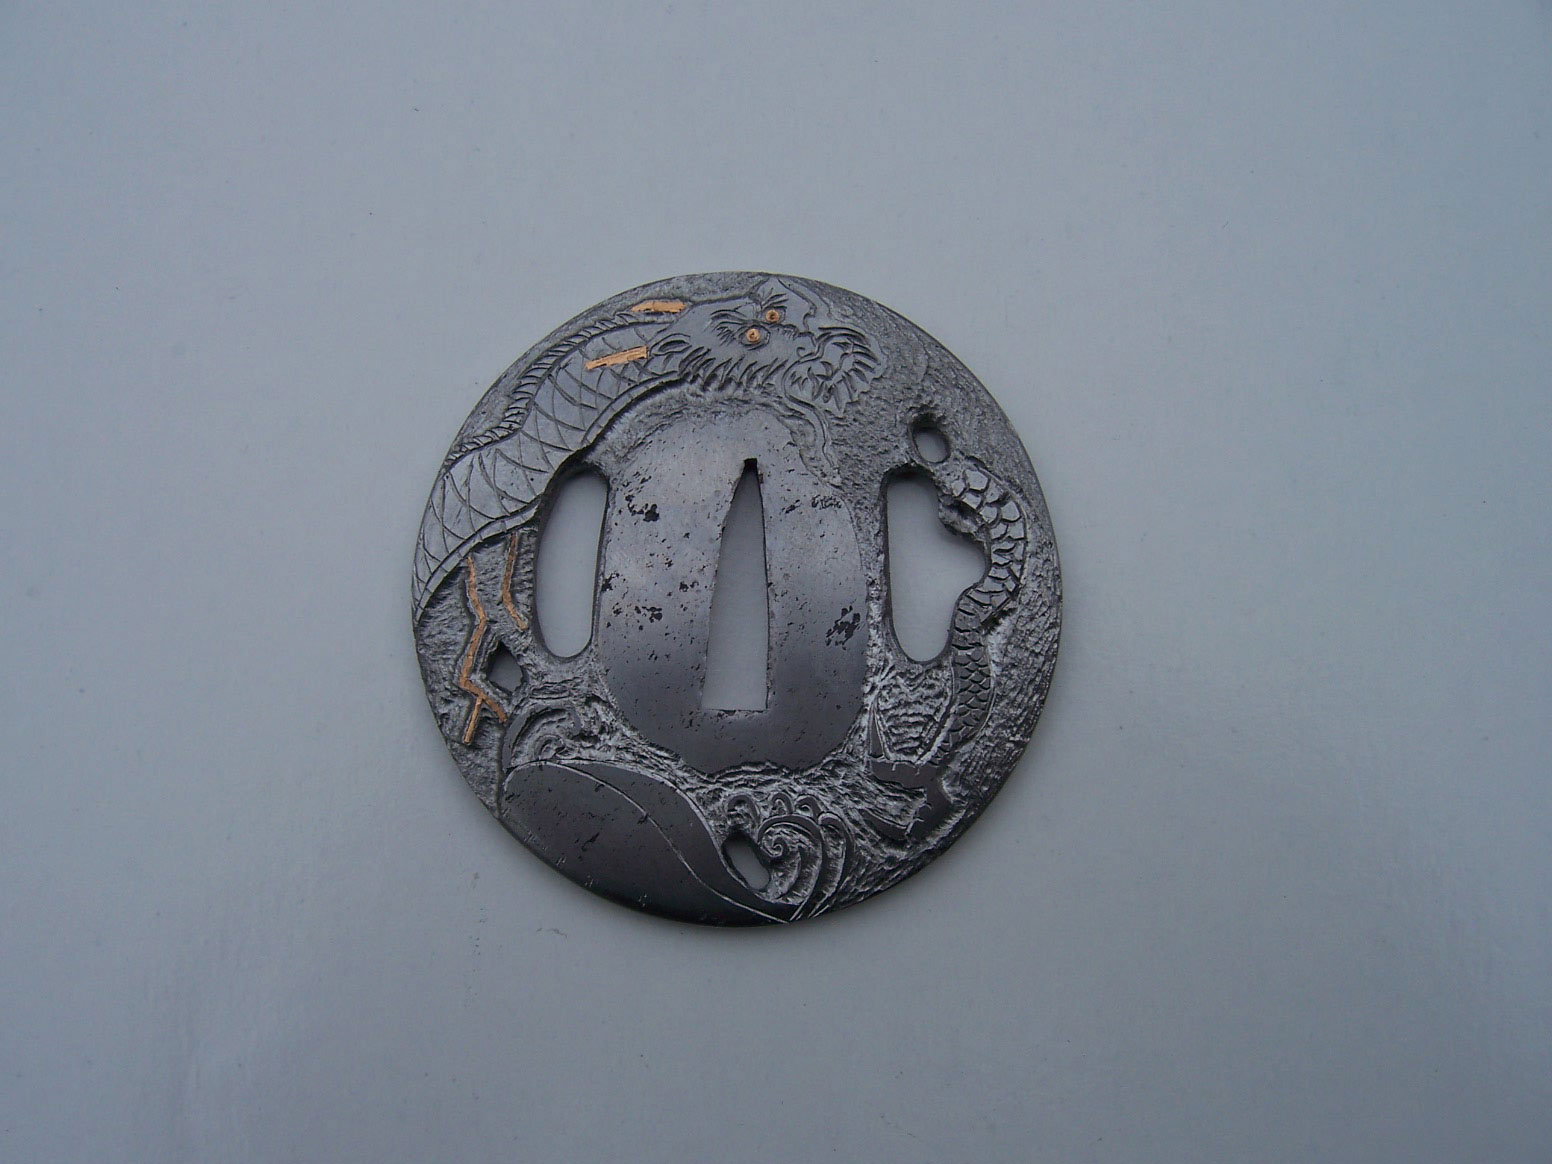
The tsuba the author made for this story appears on a katana he said he made for Axl Rose of Guns ‘N Roses fame. All photos via the author.

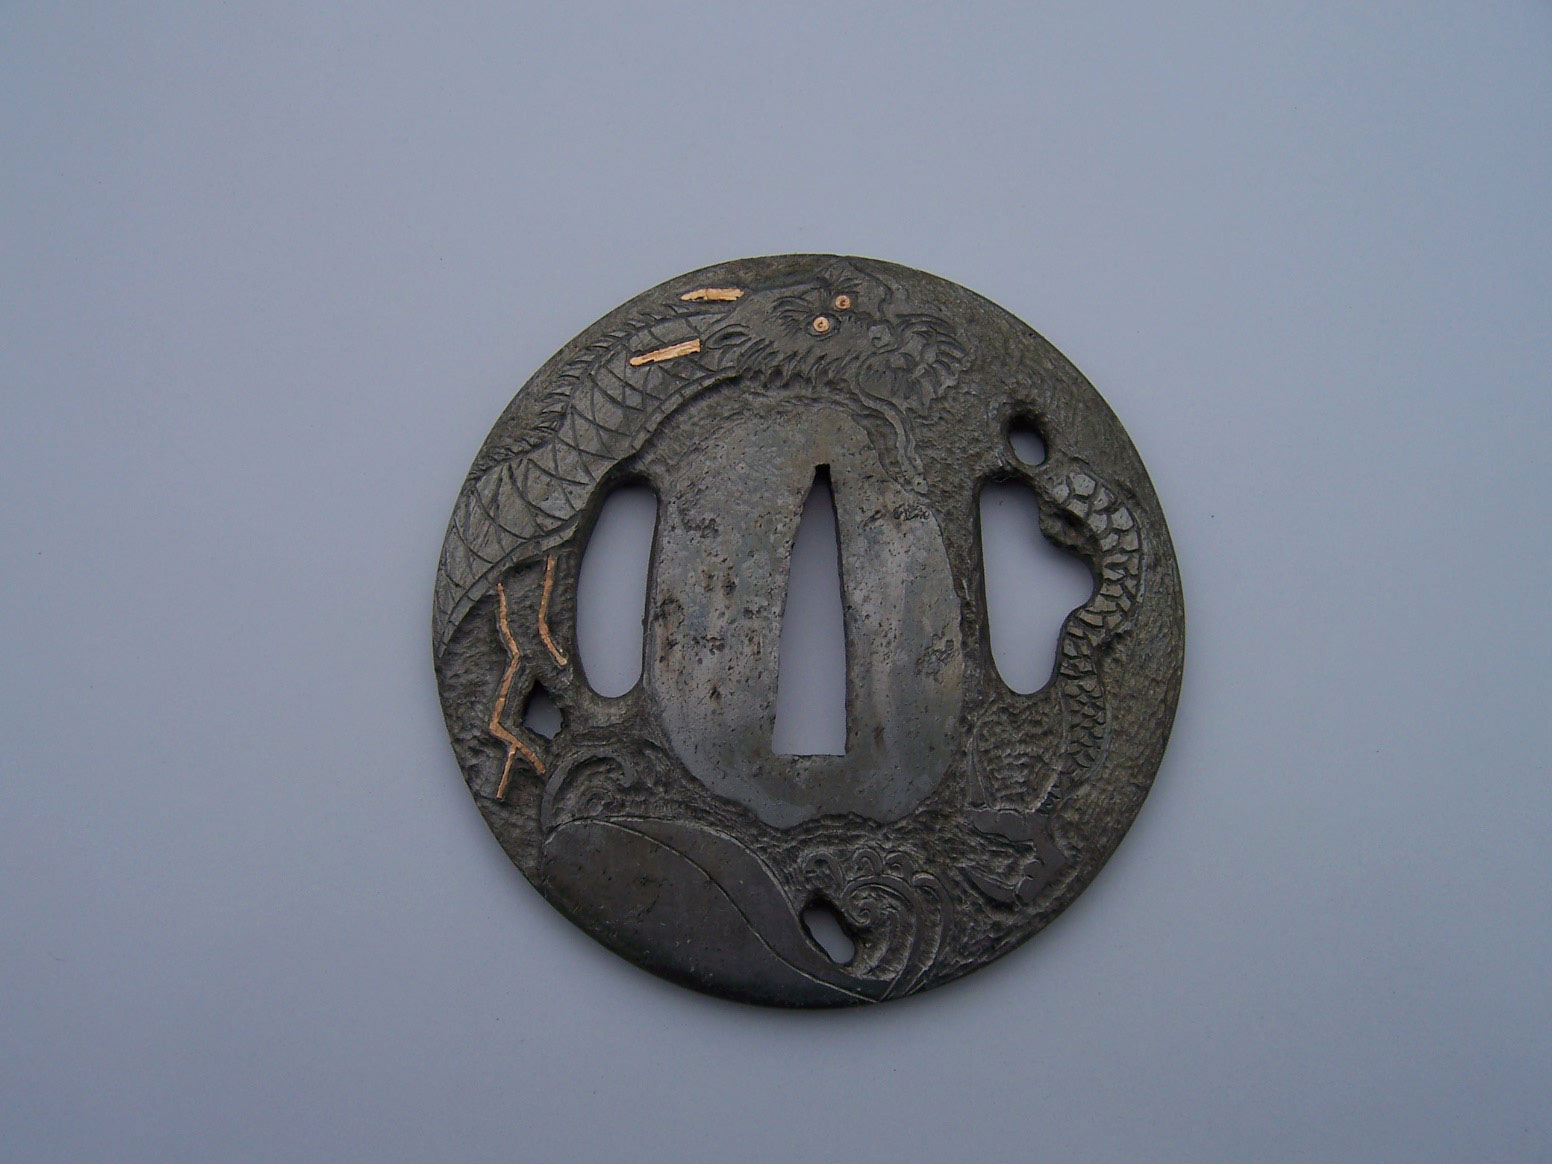
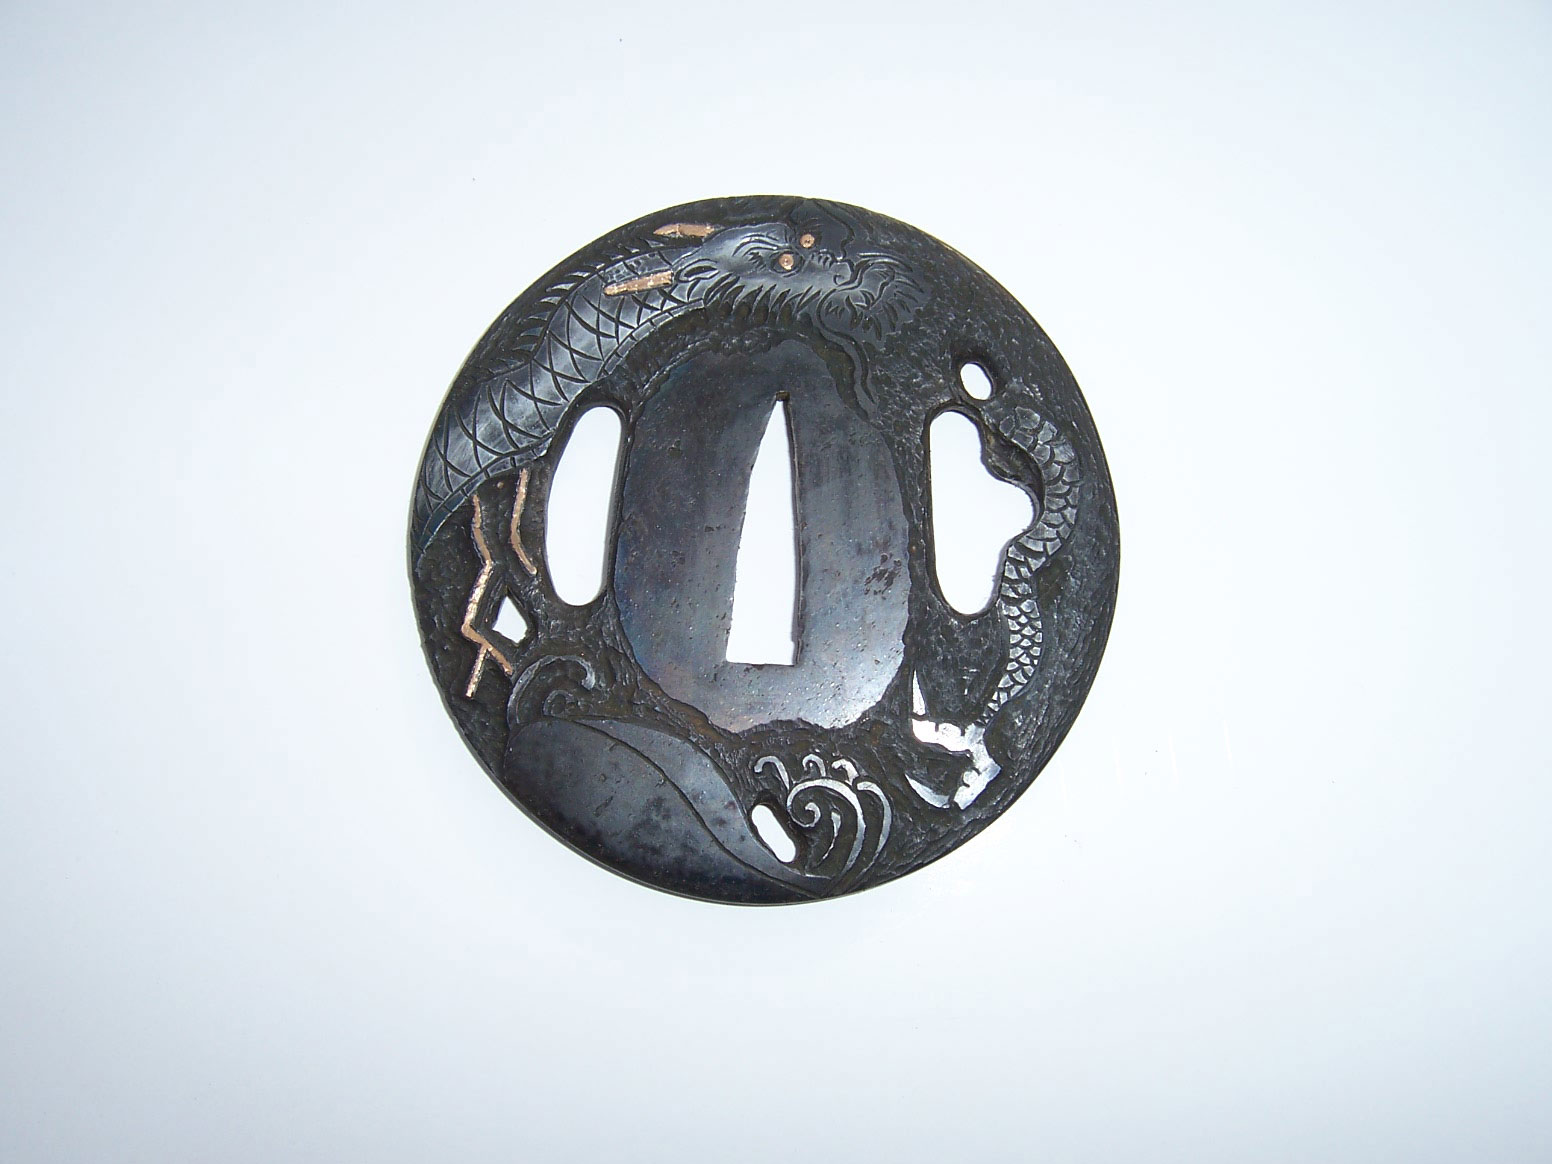
Making a “tsuba,” Japanese for “guard,” is one of my favorite steps in sword making. You have a chance to build something as simple or as complicated and artistic as you like.

I first started making the tsuba (pronounced SUE-ba) way too thick and heavy, and learned over the years how to refine all of my sword parts. I hope this overview helps shed some light on the subject and gives you some ideas.

I have made tsuba from damascus, mild steel, high-carbon steel and antique wrought iron. Many traditional tsuba were made from folded Japanese steel called “tamahagane.” I used wrought iron for this demonstration.

Step One: Thin it Out

Wally Hayes
Photo 1: Wrought iron forged out and rough cut round for the tsuba.

To begin, cut 3.5 inches of steel from an old wagon wheel. Forge it thinner and wider, and taper the edges thinner all the way around (Photo 1). If you leave the center a little thicker and taper the edges, it looks more balanced and is lighter. Wrought iron is soft and forges out easily and is simple to cut, sand, file and drill. Using the spray from a can of WD-40™, trace around your steel. Cut it out on a band saw and grind the shape round. Sand the tapers even, gradually progressing to finer-grit belts.

Wally Hayes tsuba
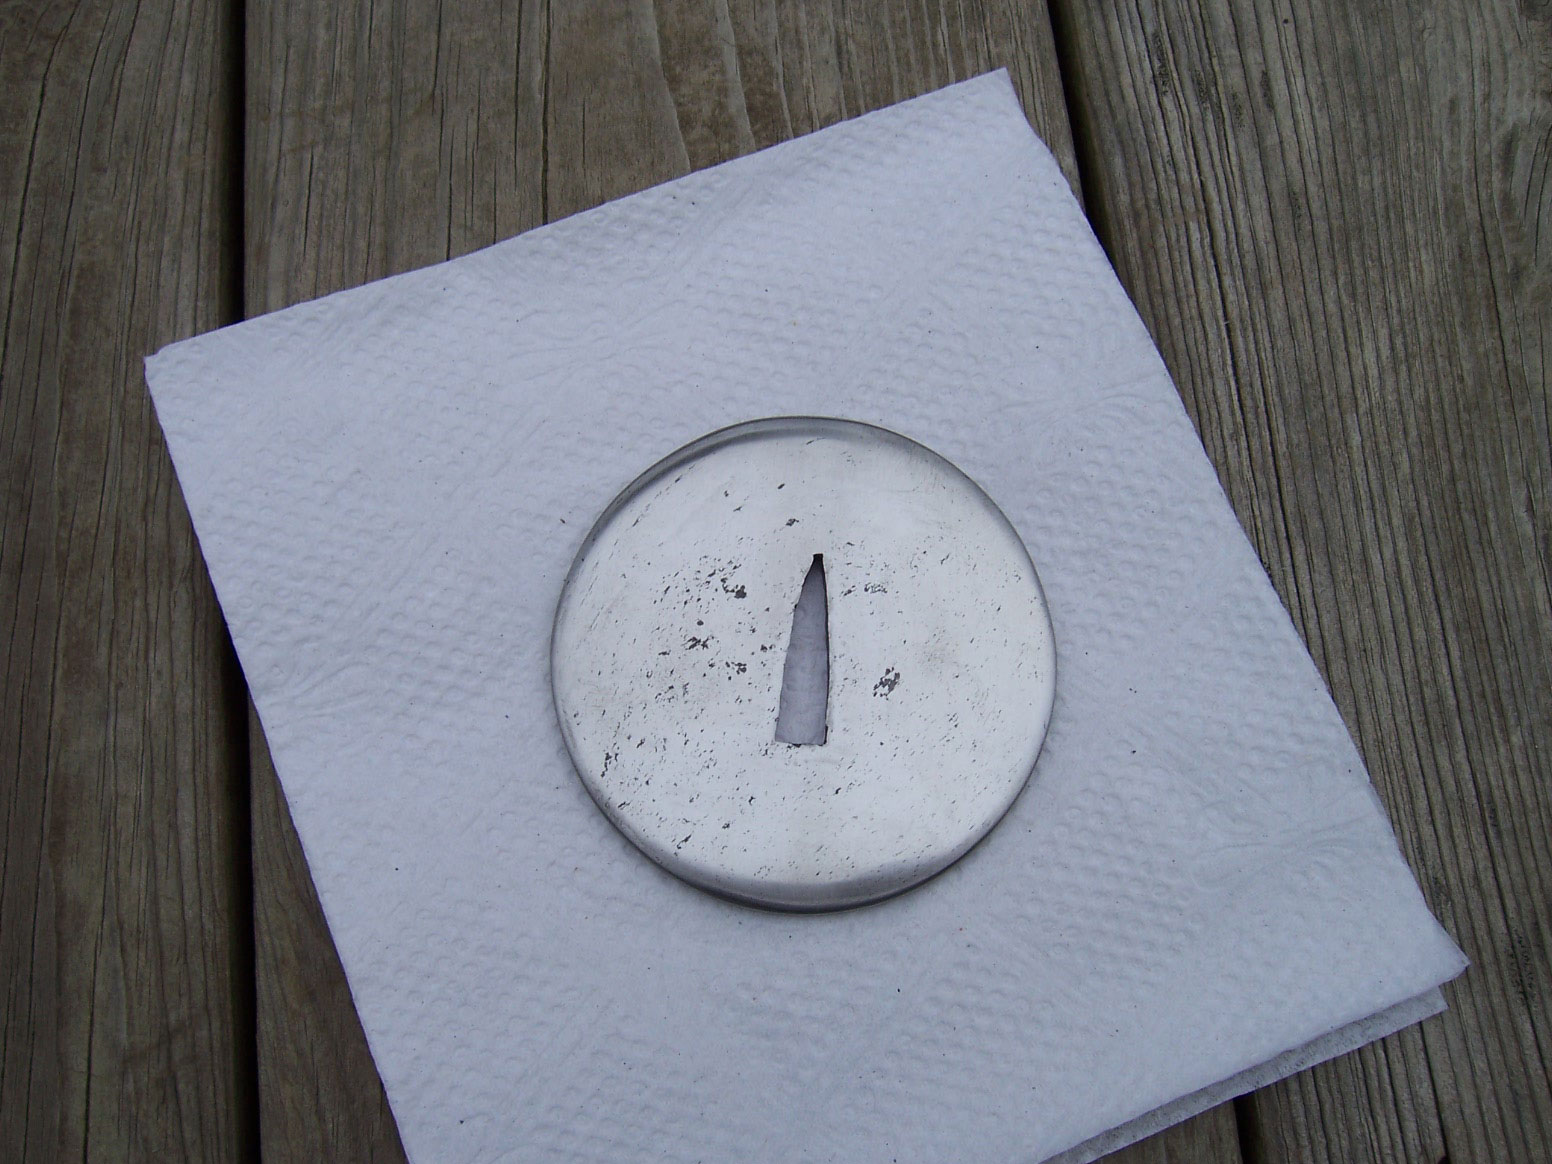
Photo 2: Sand the tsuba and start cutting the holes.

Before polishing, I drill the holes (Photo 2). I use a Dremel cut-off wheel to cut out the webbing between the holes. You can also try a jeweler’s saw. I use both.

Employing needle files, make the tang hole big enough to slide up to the “sepa” (washer) on the sword. At this point I polish the tsuba to an 800-grit finish.

Wally Hayes tsuba
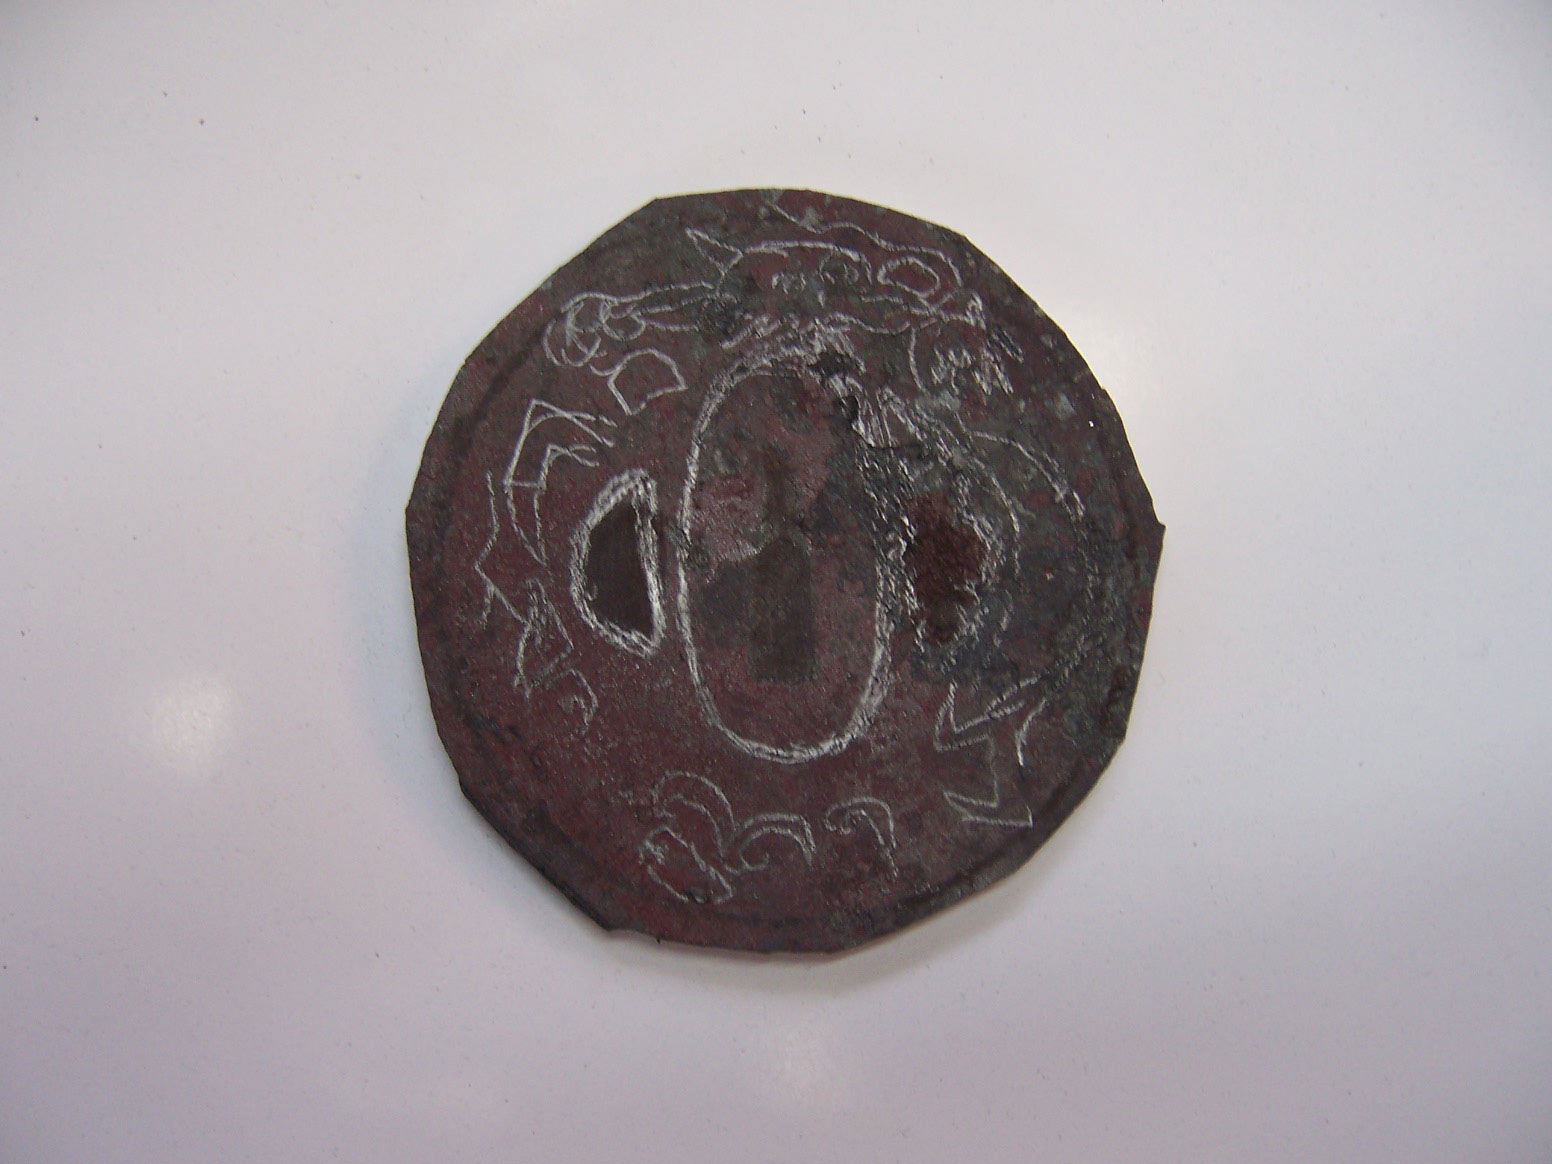
Photo 3: Draw the design with a Sharpie® and start engraving.

Depending on how detailed the engraving is, I draw my design on or transfer the design onto the tsuba (Photo 3). This one I drew the design on with a Sharpie® marker. I printed out some of my favorite design pictures to use as a reference.

Engraving and Etching

Wally Hayes tsuba
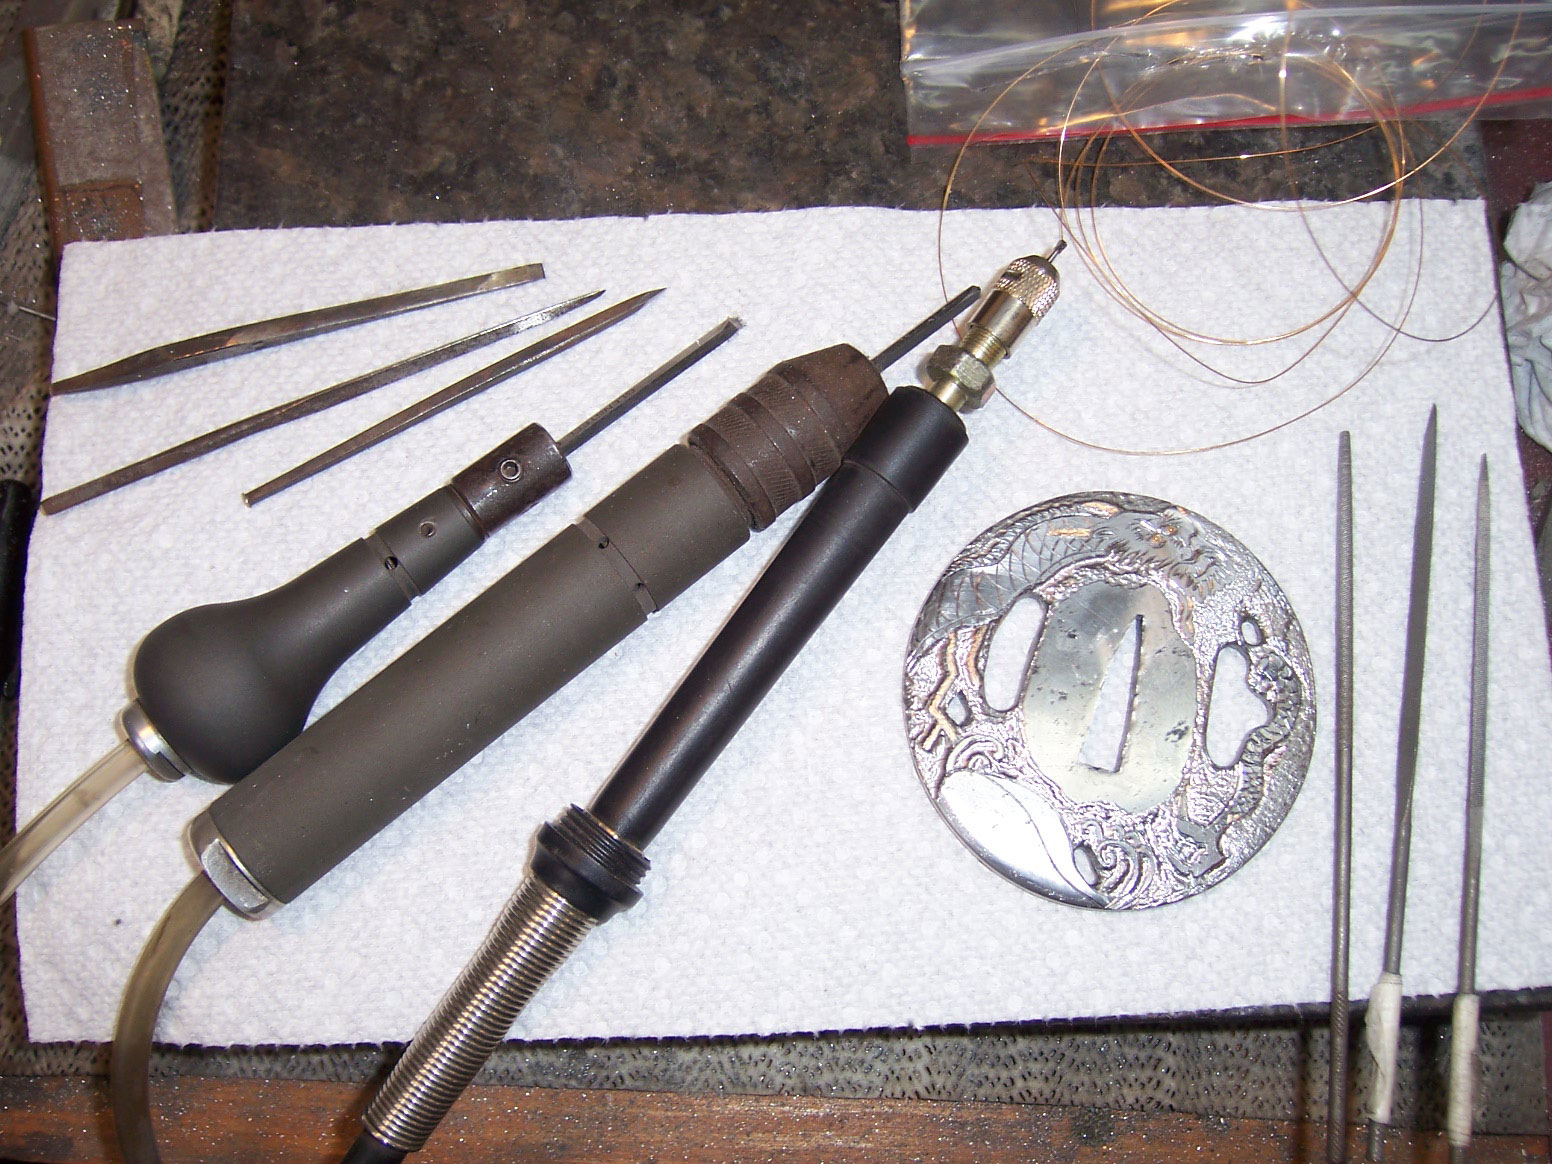
Photo 4: Tools of the trade: gravers, chisels, and high-speed air and Dremel® tools.

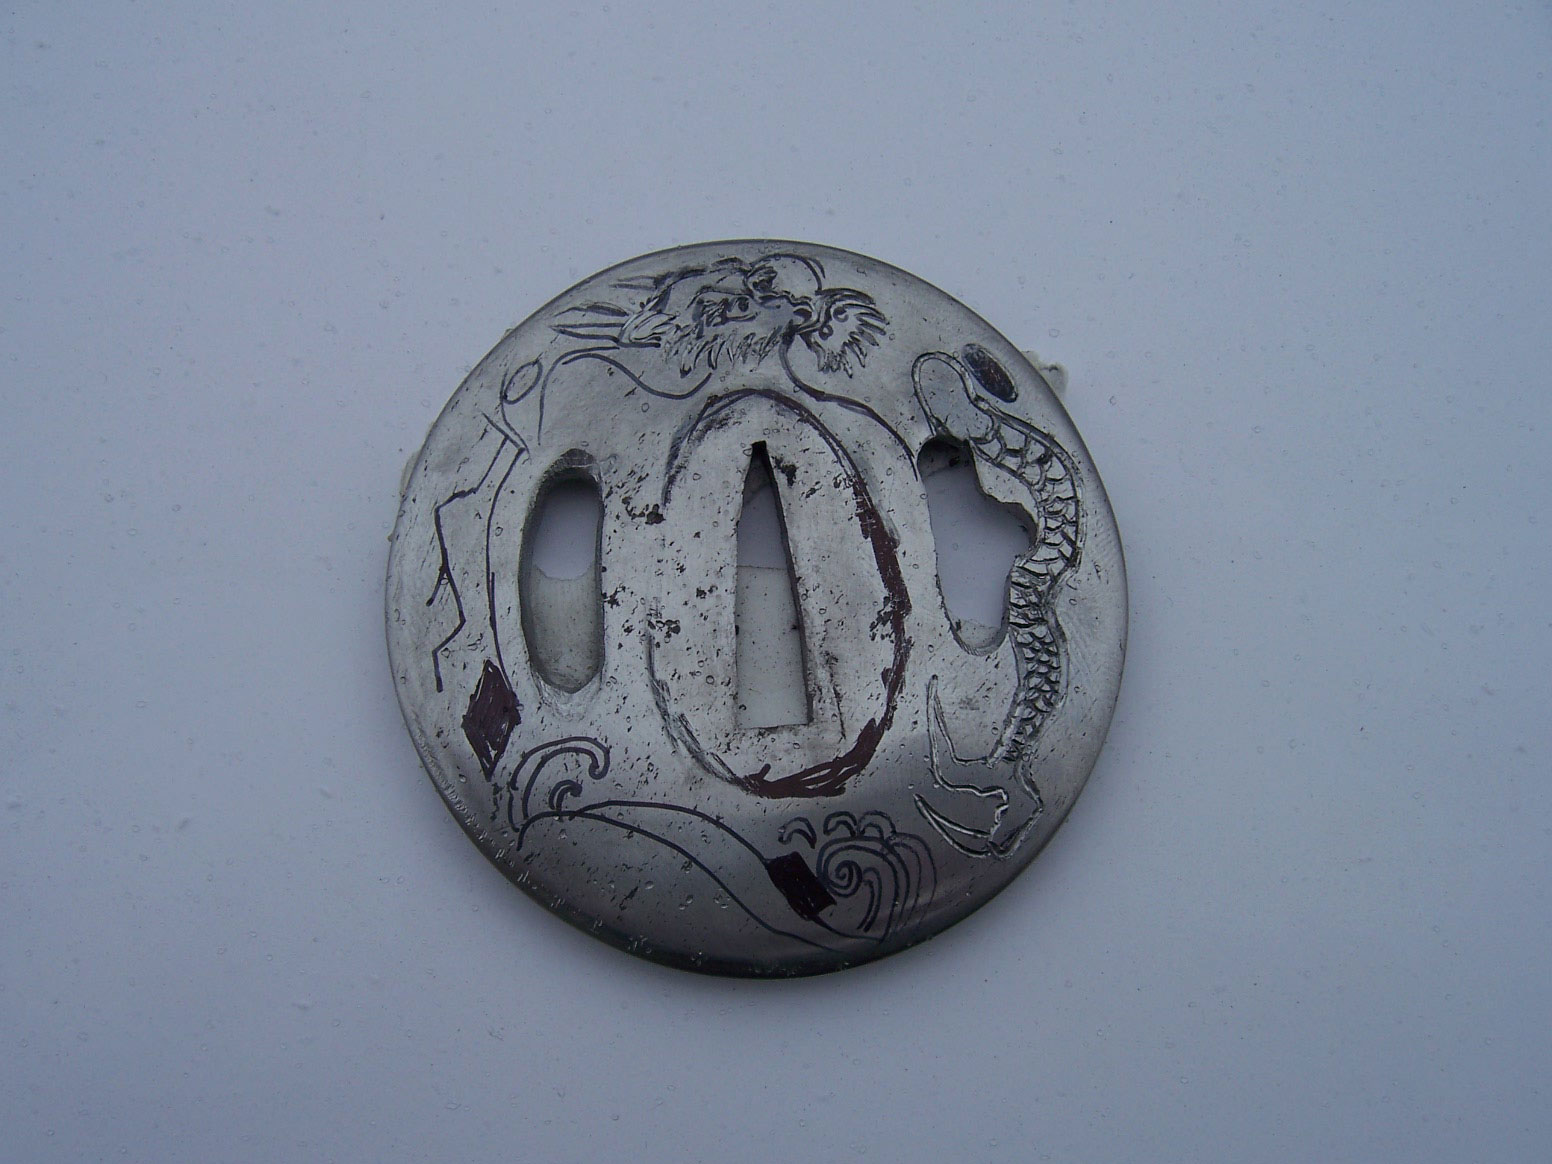
Now the fun begins: engraving the lines. I use square gravers from GRS and from engraver Steve Lindsey. The new gravers both work great and Steve’s Carbalt gravers got me back into engraving. The tips of standard high-carbon gravers break too often. The new gravers last a long time and take a real beating. I use a Dremel Tool and a high-speed air hand grinder to texture the background (Photo 4).

Wally Hayes tsuba
Photo 5: Inlay the gold into the tsuba.

If you practice it a lot, gold inlay is easy (Photo 5). First, cut your line with a square graver, then take a small flat chisel and tap it perpendicular along the line to undercut the groove. Raise some burrs along the bottom of the groove, then tap in the 24k-gold wire.

Wally Hayes tsuba
Photo 6: Texture and carve the background.

After engraving, I etch the tsuba in acid. This brings out the pattern in the wrought iron and resembles damascus somewhat. It gives an old look and feel to the piece. I mix four parts distilled water to one part muriatic acid or ferric chloride. I neutralize the etched steel with Windex® and then lube with WD-40. To bring out the highlights on the engraving, I use a small Cratex® rubber wheel and polish the surface by hand.

When done, I apply Renaissance Wax to keep the tsuba from rusting.

Wally Hayes tsuba
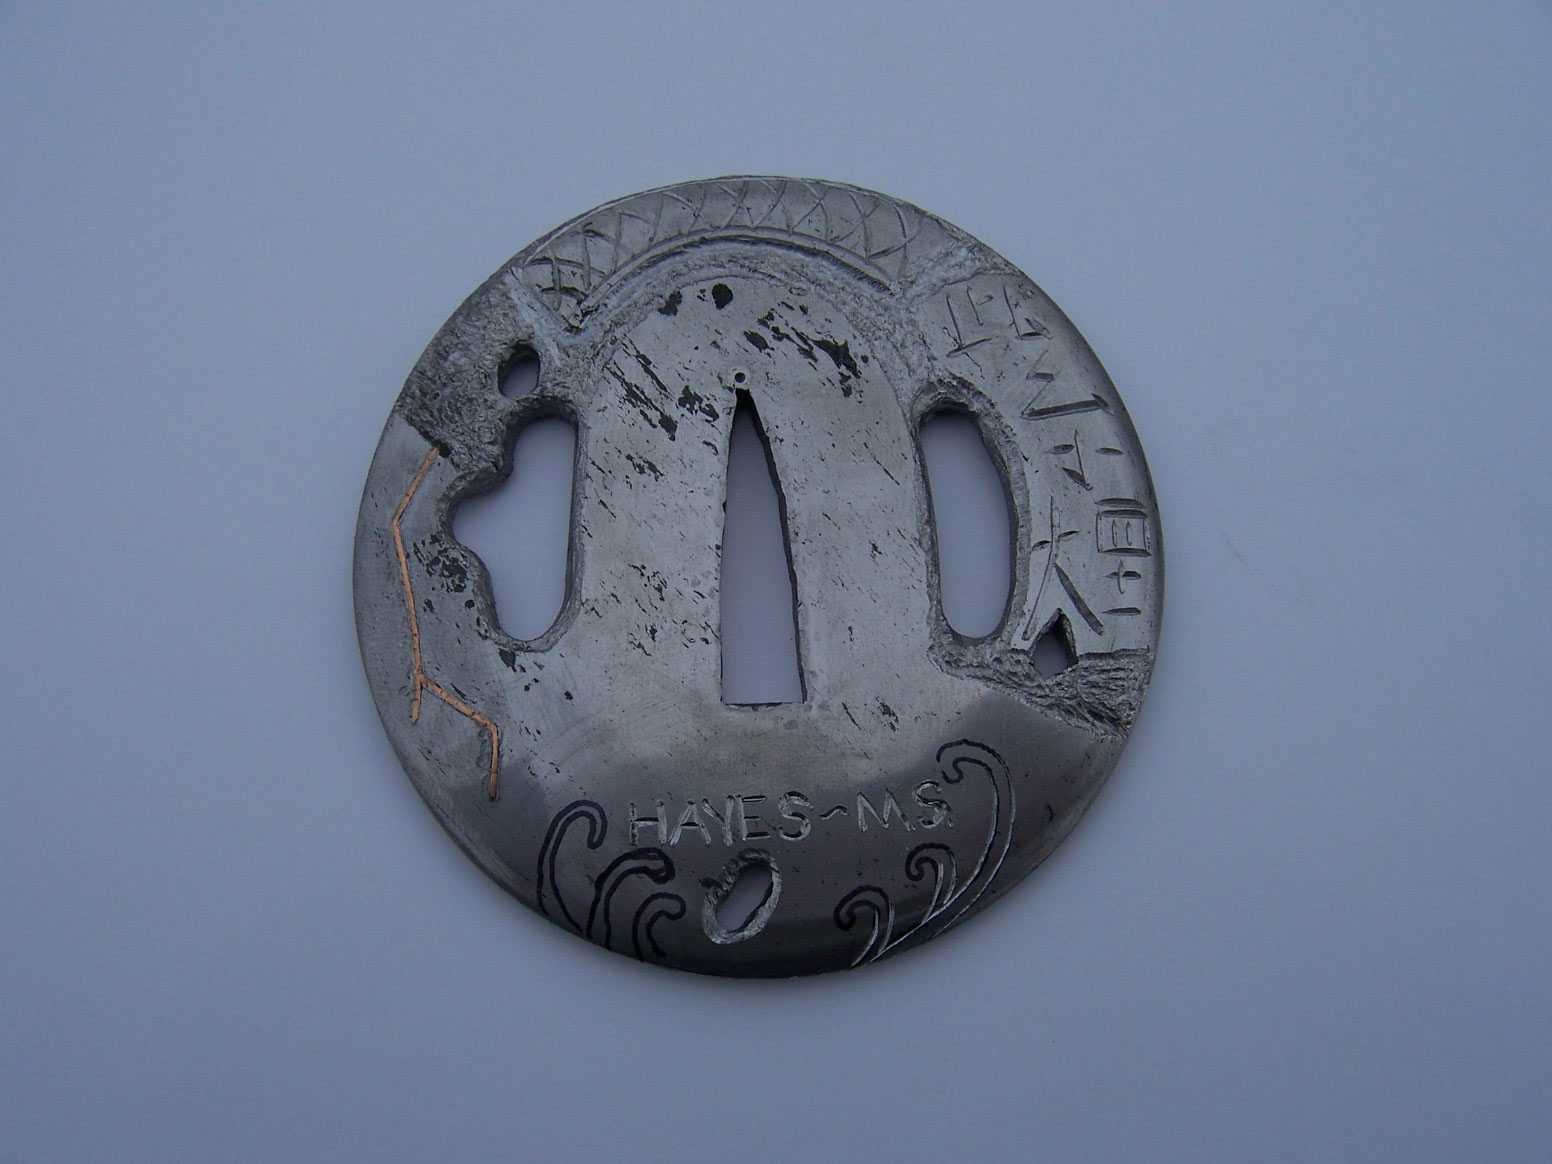
Photo 7: Carve the other side of the tsuba.
Wally Hayes tsuba
Photo 8: Blue the tsuba with cold gun blue.
Wally Hayes tsuba
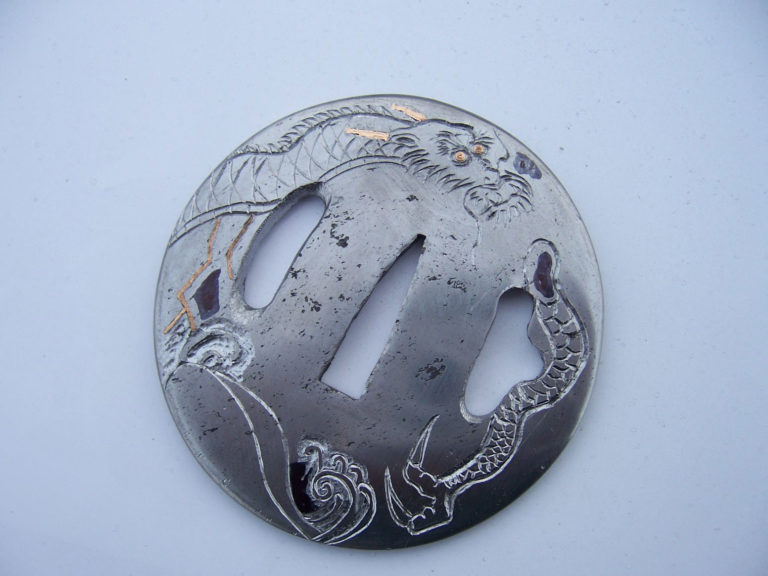
Photo 9: Polished, waxed and finished, the tsuba is ready for mounting.

Keep Learning About Making Swords 

Learn swordmaking

What’s the Best Kind of Knife Grind?

Is There a Perfect Blade Grind?

Who knows when the first argument over the best blade grind started? Most likely it was a conversation between two flintknappers sitting around a cave—and the battle of which grind is the best rages on to this day. The modern tactical and bushcraft movements have brought heated debates on which grind is the best. The grind of a blade is where a key battle is won, and blade geometry varies widely. But is there a so-called best blade grind and, if so, which one is it?

Curved or Flat?

walter brend custom knives
Before becoming a renowned custom knifemaker, Walter Brend was a meat cutter, the skills of which gave him keen insight into the art of the slice. The man some call the best grinder ever shows his stuff here. (Rodney Hiers image)

According to Wikipedia, blade geometry refers to the “physical properties of a sword blade: cross-section (or grind) and taper.”

You can forget the “sword” qualifier—blade geometry applies to any blade. The three most common blade grinds in use today are hollow, flat and convex, with other grinds of note are the chisel, asymmetrical, Scandi and compound. There are others.

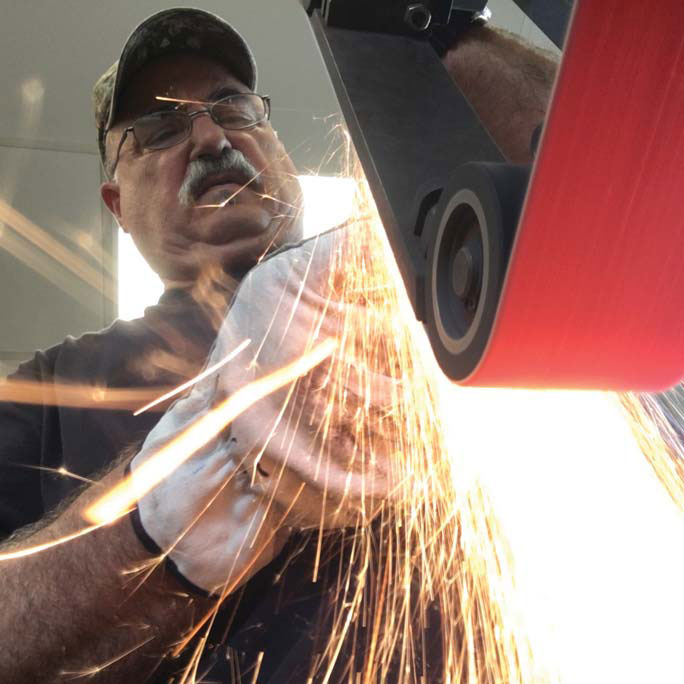
Before becoming a renowned custom knifemaker, Walter Brend was a meat cutter, the skills of which gave him keen insight into the art of the slice.

“What works for me is the hollow grind,” Brend says. “The hollow-ground blade is not a flat surface, it is concaved, so as you cut an object it immediately starts a separation. The bottom edge should flow from the point to the back of the blade with a recurved blade edge.”

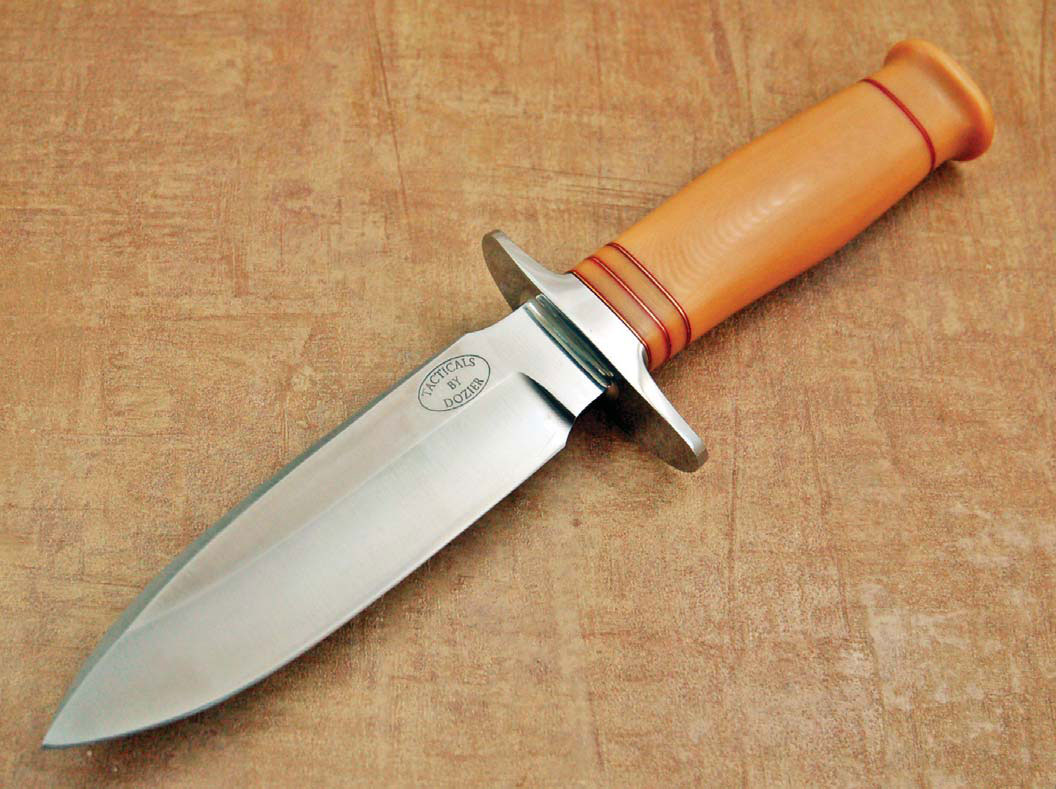
Knifemaker Bob Dozier, well known for making hard-use knives, prefers the hollow grind as well.

“Since I make mostly hunting knives, I prefer the drop-point blade style. Since Bob Loveless popularized the drop point, it’s been the most popular shape for hunting knives for many decades now. Also, for a hunting knife, the hollow grind is the best as it stays thin at the edge much longer.”

hollow grind blade
Like Walter Brend, Bob Dozier prefers the hollow grind. “For a hunting knife, the hollow grind is the best as it stays thin at the edge much longer,” Dozier opines. Bob’s fixed blade features a nice, clean hollow grind. (Kerry Peal images)

However, that’s not to say Dozier is adverse to other grinds.

“The flat grind is the best for the kitchen as it does not wander when making thin slices,” he opines. “A convex grind is great for splitting firewood.”

Award-winning American Bladesmith Society master smith Jim Crowell won the 1st Annual BLADE Show World Championship Cutting Competition in 2003 and was inducted into the ABS Hall of Fame in 2016.

“My opinion for the best blade geometry is a full flat grind with a convex edge,” Crowell begins. “This grind will give the smoothest transition from the full thickness of the spine to the cutting edge—anything else is something less.”

Crowell is also very familiar with the Bill Moran appleseed or convex grind, which is based on the Japanese hamaguri or “clamshell” grind.

“Bill Moran did like full convex blade geometry,” Crowell notes. “He ground on a round wheel and meticulously shaped the whole blade to have a convex cross section. I have cut with several of Bill’s knives and they were very sharp and had great geometry.

“The full convex grind performs in an exemplary manner, but I cannot discern any advantage in performance over a full flat grind with a convex edge. You do not just slap a convex edge on a blade. There are a myriad of variables: how thick was the edge when you started the roll? How high or low did you roll it? A short and abrupt roll may shave but will not cut well at all.”

Bob Dozier custom knifemaker
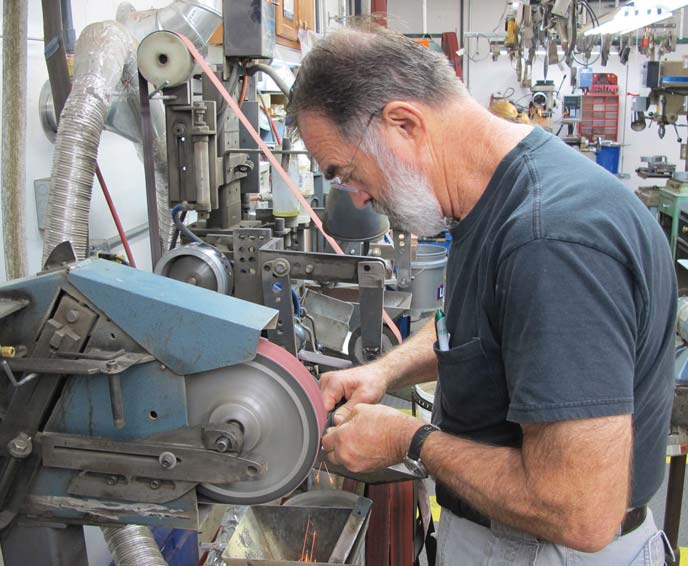
“The flat grind is the best for the kitchen as it does not wander when making thin slices,” opines Bob Dozier, here busy at his shop grinder. (Pat Covert image)

Degrees of Difficulty

Curious as to the degree of difficulty of applying the various grinds, BLADE® asked Brend, Dozier and Crowell which they thought are the most difficult to execute. They provided varied opinions.

“I think whichever one you do the most is easiest, and the one you do the least is hardest,” Crowell notes. “Once upon a time I used to hollow grind a lot, but then I started to cut a lot and it became apparent to me a flat grind would cut better overall for my use. I gradually phased out hollow grinding and now find it difficult as compared to flat grinding.”

Dozier adds pointedly, “I don’t find any of them hard. I think it depends on how you learn to grind at first. A lot of the makers today learned from someone else and stick with the grind they learned.”

Brend ranked the grinds in order of difficulty.

“Hollow-ground knives, in my opinion, are the hardest to grind,” he begins. “You have to control the blade on a wheel to form a perfect symmetrical line. In my opinion you should keep the point thick, and, at the same time, make your edges sharp and thin.

“Flat ground is next after hollow. In my opinion a true flat-ground blade should be finished by hand because the grinding belt will not allow a true flat surface. Convex is the easiest because you have no set lines or pattern when grinding.”

Order of Importance

best blade grinds
At the grinder here, Bob Dozier says blade geometry is more crucial
in terms of a blade’s cutting performance than the type of steel or
how it is heat treated. “The most important is blade geometry,” he
notes. “The type of steel and how it is heat treated has nothing to do
with how it cuts, only how long it cuts.” (Pat Covert image)

Is blade geometry the most important aspect of a blade’s cutting effectiveness, or is the type of steel or proper heat treating most crucial?

“The most important is blade geometry,” Dozier says. “The type of steel and how it is heat treated has nothing to do with how it cuts, only how long it cuts.”

Crowell differs.

“Heat treat, geometry and steel, in that order,” he opines. “If the heat treat is wrong, the rest will be of little consequence. Proper geometry is next in importance. The steel, although important, is not the determining factor. Of course, you need to have a ‘good’ steel, but it is not the steel that makes the difference. Just because you may have the latest, greatest steel does not mean you will have a superior knife. You have to do it all correctly and in the right order.”

Brend ranks the three differently.

“I think the type of steel is the most important. With proper heat treating you can vary from two-to-four points [on the Rockwell hardness scale] and still cut with the knife because of the type of steel,” he says. “Heat treating is second. With most steels you can be within two points and still cut with the blade. All heat treaters are not the same because of the equipment or their method. Geometry would be the last because if you use the proper steel, you should be able to make any blade work well.”

Flunking Geometry

custom knife mistakes
Uneven grind/plunge lines (right) as seen from the bottom of the blade are one of the more obvious and common things to look for in a bad grind. By contrast, the plunge lines at left are nice and even.

Finally, what makes a bad blade grind?

“What I look for are the grind lines,” Brend explains. “Are the sharp edges of lines rolled? Also, at the back of the blade—where the [grind] line starts—is the steel uneven? I see some hollow grinds where the edges are too thin. If you hit a hard object the blade will chip.”

Opines Dozier: “A poor grind is shown with uneven grind lines, crooked cutting edges or a non-uniform cutting edge.”

“Poor grinding is evidenced by several telltale signs,” Crowell interjects. “Uneven grind/plunge lines as one would look from the bottom of the blade. This is one of the more obvious and common things to look for. Also, the finish on the bottom of the ricasso and choil area is often neglected. You can hold a blade horizontal and look down the flat of the bevel and it should be smooth as glass with no ripples or distortions.”

Jim also notes that on symmetrical patterns such as daggers, look for mirrored-image grinds on both sides of the blade.

One interesting takeaway: The perfect grind may just be determined by how you plan to use your knife—or perhaps you may need two or more knives to cover all the bases.


Keep Learning About Knifemaking

how to make knives

The Hamon: What, Where, Why and How

To those who appreciate the tempered steel of a Japanese sword, the hamon is visual evidence of the maker’s effort to produce the finest blade work. In the West, the hamon appears in much the same fashion on Western knives, a blending of culture and craft. Where East meets West on the steel blade, there is the hamon, the graceful temper line.

“From a practical point of view, the hamon is a visible indication of a differentially heat-treated blade,” explained knifemaker Stuart Branson. “In many cases, it’s advantageous to have a harder edge supported by a softer spine in a knife. In this way, you gain the benefits of the good edge retention afforded by the harder edge with the durability of the softer spine region of the blade. In the long and graceful form of the Japanese sword this might seem obvious, but the same is true for Western blades, particularly those hard-use knives or the very popular larger chopping knives.”

According to veteran maker Gary House, the aesthetic effect of the hamon is behind its surge in demand among Western collectors, clearly defining the transition zone between hard edge and soft back.

“The popularity of the hamon on non-Japanese blades today, I believe, is the visual effect of the temper line,” he commented. “The movement and variations of the hamon are very attractive and visually appealing compared to a straight temper line.”

More and more, discriminating knife customers are looking for the hamon on the blades of some of the best-known, iconic Western-style knives.

“‘You will put a little something in the blade, won’t you?’ is a common request these days,” commented Mike Craddock, who started making knives in the 1970s, took a 40-year hiatus, and has come back strong recently. “It doesn’t necessarily make the knife better, but it does look good. I consider it the spirit of the steel.”
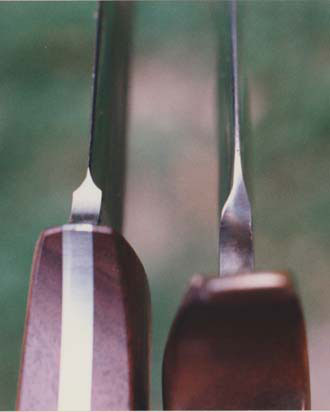
Certainly, the hammered and heat-treated steel is expected to be sturdy. However, the quest for the hamon is a classic case of discovering what lies beneath.

“For me, it is the mystery of the hamon,” related bladesmith Erik Fritz. “What shape is it going to take? How much work is it going to entail to bring it out so it can be seen? I think what makes it so special is that each hamon is so different and unique.”
 

PRODUCING THE HAMON

The hamon is there, lying within the reach of the knifemaker who is willing to take the time to thoroughly rub the steel to enhance the elusive line. For some makers, that effort is standard procedure. To them, a blade without this unmistakable flair of the Orient just comes up short. A hamon on Western knives bridges cultures and demonstrates a willingness on the maker’s part to invest the time and energy required.

“Like many, I have always been enamored of the Japanese sword,” Branson said. “The hamon is integral to its design and construction, and although it isn’t necessary that it be brought out to that degree, polishing these swords has been elevated to an art.”
Branson says he attempts to achieve several goals in the production of the hamon. First, he wants to emulate the beauty of the Japanese blade. In the attempt, he learns to see the intricacies of the pattern, theory of design, and the dedication of the artists that have gone before him.

“Producing a hamon is not just adding clay to a blade and hoping for the best,” he reasoned. “It is understanding the steel being used, the temperatures and times needed to achieve your aim, and the amount and pattern of the clay to produce the hamon you are after, the delicate process of heating the blade properly before the quench and, in the case of water quenching Japanese-style blades, the terror and elation of a successful water quench—the violent transformation of the steel into two forms above and below the hamon line, and the resulting curvature induced. One can understand how the swordsmiths approached their craft with a religious reverence.”


WATER VS. OIL QUENCH

Producing the hamon involves a process of coating the blade with clay and then quenching it in either oil or water. The water quench is more rapid and therefore potentially more catastrophic should a crack or complete break occur.

“I use clay and white crushed stone,” House noted. “A paste of satanite also works well. The clay insulates the blade from heat and will be a thin layer as it comes down toward the edge of the blade.”

Most makers who frequently produce a hamon opt for such tool steels as W1 and W2, and carbon steels such as 1050, 1075, 1084 and 1095. “Simple carbon steels are conducive to the very fast quenching requirements of a clay-coated quench,” Fritz remarked. “This allows the insulating clay to retard the hardening of the coated areas of the blade. High-alloy steels that allow thorough hardening of the blade are not conducive to the creation of a very active hamon. What you get with the high-alloy steels is more of a straight line.

“With W2 I prefer the water quench,” Erik continued. “With 1084 and 1095 I use Parks 50 quenching oil. Any hamon requires an insulating layer of clay to be applied to the spine. The biggest difference in hamon activity is in the quenching medium, such as water or oil. In my experience and opinion, greater hamon activity is achieved through a water quench. If you are going the safe route and using oil, there is less chance of a catastrophic blade failure.”

Branson said he sees fundamental differences in the hamons produced and the effects of the water or oil quench on the steel itself. On Japanese-style blades, the water quench introduces sori, or curvature to the blade. As the water quenches the steel, the uncoated steel cools quickly while the coated spine retains heat, staying expanded longer and causing the blade to curve downward. As the spine cools, the hardened edge begins to curve upward.  Quenching oils are typically made for industrial use and to prevent deformation of the steel as much as possible. Consequently, the blade tends to curve downward and remain so.

When quenching a blade in water, Stuart added, “The hamon tends to be more cloudlike, more diffuse, and to my mind a little more mysterious and poetic. The oil hamon, however, is more literal, more willing to follow the clay pattern and is more defined on its boundaries. However, the ashi, the wispy lines that come off the main patterns, can be very delicate and defined. Control of this can make for a very exciting hamon.”

The investment of both materials and a significant amount of time impact the cost of a blade complete with a hamon. However, for the maker willing to commit the time and the potential buyer, a genuine value is readily apparent.

“You do have extra work in claying the blade,” Craddock said, “and then there are literally hours of hand rubbing to get the aesthetics right. The steel does what it wants to, but there is a process that you go through. The steel offers it if you are willing to go out and get it. To me, the time involved in the hamon, and about 90 percent of the steel blades I make have them, adds about 10 percent to the cost of the knife—but from the standpoint of hours it should probably be double.”


LANGUAGE OF THE BLADE

The hamon brings beauty and satisfaction to the maker and the buyer. Further, it is taking its place among the desired aesthetic effects of Western knives, proving that the world is indeed much smaller when the same language is spoken—in this case, the language of the blade.—BY MIKE HASKEW

What To Look For in a Hamon


Discriminating knife buyers looking for a quality hamon should bear a few things in mind. A hamon can be wavy, undulating or any number of shapes. Whatever the shape, it must be well formed, clear and unbroken. What’s more, according to Don Fogg, it must be possible to describe in an understandable manner using a traditional vocabulary.

Erik Fritz advises that a professionally done hamon will exhibit a sharp demarcation between the hard and soft areas. Watch out for a hamon line that dips too close to the cutting edge. Stuart Branson agrees that if the hamon comes close to or reaches the edge of the blade, then a section of the edge is not hardened properly. Levels of refinement in the hamon involve subjective preferences as they relate to clarity and detail.—BY MIKE HASKEW


How To Obtain a Hamon


For more on producing a hamon, see “How To Clay Temper and Obtain a Beautiful Hamon” by ABS master smith Don Fogg in the book, Spirit of the Sword. To order a copy call 1-855-278-0406 or visit www.shopblade.com and click on “Books & References.”

CAPTION FOR PICTURE AT TOP

For his stag “Ferncliff” model, Lin Rhea employs a wavy, cloud-like hamon on the 9-inch W2 tool steel blade. Overall length: 14 inches. (Chuck Ward photo)


For the latest knives, knife trends, knifemakers, what knives to buy and where, knife legislation, knifemaking instruction, and much more, subscribe to BLADE® Magazine, the World’s No. 1 Knife Publication.

91-Year-Old Knifemaker Murray Sterling is Still Going Strong

1

Murray Sterling has seen a lot and done a lot in his 91 years on this earth. For the past 30, he’s made a name for himself as a custom knifemaker. When approached about doing a story for BLADE® that focuses in part on his age, he agreed without hesitation. 

“I’m proud that I’m still here to talk about it!” he grinned. “I love to go out to the shop and do this stuff. I don’t have any real physical ailments and I’m steady enough. I can do just about anything—and I just love doing it. It’s therapy!”

In terms of making knives, Murray seems to be at his best these days. He attributes it all to experience, saying every time he makes a knife, he refines his knowledge base. “I can make 10 knives in a row, and I’ll learn something from one to the other,” he related. “A little different, and a little easier, a little better.” 

Murray made this stag stockman earlier this year.

One of the most interesting things about Murray’s career is that he didn’t even start making knives until after he retired, likening it to “a good retirement hobby.” Machining was his original career choice. He recalled that back in 1947, when he was a “late teenager,” he and his cousin decided they didn’t want to go to school anymore. Murray said, “Let’s go get a job,” and they drove to a nearby tool-and-die shop. “They hired both of us,” he remembered. “My cousin didn’t stay too long but I was there for about four years.”

Flash forward about a decade and Murray had gotten married and started his own machine shop. Being in southern California in the wake of World War II, he found himself doing jobs for big companies like Hughes Aircraft and Northrop Aviation. A typical job was machining hydraulics parts for aircraft such as the DC-7 and, later, the B1 Bomber. His work product spread out across the world.

Pictured: Murray’s dual linerlock folder sports 2 3/8-inch blades of Doug Ponzio damascus, ancient walrus ivory scales and filework. Closed length: 3.5 inches.

“It was all about high quality and reliability,” he recalled of his formative days, and he carried that ethic forward over the following three decades of his successful business. In 1986, he decided to retire, but kept his shop in the family for a few more years. This was about when computer numerically controlled machines were becoming prevalent, so, Murray recalled, he figured it was time to get out of the business. Consequently, he closed up shop and brought some machines home to start making knives.

“I’m an old-school machinist. I started on old overhead belt-drive machines,” he recalled. “When I went out of business, we had some pretty modern machines, but not CNC.”

Murray doesn’t keep it a secret that he’s not a big fan of using CNCs or water-jet equipment, though he understands why makers use them and that the machines certainly make things easier. He explained that in his day all the machines had handles, but the trend continued toward “machines with buttons that can be programmed from 50 feet away.”

Murray’s dual mid-release auto features ATS-34 stainless blades, a 416 stainless steel frame and stag scales. Closed length: 4 1/8 inches.

“When I started working in that tool-and-die shop, there were about six tool-and-die makers in there,” he remembered. “When they came in in the morning, they’d bring out their files, a cup of coffee and a cigarette. It’s hard to imagine how much hand work they did in those days. They had an old lathe and an old mill, but most of the work was done on the bench filing and sanding.” 

As he reflected, he added that he admires some of the “out-of-this-world” knife designs that have resulted with the benefit of computerized, automated machines. “They do fantastic work, no question about it,” he allowed. “The machinery these days makes it much easier. If I was 20 years younger, I’d probably have one!”

FIRST KNIFE SHOW

His journey into the knife world began in 1977, when he ventured into the MGM Grand in Las Vegas for a knife and antique gun show. It was there he experienced his first custom knife show and bought his first custom knife—a coffin-handle folder from BLADE Magazine Cutlery Hall-Of-Fame® member Wayne Goddard. “That was when I got impressed with the work that these guys were doing with the equipment they had in those days,” he recalled.

Murray set out to learn knifemaking in 1989. Along the way, he had guidance and education from a lot of makers, as well as reading iconic books on how to make knives. However, he draws a distinction between that and actually learning the craft. He characterizes himself as mostly self-taught through a lot of trial and error and the determination to put in shop time.  

Murray profiles bolsters on his belt grinder.

“Hollow grinding is not something you can teach somebody,” he explained. “They can tell you how to do it and show you how to do it, but you have to put in the time and learn to get the feel for yourself. You can’t give the feel to somebody.” So, he burned up a lot of gloves, as well as his fingers sometimes, until he finally learned how to do it.

He made fixed blades until about 1991, when he talked to slip-joint master Jess Horn a lot about transitioning to making folders. Murray said that’s when he learned he needed to add a surface grinder to his shop. “I didn’t make really good folders until I got a surface grinder,” he allowed. “I learned a lot from Jess.”

That year, Murray also sold his first knife. By 1995 he had won his initial award—for best folder—at the Oregon Knife Collectors Association Show. He was on the map.

Murray made this stag stockman in 1999. Note the blade mark of his surname in cursive.

Over the course of the ensuing 25 years, he would go on to make and sell a wide variety of folders that runs the gamut of styles and mechanism applications, from traditional multi-blade slip joints to modern automatics and seemingly everything in between. His choice of blade steel is ATS-34 stainless, and a wide array of beautiful damascus forged by Mike Norris, Devin Thomas, Alabama Damascus or Doug Ponzio.

“I’ve never had a lot of luck selling wood handles, so I like a lot of stag, ivory and pearl,” he explained. He also uses acrylic to great effect. When he wanted to start doing inlay, Murray said, he turned to award-winning maker Tim Herman. “I wanted to do inlay and I called him—this must have been 15 or 20 years ago,” he recalled. “I’m still doing inlay the way he taught me, which is the hard way.”

As for mechanisms, he enjoys making several variations of locks including button, front, mid, rear and even dual locking liners. He also makes autos that feature bolster release, button release, mid-release, top release, frame release and most any release imaginable. 

A double-ground damascus blade, a bolster of mokume gane and an ancient ivory handle highlight Murray’s folder. Note his “S” mark on the ricasso.

“They’re hot and cold,” he surmised of making autos. “Two years ago, I sold 10 right off the bat in Atlanta. Then the next year, they cooled off, so I went to something else. Every year you have to come up with something new and stay aware of the trends.”

In fact, the true problem Murray admitted to is, after making knives for 30 years or so, he must continuously come up with something new. Trends tend to go round and round, he explained, so what was hot 10 years ago will go away and then return.

Nowadays, Murray goes to only a couple of shows each year, including the BLADE Show, with his 63-year-old son, Steve, who has started making knives the past couple of years. Murray admits that the shows are getting too long for him and he gets worn out pretty quickly.

“My son goes with me all the time or otherwise I probably wouldn’t go,” he noted. “I don’t go to the ICCE Show”—he’s been a voting member of the Knifemakers’ Guild since 2000—”because it’s a two-day drive and I just don’t think I could handle it.

CHANGING TIMES

When asked about what he’s taken note of as any drastic changes in the industry over all these years, he mentioned few things in particular. One, as mentioned, is the evolution of equipment across the board. “The quality of the knives back in the day was great, but the quality of the equipment today is 100 percent better,” he pointed out. “The gravers, the machines, even the belts you can get today—2,000-to-3,000-grit belts. You couldn’t get that 25 or 35 years ago.”

The other drastic change he’s noticed is the Internet, which he believes changed the industry in terms of selling knives. While the real knife collectors still want to see and know the maker, he’s noticed a lot of impulse buyers on the Web.

Also, he added, “Instead of hundreds of custom knifemakers, today there’s probably thousands of them. They’re using water jets to cut out the blanks and using CNC machines—there’s a lot of production, it seems like. They’re still custom made,” he qualified, “but handmade is kind of going out the window.”

However, as usual throughout our conversation, Murray hesitated to grind for too long on makers who use state-of-the-art equipment, concluding, “There’s a market for everything. High-dollar, low-dollar, mid-dollar—two-dollar knives and two-thousand-dollar knives. There always seems like there’s a buyer today.”

“Hollow grinding is not something you can teach somebody,” Murray explained. “They can tell you how to do it and show you how to do it, but you have to put in the time and learn to get the feel for yourself.” He continues to get that feel on a regular basis in his grinding room.

For more information on Murray Sterling and his knives, contact him at Dept. BL10, 693 Round Peak Church Rd., Mount Airy, NC 27030 336-352-5110 fax 336-352-5105 [email protected], sterlingcustomknives.com.

8 Well-Made Knife Guards

Constantly on the lookout for something that will make their knives better and stand out at the same time, many of today’s custom makers don’t hesitate to jazz up the guard.

And why not? A handsome, well-made guard adds to a knife’s looks, and, more importantly, serves as a sure safety feature in helping keep your hand where it needs to be—on the handle.

Above: Brad Millman forged the hammer-finished copper guard of his Wolftooth bowie. The 12-inch recurve blade is a san-mai construction of 360 layers of 1095 carbon and 15N20 nickel-alloy steels for the core sandwiched in a jacket of 1084 carbon steel. The bird’s-beak handle is curly Tasmanian blackwood. Overall length: 18 inches. (Caleb Royer edited image)


Above: Wayne Barrett heat-colored the shapely mild-steel crossguard of his 14.56-inch stiletto. The 10.6-inch blade is vintage butcher’s steel by F. Dick of Germany and features a classic triangular grind. The handle is Merino ram’s horn. (SharpByCoop image)

.

Above: It’s easy to see how Ryan Breur’s Ball-Guard Bowie got its name. The guard is cast bronze and the handle is flamed white oak with a domed inconel pin. The blade has a sharpened clip and is forged from 80CrV2 carbon steel. (Caleb Royer edited image)

Above: A stylish guard of wrought iron helps put the finish- ing touches on an ancient-walrus-ivory bowie by ABS master smith Tad Lynch. The 11.25-inch clip-point blade is W2 tool steel—a material some leading smiths consider ideal for producing a handsome hamon—and the knife is 16.375 inches overall. (SharpByCoop image)

Above: An upturned guard with a finger ring—each of hot- blued 4340HT steel—and a ladder-pattern damascus blade of 1095 carbon and 15N20 nickel-alloy steels help complete a quillon dagger by ABS journeyman smith Paul Savage. The handle is buffalo horn. (SharpByCoop image)

Above: Black mirror accent balls cap the stainless steel quillons on ABS master smith Kyle Royer’s Maiden Voyage Stiletto. The 11.75-inch damascus blade features an extra-deep hollow grind, a fuller and a reinforced piercing tip. The sculpted, fluted handle is wrapped in 24k-gold twisted wire. Overall length: 17.5 inches. (Caleb Royer image)

Above: The handforged nickel-silver finger guard “with curls” gives a damascus bowie by David Davis a curvaceous look. The 7.25-inch blade is pattern-welded steel forged by Alabama Damascus. Blade finish: acid etched. The handle is stabilized buckeye burl and the spacers/ liners are ebony and bone. Construction: hidden tang. Overall length: 12.25 inches. (Caleb Royer image)

Above: Tyler Turner outfits his coke-bottle-pattern pocketknife with a folding swing guard of 416 stainless steel. The 4-inch blade is CPM 154 stainless steel in a hollow sabre grind and the scales are jigged bone. Closed length: 5 3/8 inches. (SharpByCoop image)

This article is from a previous Issue of BLADE Magazine. Subscribe to a year of Blade Magazine for just $19.99 by clicking here.

5 Leading Sharpening Rods

0

5 LEADING SHARPENING RODS TAKE THE AUTHOR’S SHARP TEST

The sharpening rod is perhaps the No. 1 kitchen knife accessory in many households. Why? Usually 8 to 12 inches long, it is a hardened steel rod with a coating of industrial diamonds that helps abrade steel and lightly sharpens a  cutting edge. Most models are basic and there’s not much to them. They are more effective than standard butcher-type steels that align the edge and don’t remove material, and are good for regular maintenance of kitchen knives in between professional sharpening.

Accusharp 9-inch

Accusharp offers a 9-inch sharpening steel, model #034C. The ergonomic, rubber overmold handle makes it easy to hold thanks to the non-slip grip. It stores easily in a drawer or hangs from an extra-large handle hole. The guard is round, so the sharpener will roll when you set it down, which can be annoying. It does not come with a container for protection while not in use.

The steel and its fine abrasive in a 1500 grit maintains a blade well. My only complaint is with the soft rubber part of the co-molded handle. The rubber is in a diagonal shape and on one end closest to the guard of the test model, it is visibly raised and you can peel it back a bit. However, if it comes undone, you can easily fix it with a strong adhesive. Country of origin: China. MSRP: $34.99.

TOOTHIER EDGES: Lansky’s Diamond Sharp Stick

The handle of Lansky’s 9-inch Diamond Sharp Stick is a dual-material, rubber overmold for both comfort and durability. Like most sharpening-steel handles, a full integral guard protects your hand from accidental cuts. A split ring affixed to the handle’s end provides for hanging the rod on a hook or nail.

The Sharp Stick has a hard plastic tube that fits over it and secures in place by an O-ring that slides down the rod close to the guard. You can remove the O-ring but you must leave it on to take advantage of the hard plastic tube to protect the sharpening rod surface when stored. The O-ring is positioned far down on the handle to not interfere with operation.

I discovered something interesting with the Sharp Stick. As with all the test models, the grit is fine but the Lansky seemed most aggressive in the cut and produces a toothier edge than the rest. In my opinion this is very good, as I prefer a toothier edge on my kitchen knives, though some do not.

The rubber gripping portion of the handle is textured well, and offers a great purchase with wet or dry hands. The guard is also robust in appearance, as some equate robustness with better quality. That’s not always the case but with this one it definitely is. Country of origin: China. MSRP: $33.99.

Diamond Machining Technology (DMT) DS2F

In my opinion, the Diamond Machining Technology (DMT) DS2F diamond sharpening steel is superior in several ways to the balance of the test rods. The fine-grit diamond-coated model has a red plastic/rubber tip. DMT uses a color-coded system to denote various grits, including red for fine. The tip also helps stabilize the rod on a flat surface. The DS2F ships in a nice, clear vinyl pouch that locks around the guard. The pouch is great for storage.

While the other test models have dual-molded handles that incorporate hard plastic and firm rubber for comfort, the DMT has a hard plastic one. However, don’t turn your nose up just yet. The handle tapers gradually toward the guard, which makes the entire grip fill your hand nicely. There are also five grooves on the tapered part that enhance a secure hold. The guard has four semi-circular cutouts to provide anti-roll qualities, which I really like. The DMT doesn’t roll at all when you put it down. A plastic shackle attached to the handle end for hanging also is color-coded to grit. The shackle can be removed if you desire. It’s creature comforts like these that make the difference between a good product and a great one.

The DMT is definitely a top performer. The 12-inch rod captures pretty much all sizes of kitchen knives. Of all the test models, I felt the DMT produced the finest edge, that is, the edge isn’t toothy or grabby, it’s just plain sharp. The D2SF leaves a nice, refined finish on the cutting edge.

One thing about the handle shape: Since it tapers toward the guard, it forces you to nestle your hand up against the guard when holding it. This stabilizes the sharpener in your hand. When you grip it farther away from the guard, the sharpener isn’t as stable—something to consider. If you prefer holding your sharpening rod, you might want to get the DMT for this very feature. This is just a top-notch, high-end sharpener. Country of origin: USA. MSRP: $53.59.

EZE-Lap Model G

The 8-inch EZE-Lap Model G is the shortest of the test models. The shorter rod allows for easy use as well as com pact storage inside a drawer. It comes in a fine grit to produce a nice working edge in a minimal amount of time. The large-diameter plastic handle has enough girth for a comfortable hold. The integral guard is very much like the DMT D2SF’s, with a non-round shape that helps curb rolling on a flat surface. Well done! An extra-large handle hole promotes hanging for storage.

EZE-Lap’s Model G round-profile diamond sharpening rod is only 8 inches long, which makes it the shortest rod evalu- ated, though that doesn’t mean it is any less effective. The shorter overall length stores in a drawer easily or in cramped quarters such as in an RV.

The thing about a shorter rod like the Model G is you must be quick on the draw when working on longer kitchen knives, such as 8-inch chef’s knives and up. Compared to 10- and 12-inch rods, you’re losing real estate to work from and must pull the blade across the length of the Model G quicker. For shorter blades, this should not be an issue. On the other hand, the smaller size is ideal for camping, traveling in an RV, etc.

The Model G ships in a stiff paper sleeve, which can be reused to protect the rod as well as other items stored near/by it. The sharpener felt very coarse to the touch out of the packaging. All diamond sharpeners do. As you use them they will smooth out, though this has no bearing on performance, and performance-wise the EZE-Lap does very well. Country of origin: USA. MSRP: $31.95.

Work Sharp Culinary M3 Sharpener

The Work Sharp Culinary M3 sharpener takes the basic diamond-coated steel rod sharpener and improves on its function by offering choices. The M3 comes with not one but two rods—coarse-grit steel with a diamond coating and a fine-grit ceramic rod. Both rods interchange with the included ergonomic handle and are secured in place by strong magnets.

The 8.25-inch steel rod tapers gradually from handle to tip. At the end of the rod is a rubber button, which helps stabilize the sharpener when the end is placed on a table or countertop and the handle is held with one hand. It sounds like a typical steel rod until you get to the handle.

Instead of the standard integral, flared guard is a pair of ramped surfaces that serve as angle guides. When you hold the sharpener upright, place the side of the blade on the rod and rest it against the ramped surface. Then, with the standard motion using a rod sharpener, travel down the rod, holding the blade at the preset angle. Bring the opposite side of the blade to the other side of the rod and repeat. The gripping part of the handle is firm-textured rubber, and a thumb divot on the end helps stabilize the sharpener in use.

A little “MicroForge” slot in one of the guides contains a small yet wide serrated wheel. After you get a sharp edge, remove the rod from the handle and place the end of the handle on the table, in similar fashion to how you were sharpening. Place the blade in the slot at the tip. With light pressure, push the blade through until the handle gets to the tang, then stop. The serrated wheel will crimp the edge slightly, forming tiny and evenly spaced micro serrations. The serrations act like bigger serrations found on other kitchen knives. Using the MicroForge feature is not mandatory, but it is designed as an additional function to help provide the longest-lasting edge possible.

The steel rod cuts fast to restore dull edges. It provides a working edge in a minimal amount of time. Follow up with the fine ceramic rod after the edge has been established to refine it further. The ceramic rod’s smooth and fluted sides give a choice of edge finishes: a bit more bite with the latter and a more polished edge with the former.

The M3 ships in a sturdy cardboard box, the sharpener parts store inside a tray, and the tray slides into the box. The steel rod has a protective plastic sleeve, too. It is the most comprehensive of the test lot. Country of origin: Parts sourced globally, U.S. assembled/calibrated. MSRP: $69.99.

HOW TO USE A ROD

No matter the brand or model, sharpening steels are used the same way. Most manufacturers recommend using one while standing at the kitchen counter or seated at a table.

Take the sharpening steel and place the tip on the table, held upright with the handle at the top. With one hand, grasp the handle firmly, keeping it perpendicular with the flat surface at all times. With the other hand, grasp the knife handle and place the blade at a 20-to-30 degree angle in relation to the sharpening steel. Place the blade as close to the guard as possible, set to start at the part of the blade closest to the tang. In one motion, move the blade down the length of the rod while at the same time draw the blade fully across the steel. When you near the flat surface you are working from, though without touching the surface, you should be at the blade tip.

Raise the blade to where you started from, switching the blade to the opposite side, then repeat the same stroke. Then, return to the side you started from, and repeat once again. Do an equal amount of strokes for both sides of the blade.

As you become more comfortable using the sharpening steel, you can forego the flat surface and hold the steel with one hand similar to how you would a large kitchen knife. With the other hand, place the blade on the rod at the recommended 20-to-30 degree angle and lightly push the blade across the rod, ending at the blade tip. I highly recommend you not proceed to this step until you are confident enough, because with this alternate method chances for not holding the angle correctly is greater.

Whatever method you use, remember to always use light strokes. There is no need to bear down on the blade with pressure. Let the rod do the work.

Advertisement

Must Read Articles

Read this before you make a knife

Knifemaking 101 – Read This Before You Make a Knife

  by Wayne Goddard My experience has taught me that there's nothing like digging in and getting started. I've often said the hardest part of the...
how to forge damascus steel

How to Forge Damascus

Advertisement
Advertisement