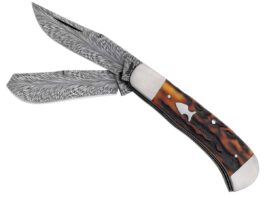
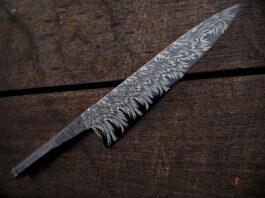
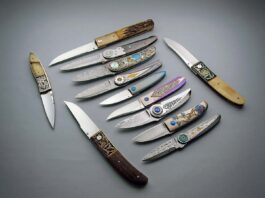

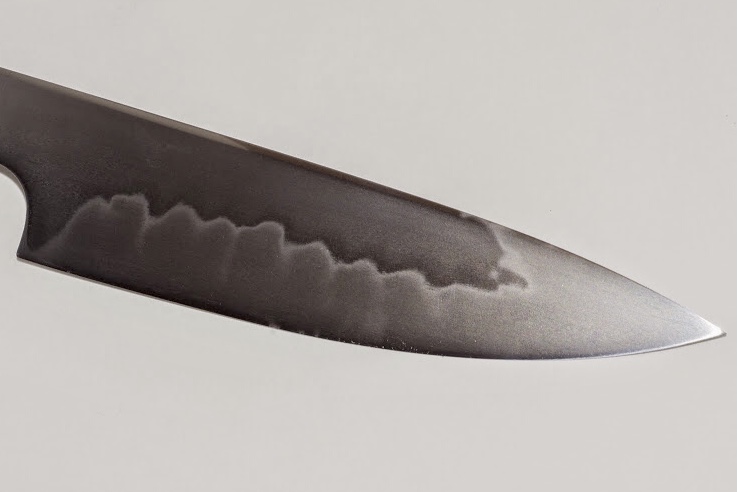
Knifemaking is the building of a knife, which includes the blade, handle and other accouterments. Blades are made by either removing metal from a steel blank via a grinder – known as stock removal – and the forging to shape of hot steel into a blade in the process known as bladesmithing. Other parts, including bolsters, guards, pommels, etc., are needed to complete the finished knife.
Blending the old with the new sometimes can yield notable results.
It’s been said there’s nothing new under the sun. I might add that new ideas in knifemaking are rare. I do not claim the technique I am about to share is new because that could start the story off on the wrong foot. On the other hand, I will say I have not seen it done in the context of making knife parts. Comparisons can be drawn to particular cultural techniques, and I encourage that in the name of inspiration. Speaking of, that will be the purpose of this discussion—inspiration.
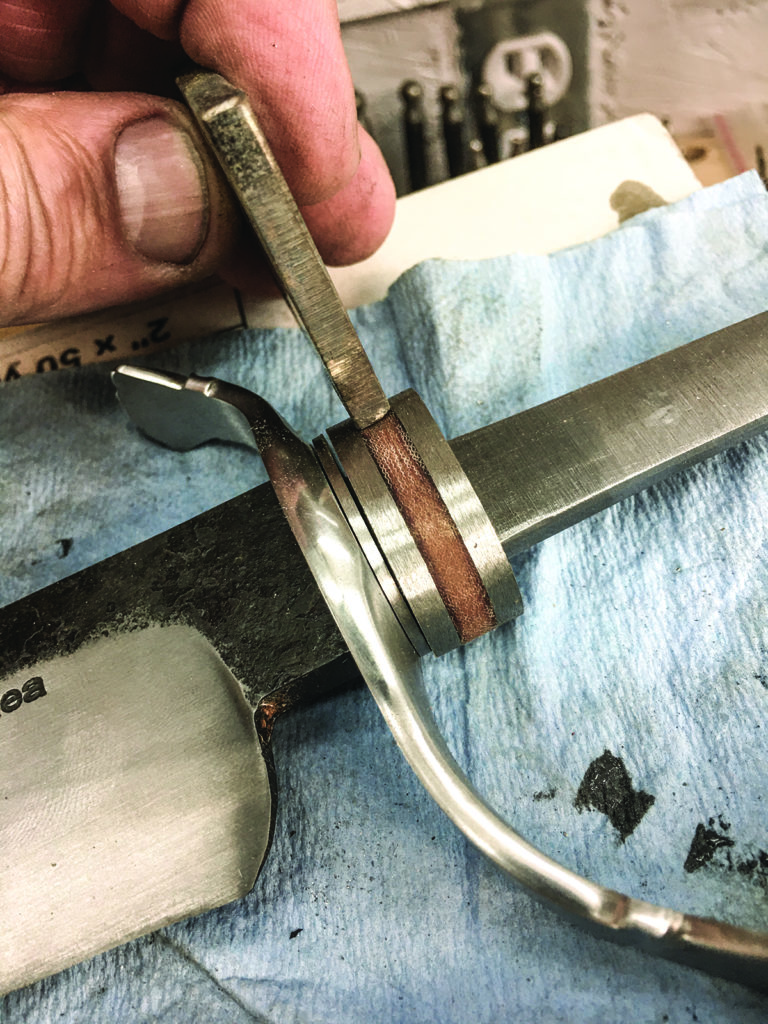
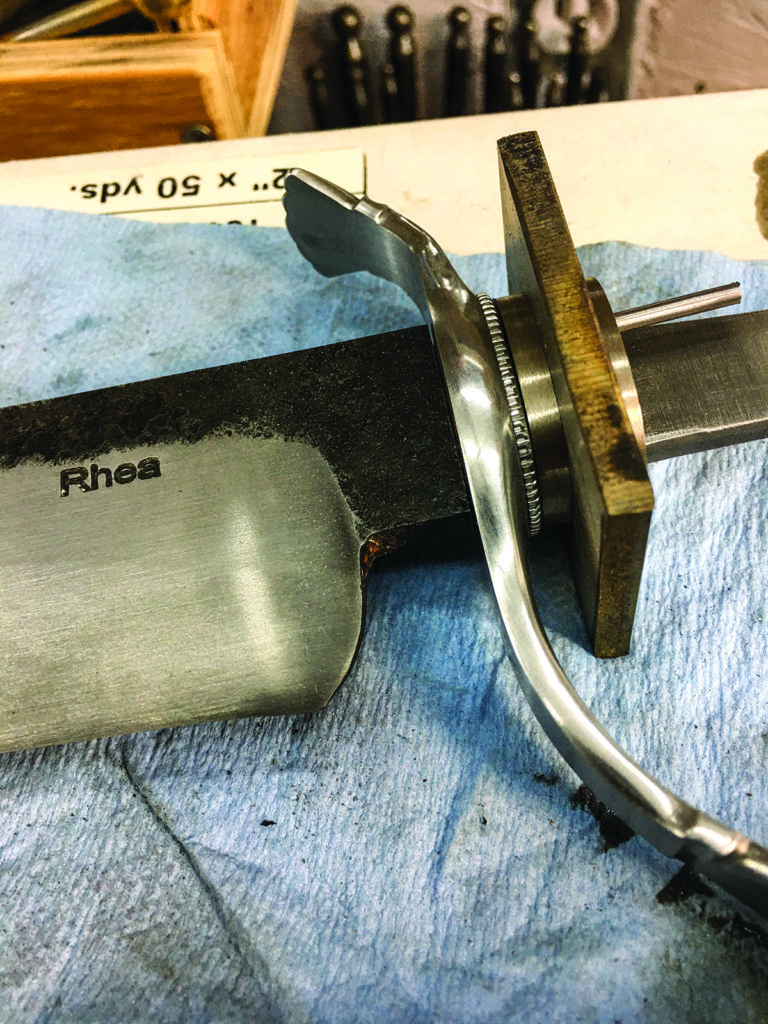
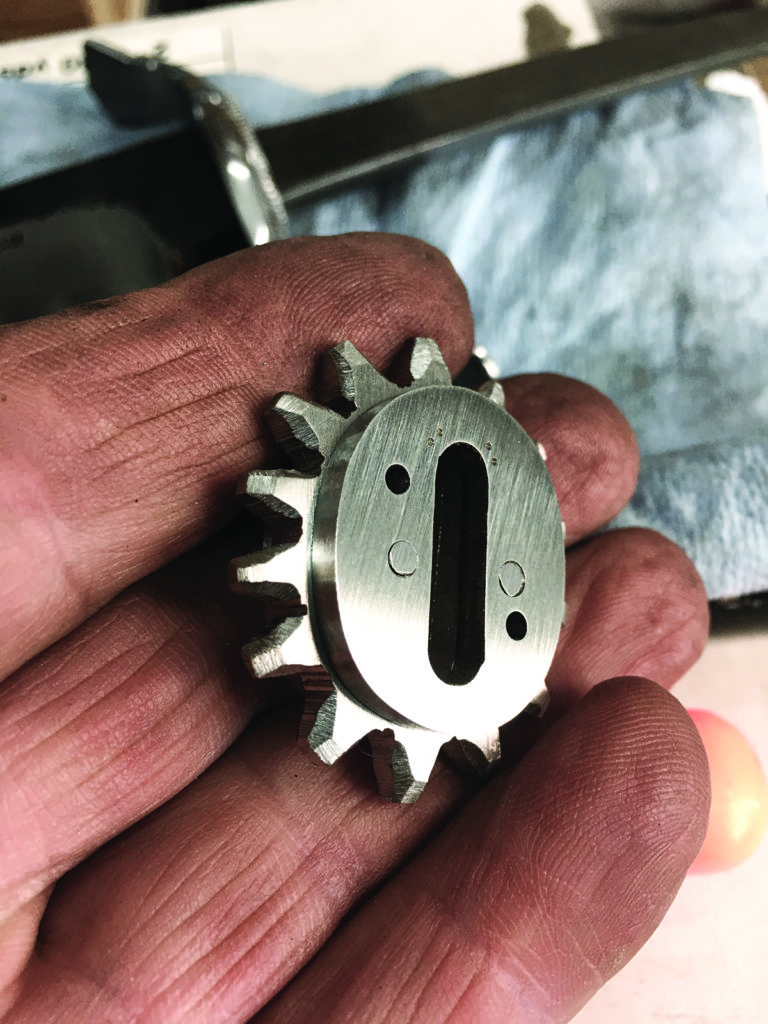
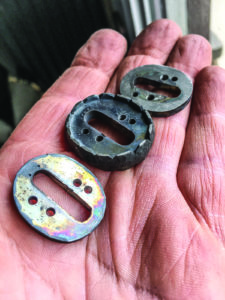
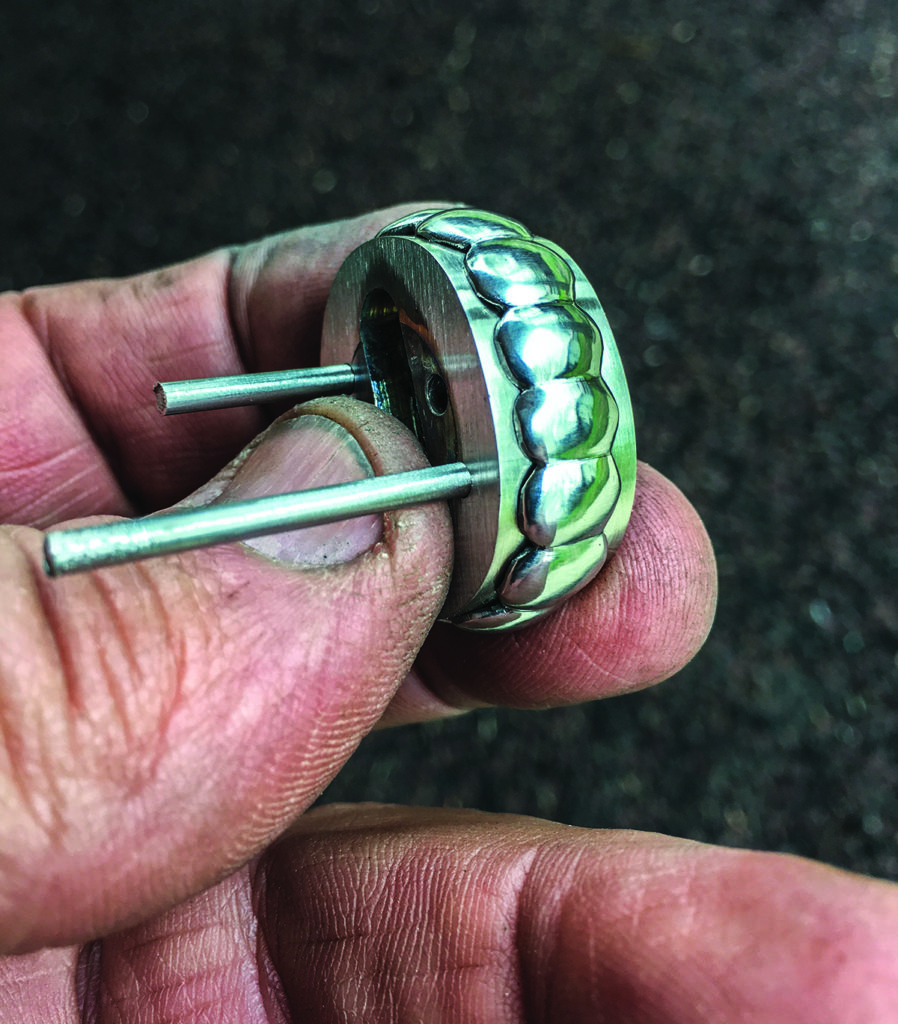
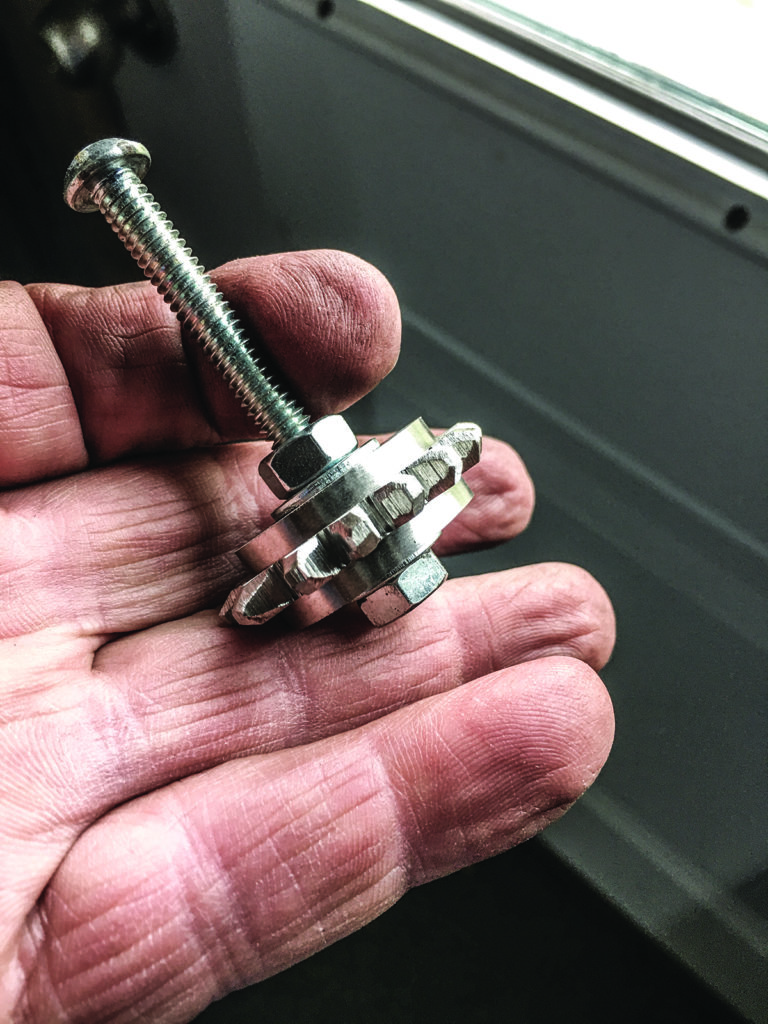
PHOTO 1: The spacer arrangement includes the temporary Micarta® spacer in the middle and the actual stainless piece for the spacer in the author’s hand.
PHOTO 2: The stainless piece is inserted into the middle and the outside layers of spacers are used as templates for drilling alignment holes, and to establish the margin of reveal above the surface—in this case, 1⁄4 inch. The middle spacer is simply cut and ground to this margin and further prep is done. (See PHOTO 3.)
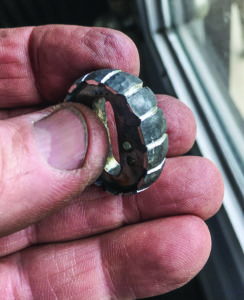
PHOTO 3: The margin of reveal is established and, for the author’s purposes in this particular look, the notches are cut. If you want a simpler look, you may want the smooth band—often called wedding band—and omit the notches. For the wedding band, the author recommends not only omitting the notches but using less reveal, say, 3/16 inch or so. Remember, every decision has its consequences. Consider the volume of the material no matter how small and adjust accordingly.
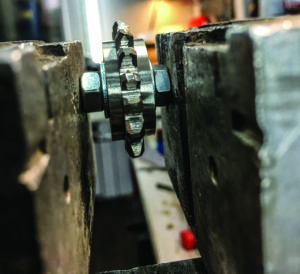
PHOTO 4: The next consideration is “How do you hold the thing?” The author inserted a bolt of appropriate size into the slot. Note: On a knife this large, use a quarter-inch center hole as a start to the slot. Hence, a quarter-inch bolt (or all thread) works well for the process. The bolt has a washer and a
nut on each side and is cut off after tighten- ing. The alignment pins are slightly inside the surface so as not to interfere with the bolt/nut arrangement, as well as the necessary pressure to hold it, while forging the spacer.
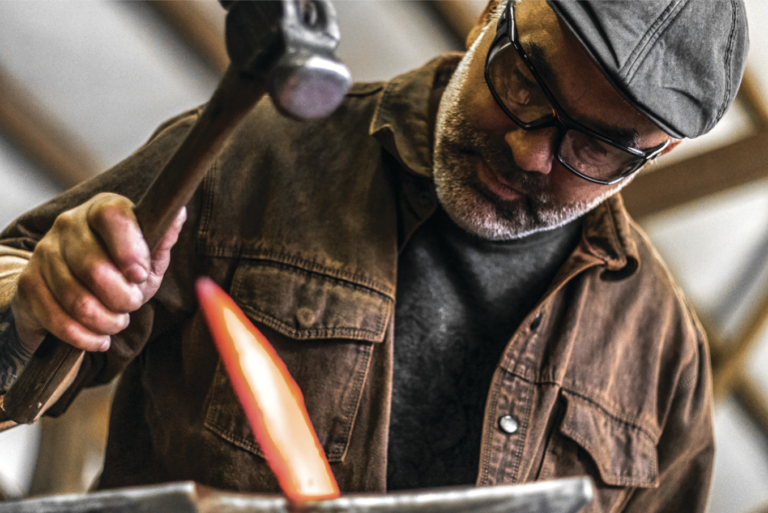
I have been fortunate to have had several sources of inspiration, not the least of which is my time and training in historic blacksmithing. One of the guiding principles of the early blacksmith was practicality. You will end up being the judge as to whether or not this technique is practical or not for your purposes. I will try to show how blending the old with the new sometimes can yield unique results that can be beautiful as well as inspiring. I call the technique intermediate forging. I chose the name to imply it involves a mixture of old and new techniques within the same process in order to accomplish the task. It can involve forging—the old—as well as the new via the use of modern tools such as grinders, saws, etc. The particular order of the use of the techniques is at your discretion as well. In other words, you may forge, then saw/grind, then forge more before, perhaps, grinding again and finishing or polishing.
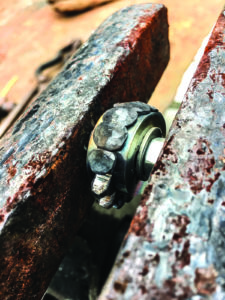
PHOTO 5: While this vise is not the one the author uses for this step, it illustrates the way the piece is held and the relative position to the top of the jaws that the piece should be held during forging. Use a small, 6-to-8-ounce ballpien hammer so as not to move the piece around in the vise when forging the small areas heated by the torch. The grip of a common post vise under moderate jaw pressure will be enough. The radius of the ball along with the positioning in the vise jaws will pro- tect from beating up the outside spacer. The parallel lines provided by the jaws and the layers of the spacer will provide ample references to target the blows. This might take actually doing it before you really get confident.
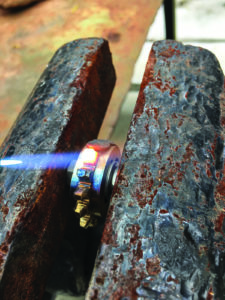
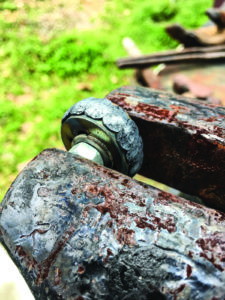
PHOTO 6: The proud area of the middle spacer is forged down a little at a time using focused heat from a brazing tip of an oxyacetylene torch. The piece is set within the jaws of a vise large enough to provide mass and enough force to the grip. The mass absorbs residual heat that could build up and soften areas that must not be deformed.
PHOTO 7: This shows the progress of the forging as the middle spacer is forged down against the outer spacers. The piece will have to be turned often and with a tool that won’t scar it. The author uses flat-jaw tongs very carefully. The outer spacers should need a light surface clean- ing only, so everything outside the forged part should be viewed as fragile—especially the rim.
PHOTO 8: The piece appears as it does after a few rotations and triple checks to ensure the forging is done. Note that it
is not beat up, nor wracked out of shape and shifted. Risky work? Yes, but it can be done. Bladesmiths do this kind of thing all the time. As the man said, “Aim small, miss small.”
It’s time to return to the finishing. Take the piece apart and examine it.
11: The piece is ready for final shaping and finishing.
Intermediate forging can be used on blades or integral parts of blades. This may be where it is easiest to see and accept the possibility of enlisting the technique. I’m sure you may have seen the need to return to the forge to refine or make corrections in order to improve or actually save a project. It’s often viewed as a concession or acknowledgment of defeat if you must return to the forge for corrections. I now present to you the possibility of pushing aside the puristic view and actually using the intermediate forging technique as part of some projects, and opening up new combinations of techniques for new looks.
PHOTO 12: After final shaping and finishing, the author installs permanent alignment pins. While the way the three pieces are fit together means it’s unlikely they’ll get turned around, the author pins them anyway just to be on the safe side.
PHOTO 13: All hail the completed project!
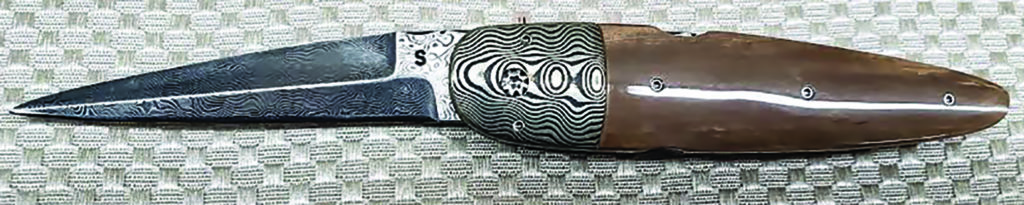
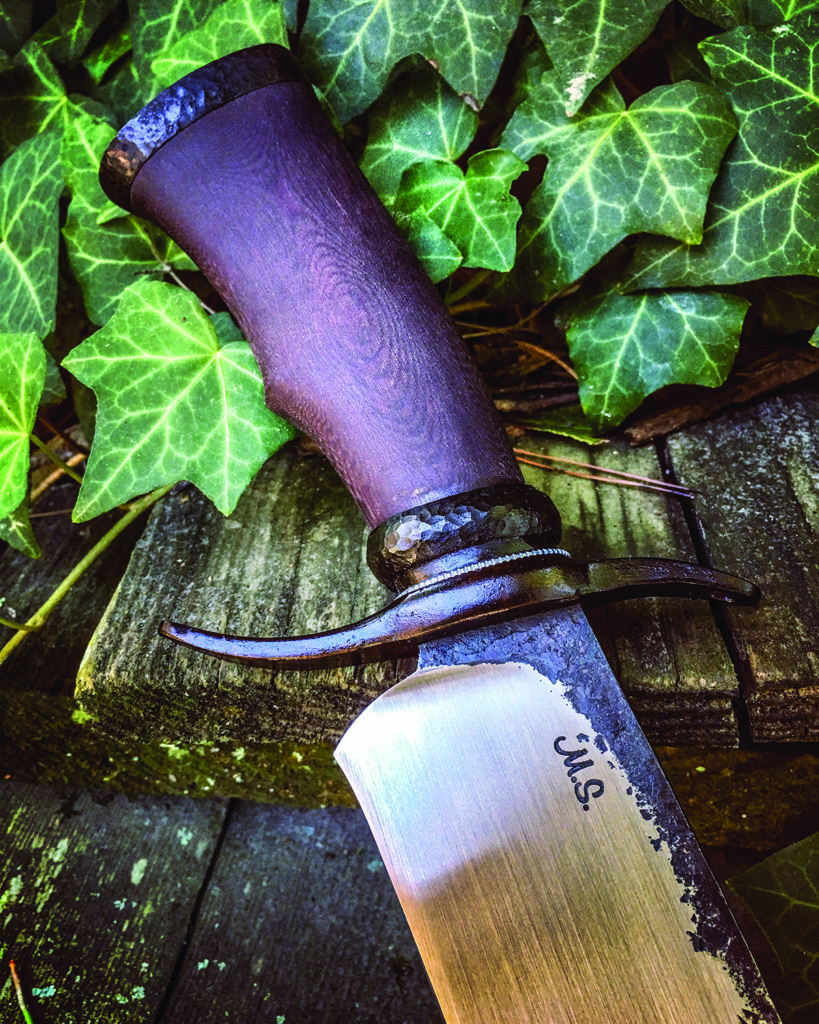
The HANDLE SPACERSOne way in particular I have made changes in the look of my knives by intermediate forging is on the handle spacers. The accompanying photos and descriptions pertain to how I set up and mix the techniques of old and new to arrive at a unique process with almost endless possibilities. I show the progression of one project along with a finished photo, and then some other examples of variations of the technique.I use stainless steel for the spacer, though mild steel or other forgeable materials would work as well. I start with three layers, leaving the middle layer proud by a chosen margin according to my plan. Note: I often “lean” the guard and spacer forward. This creates the need to provide a fake middle spacer that will be discarded after the outside spacers have their inclination established. I then insert the actual middle spacer and leave it proud for the subsequent steps. The author used his intermediate forging process to make the handle spacer for his S-guard bowie. (Whetstone Studio image)YOU be THE JUDGEAs noted, you must be the judge as to whether intermediate forging is for you. I’ve found that the results are worth the extra effort it takes to accomplish my intent. Also, while steps in this process are examples of workmanship of risk*, the risk is usually limited to an individual part of and not the whole knife. I’ve also found that risk itself adds intrigue to the project, and intrigue attracts the curious. Of course, as with a movie, risk and intrigue are good when the ending can be written with a predictable result. Hence, intermediate forging also needs to have predictable results. I can say that it certainly has for me.*Workmanship of risk refers to a principle found in the book, The Nature and Art of Workmanship, by David Pye.For more information, contact Lin Rhea, Dept. BL11, 413 Grant 291020, Prattsville, AR 72129 870-942-6419 [email protected], rheaknives.com.
THOSE WHO KNOW DISSECT TV’S LONG-RUNNING FORGED IN FIRE
Bladesmithing enjoys the same treatment as motorcycle building got in the mid- 2000s—that is, it has become a well-established reality show competition on cable television. Such treatment has ups and downs regarding its effect on the knife industry. Be that as it may, History Channel’s hit show, Forged in Fire, has been on the air for seven seasons, which proves its staying power.
FIF is characterized as both inspirational and gimmicky depending on who you ask. And ask we did—two contestants, a former FIF guest judge and a member of the board of directors of the American Bladesmith Society—with the goal of shedding light on where the hit show lands on the spectrum between the two.
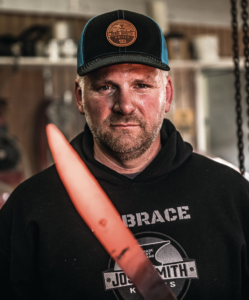
At 19, Josh Smith was the youngest smith to ever achieve ABS master smith status when he did so in 2000. He has appeared on two episodes of FIF. (Brandon Horoho mage)
The long-running TV competition undoubtedly has been an asset to the forging community. For starters, it has introduced the general viewing public to a cast of characters that constitutes a realistic cross section of the knifemaking community. While its list of participants is far from a comprehensive Who’s Who of bladesmiths, one would be hard-pressed to spend more than an hour at the next BLADE Show without encountering a first- person recollection of pounding steel on the small screen.
More important is the awareness such publicity has brought to the craft, according to J.W. Randall, veteran ABS master smith and winner of FIF’s 2017 international championship (season four, episode 19). “It’s brought the public’s awareness around to hand- crafted items, and that’s a good thing,” Randall observed. “It appeals to a lot of people because it’s an old craft, and it’s been brought back, in a sense.”
Indeed, the fiery furnaces easily translate into a burning interest among many of the show’s viewers. For them, witnessing the process of manipulating steel into a knife, sword or axe using fire, a hammer and other assorted machinery and instruments, while facing the adversity of time constraints and random surprises, is at once exciting and inspiring.
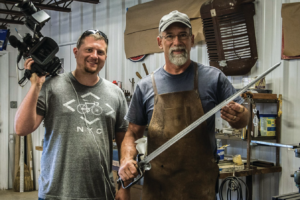
ABS master smith J.W. Randall holds his spadroon sword, the one he made to win the International Competition episode of FIF. At left is “Dan the cameraman.” (Tammy Randall image)
“The men and women who compete on this show are engaging in an arena of gladiators,” described ABS master smith Jason Knight, B.R. Hughes Award winner and guest FIF judge during portions of seasons three and four. He agreed that the show’s primary value lies in inspiring its audience to appreciate, and perhaps pursue, a craft that ties together history, art, science and technology from an ancient world. “It’s important in our culture,” Knight added. “People like me hold fast to it, and I want to share it as art.”
Such interest has had a measurable effect on ABS membership, according to ABS journeyman smith, board member and treasurer, Bill Wiggins. “I don’t know what to call it,” he pondered. “It’s not a spike—I’d call it a steady rise in membership since the show started.”
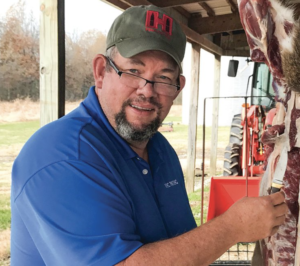
An ABS journeyman smith and treasurer of the ABS, Bill Wiggins said the ABS has enjoyed a steady rise in membership ever since FIF’s debut episode seven years ago. (image courtesy of Bill Wiggins)
He added that the ABS has also seen a lot more turnover lately, with people joining up for a year only to never be heard from again. “We’re still gaining members, though,” he allowed. “There’s good and bad, but the good outweighs the bad.”
“The bad” is definitely part of the mix, according to the story’s sources who were contestants. Though none had the proverbial sour grapes about their FIF experience, the recurring caveat was that good television producers have one goal in mind, which is producing good television—and that doesn’t necessarily translate into total satisfaction for the contestants.
One way to achieve “good television” is to introduce drama. Thankfully, according to Josh Smith, a two- time FIF contestant and the youngest person ever to earn an ABS master smith stamp at 19 in 2000, it didn’t include any typical reality-show-style infighting on the set.
“Everybody needs to realize that they’re trying to make an entertaining TV show, and I think they do a good job,” Smith explained. “The clock provides the drama that they need instead of drama between the contestants.” He added that Mareko Maumasi, his competitor and winner of the “Judges’ Pick” special episode (season four, episode one), is now a good friend. “We didn’t have to become enemies!” Josh emphasized.
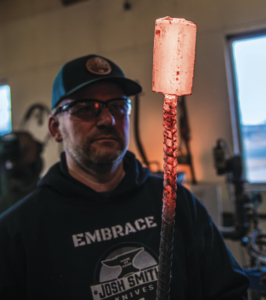
Unanimously, those interviewed who appeared on FIF maintained that the contestants should be better paid. “If you’re not sure if you do that show that you’ll be able to make your house payment, don’t do it,” advised Josh Smith, here admiring a red-hot billet in his shop.
TIME TELLS
Regarding the clock, each bladesmith is presented with strict time constraints— typically three hours to forge, grind and heat treat a blade, followed by a round of judging. In a second round, they have three hours to finish and handle the blade, followed by another round of judging.
“Three hours is a totally unrealistic timeframe,” Randall said. “That’s what makes the show interesting. Everything is stacked against you from the front, and that’s just a critical-thinking-and-an- overcoming-adversity deal. If you realize you’re backed into a corner, you have to adjust and come up with something to overcome it to gather yourself some time back on that clock.”
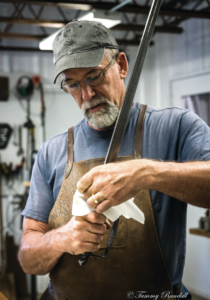
J.W. wipes down the spadroon sword in his shop. Of FIF he said, “It’s brought the pub- lic’s awareness around to hand-crafted items, and that’s a good thing.” (Tammy Randall image)
“A lot of these contestants have no experience, and it’s very entertaining to watch someone who doesn’t know what they’re doing get out there and forge a blade with unknown material,” Knight added. “It’s like throwing them to the beasts. It’s very gladiatorial and can be catastrophic. A lot of people will win by default because competitors will push themselves to the edge or get a bad choice in some garbage materials.”
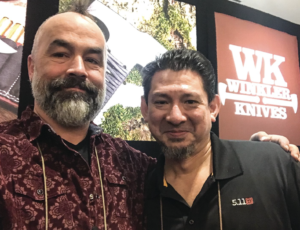
Jason (left) and his fellow FIF judge, Doug Marcaida, deliver looks that “will keal” at the Winkler Knives booth during the 2018 SHOT Show. (image courtesy of Shelly Knight)
He emphasized that the use of questionable materials adds a dramatic challenge to the mix, and during his time as a judge, Knight would advise the show’s producers on what to make available. “They have no idea about metallurgy, chemistry, physics or any science,” he remembered. “Their job is to produce content, and they have license to do whatever they want because it is entertainment. It’s good television but it’s not good bladesmithing.”
During a third portion of the show, makers have five days, or 40 hours, at their home shop to produce another more elaborate project.
Knight likened the whole production to a television game show made to entertain rather than inform viewers of the actual forging process. “You shouldn’t watch Forged in Fire with an expectation of learning how to forge blades,” he said. “That isn’t what the show is about.”
He should know, as he said he and his wife, Shelly, created the original premise. Before Forged in Fire was ever conceived, Battle of the Bladesmiths began as an ABS competition. “In 2010, Bill Wiggins asked ‘Hey, what could we do at a hammer-in that would be more fun?’” Knight recalled. “Shelly got the idea from Iron Chef. She said ‘What if you did a competition where you have unknown materials, a limited amount of time and you have to make a knife that works?’”
“You shouldn’t watch Forged in Fire with an expectation of learning how to forge blades,” said Jason Knight, here in his FIF garb during a forging demo in Johnson City, Tennessee. “That isn’t what the show is about.” (Shelly Knight image)
Big recurve blades are one of Jason’s specialties. He said he and his wife, Shelly, created the original premise for FIF: the Battle of the Bladesmiths, the first of which was held in 2010 during an ABS hammer-in at Haywood Community College in Clyde, North Carolina. (Matt Cohen/2020 Knight Forge Studio image)
“Jason approached me about doing Battle of the Bladesmiths at the Haywood Hammer-In,” at Haywood Community College in Clyde, North Carolina, Wiggins confirmed. “He won the first one, and since then it has become a yearly event.”
Flash forward to 2014. Knight also competed in and won the first-ever, never-aired pilot episode of Forged in Fire. “I’m glad to have been a part of the founding legacy that no one knows about,” he laughed, adding that he also advised the content producers on 12 of the episodes but remains unlisted as a creator. “I wouldn’t do the show again unless they paid me what I want to get paid,” he added. “What I want to do is what I’m doing. What I want that show to be, it can’t be.”
Smith, who competed on the show twice (including season three, episode five) but never won, said if he could change something about the show, it would be an opportunity to explain the knife project to the judges. “Instead of just handing the sword over to the judges, give me two minutes to talk about it,” he said. “I would have educated those guys about details that otherwise they wouldn’t notice with a cursory glance. I think it would have made a difference.”
He feels like he got a raw deal with his Kora Sword, in which his mosaic damascus was oriented so the pattern lined up, made with all take- down construction and blind-pinned together. “It’s a lot of stuff that no one on TV knew,” he noted. To his credit, changing the rules to allow non-winners to get their knives back was a prerequisite for his return to the show.
Randall said editing was an aspect that bothered him. “I want to be represented for who I am. I don’t want television to modify me and make me be somebody that I’m not,” he said, referring to being “bleeped” twice during his episode when he did not use profanity. “I don’t want to be seen by the world as that guy. That’s not who I am and what I want to represent, and it bothered me.
J.W. and Argentina’s Guillermo Mendoza (left), the two contestants in FIF’s Inter- national Competition, enjoy a reunion at a past BLADE Show. (Tammy Randall image)
“And more so in my closing remarks,” Randall added regarding the editing. “I gave God the credit and the glory at the end of this deal, and I also gave our military a bunch of credit for providing the freedom that we should never take for granted. That all got omitted. Represent people accurately for who they are and what they are.”
MORE JACK
Unanimously, those interviewed who appeared on FIF maintained that the contestants should be better paid. The $10,000 prize, which is only administered to the winner, isn’t enough compared to the month it takes the maker away from his or her work. For non-winners, it is a big financial hit to walk away with nothing. “If you’re not sure if you do that show that you’ll be able to make your house payment, don’t do it,” Smith advised.
“It’s like rolling the dice,” Randall proclaimed. “For me, it’ll take $25,000 to get me back. They’re cutting a fat hog, partner. That producer is making money hand over fist. They asked me to come back and I told them I’m not leaving my shop for 10 grand when I can make more money staying in my shop. Why would I roll the dice and potentially come up empty and lose a month of income?”
Overall, each source in the article was gracious in his comments about Forged in Fire, often reiterating that the drawbacks are tied into the fact that it is a television show. The point is to be entertaining, and it comes at the expense of some grievances about how it should be produced. They unanimously agreed that the most important effect is that it has enlightened and inspired millions of people regarding the craft of forging and knifemaking.
For the latest knives, knife news, trends and more visit blademag.com, BLADE®’s popular Instagram page @blade_ magazine, and on Facebook and Twitter.
Most beginning bladesmiths can hardly wait to forge out their first damascus blades. Making damascus is challenging and exciting, especially when you advance enough to try and create the more complex designs. I still enjoy the challenge forging intricate mosaic damascus patterns, and especially figuring out how to make new ones.
I also enjoy teaching and passing down whatever knowledge I have collected over the decades. So, in 2008 I opened a knifemaking school in Pine Plains, New York. Most of my classes are based on the forging technique.
The most exciting thrill of teaching is watching a few of my students advance to become competent bladesmiths in their own right. I can honestly say I have met a lot of very nice, talented folks over the years at my school. Some just want to be hobbyist or part-time makers, and others hope to one day become full-time knifemakers.
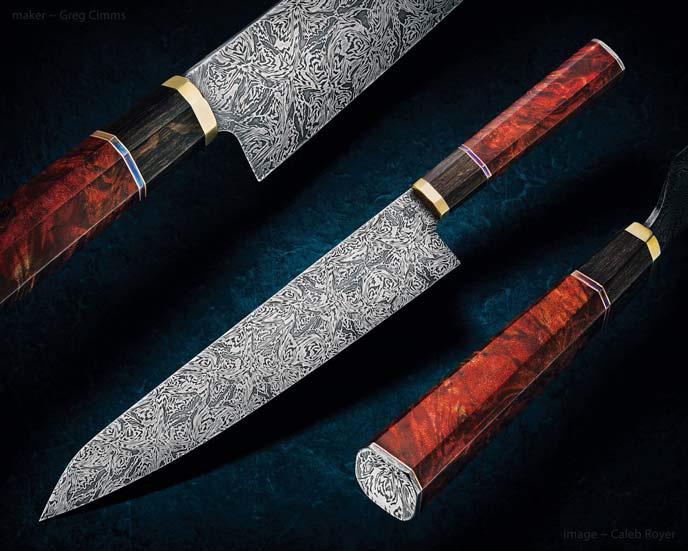
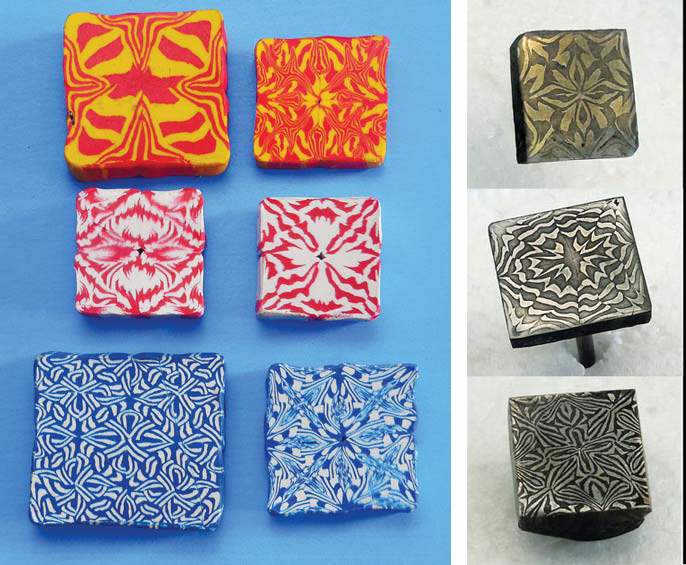
Greg Cimms forged the blade for his chef’s knife of multi-bar mosaic damascus in a pattern originally worked out in clay. (Caleb Royer image)
They are talented bladesmiths who have been doing incredible work so far. These gents have only been making knives a couple of years. They have learned the proper way to forge and forge weld and have made some nice damascus. I knew they were ready for the next challenge making more complex damascus. I decided it was time for me to hold a more advanced multi-bar mosaic damascus class for them.
The class was four days. On the first day we went down to the shop and I explained what multi-bar mosaic damascus was and how it is made. I also explained how powdered mosaic damascus is made, though it is a completely different process.
The Problem: “Shooting in the Dark” with Mosaic Damascus Designs
While we were sitting around the table I gave everyone a box of different colored clays. Some thought I was making a joke with the clay until I showed them some of the damascus patterns I had made. Some of those clay designs I made in the early 1990s.
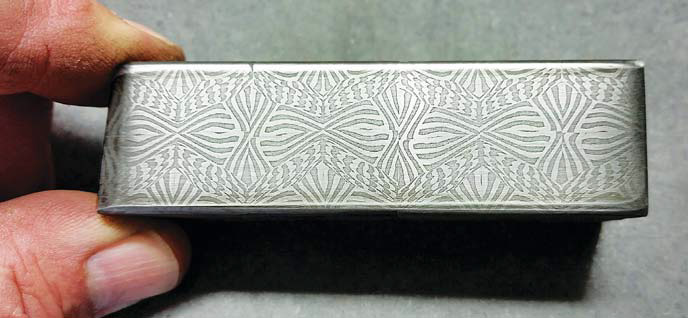
Bill Greulich followed the same steps he used to develop his pattern in clay to forge his first billet of multi-bar mosaic damascus.
Back then I was working in an art foundry full time pushing a lot of hours, so I had very limited time to forge my knives and tomahawks, never mind work out new damascus patterns. At night I would work out damascus designs on paper. The weekends were often spent working hard at the forge making damascus from the paper designs.
Unfortunately, many times when I finished the mosaic damascus billet, even though some did turn out to be nice patterns, they were not quite what I wanted. Basically, when you work out designs on paper, at least for me, I felt I was shooting in the dark without night vision. I knew I had to find some answer or solution to my problem.
The Solution: Kids’ Modeling Clay
While I was thinking what would be the best solution, the answer was right in front of me. I was working on a sculpture using red and yellow wax, and that is when it occurred to me. I started cutting off a few slices of red and yellow wax and made a billet out of it. I folded, twisted and so on as I would do with steel. While the wax was not so pliable in the cold form, it still gave me the idea of what I had to do.
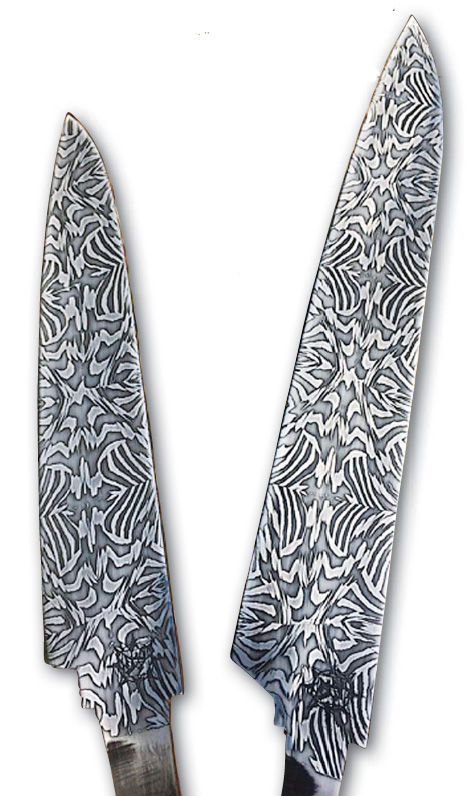
Greg Cimms forged these two blades from a billet he designed and made in the author’s Advanced Damascus class.
The next day during lunch break I ran out to the arts and craft s store and bought two boxes of multi-colored clay, the kind kids used to play with or use at school. I was very excited for my new finding and anxious to see how well it would work.
I made my first multi-bar mosaic clay billet that turned out better than expected in allowing me to preview the mosaic damascus designs. Making clay damascus does not mean you will like every pattern you create, but it is still a lot more efficient and easier on the pocketbook than forging all day long to find out the design is not what you wanted.
I could hardly wait to show my wife Lori that I had found the solution to my problem. Over the years, I probably came up with more designs in clay than I would ever be able to forge out in steel.
A Shortcut with a Long History
That is how I got started making clay damascus. I shared this technique with fellow makers. Actually, similar techniques have been done in glass beads for hundreds of years. I have many books on Indian trade beads in beautiful designs.
As kids we used to play with marbles that also had beautiful designs in them. It just never occurred to me to incorporate any of this into my knives.
Making Clay Billets
On the first day of class I demonstrated making a clay billet and explained, step by step, what to do and what to watch for.
Next I showed the group how to take the same starting multi-bar billets, and, by using different arrangements and folds, create two or three different mosaic damascus designs.
As the students started working out their designs in clay, I asked them to write down every step they took: how many layers they started with, how many times they cut the billet, how many times they folded it, in which direction they folded, in which direction they forged, and so on. This written reference is very important if you want to recreate the design in steel.
I got such a kick out of watching grownups having fun with clay, showing off to each other the designs they had created. It reminded me of back when I started making clay mosaic damascus and how excited I was.
That day everyone seemed on a diet because no matter how often I said “Lunchtime!” no one was hungry. Finally, Lori came home from work and we had dinner. At the table the only conversation was which of their designs they would choose to forge out on the second day of class.
* Images by the author, Jeremy Spake and Austin Moody unless otherwise noted.
Pronounced “moe-ka-may ga-nay,” mokume-gane—or mokume as it is more commonly known—is all about layering. For me it’s simply another component of my work, but within itself it’s about color and pattern.
In short, you stack a variety of different metals, bond them together, forge them down, pattern the material by cutting then forging, or forging then cutting, and expose the various colors that lie beneath. It sounds pretty simple and much like damascus.
Neither is true. I do find mokume a bit more difficult and less forgiving. However, all of this is subjective and depends on the specific materials you’re working.
For damascus I use straightforward, low-alloy high carbon steel; for mokume I frequently use exotic alloys that are not forgiving. You can use exotic high-alloy steel, which makes damascus less simple, and straightforward metals for mokume, which makes it simpler.
But enough of my doubletalk—let’s get into the process.
What You Need
Torque plates: 1-inch-thick 316 stainless steel. The plates should be large enough to accommodate both your billet—with some wiggle room—and a half-inch bolt in each corner of the plate.
Bolts, nuts, washers: at least half-inch thick Grade 8 heat-treated, high-alloy steel bolts. Black oxide will help prevent the bolts from bonding to the nuts. I hope this goes without saying, but you will need the correct size of nuts and washers to accompany your bolts.
Boron nitride: It acts as a resist between bolts, nuts, washers, torque plates and your billet. It also acts as a lubricant.
Three plastic tubs at least 1 foot by 1.5 feet and 6 inches tall, or whatever makes the most sense with the size billet you’re making.
Distilled water.
Simple green® Concentrate All-Purpose Cleaner.
For cleaning, 7447 maroon Scotch-Brite™.
Scott® Shop Towel. .002-inch-thick 304 stainless steel sheet. Medium silver solder: It’s always important to have on hand and can help fix problems should they arise.
Activated charcoal pellets.
How to Make Mokume Step by Step
STEP 1: Cut all of the metal to the appropriate-sized sheets, deburr, and make sure they are relatively flat without denting or kinking the metal. You need each piece to be of a consistent thickness. All the sheets can be different thicknesses, but there must be no dents or tapers within individual pieces.
STEP 2: Take the torque plates with the holes already drilled and coat the inside faces with boron nitride. The inside faces of the plates should be dead flat. Also, coat the threads of the bolts and the faces of the washers. Set aside to dry.
STEP 3: Take the three plastic tubs and place them one next to the other. Fill tub number one and number three with 1 inch of distilled water and the center tub with 1.5 inches of the water.
STEP 4: Mix a couple of tablespoons of the simple green cleaner in tub one.
STEP 5: Using tub one and a small piece of Scotch-Brite, clean each side of the first piece of metal. Use a scratch pattern to track your progress. When finished rinse the piece in the first tub, being sure that the water skims cleanly and easily over the surface. If it beads up anywhere, clean again.
STEP 6: After cleaning and rinsing the piece of metal in tub one, rinse it in tub two and store it in tub three.
STEP 7: Clean all of the metal, dedicating respective corners of tub three to hold each type of metal.
STEP 8: Place the bolts through the holes in the bottom torque plate and set it close to tub three.
STEP 9: Remove each piece, gently dry using the Scott Shop Towel, and stack in the correct order on your torque plate (see image 1).
STEP 10: Your kiln should be preheated by this point.
STEP 11: Align the metal using a straight edge or square.
STEP 12: When you place the second torque plate on top, be careful to not knock around the billet. Re-align the sheets as necessary while tightening the nuts and bolts.
STEP 13: When everything is tight, go to your hydraulic press. Use steel standoffs to get past the nuts and bolts, and press down on the stack. Tighten the nuts with the billet under pressure (see image 2).
STEP 14: When you create the stainless steel jacket, you want all of the seams to be folded twice. After each fold, either work the seams with a rawhide mallet or burnish them with an appropriate tool (see image 3).
STEP 15: Activated charcoal is ideal for this process—use two tablespoons—but if you only have charcoal on hand, that’s fine. We used hardwood charcoal and crushed the chunks up a bit. You need only a small amount. The point is to seal the foil well enough where no oxygen can come in to cause combustion and burn up the charcoal. Prior to adding the charcoal to the packet, let it sit in the oven for one hour at 250°F to remove any moisture from the charcoal.
STEP 16: To prevent damage to the bottom of the kiln, we slid our packet in on a thin piece of steel (see image 5).
STEP 17: Kiln time varies depending on how large the billet and torque plates are. You really need everything to be at temperature for only a couple of hours. Larger billets obviously take longer to get to temperature. I recommend doing some research. The billet documented in the article was fired for three hours.
STEP 18: When you have fired the billet long enough, remove it from the kiln, remove it from the foil, and reduce the entire billet by 50 percent thickness at forging temperature. Reduce between 20-to-30 percent with each heat.
STEP 19: For the first forging process, leave the billet in the torque plates and go straight to the press (see image 6).
STEP 20: After the first reduction, the billet should slide out of the plates when tilted to the side. You can place the billet between two thinner steel plates—though only if you have a secure way to hold everything—and put them back in the kiln at forging temperature. The plates will help prevent the press dyes from chilling the billet too quickly. Continue until you have reduced by 50 percent from your starting point (see image 7).
STEP 21: Now you can go to cold working. Start out by reducing the billet no more than 10 percent prior to annealing. As you work the billet down, you can start to get closer to 20 percent between annealing cycles. The process for annealing depends on your metal combination. The relevant information should be easy to find with an Internet search.
STEP 22: When it comes to patterning mokume, the process is very similar to damascus. However, instead of using a milling machine or angle grinder to cut a pattern into the metal, tools such as a flex shaft or files would be more appropriate. After cutting a pattern into the metal, forge the billet flat to bring the low points to the surface. As with damascus you can also forge patterns into mokume, either with a hammer or specific coining dyes. Reveal your pattern by grinding down to the low points. As a rule of thumb, it’s not recommended to pattern deeper than one-third the thickness of the billet.
More than One Way to Do It
Full disclosure: there is more than one way to make mokume. I have made and know others who make mokume using processes that differ from what I am sharing.
There have been tons of stories on how to be a knifemaker. Most are great and deal with subjects like taxes, suppliers, marketing, sales, bookkeeping and safety. Other great articles cover the technical side of how to make the knives you wish to sell, including stories on forging, grinding, heat treating, handles, sheaths and more.
My story will outline some things I have learned over the years as a full-time knifemaker in a home-shop setting that I think will benefit you, your knives and, most importantly, your family.
1) A Toaster Oven
Your kitchen will get messy in a hurry if you don’t take things outside. Buy a cheap toaster oven. Problem solved.
The kitchen is not the place to be tempering knives, warming up knife sheaths for waxing them, heating Kydex® for the molding, or burning out axe heads. A $5 toaster at the flea market will do all that in your shop and is a bargain.
2) Pots & Pans
Get a selection of pots and pans, cutting boards and a small scale from a thrift shop. Don’t be tempted to use a “good pan” for that one, little task.
3) A Shop Sink
Would you want to eat out of this sink? No. That’s why it’s the dedicated shop sink, not the one inside the kitchen.
Install running water in your shop, or at least have a five-gallon bucket handy. Make sure there’s a countertop, too, in case of spills.
On that note, wipe your feet off before re-entering a home.
4) A Coffee Thermos
If who like your coffee as much as I do, get a big thermos, fill it in the morning, and take it to the shop with you. This cuts down on the trips away from the shop, as a trip inside the house to grab another cup can turn into an hour away by the time you get the cup, peek in the fridge, check for phone messages, etc.
Plus, every time you re-enter the house, you track shop dirt and oils in with you.
5) Discipline/Knowing When to Stop
Know when to quit for the day. This is one lesson I’m still learning. You get wrapped up in your work and the next thing you know it’s 2 in the morning.
Not only will you spend that night on the couch, but you may spend the next one there too if, as a result, you also forgot the plans you made, dinner, one or more of the kids’ school activities, etc. Besides, it’s tough to make good knives after a rough night on the couch.
6) Do Something Special for Your Family
Make knives, buy flowers, repeat.
Use some of your knife money to buy your wife/husband/partner/significant other flowers. Buy them on a regular basis. Put it on the calendar if you must so you will remember. Think of the flowers as supplies, like grinding belts.
This is very important!
7) Mind the Dust
Know that what happens in your shop does not stay in your shop, and act accordingly. Dust from exotic woods will make it into your home. You may not be allergic to the dust but your wife, kids or family pets may be.
Keep an eye peeled for anything out of the ordinary when introducing new woods or materials into your shop. This also goes for smoke from quenching. Use “green” quenchants when you can, including vegetable-based oils and water. And keep the door to the rest of the house closed until you clear the air.
8) Consider Where Your Shop is Located
If you’re considering moving your shop away from your house, think long and hard about it.
Yes, a home-based shop offers some challenges. However, it offers quite a few benefits, too. Namely, the morning commute is a thing of the past, and people know how to find you.
Move the shop away, as some friends of mine have, and you may end up moving it right back anyway.
9) Make the Most of Breaks
Maximize the time between your work by throwing in a load of laundry, starting supper, taking care of a household task, paying bills, etc. This helps your family’s day-to-day quality of life.
10) Test Your Knives in the Kitchen
If you make them, there is no better test of the kitchen knives you create than to use them in making dinner. This is a twofer in that not only do you get the immediate feedback from hands-on testing, but also the household benefit of preparing meals.
11) Double Up Your Shop
With your shop set up, you have all sorts of tools on hand you can use for other projects. From fixing your kid’s bicycle to tuning up a lawn mower, you’ll find taking care of these everyday things can reset your focus for knifemaking later.
Of the assorted American Bladesmith Society-sanctioned knifemaking classes I’ve attended, many pertained to the construction of a well-made knife. In one class, the subject of line and flow was a topic.
An ABS founder and a BLADE Magazine Cutlery Hall-Of-Fame® member, B.R. Hughes said, “A curve looks better than a straight line”—pausing for effect—“and a hint of a curve looks better than a curve.”
The human form and other objects in nature often have been used to illustrate proper execution of line and flow. Some of the simplest of things common in everyday life are there for our benefit if we would notice.
Taking Cues from Nature
When flow is hard to achieve on a knife, Jerry Lairson puts the design on paper to figure out what does not look right. Once he has the general shape he wants, he starts changing things until the knife starts to flow. Lin Rhea also worked on his art dagger in drawn form (above) before arriving at the finished knife (top). (Chuck Ward knife photo)
An unfurling fern, drifting snow, a vine climbing to the sun—these things look alive and give the impression of fluidity even though they are at rest. Consider a falcon’s dynamic grace. Simply when perched it looks designed for motion. These are things the great masters studied and emulated, often applying mathematical formulae, yet concealing any and every hint of math within the object’s overt beauty.
We are all “wired” to be attracted to certain combinations of lines that flow into the whole dynamic appearance of an object, whether a person, a falcon or a knife.
Knifemaking long has been elevated to an art form. It’s a natural medium to express artistry in a functional tool. Knifemakers are the formulators, mechanics and artists who create from raw materials something static that also has dynamic character. It looks like it wants to be moving even though it’s not. Remember the falcon?
The object of this brief dissertation is to help makers wanting to improve their work find a perspective. I say “a perspective” knowing it would be uniquely each maker’s since each maker is different and can’t see things exactly the same. Michelangelo’s perspective was not Leonardo da Vinci’s and vice versa, but each developed an eye for his own work.
Also, it may not be possible to explain to another exactly how to have an eye for line and flow. My attempt is simply to rationalize that it is possible to cultivate its development.
Developing an Eye for Line and Flow
If this development is possible, then each maker should ask, “How can I cultivate it in my own work?” Considering the question requires a level of honesty that some are just not willing to attach to something they mistake for “a knife.”
Indeed, the question pertains to the process rather than the product. It is a way of thinking about the craft and not simply “a knife.” That mistaken thinking will never allow a person to elevate knifemaking to an art form, and it can’t help but to manifest itself in a maker’s work. Fortunately, there are many examples of makers who have enhanced their natural talent by honest self-improvement.
What do some of the world’s best makers do to cultivate their eye for line and flow? Where do they look for inspiration? What influences have shaped their perspective?
How the Master Smiths See Line and Flow
Jerry Lairson indicated embellishments such as carving should enhance the line and flow of a knife rather than compete with it. (Buddy Thomason knife photo)
“Many of my best knife designs were inspired by nature,” such as a lily, a bird’s wing and vines, stated ABS master smith Jerry Lairson. “I think it’s good to follow a theme throughout the knife. An example is the fluting on French flintlock pistols combined with the other parts of the gun to create flow. If you see something you like, even if it doesn’t pertain to knives, try to use it as a theme to design a knife. If a knife is decorated with engraving, carving or filework, it should enhance the flow and line of the knife rather than
compete with it.
“Sometimes I see things in museums that have nothing to do with knives but have graceful lines that can help design a knife that flows. How a knife design starts and stops at the point and butt has a lot to do with flow. Sometimes flow is hard to achieve even when you have a good design in your head.
“When this happens to me,” Jerry continued, “I put it on paper and if it doesn’t flow, I start trying to figure what doesn’t look right. I always design a knife on paper. Once I have the general shape I want, I start changing things one at a time until it starts to flow. Sometimes one small line that isn’t right will throw the whole thing off. Sometimes simpler is better.”
Rodrigo Sfreddo’s eye for line, flow, and overall design and innovation shines in his “Dark Tulip.” (photo courtesy of Lin Rhea)
“What makes a knife more desirable than another? Good design,” he began. “Nobody spends hundreds or thousands of dollars on a knife just because they need a good knife for camping or cooking; they’re buying for collecting because [the knives] are beautiful, so good design and aesthetics are of the utmost importance.
“I always say to my students to think about the beauty when planning a knife, not what is easy or what not to make. It’s very easy to make the same blades, guards and handles we’ve already made and seen. The result is just a combination of designs we’ve already used before—one blade just like the one we made some time ago, combined with another guard we made in another project, with another handle, and even the filework, just new combinations of our same old ideas!
“That’s why it’s so important to pay attention to anything that’s beautiful and has great design,” Rodrigo maintained, “like cars, antiques, furniture, architecture and so on. We must refine our taste on everything so it will reflect on our work. It’s unbelievable how we can figure a knifemaker’s characteristics from his work, especially if he’s ‘thinking’ about his work or just following the crowd.”
Jason Knight is a proponent of curves, and long and subtle arcs, in his knife designs. This recurve bowie in damascus and stag—winner of the award for Best Bowie in the 2012 BLADE Show custom knife judging competition—is an excellent example. (SharpByCoop.com photo)
ABS master smith Jason Knight’s knives are known for their superlative lines and great flowing execution. He spoke of the ancient ways of looking at and designing things, saying they work and that he won’t try to change them. He described his method as a “way of seeing” involving his eyes and his heart. He pointed out that makers have choices in materials that offer color and texture.
“Materials can limit or enhance design. Some designs might look cool but don’t work well. Usually,” he qualified, “if it looks good, it works well.”
He recommended taking inspiration from other art forms, such as sculpture and woodworking, adding that he likes curves and both long and subtle arcs.
Open Your Eyes
Trying to express the causes and effects of something whose nature is so intangible requires some degree of interpretation, and I’m not sure I am the one to carry this task to completion. However, most makers are in the same boat. Who would have thought so much would be involved in the making of a knife?
Do I understand it all? Not by a long shot. Am I overthinking the matter? Maybe. But it could be that considering these points will help my perspective become a little clearer. Besides, considering that the above three makers give serious attention to advancing line and flow in their work, I feel I’m in good company.
Editor’s note: This article was originally published in 2005, so be sure to adjust for inflation. That said, Wayne Goddard’s $50 Knife Shop book is the next step if you’re looking to get started on a minimal budget.
The short answer: A few thousand dollars if you want to get serious about knifemaking, and considerably less than that for hobby projects.
At most forging demonstrations I do, I try to use only minimal tools because I want people to see what can be accomplished with just a few basic implements—a hammer, a few tongs, a good anvil and a forge. Most folks are not set up with every type of tool that can be used in bladesmithing. As you have seen, with just a few basic tools you can make much more than just a basic knife or hawk.
Using only basic tools does require a bit more sweat. This may be fine if you are a part-time blacksmith or bladesmith, but may not be the most efficient avenue for someone trying to make a living at it. If the latter is the case, you can quickly run into thousands of dollars setting up your shop.
Next step: Learn how to get started making knives with just 50 bucks in tools in “Wayne Goddard’s $50 Knife Shop.”
For starters, if you do not already have a place to set up your forge, then the biggest expense will be for shop space. Obviously, the space cannot be an old woodshed. Keep in mind that you are working with hot metal and fire, and that you need to set up the forge where the metal sparks will not fly where they could cause trouble.
The room also will need good ventilation, no matter if your forge uses gas or coal.
If you already have such a place to use as your forge room, then you can start setting things up. Your next biggest expense will be the forge itself, either gas or coal. I recommend a gas forge because it is cleaner and you have more control of the heat. Such a forge could run about $600.
You need a good anvil; my preference would be at least a 125-150 pounder. You will need a sturdy worktable with a quality, heavy-duty vise, a bench grinder, and a few well-chosen tongs and hammers. This will be all you need to do most of your bladesmithing.
However, whoever told you that you can spend thousands of dollars setting up a shop with all the tools was not pulling your leg. Power hammers, various dies, a drill press and other tools of the trade will make your work easier. Specialized knifemaker’s grinders from Burr King, Bader or Square Wheel will cost you but will be worth the investment.
You could write a whole book on tools that would make your life easier and your pocket emptier. Visit a well-established blacksmith shop and you will be surprised how much tooling will be there. Of course, you do not have to purchase everything at once, but over the years as time and funds allow, you probably will.
My opinion is that you do not have to spend thousands of dollars to set up a shop where you can create a great variety of beauty and function. However, if bladesmithing is your chosen trade, to not invest in the equipment that will save you time and sweat is not a smart option.
Like they say, you need to spend money to make money.