
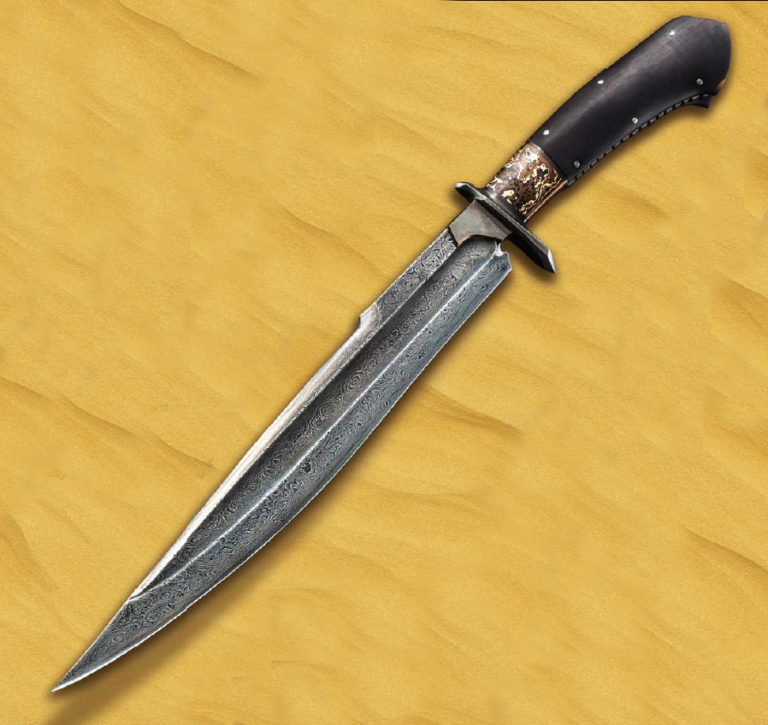
Knifemaking

Knifemaking is the building of a knife, which includes the blade, handle and other accouterments. Blades are made by either removing metal from a steel blank via a grinder – known as stock removal – and the forging to shape of hot steel into a blade in the process known as bladesmithing. Other parts, including bolsters, guards, pommels, etc., are needed to complete the finished knife.

Featured Knives – – Knife Collecting – – Tactical Knives – – Survival Knives

How to Make Mokume

0

* Images by the author, Jeremy Spake and Austin Moody unless otherwise noted.

Pronounced “moe-ka-may ga-nay,” mokume-gane—or mokume as it is more commonly known—is all about layering. For me it’s simply another component of my work, but within itself it’s about color and pattern.

In short, you stack a variety of different metals, bond them together, forge them down, pattern the material by cutting then forging, or forging then cutting, and expose the various colors that lie beneath. It sounds pretty simple and much like damascus.

Neither is true. I do find mokume a bit more difficult and less forgiving. However, all of this is subjective and depends on the specific materials you’re working.

For damascus I use straightforward, low-alloy high carbon steel; for mokume I frequently use exotic alloys that are not forgiving. You can use exotic high-alloy steel, which makes damascus less simple, and straightforward metals for mokume, which makes it simpler.

But enough of my doubletalk—let’s get into the process.

What You Need

Torque plates: 1-inch-thick 316 stainless steel. The plates should be large enough to accommodate both your billet—with some wiggle room—and a half-inch bolt in each corner of the plate.

Bolts, nuts, washers: at least half-inch thick Grade 8 heat-treated, high-alloy steel bolts. Black oxide will help prevent the bolts from bonding to the nuts. I hope this goes without saying, but you will need the correct size of nuts and washers to accompany your bolts.

Boron nitride: It acts as a resist between bolts, nuts, washers, torque plates and your billet. It also acts as a lubricant.

Three plastic tubs at least 1 foot by 1.5 feet and 6 inches tall, or whatever makes the most sense with the size billet you’re making.

Distilled water.

Simple green® Concentrate All-Purpose Cleaner.

For cleaning, 7447 maroon Scotch-Brite™.

Scott® Shop Towel. .002-inch-thick 304 stainless steel sheet. Medium silver solder: It’s always important to have on hand and can help fix problems should they arise.

Activated charcoal pellets.

How to Make Mokume Step by Step

STEP 1: Cut all of the metal to the appropriate-sized sheets, deburr, and make sure they are relatively flat without denting or kinking the metal. You need each piece to be of a consistent thickness. All the sheets can be different thicknesses, but there must be no dents or tapers within individual pieces.

STEP 2: Take the torque plates with the holes already drilled and coat the inside faces with boron nitride. The inside faces of the plates should be dead flat. Also, coat the threads of the bolts and the faces of the washers. Set aside to dry.

STEP 3: Take the three plastic tubs and place them one next to the other. Fill tub number one and number three with 1 inch of distilled water and the center tub with 1.5 inches of the water.

STEP 4: Mix a couple of tablespoons of the simple green cleaner in tub one.

STEP 5: Using tub one and a small piece of Scotch-Brite, clean each side of the first piece of metal. Use a scratch pattern to track your progress. When finished rinse the piece in the first tub, being sure that the water skims cleanly and easily over the surface. If it beads up anywhere, clean again.

STEP 6: After cleaning and rinsing the piece of metal in tub one, rinse it in tub two and store it in tub three.

STEP 7: Clean all of the metal, dedicating respective corners of tub three to hold each type of metal.

STEP 8: Place the bolts through the holes in the bottom torque plate and set it close to tub three.
How to make mokume

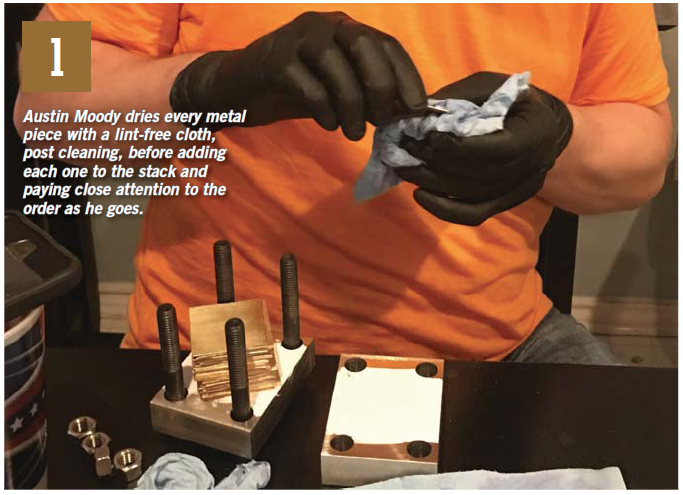
STEP 9: Remove each piece, gently dry using the Scott Shop Towel, and stack in the correct order on your torque plate (see image 1).

STEP 10: Your kiln should be preheated by this point.

STEP 11: Align the metal using a straight edge or square.

STEP 12: When you place the second torque plate on top, be careful to not knock around the billet. Re-align the sheets as necessary while tightening the nuts and bolts.
How to make mokume

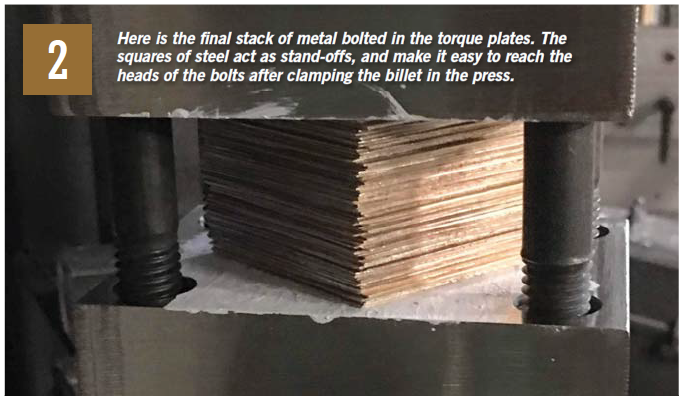
STEP 13: When everything is tight, go to your hydraulic press. Use steel standoffs to get past the nuts and bolts, and press down on the stack. Tighten the nuts with the billet under pressure (see image 2).
How to make mokume

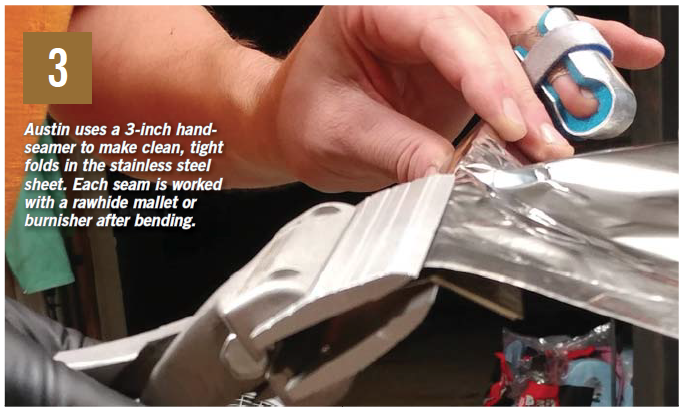
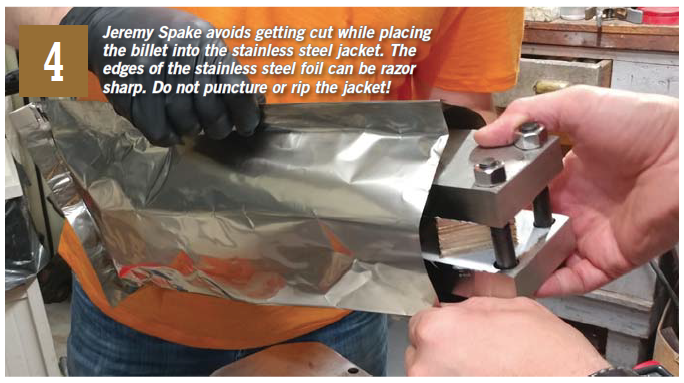
STEP 14: When you create the stainless steel jacket, you want all of the seams to be folded twice. After each fold, either work the seams with a rawhide mallet or burnish them with an appropriate tool (see image 3).
How to make mokume

STEP 15: Activated charcoal is ideal for this process—use two tablespoons—but if you only have charcoal on hand, that’s fine. We used hardwood charcoal and crushed the chunks up a bit. You need only a small amount. The point is to seal the foil well enough where no oxygen can come in to cause combustion and burn up the charcoal. Prior to adding the charcoal to the packet, let it sit in the oven for one hour at 250°F to remove any moisture from the charcoal.
How to make mokume

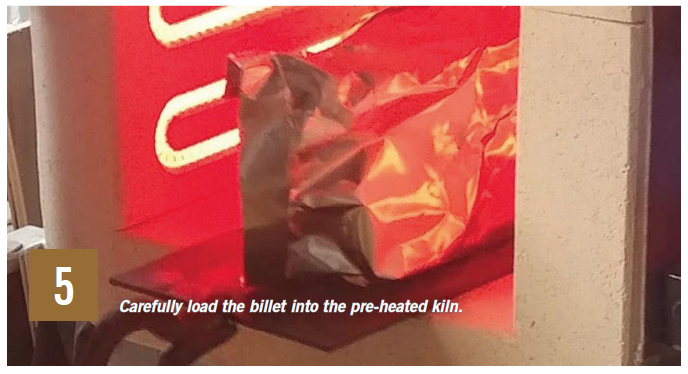
STEP 16: To prevent damage to the bottom of the kiln, we slid our packet in on a thin piece of steel (see image 5).

STEP 17: Kiln time varies depending on how large the billet and torque plates are. You really need everything to be at temperature for only a couple of hours. Larger billets obviously take longer to get to temperature. I recommend doing some research. The billet documented in the article was fired for three hours.

STEP 18: When you have fired the billet long enough, remove it from the kiln, remove it from the foil, and reduce the entire billet by 50 percent thickness at forging temperature. Reduce between 20-to-30 percent with each heat.
How to make mokume

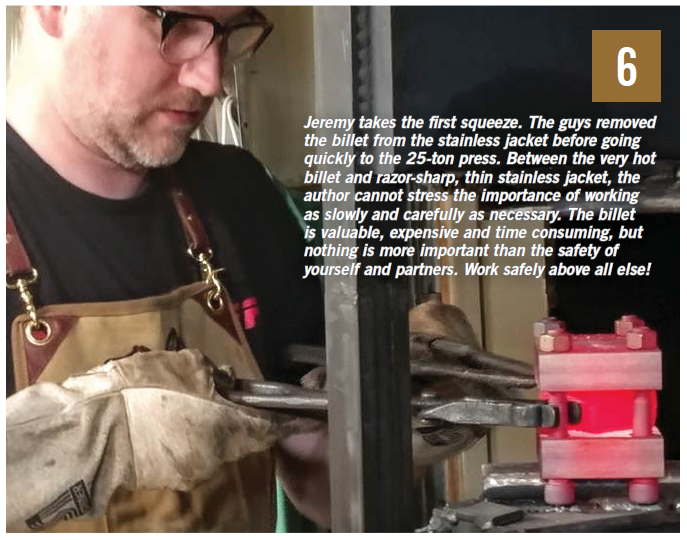
STEP 19: For the first forging process, leave the billet in the torque plates and go straight to the press (see image 6).
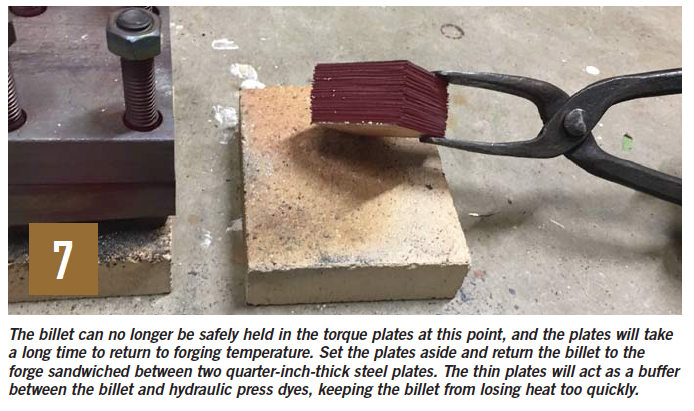
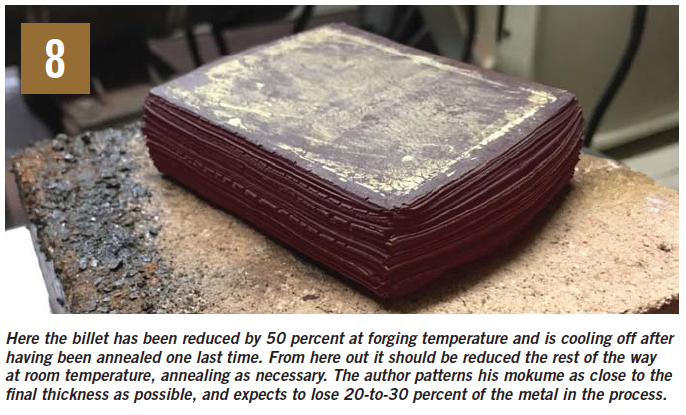
STEP 20: After the first reduction, the billet should slide out of the plates when tilted to the side. You can place the billet between two thinner steel plates—though only if you have a secure way to hold everything—and put them back in the kiln at forging temperature. The plates will help prevent the press dyes from chilling the billet too quickly. Continue until you have reduced by 50 percent from your starting point (see image 7).

STEP 21: Now you can go to cold working. Start out by reducing the billet no more than 10 percent prior to annealing. As you work the billet down, you can start to get closer to 20 percent between annealing cycles. The process for annealing depends on your metal combination. The relevant information should be easy to find with an Internet search.
How to make mokume

STEP 22: When it comes to patterning mokume, the process is very similar to damascus. However, instead of using a milling machine or angle grinder to cut a pattern into the metal, tools such as a flex shaft or files would be more appropriate. After cutting a pattern into the metal, forge the billet flat to bring the low points to the surface. As with damascus you can also forge patterns into mokume, either with a hammer or specific coining dyes. Reveal your pattern by grinding down to the low points. As a rule of thumb, it’s not recommended to pattern deeper than one-third the thickness of the billet.

More than One Way to Do It

Full disclosure: there is more than one way to make mokume. I have made and know others who make mokume using processes that differ from what I am sharing.
11 Tips For Starting a Knife Shop at Home

0

* All images courtesy of the author

There have been tons of stories on how to be a knifemaker. Most are great and deal with subjects like taxes, suppliers, marketing, sales, bookkeeping and safety. Other great articles cover the technical side of how to make the knives you wish to sell, including stories on forging, grinding, heat treating, handles, sheaths and more.

My story will outline some things I have learned over the years as a full-time knifemaker in a home-shop setting that I think will benefit you, your knives and, most importantly, your family.

1) A Toaster Oven

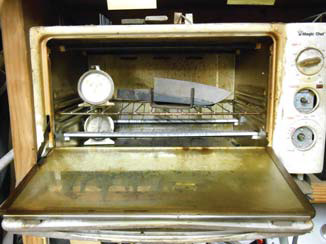
Your kitchen will get messy in a hurry if you don’t take things outside. Buy a cheap toaster oven. Problem solved.

The kitchen is not the place to be tempering knives, warming up knife sheaths for waxing them, heating Kydex® for the molding, or burning out axe heads. A $5 toaster at the flea market will do all that in your shop and is a bargain.

2) Pots & Pans

Get a selection of pots and pans, cutting boards and a small scale from a thrift shop. Don’t be tempted to use a “good pan” for that one, little task.

3) A Shop Sink

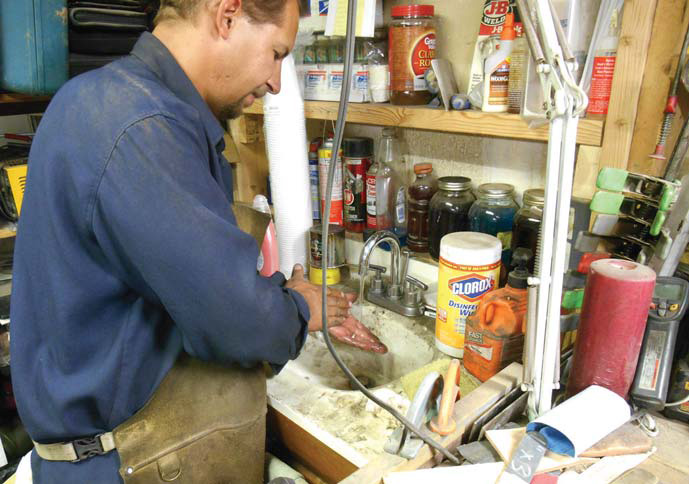
Would you want to eat out of this sink? No. That’s why it’s the dedicated shop sink, not the one inside the kitchen.

Install running water in your shop, or at least have a five-gallon bucket handy. Make sure there’s a countertop, too, in case of spills.

On that note, wipe your feet off before re-entering a home.

4) A Coffee Thermos

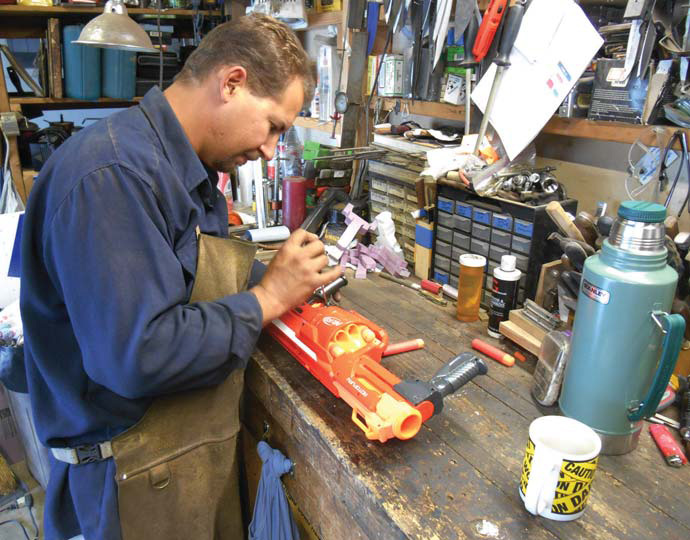
If who like your coffee as much as I do, get a big thermos, fill it in the morning, and take it to the shop with you. This cuts down on the trips away from the shop, as a trip inside the house to grab another cup can turn into an hour away by the time you get the cup, peek in the fridge, check for phone messages, etc.

Plus, every time you re-enter the house, you track shop dirt and oils in with you.

5) Discipline/Knowing When to Stop

Know when to quit for the day. This is one lesson I’m still learning. You get wrapped up in your work and the next thing you know it’s 2 in the morning.
Not only will you spend that night on the couch, but you may spend the next one there too if, as a result, you also forgot the plans you made, dinner, one or more of the kids’ school activities, etc. Besides, it’s tough to make good knives after a rough night on the couch.

6) Do Something Special for Your Family

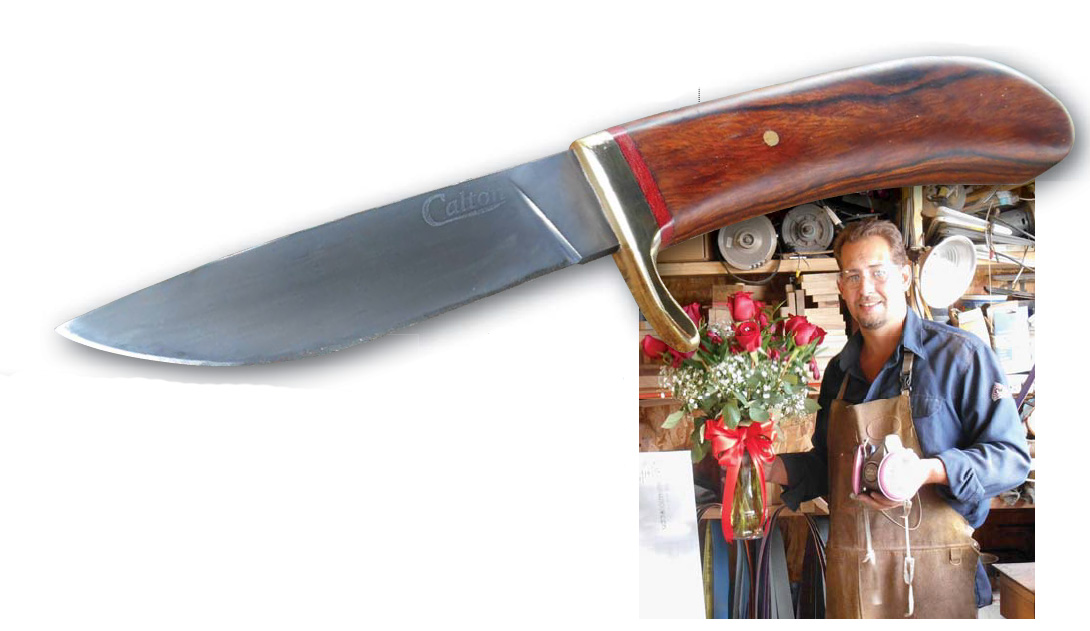
Make knives, buy flowers, repeat.

Use some of your knife money to buy your wife/husband/partner/significant other flowers. Buy them on a regular basis. Put it on the calendar if you must so you will remember. Think of the flowers as supplies, like grinding belts.

This is very important!

7) Mind the Dust

Know that what happens in your shop does not stay in your shop, and act accordingly. Dust from exotic woods will make it into your home. You may not be allergic to the dust but your wife, kids or family pets may be.

Keep an eye peeled for anything out of the ordinary when introducing new woods or materials into your shop. This also goes for smoke from quenching. Use “green” quenchants when you can, including vegetable-based oils and water. And keep the door to the rest of the house closed until you clear the air.
8) Consider Where Your Shop is Located

If you’re considering moving your shop away from your house, think long and hard about it.

Yes, a home-based shop offers some challenges. However, it offers quite a few benefits, too. Namely, the morning commute is a thing of the past, and people know how to find you.

Move the shop away, as some friends of mine have, and you may end up moving it right back anyway.

9) Make the Most of Breaks

Maximize the time between your work by throwing in a load of laundry, starting supper, taking care of a household task, paying bills, etc. This helps your family’s day-to-day quality of life.

10) Test Your Knives in the Kitchen

If you make them, there is no better test of the kitchen knives you create than to use them in making dinner. This is a twofer in that not only do you get the immediate feedback from hands-on testing, but also the household benefit of preparing meals.

11) Double Up Your Shop

With your shop set up, you have all sorts of tools on hand you can use for other projects. From fixing your kid’s bicycle to tuning up a lawn mower, you’ll find taking care of these everyday things can reset your focus for knifemaking later.

Knife Design 101: What are Line and Flow?

0

“A Hint of a Curve Looks Better than a Curve”

Of the assorted American Bladesmith Society-sanctioned knifemaking classes I’ve attended, many pertained to the construction of a well-made knife. In one class, the subject of line and flow was a topic.

An ABS founder and a BLADE Magazine Cutlery Hall-Of-Fame® member, B.R. Hughes said, “A curve looks better than a straight line”—pausing for effect—“and a hint of a curve looks better than a curve.”

The human form and other objects in nature often have been used to illustrate proper execution of line and flow. Some of the simplest of things common in everyday life are there for our benefit if we would notice.

Taking Cues from Nature

Line and flow knifemaking tips
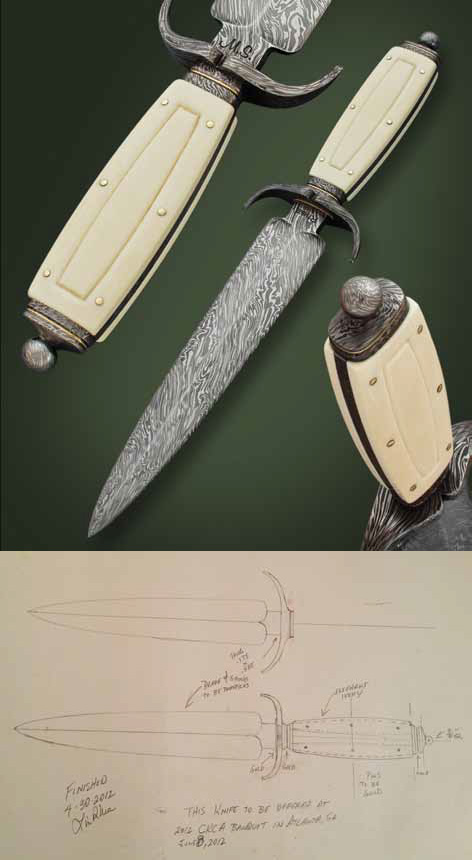
When flow is hard to achieve on a knife, Jerry Lairson puts the design on paper to figure out what does not look right. Once he has the general shape he wants, he starts changing things until the knife starts to flow. Lin Rhea also worked on his art dagger in drawn form (above) before arriving at the finished knife (top). (Chuck Ward knife photo)

An unfurling fern, drifting snow, a vine climbing to the sun—these things look alive and give the impression of fluidity even though they are at rest. Consider a falcon’s dynamic grace. Simply when perched it looks designed for motion. These are things the great masters studied and emulated, often applying mathematical formulae, yet concealing any and every hint of math within the object’s overt beauty.

We are all “wired” to be attracted to certain combinations of lines that flow into the whole dynamic appearance of an object, whether a person, a falcon or a knife.

Knifemaking long has been elevated to an art form. It’s a natural medium to express artistry in a functional tool. Knifemakers are the formulators, mechanics and artists who create from raw materials something static that also has dynamic character. It looks like it wants to be moving even though it’s not. Remember the falcon?

The object of this brief dissertation is to help makers wanting to improve their work find a perspective. I say “a perspective” knowing it would be uniquely each maker’s since each maker is different and can’t see things exactly the same. Michelangelo’s perspective was not Leonardo da Vinci’s and vice versa, but each developed an eye for his own work.

Also, it may not be possible to explain to another exactly how to have an eye for line and flow. My attempt is simply to rationalize that it is possible to cultivate its development.

Developing an Eye for Line and Flow

If this development is possible, then each maker should ask, “How can I cultivate it in my own work?” Considering the question requires a level of honesty that some are just not willing to attach to something they mistake for “a knife.”

Indeed, the question pertains to the process rather than the product. It is a way of thinking about the craft and not simply “a knife.” That mistaken thinking will never allow a person to elevate knifemaking to an art form, and it can’t help but to manifest itself in a maker’s work. Fortunately, there are many examples of makers who have enhanced their natural talent by honest self-improvement.

What do some of the world’s best makers do to cultivate their eye for line and flow? Where do they look for inspiration? What influences have shaped their perspective?

How the Master Smiths See Line and Flow

ABS master smith Lairson
Jerry Lairson indicated embellishments such as carving should enhance the line and flow of a knife rather than compete with it. (Buddy Thomason knife photo)

“Many of my best knife designs were inspired by nature,” such as a lily, a bird’s wing and vines, stated ABS master smith Jerry Lairson. “I think it’s good to follow a theme throughout the knife. An example is the fluting on French flintlock pistols combined with the other parts of the gun to create flow. If you see something you like, even if it doesn’t pertain to knives, try to use it as a theme to design a knife. If a knife is decorated with engraving, carving or filework, it should enhance the flow and line of the knife rather than
compete with it.

“Sometimes I see things in museums that have nothing to do with knives but have graceful lines that can help design a knife that flows. How a knife design starts and stops at the point and butt has a lot to do with flow. Sometimes flow is hard to achieve even when you have a good design in your head.

“When this happens to me,” Jerry continued, “I put it on paper and if it doesn’t flow, I start trying to figure what doesn’t look right. I always design a knife on paper. Once I have the general shape I want, I start changing things one at a time until it starts to flow. Sometimes one small line that isn’t right will throw the whole thing off. Sometimes simpler is better.”

Rodrigo Sfreddo knifemaker
Rodrigo Sfreddo’s eye for line, flow, and overall design and innovation shines in his “Dark Tulip.” (photo courtesy of Lin Rhea)

ABS master smith Rodrigo Sfreddo pointed out that good line and flow is the “obligatory minimum” for any custom knife.

“What makes a knife more desirable than another? Good design,” he began. “Nobody spends hundreds or thousands of dollars on a knife just because they need a good knife for camping or cooking; they’re buying for collecting because [the knives] are beautiful, so good design and aesthetics are of the utmost importance.

“I always say to my students to think about the beauty when planning a knife, not what is easy or what not to make. It’s very easy to make the same blades, guards and handles we’ve already made and seen. The result is just a combination of designs we’ve already used before—one blade just like the one we made some time ago, combined with another guard we made in another project, with another handle, and even the filework, just new combinations of our same old ideas!

“That’s why it’s so important to pay attention to anything that’s beautiful and has great design,” Rodrigo maintained, “like cars, antiques, furniture, architecture and so on. We must refine our taste on everything so it will reflect on our work. It’s unbelievable how we can figure a knifemaker’s characteristics from his work, especially if he’s ‘thinking’ about his work or just following the crowd.”

Jason Knight custom knives
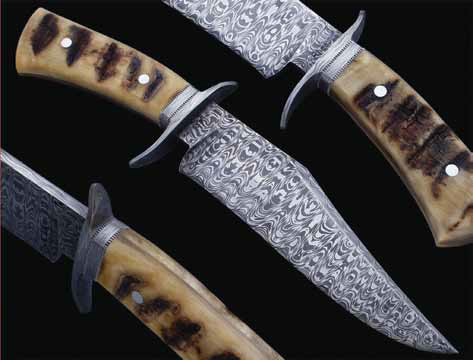
Jason Knight is a proponent of curves, and long and subtle arcs, in his knife designs. This recurve bowie in damascus and stag—winner of the award for Best Bowie in the 2012 BLADE Show custom knife judging competition—is an excellent example. (SharpByCoop.com photo)

ABS master smith Jason Knight’s knives are known for their superlative lines and great flowing execution. He spoke of the ancient ways of looking at and designing things, saying they work and that he won’t try to change them. He described his method as a “way of seeing” involving his eyes and his heart. He pointed out that makers have choices in materials that offer color and texture.

“Materials can limit or enhance design. Some designs might look cool but don’t work well. Usually,” he qualified, “if it looks good, it works well.”

He recommended taking inspiration from other art forms, such as sculpture and woodworking, adding that he likes curves and both long and subtle arcs.

Open Your Eyes

Trying to express the causes and effects of something whose nature is so intangible requires some degree of interpretation, and I’m not sure I am the one to carry this task to completion. However, most makers are in the same boat. Who would have thought so much would be involved in the making of a knife?

Do I understand it all? Not by a long shot. Am I overthinking the matter? Maybe. But it could be that considering these points will help my perspective become a little clearer. Besides, considering that the above three makers give serious attention to advancing line and flow in their work, I feel I’m in good company.

How Much Money Do You Need to Start Making Knives?

0

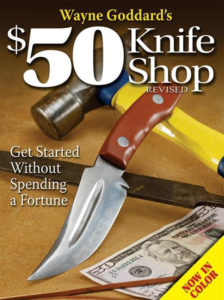
Editor’s note: This article was originally published in 2005, so be sure to adjust for inflation. That said, Wayne Goddard’s $50 Knife Shop book is the next step if you’re looking to get started on a minimal budget.

The short answer: A few thousand dollars if you want to get serious about knifemaking, and considerably less than that for hobby projects.

At most forging demonstrations I do, I try to use only minimal tools because I want people to see what can be accomplished with just a few basic implements—a hammer, a few tongs, a good anvil and a forge. Most folks are not set up with every type of tool that can be used in bladesmithing. As you have seen, with just a few basic tools you can make much more than just a basic knife or hawk.

Using only basic tools does require a bit more sweat. This may be fine if you are a part-time blacksmith or bladesmith, but may not be the most efficient avenue for someone trying to make a living at it. If the latter is the case, you can quickly run into thousands of dollars setting up your shop.

tips for how to make a knife
Next step: Learn how to get started making knives with just 50 bucks in tools in “Wayne Goddard’s $50 Knife Shop.”

For starters, if you do not already have a place to set up your forge, then the biggest expense will be for shop space. Obviously, the space cannot be an old woodshed. Keep in mind that you are working with hot metal and fire, and that you need to set up the forge where the metal sparks will not fly where they could cause trouble.

The room also will need good ventilation, no matter if your forge uses gas or coal.

If you already have such a place to use as your forge room, then you can start setting things up. Your next biggest expense will be the forge itself, either gas or coal. I recommend a gas forge because it is cleaner and you have more control of the heat. Such a forge could run about $600.

You need a good anvil; my preference would be at least a 125-150 pounder. You will need a sturdy worktable with a quality, heavy-duty vise, a bench grinder, and a few well-chosen tongs and hammers. This will be all you need to do most of your bladesmithing.

However, whoever told you that you can spend thousands of dollars setting up a shop with all the tools was not pulling your leg. Power hammers, various dies, a drill press and other tools of the trade will make your work easier. Specialized knifemaker’s grinders from Burr King, Bader or Square Wheel will cost you but will be worth the investment.

You could write a whole book on tools that would make your life easier and your pocket emptier. Visit a well-established blacksmith shop and you will be surprised how much tooling will be there. Of course, you do not have to purchase everything at once, but over the years as time and funds allow, you probably will.

My opinion is that you do not have to spend thousands of dollars to set up a shop where you can create a great variety of beauty and function. However, if bladesmithing is your chosen trade, to not invest in the equipment that will save you time and sweat is not a smart option.

Like they say, you need to spend money to make money.

Tips For Making A Hidden-Tang Knife

0

There are a few things to be careful of when making a knife of hidden-tang construction.

The Blade and Tang Both Need to be Straight

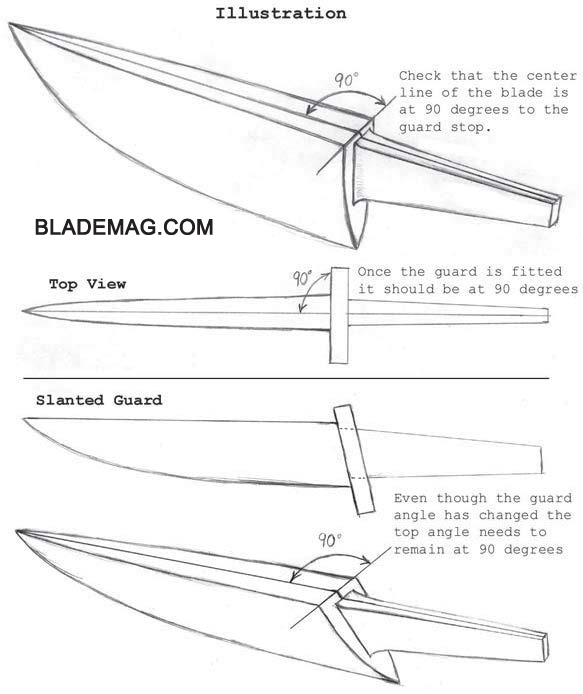
First, make sure that your tang and blade are straight. If the tang is tapered, it must be evenly tapered on both sides. The centerline of the tang must be straight to the centerline of the blade.

If the tang is warped a little to the right or left of the blade, or unevenly tapered, then you are not yet ready to fit either the guard or the handle. Go back to the forge or grinder and make your corrections to get things straight right from the start.

A limited amount of “fudging” can be done while gluing the handle to compensate for a tang that is not 100 percent straight and center. To repeat, in my opinion, it is best to correct things right from the start.

Fitting the Guard

After making sure your tang is not going off to the left or right, go ahead and fit your guard. Take your time! The guard must be at 90 degrees from the center-line of the blade and tang, even if you are making a knife with a slanted guard.

Attaching the Handle

Now you can start fitting your handle. Fit the handle to both the guard and the tang as you normally do. If you do this, the handle will be straight to the blade.

Most often I will not cut the handle material in half when making a hidden-tang knife. I will usually use a solid block of wood or a piece of stag.

First, I drill a couple of starter holes in the end where the tang will be inserted. The thickness of the drill bit will depend on the thickness of the tang. I then file the hole out to fit the tang.

It is more important to fit the handle material to the properly fitted guard than it is to fit it tightly to the tang. This does not mean that the fit should be sloppy, just that it is not necessary to make it that tight. Besides, you need to leave some room in between the tang and handle for the glue to be effective and have a strong bond.

With either of these methods, if the blade and tang are straight and the guard is at 90 degrees to the centerline of the blade and tang, then the handle will have to follow.

Try Knifebuilding:

Knifemaking: How to Do Pearl Inlays

0

Pearl Inlays: Impressive Yet Simple

From the Editor: Wally Hayes is probably best known for his tactical folders and Japanese-style knives and swords, but he also offers something on the embellished side when he can.

The Canadian ABS master smith has penned a number of informative how-to stories for BLADE®, and his seminars on how to wrap a Japanese knife handle at past BLADE Shows have been some of the most popular and best hands-on demos in show history.

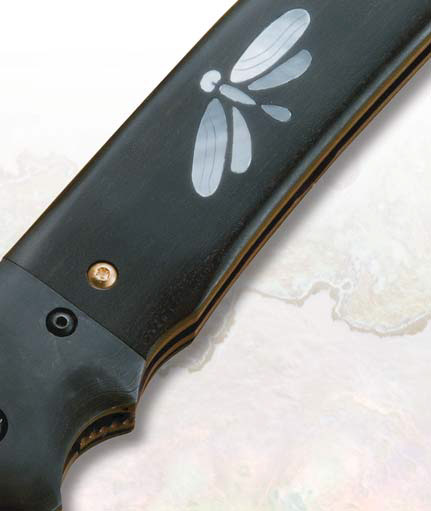
Here, he shows you how to inlay pearl—specifically, in the shape of a butterfly—into a handle. He said it’s easy once you know how.

Pearl Inlays Knifemaking
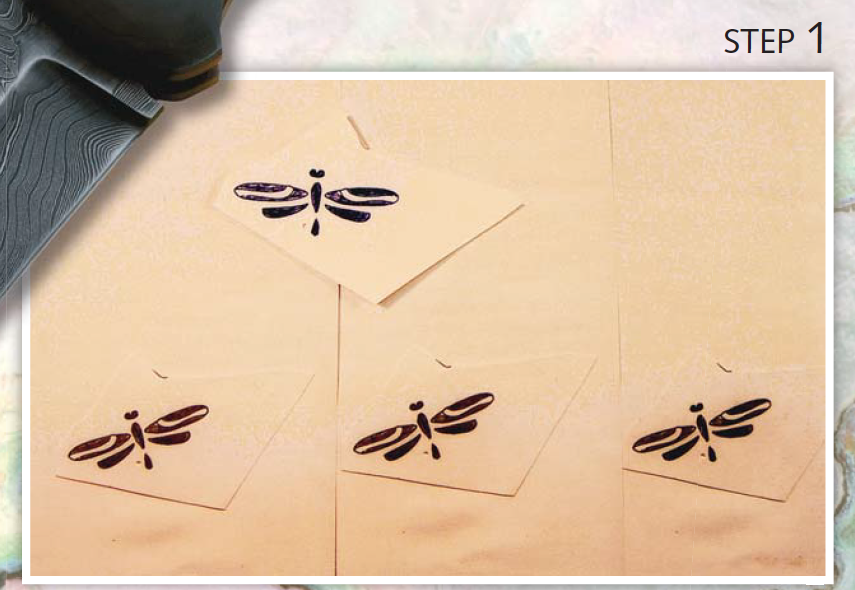
Draw your design and make multiple photocopies. I run the copies off on my printer. (Hayes photo)
Pearl Inlay Knife Technique
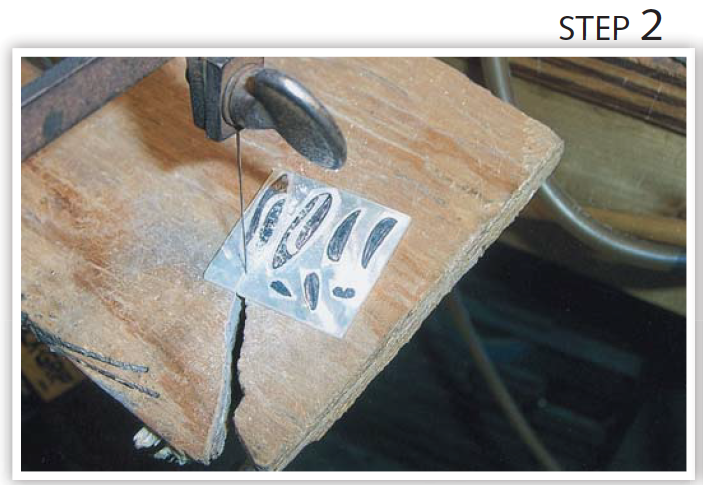
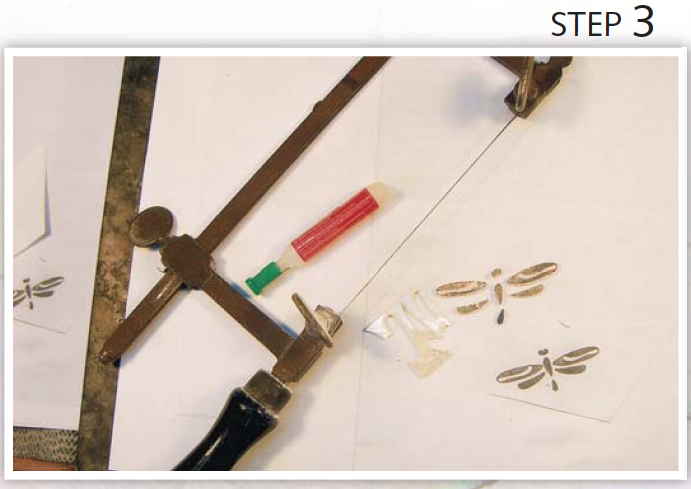
Cut out the butterfly parts with an X-ACTO® knife and Krazy Glue® them to the pearl. After the glue dries, I use a jeweler’s saw and a No. 2 blade to cut the butterfly parts from the pearl. (Hayes photo)
Pearl Knife Handle Inlay
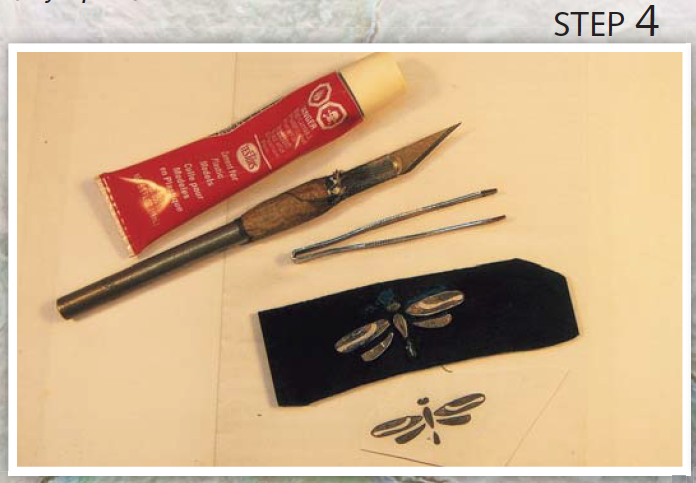
At bottom right is one of the drawn butterfly designs. To the upper left of it are the cutout pearl parts arranged in the shape of a butterfly. (Hayes photo)
Pearl Inlay Tips
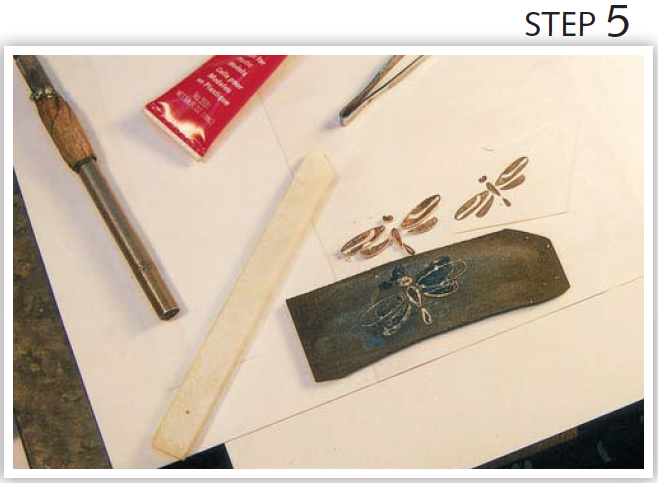
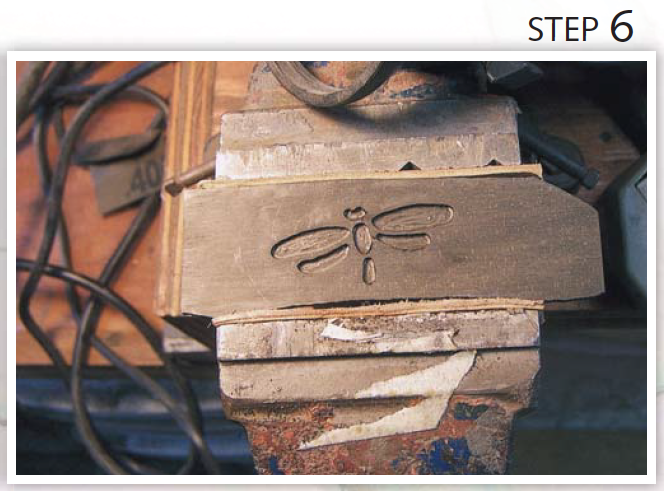
Sand a piece of ebony or African blackwood to 400 grit. Arrange the pearl parts in the shape of a butterfly and glue them to the wood with plastic model cement. Let dry and scribe around the parts with an X-ACTO® blade. (Hayes photo)
Tips for making pearl inlay
Lift the pearl off the wood and rub chalk into the scribed lines. (Hayes photo)
Pearl Inlay Tutorial
Rout out the wood with a 1/16-inch end mill bit. I use a Dremel® Tool with a router attachment. (Hayes photo)
Pearl Inlay Knife Handle Tips
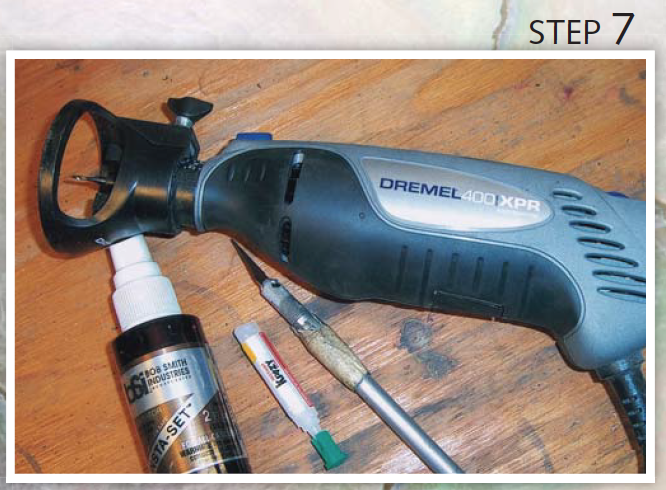
Here are the implements I use, from top: a Dremel® Tool with router attachment, X-ACTO® blade, Krazy Glue® and Insta-Set™ spray. (Hayes photo)
Pearl Inlay Handles How To
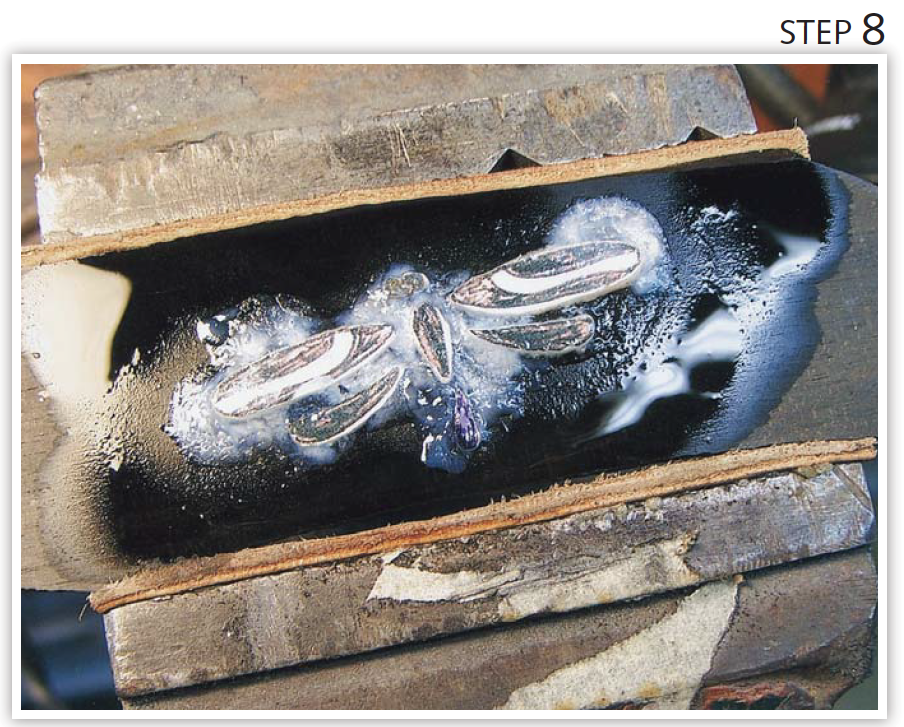
Place the pearl parts into the wood. Squeeze lots of Krazy Glue® onto the pearl, being sure to fill all the gaps. Freeze the glue with the Insta-Set Spray™. (Hayes photo)
Pearl Inlay
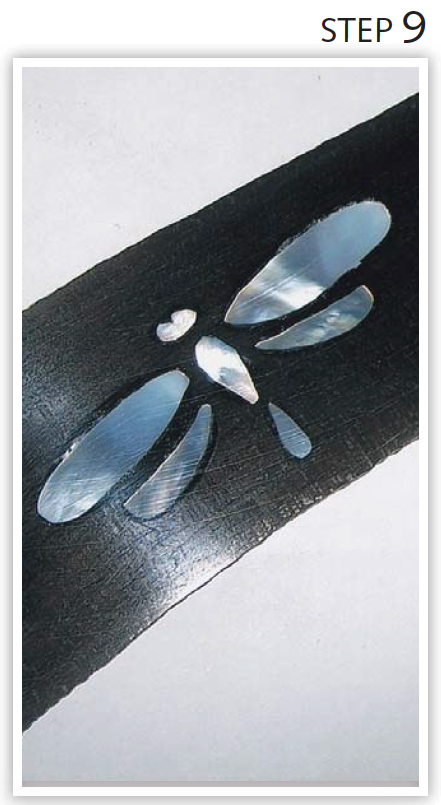
Let the glue harden well. Sand the pearl flush to the wood, working up from 80 grit to 1,000 grit. Buff with white compound. (Hayes photo)
Make Knives with Pearl Inlay
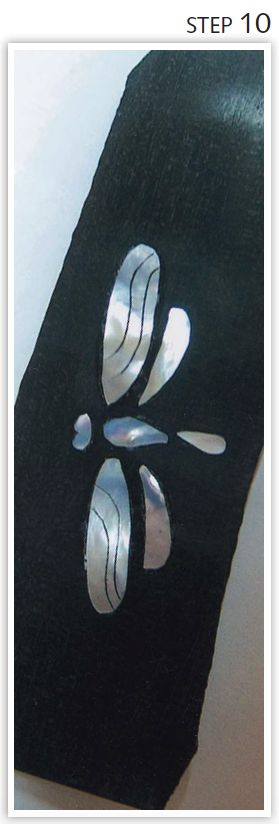
Engrave the pearl with a square graver and rub black India ink into the grooves. Wipe clean and you’re done! (Hayes photo)

If you enjoyed this tutorial, be sure to check out BLADE‘s other knifemaking features.

Get the Supplies

Photos: How to Wrap a Japanese-Style Handle

0
Japanese Style Knife Handle Wrap
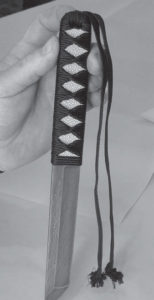
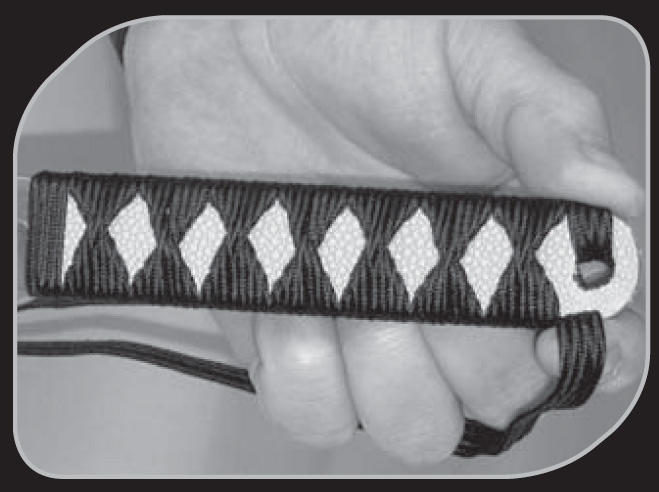
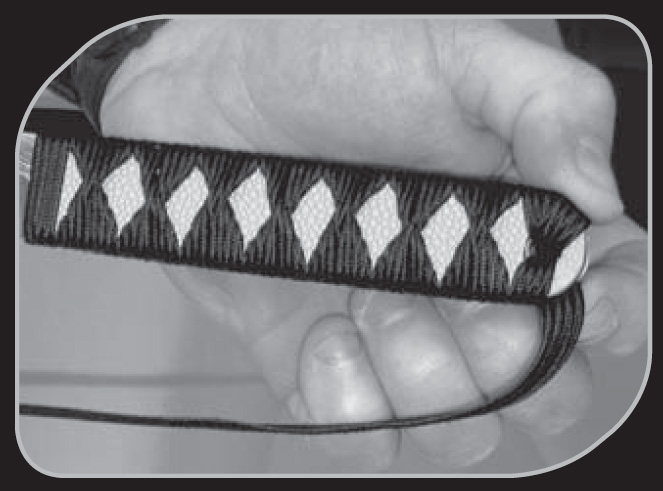
The finished wrap should look like this.

ABS master smith Wally Hayes details each step in this photo series. This demonstration wraps over a ray skin handle.

Japanese Style Handles
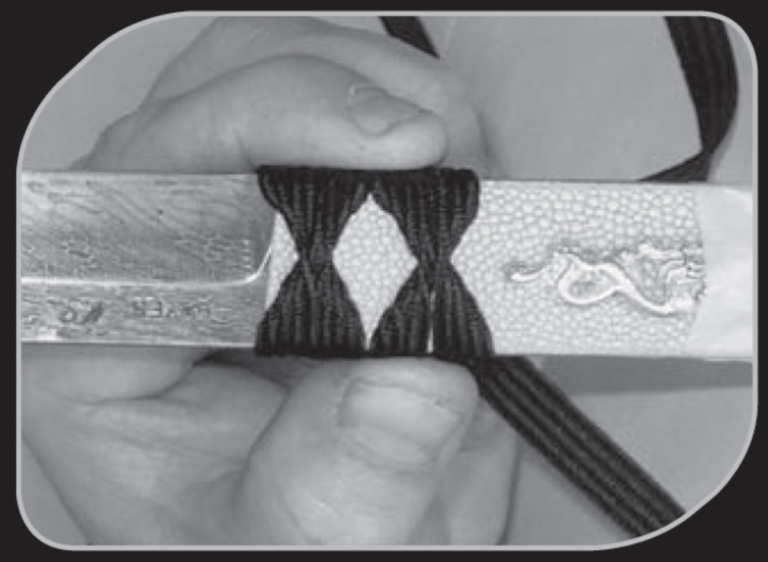
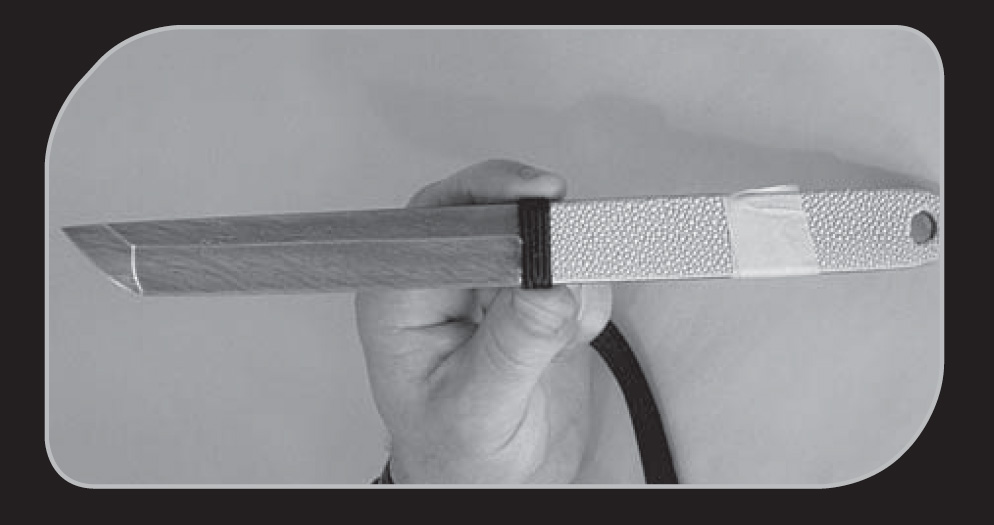
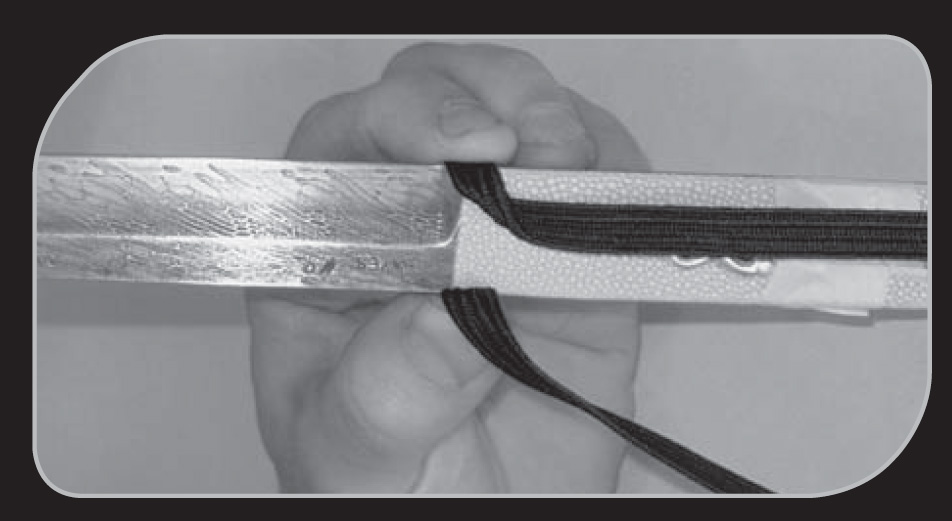
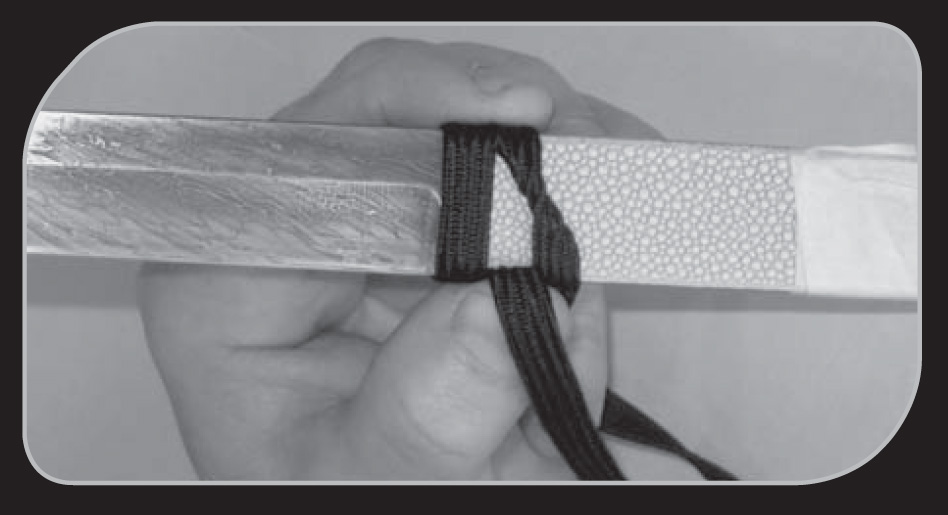
Step 1: Lay the middle of the silk wrap across the handle, overhanging the ray skin a little bit.
Knifemaking photos
Step 2: Start by folding the wrap a half turn down. The trick is to fold the wrap, not twist it.
Wally Hayes knifemaker
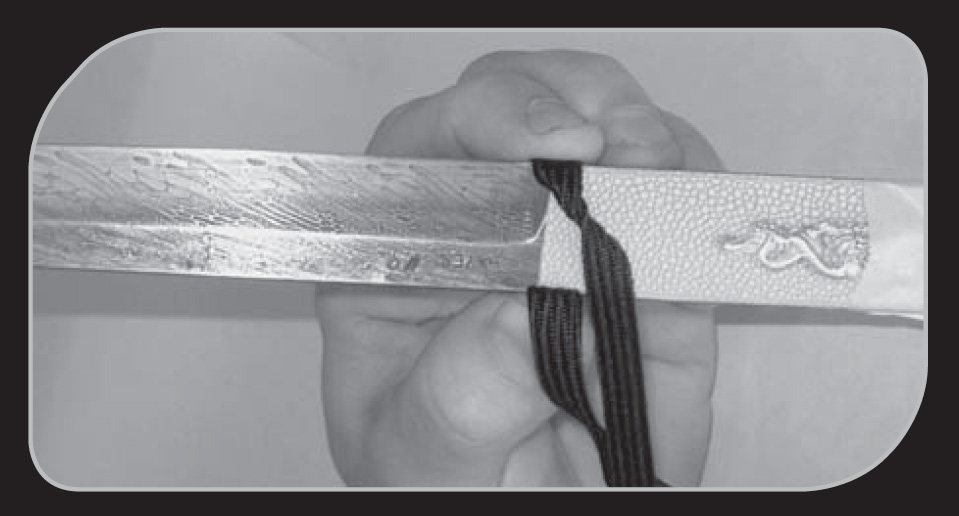
Step 3: Fold the wrap a half turn up.
Japanese knife handles
Step 4: Fold the wrap a half turn down, being sure to always turn the half-turned-down part into the handle side.
How to wrap a knife handle
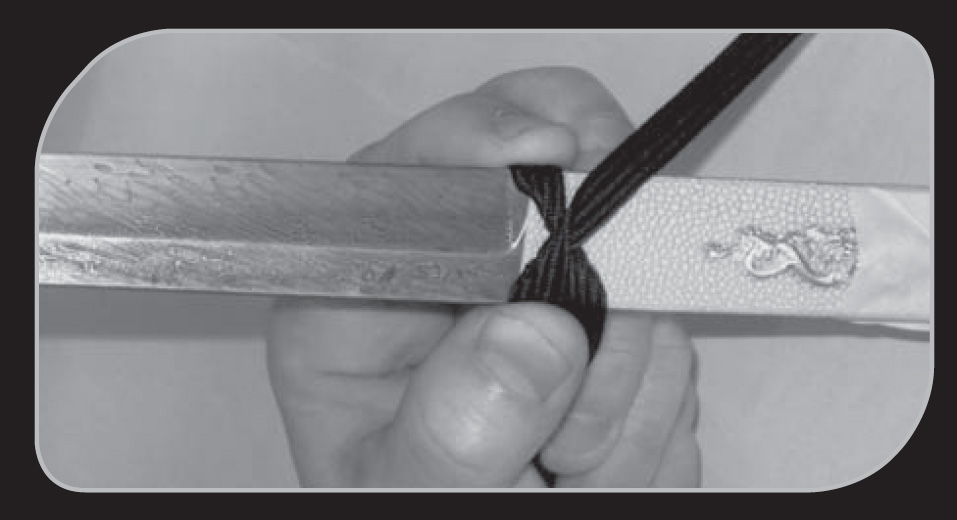
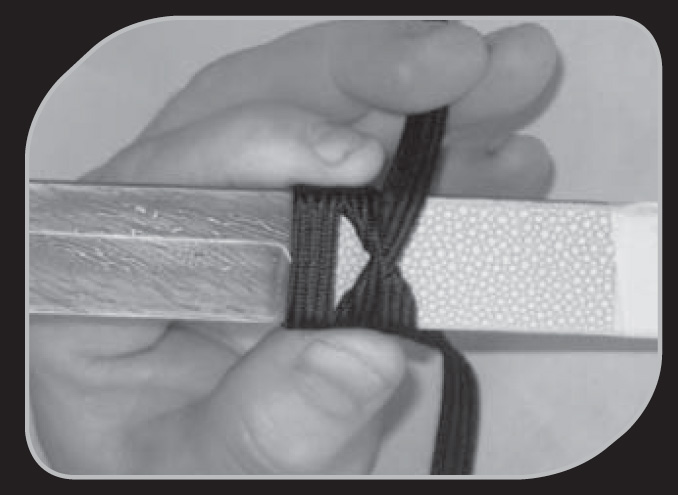
Step 5: Fold the wrap a half turn up and lay it across the handle. Reach around the back of the handle and pull the ends of the wrap tight.
Knife handle wraps
Step 6: Start again on the right-hand side of the handle. Fold the wrap a half turn down.
Ray skin knife handles
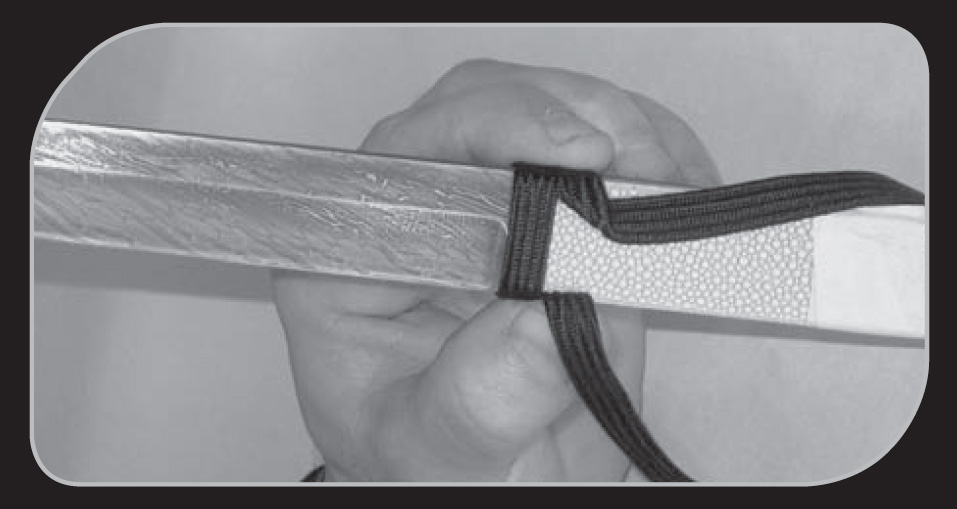
Step 7: Fold the wrap a half turn up.
Wrap a knife handle with cord
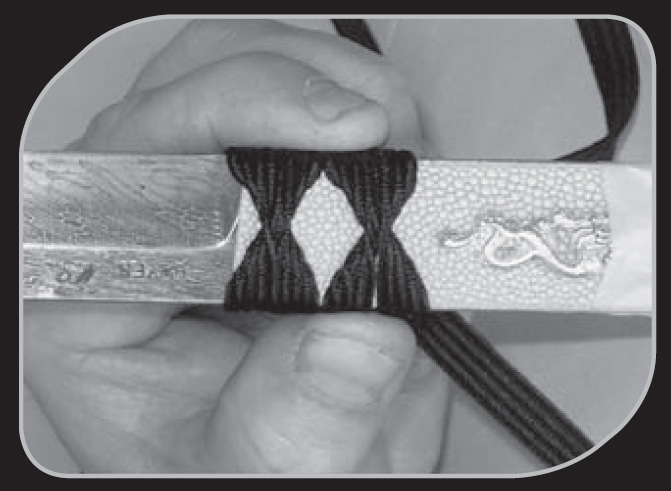
Step 8: Fold the wrap a half turn down and then a half turn up, lay it over the right side and grip it. Adjust your grip, pull the ends of the wrap tight and re-grip. The wraps will lock into each other. Keep the folds and crossover section in the middle of the handle. Pull both ends tight.
Knife handle wrapping tips
Step 9: Continue wrapping down the handle. The first wrap on each side is left over right. As you continue down the handle, alternate left over right, then right over left.
Japanese Style Knife Handle Wrap Example
Step 10: Once you get to the handle butt, feed the wrap through the lanyard hole.
Step by step knifemaking tips
Step 11: Feed the wrap through the lanyard hole until you cover the entire butt.
Gluing knife handle wrap
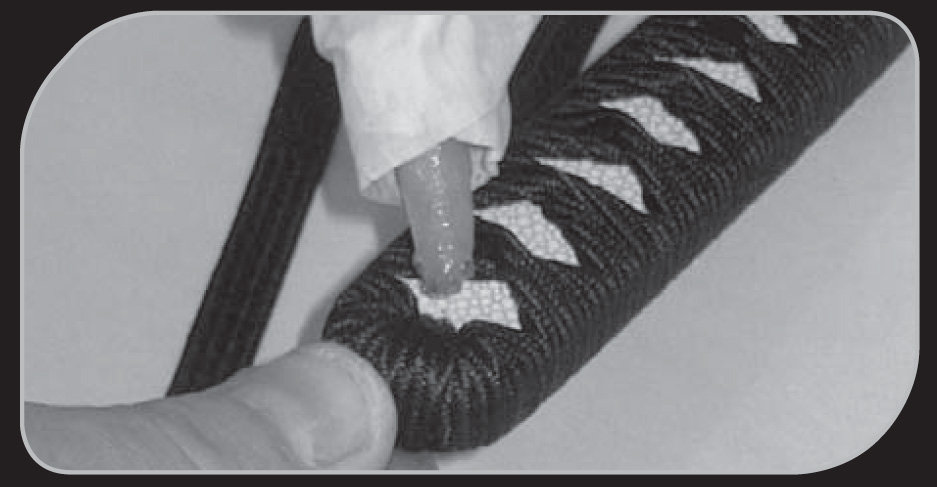
Step 12: Hold both ends of the wrap and apply a drop of Crazy Glue® to freeze the wrap in place.
Wrapping a knife handle
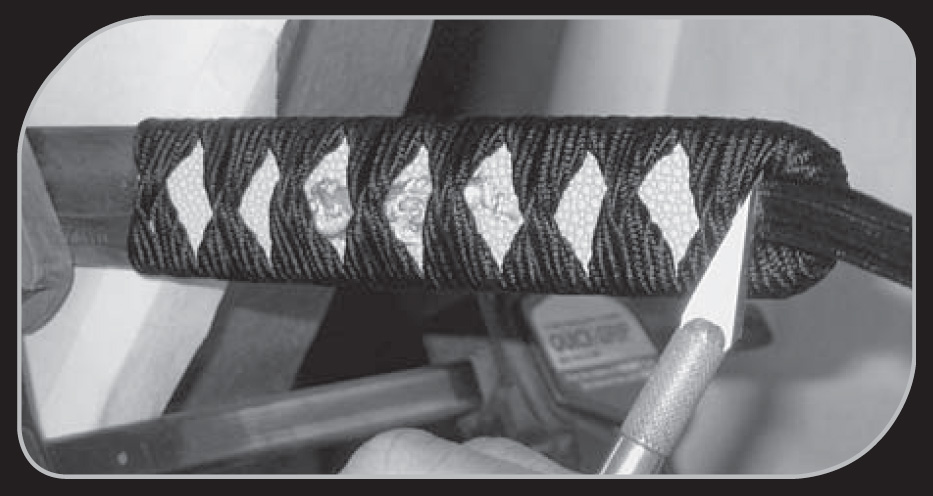
Step 13: Turn the knife over and clamp the blade to a table. Cut off the ends of the wrap with an exacto blade.
Gluing a knife handle
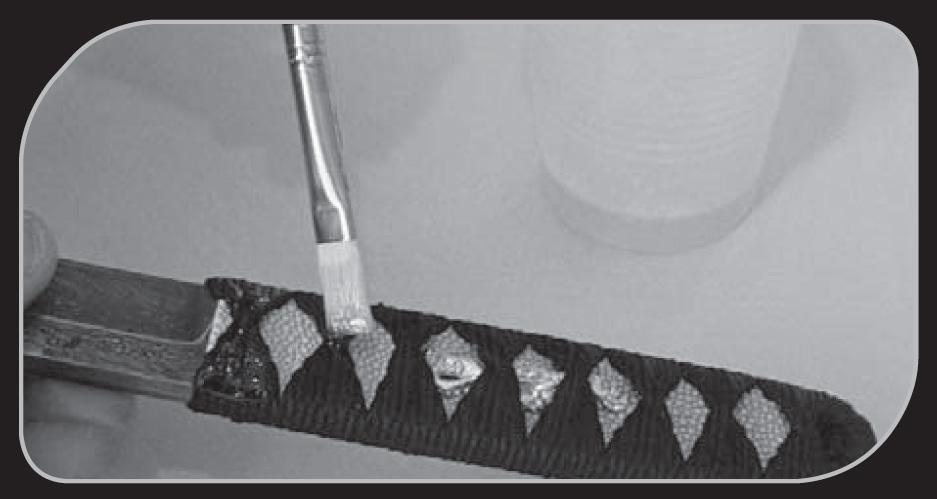
Step 14: Being careful not to get it on the ray skin, apply epoxy to the wrap with a small paintbrush.


Advertisement

Must Read Articles

Read this before you make a knife

Knifemaking 101 – Read This Before You Make a Knife

  by Wayne Goddard My experience has taught me that there's nothing like digging in and getting started. I've often said the hardest part of the...
how to forge damascus steel

How to Forge Damascus

Advertisement
Advertisement