
Knifemaking

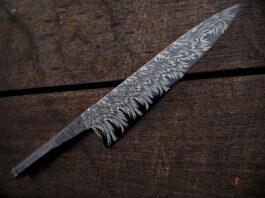
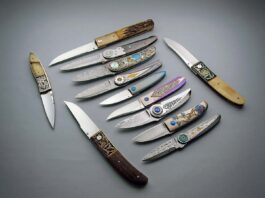
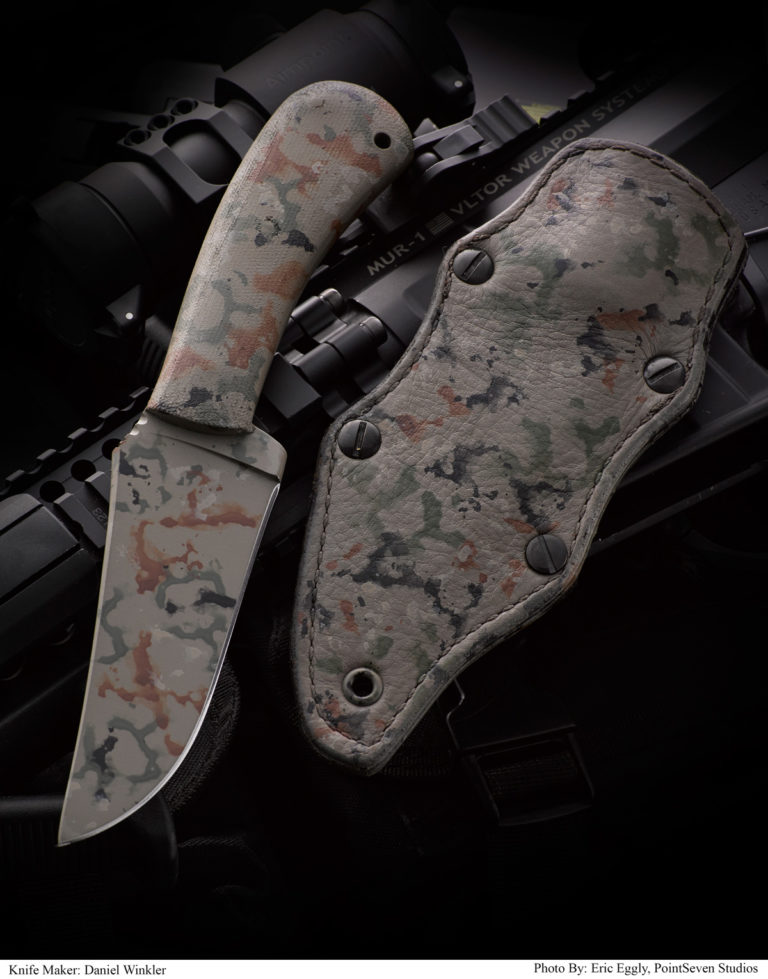
Knifemaking is the building of a knife, which includes the blade, handle and other accouterments. Blades are made by either removing metal from a steel blank via a grinder – known as stock removal – and the forging to shape of hot steel into a blade in the process known as bladesmithing. Other parts, including bolsters, guards, pommels, etc., are needed to complete the finished knife.

Featured Knives – – Knife Collecting – – Tactical Knives – – Survival Knives

Want to Make Knives Full Time? Read This First

0

What is a Full-Time Knifemaker?

There are different definitions of a full-time maker. My definition is that of a maker whose sole source of income comes from the making and selling of his/her knives. This is no easy task.

In fact, by my estimate, less than 2 percent of the makers worldwide fit into this category. The reason the number is so low is it is very difficult to depend on knifemaking as your sole source of income.

I asked five full-timers what it takes to make a living making knives: David Broadwell and ABS master smiths Jerry Fisk, Daniel Winkler, Don Hanson and Shawn McIntyre. All agree the following are keys to becoming a full-time maker.

#1 – Treat Your Knifemaking Business Like a Business

Fisk’s advice is to take college courses on business management, accounting and marketing prior to going full time. McIntyre agrees. He recommends putting as much effort into learning to run a small business as you do into making knives.

I recommend adding a certified public accountant (CPA) to your knifemaking team. In addition to handling your books, a CPA can recommend which type of business entity you should form. Perhaps the CPA’s best skill: tax planning.

#2 – Invest in Equipment

What kind of equipment? As Winkler noted, he and his partner, Karen Shook, “invest money in new equipment that will make our work better and more efficient.”

#3 – Find Your Niche

This is where your marketing plan comes into play. The objective is to optimize how you introduce your knives to potential buyers. At a minimum, your plan should address how you will make the most of attending knife shows, advertising in print and on the internet, and the potential of working with a dealer and/or purveyor.

#4 – Communication Matters
How to Be a Full-Time Knifemaker
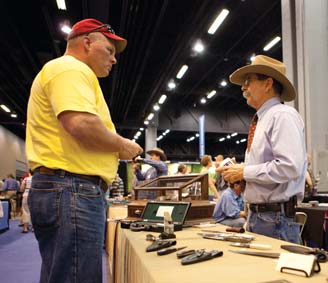
You must build time for interaction with your clients into your schedule. A basic rule of thumb: No customers, no business. The late John White (right) talks knives with a client during a past BLADE Show. (Point Seven photo)

For Hanson, it is one of the most important aspects of being a full-time maker.

“I answer phone calls and e-mails very quickly, and deliver on time or contact clients and let them know why there is a delay,” he stressed. “I listen to my clients.”

#5 – Create a Competitive Advantage

What separates you from your competitors? Winkler said adding Shook and her period style of sheathmaking to his operation years ago gave him a competitive advantage at the time.

“She brought a lot of business skills and makes sheaths that really put our work in a whole new league,” he observed.

More times than not your competitive advantage will come from being the first to adopt a new steel, handle material, design element, etc. You should incorporate such use of new materials or techniques into your business plan.

#6 – Delegate

No matter what their level of expertise, most makers realize they cannot do it all by themselves, though some try. Successful businessmen understand that utilizing the expertise of others frees them up to do the things they do best.

#7 – Use Professional Photography

One thing the makers interviewed all agreed on was employing a professional to photograph their knives.

#8 – Love What You Do (But Stay Grounded)

Enthusiasm and loving what you do are important factors in becoming a successful full-time knifemaker. However, understanding and implementing basic business concepts are equally important to building and maintaining a long-term, successful enterprise.

Final Words of Wisdom

Winkler may have summed it up best.

“I suspect very few makers are at [the full-time] level, as it’s the most difficult to survive in. It does not make your work more sought after. It does not put you in any kind of ‘exclusive club.’ But,” he observed, “if a maker can handle the pressure, it can be very rewarding mentally and somewhat rewarding financially.”

5 Things You Didn’t Know About MicartaⓇ

Editor’s note: “Micarta” has become the Kleenex of knife handles. It’s used so generically that it’s easy to lose sight of the fact that the word refers to something specific.

That’s why BLADE is bringing you this quick rundown of Micarta® from Kevin Brainard, a business development manager and 45-year veteran of Norplex, the company that owns Micarta® (the real deal). You may have caught the company at BLADE Show, where it runs the UltreX booth.

The goal of this piece is for knifemakers and knife collectors to become more aware of what is and isn’t actually Micarta®. 

Hint: If it didn’t come from Norplex, it’s not genuine Micarta®!


by Kevin Brainard

1 – Micarta® is a Registered Trademark of Norplex/Micarta

We own several registrations for our Micarta® mark around the world, including U.S. Trademark Registration Nos. 0096374 (issued in 1914), 0320374 (issued in 1934), and 0324365 (issued in 1935), covering our high-quality industrial laminates.

Global Thermoset Composite SolutionsThese laminates have been offered by Norplex-Micarta and our predecessors since at least as early as 1912. As a result of the significant sales, promotion, and widespread use of Micarta® brand laminates, our mark is widely recognized around the world as a designation of the source of our products, which are used in a variety of applications ranging from electrical insulation to gun and knife handles.

In addition to our common law rights in the Micarta® mark, our incontestable federal trademark registrations constitute conclusive evidence of the validity of the mark, the registration thereof, and of our ownership and exclusive right to use Micarta® in connection with these products.

2 – Micarta® is Made in the USA

Available in several different colors, combinations, and surface treatments, UltreX™
paper and cotton phenolic materials use the original production methods of Westinghouse,
updated with today’s process and environmental controls.

And unlike some of the other “micarta” available in the market, UltreX™ Micarta® is produced in the USA in Postville, Iowa.

3 – G-10 is Not Micarta®

Consider the Spyderco Persistence—a small knife that cuts like a bigger one.
The Spyderco Persistence sports G-10 handles.

Micarta® is made with a cloth or paper substrate and coated with phenolic or melamine resin. G-10 is woven fiberglass and coated with epoxy resin.

The processes to make both materials are very similar in the fact that both are consolidated under heat and pressure to make the final laminate. There is a chemical reaction that is called polymerization that bonds the layers together into a high-pressure thermoset laminate.

According to the trademarks, G-10 is not Micarta®.

4 – “Micarta” Refers to a Specific Product

Like so many other trade names, Micarta® name is used like Kleenex is for facial tissue. Instead of calling it a “thermoset laminate” it is easier to call it Micarta®. This is true in the knife scales, handles and gun grip markets. We have similar issues with the Micarta® name in our other markets.

5 – Micarta® Goes Back to 1912

It was originally designed to be used as electrical insulation back in 1912 by George Westinghouse using a phenolic resin developed by Leo Baekeland called Bakelite.

Where To Learn More

Visit the official UltreX website.

Knifemaking 101: The 12-Step Vine Filework Method

0

Step-By-Step Instructions In Photos

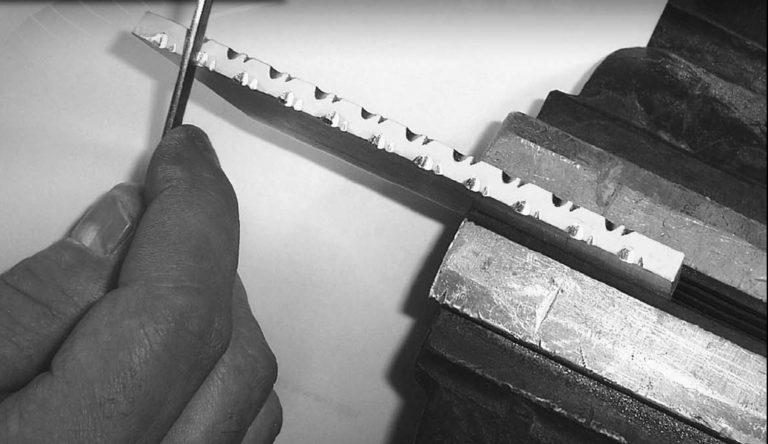
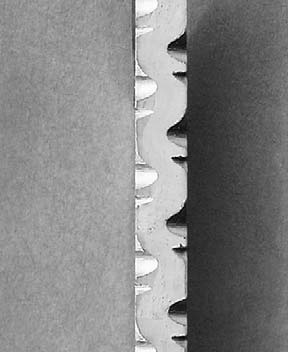
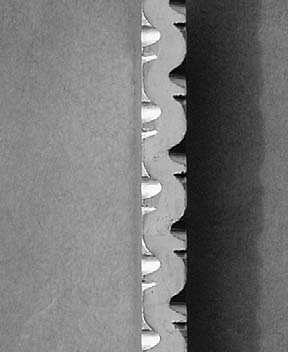
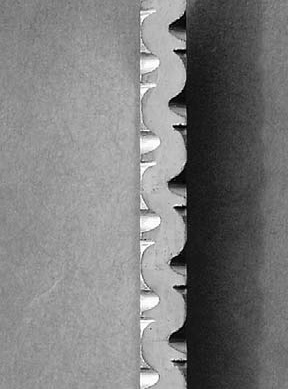
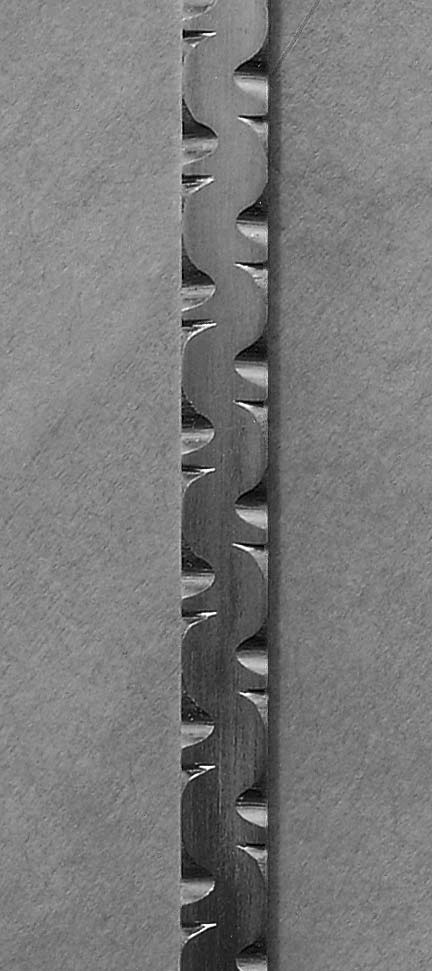
Vine filework is my favorite style of filework. If you break it down into baby steps, it is quite easy to do.

The materials you will need are a Sharpie® marker, a vise, and a 5/32-inch round file and a small triangle file. You can use a bigger round file on thick blade material or a smaller round file when engraving liners or thin blades.

The triangle file is ground safe (sanded) on two sides to produce one corner that is sharper than the other two corners. This provides a left and right safe side for opening up your vine file cuts, and for giving them sharp points as well.

STEP 1

Bladesmithing filework

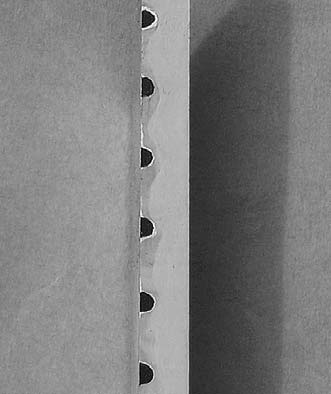
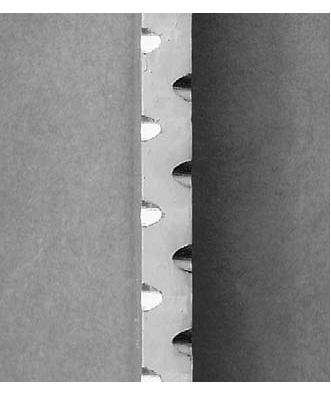
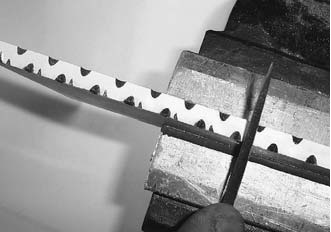
Using your Sharpie® marker, lay out half-round marks approximately 5/16 inch apart down one side of the blade spine. (Though not shown here, be sure to secure the blade in a vise.) (Hayes photo)


Step 2

Wally Hayes master smith

File the marked side with the round file at a 45-degree angle. File into the spine, stopping just short of the middle of the blade. (Hayes photo)


Step 3

Fileworking techniques

Using the marker, put marks down the other side of the blade spine in-between the notches. (Hayes photo)


Step 4

File knife spine

File in another row of half-round notches on the “new” side. Remember to keep the file at approximately a 45-degree angle and stop filing just short of the center of the blade. (Hayes photo)


Step 5

Bladesmithing filework

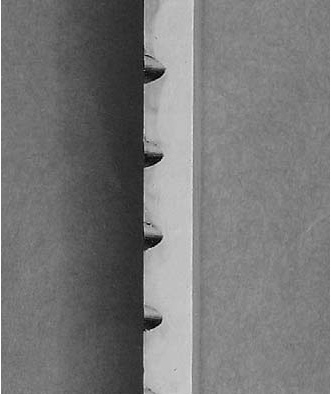
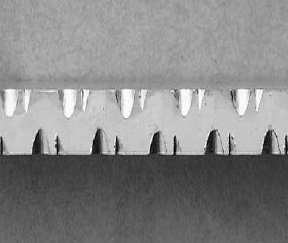
Next, take your triangle file and place it beside one of the notches. I leave about a sixteenth of an inch between the half-round notch and the triangle I am going to cut.

Before you cut, make sure you have a safe (sanded) side of your file closest to the notch you are cutting beside. Tilt the file so the cut closest to the notch is perpendicular (90 degrees to the blade). This gives you a straight line into your cut and an angle coming back out of the cut.

In other words, you want this “V” notch to be straight on one side and angled on the other. (Hayes photo)


Step 6

Filing techniques for knifemaking

Turn the blade around in the vise and cut “V” notches in front of the other half-round notches. (Hayes photo)


Step 7

Filework on knives

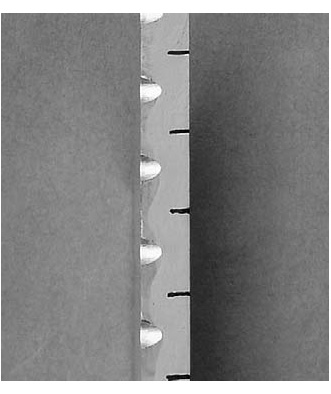
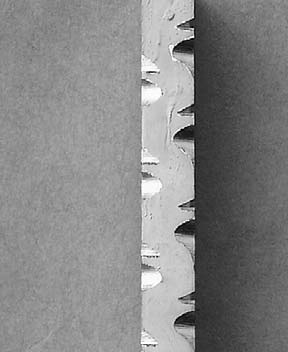
Take the triangle file and file the corner of each half-round notch, producing a gentle curve opening up one side of the half-round notch. (Hayes photo)


Step 8

Techniques for fileworking knives

Open up the other sides of the half-round notches. In both cases, they are in front of the “V” notches. This is how I remember so I do not get mixed up. (Hayes photo)


Step 9

How to filework a knife

Now let’s move on to the “V” notches. Open up one side of the blade spine first. File the “V” notch to produce an even arc to the edge of the blade spine. If you do not twist the file in your hand as you file, you will get a flat spot. GO SLOW AND EASY. (Hayes photo)


Step 10

File working knives

Turn the blade around and open up the “V” notches on the other side of the spine. Remember the “V” notch is opened on one side only, behind the halfround notch. The safe 90-degree side is not touched. (Hayes photo)


Step 11

Art filing knife spine

Take the sharp safe-sided angle of the triangle file and file into each point of the “V” notch. File it to a sharp, crisp point. (Hayes photo)


Step 12 (Final)

For the 12th and final step, go over the entire fileworked area with fine sandpaper. Increase 3-inch strips of 320-grit sandpaper and put the paper over the round file and triangle file to back up the paper. Do not push too hard and tilt the wrap away from the safe sides so you do not round safe (square) the corners of the filework.

Have fun and stay safe.

What is a Bird’s-Beak Handle?

The short answer: A handle design favored by custom knifemakers that resembles a bird’s head with a short beak at the butt of the handle.

Given the practicality and curves of the bird’s-beak handle, it is small wonder that it is quite the popular grip among today’s knifemakers. In fact, the design resembling a bird’s head with a short beak at the butt of the handle has appeared in many cultures over many centuries.

Birds Beak knifemaking
Tad Lynch indicated that crafting a good bird’s-beak design requires practice and the courage to push things. His Irish Traveler Fighter features a handle of koa, a 9-inch blade of W2 tool steel with hamon and is 14 inches overall. His list price for a similar knife starts at $1,100. (SharpByCoop knife image)

“You see it in different variations on Persian daggers and swords,” said North Carolina knifemaker Ken Hall. “Also, some kukris have the ‘hook’ in the handle. In American knives you see it in some of the Buck knife designs.”

When the ABS journeyman smith with 11 years of experience is not forging in the Smoky Mountains, he raises honeybees, hikes and teaches others the craft. He made a bowie in January in preparation for an ABS master smith test that had to be pushed back because of a bicycle accident.

What is a birds beak handle on a knife
While many makers make a bird’s-beak handle with a dense hardwood, Paul DiStefano took a risk on a material that has a reputation of being temperamental: ancient walrus ivory. Blade length and material: 12 inches and 500 layers of 1095 carbon and 15N20 nickel alloy steels. His list price for a similar knife: $1,800.
(SharpByCoop knife image)

He picked the bird’s-beak handle design because it pairs well with large knives, especially those with recurve or clip-point blades. A big block of wood large enough to develop the butt’s shape is one of the best material sizes for the design, Hall explained.

“The bird’s beak provides a more controlled grip for the hand,” he noted. “The contour snugs around the little finger, keeping the knife from slipping forward while in use.”

The result, combined with a balanced knife, is a tool that feels like an extension of the hand.

Mini-Documentary: American Forged – A Knight with Neil

0

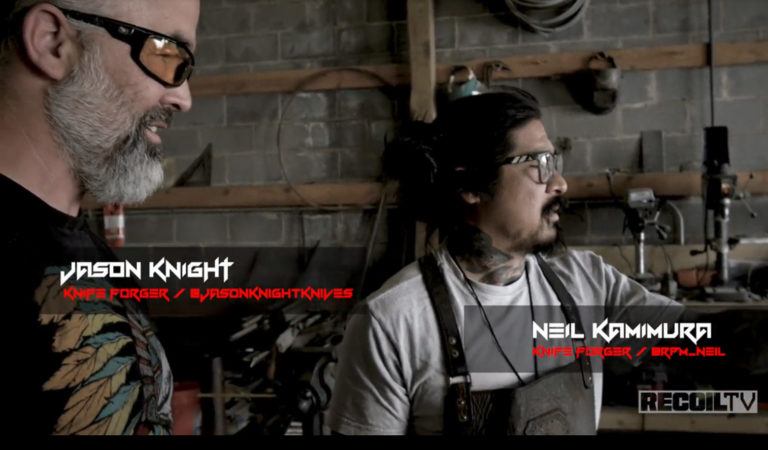
Every blade that is created by hand is something unique. The edges, curves, look and feel will never be identical to any other knife, especially when you create that knife with someone like Jason Knight.

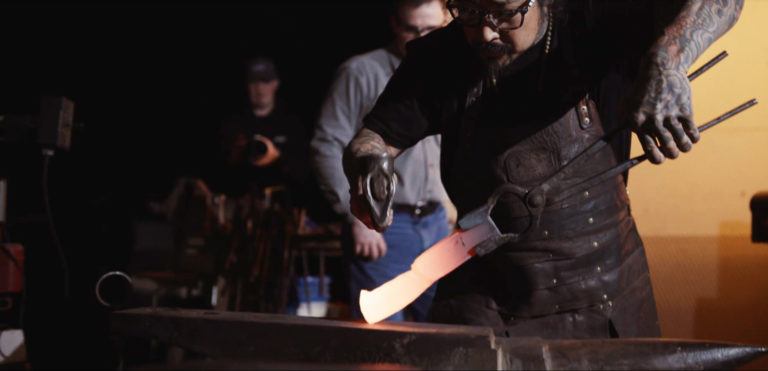
BLADE is proud to present A Knight with Neil. We followed knife forger Neil Kamimura to Jason Knight‘s own forge. We witnessed the two transform a military vehicle’s axle into a battle axe, create some badass looking kukris, and had some crazy good times in between.

Sharing his design experience with Neil, we learn a bit about Jason Knight’s crafting abilities, along with his lively persona. With these two personalities on hand, there are bound to be some shenanigans once the forging is complete.

See more from RECOIL TV’s American Forged series here.

Mini-Documentary: American Forged – Carter Cutlery Hand-Forged Knives

0

In this video from BLADE partner RECOIL TV, you’ll get a front row seat with Murray Carter of Carter Cutlery to learn his journey from a young apprentice of a Japanese bladesmith to one of the most respected knifemakers in the industry.

See more from RECOIL TV’s American Forged video series here.

Video – American Forged: Hammer In with Travis Wuertz

0

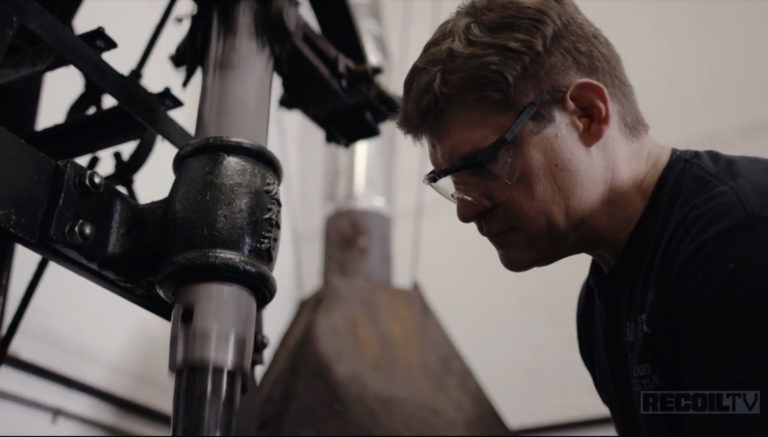
BLADE partnered with Recoil TV to bring you this beautifully produced mini-documentary about knifemakers at Travis Wuertz‘s annual Hammer In.

Hosted by Neil Kamimura, this 10-minute video explores the tools, techniques and talent that bring so many from so far together. It’s well worth the watch. Enjoy!

For more knifemaking videos and a lot more, be sure to visit Recoil TV.

Advertisement

Must Read Articles

Read this before you make a knife

Knifemaking 101 – Read This Before You Make a Knife

  by Wayne Goddard My experience has taught me that there's nothing like digging in and getting started. I've often said the hardest part of the...
how to forge damascus steel

How to Forge Damascus

Advertisement
Advertisement