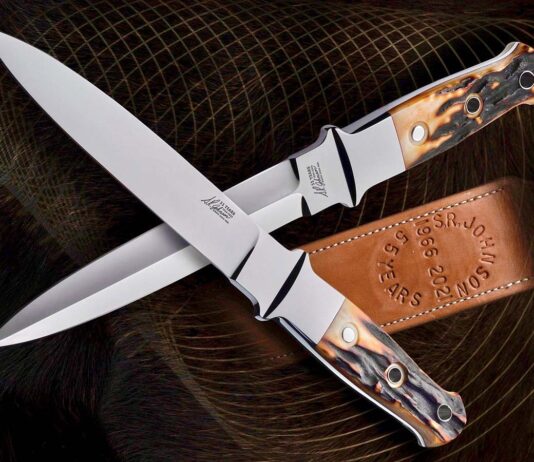
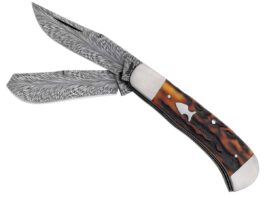
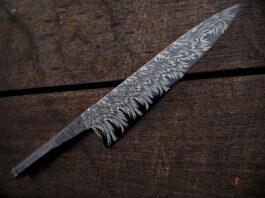
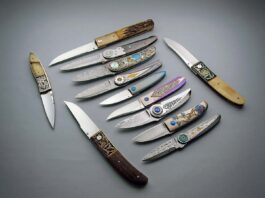
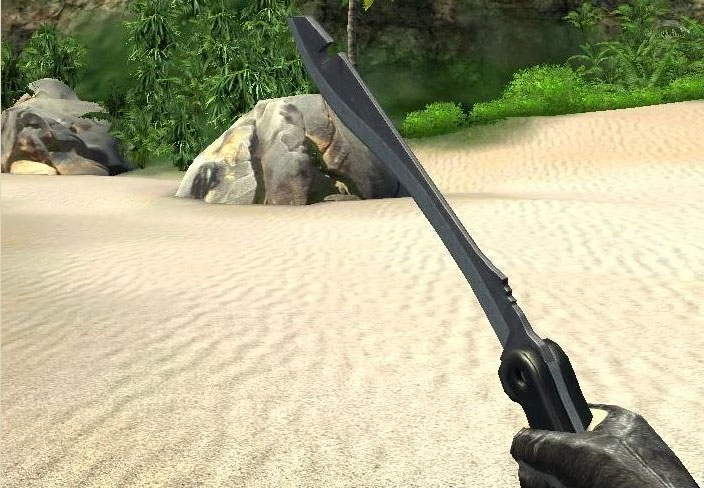
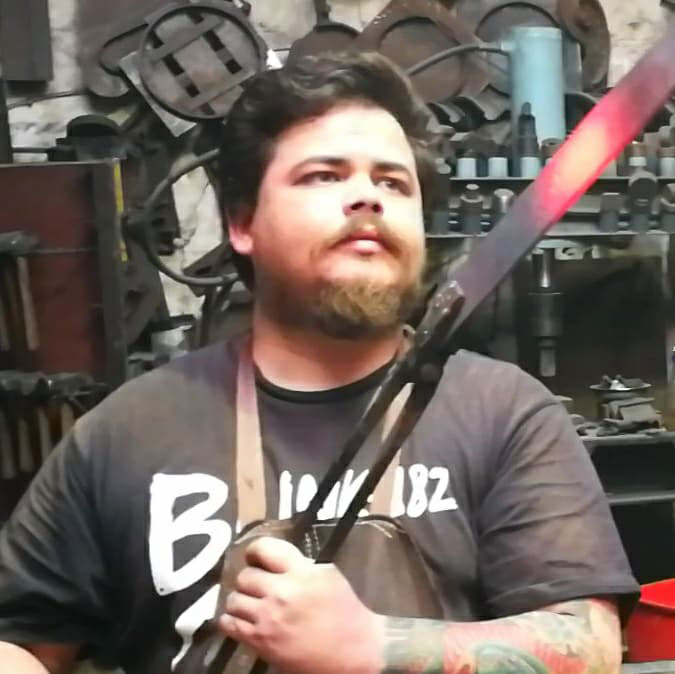
Knifemaking is the building of a knife, which includes the blade, handle and other accouterments. Blades are made by either removing metal from a steel blank via a grinder – known as stock removal – and the forging to shape of hot steel into a blade in the process known as bladesmithing. Other parts, including bolsters, guards, pommels, etc., are needed to complete the finished knife.
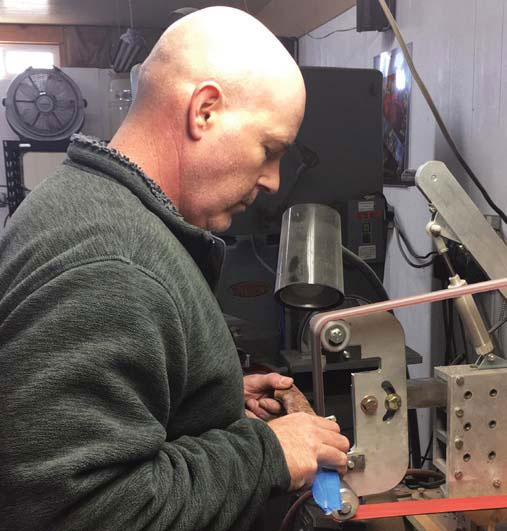
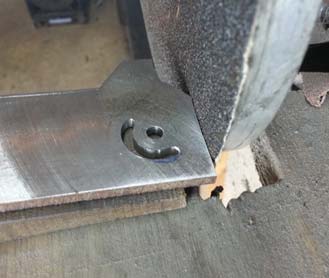
In CPM-154 stainless, John Bartlow said he found a steel that allowed for a flawless finish. At the grinder here in his shop, Bartlow uses the steel on his utility fixed blade equipped with his trademark line cutter in the ricasso. (SharpByCoop knife image)A veteran of 30 years in the Knifemakers’ Guild, John Bartlow started out using 440C stainless steel for his knives, moved to ATS-34 and today has graduated to CPM-154. Raphael Durand uses the latter steel on his stag lockback. (SharpByCoop image)
Based in Sheridan, Wyoming, by way of Tennessee, 30-year Knifemakers’ Guild member John Bartlow uses CPM-154 for his bird and trout and hunting knives. When Bartlow first started making knives, he was also a hunting outfitter.
As a result, he gutted and skinned a lot of animals on a weekly basis. Having many of his guides use his knives, he got a lot of feedback over the years about design and function.
“I started out with 440C stainless steel a million years ago,” Bartlow remembered. “I quit that nearly 20 years ago and jumped to ATS-34 stainless and used it for years and years.”
He said that about a decade ago he started to become frustrated with the quality of the ATS he was getting. There weren’t major structural problems like chipping or breaking, but there were very subtle issues Bartlow observed under 10-to-12-power magnification.
“My customers never noticed it but it bugged me,” he continued. “I was trying to get some finishes in that stuff —and I was buying through normal channels from several suppliers—but when I would go to finish it, once in a while I’d get this little area that looked like it had pits in it, or it kind of had a little ‘road rash’ that I could not get rid of.”
He approached other makers about it at the time and they said they’d seen the same thing. That motivated him to jump ship to CPM-154, he said, which is very much a sister steel to ATS-34 and 154CM.
“They are closely related on the family tree of steel,” he said. In CPM-154, he found a material that allowed for a flawless finish. With the powder metallurgy process and the accompanying uniform distribution of carbides, it eliminated the “road rash” issue.
Here grinding a blade in his shop, David Sharp said CPM-154 exhibits excellent edge retention, sharpenability and corrosion resistance.
“A large percentage of my knives have a very fine finish, polished or over-1200-grit hand satin,” the maker based in Hesperia, California, remarked. “CPM-154 is very fine, so when it’s finished to a high level you don’t see the steel’s grain.”
He added that CPM-154 is not quite as abrasion resistant as other of the relatively newer steels, so obtaining a fine finish is a bit quicker. He said that though steels are an oft-discussed topic online, he very seldom has customers request a steel type or brand, which could be seen as a testament that his choice of CPM-154 is a good one.
“I have not noticed a downside,” Sharp continued. “The upside is the finish and that it is, in my opinion, a balanced steel. For the majority of users it exhibits excellent edge retention, sharpenability and corrosion resistance.”
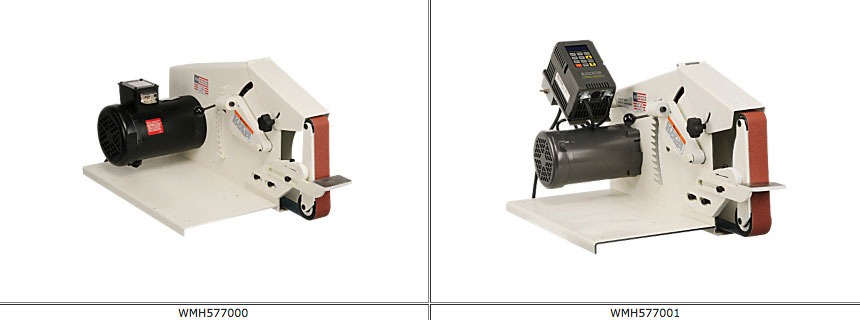
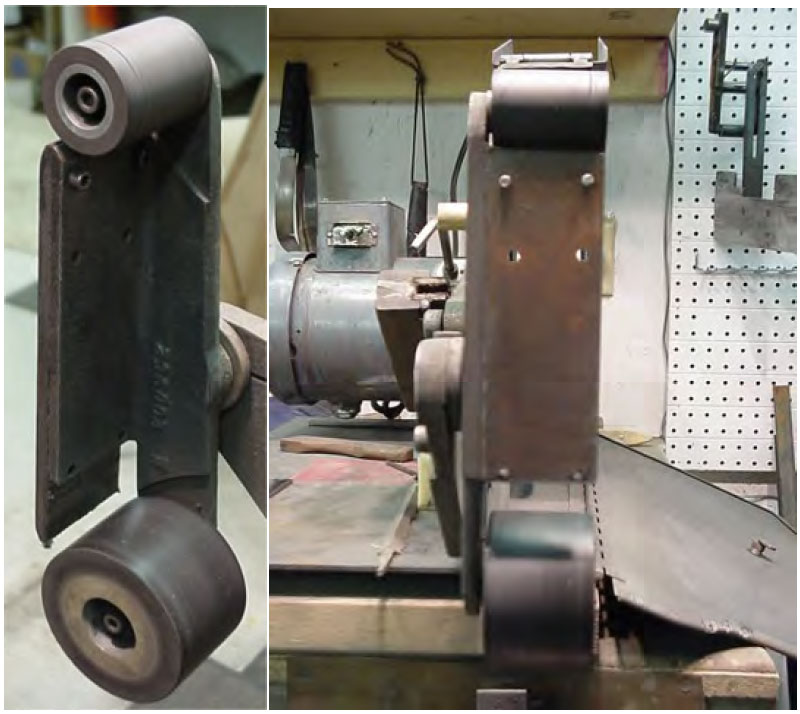
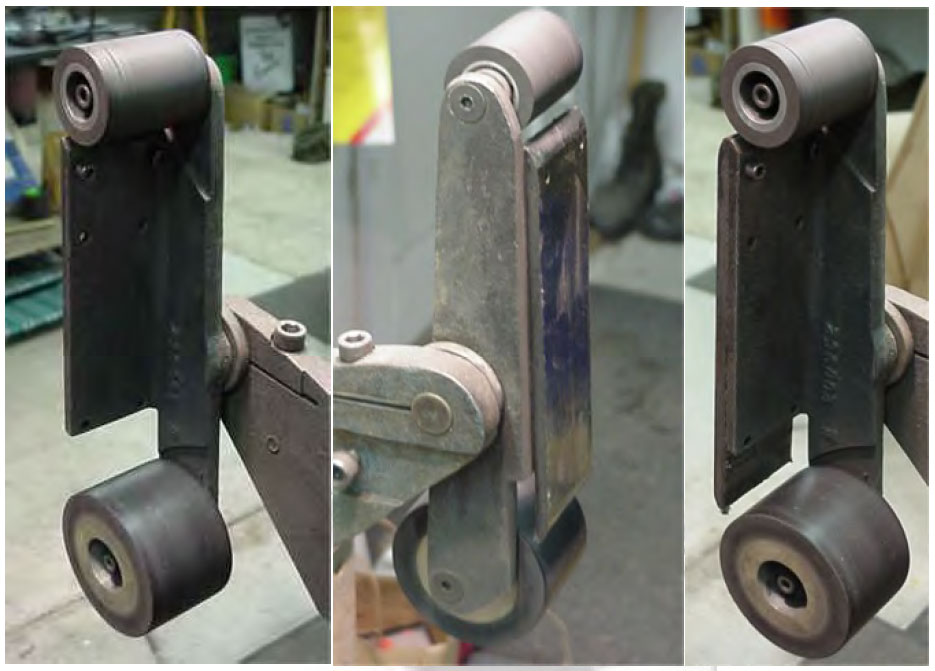
Two variations of the Wilton Square Wheel Grinder. (Images courtesy of Southern-Tool.com)
The variety and types of belt grinders available today is tremendous. Without a doubt each individual has his/her favorite machine. Although all are very good, we always wish that we could make them do more, or modify them to better fit how we each do things in our shop(s).
I have used every grinder out there at one time or another, and have chosen the Wilton Square Wheel as my favorite. The most attractive feature for me is the ease and speed of changing attachments.
As it comes from the factory or dealer, there are a few draw backs that can be irritating to a knifemaker. Below are a few modifications I have made to increase versatility and production in my shop.
Specs
The machine is set up to run either 110VAC or 220VAC. As delivered it is set up to run at 110VAC, I highly recommend setting it up to run on 220VAC. There is a world of difference in the power and smoothness of the machine from 110 to 220. (My machine had change over instructions located inside the switch housing.)
Slow Down
(All images by the author unless otherwise noted.)
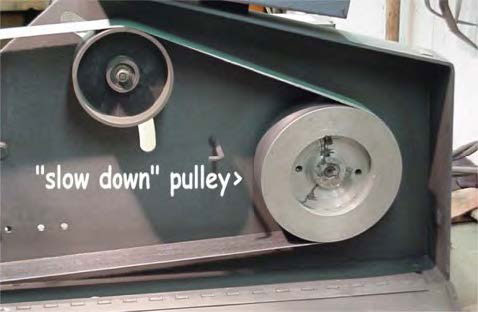
If you did not purchase a variable speed machine, get a “slow down” drive pulley. As it comes from the factory, the Wilton Square Wheel has a 10″ drive pulley that runs the machine at 4600 SFPM (surface feet per minute) Before they were offered commercially, I had one made at a local machine shop. Mine is 7″ dia, and slowed the belt speed down to 2950 SFPM.
By slowing the machine down, it may seem at first that your progress is very slow, but your grinds will come out much nicer, and you’ll get a lot more mileage out of your belts.
Flat Platen Attachment
Next we turn to modification of the flat platen attachment. As it come from the factory, and with the way the platen attachment is cast, there is simply not enough room or tracking adjustment to allow one to create plunge cuts on the left side of the platen (as you are facing the machine).
It took me a while to work this one out, but the solution is a simple fix. I created a platen that bolts onto the existing platen. These “add on” platens are nothing more than a piece of 1/4″x 2″x whatever length you want (up to the original 8″) that the belt “rides” over. This will give you plenty of room for plunge cuts. In the photos below you can see how I drilled two holes in the casting, and use two socket head bolts (10-24 thread) to secure the “add on” platen.
The easy way to do this is to remove the contact wheels and use a set of vise grips to drill the holes for threading, and then enlarge the holes in the casting to accept the socket head bolts.
Modify Platen Lengths
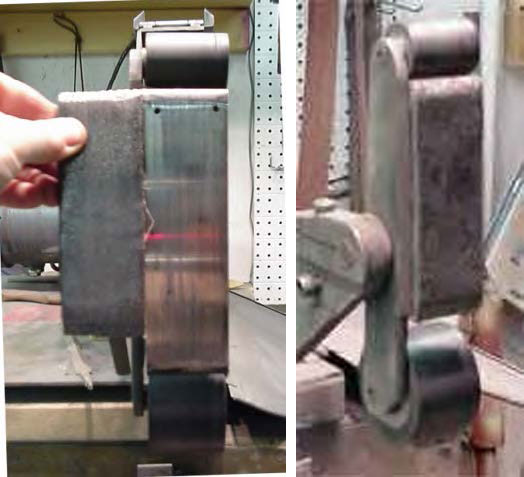
For those who were paying close attention to the photos above, the platen may have seemed shorter than it should be. This brings us to one of the best improvements. Remove 2″ at the bottom of the factory platen casting. This gives an area that is ideal for convex grinding.
Platens can be made in different lengths, for various applications. The above photo on the left shows two different platen sizes, the large for flat grinding, and in the right photo, the shorter platen is in place for convex grinding. Below is a close up view of the setup I use for convex grinding. It’s easy to get carried away and use too much pressure, so nice and easy is the key. You can control the amount of convex with a combination of belt tension, and the amount of pressure you apply to your work piece.
Using the Short Platen
I seldom use the 8″ wheel, with the exception of profiling blades. The long flat platen, I use for flattening, and tapering, the shorter platen is used for convex grinding.
If you have made modifications, and are willing to share your ideas, let me know in the comments.
NOTE: Since first writing this article, I have trashed the idea of using Graphite canvas for a platen backing. This material wears too quickly, causing uneven grinds and just general mayhem. I now use “pyro-ceram” or tempered glass on all my platens. The platen MUST be flat, and the glue used to attach the glass able to withstand heat (I use AccraGlass) but it will improve you grinding 10 fold.
Keep Learning About Knife Grinding with This Download
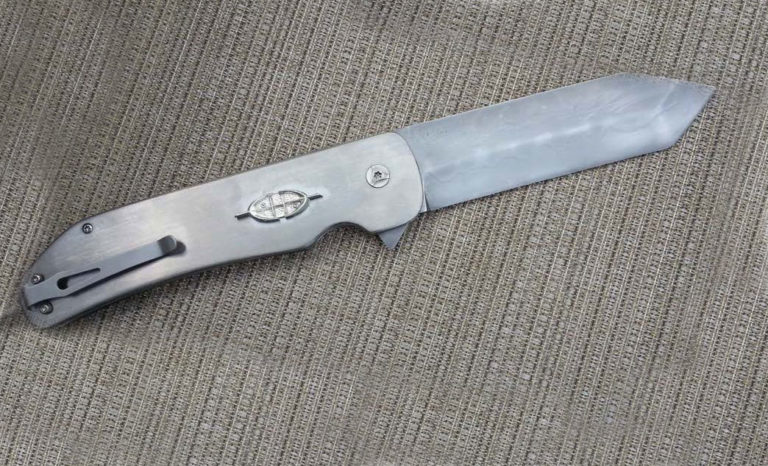
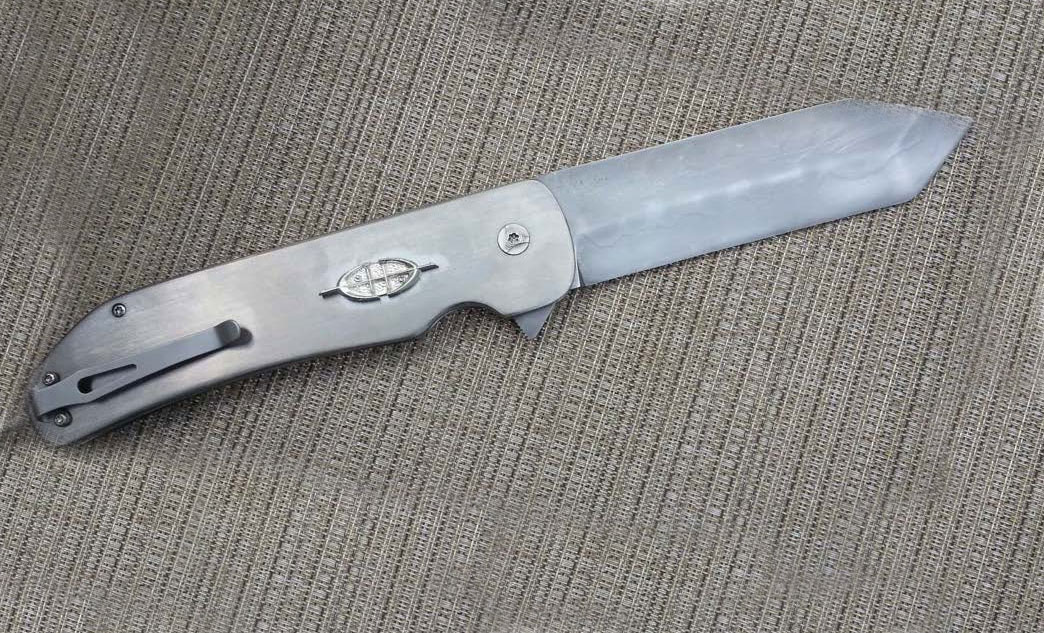
The author’s finished flipper folder—sanded, polished and ready to go!
Folder making has advanced so much in the past few years. Now, flipper folders are the hot new ticket.
Following is an overview of the steps in making a modern flipper by hand.
Draw It Up
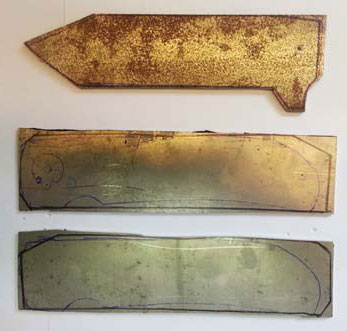
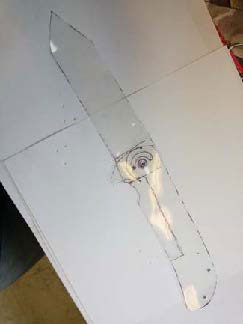
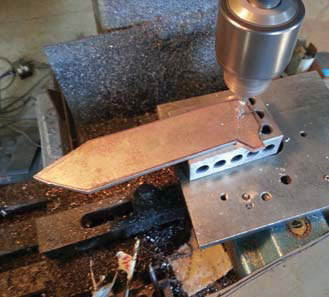
The parts are all cut out. The holes in one handle side (center) are center punched and ready to drill.Design the knife parts on clear plastic so you can see where to locate everything.
To begin, draw designs on paper and transfer them to clear plastic. Cut out the designs of the blade and handle from the clear plastic. Overlap the tang of the blade on the handle and insert a needle through both pieces where the pivot pin will be.
From there, fold the blade onto the handle and adjust the design as needed.
Next, trace around the plastic handle on a titanium sheet. I use titanium in a 1/8-inch size for the top part of the handle and .070 inch for the two bottom pieces. Trace the blade and cut it out.
Know the Drill
Counter sink all the holes a small amount before drilling them with the 1/16-inch drill bit.
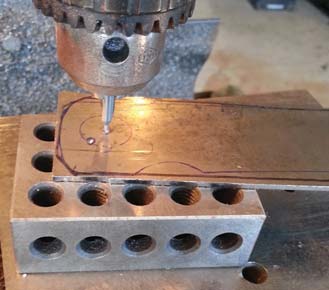
Making folders is mostly about drilling holes. Drill out one plate of titanium with 1/16-inch holes. Place another plate of titanium underneath the drilled-out plate and clamp the two together. Turn it over and drill through the second plate.
Starting with the pivot hole, place a ½x1/16-inch hardened dowel pin in it so the two plates won’t move. Next, drill the end of the handle and put a pin in it.
Continue drilling, clamping and adding pins where your stand-offs go. Each time you drill a hole, take the plates apart and de-burr. A hand drill with a four-flute counter-sink is handy for de-burring.
Start drilling all the holes with a 1/16-inch drill bit.
This flipper will have an internal stop pin, so don’t drill all the way through the top plate. However, do drill through the bottom plate—the .070-inch one. From here, affix the plates with 1/16-inch dowel pins. Clamp, remove the pivot pin, and drill and ream to 3/16 inch for the pivot pin. De-burr and reassemble. Drill and ream a 1/8-inch stop pin.
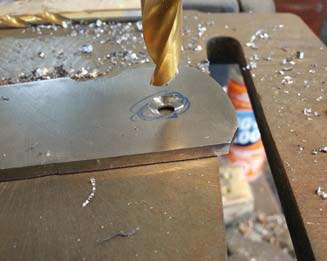
CAUTION: Do not go all the way through the top 1/8-inch plate! Countersink the outside plates for the 2-56 screw heads. I use a #20 drill bit for this.
Pivot, Washers & Pins
Mill the slot for the stop pin.
Now it’s time to countersink the two pivot screws. Different types of spacers and stand-offs can be used on a folder. For this flipper I used ones with shoulders from Knifekits.com. Normally I use custom-made stand-offs from Sheffield Knifemakers Supply. The shouldered step-down stand-offs prevent any unwanted movement in the blade.
I open up the holes for the stand-offs to fit in with a 1/8-inch reamer. Actually, I use a reamer .001 inch larger, so it is .126 inch.
The cool new thing with folders is pivot washers with ball bearings. There are many different types from which to choose. Michael Burch recommended washers from Jantz Supply to me at BLADE Show.
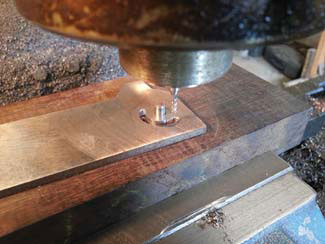
Countersink the pivot screws.
You have to sink the washers down into the scales a bit. I use a 3/8-inch, four-fluted end mill to do this step. First, I index a 3/16-inch end mill into a hole on a plate of steel held in a mill vise. I lock down my table and take out the 3/16-inch end mill and put in the 3/8-inch one using a dial indicator to show how far down I am drilling.
Most tactical folders are going pretty thick with washers .020-to-.040-inch on each side of the blade. I sink the washers down so they and the blade are the same thickness as the stand-offs. You want the space between the blade and washer to be equal to the space between the stand-off s or spacer material. Drill and ream a 3/16-inch pivot hole in the blade. Mill a half-moon slot for the 1/8-inch stop pin.
Many makers put the pin in the handle at about the 7 o’clock position when open. Grind the pivot and stop pins down to the proper length. (Author’s note: Grind the pivot pin so it is not exposed past the top of the countersunk hole of the pivot screw. Grind the stop pin so it floats between the two scales.) Grind the 2-56 screws down so they don’t touch each other when they’re screwed into the stand-offs.
Profile the blade and grind the tang at a 7-degree angle. I use a 7-degree block of Micarta® held up against my disc grinder for a guide.
Lock & Detent
Grind the tang to fit the lock.
Now it’s time to cut the lock. Place the blade on the bottom liner with the pivot and stop pins in place. Open the blade and scribe a line with an X-acto™ Knife behind the tang onto the liner. Draw a line 3 inches long with a marker down the scale. Clamp in the mill, and, using a slitting saw, cut the 3-inch length. Use a band saw to cut the short face, which will be the lock. Using a cut-off -wheel attachment in a Dremel® Tool, clean up the end of the lock.
On a locking-liner or flipper folder, the lock is made by bending a tab of the titanium liner over so it engages with the end of the tang of the blade. The end of this tab must be coated with carbide. The machine that does this is a little hand-held micro welder and is called a carburizer. Simply run the rod onto the end of the titanium lock and it welds a coating of carbide onto the titanium. This produces a smoother action on the folder.
You can also flame harden the lock by heating it until it turns orange. In order to let the lockbar bend, grind in a .020-inch dent with a ¾-inch wheel at the other end of the lock.
It’s time to drill holes in the lock and blade for the 1/16-inch detent ball. Center punch a hole in the middle of the lock. Drill through with a #54 drill bit.
Close the folder and clamp it closed. Drill through the same hole as the liner into the blade about .060-inch deep. The #54 drill bit is .053 inch. You can also use a .054- or .055-inch drill bit depending on how you want to tune your folder. Grind, heat treat and polish the blade. Press the 1/16-inch ball bearing into the lock. The height left remaining of the ball bearing should equal the thickness of the washer.
Bend the lock over to about the middle of the folder. Now grind the tang at 7 degrees on a disc grinder until the lock starts to grab. You can assemble the folder, hold it up to the light and push the lock away from the knife to see how much more you have to grind the tang. Go slow and grind just a little before checking the lock. Drill and tap the scale for the pocket clip.
“I have been thinking of making a hidden-tang knife with a blade made by one of the companies that advertises in BLADE®. However, that leaves a problem. Most of the blades in question have either a small tang, which causes a possible stress point, or a traditional-shaped tang that seems very short. Which is better and why?
“I also have seen hidden tangs cut out of full-tang knives; how can this be done without affecting the temper?”
~Anonymous knifemaker
Answer
Let me start with the second question about converting a full-tang knife into a stick-tang- or a so-called hidden-tang knife without affecting the temper. If this is what you would like to do, it certainly can be done without damaging the blade or losing the temper.
While most factory-made blades are fully heat treated, tang and all, you do not need to be so worried about softening the tang. This area could just be spring hardened. But, as you know, it is very important to not let the heat travel up into the blade and soften it.
You will need a bench grinder or a belt sander, or you can even use a disc grinder. Any will do. Whichever machine you happen to have or choose to use, the main thing is to not overheat the material while working it.
To ensure this, you will need to use a coarser grinding stone or a new sanding belt not higher than 60 grit. A fresh new belt is essential for the operation. The sharper the belt, the less friction/heat will occur. A duller belt will create a lot more heat.
Another thing to watch for is to not apply a lot of pressure when you are grinding. Again, the more pressure, the more heat.
Besides using a sharp belt and light pressure, after each pass on the grinder be sure you cool off the blade completely by dipping it in cool water. If you want to get fancy, you can place the blade on a piece of dry ice to cool it, though it is not necessary to go to such lengths.
One obstacle when converting a full-tang knife into a hidden-tang one is the pin and glue holes. The size and placement of the holes will dictate the shape of the tang and obviously the handle shape as well. Consequently, you are limited as to what you can do.
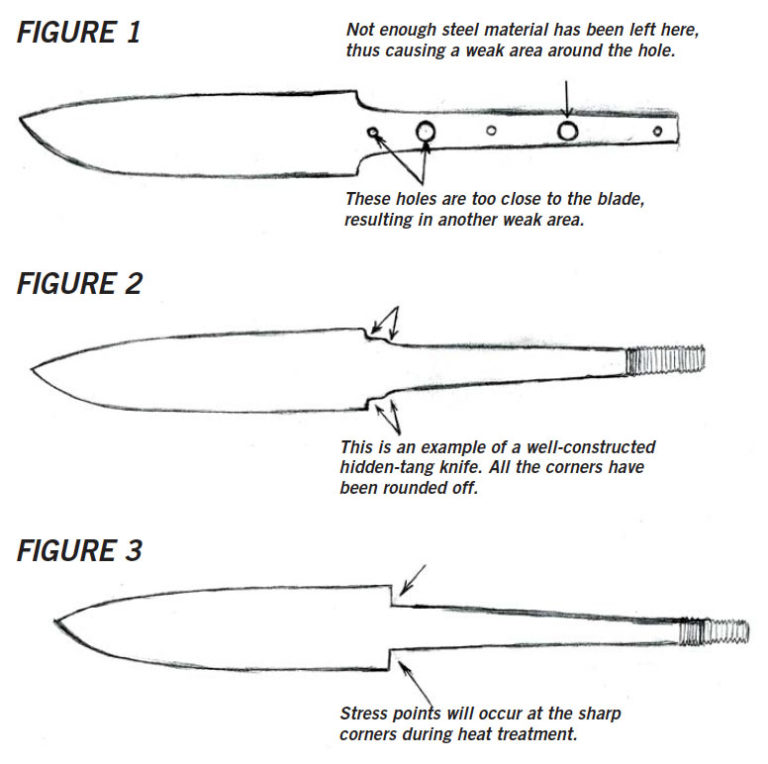
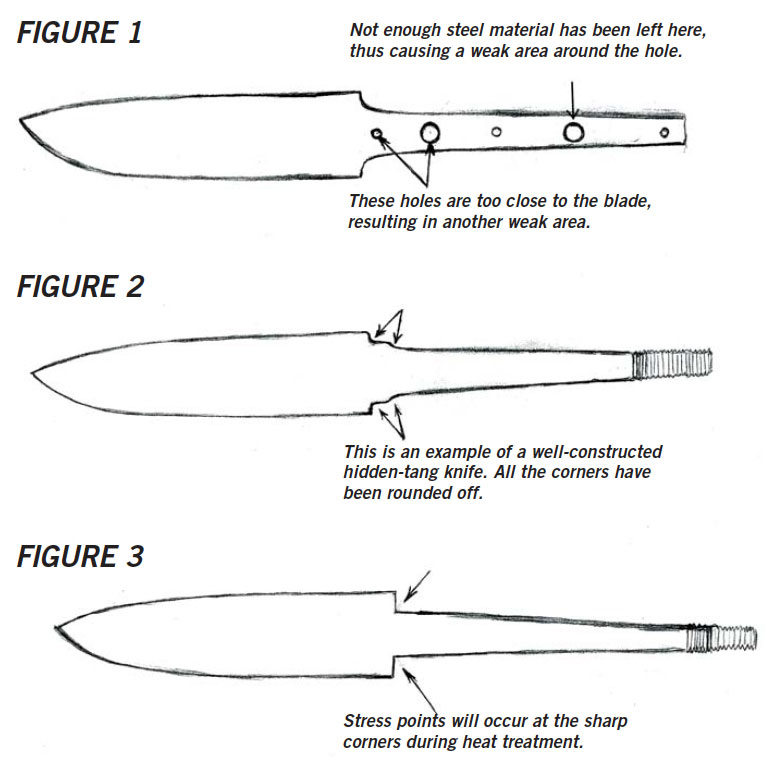
One last thing to watch for is to not grind too close to any of the pin or glue holes because this will be the fault or weakest point of the knife. (See Figure 1.)
As for your first question, both the hidden-and full-tang style of knife construction have been serving mankind for hundreds of years, so I would not consider one more traditional than the other.
Concerning which type of tang is better, it is up to individual preference. The properly prepared tang, either full or hidden, will perform well. A well-constructed hidden-tang knife should have no stress points. (See Figure 2.) A stress point can occur during heat treating if the juncture where the blade and tang meet has sharp corners. (See Figure 3.)
This juncture is where you need to pay more attention and take care to avoid creating sharp corners and edges. A full-tang knife also can have stress points if the drilled holes are not slightly countersunk to eliminate sharp edges.
You mentioned that some of the tangs appeared short in the advertisements you have seen. They say a picture is worth a thousand words, but sometimes a picture does not do justice or give you a true measure of the proportions of the subject.
While checking out all the pictures and blade designs available, you may have missed the information written under each picture. Each picture has the overall size and the blade size. If you take away the blade size from the overall size, you will end up with the exact measurement of the tang.
I am happy to hear you are going to try making a knife from a kit or a factory-made blade. Everyone needs to start somewhere. Maybe it will lead you to try making your own knives, too.
Learn More About Knifemaking
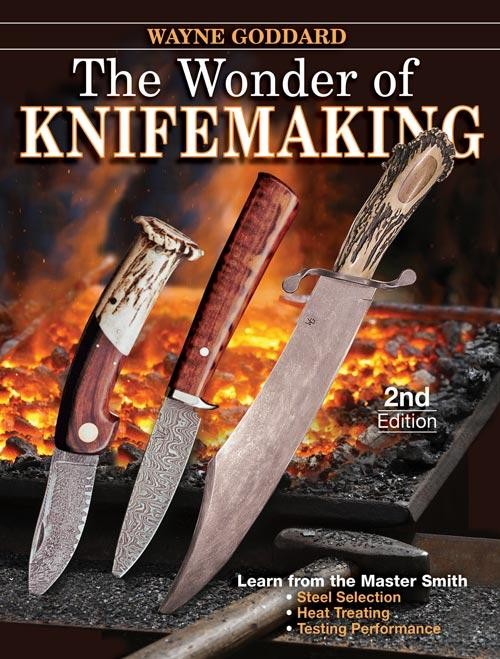
Wayne Goddard’s book makes knifemaking a wonder to behold.
Keep reading and learning in the author’s classic “$50 Knife Shop” book.
My experience has taught me that there’s nothing like digging in and getting started. I’ve often said the hardest part of the most difficult project I ever completed was getting past the decision to get started. Once I get started, it becomes a matter of problem solving and never giving up. The great inventor Thomas Edison wrote, “Many of life’s failures are people who did not realize how close they were to success when they gave up.”
I have some strong opinions about how a new knifemaker should get started. I recommend the first knives be made with simple and even makeshift tools. That’s the kind of thing that lets you ease into knifemaking without spending a lot of money. If the simple method is not for you, it won’t hurt my feelings—just grab your checkbook and credit cards and head for town. Don’t forget the list of basic tools.
Old School
I’m what you would call an old-school knifemaker. That’s because I never learned CAD (Computer Aided Design) or CAM (Computer Aided Manufacturing). I don’t work with titanium or drill and tap a lot of holes in order to put knives together with screws.
To me, “old school” is riveting together the handle and blade tang, giving the knife a unique personality by hand finishing all the parts. There are no square corners—everything is rounded, smooth and friendly.
About Design
It’s been said that good designs evolve, and I believe it. When I got started in knifemaking, I didn’t have one clear thought about design. I grabbed the only suitable knifemaking material I could find and went to work grinding on it. There was no thought as to knife proportions or design principles. I had built myself a grinder, and the thrill of shaping steel drove my activity.
The result was a blade that wasn’t practical and a handle that was too short. See the related illustration. The knife models I’ve developed to date are good designs because they evolved. It just isn’t possible to get everything right the first time. A maker starting out today has some advantages. He or she typically has access to books and magazines full of good knife designs to study and analyze. Today, there isn’t much of an excuse for making ugly knives.
Perhaps the best thing I can teach about design is to consider the flow of the lines that define a knife’s shape. Don’t do things that disrupt the flowing lines of the knife. The new knifemaker should try different styles, shapes and sizes when starting out in this field. With experience he or she will fi nd a unique style.
Blade and Handle Length
Years ago, I settled on a length of 3 7/8 inches as the ideal size for a hunting knife blade. A blade that stretched 4 inches seemed a bit too long, but a similarly shaped blade at 3 3/4 inches was too short. Splitting the difference gave me a blade length of 3 7/8 inches and I was comfortable with that size.
When you become accustomed to using a knife with a 4-inch blade and then switch to one that’s slightly shorter, or longer, you’ll notice a difference, and you might not feel comfortable. I’ve offered a basic hunting knife blade of 3 7/8 inches to my customers as a standard size ever since deciding on it and they seem to be comfortable with that length.
An ideal handle length can be difficult to determine, mainly because people’s hands all come in different sizes. I’ve got short arms and small hands for my height, and at first, I made knife handles that were too short for some folks. I finally learned to make the handles longer to accommodate the general public. On occasion, I might even go oversize on handle length in an attempt to keep the grip from being too short.
I outfitted the “project knife” for this book with my standard 4 1/4-inch handle. A knife handle of this size can be used on blades that are up to a half-inch longer than the project blade. See the accompanying photo for two versions of the knife. The knife on the right in the photo is the full-sized project knife, and on the left is a computer-enhanced version with a slightly shorter handle. Use your judgment on handle length but don’t opt for a grip shorter than 4 inches.
Over the years I’ve received many beautiful drawings of proposals for both fixed-blade and folding knives. Many of the fixed-blade drawings were not practical to make because the handles, as drawn, were too short.
Knives on paper look quite a bit different than they do when mocked up in wood or cardboard. The folding knife drawings were often attractive in appearance but had blades that would not fit into the handles when folded. For these reasons, it’s always good to make mock-ups of new designs. This gives you non-working models to hold in your hands, and that’s just one more step towards real knives of good designs.
If you’re still learning how to make knives, this is a great book to show you the ropes. Click the cover.
Paper drawings don’t work out too good for me because I can’t draw a straight line or an evenly curved one. What I can do is use the belt grinder to grind straight and curved lines that are what they should be.
A drawing can be scanned into a computer and then printed out to whatever size is wanted. Once the design on paper is finalized and printed out, I use rubber cement to glue the printout to a piece of thin hardboard or plywood. The pattern is then sawed, sanded or whittled to shape. The physical pattern gives me something to hold in my hand and some idea as to proportion and size. This is where needed changes become more obvious and can be made. If the pattern isn’t right, I’ll use whatever parts of it are right to make another pattern that will get me closer.
Once the hard pattern is satisfactory, it is transferred to steel and the real work starts. I keep a lot of the hard patterns I make. Having a collection of rough models on hand gives me a head start on size proportions when I have a new design to develop. Storage of the physical patterns has become a problem, so for the last several years I’ve kept many of them as tracings in a big book.
I’ve found it useful to have a collection of handles. My customers furnished some of them, while others came off of knives I customized, and at least three came from broken knives. There are lessons in all of them, both good and bad. Often, a new design comes together quicker because I have an actual handle to work from.
The Computer as a Design Tool
A scanner hooked to the computer is a valuable design tool. Drawings, illustrations or photos are scanned into the computer where they can be scaled down, scaled up, modified or just stored for future reference. Microsoft Publisher is not only a great program for desktop publishing projects, but also a valuable tool for resizing knife designs.
A drawing or picture appears in Publisher with a marquee that has eight “handles” when it is selected with the curser.
let’s say the picture is of a knife. Depending on which handles of the marquee are dragged one of several ways with the computer curser, a knife in a picture can be lengthened without being widened, widened without being lengthened, or made larger or smaller proportionately.
Microsoft Publisher will allow you to set up your page at any size. When I’m working on a bowie knife design with a 15-inch blade, I set up a page that’s 24 inches wide. I can then work my pattern full size and print it out. It comes out of the printer on two or more sheets of paper and it’s then necessary to cut and paste them together. See the photo showing three sizes of the same knife printed out from Publisher.
The Everyday Working Knife Design
The design for the project knife is practical and simple from a construction standpoint. Although a simple knife, it’s also a good working knife. History is on our side because it was simple working knives that got meat from the hoof and into the kettle. And, there were all the other cutting chores required for those living close to the land. A fancy design or beautiful finish wasn’t required; all that was necessary was a sharp blade with a good handle to grip.
It’s been said that the perfect design is achieved when everything that isn’t necessary has been stripped away. Therefore our project knife won’t showcase fancy file work, gold plating, inlays, attached guards, bolsters or a pommel cap. It will employ only that which is necessary to get the work done.
The blade is known as a “dropped point.” I call it a utility shape. If you look up “utility” in a dictionary, you’ll find something like, “the quality of being of practical use.” The advantages of the drop-point blade are many when compared to the upturned point on some commercial and handmade knives.
I’ve always figured that upturned points were left over from the bowie knife era. The drop-point blade is not only stronger but also more useful for almost every job of which I can fathom. The drop-point blade allows the opening cuts on game animals to be made without the point digging in. When it comes to skinning or processing meat, the drop point, or the slight modification known as a “semi-skinner,” is hard to beat. See the related photo.
The guard of the project knife is integral to the handle—the guard and handle are one piece—and this simplifies construction. I’ve offered hunting and utility knives without guards for 35 years. An attached guard must be ordered from me as an extra. An attached guard has become an accepted design element of the modern hunting knife, and it serves as a safety feature, keeping a knife user’s fingers away from the edge.
My opinion is that thinking you won’t cut yourself with a knife that has a guard on it is like thinking you won’t have an automobile accident if you wear your seat belt all the time.
Handle Materials
The modern hunting knife should be built to last. First class, beautiful handle materials might raise the cost of making a knife but are well worth the difference. I have seen many knives sold, not only by me, but also by others, to customers who were actually buying the handles. The blades were secondary.
A modern knife is apt to have a plastic-based handle material. These materials are waterproof, strong and dependable.
Sharpening will eventually wear out a blade, but of the countless elements that can attack natural handle materials, few, if any, will have an effect on Micarta®. A knife with a stainless blade and a Micarta handle could outlast its owner. My favorite material for a foolproof handle is Micarta, which is in the family of thermoplastics and includes more than two dozen types of material.
Traditional materials for handles depend somewhat on the country of origin. Wood, ivory, horn, antler and bone were, and are, still used for handles. A disadvantage to using natural materials for knife handles is that they are subject to cracking, or attack by bugs and animal teeth. (I’ve had to replace several handles, and also some sheaths that were chewed by dogs.)
Natural materials have the ability to soak up moisture when wet, then shrink and sometimes crack when they dry. The trend today is towards using wood that has been stabilized. Wood can be stained nearly any color and then stabilized.
Hardwoods should be cut just a bit oversized as compared to the projected dimensions of the finished handles, and then be stored in a dry place for a minimum of six months. A year is better. The wood in the center of a 2-by-4-inch chunk of hardwood will have quite a bit of moisture in it compared to the outside layer. Like almost everything else, I learned this the hard way.
About 25 years ago, I bought a beautiful piece of Macassar ebony that was 2 inches thick, 8 inches wide and about 18 inches long. I got it from a wood dealer who had the large board it was cut from for more than 15 years. I had no reason to suspect that it wasn’t dry enough to use. I brought it home and sawed off enough pieces for a matching bowie and Texas toothpick set I was making.
The knife set was finished and delivered. Within four months, one of the handle slabs had shrunk enough to cause cracks to develop around the pins at the ends of a five-pin pattern. One slab had shrunk very little; the other three slabs had shrunk to varying degrees, and I had to replace three of the four handle slabs.
Let’s pretend that I numbered those slabs from one to four as I cut them off the chunk. Number one was the first one off the outside (the driest) of the ebony section. Number four was closest to the center of the ebony and it was the one that shrunk enough to crack. I had cut my slabs off of the end that was fresh cut by the wood dealer. The other end was sealed with wax so there was no way for the wood to be free of excess moisture. The moisture came out fairly quick once the slabs were exposed to the warm air of an Oregon summer.
I check the moisture content of new wood by weighing a small piece (1/2-inch square) on a scale used for measuring powder for reloading cartridges. I write the weight on the test piece with pencil and then put it under my epoxy curing light. The light is adjusted so that the temperature is around 120 degrees Fahrenheit. The wood sample is weighed every 4-to-6 hours until such a time that there is no more loss in weight. This shows me how much moisture it has to give up. At this point, the material is drier than it should be. If attached to a knife in the dehydrated condition, it will probably swell as it becomes normalized to the average humidity and temperature of its new home. The trick is having material on hand with average moisture content (5-8 percent), then, with luck, it will stay close to the same size and remain attached to the steel of the knife tang. I’m told that stabilized wood solves this problem.
The Project
Our project is to make an everyday working knife. The knife we decide to carry for our daily cutting chores will depend on our experience and the type work we do. An electrician working in the mild climate of Eugene, Oregon, will need a very different knife than that used by a rancher from Wyoming. On the other hand, my experience is that most folks actually get the work done with whatever knife they have, regardless if it is truly suitable for the job. The governing principle is that when real work has to be done, any knife is better than no knife.
I’ll be taking the approach to making the working knife as if it will be the first project for a new maker. I’ll use simple equipment and methods to work my way through the basic project knife. Along the way, I’ll explain how it would be done with more sophisticated tools.
The project knife will have a narrow tang with a two-piece handle that is carved out to receive the tang. This is a handle that requires no attached guard, and can be done with all hand tools. I like the lightweight feel of knives put together with this method and employ the process often for every type of knife, from small utility pieces to larger camp knives. See the drawing showing the profile of all the knife parts, and use it as a pattern for pieces necessary to complete the project knife.
Setting up Shop
Don’t stop at this article! Find more instructions in this classic knifemaking book.
I recommend easing into the purchase of major tools. I’ve heard of new knifemakers giving excuses for sloppy workmanship because of poor tools. Frankly, it was not the tools but the makers’ own lack of skill that was the problem. Give a new maker all the tools in the world and it will be a long time before he or she is turning out consistently good work.
I’ve been digging around in the handmade knife scene for 42 years, and I’ve rarely seen a “talent for knifemaking.” It’s all about practice and it takes weeks, months and sometimes years to develop the skills necessary to make knives good enough to holdup in the marketplace.
It will be all right to use more advanced tools if you have them. I’m in favor of anything to make the work easier and quicker. Always remember, being quick isn’t good for the sake of being quick. Neat and accurate work is what will make you a good knifemaker. It’s better yet if you can be quick and do good work.
Don’t wait until you have a dream shop. The idea is to get started with what you have. My first knives were in made in 1973 on the sun porch of a rented apartment. My first work station was a discarded bookcase that supported my homemade grinder. An old wood chair without a back served as a platform to hold things on for drilling with my electric drill. I didn’t have much but I had a real bad case of that incurable disease named “I want to be a knifemaker.” My workbench in 2005 is a big improvement over the chair and bookcase on the sun porch.
You can make knives if all you have is a sharp pocketknife and some scraps of soft wood. Employ the design process described earlier, then draw your dream knife on a piece of wood and carve it to the finished shape. You’ll learn how to look at a piece of material to see if it is being kept symmetrical as you progress. You’ll learn how to shape a nice radius on the handle surfaces. You may not want to be a wood carver but this exercise will get you started on your journey to being a knifemaker. A bonus is that it will also give you practice sharpening knives.
You’ll have more than enough to get started if you have some of the things commonly found in a home shop, such as a bench grinder, drill press and a vise. An abrasive cutting wheel on a bench grinder or homemade grinder as shown in the photo will save a lot of time compared to cutting the steel with a hacksaw.
You’ll need some type of workbench. I used an imported version of the Black & Decker Work Mate while making the project knife. It cost less than $10 on sale at Harbor Freight. I attached a heavy tabletop to it. It was still not real solid so I made a shelf to sit on the cross supports for the legs, and I put a lot of heavy stuff on it. If a work table wiggles too much when draw-filing or hand sanding, just back it up into a corner of the room so it can’t get away.
Small Tool List
1) Safety glasses, goggles or face mask; This is a faithful replica of the first homemade grinder that the author made in 1963.The sandpaper cutting jig will make 1-inch strips of square sheets, at 8 inches by 8 inches, for use on the author’s flat-disc machine.
2) Dust respirator, either paper or deluxe. Any protection is better than using nothing;
3) Homemade grinder, store bought grinder, angle grinder or whatever you have access to;
4) Drill press (electric or hand drill) with drill bits to match the pin sizes;
5) Flexible disc sanding attachment with both wood and metal working disks. Look for the ones that use the sticky-back discs;
6) Vise with soft jaw inserts. In my opinion, top of the line Wilton vises are the strongest that can be found, and also the most expensive. I’ve been fortunate to have a nice collection that I found in used condition at reasonable prices;
7) Propane torch. A BernzOmatic® model JTH7 is the best;
8) High temperature, soft fi re bricks to make a one-brick forge;
9) File for steel;
10) Optional wood rasp for rough-shaping handles;
11) One or two C-clamps;
12) Scribe for marking metals (made out of an old triangular or round file);
13) Center punch;
14) Thrift store toaster oven with an accurate oven thermometer;
15) Telescoping magnet from a dollar store;
16) Sharpening stone. Wet or dry paper will work if you don’t have a stone;
17) Flexible disc sanding attachment with assorted discs; and
18) Ball-peen hammer.
Gather the Following Materials
1) One or two gallons of oil for quenching the blade. I call it a “goop quench.” Used motor oil, cooking oil, cooking fat saved from the kitchen, automatic transmission oil or hydraulic oil will suffice. Various mixtures of some or all of the oils or fat will also work. The oil or fat should be in a metal container with a lid so that any potential flame-up can be snuffed out. Used for hardening the blade, my goop quench for the project knife consisted of one-third cooking fat saved from the kitchen, one-third paraffin and one-third hydraulic oil or automatic transmission fluid;
2) Blade material—precision-ground flat stock, lawnmower blades or worn-out files;
3) Handle material—wood or Micarta;
4) Coarse, medium and fine sandpaper;
5) Duro Quick Set epoxy;
6) Fine steel wool;
7) Knife board made of scrap hardwood, 3/4-inch thick, 2 inches wide, 12 inches long, shown being used in the accompanying photo;
8) Push sticks for backing up sandpaper. Note the variety of materials and shapes shown in the related photo;
9) One or two C-clamps; and
10) Wire for pins, (welding wire, nails, a coat hanger, whatever you have.)
Major Tool List
1. A 2-inch-by-72-inch belt grinder, which is the standard of the handmade knife industry for many good reasons. For that size of a belt grinder, excellent, quality belts are available in any grit and type you would ever need. The Coote belt grinder gets my vote as the most machine for the money. It comes without a motor. With some luck, a suitable motor can be found for a fraction of the cost of a machine with a motor installed. The Coote 2-inch-by-72-inch grinder with a 10-inch contact wheel is around $400. The Coote is available from the manufacturer, no middleman, and that saves dollars;
2. A drill press—the imported type for $75-150 will be adequate. See the accompanying photo for the author’s collection of drill presses;
3. A decent bench grinder can be purchased for $75 or less. Check with Sears, Costco or one of the import places. You might not want to use a grinding wheel that much, but with one end set up with an abrasive cutting wheel, it just might become one of your most-often used tools;
4. A used, 1/3-to-1/2-horsepower, 1,750-rpm, double-ended motor with work arbors attached will make a good enough buffer. That’s what I use. Knifemakers supply companies sell these adapters, as does Sears. You’ll need some 8-inch or 10-inch buffi ng wheels and compounds from one of the knifemaker supply companies. The author sets his up as shown in the related photo; and
5. Band saw for wood. A small one from Sears or an import place will do to start with.
A Homemade Bench Grinder
I did 90 percent of the work on the project knife with my homemade hard-wheel grinder. Making a grinder isn’t for everyone because it takes time and a certain amount of money to fashion one. If you consider your time to be worth something and you have the dollars in your pocket. it is wise to purchase rather than do with makeshift tools. I got my start in 1963 with a homemade grinder. See the photo of the faithful replica of that machine, which was used for the making of the project knife.
I’ve made two knives using only an angle grinder, also called a disc grinder. The only good thing I can say for it is that the belt grinder was not needed. The blades were forged to shape, rough ground with a hard abrasive disc and then finished with the flex disc attachment. Nothing beats them for taking the scale off of forged blades or damascus billets. These grinders come in a wide variety of sizes and price ranges.
The Flat Disc Machine
The flat disc machine makes it possible to create an absolute tight fit between matching surfaces, something that is not possible with a belt grinder. There are two necessary things to get the most out of a flat disc machine—the disc has to run extremely true, and the on/off switch needs to be the foot-operated type.
When material is pressed against a disc or belt that is running, one end of the material will be slightly tapered because the initial contact was in that area. This is eliminated with a foot switch, which allows the material to be applied to the disc prior to turning it on. The material is kept in contact with the disc until it stops turning after the foot switch is turned off.
I built my 8-inch, flat-disc machine with parts designed for lapidary work. The type of arbor that I used is no longer available, but the threaded aluminum discs are still in production. If you can find the discs, then the search is on to find an arbor on which to mount them. The place to look for the discs is at lapidary supply stores. See the photo.
A paper-cutting jig cuts a full sheet of sandpaper so that there is not so much waste. See the photo. The strips created are used for the hand finishing required in much of knifemaking. The 8-inch square piece of sandpaper that is formed is just the size for a flat-disc machine. Once the sandpaper is adhered to the disc, a sharp knife is used to cut off the waste. The paper is held in place with 3-M #08054 Spray Disc Adhesive. This is a great product because three or four disc changes can be made before it needs to be renewed.
My friend, Craig Morgan of Morgan and Daughter Knife and Tool, just built a nice double-disc machine for less than $350. He purchased the discs from Texas Knifemakers Supply, but the arbor and pillow blocks were purchased locally. The 9-inch discs run on a shaft supported by ball-bearing pillow blocks. The advantage of the double discs is that they allow for left- and right-hand rotation. This makes it much easier to refine the grind termination on both sides of a blade. The 9-inch size allows the user to cut discs from standard-sized sandpaper.
Forming the Blade
There are two ways for the beginner to shape blades—stock removal and forging. The forged blade is shaped by heating the steel to the plastic stage (1,800-2,100 degrees F) and then using a hammer to work it close to the final shape.
There was a time when all blades were made by forging. Steel was expensive and even rare in those days. Stock removal wouldn’t have been feasible because it would have wasted enough material to make another knife or two. Two blades can often be forged from the same-sized piece of steel that would make only one full-tang stock-removal blade. The invention of manmade grinding wheels opened up the possibility for steel to be removed quickly, and stock removal became feasible for making knives.
The tang is iron that was forge-welded onto the steel blade. This sounds like a lot of work for those of us who have unlimited piles of steel with which to work.
The welding of scraps to make bigger pieces was business as usual for the tribal smith who made this knife. Note the branch from a tree that was used for a handle and the crude bolster to keep the handle from splitting. The hole for the tang is the exact shape as the tang and that shows that the tang was burned into the handle.
A novice knifemaker who opts to forge a blade does not need a grinding machine, assuming the blade is forged close to the final shape. The forged-to-shape blade can be finished with files, stones and abrasive paper. This allows the new maker to get started making knives with a bare minimum of equipment.
An advantage, for myself, to forging is the energy created by the process. I get sick and tired of grinding and sanding inside my shop. Grinding creates smelly grit that permeates the skin and clothing. Fine steel and wood dust fills the air and settles in every nook and corner.
I prefer the fresh air of my smithy, which isn’t much more than a lean-to hooked onto the back of my shop. I love to retreat to the smithy, fire up the forge, get some steel hot and start swinging the hammer. This gets the juices flowing and I get the energy to work another hour or two. That energy thing is hard to explain; it must be experienced.
The Stock-Removal Process
Stock removal has been defined as taking a bar of steel and grinding away everything that doesn’t look like a blade. That sounds good to me. The profile of the blade is sawed or ground to shape, and then the wedge-shaped cross-section that tapers to the cutting edge is ground in with abrasive wheels or belts. The steel bar stock selected for the stock-removal blade should not be much wider and thicker than is necessary to make the blade. It will save you a lot of grinding time if you take time to find material of the proper size. For the beginner, a blade thickness of no more than 1/8 inch is good because there is not as much material to grind off.
The tendency today is to make hunting and utility knives out of 1/4-inch-thick steel. I don’t agree with this and usually choose 1/8-inch- or 5/32-inch-thick stock for my working-type knives. The width of the project knife blade is 1 inch, and since I had that width of bar in 1/8-inch-thick stock, it worked out perfectly.
I prefer flat grinding for hunting knives, even though hollow grinding is more popular. My opinion is that hollow grinding is necessary when using 1/4-inch-thick stock. The way I do things isn’t necessarily what anyone else should do. I won’t defend my ideas or methods except to say, “That’s just the way I do it.”
Profiling of the Blade
Clamp your pattern onto the steel, drill the two holes for pins, place trial pins in the holes and scribe the outline into the steel. Cut the material to length by using either a metal-cutting band saw or abrasives cut-off wheel, or grind the whole profile from the bar stock. The accompanying photo shows three ways to cut the blade from of the bar.
Another way to cut the blade off of the bar stock is to drill a series of holes and then break it apart. A properly sharpened drill bit will remove metal quite rapidly. You will find that drilling and breaking is probably faster than using a hand-powered hack saw. At top in the related photo is a steel bar scribed to show the points of two blades. At, bottom the bar has been drilled and broken apart.
Another way to separate the blade from the bar is to scribe two blades on the bar stock, with the point of the first blade meeting the point of the next blade on the bar stock. As shown in the accompanying photo, grinding the profiles will separate the two blades.
It’s important to have a nice, smooth radius where the tang meets the body of the blade. A good way to establish the radius is to use drilled holes.
Once the blade is separated from the bar, the profile is carefully ground right down to the scribed line. A hard-wheel grinder works fine for shaping the profile, however, half-dull ceramic belts, like the Norton SG Hogger on a belt grinder, will remove steel at least four times faster. The bevel-grinding process is constantly creating half-dull belts that are perfect for profile grinding.
Grinding the Bevels
There are two stages to any type of blade grind. The first stage occurs prior to heat-treating the blade, and the second is after the heat-treat process. It’s best to leave approximately 20 percent of the steel to take off after the heat treatment. Edges can warp or crack when they are too thin going into the quench process. Leaving some material to take off after heat-treat makes the quench operation a lot safer for the blade.
Blades can, and do, warp during the quench operation, and the extra material will allow some straightening to be done with the grinder. The grind prior to the heat-treating process doesn’t have to be exactly precise. The odd little things that are not quite right can usually be fi xed in the final grinding process.
The stock-removal knifemaker starts with a rectangular cross-section of steel and turns it into a wedge shape, which can be arrived at with several different methods.
Hard-Wheel Grinding of the Bevels
The stock-removal method can be completed several ways. The most common and best is with a belt grinder using either a flat platen to make a flat-ground blade or a contact wheel to make a hollow-ground blade. An adequate job can be done with a bench grinder, sometimes called a hard-wheel grinder. The wheel leaves a lot of little tracks that need to be evened out by draw filing, using hand stones, or with a powered flat disc or flexible disc.
When I got my start in knifemaking, all I owned was a homemade hard-wheel grinder to profile and to grind the rough bevels. At first, I smoothed blades up using a flexible-disc attached to, and rotated by, an electric drill. Before long, I had mounted an electric motor on an upright frame and attached the flexible disc to the shaft, which put the disc in the horizontal position.
This allowed me to control the blade with both hands and see what I was doing. I ruined more than a few abrasive discs by jamming them on the sides of blades where the discs were cutting towards the edges. With this type of setup, it would have been nice to have a reversible motor. I made close to three hundred knives with such a setup before I had a belt grinder.
Once I built my first belt grinder, I only used the grinding wheel for rough-grinding blade profiles in order to save on sanding belts. The time required cancelled the savings in belts. It was actually kind of foolish if I would have considered my time to be worth money.
Sharp, new belts are required for getting the bevels set up accurately. Many grinding errors that new makers make are caused by trying to work with dull belts. Make up your mind that each hunting knife is going to cost you the price of at least two new belts. To build a bowie knife takes as many as five belts.
It’s time for an adjustment to the thinking process if you worry about the expense of materials for knifemaking. Materials are free when you figure their cost into the sale price of your product; it’s your customer who buys the material. The only time the expense comes out of your pocket is if you can’t sell the knife.
The Flat Grind
When using a belt grinder, the flat surface is relatively easy to establish. That is not so easy using a grinding wheel because it takes lots of different “tracks” to make the wedge, and then the tracks have to be blended into the surface of the steel with a disc sander, or by draw filing.
Use a red, waterproof marking pen to ink in the blade prior to each new grit size. I use 60-grit belt for rough grinding the blade, then go to a 120-grit belt, which creates a fine enough finish prior to heat-treat. Use an OptiVISOR or other headband magnifier o check your progress. Any grinding scratches that remain will show up easier because of the red ink. Check for those remaining scratches under a good light. Look at the blade from tip to tang, then from edge to back. The flat grind is easy to get right when using the belt grinder with a flat platen.
Sequence for Grinding the Bevels
1) Double-check the blade profile to see if it is correct;
2) To establish the thickness of the edge, I like to make two lines with approximately 1/32-inch between the two. Grinding to the line from each side will leave approximately the correct thickness at the edge to make it safe for the quenching operation. If the bevels are brought down to a thin, nearly sharp edge, the edge may crack or warp during the quench. The photo on page 38 shows two ways to mark the centerlines;
3) Mark the place on the side of the blade where the bevels will end, sometimes called the “plunge grind” or “termination point;”
4) Grind a flat bevel, at approximately 45 degrees, down to scribed line on each side of the blade;
5) Next, grind a series of shallow grooves, or tracks, the length of the blade until the width of the bevel is established and fairly flat. As an alternate method, you can create a convex blade shape as you go along. Use a straight edge to check the progress of either the flat or convex grind. If you find that you are having a lot of trouble with the grinding it would be appropriate to get some mild steel on which to practice;
6) Be especially careful to not grind past the drawn lines that mark the termination point of the grind. Also, don’t grind so high on the back as to make the back of the blade thinner than you want;
7) Grind several passes on one side of the blade and then grind the same amount on the other side. This keeps the stress in the blade more uniform. Taking off all the material from one side of the blade before the other side is ground can cause it to warp;
8) Once more, do not make the edge too thin prior to heat-treatment. You should leave approximately 20 percent of the steel to take off after the blade is hardened and tempered;
9) Put together a blade-wedge-checking jig made of wood or other material. See the related photo. Adjust the jig on a knife blade that has a wedge that you like, lock the wing nut and then put the blade you’re working in the gauge to see if it is thin enough;
10) If you don’t have a belt grinder, use a disc sanding setup to smooth up the tracks from the grinding wheel. If the grinding wheel was 36-40 grit, start disc sanding with an 80-grit disc, then go to a 120-grit disc, and then to a 240-grit disc. That will be fine enough to go into the heat-treating sequence. The self-adhesive discs are used here; the flexible disc attachment was made for them. See the accompanying photo. Trim off any excess disc material so that a fairly sharp corner can be created;
11) You may find that your blade is slightly convex, but that is fine as long as it isn’t too thick;
12) Smooth up the back of the blade, or leave it square, the latter of which, to me, seems a bit unfinished. I always create a false grind, or simply round the back of the blade. The working knife will have a rounded back that is first rough shaped with a file, then finished with a grooved stone. The photo shows how I use a medium Crystalon stone with a groove in it to get a nice radius on the back of the blade;
13) Use a fine stone or sandpaper to get all coarse grinding marks out of the edge, with the movement of the stone or sandpaper being from the blade ricasso (between the blade and tang) to the tip and back. This eliminates any “stress risers” that might lead to an edge crack during the quenching process. Use your fingernail to feel for coarse grinding marks, nicks or anything that’s not smooth. They’re called “stress risers.” The stress created in the quench can cause a crack to form at a stress riser, and they must be eliminated;
14) Do not use the flexible disc on the ricasso. That should be done with a fi ne belt on a platen or flat disc, or by hand as shown in the picture. The photo shows how a sheet of wet or dry paper is folded in half, clamped to a flat piece of steel and the ricasso is finished with handwork. This method takes a bit of time but the results are nice when taken down to a 600-grit finish; and
15) Be sure that there is a rounded junction where the tang meets the ricasso. Give the whole blade a once over and it is now ready for the heat-treating sequence.
Draw Filing
Draw filing is an old-school technique that allows a surface to be worked extremely flat. It is a good skill to develop if you don’t have a belt grinder. With knife work, the draw filing is used to get the blade flat prior to heat-treating the blade. The blade will be too hard to draw file after being hardened and tempered.
The file is held at both ends and is alternately pushed and pulled across the work. The action of the file on a blade would be to draw it the length of the blade.
When the file is pushed, as in normal filing, the teeth are more apt to dig into the work and leave a rough finish. A standard mill bastard file works best for getting a smooth finish. A double-cut file will remove material quicker but will leave small ridges that have to be worked out with the mill bastard file.
A light touch is best because it keeps the teeth from digging too deep. Keep a file card close by, and every so many strokes, use it to keep the teeth free of filings. When the teeth are allowed to plug up, it can cause galling of the surface and that will only make more work for the draw filer. If the file is lubricated with chalk dust, it is supposed to help keep the teeth from clogging. I’ve tried it both ways and don’t notice much difference; it may depend on the type of material being worked.
There are plenty of cheap, imported files for sale. I’ve tried some of them and found them to be a waste of money. It pays to buy good, quality files and Nicholson is the brand that I prefer. Time is money and they will make the work faster and smoother.
Heat-treating
Learn more about how to start making knives in this go-to book.
Civilization as we know it would not be possible if man had not learned how to utilize iron and steel to the high degree of which it is employed today. Steel is unique and useful because it can be treated so that it is extremely hard, springy or relatively soft.
As knifemakers, we can utilize the extreme forms that steel can be heat-treated to for our advantage. The best example of this is a blade that has been either selectively hardened or selectively tempered. Such a blade can have an extremely hard edge, yet withstand a 90-degree flex test. This is possible because the edge is hard, the center section of the blade is spring tempered and the back is relatively soft.
Heat-treating can be described as certain time/temperature treatments performed on a metal to gain specific strength, ductility or other properties. The heart of any knife is the heat-treatment the blade received. The heat treatment will be considered a success when the blade is capable of doing the work expected of it.
If a blade is too soft, it will not stay sharp and could actually bend from being used for hard work. If it is too hard, it will chip or break in normal use. The successful knife heat-treatment leaves the blade just right, not too hard but not too soft. The ideal hardness is best worked out by trial and error by comparing blades with new types of steel or heat-treatments against blades of known value.
There are three elements to any heat-treating process—heating, cooling and time. A little difference in temperature can have a big effect on the results. The element of time is perhaps less important, but it is always the correct combination of time and temperature that is necessary to accomplish the transformations that give the desired results. Each steel type has its own unique combination of time/temperature cycles that will result in a blade of superior strength and cutting ability.
Edge-holding ability is almost entirely dependent on a relatively high hardness. I would estimate that 95 percent of handmade knives are between 57-61 Rc on the Rockwell hardness scale. The specifi c alloy elements in some types of steel will allow them to have more strength than other types at the same hardness. The intended use for the knife will determine the maximum hardness that will be acceptable.
I’m often asked what steel type is best, or what steel type I prefer. My usual answer is that it depends on the heat-treatment. As a general rule, proper heat-treating is more important than the steel type. A relatively simple steel, when properly heat-treated, will outperform a more sophisticated steel that has a defective heat-treat. I’ve proved this many times.
The Quench
When heated to a certain point and cooled quickly, the steel becomes hard, brittle and full of stress; this is called the quench. This form of steel is known as “martensite.” Martensite, as it comes from the quenching process, is brittle, full of stress and unsuitable for a knife. Heating the martensite to a lower temperature will soften it somewhat, relieve the stress, and if the temperature was correct, the result will be a serviceable product. The low temperature treatment, usually between 375- 500 F, is called tempering, or drawing the temper.
Heat Sources
The heat source for the quenching process must generate an even heat and the temperature needs to be controllable. If the heat source is too hot, it will be difficult to get a slow and uniform heat on the blade. When the blade is brought up to temperature too fast or in a heat source that it too hot, the thin sections usually overheat. The gas forge is an excellent source of heat for the quenching process when it can be adjusted to the temperature range required.
Here’s how a gas forge works: A flame heats the liner of the forge or furnace and the radiant heat from the lining heats the material. A burner-tube or torch burning in the open air to heat a work-piece wastes what I would estimate to be 200 percent or more of the potential heat.
When the flame is contained in a heat-chamber or something as simple as the heat trapper described below, the result will be a more even heat and a larger work-piece can be heated. The flame from the torch or burner should never aim directly at the work piece, but instead should be directed so that the flame can wrap around the work, heating the forge liner at the same time.
My first homemade, tube-type “Dragon Breath” forge was built primarily for forge welding in a temperature range of around 2,300 F. It had a forced-air burner that was not adjustable over a wide range. The solution for me was to build a second forge that was designed to run at lower temperatures suitable for heat-treating.
That meant it had to have a smaller chamber and a smaller burner tube with a proportionally smaller orifice. The smaller forge has worked out well for heat-treating and forging. The bonus is that I’m not bothered with the borax flux contamination of blades the way I was when I used the welding forge for forging and heat-treating.
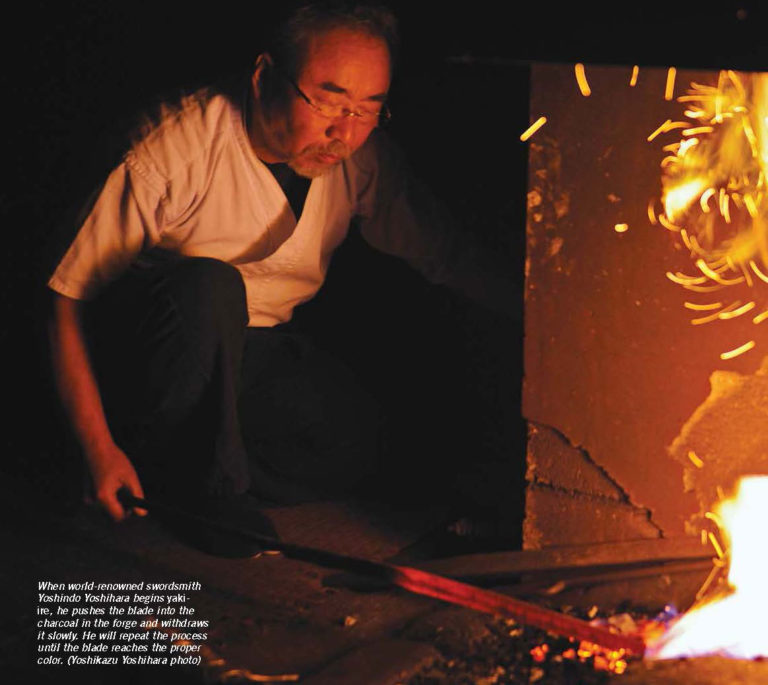
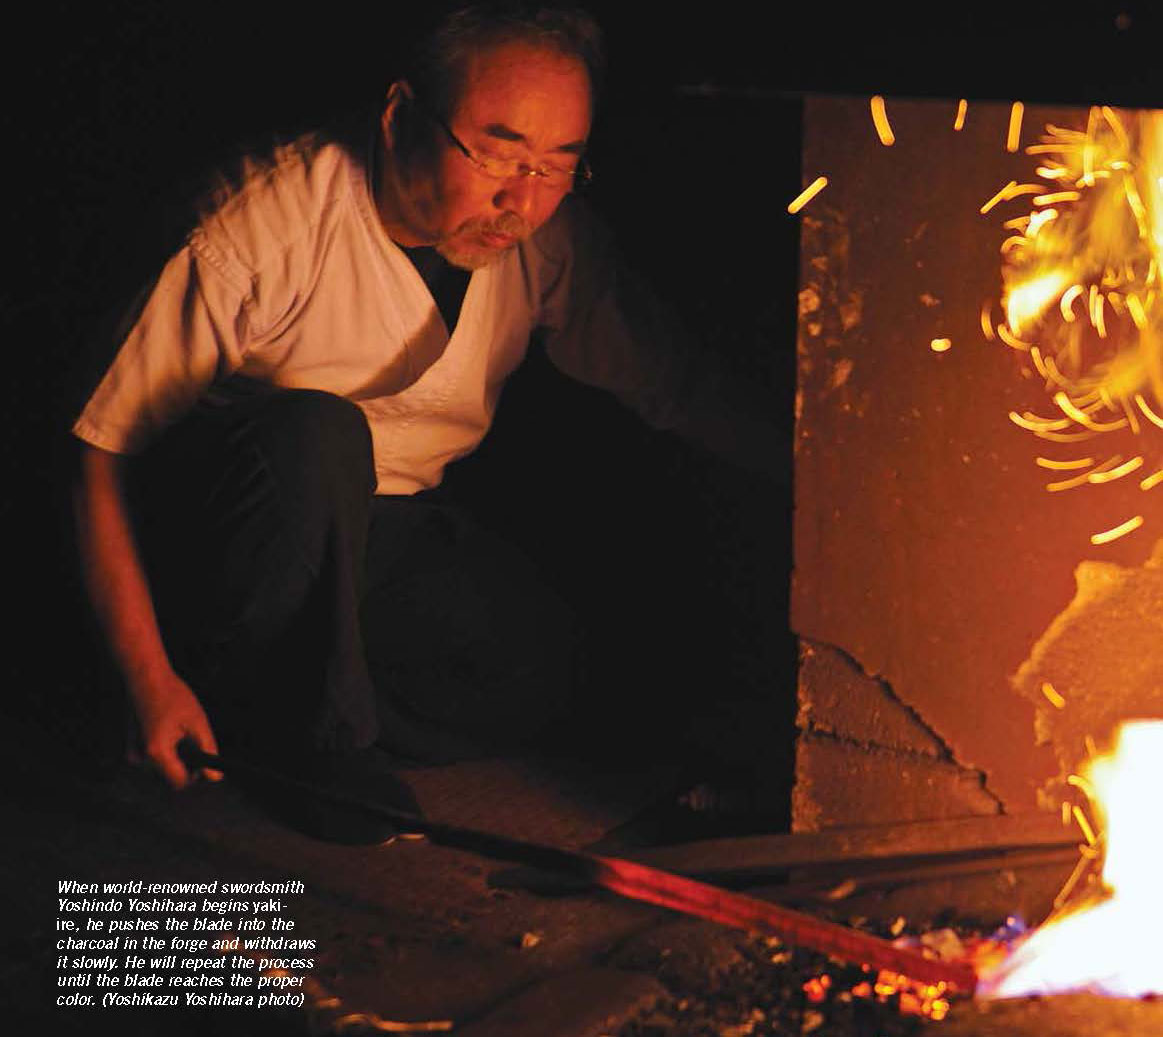
When world-renowned swordsmith Yoshindo Yoshihara begins yakiire, he pushes the blade into the charcoal in the forge and withdraws it slowly. He will repeat the process until the blade reaches the proper color. (Yoshikazu Yoshihara photo)Done in the moroha style, this tanto blade has a double edge with a hamon on both edges. Each hamon is composed of small but long gunome waves, and the two hamon mirror each other. There is a very clear, well-defined boundary (habuchi) defining the entire hamon. (Aram Compeau photo)
A hamon is made using completely traditional methods. The description provided here is intended to explain the method and details as used by world-renowned Japanese swordsmith Yoshindo Yoshihara, though there are variations in the details of the technique as used by other swordsmiths.
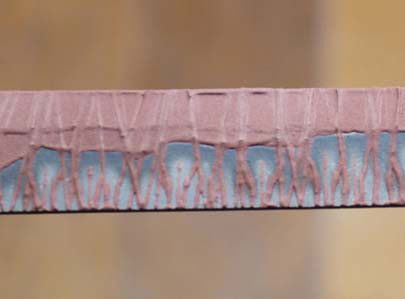
Basically, the swordsmith coats the edge region where the hamon will be with a thin clay layer. He then coats the upper part of the blade with a thicker clay layer above where the hamon will be. A series of clay strips (ashi) are placed across the entire width of the blade from the top surface down to the edge, and the clay ashi determine where the ashi—the extensions that run perpendicular to the sword’s lengthwise direction—will form in the hamon. The boundary line between the two clay types, along with the ashi, will completely define the resulting hamon.
However, the final results also will depend on the steel, the temperature the blade is heated to during the yaki-ire process—which the smith judges by eye—the clay pattern on the blade, and the swordsmith’s skill and experience.
Making Hamon: The Steel
A closer view of the hamon area and ridge at the top of the clay-coated portion.
Japanese swordsmiths use steel called tama-hagane. It is the traditional Japanese steel used for swords and tools since iron and steelmaking was introduced to Japan. A very important property of tama-hagane is its composition. It is almost pure iron and carbon, with very little traces of any other element.
The tama-hagane is forged out and folded over on itself an average of 12 times, though the exact number of times it is folded and worked depends on its carbon content and how it behaves during the forging process. The finished material usually will have a visible grain pattern on its surface—if it is polished properly— and a carbon content of about .6 to .7 percent, which is considered optimal for a traditional Japanese sword.
These properties are important considerations in making a hamon. The traditional method used to make the hamon was developed while working with this type of steel, and, thus, the steel composition is an essential element in making a traditional Japanese-style hamon.
During the early part of the 20th century, the Japanese military establishment wanted all officers to carry a traditional Japanese blade. However, it was impossible to make a sufficient number of swords using fully traditional methods. Consequently, many swords were made for military personnel using non-traditional methods. The primary labor-saving consideration was the use of modern—that is, early 20th-century—steel. Generally, the steel was salvaged from railroad tracks thus, the steel composition is an essential element in making a traditional Japanese-style hamon.
During the early part of the 20th century, the Japanese military establishment wanted all officers to carry a traditional Japanese blade. However, it was impossible to make a sufficient number of swords using fully traditional methods. Consequently, many swords were made for military personnel using non-traditional methods. The primary labor-saving consideration was the use of modern—that is, early 20th-century—steel. Generally, the steel was salvaged from railroad tracks and other structures, and most of it had been fabricated in the late-19th and early 20th centuries.
The steel was forged to shape and then a hamon was formed using traditional methods. Though traditional methods were used to make the hamon for the military swords, and hamon are clearly present, they usually do not appear to be quite the same as hamon made on swords formed from tama-hagane. The hamon are often not as bright as on traditional swords, and there are not many hataraki, or complex details, visible in such hamon. It is probably because the composition of the steel used in the “modern” blades is not the same as the composition of tamahagane.
This means that forming a traditional, complex-appearing hamon in modern steels may not be as simple as just carefully applying traditional procedures.
The Japanese method of making a hamon was developed over a 500-year period specifically to use with Japanese tama-hagane steel.
Tsuchioki: Applying The Clay
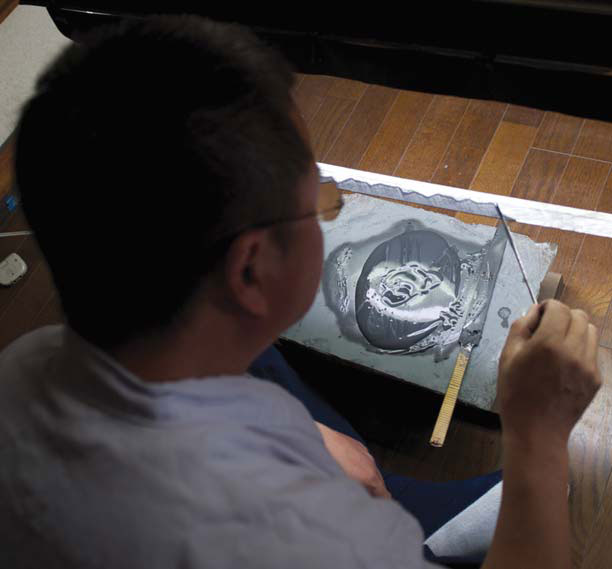
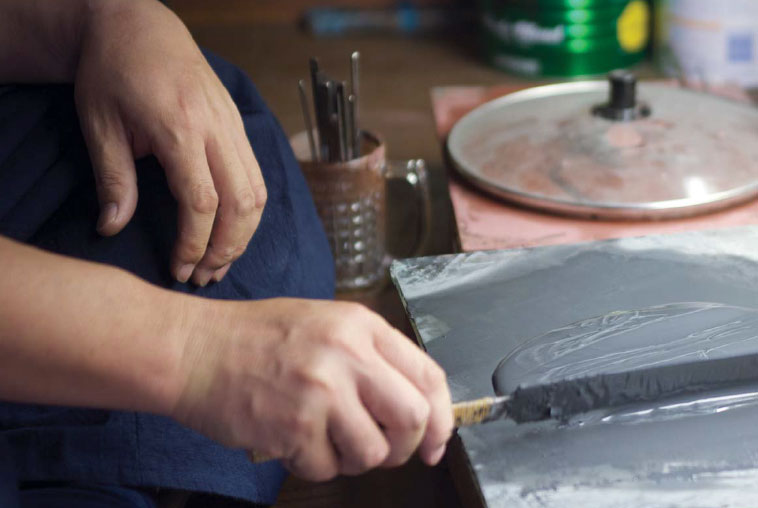
Yoshikazu (applies the black clay to the edge where the hamon will be. The clay is applied and then scraped off, leaving a very thin, minimal layer on the hamon area. Note the ridge at the top of the clay layer. This will be the boundary of the hamon.
After forging, the blade is filed to shape, and the edge is left about .16 to .2 inch thick. If the blade has a sharp edge, it will likely crack during the yaki-ire process. If the edge is too thick during yaki-ire, the final pattern visible on the sharpened edge could be different from what was visible on the outside of the much wider edge during yaki-ire.
When the blade is ready to have the hamon made, it is cleaned again by polishing with the coarsest polishing stones, usually about 200 grit. Rough scratches from a coarse stone make it easier for the clay to adhere to the sword. After this polishing step, there is no contact between bare skin or fingers and the blade’s surface, because oil from bare skin can prevent clay from adhering strongly to the blade. From this stage until after yaki-ire, only the tang of the blade is handled.
The process of placing a thermal clay layer on the blade to form the hamon is called tsuchioki.
A black clay formula is used to coat the edge of the sword. Yoshikazu Yoshihara adds water and mixes the clay until it has an even and smooth consistency. A red clay mixture is used for the upper part of the blade to form the ashi.
Several types of clay can be used. Yoshindo generally uses two types. To cover the edge region, he uses a black clay. It is composed of approximately equal part ground charcoal, clay and ground stone (omura-to or omura stone, a rough limestone used to shape new swords). The clay is spread over the hamon area and then scraped off to leave a thin, uniform layer. The hamon actually cools faster if covered with the clay than if left uncoated. This is because of the fine ground stone in the clay. The fine stone particles produce a rough surface and greatly increase the surface area and cooling rate over the hamon region.
Yoshindo uses a second clay to cover the upper part of the blade above the hamon which is not to be hardened, and also to form the clay ashi to define and form the hamon pattern’s details. The second clay contains ground charcoal, clay and kanahada—finely ground red iron oxide—and this clay has more effective thermal properties. Kanahada is the fine red iron scale that forms on iron or steel surfaces after the metal has been heated to a red or brighter color and allowed to cool. The scale is collected and ground into a fine red powder.
The quantities of the ingredients are approximately equal.
However, many swordsmiths use their own proprietary formulas and may use other ingredients, too. Yoshindo says the clay component is very important—he uses clay made for ceramic work—and the most vital consideration is that the clay must adhere very tightly to the sword.
Before the thermal clay preparations are used, the clay mixtures are worked slowly with water and a spatula until they form a thick, uniform paste. They are applied with a spatula to the blade. The technique requires some practice. Spreading the black clay over the hamon area is relatively straightforward. The second step is to spread the red clay over the upper part of the blade where the hamon will stop.
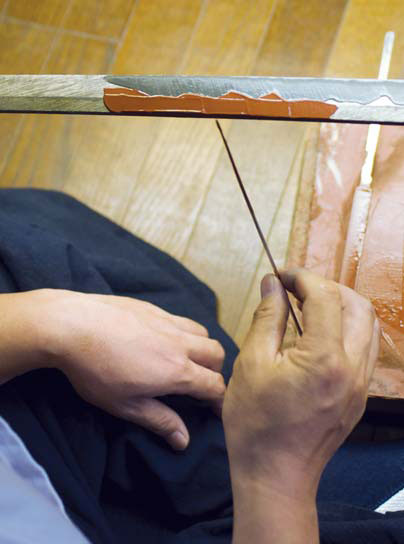
Yoshikazu begins to apply the red clay from the back edge (mune) of the sword down to the black clay boundary. He places the clay on the sword with a spatula, and then pushes it down to the ridge formed by the black clay.
Usually, a ridge is formed with the black clay at the top of the hamon area. The ridge is also the limit of the area where the red clay will be placed. The ridge is reinforced with the red clay and marks the contour that will form the top of the hamon. More red clay is then spread on the upper part of the blade and pushed down toward the hamon to the ridge formed earlier with the black clay.
Once the black and red clays are in position, the ashi are placed on the blade.
Yoshindo uses the edge of a spatula for the procedure. The edge of the spatula is placed into the clay, and then the spatula edge is rolled across the width of the blade from the edge to the back (mune) in one stroke. The ashi can be perpendicular to the blade’s lengthwise axis. This will result in visible ashi in the final hamon that will be perpendicular to the hamon boundary.
The ashi can be very thin or thick and will contribute to the final appearance of the hamon. If the ashi are placed close together, the final result can be regular loops or waves, or gunome. To form choji-shaped loops (where the top of the loop is wider than the bottom), the alternate ashi are slanted in different directions across the hamon.
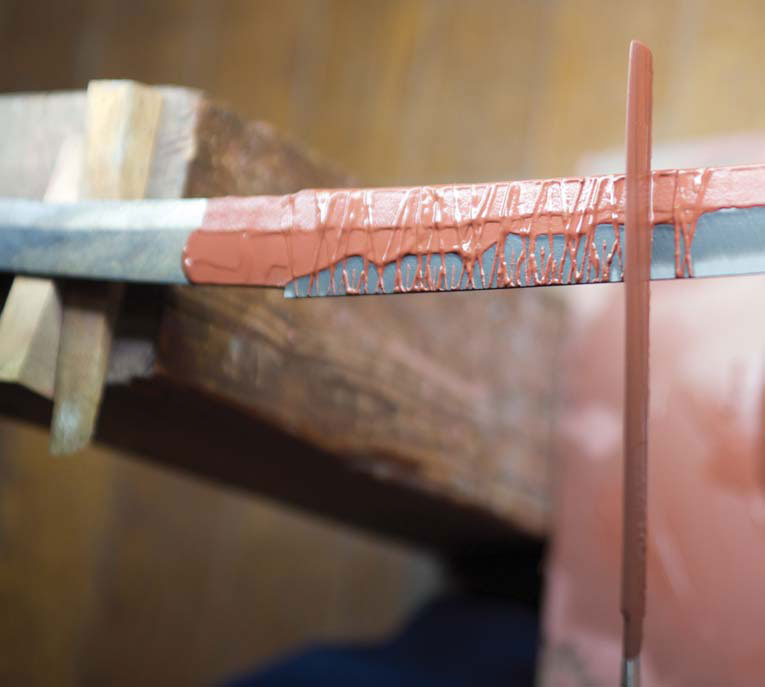
To form the fine details of the hamon, clay strips or ashi are added to the full width of the blade from the edge to the back. A spatula is dipped into the clay and then the edge of the spatula is rolled across the full width of the blade. Smaller ashi will then be added to the bottom part of the hamon, too. This pattern will help to define the choji “waves.”The complex pattern of ashi will form a choji hamon. Note the larger amount of open spaces at the top part of the hamon area.
Even when a correct clay pattern is placed on the blade, the blade’s temperature at quenching is very important. If the blade is heated to the correct temperature and the ashi are designed to produce a choji hamon, the results should be satisfactory.
However, a set of ashi intended to produce a choji hamon could result in a gunome hamon if the temperature is too high. This means many factors must be correct to obtain the desired results, including the steel composition, the clay composition and placement, and the temperature of the sword when quenched.
After the clay coating is finished, it is allowed to dry. When it is partially dry, the light gray areas near the edge can provide a preview of how the hamon likely will appear. Here, light gray choji “waves” are clearly visible in the partial dry clay coating.
Yaki-Ire: Heating and Quenching to Form the Hamon
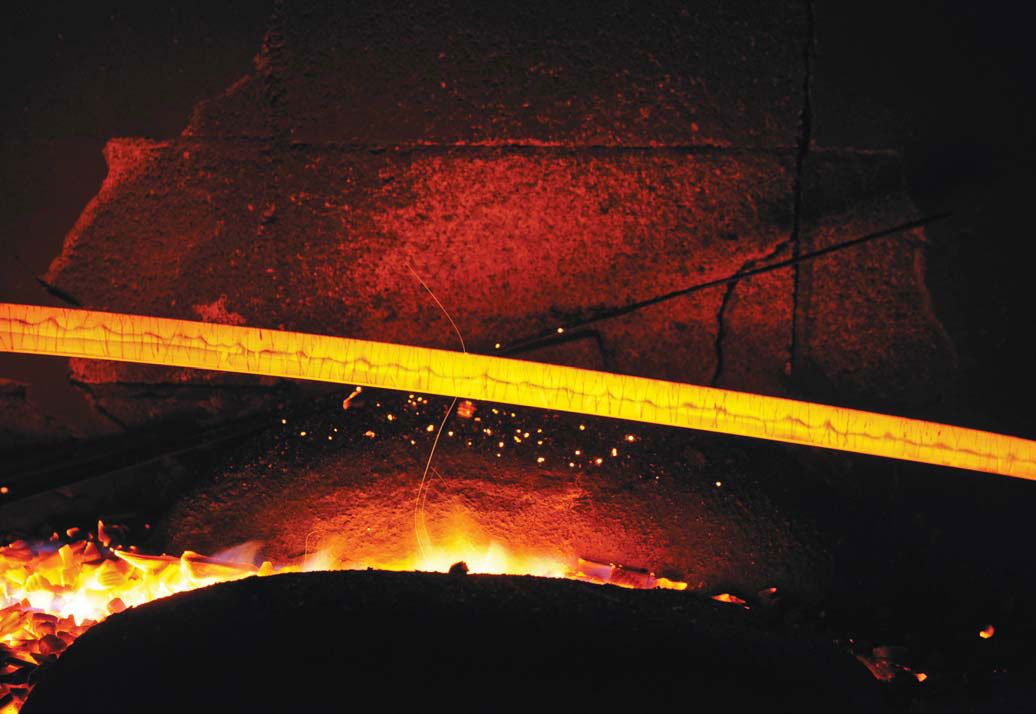
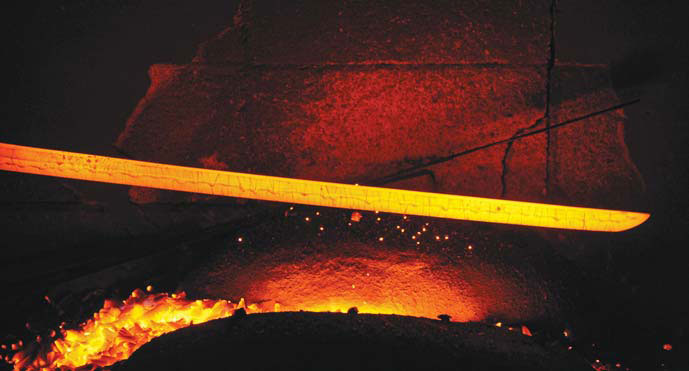
The blade is repeatedly pushed through the charcoal in the forge until it becomes a bright orange or almost yellow color. The hamon boundary between the black and red clays and the ashi is visible. (Yoshikazu Yoshihara photo)The blade is pushed through the forge with the edge down, and it will be heated until the edge is somewhat brighter than the back. The colors must be consistent over the entire blade and the point area to achieve a uniform, well-defined hamon. (Yoshikazu Yoshihara photo)
Heating and then quenching the blade in water in a process called yaki-ire forms the hamon. When the clay is dry and the blade is ready for yaki-ire, the blade is heated slowly in the forge. The charcoal used at this step is cut into very small, fine pieces, each about the size of a sugar cube. The charcoal must be of the pine variety.
Pine charcoal is very light and less dense than oak or hardwood charcoal. When cut into small-sized pieces, it can produce a very hot fire and rapidly heat the blade.
Another important detail is that the small, soft charcoal pieces will not damage or scrape off the blade’s clay coating while the blade is continuously pushed through the fi re in the forge to heat it.
World-famous Japanese swordsmith Yoshindo Yoshihara begins the yaki-ire process by pushing the blade into the forge slowly with the edge up, and then slowly pulls it out.
When the blade reaches a bright orange to yellow color, it is rotated and pushed into the forge with the edge down. Yoshindo will continue until the edge is visibly hotter and brighter than the body of the blade.
Click for a larger view.
When the blade is ready, the edge will be brighter and hotter than the body, the clay boundary on the blade defining the hamon will be visible, the blade will be uniformly heated along its entire length, and the temperature (as judged by the color) will be correct. At this point, Yoshindo will pull the blade out of the forge and plunge it into a tank of water.
After the blade is removed from the water, it is inspected to be sure the clay coating has remained intact, and that the blade has experienced no severe flexing or bending. The final step is to anneal the blade because it will be too hard and brittle after the yaki-ire step.
The annealing step is called yaki modoshi. Yoshindo pushes the blade through the forge until it reaches a temperature of about 170° Celsius (338°F). Yoshindo can judge this from when the clay becomes dry and from other visual clues.
After yaki modoshi, the clay is removed and the blade is cleaned up rapidly with a grinding wheel under a water jet to prevent the blade from overheating.
The hamon easily can be seen at this stage after pouring a solution of 5 percent nitric acid over the blade. If the blade passes this inspection, the polishing process will begin.
Blade Stresses
Click for a larger view.
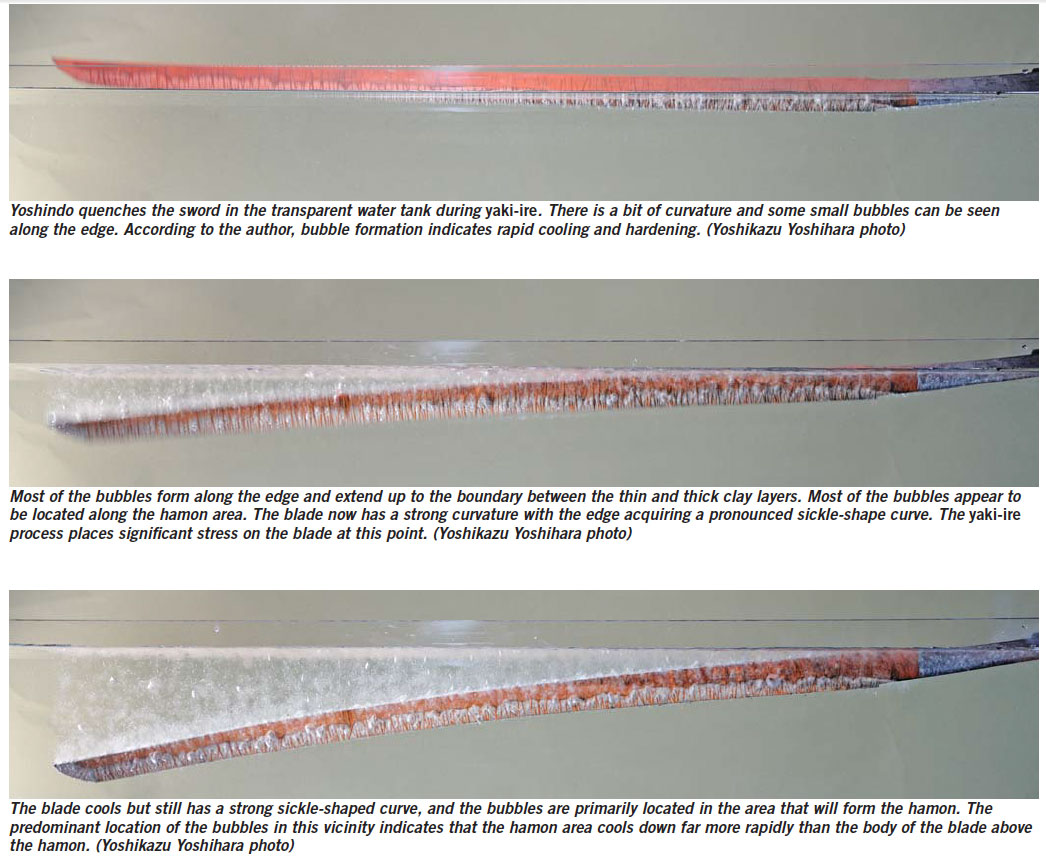
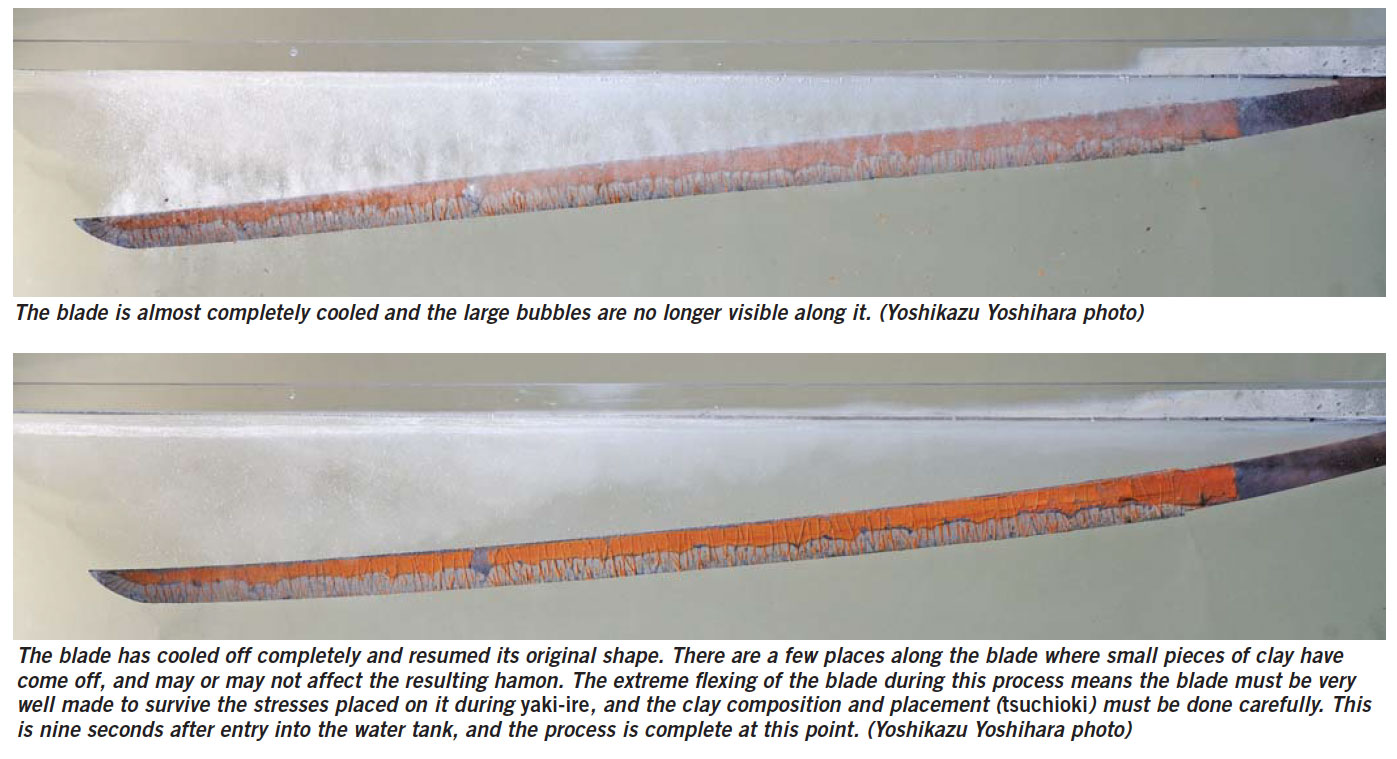
The accompanying photos taken of a transparent water tank built by Yoshindo and his son Yoshikazu shows how the blade behaves during yaki-ire.
When the blade enters the water, it is nearly straight. Shortly thereafter, the blade curves towards the edge. As the blade cools, it reverses the curvature and curves toward the back surface. Thus, a blade flexes twice during the quenching process: first strongly toward the edge, and then strongly toward the back.
At the end of the quenching process it may be nearly straight or have some degree of curvature toward the back surface. The degree of curvature remaining after yaki-ire may be fairly uniform or variable and almost random. The final curvature is produced by hammering and local heating to produce the precise curvature the swordsmith wants.
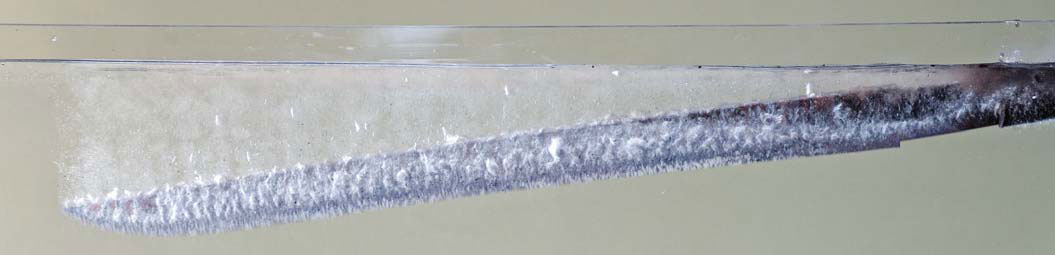
Hadaka-Yaki: Making a Hamon Without Clay
A hira zukuri tanto is plunged into the water during the hadaka yaki process—yaki-ire with no clay coating on the blade. The blade has curved down so that the edge has a concave contour. Bubbles, including many large ones, cover the sides of the blade. (Yoshikazu Yoshihara photo)
A hamon can be formed without using a clay layer, and one of the most famous schools of swordmaking, the Ichimonji School in Bizen circa the 13th century, used this method. The blade is prepared in the same way as described above, but no clay is placed on it. The blade is heated in the forge as before, first with the edge up, then with the edge down. When the edge is visibly hotter than the blade’s body, it is plunged into a tank of water.
The edge should be approximately 800°-850°C (1,472°-1,562°F), and the body of the blade should be approximately 750°C (1,382°F) or lower.
If the blade is prepared properly and heated correctly, an interesting hamon will form. This type of hamon can have abundant ashi and a gunome or choji hamon with plentiful hataraki.
However, the swordsmith will have no control over the final hamon form, and the hamon will vary with each hadaka-yaki attempt. Using a thermal clay coating allows an experienced swordsmith almost complete control over the final hamon, so most swordsmiths use clay today, though some swordsmiths do use hadaka-yaki to form the hamon.
An accompanying photo shows hadaka-yaki (with no clay on the blade). The blade is a large hira zukuri tanto, so the extent of flexing is not as great as that seen with the katana or long sword. However, the pattern of cooling along the blade and bubble formation and distribution are clearly different for hadaka-yaki than for traditional yaki-ire. Far more bubbles form all over the sides of the blade with hadaka-yaki.
For yaki-ire, bubble formation is concentrated along the edge of the blade. Since bubble formation indicates rapid cooling and hardening, the cooling patterns and hamon will be different with the two methods.
Evaluating a Hamon
A hamon must meet certain criteria to be considered good or functional on a Japanese sword blade. There must be no nioi-gire or gaps in the nioi line defining the hamon. The nioi should form an even, wide and clear belt along the length of the sword. The hamon boundary (the habuchi), whatever its shape and style, should be clear and strong everywhere along the blade. There should be some hataraki or ashi, and a clear, recognizable pattern. The hamon on the point should be well formed and clearly visible. The hamon should form a good composition with and complement the blade so that the entire presentation forms an aesthetic whole.
It takes a considerable amount of experience and effort to make a properly formed and aesthetically complementary hamon on a Japanese sword blade.
It often takes years of experience before a young Japanese swordsmith can consistently make good hamon.
A hot movie knife can still take on a life of its own, but the shift toward video games in entertainment is changing the relationship between knife enthusiasts and screen time. Global video game revenue was estimated at $108.9 billion in 2017. That’s more than the movie and music industries combined.
With numbers like that, it’s no wonder that some of the newest, and youngest, collectors to commission custom knives draw inspiration from popular video games.
Here’s one example.
Making The Far Cry 4 Video Game Knife
The knife featured in the “Far Cry 4” video game. (image via farcry.wikia.com)The knife in “Far Cry 4” is wielded from a first person point of view. (image via farcry.wikia.com)Tim Flack, a knifemaker from Capetown, South Africa, received a commission for a knife featured in the video game, “Far Cry 4.” (image via Facebook)
Tim Flack, of Flack Handmade in Capetown, South Africa, recently received a request to recreate the knife featured in Far Cry 4, an action-adventure video game. The knife is inspired by the real-world kukri, although the iconic bend in the middle of the blade isn’t as pronounced.
This presented a challenge for Flack. Unlike movie knives, which follow physical specs, there wasn’t a template to work from. The knife only exists in the video game, although the Extrema Ratio KH is often cited as the inspiration.
Flack filled this gray area with his own creativity.
“I gave it a more practical look and feel,” Flack said in an e-mail.
It helped that the collector commissioning the knife acknowledged there was wiggle room.
“[The client] wanted the blade to look aged and battle used,” Flack said. “This was a challenge, as it’s been drilled into me that fit and finish is everything. So using fine belts I put nicks into the blade after heat treat, and then left it in a 10-percent ferric chloride solution for 20 minutes.”
The rest of the build followed along the same lines.
“The [stink ebony] handle was also, after the bolsters an pommel were peened on, left in ferric for five minutes and then neutralized in soapy water and bicarbonate of soda,” Flack said. “The handle was then saturated in sure glue and buffed, and then scuffed and sanded to age it.
“The ‘engraving’ was cut from vinyl and then transferred onto the blade with a nine-volt battery and some salt water on a Q-tip.”
It took three grinds to finish the O1 blade’s edge: a full flat that turned into a hollow, and a convex on the tip. The overall length of the completed knife came in at 370mm (14.56 inches).
Worth the Challenge
Flack acknowledged that the knife was a challenge to create, but that it was worth it in the end for both maker and collector.
“I’m really happy with how it came out,” he said.
Collecting Video Game Knives
The collectibility of video game knife reproductions should follow the path already set by movie knives. These are display pieces that appeal to built-in audiences. They should retain value so long as the game is popular.
How that translates into returns decades down the road is yet to be seen, since video game sequels are regular. Far Cry 5 is slated for release in March.
However, there’s no doubt that this segment of knife collecting is here to stay.