Knifemaking is the building of a knife, which includes the blade, handle and other accouterments. Blades are made by either removing metal from a steel blank via a grinder – known as stock removal – and the forging to shape of hot steel into a blade in the process known as bladesmithing. Other parts, including bolsters, guards, pommels, etc., are needed to complete the finished knife.
Editor’s note: This article is the conclusion toMake a Bowie Knife in 10 Steps. Read that one first if you’re interested in making a complete knife from start to finish.
1) Choose the Material
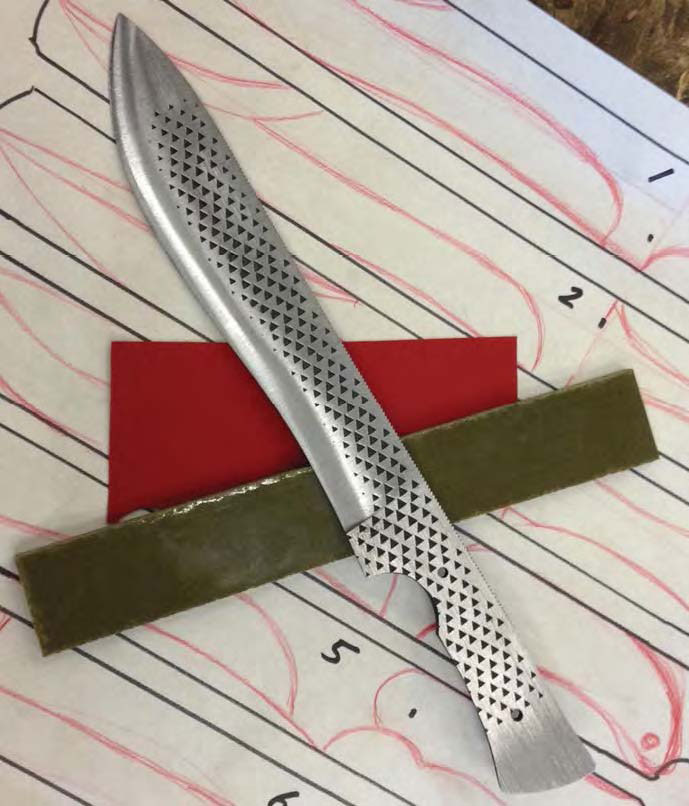
For handle material, I chose olive drab G-10 with a simple red liner for a little flair. The choice for your handle material is up to you.
While the material used, the rasp, is classic and traditional, the handle material will be more modern. I’ve chosen olive drab G-10 with a simple red liner for a little flair. Any material you like would be fine. It’s your knife and the handle is the easiest place to express your personal taste.
2) Lay Out the Scales
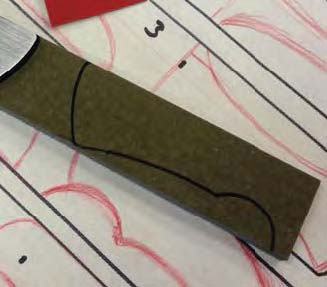
Trace the handle profile. I use a black magic marker since the G-10 won’t absorb the ink.
Now that we have our materials it’s time to start laying out our scales. Trace the handle profile. I use a black magic marker since the G-10 won’t absorb the ink.
If you use a natural or unstabilized material, a pencil might be a better choice to avoid staining or permanent marks.
3) Mark the Holes
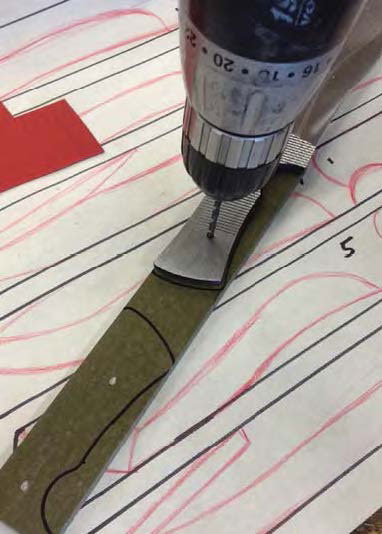
To help ensure your holes will line up, make a light mark with a hand drill and finish in a drill press to help ensure the holes are square and true.
Mark the holes you need to drill on one side of the pair of scales. To help ensure your holes will line up, make a light mark with a hand drill and finish in a drill press to help ensure the holes are square and true.
4) Sand, Drill and Glue
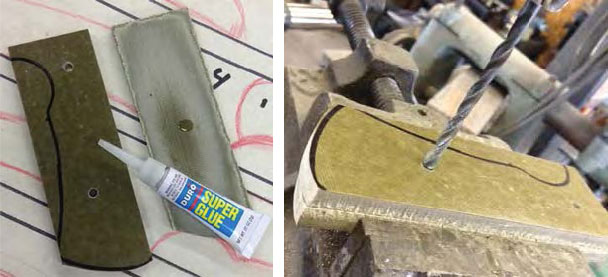
A simple light sanding will flatten the scales and rough up the surface for a better bond. Drill the holes in one scale, place a drop of Super Glue® on the flattened inside surface, and glue the two scales together.
One important thing to remember when doing anything is to never assume. While the handle scales look flat they in fact are not. A simple light sanding will flatten them and rough up the surface for a better bond.
Using the drill press I drill the holes in one scale, place a drop of Super Glue® on the flattened inside surface, and glue the two scales together. This ensures the scales will stay perfectly matched up as you drill your holes and do the rough shaping.
5) Profile the Scales
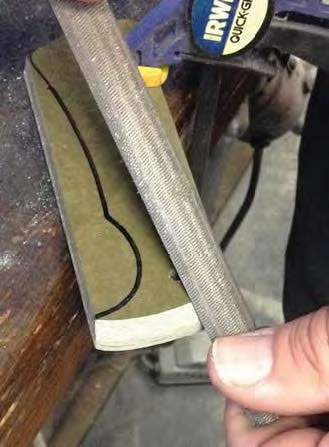
Profile the front of the scales while they are attached by the light glue bond.
Another important step is to profile the front of the scales while they are attached by the light glue bond. First, it is very difficult to clean up the front once it is attached to the blade without scuffing and scratching the blade. Second, it ensures that the faces of the scales will match up just like the holes do.
6) Pop them Apart
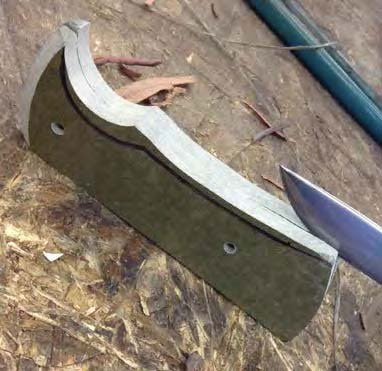
Place the edge of a blade on the seam between the scales. A light tap will pop them apart easily and you are ready to add any spacer material if so desired.
Once the holes are drilled and the rough shaping is complete, simply place the edge of your everyday carry blade on the seam between the scales. A light tap will pop them apart easily and you are ready to add any spacer material if so desired.
7) Trace, Cut and Glue
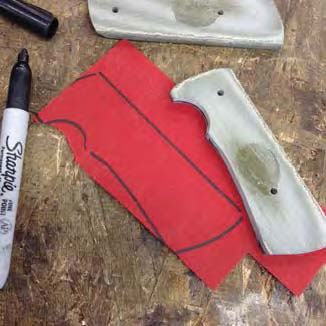
Trace the handle shape onto the spacer material, cut to rough shape and then glue to the inside of the scales.
Trace the handle shape onto the spacer material, cut to rough shape and then glue to the inside of the scales. Super Glue or epoxy is fine for this. Different materials will need different bonding agents. I use Super Glue here because the materials are very non-absorbent. If you choose antler or unstabilized wood, an epoxy is probably a better choice.
Once the material dries, clean up the edges and drill through to match the existing pin holes. A hand drill is fine for this as the holes in the scales will guide the bit.
8) Assembly
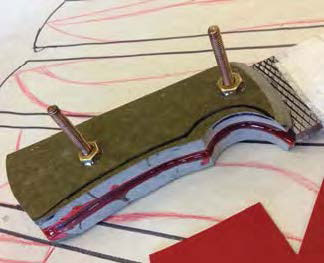
Now you’re ready for assembly. For pins the author uses two simple brass bolts. Use the pins themselves to clamp the scales in place by simply adding a nut and snugging it down after applying epoxy.
Now you’re ready for assembly. I’m going semi traditional and keeping the build simple. For pins I use two simple brass bolts. The advantage is I can use the pins themselves to clamp the scales in place by simple adding a nut and snugging it down after applying epoxy.
Also, the threads on the bolt help add an extra mechanical bond to the handle assembly.
Once you’ve checked the fit of the parts, give them a good spray with brake cleaner to be sure they are free of dirt and oil and to ensure a clean bonding surface.
9) Get the Pins Flush
Clean off the head of the bolt and then extra length of bolt body on the nut side, and your pins will be flush.
After the epoxy dries, take your angle grinder or whatever you have been using—a file or hacksaw will do as well—and clean off the head of the bolt and the extra length of bolt body on the nut side, and your pins will be flush. When doing this be sure to work slowly! Brass heats up very quickly and that can compromise the bond of the adhesive if you’re using power tools.
10) Clean and Shape
Jump into the rich tradition of knifemaking with this collection of essential books from BLADE. You’ll save a bundle with this bundle!
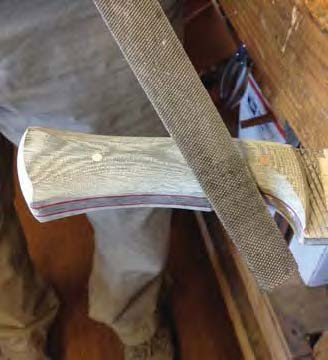
You’re almost to the finish line. All that’s left is to clean up your handle and shape it to fit your hand. When you do this, again, take your time.
Once you remove any material, you can’t put it back. Go slowly and check the fit often till it fits like a glove, an extension of your hand.
Do some cutting and chopping with the knife—this will let you know what, where and how much material you need to remove.
Work through your sandpaper grits to whatever final finish you desire and voila! Your personal vision of knife perfection is in your hand.
I hope you enjoyed this journey of steel as much as I have. Now get out there and put that knife to work!
With the popularity of the original article about knife shop accidents, here are five more knifemaking lessons learned the hard way. Use these stories as examples of what to watch for while in the shop. Stay safe!
“I Sawed My Index Finger in Half”
Lesson: A slow moving metal-cut bandsaw can appear quite harmless, yet one of my worst injuries in over 40 years of knife making occurred with mine.
While hurrying to cut a screwdriver slot into the head of a threaded stainless steel handle escutcheon bolt, I failed to do the two safety steps I apply now: fully support the fastener upon a slotted plate encircling the saw blade and hold the bolt with a pair of vice-grips, keeping my hands a safe distance back away from the blade.
But instead, as I pushed the 3/8″ fastener into the saw blade, it snagged the top edge of the face, dragging it down into the exposed slot in the table in front of the blade, pivoting the front part of my index finger into the blade while wedging it in place with the opposing shoulder on the part. As the blade sawed my nail in two and continued to slice through my entire fingertip due to the back pressure from the part, I had to slowly watch and wait for this gruesome process to end once I quickly turned the machine off.
To say it bled a bit was an understatement, as a friend who’d stopped by after I’d left for the hospital asked excitedly if I’d gotten a deer that morning, due to the amount of blood all over the doorknobs and floor leading into the house.
As the doctor was about to remove the sectioned fingernail pieces and stitch up the huge, tapered gash, I’d chosen to remain seated upright on the bench to watch. However, upon trying to insert the needle into my fingertip to deaden it, the callused tip proved so dense that he proceeded to drive the needle all the way through my finger and out the top, shooting a stream of Novocaine all the way to the top of my shoulder.
At that point, I told him, “I think I’ll lie down now.”
Lesson: Any time you place a blade against a fast-moving wheel, use extra caution.
I was getting ready for a turkey dinner and noticed how dull my knife was. I went out to my garage to my paper wheel. I started to sharpen, but my sleeves were loose. I put the knife down, rolled up my sleeves, and grabbed the knife. The knife caught the wheel like a bullet. It hit the back wall and shot straight at my head. I blocked the knife with my hand, and in doing so cut tendons on top of my little finger at the knuckle. I felt like a fool and knew that I did a stupid thing.
James Merten
“That Got Me Nine Stitches”
Lesson: Don’t assume pliers will never fail.
I’ve had a few times that scared me, but one time stands out in particular. I almost had this knife done, and I was holding the handle in my left hand and the blade in my right with a pair of pliers. The blade slipped, and the point went right through my first finger. That got me nine stitches.
Bill Stout
“The Point Spun Across the Palm of My Hand”
Lesson: Protect your hands when using a drill press.
I just finished grinding the blade and a small clip on this little 3-inch blade. I took it over to the drill press for the handle holes. Little did I know that copper, which is what the customer wanted, would grab the drill bit. The knife started to spin out of my hand, like a helicopter.
Instinct made me hold tighter, but the press was stronger. The point spun across the palm of my hand and gave me a deep, 1.5-inch gouge in the palm of my hand.
Now I always wear a Kevlar glove or use a stopper of some sort to catch the knife if it ever spins again.
Lesson: Locks have come a long way, but they’re not foolproof. Also: don’t stab tires to be a show off.
Editor’s note: This one isn’t about knifemaking, but it’s still worth reading.
I was at one of those big shows they hold at Las Vegas every year. The guy hawking the knife was talking about how his knife had the best grip. He was stabbing his knife through a steel belted radial tire.
As the demo went on he invited anyone from the crowd to come up and try to stab their knife through the tire. Finally, a man that looked like Charlie Daniels decided to try. He had a folder in his hand. He took two or three steps and lunged at the tire knife in hand.
I heard a crack and the big man withdrew his hand like people do when they get cut. He stared at his drooping fingers in disbelief. The lock on the lock back had broke and the folder folded closed on his fingers. The crowd gasped. The first aid guys shuffled him off.
So another big guy comes up with a rather large hunting knife. He raised his hand as high as he could and brought the blade down hard in a hammer fist motion. His hand slid down the handle on to the blade, cutting most of the way through three fingers.
That brought the dog and pony show to an end while the organizers of the show directed everyone’s attentions else where. Lesson learned: let someone else show off for the big crowd.
Ernest Lephart
Share Your Stories
Have a horror story of your own? Tell BLADE about it. It could save someone from injury, or worse.
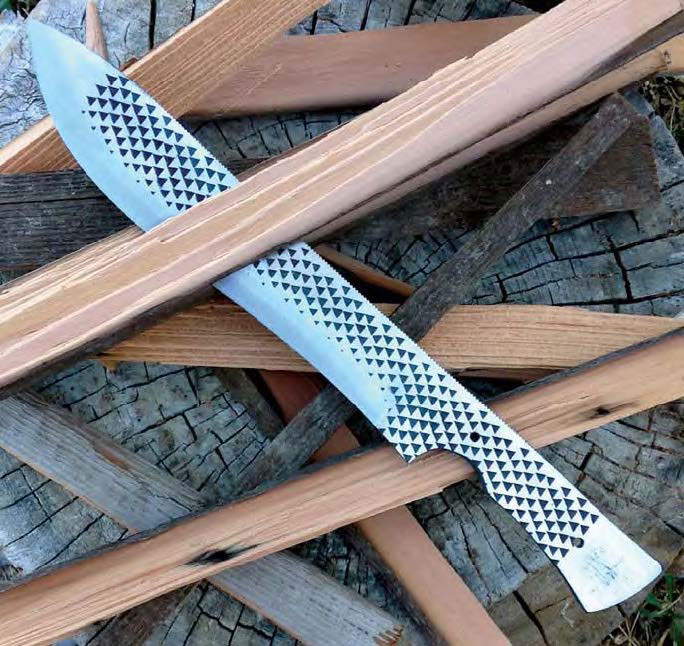
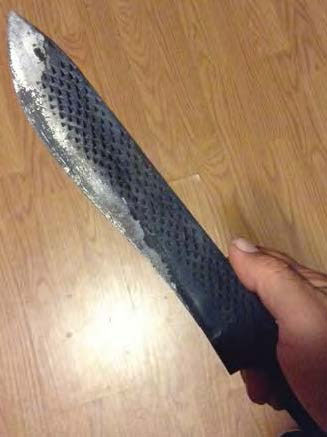
This is what the finished project looks like. The handle is not covered in this tutorial, but the design is ready to take any number of options. (All images by the author)
I’m going to walk you step by step through making a bowie from a common farrier’s rasp, as simply as possible, with a few tips to save time and improve the finished blade as we go. It is a simple bowie-style camp knife useful for all sorts of tasks.
1) Pattern Sketch
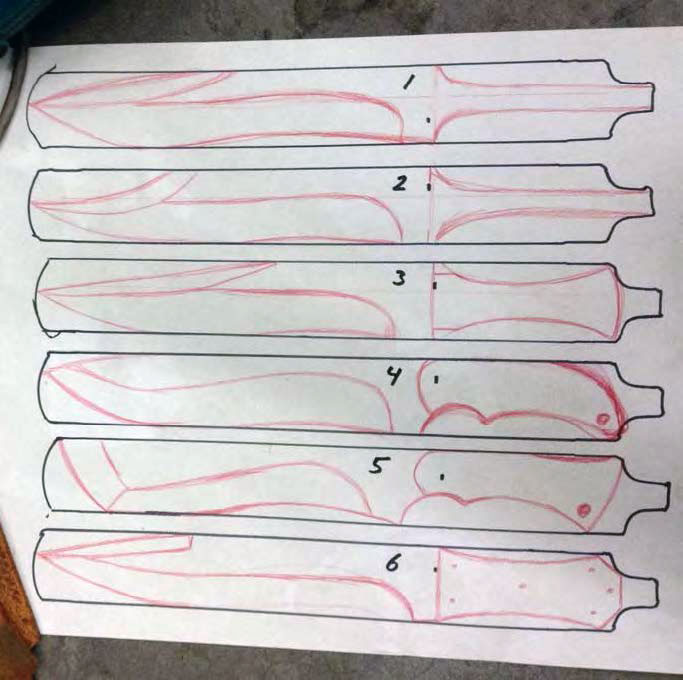
The author traced assorted patterns on the rasp images on a large sheet of paper so he could compare each style side by side and see what works and what doesn’t.
The first thing you need to do is decide on a style that suits your needs and your purpose. I find that visual aids are the easiest way to get the results I’m after, so I often do several sketches and drawings to decide what I’m trying to accomplish.
For this I traced the rasp multiple times on a large sheet of paper so I could compare each style side by side and see what works and what doesn’t, as well as what the maximum potential of my material was. I decided on blade shape #4 with handle shape #5. The combo should be a good general chopper and comfortable in the hand.
By visualizing this way I can mix and match infinitely. Don’t be afraid to get creative, especially when using recycled and often-free materials. This is a chance to express yourself and your vision in steel.
2) Annealing
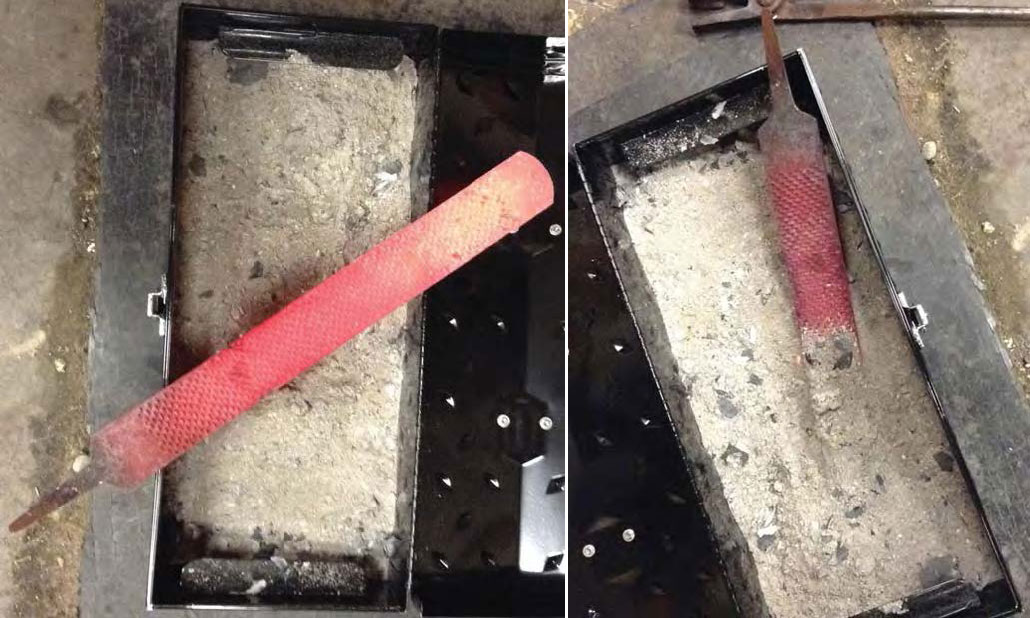
Heat the rasp to nonmagnetic and then bury it in a simple metal toolbox filled with clean wood ash.
Now you have a design in mind, but, before you can achieve bowie knife greatness, you must anneal the rasp so it can be shaped, drilled and ground more easily.
It is certainly possible to make a rasp or file knife without annealing, but great care must be taken not to get the steel too hot and ruin the temper. Moreover, the high hardness of the file in its current state means a blade made this way would be very brittle and prone to breaking under hard-use conditions.
If you have access to a heat-treating oven, by all means use it to anneal your steel. This is a very simple and basic build, so I’ll be heating the rasp to nonmagnetic and then burying it in a simple metal toolbox filled with clean wood ash. Burying it insulates the steel, allowing it to cool very slowly. The slow cooling softens the steel so it’s easier to work.
Vermiculite is also great for this step if you don’t have access to wood ash. Vermiculite can be purchased at most garden centers and insulates very well. It will take several hours for the rasp to cool. Don’t rush it! It will be well worth it once you start filing, drilling and grinding.
3) Design Transfer
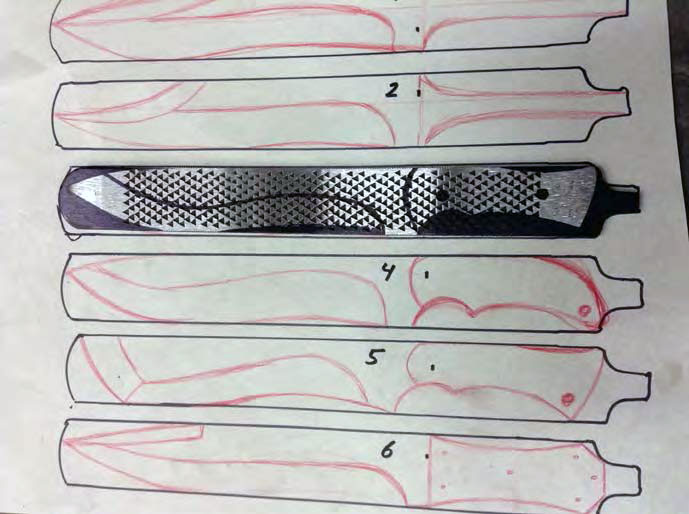
Once the teeth are cleaned off, transfer the blade design to the rasp.
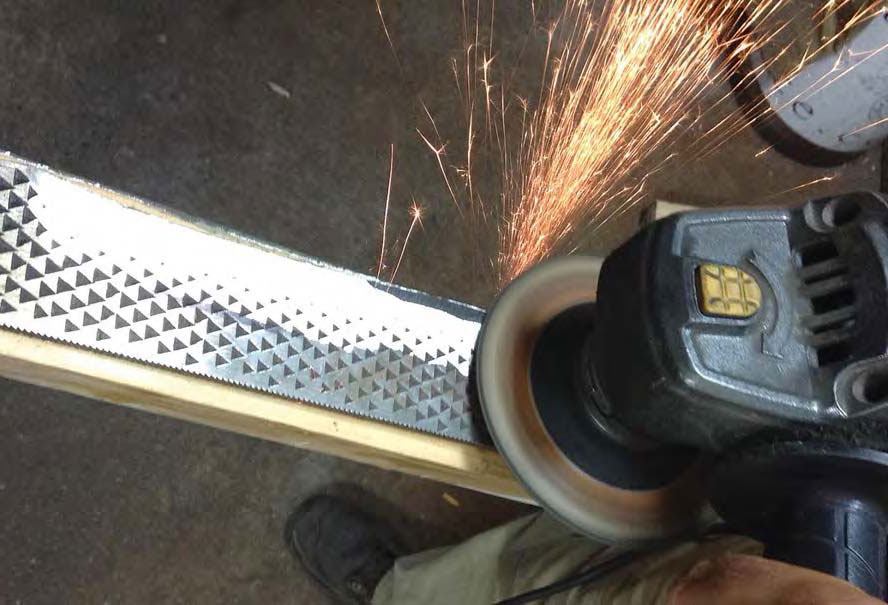
The rasp has cooled and it’s time to go to work. The first step is to grind the teeth off both sides. This leaves a nice, flat surface to work with but the memory of the rasp is left behind, which gives the knife a distinctive, rugged look.
An angle grinder will work great for this task, but any number of basic tools will suffice. Use whatever is readily available to you. Once the teeth are cleaned off , transfer the blade design to the rasp. Cutting out the pattern and over spraying it with black paint works very well.
However, since this design is fairly simple, I drew it out with a permanent marker.
4) Notched & Cleaned Up
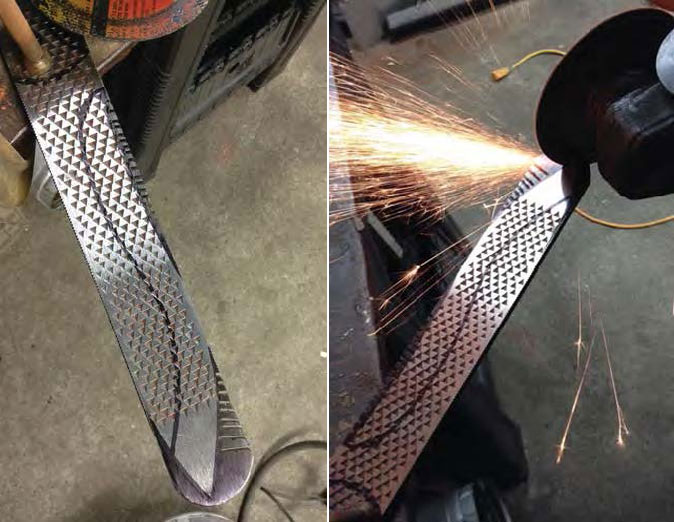
When you go to cut out the profile from the rasp (left), notching out the shape with a hacksaw or cutting wheel (right) makes the job much easier.
Now you can start cutting out the profile. Notching out the shape with a hacksaw or cutting wheel will make the job quite a bit easier. I find that removing small pieces of metal is easier then trying to make large cuts.
After the bulk of the steel has been removed, the final profile can be shaped out with files or an angle grinder.
5) Drilling Pins
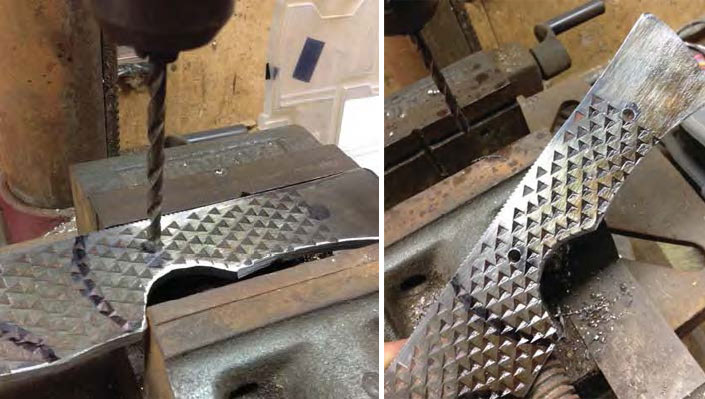
Drill a couple of holes for pins. The author uses brass bolts for the latter.
The blade is starting to take shape. Now is a good time to consider what handle material is best for your creation.
There’s no wrong choice. With the seemingly limitless options available today, you can truly express yourself from mild to wild. If you’re feeling traditional you can go with antler or perhaps stacked leather.
If you want to go more cutting edge, there are hybrid burl blocks with every color resin in the rainbow. Shredded money and eggshells are even finding their way into knife handles these days.
I’m going more traditional, so now is the time to drill a couple of holes for pins. I’m going to use brass bolts as pins. They are inexpensive and can be bought at any hardware store. The threads add an extra mechanical bond when they are epoxied into place, and also act as built-in clamping devices to ensure a solid, tight fit-up when the scales are applied.
6) Grind the Bevels
Rough grind the bevels. The author used a 4-inch angle grinder. Leave the edge about the thickness of a penny.
With the profile cleaned up and all necessary holes drilled, it’s time to start grinding in the rough blade bevels in order to get your blade ready for hardening.
The trusty 4-inch angle grinder goes to work again, though a bench-top grinder or even a good, sharp file will get the job done. The goal here is simply to remove the bulk of the metal on the sides of the blade evenly so there is less work to do after hardening.
Don’t grind all the way to sharp at this point! Leave the edge about the thickness of a penny—this will protect the steel that will become your cutting edge from overheating and decarburization, helping to ensure your finished knife will live up to its maximum potential.
Once the bevels are roughed in, finish up with sandpaper or a flap disc to 220 grit. Be sure to remove any deep, heavy scratches, as these could lead to cracks during hardening.
7) Heating and Quenching
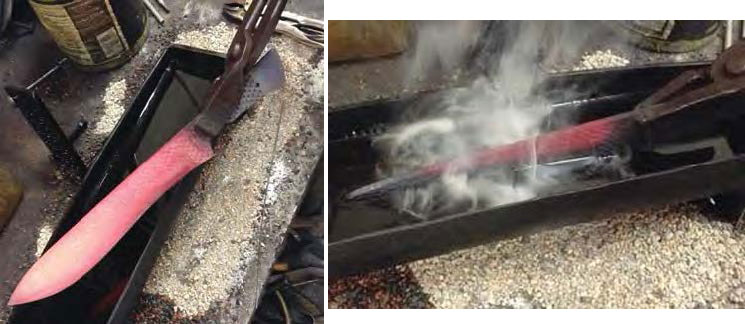
After you heat the blade to nonmagnetic, quench the edge.
Now you’re ready to harden some steel! I’m going to use a forge to heat the blade to nonmagnetic—aka the critical temperature—though a torch works equally well.
Slowly bring the blade up to temperature and check it oft en with a magnet. When nonmagnetic is reached, edge quench to harden the cutting edge, and leave the spine slightly softer for additional strength and toughness.
Submerge the blade in the quench oil once all the color has left the blade and it goes to black. Allow the blade to cool to room temperature in oil. This will take an hour or so.
A variety of things will work as quench oil and everyone has a favorite. Depending on the types of steel used, I’ve had good luck with canola oil, ATF transmission fluid and mineral oil. I quenched my blade in Texaco type A.
WARNING! Mixing hot steel with oil can and will cause a fire! Be sure to take appropriate safety precautions. A well-ventilated space free of other flammable materials, as well as personal protective gear and a fire extinguisher, are musts!
8) Check for Hardening
Once the blade has cooled, remove it from the oil and clean it off. Brake cleaner works well for this, as well as simple dish soap and warm water.
Once the blade has cooled, remove it from the oil and clean it off . Brake cleaner works well for this, as well as simple dish soap and warm water. If the hardening was successful, you should see an area of clean steel on the cutting edge where the carbon scale has popped off the blade.
A second simple and easy way to check for a hardened blade is with a fresh, sharp file. Run the file over the knife’s cutting edge. The file should skate easily and not bite into the edge. If this is the case, you are ready to temper the blade.
9) Tempering
During the basic heat treatment and tempering process, the steel oxidizes and the clean portion changes color.
Tempering is a fairly simple process. Basically, in order to reduce brittleness and increase toughness, tempering is heating the blade to a lower temperature than you did in the annealing step.
Again, if you have access to a heat-treating oven, by all means use it. However, a toaster oven or basic household oven will work just as well. Oven temperatures vary greatly—especially toaster ovens—since they lack heavy-duty insulation. This means the exact temperature you need to use will vary as well.
I start by putting my blade in the oven for an hour at 375°F. As the steel heats it oxidizes, and the clean portion changes color. This is a simple, basic heat treatment and temper, so the color change is your indicator rather than an exact temperature.
As the heat rises the color goes from a bright gold to a shade of bronze straw, then a light purple to a blue on its way to a dark blue/almost black. The dark bronze to purple is your goal. The blade should be hard enough to hold a good edge but soft enough to not chip or break during use.
I did three one-hour cycles, each 25°F hotter according to my oven, and 425°F was the temperature that gave me the desired result. A simple trick to get a more even heat in a regular household oven is to put a sheet pan on the bottom rack.This holds heat closer to the element and keeps the temperature fluctuations to a minimum.
10) Finishing and Final Edge
Jump into the rich tradition of knifemaking with this collection of essential books from BLADE. You’ll save a bundle with this bundle!
Now you have a hardened and tempered blade ready for finishing and a final edge.
You need to remove only a small amount of steel to get down to the final edge. Don’t rush at this point! Go slowly to keep from getting the steel too hot and ruining all your hard work up to now. As long as the steel stays bright and shiny you will be fine. Any discoloration at this stage means overheating and the risk of losing the blade temper.
You also are working down to the final, finished and sharp edge. Stitches aren’t cheap! Be aware of where your fingers are.
Some light grinding or fi ling as in the previous steps will bring your bevels down to the finished edge. Polish to at least 220 grit. A higher-grit polish will look more finished, as well as be less prone to rust, and provide smoother, more fluid cuts.
Once you get to 220, it’s time to apply an edge and see how you did. Some simple test cutting and chopping will tell you if you need to change anything, such as the thickness of your cutting edge or if you need to re-temper perhaps a few degrees hotter. Use the materials you originally planned on cutting with your new bowie to decide this.
For example, since the blade primarily will be a camp knife, simple tests such as splitting kindling, cutting rope and twine, and making the all-important hotdog stick will tell you what you need to know.
The rich tradition of knifemaking is full of rewards, but it demands respect. The ways a knife shop can inflict bodily harm are endless. That’s why BLADE asked knifemakers to share some of the worst accidents in their shops. Hopefully, others can learn how to avoid making the same mistakes.
Stay safe!
“Like a Missile Straight at My Right Shin”
Lesson: Save sharpening for the last steps of making a knife.
There’s a reason sharpening should ALWAYS be the last thing you do on any knife before it leaves the shop.
A few years back I was working on a large Bowie. The customer requested a sharp, full convex edge on the clip/swedge area. Against my better judgement, I got in a hurry and sharpened this swedge as soon as the knife was back from heat treat…with a lot of work left to perform with this razor sharp edge on the clip.
Somehow I managed to let the tip of the knife bite into a cork belt which caught it and ripped it out of my hands and sent it like a missile straight at my right shin. Since that top edge was sharp it cut through my boot and buried itself about 3/4-inches into my leg. It filled my boot with blood and ended all work for a couple days.
If I hadn’t been wearing boots or if both edges had been sharpened, I’m sure it would’ve exited the backside of my ankle and possibly crippled me, or worse. It was a lesson that reinforced a very basic rule of our craft and I don’t think I’ll ever forget it.
The buffer is the silent sleepy monster that can lull you into a wheelchair for life or just take it from you in the blink of an eye.
When I started making knives about six years ago, I had this cheap Ryobi buffer that I spent like $40 on. Thank God I did, because if it would’ve been stronger, I’d probably not be here right now. That thing ripped a fully sharpened drop-point hunter right out of my hands and spun it around to to the ground with the tip hitting first.
I was sitting down in front of the buffer, and the knife went right through my legs. Stupid hurts, and that was as stupid as it gets.
I still probably I don’t realize how close I was to death. It scared the s*** out of me, enough so as to never use the buffer facing in front of me ever again. I stick to the side now, and am always alert with the door locked so no one can come in to distract me.
I love making knives and every thing about it, except for the buffing and polishing.
“All the Skin and Part of the Finger Nail was Ground Off”
Lesson: Wear gloves while using a grinder.
While rough grinding a blade on my 2×72 belt grinder, I was pressing pretty hard against a 36-grit belt. At the time, I thought to myself, I need to stop and grab a pair of leather gloves.”
Sure enough, the blade slips, and I drove my finger in to the belt. It was only a split second, and I jerked back instantly. It was still enough time for 36-grit traveling at 1,750 rpm to do the job. All the skin and part of the finger nail was ground off.
I always say I put a little blood into every knife, usually when hand finishing, but dang this one was to excess. Lesson learned. I now keep a dedicated pair of gloves by the grinder when performing heavy roughing.
I was forging and tried to use a pair of tongs that didn’t grip the work well enough. This knocked the piece I was holding loose. The blade dropped right in the gap between my work boot and my ankle.
By the time I could get it knocked out of my boot and my foot in the water bucket, I had a perfect, knife-shaped burn on my ankle.
Lessons learned. Don’t forge in shorts. Either use tongs that hold well, forge from barstock, or weld short pieces of blade steel to a rebar handle.
Last winter, I got up before daylight with a plan to forge a couple skinners. It was extremely cold out, and I have no heat in my shop. So I lit the forge, which is pretty cold-natured due to its size. It has a small doorway in the rear that I keep blocked off with a fire brick.
Well, the fire brick fell off onto the ground at some point, and the forge was shooting flames out the rear. I fumbled around sleepily and walked behind the forge to get my gloves and glasses put on. Unbeknown to me, the flames were reaching the back of my coveralls. I started smelling something burning and immediately felt the heat.
I had caught my butt cheeks on fire.
So I sprinted through the door like a battering ram and did a flying back smacker into a couple inches of snow we had gotten through the night. I hadn’t felt pain back there like that since I was a kid when I sprayed my dad with a water hose while he was finishing concrete.
The coveralls were toast. There was a fist-sized hole in them that left me with two, half dollar-sized blisters and a hairless rear end like the bear on “The Great Outdoors.”
Complacency is the number one cause of accidents on job sites. Working around a 2,000-degree forge is no different.
That’s why we want to hear about your accidents in your knife shops. There’s no shame, and you can remain anonymous if you’d like. The point is prevent someone else from making the same mistake.
The focus here is on safety. Preventative tips are welcome, too.
Your contributions will be used in an upcoming BLADE feature. Thank you!
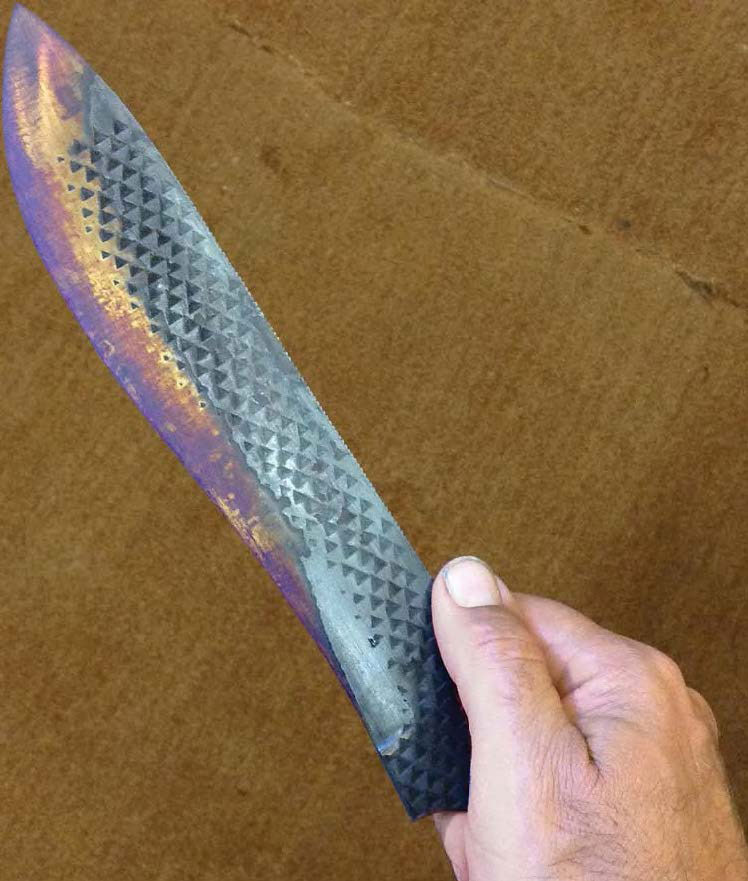
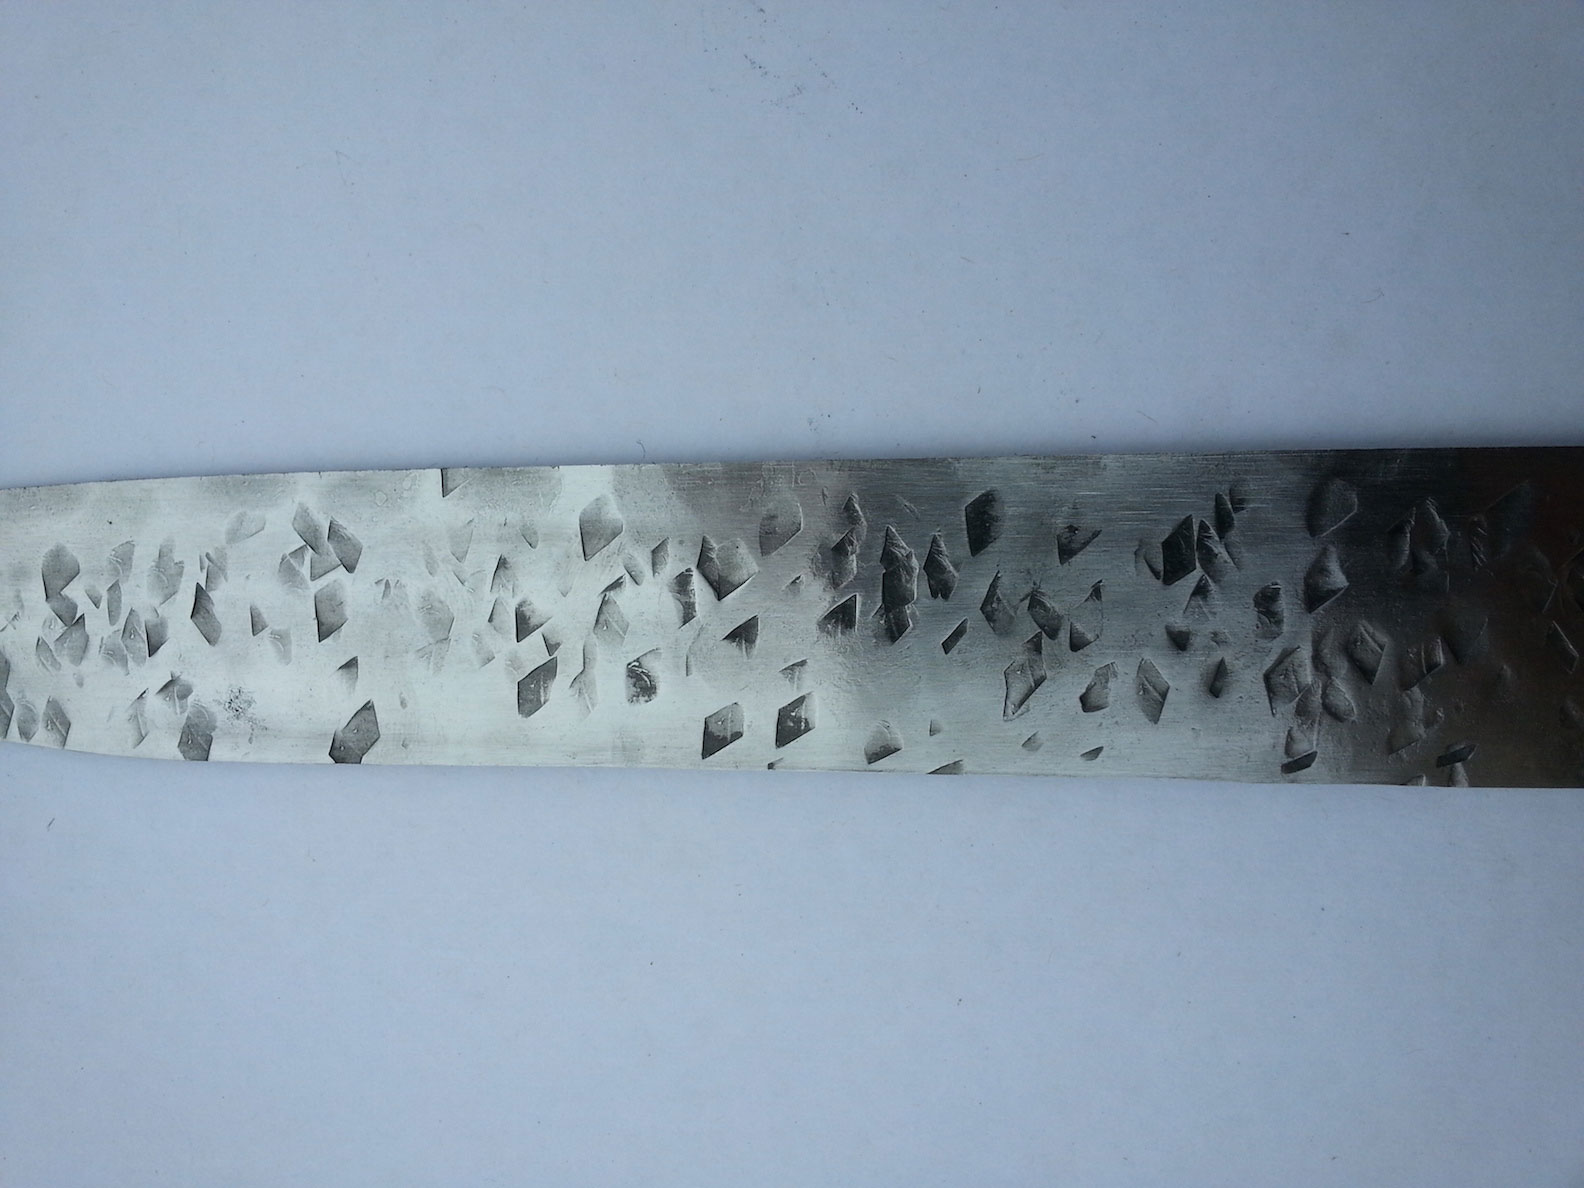
The dents create air pockets so food does not stick to the blade.
In his story, How To Make a Sushi Knife, in the August 2015 BLADE®, ABS master smith Wally Hayes explained how he achieved the texturing on the blade’s surface. The reason for the texturing is to create air pockets so food does not stick to the steel.
For blade material, he used 90-thousandths-inch-thick 15N20 carbon steel from New Jersey Steel Baron.
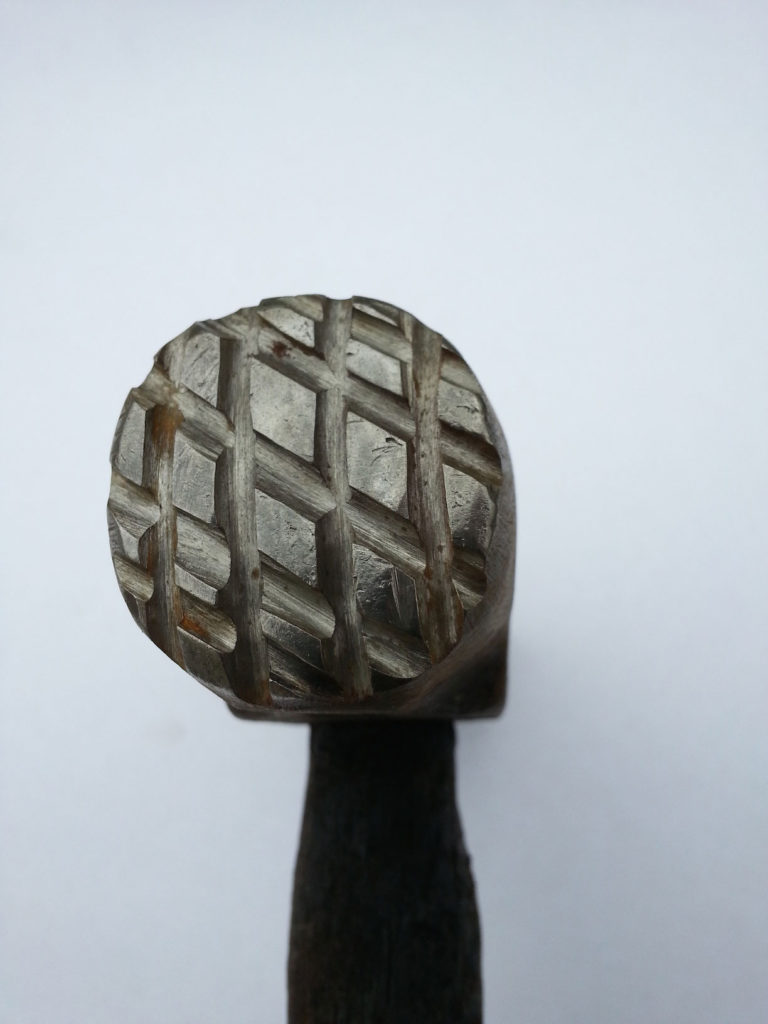
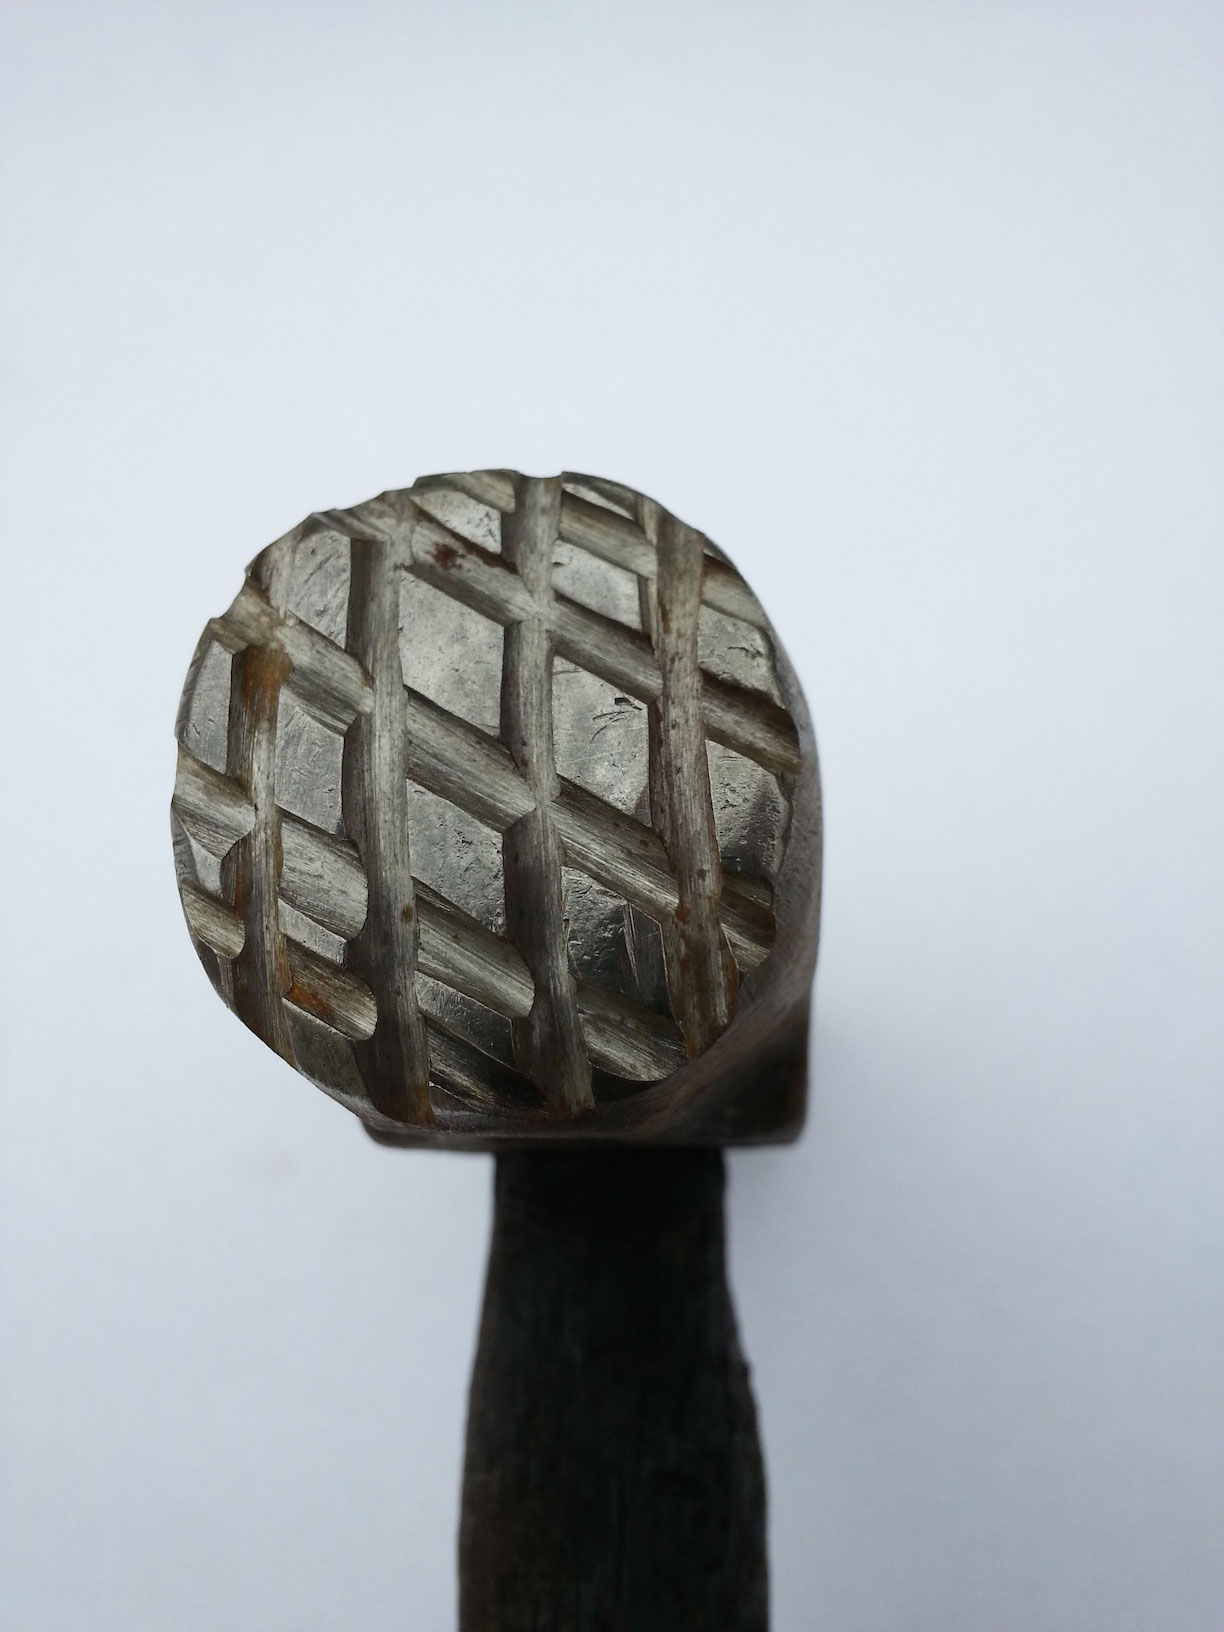
After cutting the blade to shape and heating it in his forge, the author used the hammer with a cross-hatched face to give each side of the blade a textured finish.
“First, I cut the blade to shape, around 7 inches long,” he wrote. “The tang is about 4 inches. I take one of my old hammers and cut a cross hatch into the face using a side grinder with a cut-off wheel. Then I heat up the blade in my forge and hammer a textured finish into the steel. This takes about five heats and is lots of fun! I put dents into both sides of the blade and then make sure it is straight.”
The sushi knife the author completed for the story in the August 2015 BLADE® features a blade with the hand-hammered finish and a handle of ebony and walnut.
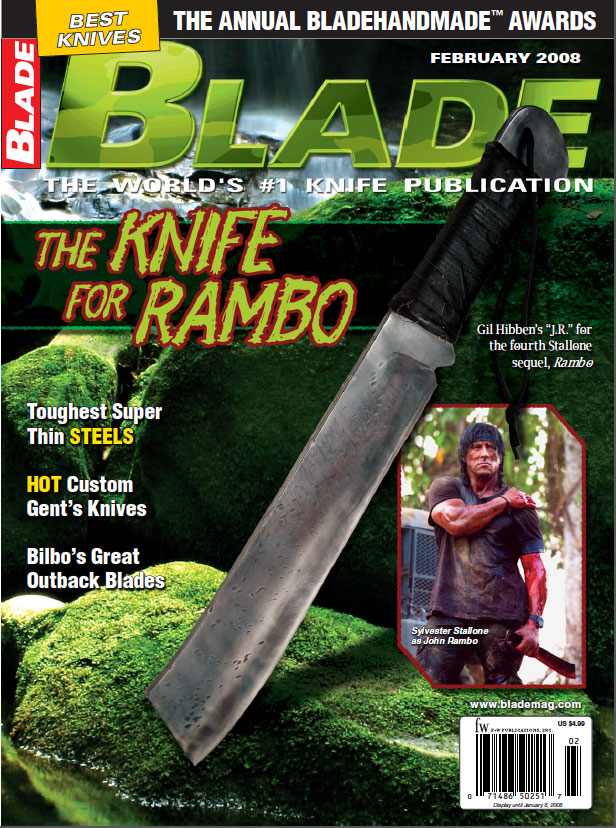
Editor’s Note: This article originally appeared in the February 2008 issue ofBLADE magazine, which you can download here.
Over a quarter century after John Rambo burst onto the big screen and changed cutlery history forever, it is near time for the character created by author David Morrell to cut a worldwide cinematic swath with his indomitable knife once again.
As BLADE® was going to press, the fourth installment of the Rambo movie series, Rambo (aka Rambo IV) a Lionsgate film, was due to be released at movie theaters on Jan. 25, 2008. Sylvester Stallone wrote the screenplay, directs and stars in the movie that finds Rambo living a secluded life working as a snake catcher in Thailand some 26 years after Rambo first appeared in First Blood.
Rambo Knives: A Brief History
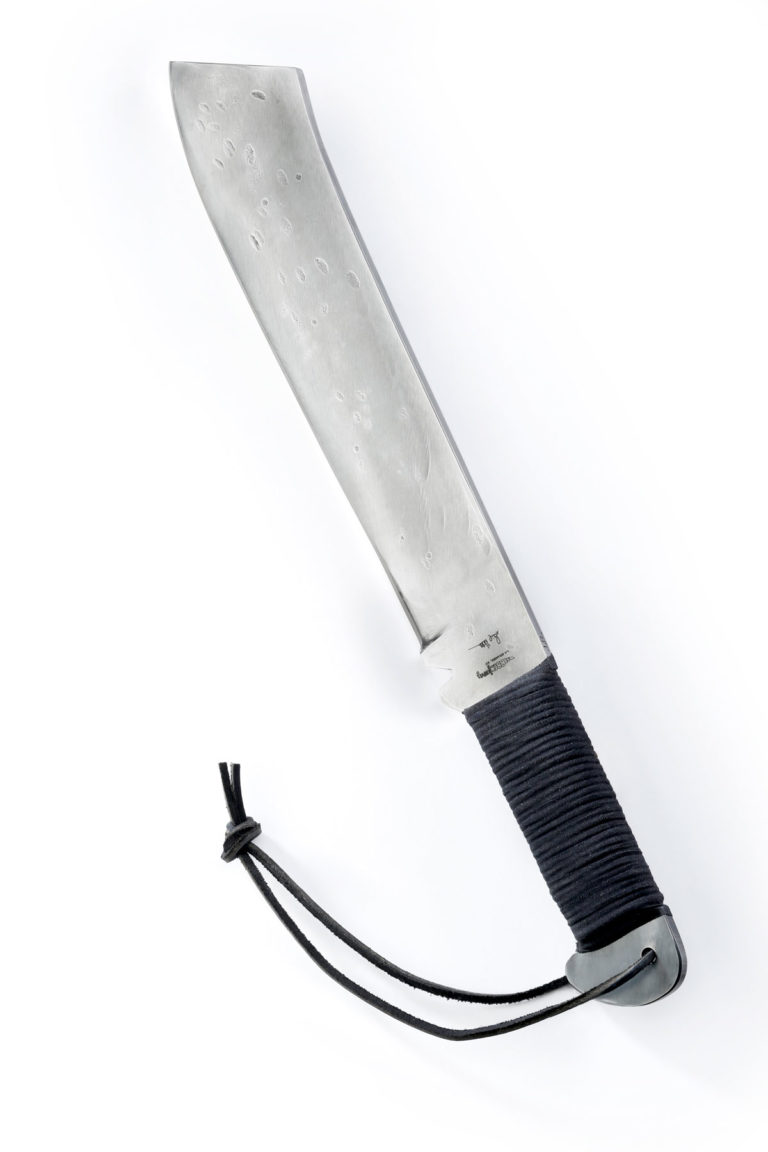
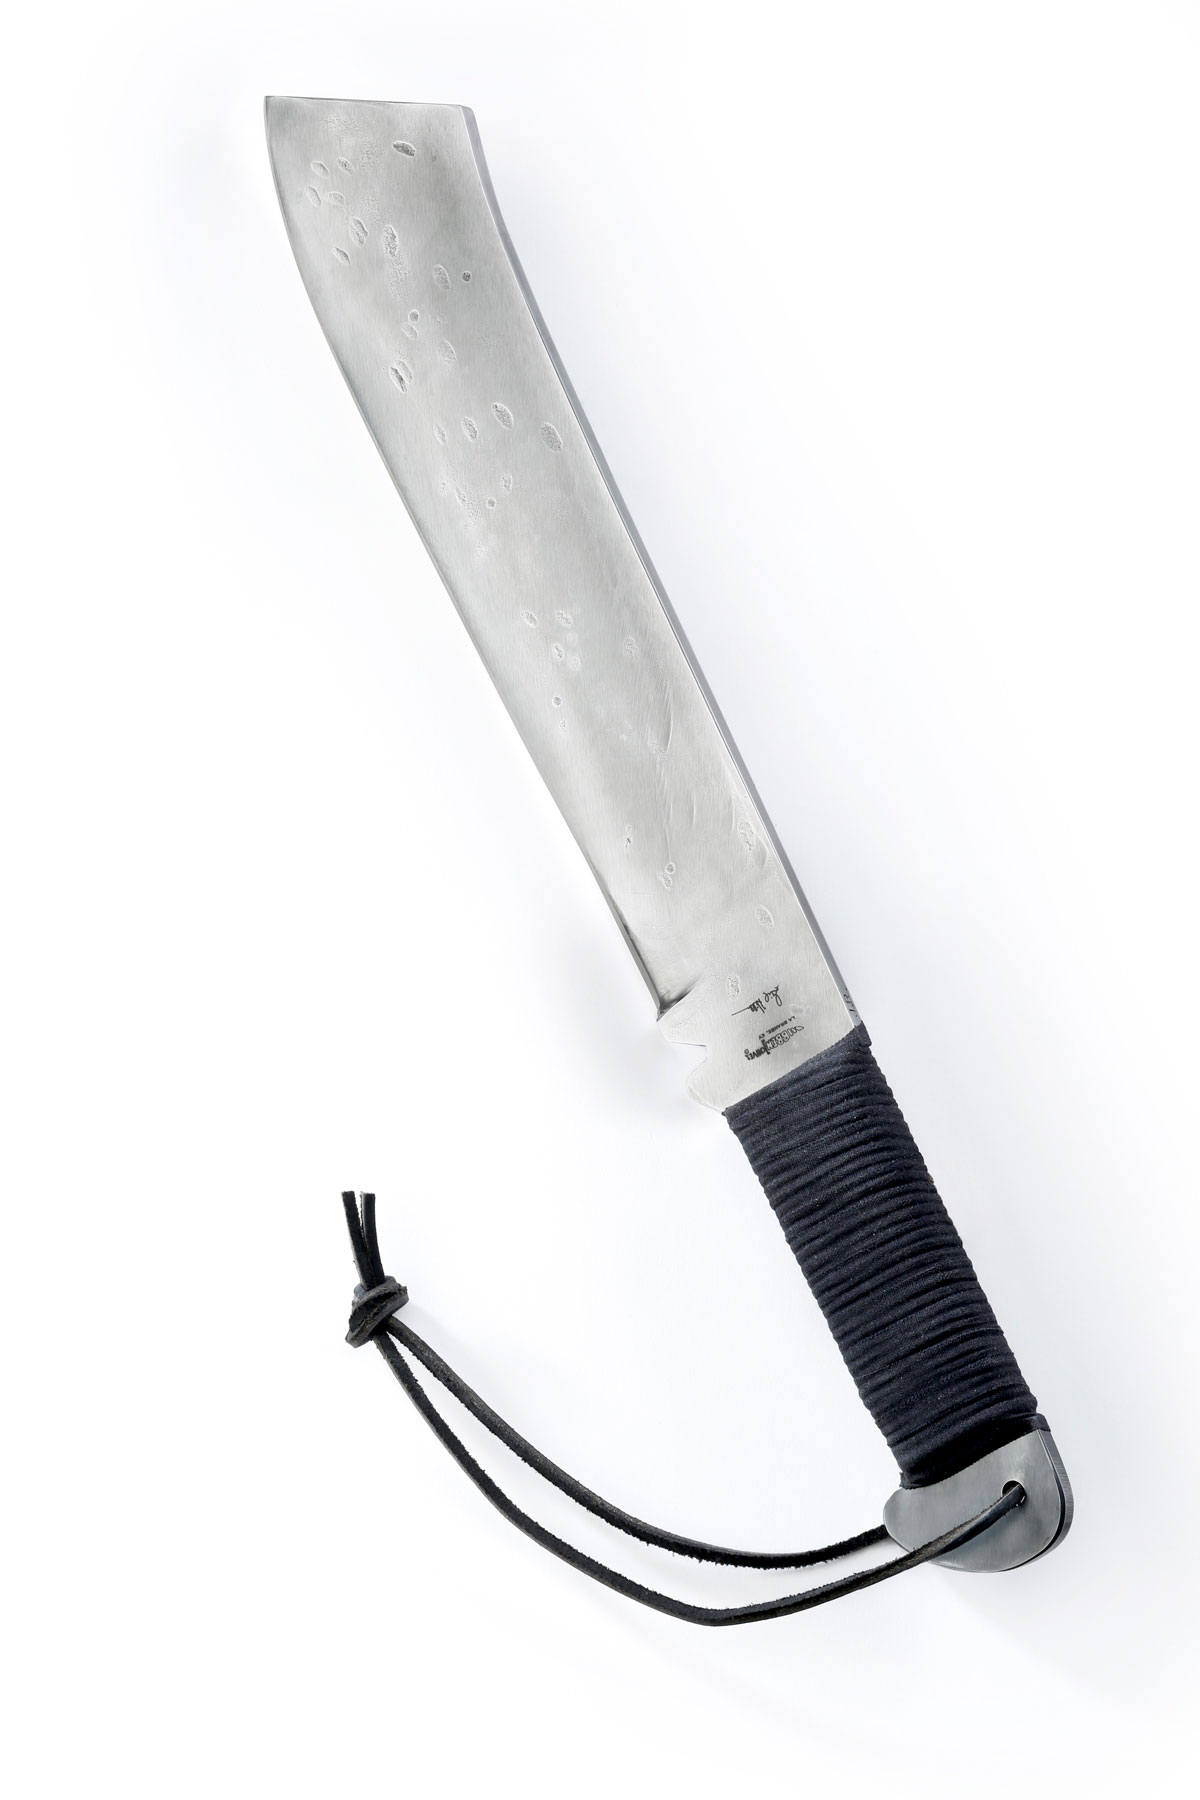
An isolated shot of the “J.R.,” the knife designed by Gil Hibben for the fourth Rambo film.
For Rambo III (1987), Stallone called on Cutlery Hall-Of-Fame knifemaker Gil Hibben to create the knife.
A Series of False Starts
For Rambo, Stallone once again called Hibben to help create a new knife for the movie. Stallone had a basic idea of what he needed and the knife was written into the script as an integral part of the movie. Hibben made at least five prototype versions of the piece before finally arriving at the design that will be used in the film.
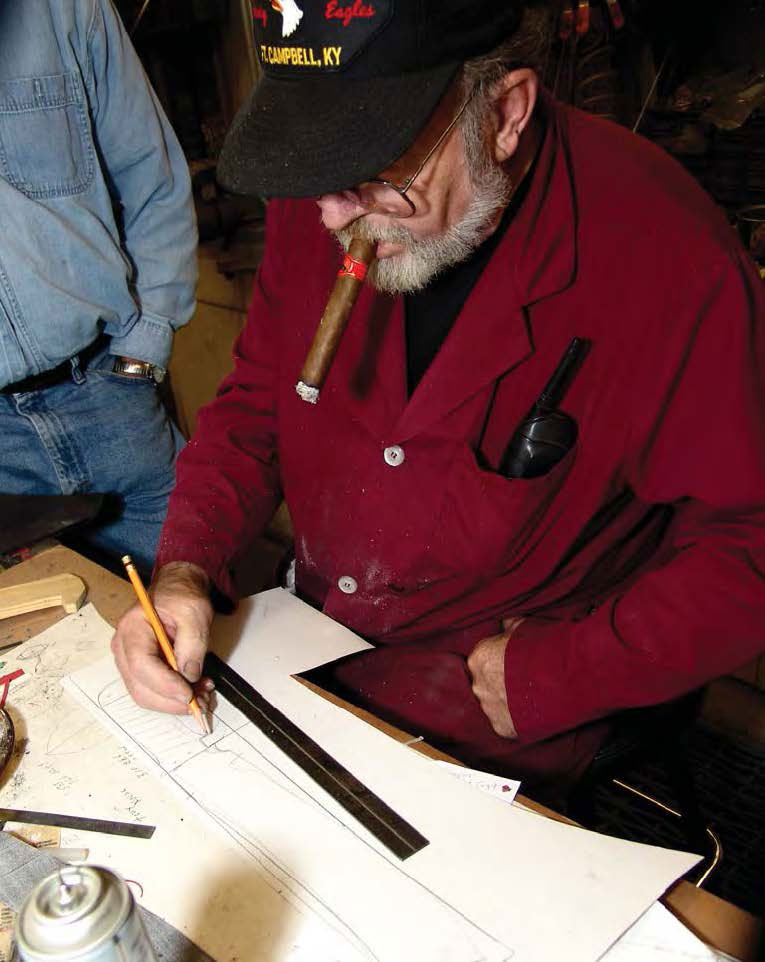
In October 2006, Hibben began designing the knife. At first, the blade exhibited characteristics of the Rambo III model.
Hibben designs the knife in his shop in LaGrange, Kentucky. (photo by the author)
“My first one had a slot in the blade [as in the Rambo III knife] but in a machete or old Chinese sword design,” Hibben recalled. He also made a modified version in which he removed the top lug of the guard.
Stallone reportedly liked the blade design but said it was “too perfect.” He wanted something much more crude looking, as if it had been pounded out quickly from the limited resources Rambo has at his disposal in the movie.
It was back to the drawing board for Hibben.
“The blade size was originally 10 inches and Sly faxed me some pictures of some of the knives he’d seen from the cutting competitions,” the Cutlery Hall-Of-Famer explained. “He liked that style, so I made one up. It evolved from a 10-inch blade to a 12-inch one. It evolved from several sizes and shapes until I got what he liked.”
To make it authentic, Hibben forged the next few prototypes from pieces of a truck leaf spring. Since there was agreement on the basic blade design, next came the question of the handle and finish of the knife.
Hibben thought about what materials might be available to the character in the movie. He considered leather, wood, paracord, tape and even seat-belt webbing for use on the handle. The second prototype had a wooden grip wrapped in green paracord and an enclosed sheath. Hibben also made a third prototype with a leather-wrapped handle.
Again, the studio said it needed something more crude looking.
There’s Crude, and then There’s CRUDE
Sylvester Stallone, seen here playing John Rambo in the fourth movie in the franchise, holds Hibben’s final version. (photo by Karen Ballard from Rambo®, a Lionsgate film)
Prototype number four was a very simple design with a cord-wrapped handle. Hibben made one with green cord and one with black cord. It was close to being right, but the finish was still too slick to have been quickly forged as it is in the script.
Finally, Hibben decided that, considering John Rambo’s skills and experience and the materials that the title character would have available, the knife would have a cord-wrapped handle, perhaps covered with tape for additional grip. The blade would be marked with depressions from the hammer blows from being forged quickly without time or resources to put a fine finish on the blade.
“So I took it out of the heat treat and beat the heck out of it,” Hibben recalled. “I really made it look like Sly made it.”
Following the Rambo knife tradition, it would be a large, heavy blade with a thick spine. Assuming that Rambo would not have time or materials to make a new sheath but would still have the sheath from his previous knife, he opts to cut the end of the old Rambo IIIsheath to accommodate the larger blade and broader tip of the new knife. This is the knife and sheath in Rambo.
Rambo IV Knife Specs
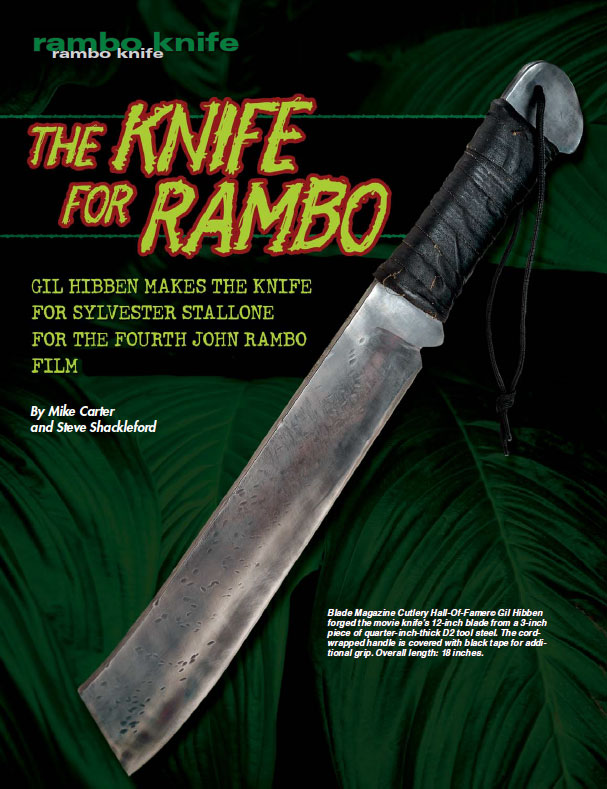
The final version, the “J.R.,” appeared on the cover of the February 2008 issue of BLADE. Click to download the issue.
The 12-inch blade is forged from a 3-inch piece of quarter-inch-thick D2 tool steel. As you might imagine, such a knife is somewhat heavy—2 pounds worth—so Hibben made some lightweight aluminum versions for Stallone to use when need be for safety’s sake during filming.
Since the movie was shot in the corrosion-inducing environs of the jungle, Hibben said he put Renaissance Wax on the non-stainless D2 to protect the blade from rust.
“There was a lot of rain there,” he noted. “Luckily they got out before the monsoons hit.”
The cord-wrapped handle is covered with black tape for additional grip. Eighteen inches overall, the knife comes in the modified Rambo III sheath.
Collector Pricing Reference
At press time (in 2008), Hibben was offering a handmade version of the knife in all the original materials—though with nicer sheaths—for $1,250. It is called the “J.R.” There will be 100 in all, with 25 of them already having been sold.