
Knifemaking

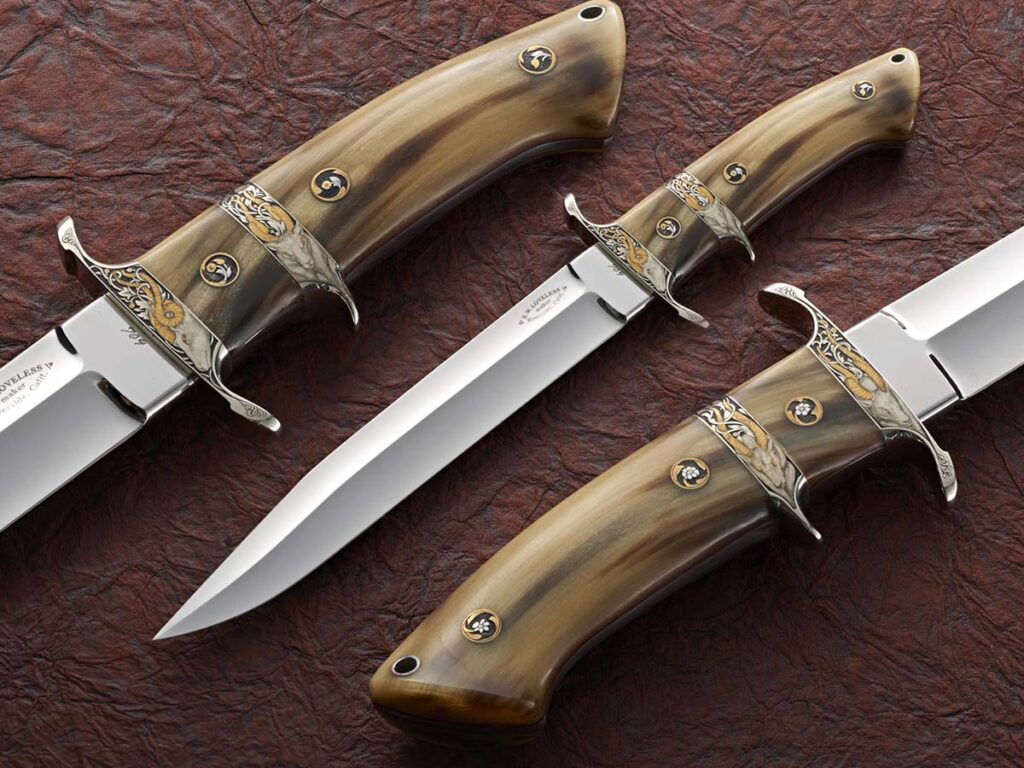
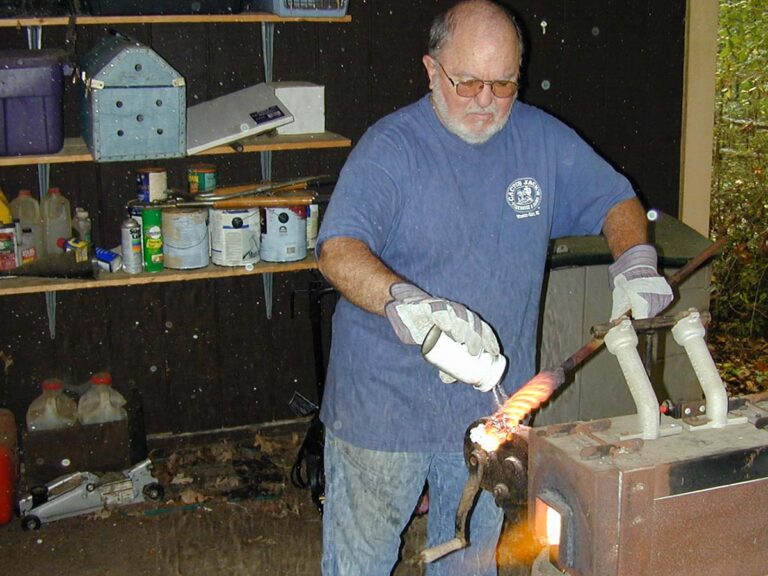
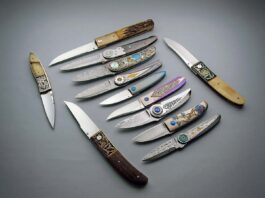
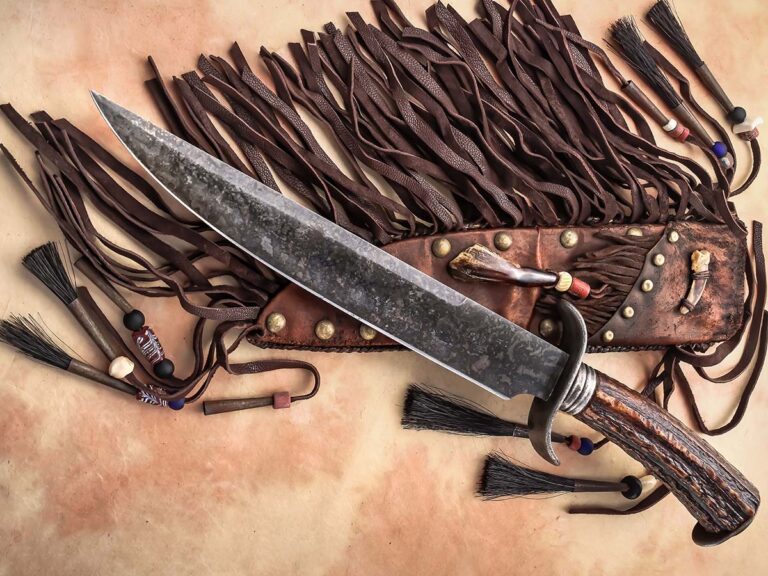
Knifemaking is the building of a knife, which includes the blade, handle and other accouterments. Blades are made by either removing metal from a steel blank via a grinder – known as stock removal – and the forging to shape of hot steel into a blade in the process known as bladesmithing. Other parts, including bolsters, guards, pommels, etc., are needed to complete the finished knife.

Featured Knives – – Knife Collecting – – Tactical Knives – – Survival Knives

Bowie Knives: Lingering Legacy Of The All-American Design

Truly an American design, the bowie continues to inspire today’s makers.

While its roots may be from across the sea, ties to the makers of old Sheffield and elsewhere, the bowie is today distinctly American. And it has been for more than two centuries.

Made famous by BLADE Magazine Cutlery Hall-of-Fame® member Jim Bowie and the fabled Sandbar Fight, no doubt present at the Alamo where Americans fought and died for freedom, and seen in countless photos of soldiers going to war—posing with the burly bowie in a proud moment—the iconic knife was also immortalized on the silver screen with the classic The Iron Mistress and other films. There is no other style of knife that more clearly defines the American spirit.

“Bowies are the quintessential American knife, deeply steeped in the mythos of our collective history,” observed ABS journeyman smith Matt Parkinson of Dragon’s Breath Forge. Shawn Shropshire of SDS Knifeworks agrees. “The bowie is the most iconic or at least the most recognized of American knife designs,” he said. “At the time of the Sandbar Fight, there was no single pattern that was called a ‘bowie knife.’ It varied in size, blade shape and even materials. Cinema later created what most people now recognize as the bowie knife, something with a large blade, clip point usually, with a double guard.”

ABS master smith Lin Rhea commented, “I do indeed believe the bowie knife is America’s knife design. It was created to fill a need. The country was expanding and was very wild and without law and order. The average traveler in the lawless wilderness needed a reliable defense weapon that could be carried on their person, that never misfired and was less conspicuous than a sword. The fact that a large knife was used in self-defense by Jim Bowie in the infamous Sandbar Fight just boosted the design into the realm of legend.”

Wrapped up in fact, fiction, myth, legend and lore, the bowie is a constant in the theme of adventure and survival. Although it does exhibit common attributes—among them impressive size—across the design, there are variations on the theme. To this day, the bowie remains a favorite form of expression for custom knifemakers who tip their creative cap to the history of the design and imprint their own skill, expertise and perspective on this truly American blade.

Barbary Coast Bowie
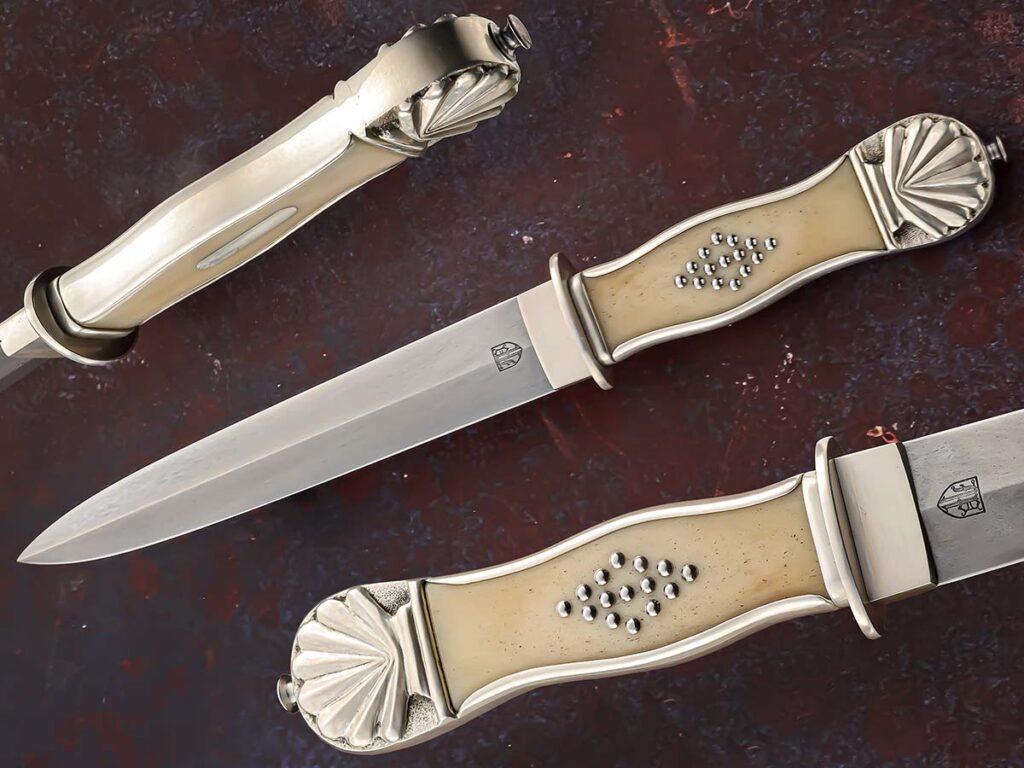
Matt Parkinson’s California-style bowie is deadly dapper. He describes it as “graceful and sleek,” featuring his own wootz steel and sterling silver bolster, pommel and guard. (SharpByCoop image)

Parkinson chose the San Francisco theme to highlight his take on the classic bowie. Representative of the days of the Barbary Coast and the rough-and-ready youth of a nation stretching from sea to shining sea, the idea captivated him.

“I have long been intrigued with the California- or San Francisco-style bowie,” he remarked. “They are graceful and sleek in a way that many bowies are not. In designing this particular piece, I looked at as many examples of this style as I could, both originals and contemporary. I didn’t copy anything but tried to match the design cues I saw in the originals that made them so iconic.”

Matt’s San Francisco Bowie features a 6.25-inch blade, an overall length of 11.75 inches, a bone handle and generous applications of stylized silver in shell and pin. “The blade is forged from my own wootz steel,” he noted, “and the bolster in front of the guard was cast, as was the shell pommel, and the guard and frame are all fabricated from sterling silver.

“One of the things I most admire about the California style bowies is the uniquely American lineage. Much of the bowie styles we think of are influenced by the Sheffield and London makers …This isn’t the case with the California makers. The knife they made for the 49ers used local materials and was a show of wealth, as much jewelry as a weapon. I kept these ideas in mind in making this one. The cow bone was a logical choice and a nod to local materials, as was the choice of sterling silver over nickel.”

Antiques Actualized
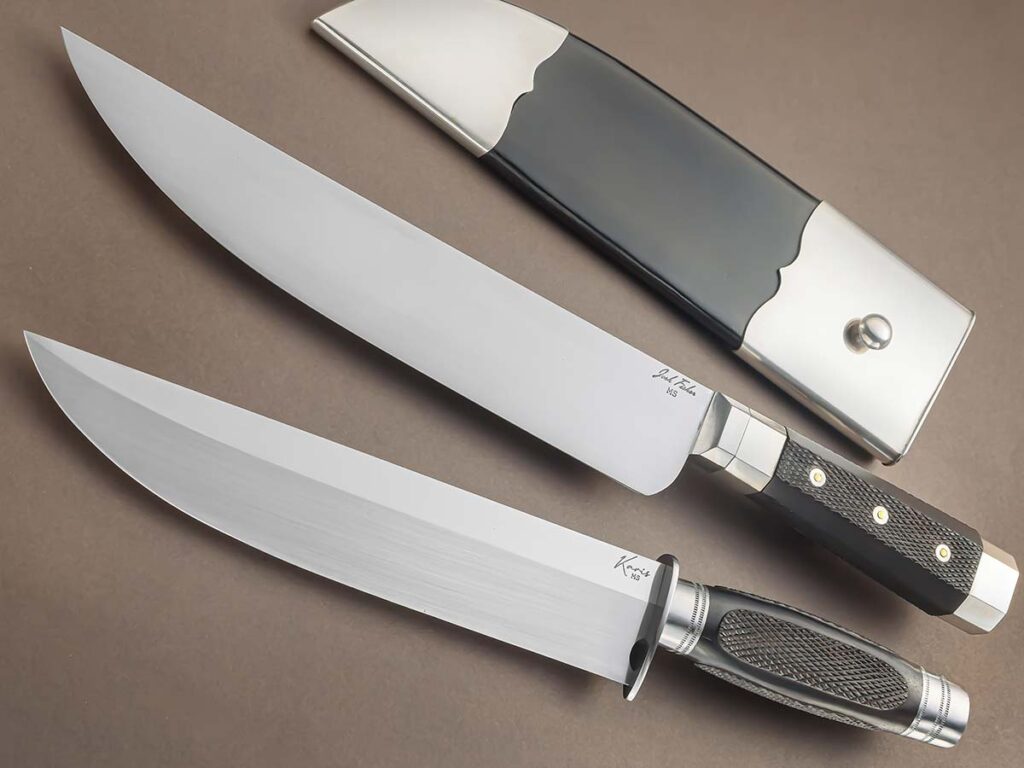
Aiming for historical accuracy circa-1830 style, father-daughter makers Josh and Karis Fisher pull off this dynamic duo. Josh’s bowie (left) was inspired by an original Schively-Perkins piece, while Karis (right) crafted a rendition of the Daniel Searles bowie. (SharpByCoop image)

The father-daughter ABS master smith duo of Josh and Karis Fisher share their own interpretations of the bowie with a pair of stunning knives touching the past. Each took inspiration from circa 1830 bowie designs: Josh the Schively-Perkins and Karis a Daniel Searles.

“I kept my reproduction similar to the original and as close in size as I could, so it would look and feel like the real knife,” Karis said. “I was mostly working from photographs, which made studying overall design really important. I also made a few changes to incorporate my own style. I left off the original silver pins and did hand checkering instead. I also changed the ferrule and butt cap. I didn’t use silver wraps. Instead, I used a combination of liners and spacers to match the original while adding my own style.”

“A few techniques that I used on my bowie were hand-checkered African blackwood on the handle and the silver ferrule and butt cap that I had to silver solder together, which was a challenge. It’s definitely a functional knife,” Josh reported. “While it’s on the larger side, it’s very well balanced due to the silver wraps on the ferrule and pommel.”

Capturing the notion of the bowie’s place in Americana, Josh related that his work in 80CrV2 carbon steel and sterling silver is true to such spirit. “It is a reproduction of an actual antique bowie knife,” he stated. “In my opinion, a bowie is a large fixed-blade knife, at least 10 inches in blade length, that is on the thicker side. I think typically they should have a clip point, but there are some exceptions as you can see in mine and Karis’s bowies.”

Small & Spruce
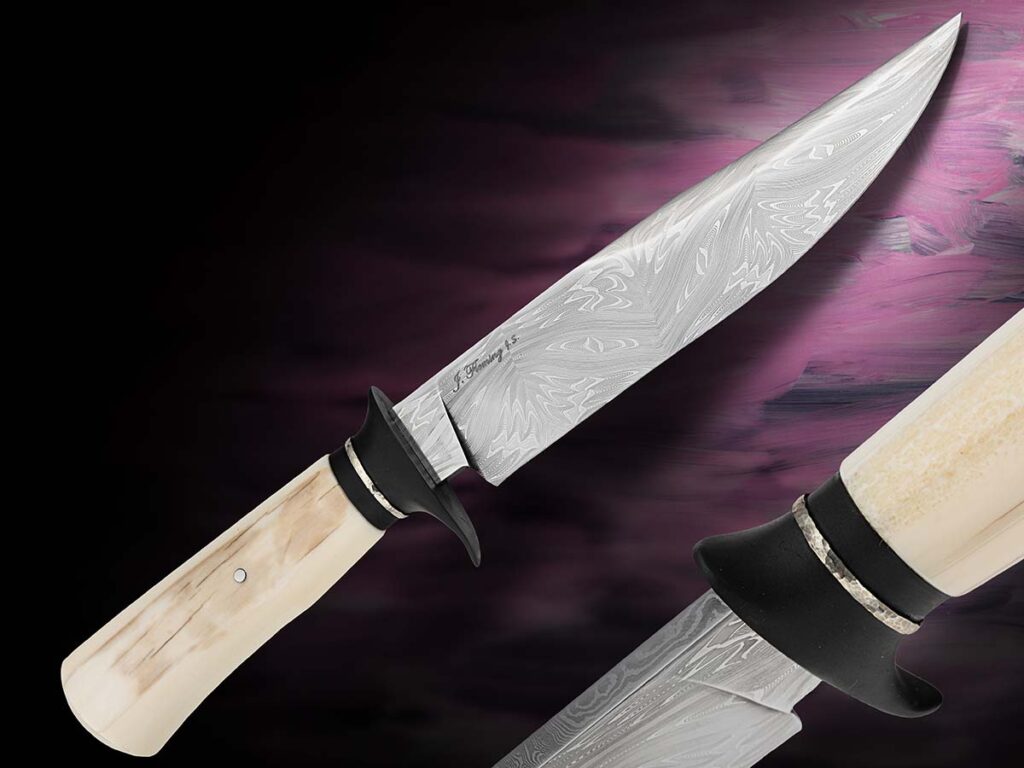
James Fleming’s gentleman’s bowie is diminutive in comparison to others but no less representative of the style. The damascus blade is complemented by an ancient walrus ivory handle with a nickel silver spacer and Parkerized steel bolster. Overall length: 11.5 inches. (Jocelyn Frasier image)

Working at Wasteland Forge, ABS journeyman smith James Fleming has produced a gentleman’s bowie, diminutive in comparison to others but no less representative of the style. The 6.5-inch damascus blade is complemented by an ancient walrus ivory handle with a nickel silver spacer and Parkerized steel bolster for an overall length of 11.5 inches.

“I wanted to make a knife that capitalized on the mosaic damascus pattern,” James explained. “I think the gentleman’s vest bowie complements the pattern. The knife is pretty recognizable as a bowie. It’s not as large as a regular bowie but has the same look and purpose. It fits the term ‘vest bowie’ perfectly. It is small enough to be concealed but large enough for defense in any western saloon. This is the kind of knife you’d see stabbed into a poker table after accusing someone of cheating at cards!”

The damascus pattern came from Fleming’s experimentation with Mareko Maumasi’s pattern-making process. He named it “Nazar,” which translates from the original Turkish as “evil eye.” He added, “I was also inspired by Lin Rhea in the way he makes his fittings. The nickel spacer is domed around the guard and bottom spacer, and it’s hammer textured to give it a nice look and feel in the hand.”

Mammoth Achievement
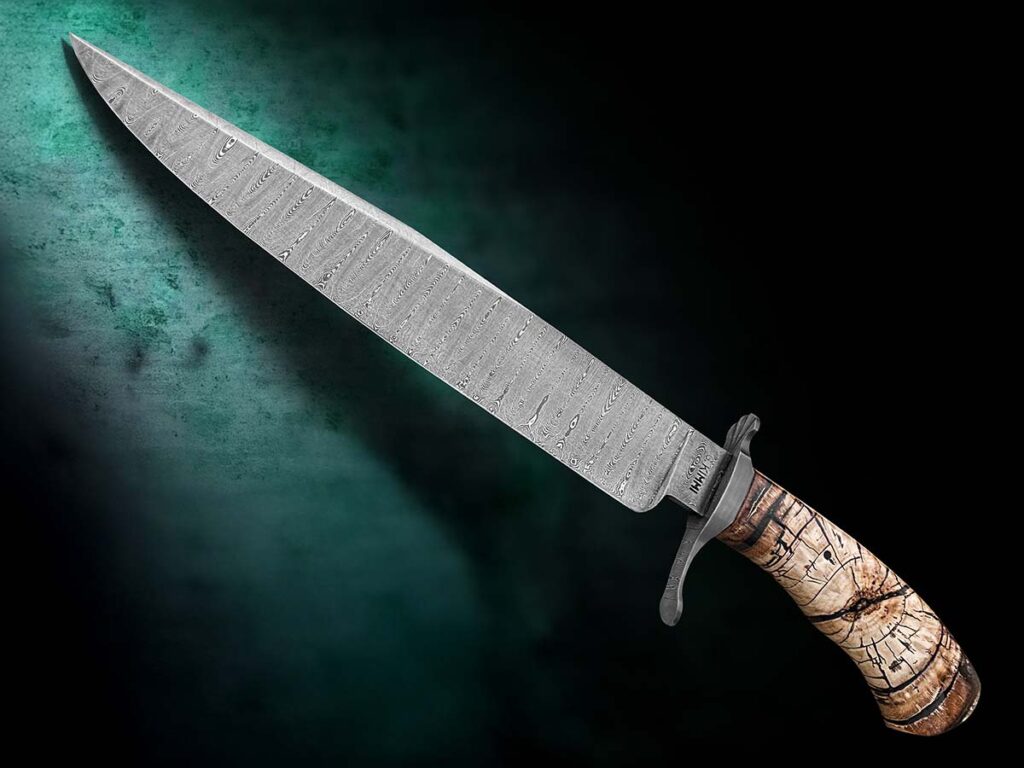
Attracted to larger bowie designs, Gene Kimmi pulls it off with a giant gem. Featuring ladder-pattern damascus—fashioned from dies he made himself—the 15.25-inch behemoth is further bespoke with a crosscut mammoth tusk handle. (Jocelyn Frasier image)

Gene Kimmi was intentional with his contribution to the bowie’s visual discourse. “I have always had a liking for the larger bowie knives,” he remarked. “When I made some laddering dies for my press, I knew one of the first knives I would make out of ladder-pattern damascus would be a large bowie. This one has some clam-shell type filing on the guard that I haven’t done before. The handle is heirloom/museum fit to the guard also.”

Gene’s bowie features the ladder damascus in a 9 7/8-inch blade and crosscut mammoth tusk handle with G-10 black pinning for an overall length of 15.25 inches. “The design is easily recognizable,” he asserted. “Anyone who sees it instantly thinks bowie. The lightness and the fit to the hand are attributes that everyone who handles it comments on. The uniqueness of the mammoth tusk handle adds to the beauty of the damascus. When I think of a bowie knife, I see a straight-backed blade of at least 6 inches. Limits can be pushed on the style and attributes of a bowie, maybe because of the mystery of the bowie knife’s beginning.”

User-Friendly Fighter
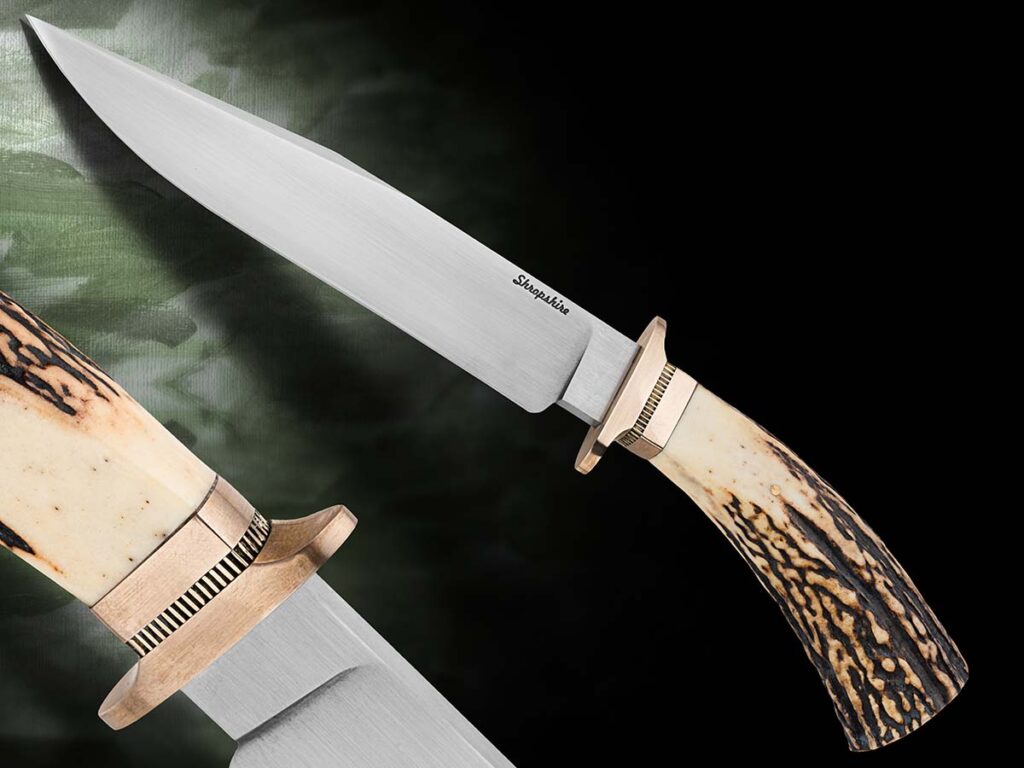
Shawn Shropshire wanted a bowie that not only looked sharp but also worked with the user. What he cooked up was this stag-handled beauty. With a 7.5-inch blade of 1084 carbon steel and a user-friendly bronze guard, the knife is easy to carry and manipulate. (Jocelyn Frasier image)

The famed Randall Model 1 provided some context for Shropshire to fashion his bowie of a 7.5-inch, 1084 carbon steel blade and stag handle with bronze bolster and an overall length of 12 inches. The proprietor of SDS Knifeworks blended the pattern with a desired functionality.

“I love making the larger versions of the bowie knife that many people think of, but as much as I enjoy them, they just aren’t very practical,” he reasoned. “This size and style is much more useful and easier to carry. It’s still a classic-looking pattern and functional without being so large that it is cumbersome and difficult to carry. I love the classic-looking lines paired with the look and feel of natural stag.”

After perusing photos of historical blades and the work of other makers, along with hours using a sketch pad, Shawn was pleased with the result. “In my opinion, this particular blade would have been right at home during the mid-to-late 1800s and at any time considered a bowie knife,” he advised. “I think most people today might refer to it more as a fighter because our notions of what a bowie knife is have been heavily influenced by cinema. The movies usually represent bowie knives as larger than life. Some were but many were not. I do think this blade hints at the history of what an American bowie is with the overall shape and the stag grip without instantly screaming ‘bowie knife.’”

Throughout the creation of his bowie, Shropshire kept user friendliness front and center. Aside from visual appeal, he designed it for easy carry with shorter “legs” on the guard and a coined spacer to help break up the smooth lines it exhibited.

The Legend Continues

The bowie theme lives—in thought, folklore and tangible craftsmanship. Staying true to its American heritage, the style has gained lasting fame and a following the world over.

Read More:

Dagger Design: Mastering Wire Wrapping The Handle

0

Wire wrapping the handle of a dagger is the finishing touch to the process, but requires a fine touch and patience.

Once the wire grooves and flutes are complete, the entire handle finished to its final state and the tang slot broached, insert the wires and lock them in tightly. As mentioned, 24-gauge wire looks good. If you want to use silver, Argentium or fine silver are both better choices than sterling, which tarnishes more quickly. Twenty-four-karat gold is terribly expensive but is the ultimate in luxury.

If you have Rolls-Royce taste but a Toyota budget, consider gold-filled wire as an alternative to pure gold. It’s brass at the core but at least 20 percent gold by thickness, and consequently much more durable than simple gold electroplate. It usually comes in 14k only. As a reference point, not long ago 12 feet of 24-gauge pure silver wire could be had for a little under $9. The same length of 24k gold in the same size was $1,050. The same length of gold fill was about $20. Save the 24k gold for times when you want to make a statement or your customer pays for the gold in advance.

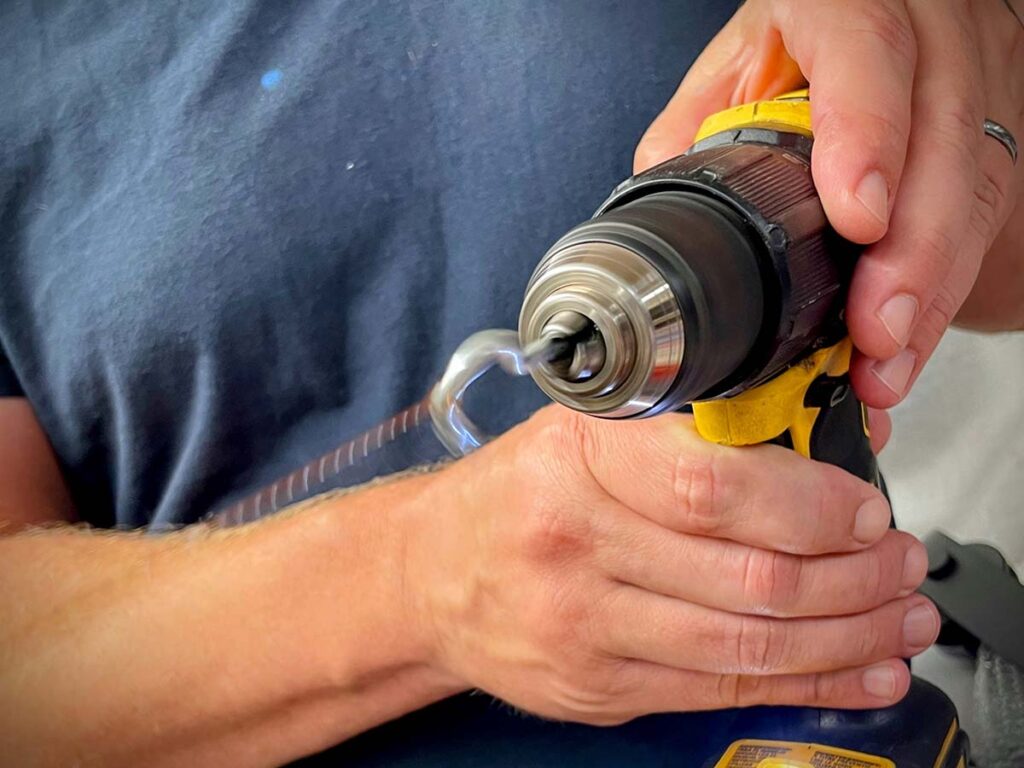
With a hook chucked in a hand drill, hook the resulting large loop, pull it tight and turn on the drill. Keep the tension constant—as you twist the wire it will pull you toward the vise.

Buy your wire dead-soft from your favorite supplier. You need about 20 percent more wire than twice the combined length of your wire grooves.

To twist the wire evenly, you must twist all of it at the same time. Clamp the two ends together tightly in a vise. With a hook chucked in a hand drill, hook the resulting large loop, pull it tight and turn on your drill. Keep the tension constant—as you twist it the wire will pull you toward the vise. If it breaks off at the vise, just re-clamp it and continue twisting. There’s no rule about how tightly the wire should be twisted, but tighter twists look better. If you aren’t sure it’s tight enough, twist it some more.

Annealing The Wire

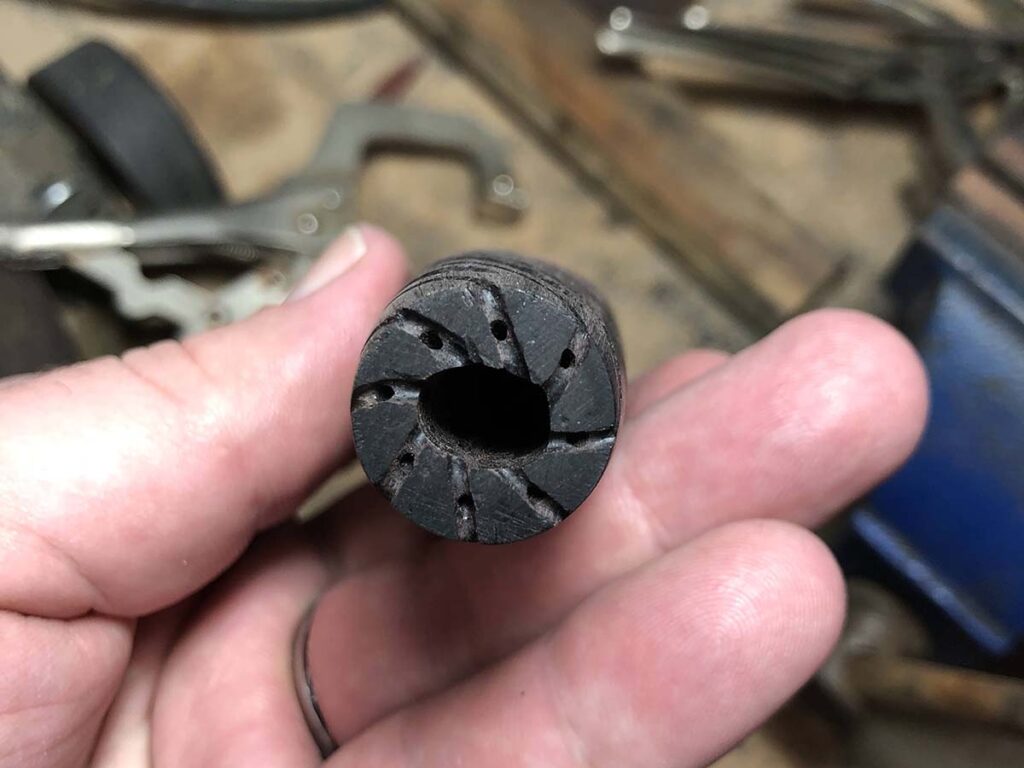
Drill diagonal holes inside your groove, starting halfway between the broached hole and the edge.

The next step isn’t required but will make things easier. Most metals, including gold and silver, work harden. After all of that twisting your wire will be hard and springy, and it’s much easier to install your wires if they’re dead soft.

To soften the wire back to its original state, you must anneal it. To do this, coil it tightly around a 2-inch piece of pipe or something similar, and tie up the coil. Using a propane torch, heat the coil evenly until it glows slightly. One trick to make sure you don’t melt it is to color your wire thoroughly with a Sharpie® marker. When the ink burns off, it’s time to stop.

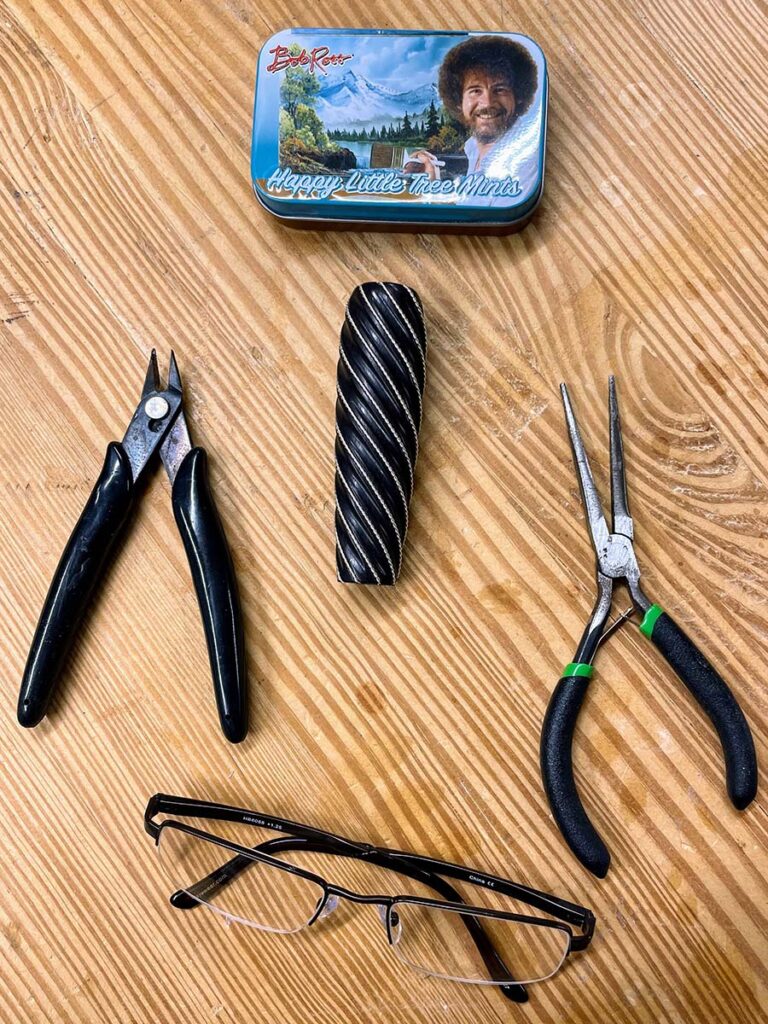
Don’t forget your essential tools—including your Bob Ross Happy Little Tree Mints.

Pick up the coil and drop it in water to cool it rapidly. It’s now dead-soft again but is likely discolored from oxidation. To remove the discoloration, let the coil sit in warm pickle solution that is available from any jewelry supply vendor. If you don’t want to go to the trouble of pickling, you’re better off dealing with the trouble of work-hardened wire.

Wire Installation

To install the wires, a little bit more work on the handle is necessary. Starting from the end points of your wire grooves, cut new grooves into both ends of your handle for at least half the distance between the outside of the handle and the tang slot. A Dremel or Foredom tool is best for this, but you can use a file also. If you use a file, go ahead and groove all the way to the tang slot—it’ll be easier that way and invisible on the assembled knife. These grooves need to be equal in depth to the diameter of the wire so that the handle will fit tight against the guard or pommel when the wire is installed and the knife is fully assembled. Cutting the line at an angle rather than perpendicular to the circumference will help when you pull things tight later.

Drill diagonal holes inside your groove, starting halfway between the broached hole and the edge. Drill at an angle toward the center so that the hole for the wire exits into the tang slot about a quarter inch from the top and bottom of the handle, in line with the end of your groove. Make the holes slightly larger than your wire diameter.

After the handle is fully assembled and the glue is set up, perform a final finish check. The wires should be tight and fully seated in the grooves.

You’re almost to the fun part. Cut your wires at least an inch longer than the length of the groove to give yourself some extra to work with. To install the wire, thread one end through the hole you just drilled into the tang slot, grab the end with some small pliers, and bend the end back up toward the handle end, locking it in. Though not strictly necessary, you can pin the wire with a toothpick in the hole and a drop of CA Glue or 5-minute epoxy for extra security. This can be cut off and sanded flush later. Pull the wire tight, seating it in your groove, and repeat the process to lock in the other end. This method guarantees that your wires are as tight as they can possibly be. The wires and glue and toothpicks should lay flush with or below the surface of the ends of the handle. Cut off the excess wire inside the tang slot to ensure the wire doesn’t interfere with the final fit-up of your knife.

Finish Check

After the handle is fully assembled and the glue is set up, perform a final finish check. The wires should be tight and fully seated in the grooves. You can lightly buff the wires for extra shine but use a light touch to avoid unintended polishing of the handle. Tarnished wires can easily be brightened up with a Sunshine® Polishing Cloth. Don’t forget to give yourself a pat on the back.

That’s A Wrap

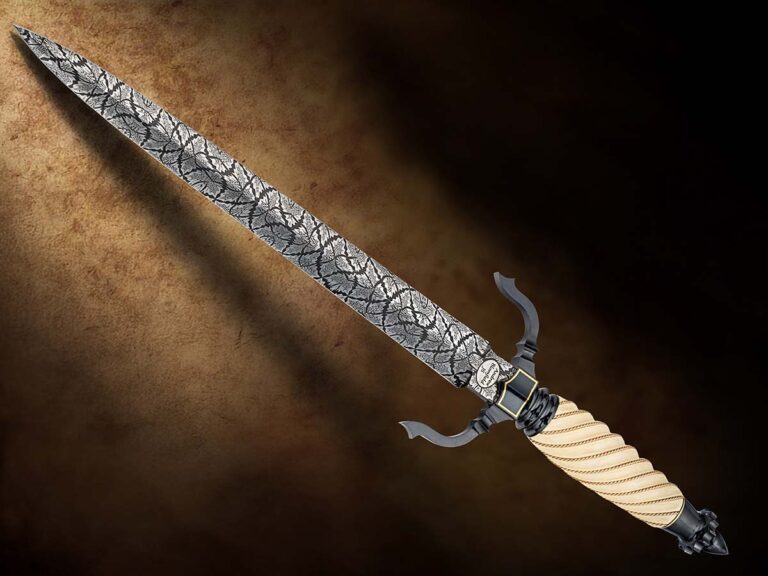
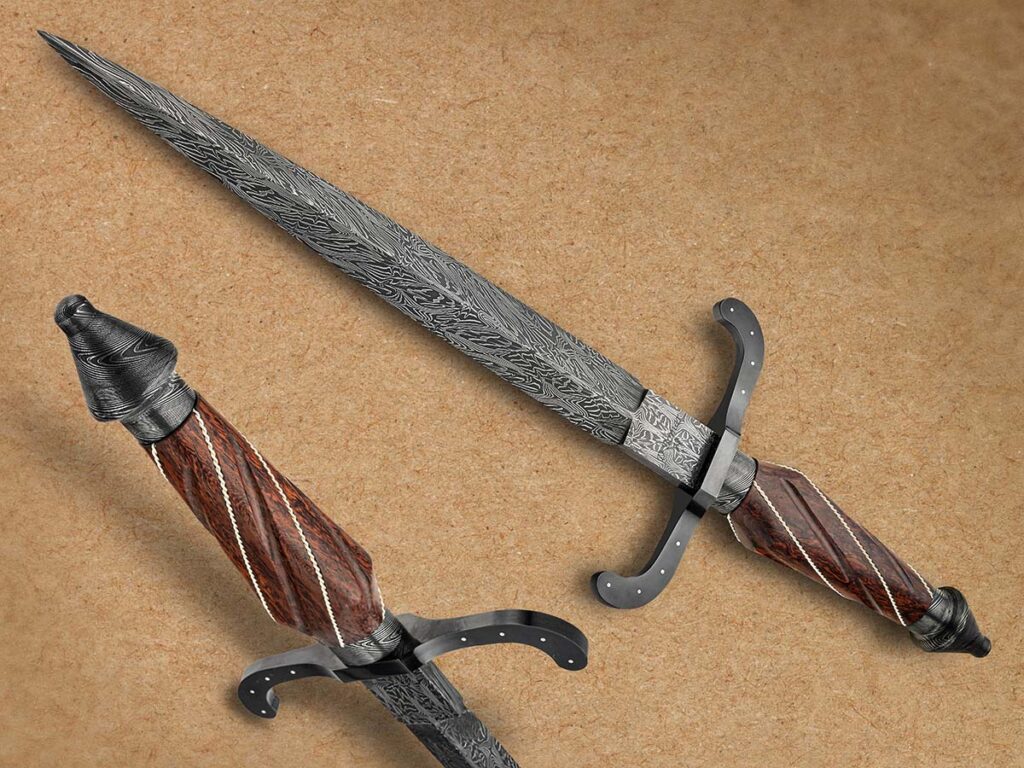
Silver wire wraps the rosewood grip of Duane Bomar’s dagger. The 10-inch blade is a damascus of 1084 carbon and 15N20 nickel-alloy steels. Overall length: 15 inches. (Jocelyn Frasier image)

Precision flutes and carefully inlaid twisted wires transform a utilitarian grip into a truly exemplary expression of craftsmanship. By selecting materials that balance luxury and performance, you anchor your design in both history and function. By following the instructions in this series, you’ll be able to master this exemplary style, and use the experience as foundation for future creativity.

Read More On Daggers:

Bob Loveless’ Influence Still Touches Those Closest To Him

Robin Askew moves on, but her father remains there for her.

The constant, the heart and soul of BLADE Magazine Cutlery Hall-of-Fame® member Bob Loveless, was wrapped up in custom knives. There was little time for anything else and there were only rare occasions that he travelled. Bob and his wife, Yoshi, made a few trips to Japan or to Hawaii, on a rare occasion to Europe, but most often with some business purpose involved as well.

And over time, Robin Askew came to appreciate and understand the singular purpose, laser-like focus and personal intensity that drove her father. He was capable of kindness but often brutally frank. He was willing to entertain young knifemakers, share information and then criticize or dismiss flaws with stark, unvarnished perspective. With patience that was sometimes fleeting, he did not suffer fools gladly.

But then, his personality was a tapestry, like all of us, an amalgam of inherited traits and life experience. His mother and father had sent him to live on a farm with grandparents at a young age. According to Robin, he lived and worked with the hired hands, not as a grandchild. At just 15 years old, he joined the Merchant Marine when his mother told the white lie that he was of age.

In addition to the knife her dad made for her, Robin’s other favorite keepsake is a photo of him, a joyous grin radiating from his face, as a cluster of pigeons lands on his shoulders and arms during a visit to Rome many years ago. “It’s a beautiful picture,” Robin stated, “and I look at it every day.”

It wasn’t easy for Bob Loveless, right from the start. But he made something of his opportunities and his native talents, shared them in the way he knew how, paying the price along the way and leaving a body of work of insight into what is beauty and flow in a handmade knife, like no one else has. For the record, he never billed himself as the world’s best knifemaker. He wasn’t, and he freely acknowledged that others were much more deserving of applause for their skills. It was his eye, perspective and sense of beauty and design that thoroughly set him apart.

Four Careers

When Robin grew up, moved out and moved on, she carried the best and the most worrisome of life experiences with her. She made her own way and has come to understand and appreciate the journey.

“I’ve really had four careers,” she reflected. “I worked 11 years in the banking industry and 20 years as a correctional peace officer at Pelican Bay State Prison in Crescent City, California, with 12 years as a peace officer. Put that together with the work in Dad’s office and then when my husband, Jimmie Askew, and I had a restaurant in Crescent City, California.”
When she worked in banking, Robin went to Crescent City on business for her employer. While there she met the most eligible bachelor in town. “It was a 400-mile, eight-hour drive to Crescent City, and I was supposed to be there for a month,” she said. “It became one of those wonderful love stories. Jimmie and I were meant to be together.”

Bob Loveless photographed Robin’s son Nico during a regular visit while they were “out and about.” Nico was 9. The resemblance to his grandfather is striking. (Bob Loveless image)

Jimmie was an award-winning chef, and with Robin’s business background the couple put together a fine restaurant that served a variety of entrees.

“I met Jimmie in 1984,” she recalled wistfully. “We got married the next year, and he passed away 12 years later. He made prime rib, barbecue pork spareribs and fresh seafood. He would go out in the morning on his boat and catch 300 to 400 pounds of rock cod. He would clean the fish and then serve it that night. It was the best seafood in all of Crescent City—wonderful. We also had meat from our mesquite grill, chicken parmesan, grilled Italian sausage, vegetarian dishes and the deep-fried seafood platter.”

Nico

The couple had one son, Nico, who is now 36. When Robin speaks of those days, a tinge of heartache touches her words. But also during that time, she rediscovered the love and care that her father had always had for the family.

Nico and Robin
Nico and Robin

“Dad came up from Riverside to visit us a month before Jimmie died,” Robin recalled. He had been in touch by telephone continually and made himself the father figure that a 7-year-old boy needed during a tragic time.

“After Jimmie died, Dad would come up regularly,” Robin related. “He took Nico fishing four or five times a year. Grandpa was there for Nico. He taught him how to shoot a gun and would charter a boat on the Chetco River in Oregon and they would fish together. He came up to see Nico play soccer, baseball and football, and he stepped in to take care of my son.”

When Bob wasn’t physically present, he was always in touch with Robin and Nico. He worried that Robin worked in the toughest place at Pelican Bay State Prison. It was called the “shoe,” and he once told Robin how he worried for her safety. Her response was from deep inside, a manifestation of something she learned when her father made the introduction to that Japanese gentleman years earlier: “I told my dad, ‘I show them [the inmates] respect, and they show me respect. It’s really the safest place in the prison to work.’ I told him there were two officers for every inmate and that I really had no qualms about it.”

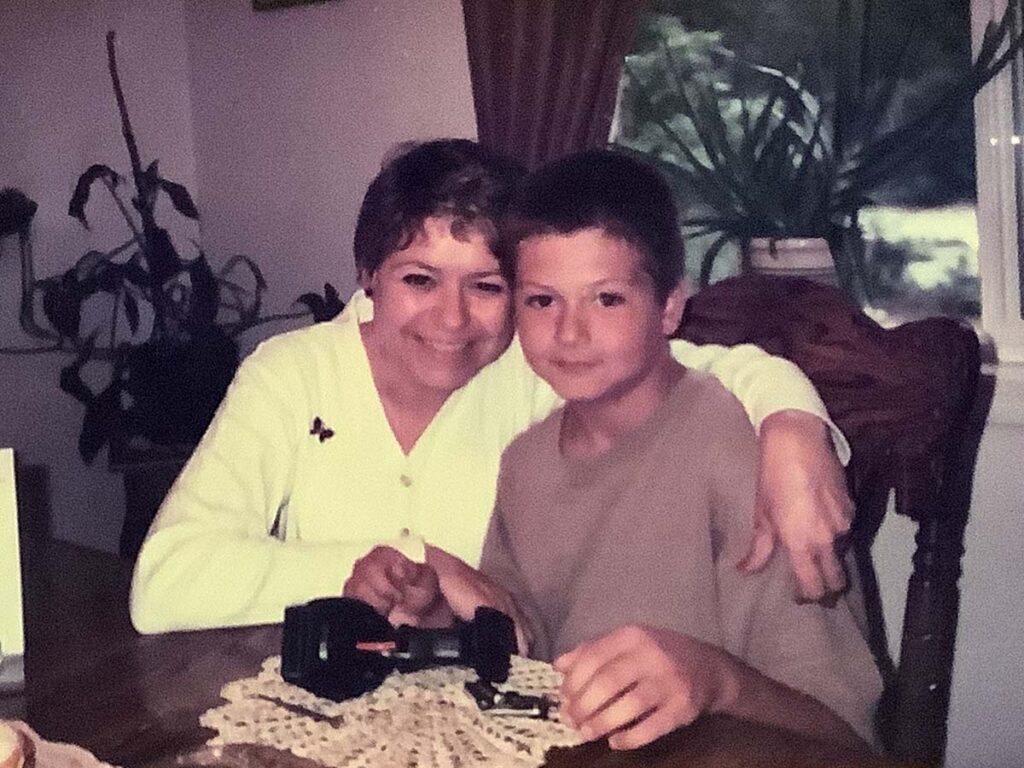
Bob took this picture when he visited Robin and Nico not long after Jimmie Askew passed away. Nico was 10.

That soft spot in Bob’s heart came through time and again as he cared for his daughter and grandson. “He would call us and say, ‘What’s Nico doing?’ He wrote a check to pay for Nico’s braces. He was there for both of us. Being a widow raising a young boy, I could call him anytime and we would talk. I also started to do that with my mother because I wanted to reach out and make sure that my contact with my family was really strong. Dad was so far away, but I talked to him at least once a week. He became the type of dad that my son needed.”

Traits & Quirks

All the while, the legend of Bob Loveless continued to grow. Tales were told. Knives were made and sold. Stories were swapped, and the maker slowly but surely grasped his own impact on the world of knives. At the same time, his various interests, personality traits and, yes, his quirks made him more than just a knifemaking phenomenon. They made him a marvel, a celebrity and an icon.

Bob always carried a gun. “Even when I was a little girl,” Robin laughed, “I remember that he would hang his gun on the towel rack in the bathroom.” For some time, he enjoyed rabbit hunting in the desert with friends. But then another fork in the road pointed a different direction when it came to outdoor activities.

It was his eye, perspective and sense of beauty and design that set Bob Loveless apart. Few if any of his knives capture these traits better than his Big Bear fighter in sheep horn and gold engraving by Dan Wilkerson. (from the John Denton collection; Eric Eggly/PointSeven image)

Robin commented, “They took a lot of hunting trips, and one day Dad decided to stop shooting animals with a gun. He started shooting pictures with a camera. He loved photography, and I have no idea how all that started—but, gosh, I remember when I was a young kid he would take me and Allison on the weekends to camera stores. He would go in and talk for a couple of hours, and we were bored out of our minds. He would take pictures like you wouldn’t believe.”

Adding to Bob’s repertoire of activities, he was also an accomplished gunsmith. If these endeavors sound like a lot to pack into a lifetime, then there is no hesitation in labeling Loveless a true “Renaissance Man.”

Nonetheless, he had pursued his passions, probably without seeking the fame that came along with them. “I do know he never liked living in fancy houses,” Robin remarked. “But he had sports cars, and his favorite car depended on his age bracket. He would drive the back roads to the Chinese restaurant in Riverside and hit 100 miles per hour. At one time, he had three cars and two airplanes. He was a pilot with a lot of camera equipment. He probably got his pilot’s license before he moved to Riverside. I forget what year he got rid of his planes. He had crashed and it was no fault of his own. It happened when a bigger plane was landing and he got banged up. He had a limp after that.”

Keepsakes

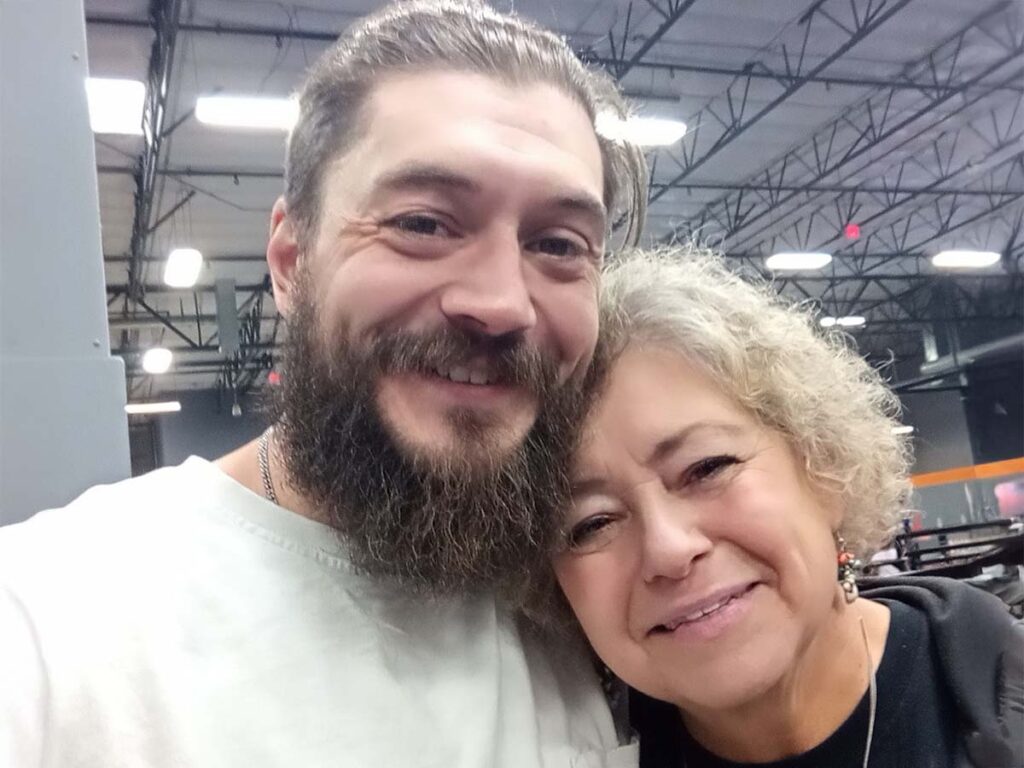
Writes Robin: “My handsome son Nico as he is today, shaggy beard and all. As a mother, I think his eyes and smile show what a kind and good man he is. I know his grandpa would agree with me and like this picture very much.”

Today, Robin’s heart is warmed by her memories, her strong Christian faith, and the knowledge that her dad truly became a father. His life was a mosaic of love and loss, turmoil and moments of calm, fiery and icy emotion, but always with a heart for the good and for his family. She clings to at least a couple of special items that symbolize the tie that binds.

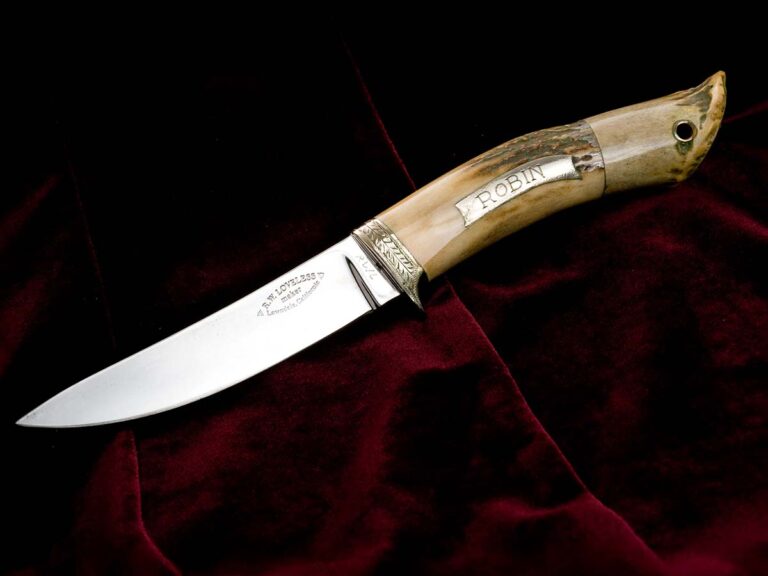
He made a banana skinner for her when she graduated from high school. “It has a stag handle with intricate engraving that he had done by a silversmith,” Robin said, “and I think the handle is at least 6 inches long with the blade about 7 inches. It is absolutely beautiful.”

A few years ago, Steve Johnson cleaned the knife up and put an edge on it. Dave Ellis took photographs of the one-of-a-kind piece, and John Denton, likely the foremost authority on Loveless knives in the world today, offered powerful words and urged her to treasure it always.

His various interests, personality traits and quirks made Bob Loveless more than just a knifemaking phenomenon—they made him a marvel, a celebrity and an icon.

The other keepsake is a photo of Bob, a joyous grin radiating from his face, as a cluster of pigeons lands on his shoulders and arms during a visit to Rome many years ago. It captures a sliver of his enjoyment of life, a glimpse into the heart and soul of just who he was. He was the gruff guy that gave generously to the local animal shelter, the edgy and matter-of-fact curmudgeon who handed substantial financial support to the UPS driver who had served faithfully in the area for years when Bob found out the guy had fallen on hard times. He was simply their quiet benefactor.

“It’s a beautiful picture and I look at it every day,” Robin offered. She ponders exactly where his genius came from and concludes that he inherited it from his mother. She admits that the spark of “genius” has not emerged from any other family member and concludes, “It was meant to be. That kind of genius is created before birth. My father was extremely gifted, and I always knew that.”

True enough, he was gifted, and in some ways that only a relative few others were even aware of.

Growing up Loveless and living within the sphere of influence her famous father created has been an adventure for Robin Askew, a thrill ride that began so many years ago, one that continues well after her dad’s departure from this Earth.

Read More On Bob Loveless:

Mike “Whiskers” Allen: Award-Winning Custom Knifemaker/Designer Passes

Remembering Mike “Whiskers” Allen, known for his innovative hidden bolster automatics and collaborations with Pro-Tech Knives.

Mike “Whiskers” Allen, affable award-winning custom knifemaker and knife designer, passed away on November 8 after a short illness.

Nicknamed for his full bushy beard, the Malakoff, Texas, cutler started making knives in 1984. He made folders mostly, specializing in automatics. He suffered a stroke in 2015 that affected his right side and eyesight, so he had to retire from knifemaking.  He designed a full line of autos for Pro-Tech Knives, including the BR1.7 LTD “Whiskers” Design, which opens via a nifty hidden bolster release and debuted at BLADE Show 2025.

Whiskers also made miniatures as well as swords. He was known all over the country for his reasonably priced, one-of-a-kind knives. He was a member of The Knifemakers’ Guild and the Professional Knifemakers Association (PKA) and carried Knifemaker’s Emeritus status in the Guild. He also served as PKA president during his last few years of making knives. He won at least one custom knife judging award at the BLADE Show, which he and his wife Denise attended on a regular basis.

Remembering Others The Knife Industry Has Lost:

Remembering Tim Britton: Rest Easy Marine

The knife community lost one of its last members from the golden era of knifemaking with the passing of George Miller “Tim” Britton, who died after a short illness on December 9. He was 85.

A veteran (1959-65) of the United States Marine Corps and known as North Carolina’s first professional knifemaker, Tim began fashioning knives in 1971. Early on he specialized in small personal and fancy boot-type knives and assorted fixed blades and wound up his career making all manner of classic slip joints.

He appeared in early ’70s issues of The American Blade and later in BLADE®. He learned about knives and how to make them from Jim Mustin of Cajun Knives and BLADE Magazine Cutlery Hall-of-Fame® members Frank Centofante and Blackie Collins. Other influencers were Tim’s knifemaking contemporaries such as Cutlery Hall-of-Famers Ted Dowell, Jimmy Lile and Bob Loveless and well-known makers Rod Chappel and Bob Dozier. Tim was an admirer of Chappel’s handles and those of Bill Luckett, too.

Britton’s career spanned the early days of O1, 440C and D2 for blade steels to today’s CPM grades.

Tim specialized in classic slip joints, this one in BG42 stainless steel, Fiji fire pearl and 24k-gold inlay. Closed length: 3.25 inches. (Eric Eggly/PointSeven knife image)

“I started with O1 in 1972 and Blackie Collins talked me into 440C,” he once told BLADE. “Peer pressure … Ted Dowell, Frank Centofante, Jimmy Lile and Bob Dozier had settled on D2. [Today’s steel] leaves them all in the dust.”

No matter the steel, its proper heat treatment and also edge geometry, not to mention comfortable handles, were of critical importance to Tim.

“Buying a knife from a reputable maker should be simple,” he once observed. “My questions would be steel type, Rockwell hardness and what kinds of tools the maker has in his shop. I’m a dinosaur.”

A colorful character known for speaking his mind, he spent time as a member of The Knifemakers’ Guild and the ABS.

“Forging is a macho trip,” he once stated. “I fancy myself a smithy in times past.”

He understood well the importance of effective marketing, regularly running one-third page color ads in BLADE, and he demanded the most in return from them. He also loved the BLADE Show and was a regular exhibitor along with Deb, his wife of 26 years.

Rest easy, Marine, and semper fi.

Remembering Others The Knife Industry Has Lost:

Dagger Design: Getting A Handle On Crafting The Handle

0

Tips on handle materials, shaping/layout, grooves and flutes.

A good knife requires a handle that not only feels right in the hand but also complements the blade’s intent. For daggers especially, few embellishments capture both technical skill and aesthetic elegance like a spiral-fluted handle paired with inlaid twisted wire.

Fluted, wire-inlaid handles trace their lineage to medieval Europe, where 9th-to-12th-century knives were often bound with spirals of wire for both decoration and basic grip enhancement. By the Renaissance, Italian and French artisans had refined this into a sophisticated embellishment. They carved shallow, evenly spaced flutes into hardwoods, stone, ivory or other materials, then inlaid twisted wire into the channels in a demonstration of their mastery of contrasting textures and precise tool control. The grooves not only trimmed handle weight for better balance but also improved the gripping surface so that daggers felt responsive and secure in the hand.

In modern times, this technique remains a key hurdle in the path to attaining the level of master smith from the American Bladesmith Society. Flawless execution of fluting and wire inlay is essential—each flute must be crisply defined and identical in depth and spacing. Each wire strand must be uniformly twisted and fitted without gaps.

When choosing your material for a fluted, wire-wrapped dagger handle, think beyond mere function. You’re going to put in a lot of time on this project, so use something nice.

In the following paragraphs, we’ll walk through choosing handle material, laying out the spirals precisely, and cutting the wire grooves and flutes.

Handle Material

When choosing your material for a fluted, wire-wrapped dagger handle, think beyond mere function. You’re going to put in a lot of time on this project, so use something nice. G-10 and Micarta® are outstanding materials from a purely functional perspective, but they lack the organic warmth and storytelling power found in natural materials. On the other hand, black Richlite and black or ivory-colored paper Micarta can be appealing and affordable substitutes to African blackwood or natural ivories.

Most hardwoods should be stabilized but the various rosewoods, desert ironwood, African blackwood and other similarly hard and dense woods can be used as they are. For collectors seeking rarities, ancient mammoth and walrus ivories are beautiful and carve cleanly, though they can crack if too much heat is allowed during shaping and can expand, contract or crack with changes in humidity. Mammoth ivory can also be difficult to find in large enough sizes without cracks.

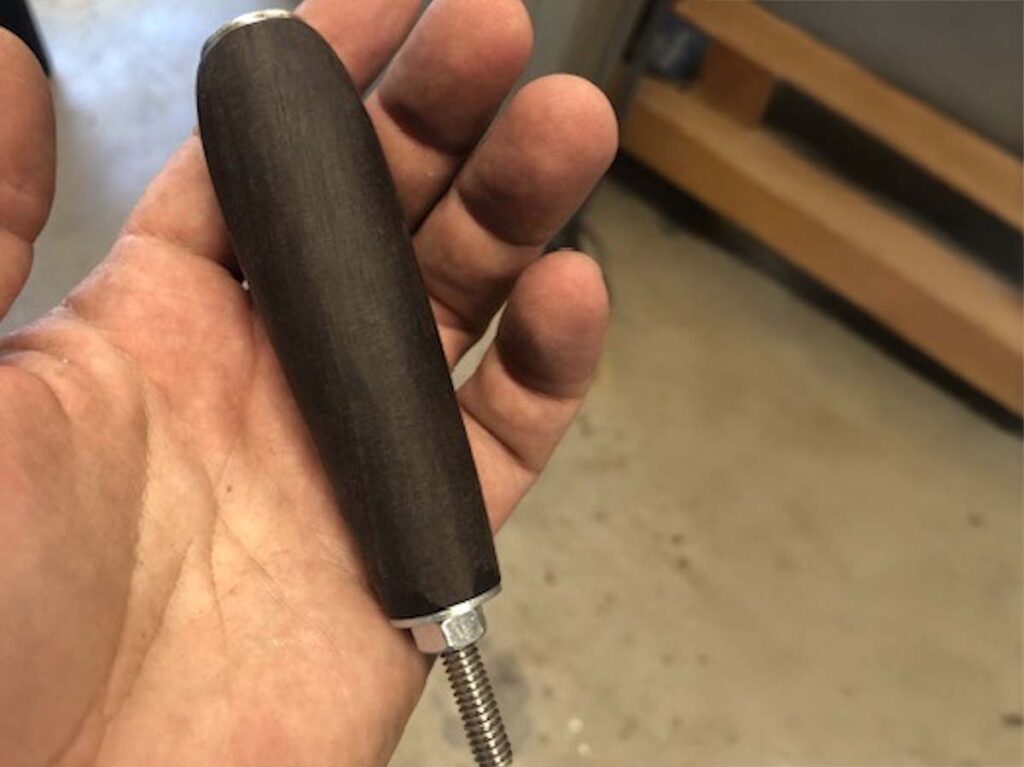
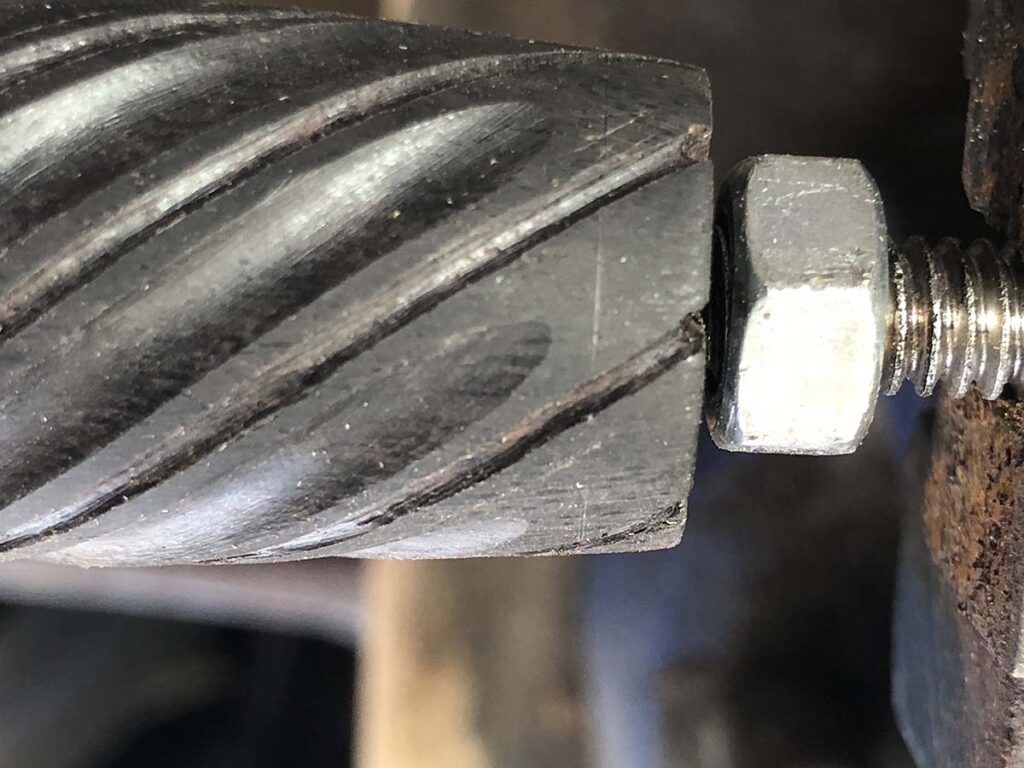
Both layout and shaping are made easier if the drilled handle is held between nuts on a long bolt or piece of threaded rod as a fixture.


Consider in advance what type of wire you’ll be using and choose the handle material accordingly. Silver and gold both look great against dark and light materials but consider matching the warmth of the color of gold with warmer-colored materials, and the cooler color of silver with lighter or cooler-colored materials. Think about chatoyance and orient your flutes to highlight the patterns under various types of light. The wires will be the visually dominant part of your completed handle, so the drama and color variation of certain burls and mammoth tooth will be outshone at best and visually distracting at worst.

Costs vary dramatically. Rare hardwoods and ancient ivories carry premium prices and should be ethically sourced. In contrast, G-10 or Micarta balance performance and cost-effectiveness but lack the luxury you’ll want in a signature piece. It’s a good idea to order materials for practice, especially if you’re planning to work with expensive ones. Antler, bone and paper Micarta all work similarly enough to ivory and the harder woods to be valuable for practice. Time spent in practice will not be wasted.

Layout & Shaping

You have carefully chosen the perfect material that fits your well-thought-out, cohesive vision for what impression or statement you want your knife to make, and now it’s time to lay the groundwork for some precision carving. While not strictly essential, it can be helpful to begin by squaring your blank on all faces—accurate squaring guarantees precise drilling and layout alignment for every step. The ends must be square to the tang slot and perfectly parallel to each other to ensure tight fit-up at the end. It will be harder to do this after you’ve shaped the handle, so do it before you start.

Gold and silver are the colors of choice for dagger handle wire wraps. ABS master smith J.W. Randall opts for the gold on the fluted handle of the warmer-colored mammoth ivory core of his art dagger. Overall length: 16 inches. (SharpByCoop image)

First, drill the tang hole. You can use a drill press but a lathe equipped with a four-jaw chuck to hold the squared blank makes it easier to ensure that the hole is dead-center and straight. Both layout and shaping are made easier if the drilled handle is held between nuts on a long bolt or piece of threaded rod as a fixture. With this in mind, it’s useful to drill a clean quarter-inch hole all the way through and save the broaching for the tang until later.

Shaping the handle profile requires some forethought into how it will mate up to the guard and pommel. The simplest transition is to make the ends of the handle and the fittings it meets round, but there are limitless options here. The handle itself doesn’t have to be round, and an oval cross-section makes it easier to index and orient the finished dagger in your hand. Assuming you’ve planned the design thoroughly before starting, shape your handle and sand it up to an even 200-to-300 grit. You’ll have some slips and scratches during the fluting process that you’ll have to sand out later, and your layout lines will be more durable on a rougher surface; there’s no need at this point to polish your handle to its final finish.

The next step is cutting the grooves for your wire, and the most important part of this process is accurate layout. There are a lot of ways to do this, but after trying most of them there is only one that has proven adequate. Luckily, it’s the easiest and the fastest method as well.

The most important part of cutting the grooves for your wire is accurate layout. Though it need not be fancy, a jig of some sort is essential here.

A jig of some sort is essential here, but it doesn’t have to be fancy. Fundamentally, all that is necessary is some means of indexing so that longitudinal lines are evenly spaced, some sort of rest or tool holder allowing the lines to be drawn perfectly straight down the length of your handle, and the ability to rotate your handle to draw evenly spaced lines around the circumference. The number of longitudinal lines is the same as your planned wire count. The number and spacing of circumferential lines around the handle determine your twist rate, and the number of resulting spaces should divide evenly into the wire count.

Once these lines are drawn, connect the corners of your resulting rectangles. Tracing each intersection gives you repeatable spiral guidelines for groove cutting and wire placement. Using a pencil is a good idea, but you can use ink if you’ve verified that it won’t permanently discolor your handle. This is the time for experimentation—you can draw new lines to test new twist rates, but once you start cutting, you’re committed.

Grooves & Flutes

When you’re satisfied with the layout you can begin cutting the wire grooves. With your handle anchored by tightened nuts on a piece of threaded rod, clamp the rod in a vise and start by precisely scoring each guideline with a fine blade in a jeweler’s saw. If you leave the handle slightly loose, you can turn it with one hand while cutting with the other. A blade size of 1/0 is good for this step. Deeper cuts will make the next step easier, so go to the full depth of the blade or slightly beyond. Alternatively, use the corner of a fine triangle file to mark and deepen the lines precisely. In either case, if you have an OptiVisor or, even better, a microscope, this is the time to use it.

With your handle anchored by tightened nuts on a piece of threaded rod, clamp the rod in a vise and start by precisely scoring each guideline with a fine blade in a jeweler’s saw.

Once the line is scored, shape each scored wire groove line with an Olson #4 36 TPI spiral scroll saw blade in a jeweler’s saw. It doesn’t have to be this brand, but since I like my inlaid wire to be made up of two twisted 24g wires, this specific saw blade’s .041-inch diameter is a perfect match for the .040-inch diameter of the combined wire. The resulting half-round groove ensures a very snug fit. Cut carefully until the depth of your grooves reach about half the combined diameter of your twisted wire, in this case approximately 0.020 inch. A single untwisted scrap of your wire can serve as an impromptu depth gauge.

Once all the wire grooves are clean and complete, it’s time to carve the flutes themselves. Lay out flute edges with dividers. Adjust the dividers to the width you need, place one leg in the wire groove, and scribe marks with the other leg to keep the spacing even. Bulk material can be removed with a coarse round file before refining with finer round files to uniform depth and width. It simplifies matters greatly if you plan your groove size to correspond to the diameter of a standard-sized file, though this is not strictly necessary. Ensure all flutes stop at an identical distance from each end of the handle. Each groove ending should be shaped so that every ending is identical—this is the trickiest part.

When filing and finishing flutes, keep the ends identical in length and shape. Any variation will stand out.

If achieving consistent flute endings is the most difficult part, sanding and finishing the grooves is the most tedious. You can start with 220- or 320-grit paper wrapped around a file or rod of the right size. Progress through all the grits until you reach the desired level of finish, ensuring that you remove all scratches from the previous grit before moving to finer paper. Eight-hundred grit leaves a nice matte finish. If you plan to buff your handle to a high gloss, keep sanding up to 1500 or 2000. You can buff out 800-grit scratches, but not without compromising the crispness of the edges of your channels. When the grooves are done, sand the flats between them as well, using a hard backing block to keep the transition between lands and grooves nice and crisp. A lathe makes this last step very fast, but it can be done by hand as well.

With these steps complete, now is the time to broach the handle to fit the tang of your knife.

Read More On Daggers:

Japanese Swords: Can Tradition Outperform Modern Tech?

There is plenty of lore surrounding traditional Japanese Swords, but do the master makers’ time-tested methods equal modern steel advancements?

Editor’s note: Long-time BLADE® subscriber and knife collector Rick Royster wrote us, wondering how the swords of the ancient Japanese samurai warriors would compare to today’s modern swords. Did all the steps the ancient Asian swordsmiths used really make a difference? “Employing special quenchants, some clay, some of this and that—is it science or mystical?” Rick asked. While we couldn’t test an ancient sword vs. one of today’s, we did go to the sources themselves for answers—some of today’s top swordsmiths.

The traditional Japanese sword blade is revered for its performance, perhaps even more than its beauty and ties to an uber-rich heritage in the world of cutlery. Combined, these elements make the classic Japanese sword something unforgettable, a work of art and poetry in motion—yet capable of delivering the decisive blow in combat.

Modern custom sword blades may not possess the allure of the centuries. They may not have a hamon—though many do—or the other attributes that make their vintage counterparts so revered. Nonetheless, they can claim respect and admiration when it comes to strength. If the comparison of relative strength is relevant and worthwhile, which is stronger—the ancient Japanese or the modern custom sword blade?

World-renowned Japanese swordsmith Yoshindo Yoshihara does yakire, the fast quenching of a sword, during one of his swordmaking demonstrations. (Aram Compeau image)

BLADE Magazine Cutlery Hall-of-Fame® member/ABS master smith Steve Schwarzer answers the question this way: “Modern steels are highly superior in almost every way except for visual structure. Traditional Japanese bladesmiths were all about taking inferior material, which was the best stuff on the planet at the time, and making it better. Modern steel is superior because it is a lot cleaner with alloys for specific jobs. Setting the structure up is what today’s American Bladesmith Society is all about: making steel better. It’s hard to compare the two, but modern steels are superior in edge holding and sharpness. Modern steel won’t bend like the old stuff because it is not designed to bend.

“Once you get the aesthetics out, the fancy hamons and stuff like that, ancient bladesmiths had a way to control the process in the old days from one portion of the blade to another. If you take a Japanese blade and quench and polish it, you have a big spring supporting the cutting edge, and that is why it would excel in battle.”

ABS master smith Zack Jonas sees the purpose as the primary differentiator in either case.

According to Steve Schwarzer, traditional Japanese bladesmiths took inferior material—the best stuff available at the time—and made it better. “Modern steel is superior because it is a lot cleaner with alloys for specific jobs,” he stated. He used modern steel and all the trimmings on his Japanese sword. (Eric Eggly/PointSeven sword image; image of Schwarzer by Chris Wellhausen)

“The strength of the traditional Japanese sword would have been measured in its ability to withstand the test of battle without breaking,” he began. “By this measure, they were marvels of engineering. Today’s technology is capable of producing swords with performance characteristics that vastly exceed the finest traditional blades. We have steel mills producing bespoke blade alloys from ultra-precise ratios of refined base elements.

“We have modern heat-treating methods capable of holding plus-or-minus a fraction of a degree indefinitely within a perfectly controlled atmosphere. We have modern quenching oils and molten salt pots and ovens for tempering, and we have analytical tools that allow us to refine how we approach our materials. Traditional swords were purpose-built for war, and they lived up to those demands for a thousand years and more. But modern science gives us greater capabilities on a purely quantitative level.”

The cutting of the tatami mat—done here by James Williams during one of his Japanese sword demos at a past BLADE Show—is said to be a good analogue for testing cuts against a human target.

Schwarzer agrees that modern steel is produced in quantity, while the traditional Japanese sword blade was produced singularly.

“It truly takes a master to get the most out of any steel,” he remarked, “but modern steels are more forgiving because they are designed around production, not one-offs.”

Traditional Sword Construction

Dave Goldberg has made traditional Japanese swords since the 1990s and learned from masters in their construction, as well as in the forging of damascus. He sees the functionality of the traditional Japanese blade and says, “The edge of the sword blade is about 60-70 on the Rockwell scale and you want that to be about one-third of the blade area. The middle is somewhat hard, and the back is not hard but flexible.”

According to Zack Jonas, modern smiths have access to modern materials and technology, but in many or even most cases, modern swords are not made with careful consideration for the practicalities of combat. Zack’s wakizashi features a 22-inch damascus blade with a shinogi zukuri grind. Overall length: 28 inches. (SharpByCoop sword image; image of Zack by B. R. Hughes)

According to Jonas, the hardening process was essential during ancient times. The warrior absolutely depended on it. Traditional swordsmithing techniques have been refined over the course of centuries through the familiar process of trial and error.

“Since ‘error’ would have been a matter of life and death,” Zack observed, “we can say with a degree of confidence that traditional methods worked extremely well. For example, it was essential to employ differential hardening—which traditional smiths did by applying an insulative clay to the spine—because given the properties of the steel they were working with, a fully hardened blade would have created a number of problems both for the smith and for the warrior. It can be tricky to retrospectively disentangle the mystical from the scientific. Mystical practices that offered no benefit would have been winnowed out in favor of those that did, and those that did offer benefit can be scientifically explained today.”

Years ago, Goldberg traveled to Japan to study traditional sword blades under the legendary Yoshindo Yoshihara, whose family has practiced the art for no fewer than 10 generations.

Zack Jonas said modern steels can get harder, tougher and sharper than traditional Japanese tamagahane steel, but it remains important to remember that tamagahane was strong enough for a thousand years of battles. This traditional tamahagane was made in a smelter, or tatara. (Yoshihara Yoshikazu image)

“He taught me a lot of things about sword making,” Dave remembered, “and in his smithy, he had on the wall behind where he forges a Japanese shrine with lightning bolts hanging and incense burners, and there was a little teapot in the smithy, too. He said it was just decoration, but with the Japanese guys even if you are friends, there are still secrets. So, I put paper lightning bolts in my shop too—to protect my spirit and so the blades will come out well and get through the quench.”

Bound up in tradition, the mysticism makes the Japanese way an art form that can never be completely separated from its origins. Even in a straight-up test of strength, whether one steel prevailed over the other, there would be no loser. Each would continue to hold its relative place in time and space and fact and imagination.

“In absolute quantitative terms, traditional materials mostly do not offer performance advantages over their modern counterparts,” Jonas said, echoing Schwarzer’s observation. “For example, modern steels can get harder, tougher and sharper than traditional Japanese tamagahane steel, but it is still important to remember that tamagahane was strong enough for a thousand years of battles. Likewise, performance isn’t everything. One of the signature features of tamahagane is its appearance. It has aesthetic characteristics that modern steels lack entirely.”

Japanese Sword Features

Eighty-two-year-old Yoshindo Yoshihara, author of this classic Japanese sword and saya (scabbard), is generally recognized as the greatest maker of Japanese-style swords of his generation. (Francesco Pachi images)

Among the most noteworthy features found in traditional Japanese sword blades is the hamon, which Zack describes as the literal demarcation point between the hardened edge of the blade and its softer spine. The hamon, he says, is a visible representation of the technique that must be used due to the material constraints and demands of tamahagane steel.

It is visible due to light diffusing off the mixture of hard and non-hardened crystalline structures, where the hardened edge transitions to the softer spine. He adds that over time, the production of the hamon stretched beyond the practical necessities of the steel and into the realm of aesthetics. Whether the shape of the hamon has any bearing on the blade’s performance is an open question.

“Any steel hardened and tempered to its best molecular composition is good steel,” Goldberg commented. “Modern 80CrV2 steel is harder than any Japanese steel. Japanese steel can take it in battle, and from sword to sword, it can be amazingly hard. It becomes its own shield when the warrior holds it above his head and can then come around and cut the other guy. Japanese steel is really hard, but modern technology is something else. I have never seen anything harder than the CrV stuff. Everything is purpose-driven.”

Matt Venier made what he calls Mattyhagane to recreate tamahagane for the blade of his katana. The tsuka (handle) consists of a wood core with full rayskin and braided wrap. The tsuba (guard) and habaki (collar) are copper. (SharpByCoop images)

Other attributes of the traditional Japanese sword, including the handle ornaments known as menuki, may contribute to performance as well. While some observers may see menuki as a sort of grip enhancement in functioning as a palm swell, allowing the user to index the sword better, others stress that they are primarily evidence of the maker’s desire to express his or her own identity and creativity. Menuki quite possibly can function on both levels.

Japanese Sword Folklore

Through the centuries, there have been claims that Japanese steel can perform certain tasks that modern sword steel cannot. Jonas says that many such contentions are simply folklore or myth and have been easily debunked.

“One popular example is the cutting of the tatami mat,” he related. “These straw mats, soaked in water and then rolled tightly together, are said to be a good analogue for testing cuts against a human target. It has been said that only the katana can do this well, but these days, videos can be found online showing a skilled swordsman cutting through a tatami with a blunted medieval-style longsword.

“The Japanese sword has been mythologized along with the warriors who made it famous. The samurai were incredible fighters who earned their reputation for fierce courage through feats in battle and cultural refinement. Their signature sword is a highly developed object with exceptional performance abilities, but traditional examples will not outperform their modern counterparts.”

Old & New Symbiosis

In the final analysis, the old and new steels co-exist, achieving a symbiosis, a sort of mutual respect. As Zack so aptly pointed out, the context of their comparison weighs in on the discourse.

“It is important to consider how this matter is discussed,” he noted. “Most of these topics bear on the question of superiority—what makes this sword better than that sword or vice versa—and while it is possible to give some answers in the absolute sense, there is a risk that these answers ignore important contextual factors.

“The traditional Japanese sword was designed for a particular form of combat and was designed with the constraints of the tools and materials available at the time,” he concluded. “Modern smiths have access to modern materials and technology, but in many or even most cases, modern swords are not made with careful consideration for the practicalities of combat. Modern smiths are unlikely to even be familiar with how a sword would need to behave in a fight.”

Times change, materials change, techniques and methods change. But through the ages, traditional icons endure, while new and emerging genres come to life and begin to build legacies of their own.

More On Swords:

Advertisement

Must Read Articles

Read this before you make a knife

Knifemaking 101 – Read This Before You Make a Knife

  by Wayne Goddard My experience has taught me that there's nothing like digging in and getting started. I've often said the hardest part of the...
how to forge damascus steel

How to Forge Damascus

Advertisement
Advertisement