Knifemaking

Knifemaking is the building of a knife, which includes the blade, handle and other accouterments. Blades are made by either removing metal from a steel blank via a grinder – known as stock removal – and the forging to shape of hot steel into a blade in the process known as bladesmithing. Other parts, including bolsters, guards, pommels, etc., are needed to complete the finished knife.

Featured Knives – – Knife Collecting – – Tactical Knives – – Survival Knives

Video: Jigging and Shaping Knife Handle Scales

0

American Bladesmith Society master smith Steve Dunn demonstrates how to jig and shape knife handle scales in this video.

The tutorial was shot during the Slip Joint Folding Knife class at Haywood Community College in Clyde, North Carolina, on Dec. 3-7, 2012.

Learn more about knife designs, including handles, in 101 Knife Designs.

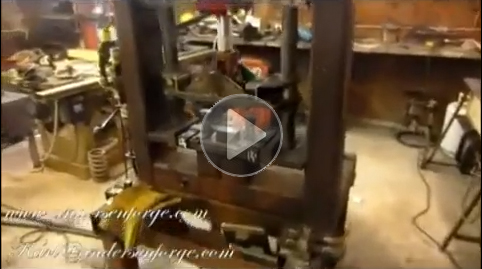
Video: How to Select a Milling Vise for Knifemaking

0

This demonstration on the selection and use of milling vises is by Dale Schafer, Machine/Tool Technology Instructor at the Washburn Institute of Technology. This was one of the demonstrations at the 3rd Heartland Hammer-In in Topeka, Kansas sponsored by the American Bladesmith Society and hosted by the Kansas Custom Knife Makers Association.


For more about knifemaking, be sure to pick up a copy of BLADE’s Guide to Making Knives. This second edition shows step-by-step the tools and techniques for making a knife.

Click here to order BLADE’s Guide to Making Knives.

Tips for Grinding a Blade

1

Editor’s Note: This is an excerpt from Murray Carter’s new book, Bladesmithing with Murray Carter. Click here to learn more from this renowned knifemaker.

The shape of the blade, or profile, must be precisely ground. Grinding is the operation of using files or other abrasives to mechanically shape the steel into a functional blade.

Grinding can be divided into two categories: grinding the blade profile and grinding the blade’s edges (secondary and primary).

Let’s talk about the profile. Grinding a forged blade’s profile can be done with a variety of tools. Heating the blade via friction is not a big concern because this grinding is done prior to heat treating (annealing, quenching and tempering). As you may know, the blade needs to be shaped after a pattern or template. At this stage that template is scribed onto the billet of steel that is to become your knife.

Place the pattern so that it most appropriately covers the billet in relation to the thickness and tang. Be careful on full-tang knife billets to orient the template the correct way. I once made the mistake of switching the tang end of the billet for the blade end and wound up with a blade with way too much taper.

Once the template is in place, secure it with a pair of locking pliers or strong clamps. Any sharp-pointed tool that is harder than the annealed steel will scribe (scratch) lines onto the billet. Trace around the template completely. Examine it before you remove the clamp(s) to make sure you can see the scribe lines clearly. Examine it again, checking it against this list:

* Are the lines clear and not making little “train tracks?”

* Is the blade/tang junction exactly where it should be?

* Is the blade where it should be?

* If you have made a mistake scribing the lines, you can lightly grind the surface and scribe again, but you will now be committed to grinding and polishing the flats of your finished blade.

Also remember that, on a laminated billet, if you grind steel from one side you really ought to grind the same amount from the other side as well, or the steel core will no longer line up in the middle. For blades
that are meant to have a forge finish or a hammer-forged finish, these options will no longer be possible, so take great care when scribing lines on a billet.

There are several methods for removing the excess steel from the billet to produce the perfect profile.

* Steel shears

* Cut-off wheel

* Band saw

* Drill press and hack saw

* Belt sander

* Bench grinder

* Kaiten toishi

As the smith is cutting out or grinding the blade profile, the scribed lines, which should be clearly visible, are the guide. As soon as you are so close to the lines that you are actually touching them in places, it is necessary to employ another “micro observation” technique to be in full control of the profile.

In a good source of natural light, hold the blade at eye height with the flats of the blade horizontal. Instead of focusing your attention on the flats, look closely at the outer edges of the blade. If you hold the blade with the point towards your eye, the spine of the blade should look compressed into a few millimeters.

Compressed like this, every high or low spot on your scribed line will be evident. Similarly, every line on the outer profile of the blade should be examined this way. In the pattern or template you used, every line should be well defined and with a purpose. Ask yourself if the lines you are now looking at were meant to be perfectly straight, curved or pointed. Pinpoint trouble areas, then attempt to grind in a way to affect only those areas and re-examine.

At this stage, the blade should be at 97 percent of its final profile. The other 3 percent will be removed in the final polishing stages.

Click here to get 40% off Bladesmithing with Murray Carter and take the next step in the knifemaking journey.


How to Select a Steel for Forging

0

Editor’s Note: This is an excerpt from Murray Carter’s new book, Bladesmithing with Murray Carter. Click here to learn more from this renowned knifemaker.

The first and most logical approach is to select steel by doing some research on cutlery grade steel. Topics to especially pay attention to are the chemical composition of different steels and the effects of each chemical; isothermal transformation graphs for different steels; the effects and importance of thermal cycles, including annealing, quenching and tempering; the availability and cost of the steels and, perhaps most importantly, how easy the steels are to work by hand.

The above paragraph only took a few lines to write and a few minutes to compose, and yet many metallurgists will spend their whole lives researching those points. Pursue it to your heart’s content, and to that end I have included a thorough bibliography at the back of this book. However, to get you focused back on the task at hand, suffice it to say that there are some specifi cs you will need to concentrate on when selecting steel. These are:

• The amount of carbon in the steel

• Forging temperature range

• Annealing temperature, quenching temperature and tempering temperature

• Availability

• Overall workability

Let’s examine each of these in a little more detail.

Carbon is added to iron (Fe) to make steel. Carbon is the element that enables steel to harden when it is quenched at the proper temperature. Steel is unique in this aspect; all other metals soften when subjected to the same thermal cycle. The amount of carbon is very important. Too little carbon will fail to make steel harden when quenched, and too much carbon turns cutlery steel into cast steel. Generally speaking, less than 0.5 percent carbon is considered low carbon steel, and not suitable for blades. More than 1.6 percent carbon is considered extremely high carbon steel, and is very tricky to make into a blade. More than two percent usually equates to cast steel. Hence, most blades in the world have a carbon content between 0.5 percent and 1.5 percent.

In this range, all other factors being equal, the more carbon, the harder the blade gets when quenched. The harder the blade, the finer an edge and the longer it will stay sharp.

Forging temperature range is the temperature at which you can “work” or manipulate the steel. Most steel can be worked between a bright red heat and orange/yellow heat (approx .700~900 degrees Celsius, 1290-1650 Fahrenheit) and it will yield under the blow of the hammer, bend or twist etc.

Below this range the steel will cease to yield to manipulation and can be damaged by subjecting it to stress. Likewise, steel can be irreversibly damaged from working it at too high a temperature.

Annealing, quenching and tempering are the three phases of heat treating steel. These temperatures are very critical figures to commit to memory for the steel you are working. The heart and soul of a blade is the heat treat, as the final quality of the blade will be determined by how successfully these three operations are accomplished. Knowing the proper temperatures, and knowing what they look and feel like, is a critical skill for the bladesmith.

Availability determines whether or not you will be able to try forging that ‘super-steel’ you have been reading about. If you cannot locate or buy the steel in question, the pursuit becomes meaningless. Cost is another factor. Even if you locate the steel of your dreams, it may cost too much to have it shipped to your location. You want to know if you can acquire the steel for a reasonable cost and if it will be available in the foreseeable future.

Overall workability considers how the steel in question compares to other steels. Is it easy to manipulate under the hammer when you are forging it? How does it heat treat? Is it prone to warping, bending or cracking? Is it easy to straighten after heat treating? How does it take a final polish?

These questions are easier to answer once you have experience with a few of the common steels.


Click here to get 40% off Bladesmithing with Murray Carter and take the next step in the knifemaking journey.
4 Steps to Perfect Freehand Sharpening


1) Select a Sharpener

Invest in a good bench stone. You have the natural ones like the Arkansas stones and the manmade ones such as the Norton India stone. There are also the diamond-bonded stones that many companies produce.

2) Color the Edge

With a black ink permanent marker, color the entire cutting edge or primary bevel on both sides of the blade. The objective is to sharpen off the black ink. After you remove the ink from both sides of the blade, it will be sharp.

3) Adjust Accordingly

Take a few strokes on the stone and then examine the edge bevel. If you see ink toward the top of the bevel, decrease the angle of the blade to the stone. Conversely, if you see ink toward the bottom of the bevel, increase the angle to capture that part.

4) Remove the Ink

After you sharpen the ink from the cutting edge, you will have to remove any stray marker ink. A liquid-based adhesive and paint remover is ideal for the job. Place a few drops on a paper towel and very carefully wipe the cutting edge.

Going Forward

After you get the hang of it, skip the permanent marker step. Congratulations, you’re now a freehand sharpening pro!


Silver Wire Inlay Techniques by Joe Keeslar, MS

0

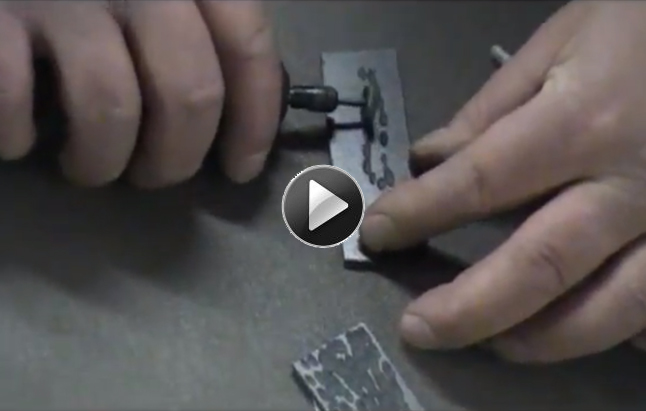
Master Smith Joe Keeslar demonstrates Silver Wire Inlay work techniques including stabing chisel cuts, wire forming, wood selection, and wire cutting.

Tools for Silver Wire Inlay by Joe Keeslar, Master Smith

0

Master Smith Joe Keeslar describes the tools needed for Silver Wire Inlay work on knife handles and sheaths.

Advertisement

Must Read Articles

Read this before you make a knife

Knifemaking 101 – Read This Before You Make a Knife

  by Wayne Goddard My experience has taught me that there's nothing like digging in and getting started. I've often said the hardest part of the...
how to forge damascus steel

How to Forge Damascus

Advertisement
Advertisement