

Knifemaking

Knifemaking is the building of a knife, which includes the blade, handle and other accouterments. Blades are made by either removing metal from a steel blank via a grinder – known as stock removal – and the forging to shape of hot steel into a blade in the process known as bladesmithing. Other parts, including bolsters, guards, pommels, etc., are needed to complete the finished knife.

Featured Knives – – Knife Collecting – – Tactical Knives – – Survival Knives

Young Knifemakers: The Future Is Now

0

As The New Generation Of Knifemakers Begin To Hone Their Craft, The Masters Of Today Help Guide Their Path Forward. 

A new wave of interest has brought the younger generation closer to the forge and to the welcoming classrooms of bladesmiths that are quite willing to share their time, talent and tips to help the youngsters develop their own skills. That interest comes not only from a growing awareness of the beauty of the finished forged blade, but also an appreciation of the time and dedication necessary.

American Bladesmith Society (ABS) Master Smith Ray Kirk has been teaching kids bladesmithing for some time, and he sees the investment in the future as time well spent.

“Most of the young students usually have a parent that will either make a blade with them or watch the total process,” he commented. “Besides understanding the phrase ‘Strike while the iron is hot,’ they learn to control the steel by where they hammer. The experience of sharing the class with a parent or sibling is the best kind of memory to make. Knowing they will make something that will probably outlast them is something they probably never did before.”

Ray began teaching his grandchildren when they spent time at his home, and he has taught both boys and girls. Depending on the age, both genders are proficient and can use the hammer. His youngest student began learning at 11, and his grandchildren have been around the forge since they were 6.

“At that age, it was just showing them how to change the shape of steel by heating and hammering,” Ray said. “If they can drive a 16-penny nail into a 2-by-4 they could do the class, and I never really considered the sex of the student to have a bearing on taking the class.”

Some of the more satisfying moments for Ray have been watching his students as young adults competing on History TV’s Forged in Fire. Several have won in competition and all have enjoyed the experience, making friends and expanding their knife knowledge. The smile that shines when a photo is taken of young bladesmiths and their knives is something special.

Ray’s class consists of work to complete two knives of hidden-tang integral design from a 12-inch round bar of three-quarter-inch 52100 steel. 

“What they can’t do I will do for them,” he explained. “Learning how is the important part. I don’t expect the students to be an expert at any part of the procedure, and as long as they are watching and learning, I can finish it for them. If I only have one student, it can be a one-day affair. Two students usually require two days, and out-of-town students can use our guest house to stay in. The cost of the class is $350 per student.”

Pride In Teaching Younger Smiths

With the blade secured in the vise in Rick Dunkerley’s shop, 7-year-old Jacob Dove sands the handle.

ABS Master Smith Rick Dunkerley began teaching privately in his shop in 1992, and his first student was Josh Smith, who went on to become the youngest ABS journeyman smith at 15, the youngest ABS master smith at 19, and twice a competitor on Forged in Fire.

“I started teaching Josh when he was 11,” Rick remembered. “That was 30 years ago. He was on the Little League team I coached and showed interest in the knives I made. He was very motivated and not deterred by the work involved.”

Dunkerley says that he doesn’t have a specific program for kids but has invited those who show interest to his shop or hammer-ins.

“If they continue to show interest, I help them out,” he remarked. “I think making things by hand gives kids and adults great self-confidence and pride. So much of the modern world is fast paced and disposable. The process of making a knife forces a slowing down and focus that is lacking in a lot of kids’ lives. It also gives them something to care for and preserve as opposed to the normal disposable crap of everyday life. I don’t encourage or discourage anyone, kids or adults, to pursue knifemaking as a career. I give them my experience on the subject and let them decide on their own if they can make the sacrifices involved.”

Rick usually starts a student out with stock-removal knives. He says he believes learning to grind a blade is more difficult than forging one. Then, should the student decide to learn bladesmithing, the learning process continues.

“My proudest moments as a teacher have always been seeing the pride and satisfaction in the students’ eyes when the knife is finished,” he added. “I believe the pride and satisfaction of making things with our hands makes better human beings. That’s enough motivation for me to help when I can.”

Absorbing lessons from Dunkerley and listening to his advice has paid huge dividends for Josh Smith, and his memories of those days filled with learning the bladesmithing art remain fresh in his mind.

“Rick’s mentorship launched me into a career that I would never have had without his help,” Josh recalled. “Thirty years ago this year, I started making knives under him. Those times under the tutelage of Rick provided me with an opportunity to tap into my craftsman and artistic side.”

Josh has taught his own kids the fundamentals of bladesmithing. “Time spent in the shop can absolutely help open up the world of possibilities in regard to craftsmanship,” he assessed. “Whether it’s making knives, blacksmithing, gunsmithing, wood carving or woodworking, the shop can provide amazing experiences for kids.”

ABS Program

Young students man their anvils in the Bill Moran School of Bladesmithing at Texarkana College.

Don McIntosh runs the youth bladesmithing program at the Bill Moran School of Bladesmithing at Texarkana College, and he sees a future with the endeavor. 

“We rekindled it this year and it was very successful, so we’re looking to make it something we’ll be proud of on an annual basis,” he commented. “It caters to 14- to 17-year-olds and it’s a 16-hour program over three days.”

The Junior Bladesmithing course was held in June and included six participants who took part in a program that was packed with hands-on activities. The fee is a modest $175, and there may be a tie-in with the college to introduce bladesmithing to a wider audience of youngsters. McIntosh also volunteers with a local Boy Scout troop to demonstrate bladesmithing and generate interest among younger kids.

“Our program at the Bill Moran School this year included a half day on Thursday, a full day on Friday and a half day on Saturday,” Don explained. “At the end of the program, if they have forged a knife, they grind it and heat treat it and then put a cord wrap handle on it.”

The program is open to boys and girls, and Don says any young ladies who are interested in learning about bladesmithing are welcome. 

“Absolutely! We want to keep the spark going, and I’ve been adamant that this is an avenue of approach that’s better than sitting in front of a video game. Most kids are enthusiastic about hunting and bowie knives at that age, and you can come to the program and do something hands-on. The idea of forging your own knife is a pretty cool concept, and interest has been amplified by Forged in Fire. The kids watch it and so do their parents.”

McIntosh says the ABS is currently looking at the format and date for the next Junior Bladesmithing event, and the commitment to the future of the program is firm.

Bladesmith Kit #1

As Ray Kirk observed, “The experience of sharing the class with a parent or sibling is the best kind of memory to make.” Jason Proctor and his son Jaxon hold the knives (top) they made in Ray’s shop. (Lou Ann Kirk images)

The Blacksmiths Depot’s Bladesmith Kit #1 may have applications with young bladesmiths, depending on their level of interest and experience. 

It comes complete with an 800-gram Swedish hammer; .75- and 1.25-inch blade tongs; White Mountain flux; Cherry Red hardening compound; PBC anti-scaling compound; regular tomahawk mandrel; regular tomahawk handle; men’s Jersey gloves; jumbo block brush; sodium flare safety glasses; ear plugs; and two publications: The Complete Bladesmith by Jim Hrisoulas and Handles and Guards by BLADE Magazine Cutlery Hall-Of-Fame® member Joe Keeslar. Priced at $395, the kit does not include blade steel.

“Most who want to do blades should experiment with mild steel or scrap before spending money on the more expensive metallurgy,” related David Kayne of Blacksmiths Depot. “Youth should not be doing any form of blacksmithing, bladesmithing or stock removal without good safety habits and adult supervision. Anything that has to do with weapons needs training and oversight, including the making of blades.

“Otherwise, we do not see any reason why this kit wouldn’t work out for youth,” he concluded. “Even the hammer in the kit is light enough weight for a youth. We do recommend that both youth and adults read through the books first before attempting to make a knife. A little background knowledge of forging could mean the difference between frustration and success.”

Stimulate And Create

The efforts to introduce bladesmithing to young people and the opportunities it affords them can bring on fantastic results, stimulate natural curiosity and offer an outlet for creative energy. More and more, such programs and events will influence the bladesmiths of tomorrow and contribute to raising them right.

Read More

Marine Vet’s Knife Memorializes the Ultimate Sacrifice of His Iraq Comrades

1 Knife for the Lima Company 11

BY MIKE HASKEW BLADE® FIELD EDITOR

*This article originally appeared in BLADE Magazine Winter 2013

The bond of brotherhood, sacrifice, and selflessness forged by fighting men in combat is, perhaps, the strongest emotion human beings can experience. So it is with Travis Williams.

Having just turned 18, Travis enlisted in the United States Marine Corps In December 2001. He reported for duty the following August and spent the next four years in the service. While he trained, his original reserve unit had already deployed to Iraq, and he was among a few who were reassigned to Lima Company, 3rd Battalion, 25th Marines, another reserve unit, headquartered in Columbus, Ohio.

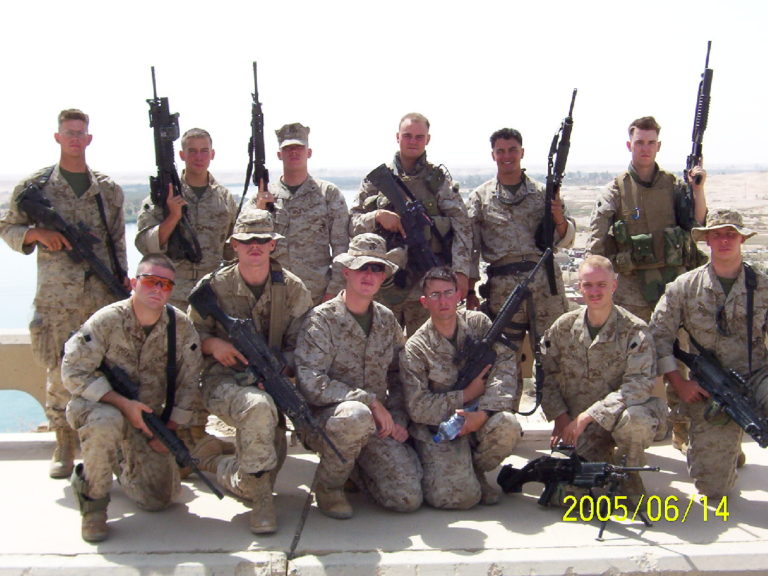
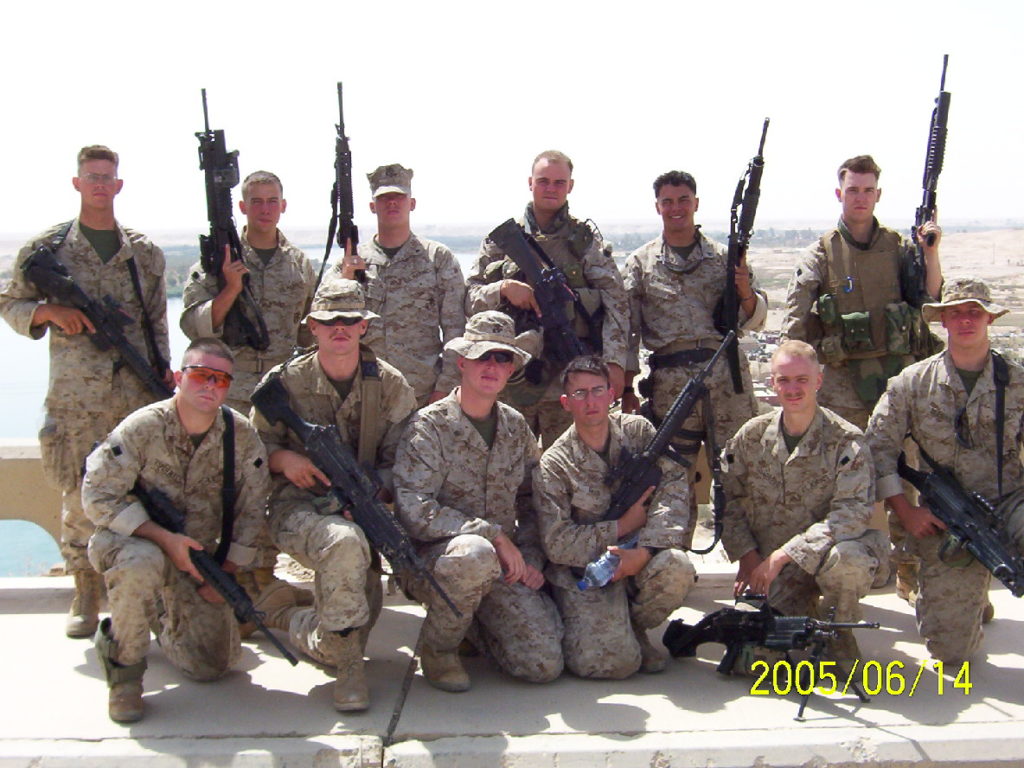
Travis Williams (second from right, back row) stands proud with his squad mere weeks before the deadly IED strike. (photo courtesy of Travis Williams)

During its deployment to Iraq, Lima Company endured days of patrols in harm’s way, intense firefights, and the ever-present danger of IEDs (Improvised Explosive Devices). With a strength of about 180 Marines, Lima Company lost 24 killed in action, and one in eight of its Marines received the Purple Heart for wounds received or death as a result of enemy action. By late 2005, Lima Company was the hardest hit unit of its size in the Marine Corps. Lima’s battalion lost 48 men killed in Iraq.


AUG. 3, 2005

Considering the tedium and tension that encompassed his time in Iraq, a single day stands out in Travis’ memory. On Aug. 3, 2005, during a patrol near the town of Barwanah, 11 Marines from his squad were killed in a massive IED explosion.

“We were going to start at 0600,” Williams recalled. “We loaded our amtracs, big transport vehicles, and about five minutes before we stepped off, a call came down from higher. For some reason the platoon commander and I got pulled out of our vehicle with 1st Squad and put in a vehicle ahead of theirs with Iraqi forces in it. We headed for town and weren’t going to take any roads in. It was about a month before we were to leave the country, and we had seen a lot of firefights and IEDs.”

After the patrol received word that the road was, in fact, clear, the catastrophic explosion erupted. “We hopped on the road, and right as we made the turn for town I was sitting down in the vehicle,” Travis continued. “Somebody has to stand up to provide security, and I saw the explosion in the glasses of the guy standing up in our vehicle.”

Williams still does not know why he and the platoon commander were ordered out of the vehicle that was hit. He was not injured. Fifteen men occupied the stricken amtrac, and he had known those Marines that were killed for more than a year. Among them was his best friend, Lance Corporal Aaron Reed of Chillicothe, Ohio.

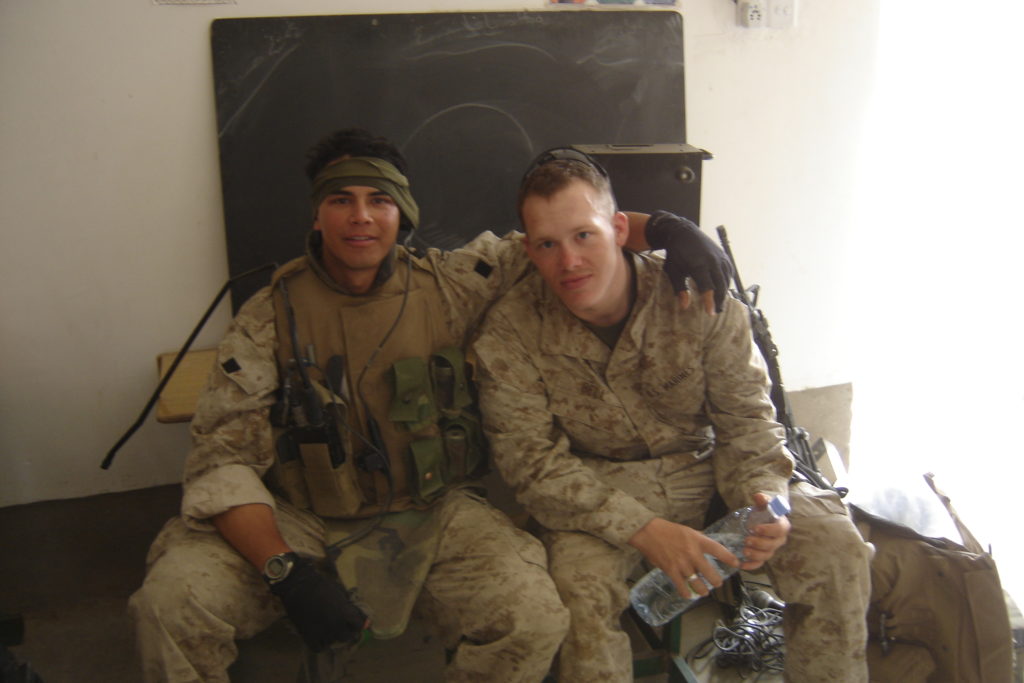
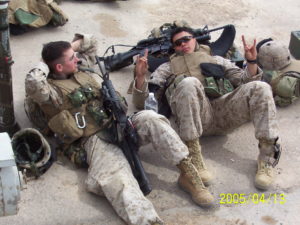
Travis and Lance Corporal Timothy M. Bell Jr., 1983-2005, enjoy some downtime. Bell, 22, was killed by the IED. His awards include the Purple Heart, Navy and Marine Corps Achievement Medal with Combat “V” for valor, and the Combat Action Ribbon. (photo courtesy of Travis Williams)

When Lance Corporal Travis Williams returned home to Missoula, Montana, in August 2006, he brought with him the memories and the scars of his wartime experience. He worked as a private investigator for about five years, and then an opportunity that he could not pass up presented itself. Always fascinated and intrigued by knives, he met custom knifemaker James Behring, Jr.

“James moved to Missoula from Michigan in 2011, and he married my friend’s sister,” Travis said. “I would hang out at the shop and watch what he was doing, and finally he told me that he was looking to hire somebody. I jumped in from there, cutting out blades from bar stock, soldering guards and finishing handles and stuff like that—until I was able to make a knife.”

GOLD STAR FAMILIES

This past February, the Wall Street Journal featured Travis in an article observing the 10th anniversary of the war in Iraq. “They wanted to know how I was doing,” he commented, “and there was a video with it and a guy followed me around the shop while we were making knives.”

A fellow Marine veteran saw the article and contacted Travis, telling him that a benefit was being organized for Gold Star Families in Ohio. These are the families of those who have lost a loved one in battle. “He asked me to make a knife for a silent auction, and the proceeds would go to support the work of an artist that was painting life-size portraits of the guys that were killed from the company,” said Williams. “It was on short notice because the event was going to be in three weeks. I cleared it with James and then contacted Roger ‘Mudbone’ Jones of Waverly, Ohio, to make sure he could make the sheath if I got the knife to him in time.”

Mudbone is an accomplished knife and sheathmaker in his own right. A friend of the Behring family who considers James Behring “like my own son,” Mudbone agreed to make the sheath. His relationship with Travis has grown as well, and he simply considers the former Marine a second son. In fact, it is Mudbone who brought this compelling story to the attention of BLADE®.

“Travis called and said he wanted to tell me about the knife and get some pointers on it and the sheath,” Mudbone remembered. “It knocked me out when he said this was for his friends, and particularly his best friend who had been killed. It turns out Aaron Reed was from my hometown, Chillicothe, Ohio. I had never met the boy, but I knew of his mother, who had been a teacher in a local school.”
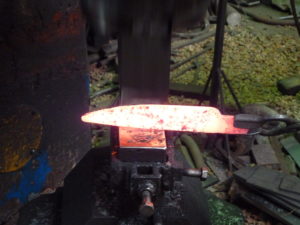
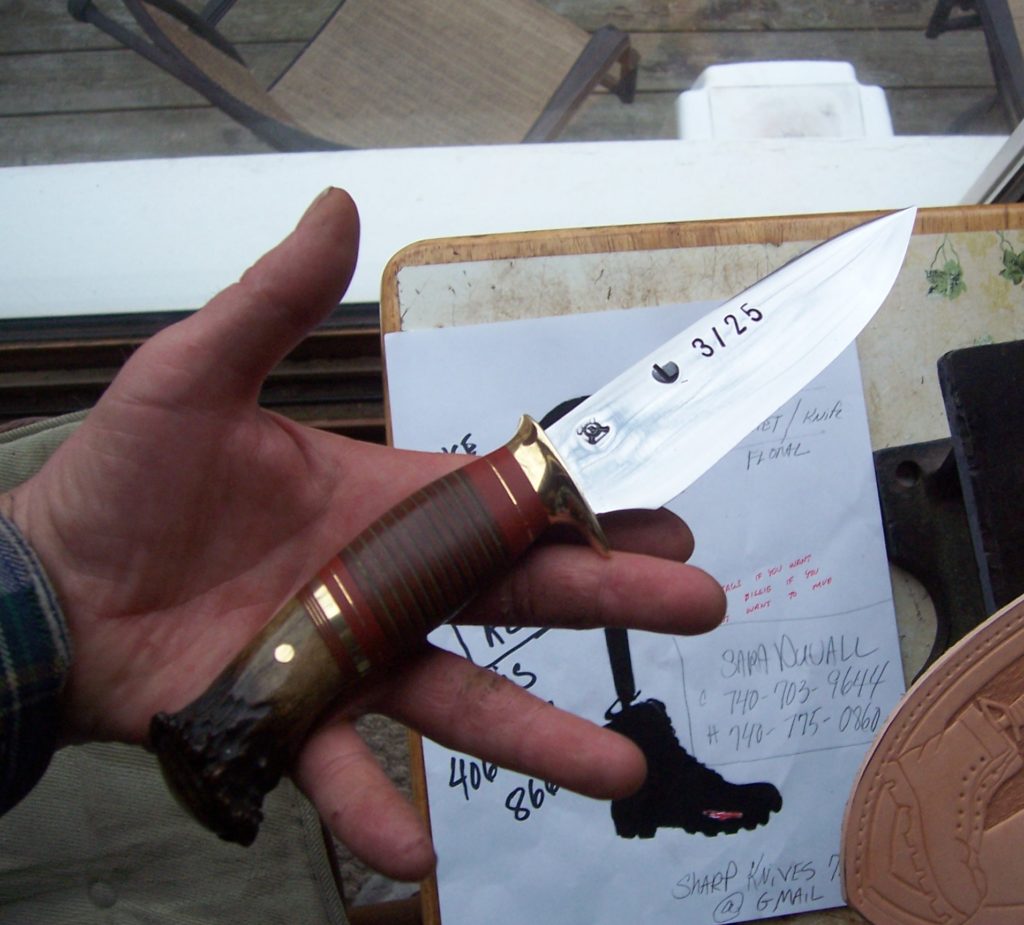
Travis set to work under the watchful eye and guidance of Behring. The finished knife includes a 6-inch drop point blade of O-1 tool steel, a thick brass guard, and a stacked-leather-washer handle with a butt of whitetail crown stag. Inserted between the leather washers is a piece of the nametape, typically worked across the top of the uniform pocket, of each of the 11 Marines killed on Aug. 3, 2005. The letter “L” for Lima Company and “3/25” for 3rd Battalion and 25th Marine Regiment are hot stamped into the blade.
Made by Travis under the watchful eye of Jim Behring, the knife has a 6-inch blade of O1 tool steel, brass guard, and a stacked-leather-washer handle with a butt of whitetail crown stag. Between the leather washers is a piece of the nametape, typically worked across the top of the uniform pocket, of each of the 11 Marines killed on Aug. 3, 2005. The letter “L” for Lima Company and “3/25” for 3rd Battalion and 25th Marine Regiment are hot stamped into the blade. (photo courtesy of Mudbone Jones)
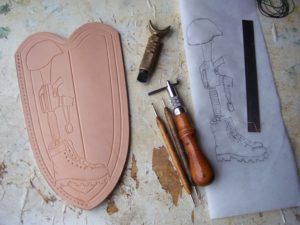
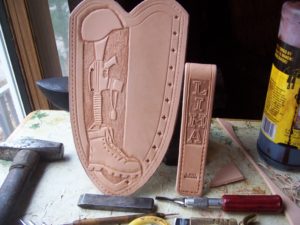
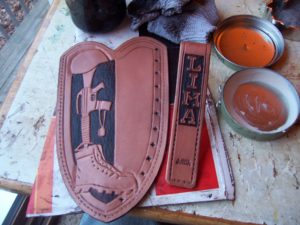
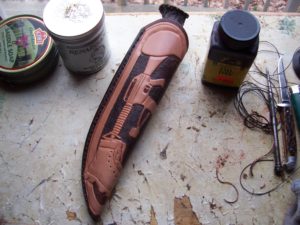
When the knife was complete, Mudbone set to work. With only a week to complete the task, he crafted a leather sheath with the iconic image of the rifle turned down into a boot and topped by a helmet. A dog tag hangs from the weapon. The word “LIMA” is also prominent.

“On the back of the sheath there are 11 four-pointed North Stars,” added Mudbone. “Craftsmen of earlier times stamped these on guns and knives so the owner could always find his way home. They finished the knife on a Saturday. I got it on Tuesday and dropped everything else to get the sheath done. Sometime around 3:30 or 4:30 a.m. the next Saturday, I pulled the last stitch and put the last wax on it.”

Above: Working from the drawing, Roger “Mudbone” Jones employed a Marine theme of helmet, weapon, dog tags and boots to make the knife’s leather sheath, including the Lima Company name. On the back of the sheath are 11 four-pointed North Stars,” added Mudbone. “Craftsmen of earlier times stamped these on guns and knives so the owner could always find his way home.” (photos courtesy of Mudbone Jones)

SOLD for $7,000

The knife sold for $7,000, but not during the silent auction. “Doc” Wentworth, a Navy corpsman who had been assigned to Lima Company, was determined to keep the Lima Knife with the portraits so beautifully painted by artist Anita Miller. The memorial event at the Ohio Statehouse in Columbus was moving and inspirational, and Wentworth succeeded through social media in raising small donations that bought the knife and will allow the memorial to remain together in its permanent home in the statehouse. An accompanying book, The Lima Company Memorial:  A Remembrance of Spirit and Choice, has also been produced.

UNBREAKABLE TIE

Learning the art of knifemaking and continuing to work with James Behring has proven therapeutic for Travis, and he is pleased with his opportunity at Behring Made Knives. While continuing to work in the shop, he attends events that help other veterans adjust to life after active duty. At some point in the future, he may begin making more knives and even taking orders. For now, he is content to continue learning.

“I like where I am with James’ company,” Williams said. “I do everything from heat treating to finishing blades and handles, and have recently gotten into making Kydex. On some of our CNC knives I’m doing the blasting, coating and sharpening of the blades. James is sitting there watching me, and someday I would like to get to the point where I am making knives on my own.”

Today, Travis finds contentment with his work and sees the future with optimism. There will, however, always be that unbreakable tie to his fellow Marines. Meanwhile, with a little help from his friends, he has created a lasting tribute to his fallen comrades.

Travis and his best friend, Lance Corporal Aaron H. Reed, take five. Reed was among those killed by the IED. His awards include the Purple Heart and Combat Action Ribbon. He was 21. (photo courtesy of Travis Williams)

For more information contact Roger “Mudbone” Jones, Dept. BL12, 320 Prussia Rd., Waverly, OH 45690 740-739-4562 [email protected], or Travis Williams, c/o James Behring, Dept. BL12, POB 17317, Missoula, MT 59808 406-926-1193 (shop) [email protected], www.behringmade.com.

Brazilian Bonanza: A Bevy Of Brazilian-Made Custom Blades

Hot custom knives from Brazilian makers.

There must be something in the Amazonian water. In the global phenomenon of custom knives, there are few geographic locales that sizzle hotter than Brazil. The country has sharp makers and attracts talent, creating some of the world’s most desirable knives. Here is a look at some of the steel expertise emanating from the equatorial nation and its cutlery shows.


Romário Ribeiro Fighter

Romário Ribeiro Fighter

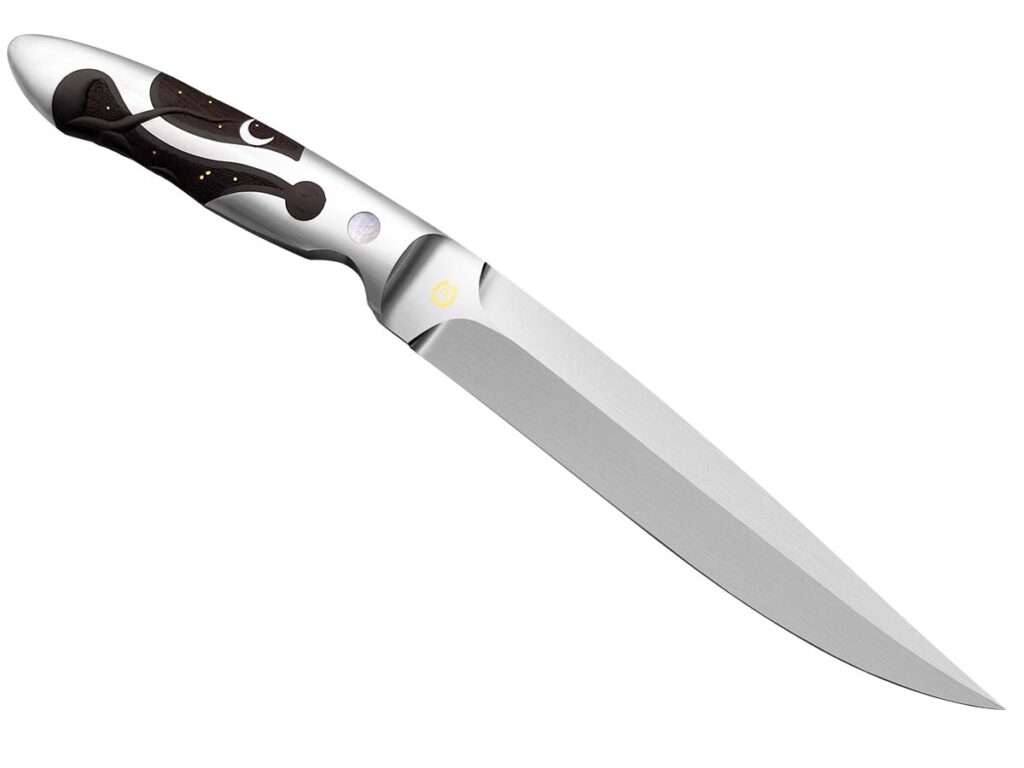
Sleek and dark, Romário Ribeiro’s 12-inch fully integral fighter of 52100 carbon steel won the Best Handle Award at Salão Paulista de Cutelaria 2025. It’s no wonder, with a seamless and intricate keyhole-style construction, and jacaranda wood and 24k gold inlays creating a boundless night sky motif, complete with a rising crescent moon.


Gustavo Schuenck Fighter

Gustavo Schuenck Fighter

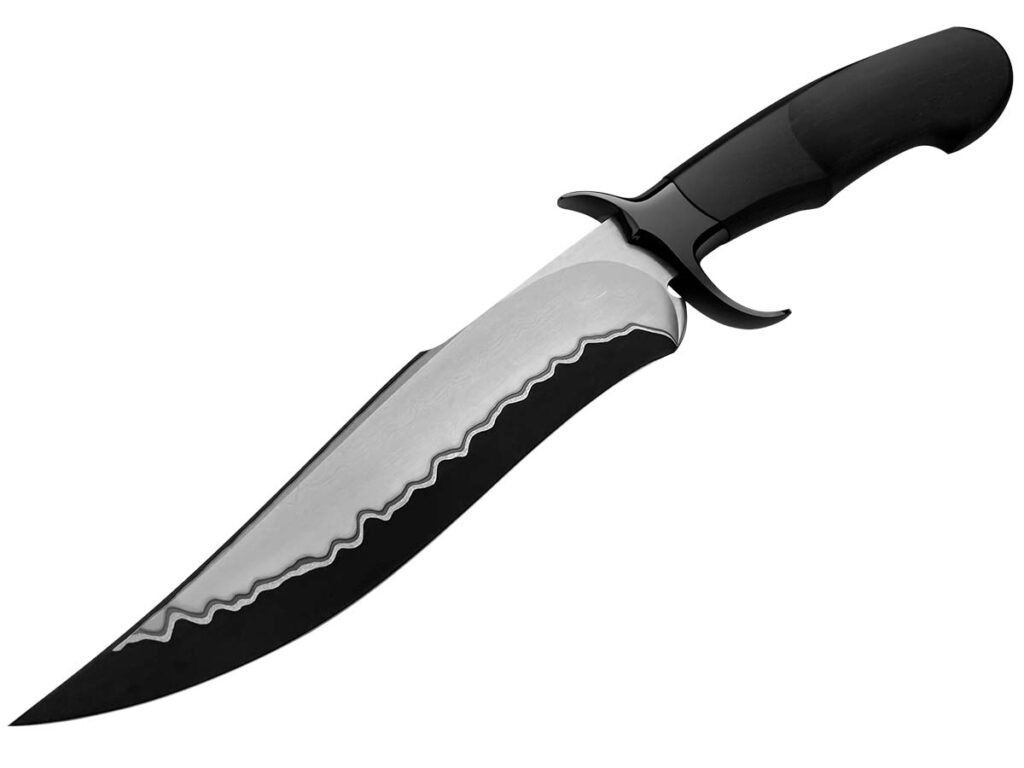
Winner of the Best Fighter Knife Award at Salão Paulista de Cutelaria 2025, Gustavo Schuenck’s blade is aggressively beautiful. San mai steel of 9½ inches with a black phosphate finish ties together with the knife’s pitch-colored jacaranda handle. The nuanced recurve toward the heel offers flow in the build, paired with an understated yet sweeping guard.


Alexandre Biguna Bowie

Alexandre Biguna Bowie

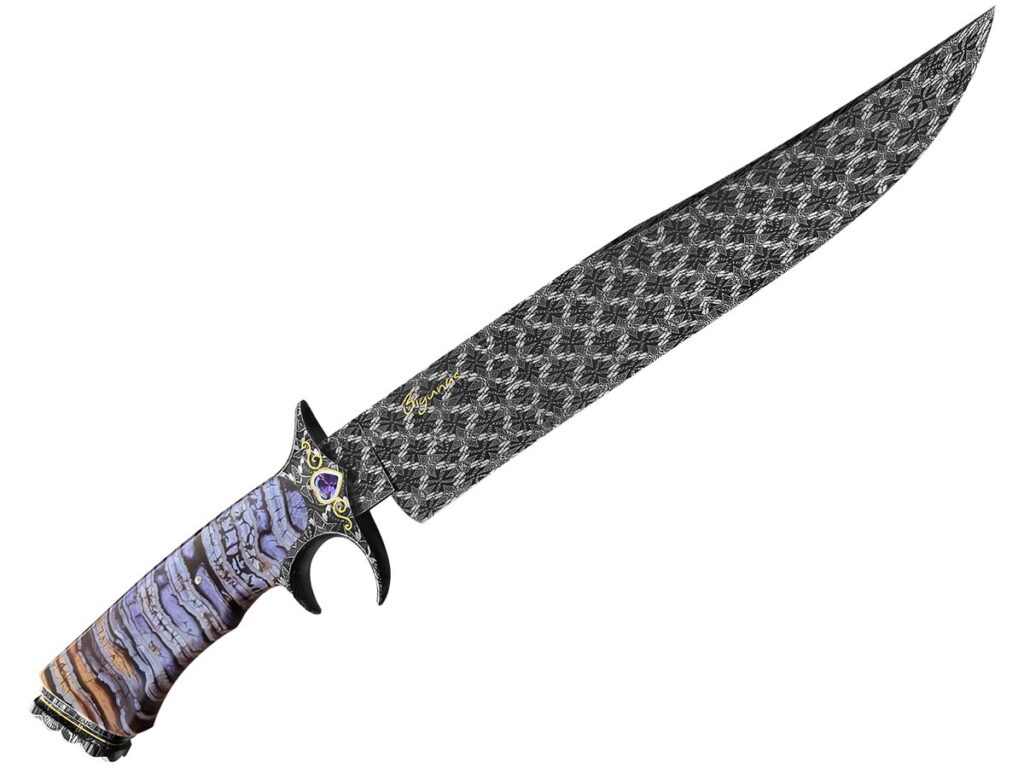
Near-perfect symmetry of Alexandre Bigunas’ basketweave mosaic damascus bowie can’t help but fascinate. The meticulous work on the 10-inch blade is contrasted by the striking color of the sub-hilt’s mammoth-molar handle and pair of amethyst stones on either side of the guard. Topping off Bigunas’ work, 24k inlay, including his signature on the blade.


Júlio Cézar Ribeiro Gentleman’s Slip Joint

Júlio Cézar Ribeiro Gentleman's Slip Joint

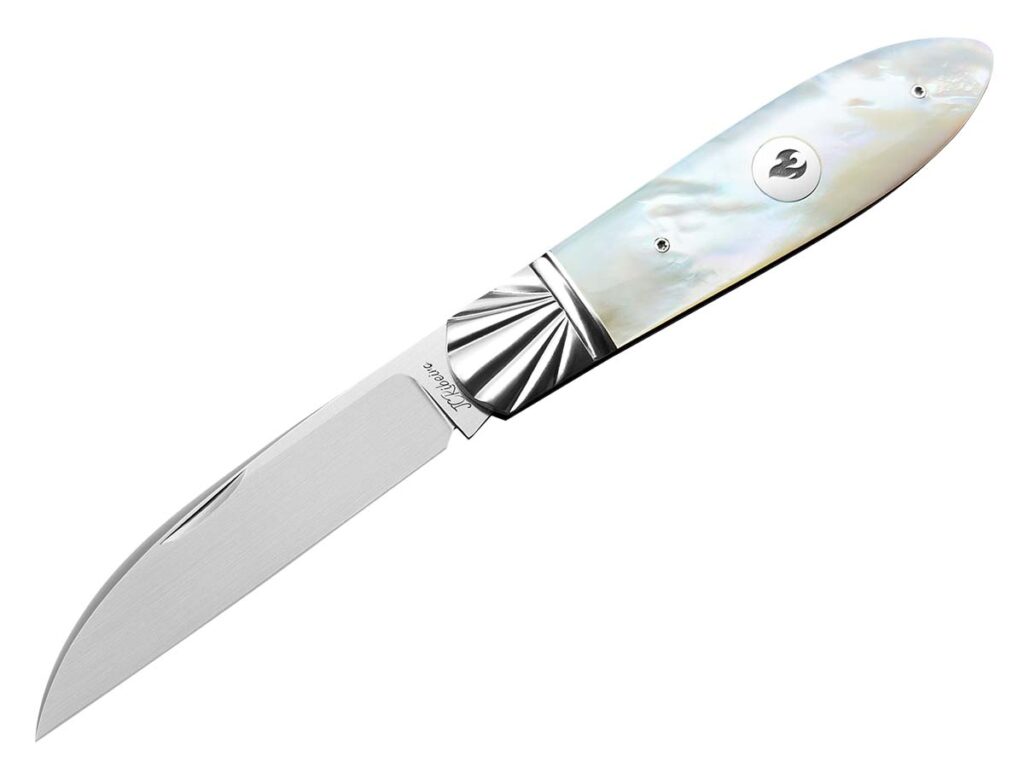
Simple, clean and classy are the driving ideas behind Júlio Cézar Ribeiro’s gentleman’s slip joint. The Brazilian’s spotless execution also caught the judges’ eyes at Salão Paulista de Cutelaria 2025, with the knife winning Best Traditional Folder. Notable aspects of the knife includes the swooping spine of the RWL 34 steel Wharncliff blade, maintaining the knife’s overall geometry with its teardrop mother-of-pearl handle.


Lizandro Bertoni Bowie

Lizandro Bertoni Bowie

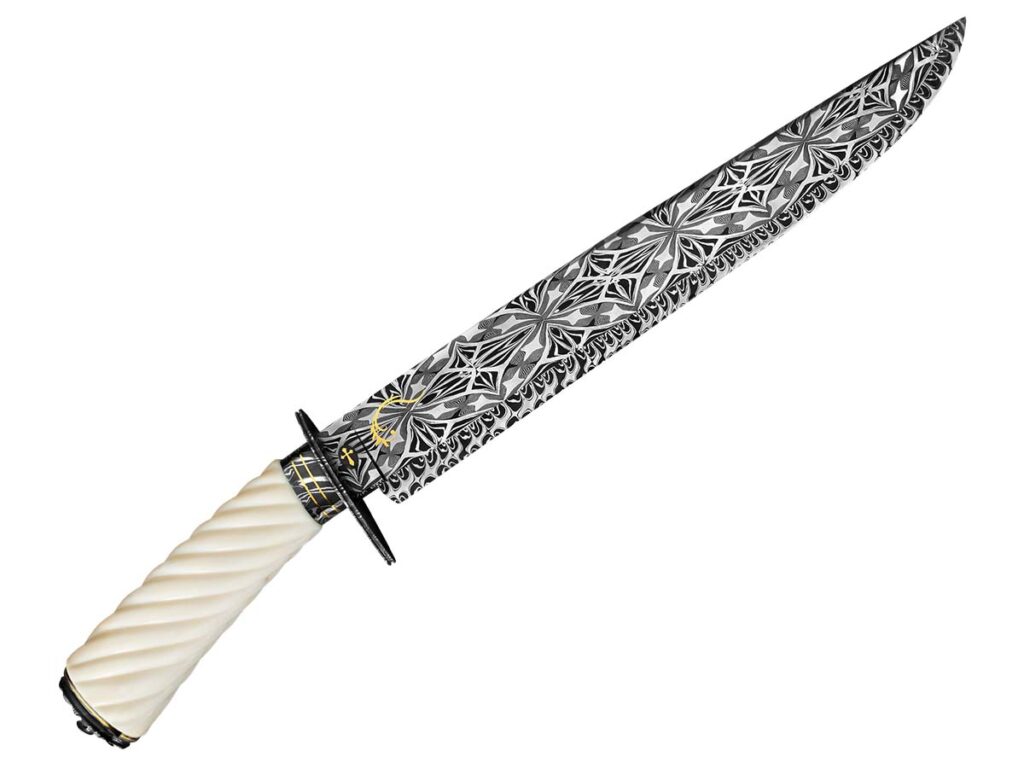
Lizandro Bertoni’s bowie is a study in contrasts. The flats of the 16-inch, 1085 and 15N20 damascus blade dominate with a starburst-like mosaic pattern, but give way to a cross pattern at the edge. Further, the busy ornamentation of the blade is contrasted with the calmer design of its walrus-ivory handle and the smooth lines of its texturing.


Vanuti Fiori Dagger

Vanuti Fiori Dagger

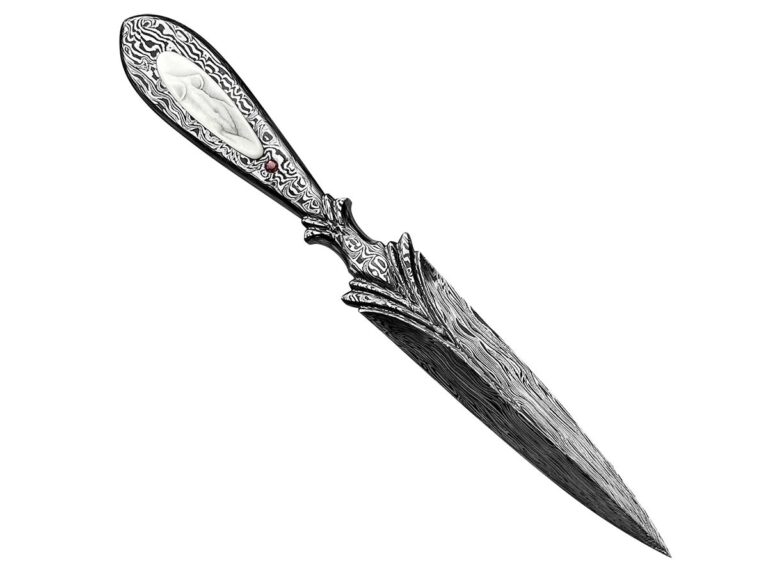
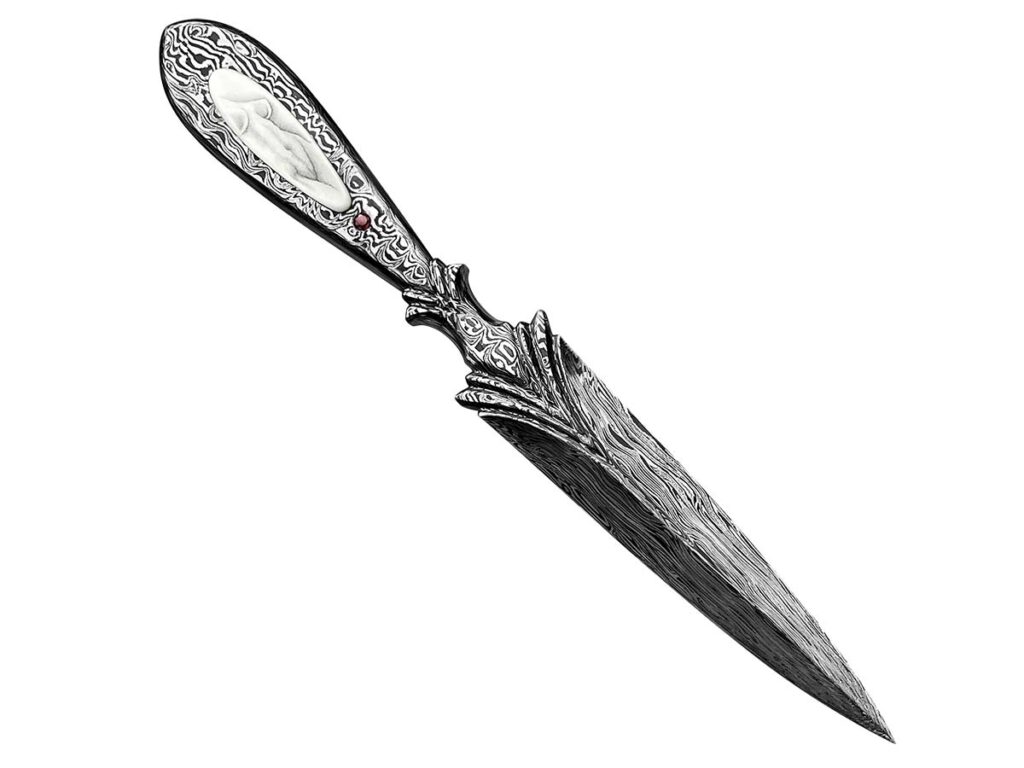
Dang sexy is all that can be said of “Lady of the Night,” a collaboration between knifemaker Vanuti Fiori and engraver Gabriel Krebs. It’s not only the lines of Fiori’s integral dagger that drip sex appeal, but also Krebs’ alluring feminine -form scrimshaw on its mother-of-pearl inserts.


Francisco Wlach Gaucho

Francisco Wlach Gaucho

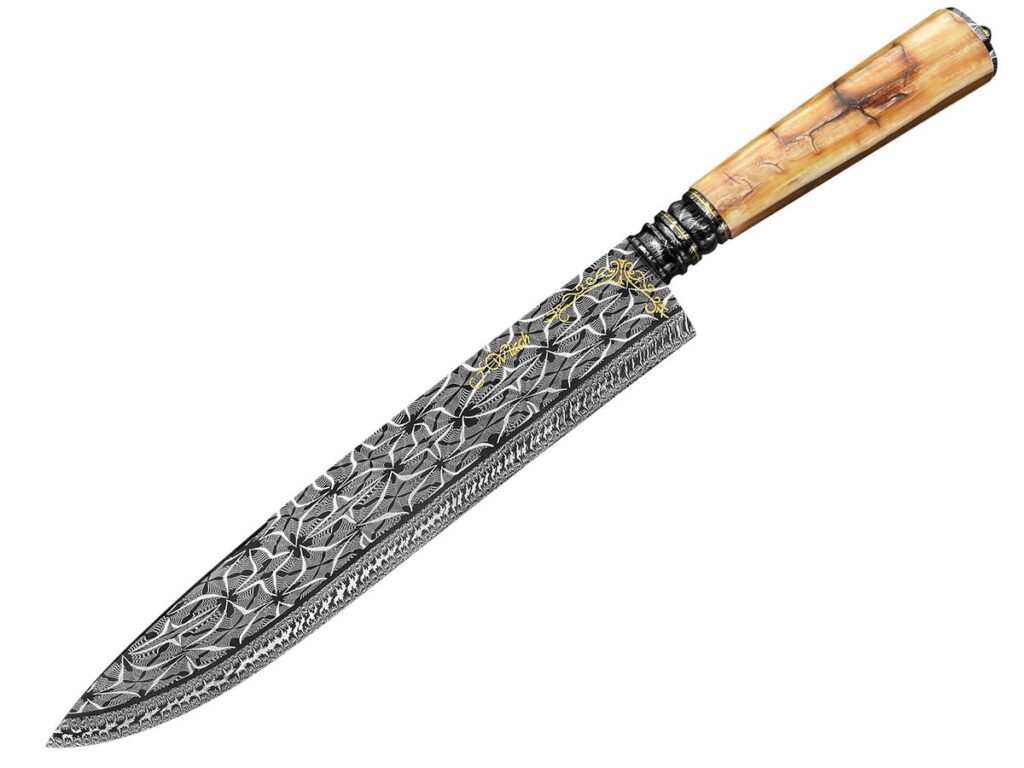
Francisco Wlach takes the workingman’s gaucho knife to a different level with the execution of his knife’s 10-inch laced mosaic blade. Wlach creates movement on the blade with a very uniform pattern over the majority of the steel, contrasted by a more subtle pattern along the edge. Gold inlay, integral bolster and mammoth-tooth handle would make this blade any gaucho’s pride.


Check Out More Cool Customs:

How to Do Plug Welds on Knives

0

Plug Welds the David Lisch Way

The ABS Master Smith shows how he puts a plug weld in a damascus blade

On this and the following pages, I will show you how to do a plug weld. Firstly, this is not a new technique. That being said, I would like to think that the way I am using it here is new—or at least it is new to my knives. I’m not showing how I made the damascus pattern as it would take way too many photos. Perhaps I will show that in another story.

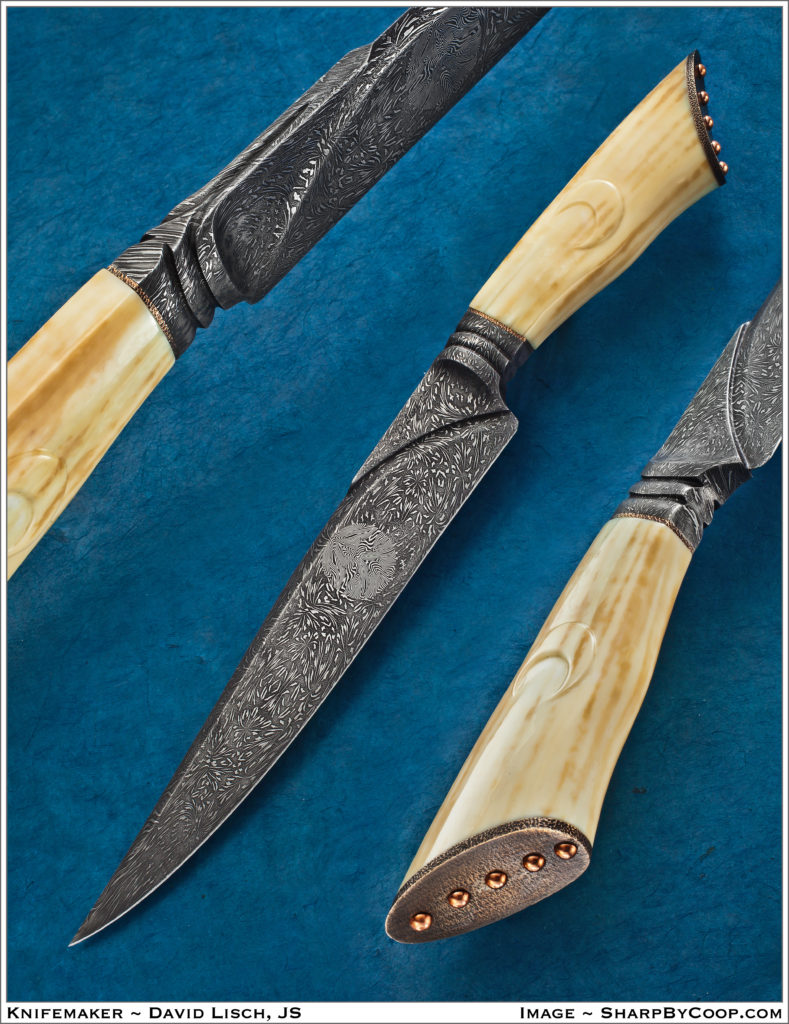
The Moon Fighter is one of two knives I have made in this style. The first one was the Sun Fighter. The Sun Fighter was the first time I made a knife using the plug weld technique. I took an order for a knife like the Sun Fighter. Since the resulting knife was slightly different, therefore I named it the Moon Fighter.

HOW DAVE DOES IT

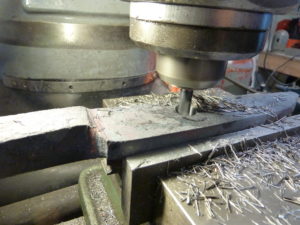
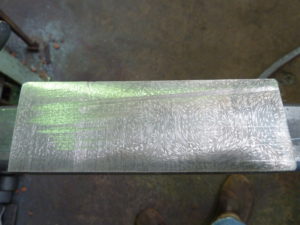
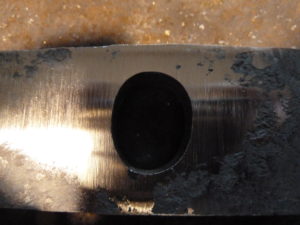
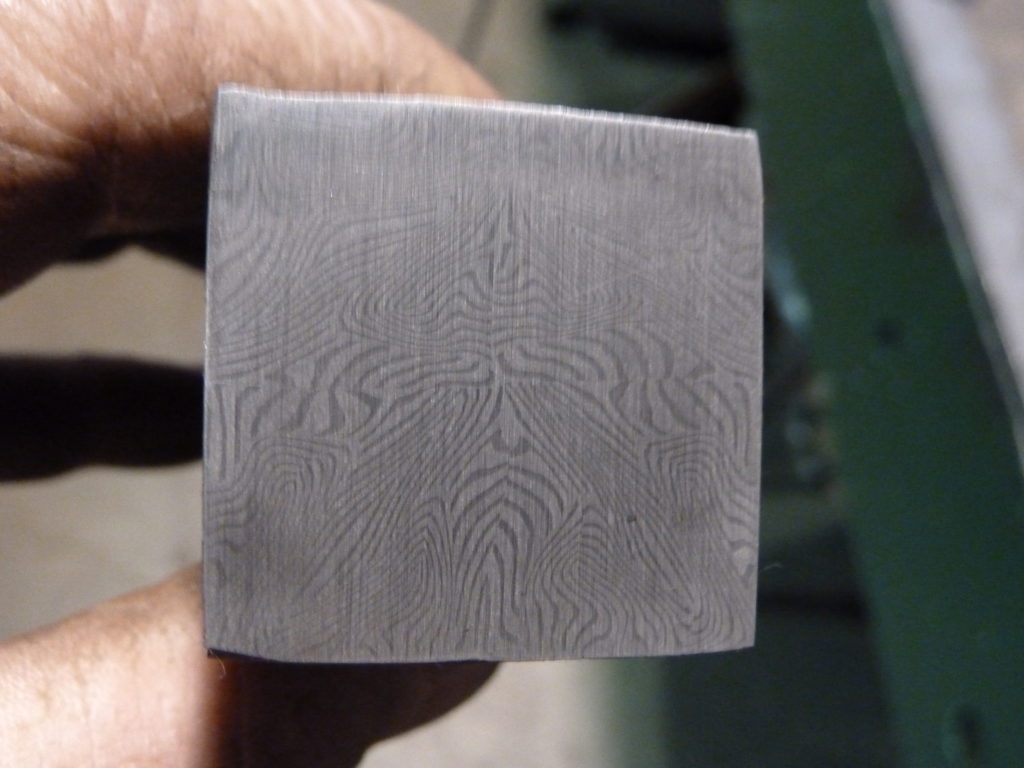
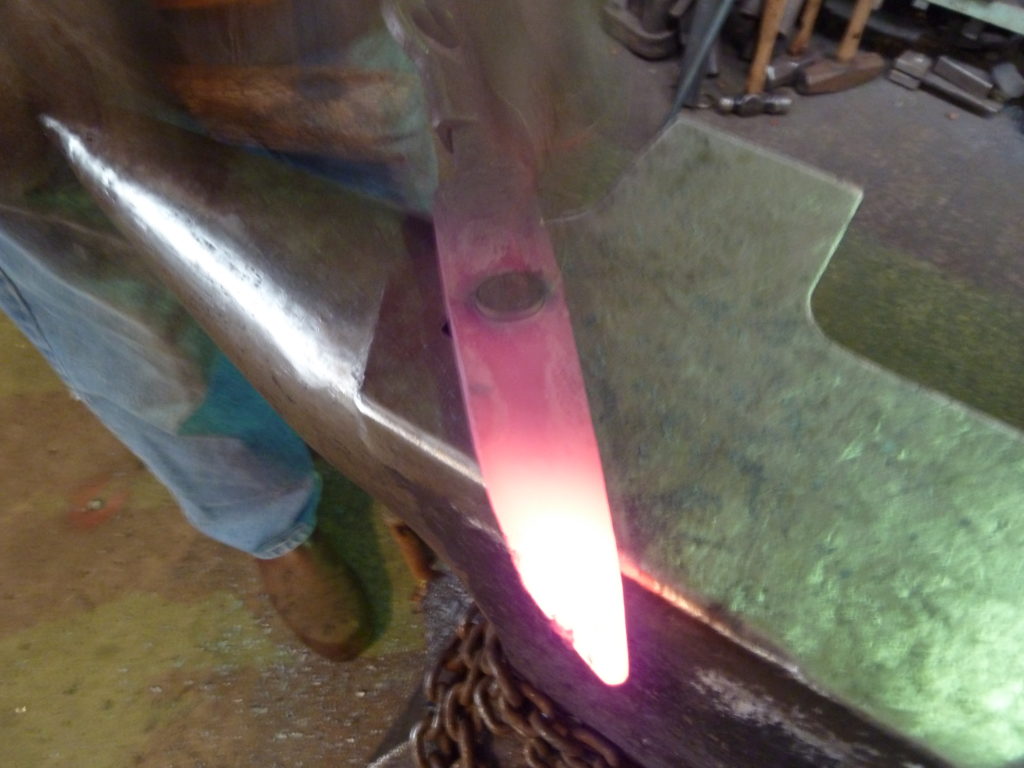
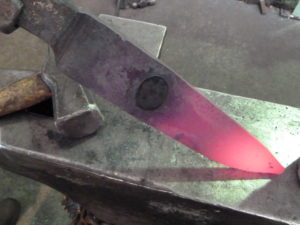
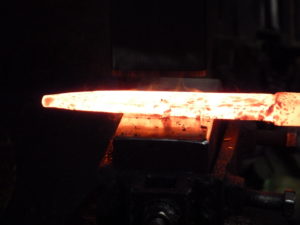
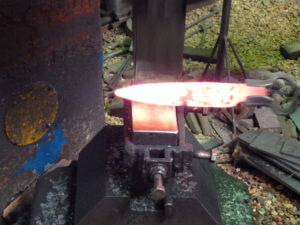
In Photo 1, I am cutting an oval hole into a forged integral blade. I forged the blade from a billet of my Star Night Damascus (Photo 2). It is important that the hole be an oval shape so it will be round once it is forged (Photo 3).

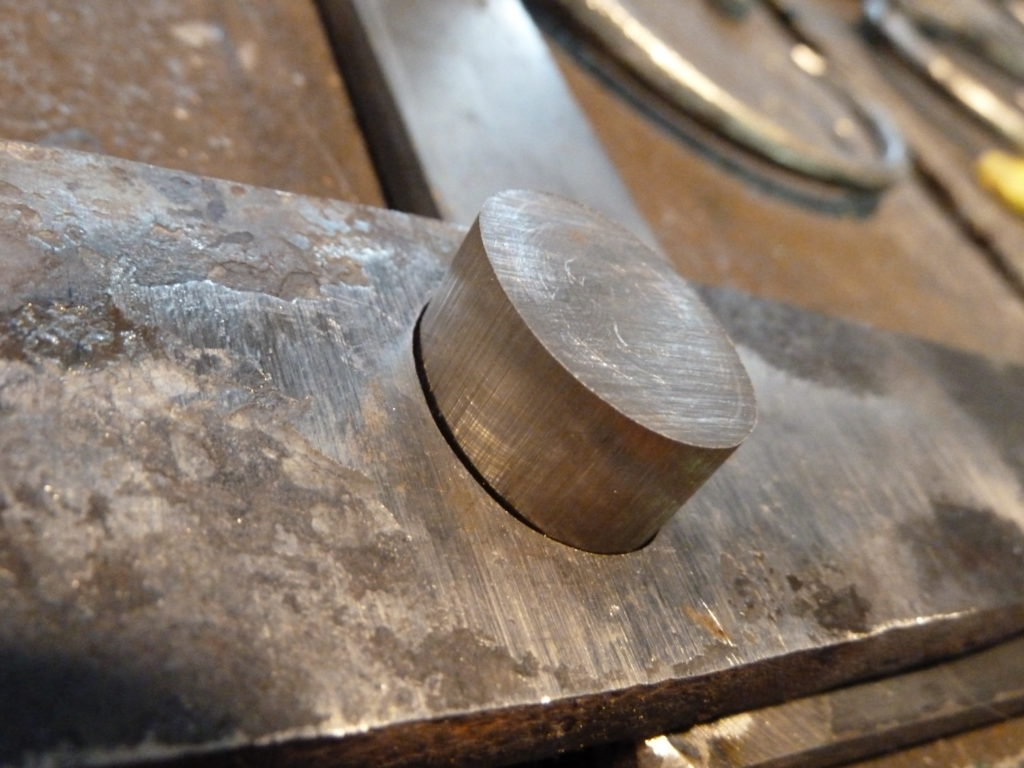
3: It is important that the hole be an oval shape so it will be round once forged.

Blade thickness is just over 3/8 inch. This will give me room to forge the blade once I make the plug weld. Photo 4 shows the end of the moon billet. I will shape the square into the oval to the make the plug for the “moon.”

In Photo 5 you can see that the plug is ready for insertion into the hole. It is close to the right size but just a bit big. I put a slight taper on the edge of the plug so it can “find” the hole. The plug is an eighth inch thicker than the blade. This will allow the plug to expand and weld into the blade.

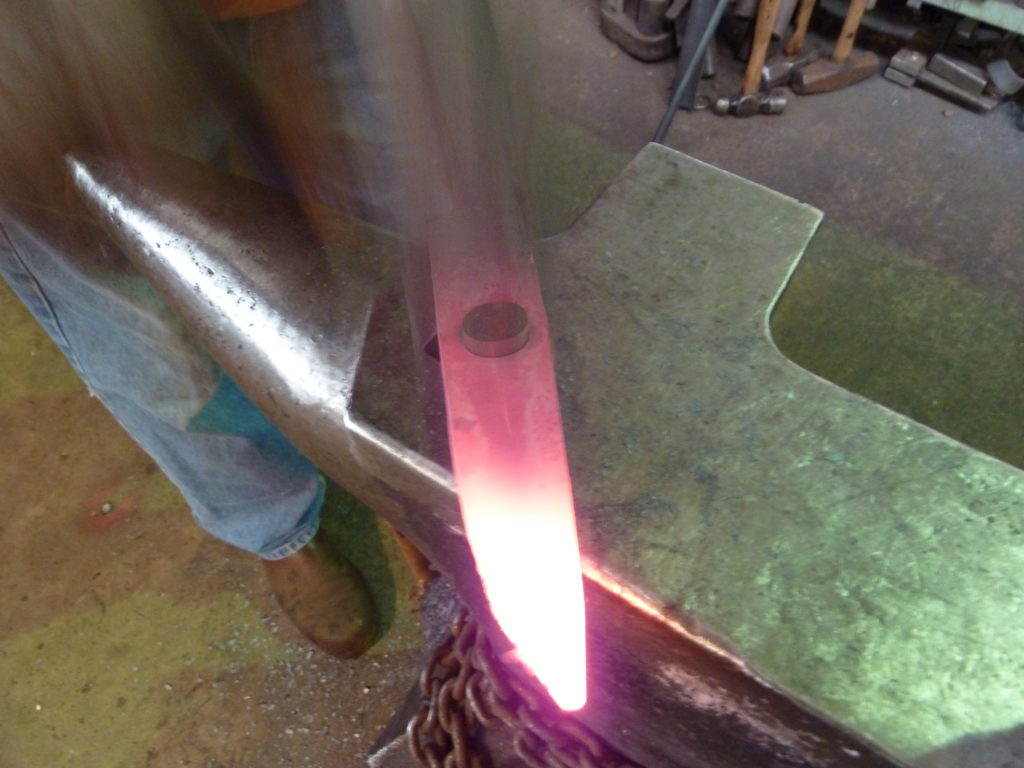
Above Photos 6 and 7: The hammer is a blur as the author pounds the plug into the hole in the hot steel.

With any process there is a learning curve. I learned that to get a really tight fit with the plug, it works best to put a dull red heat on the blade. Place the tapered plug into place and hammer it into the dull red blade (Photos 6 and 7). In Photo 8 the plug is in place. It is 1/16 inch proud on both sides of the blade. Back into the fire to a dull red and add flux.

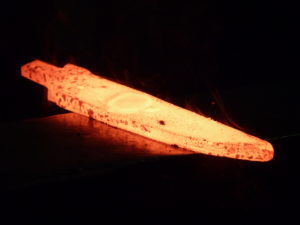
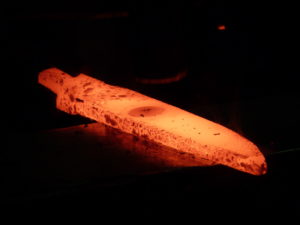
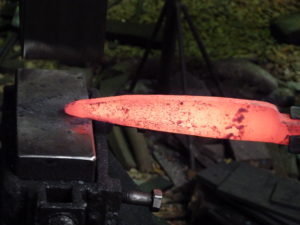
In Photo 9 I have made the first weld. The moon is still visible. In Photo 10 the moon is still a bit cooler than the blade and is getting a bit bigger. Now is the time for some heat. Photo 11 shows work at the power hammer for some drawing down of thickness and adding length to the blade. It also makes the oval moon round and very hard to see.

In Photo 12 I am forging the blade close to its final shape. In Photo 13 I am drawing out the tip, adding more length to the blade. The moon is very close to being round. After a few final taps under the power hammer (Photo 14), I will finish tuning up the profile by hand.

NO SET FORMULA

I do not have a set formula for this process. It is by gut feeling. I can see how much the steel moves when I forge it. The first time I tried it I put a round hole into the blade and wound up with an oval, so it made sense to start with an oval hole if I wanted to wind up with a round one.

With the Sun Fighter the blade was 480-layer damascus and the “sun” was a very tight W’s-pattern damascus. Once I made the initial weld, the blade was still over 3/8-inch thick at that juncture. I ground in sunrays on both sides then forged up the rays and the sun to its round shape. On the Moon Fighter I wanted the backdrop to resemble shooting stars. This took some trial and error and a lot more time than I thought it would to get a pattern I liked.

The result of the plug weld made to resemble the moon is plainly evident in the center of the damascus blade of the Moon Fighter by ABS master smith David Lisch (inset). (SharpByCoop knife photo)

NO LIMIT

There is no limit to the cool new things that can be done with damascus. I have heard folks say it has all been done before. Well, I don’t believe it. I think new and exciting things are happening in little knife shops all over the world, and the only way to keep things moving forward is to try new stuff and share the new things with everyone we can.

Please feel free to try this process. There are so many different things that can be done with it. When you come up with something new, share it so we continue to advance the art of damascus and knifemaking. Or, buy a damascus knife from your favorite maker and watch for that sparkle in his eye as he thinks to himself, “Cool, now I get to make another knife.”

Bent, Shot Whiskey Knives Keep Chopping

The June issue of BLADE® magazine features a story about wilderness survivalist Creek Stewart and his line of Whiskey Knives, made by Hank Gevedon and crew at Reptile Toolworks in Mt. Vernon, Kentucky. Whiskey Knives are carefully tested, but Hank likes to destroy a few from time to time to spot-check their quality. He starts by bending a Whiskey Corvid model to show that the hard outer layer of the A36 carbon steel will crack when bent in half, but that the knife will stay intact because of the tough inner core. Then he gets to shooting them. Besides, Hank’s just entertaining to listen to.

A Bent Whiskey Corvid Knife Still Chops and Slices

Hank Shoots A Whiskey Corvid  with an 8mm Mauser FMJ

So what does all that mean to the knife owner? Well, you won’t want to bend your knife in a vise or shoot it at the range, but the following review of the destructive testing explains how the makuri method of construction can produce a sharp, yet tough knife, ideal for hard-use bushcrafting needs.

What Does Destructive Testing Reveal About Whiskey Knives?

Sure They’re Sharp, But How Sharp?

Know How to Sharpen Your Knives

Knife sharpening is a lost art; learn how to keep your knives and tools sharp.
A collection of knives is only as good as it is sharp. Understand how to sharpen all styles of grinds, along with other tips on caring for your collection.

The blades on Whiskey Knives are asymmetrical hollow-ground, meaning that you only need to sharpen one side, the one with the Creek logo on it. The other side just requires a touch-up. Reptile Toolworks puts instructions in the crate with each Whiskey Knife it sends out, but what about your other knives? “Sharpen A Knife, And Care For Your Collection” by BLADE editors covers all aspects of sharpening, demystifying the process and ensuring you have the knowledge to keep your knives sharp at home and in the field.

Integral Knife Jigs – Mastersmith Ray Kirk

0

In this video ABS Master Smith Ray Kirk shows how to forge integral knives with jigs.

To learn more about forging, click here to check out the new BLADE’s Guide to Making Knives, 2nd Edition book.

Dagger Design: Mastering Wire Wrapping The Handle

0

Wire wrapping the handle of a dagger is the finishing touch to the process, but requires a fine touch and patience.

Once the wire grooves and flutes are complete, the entire handle finished to its final state and the tang slot broached, insert the wires and lock them in tightly. As mentioned, 24-gauge wire looks good. If you want to use silver, Argentium or fine silver are both better choices than sterling, which tarnishes more quickly. Twenty-four-karat gold is terribly expensive but is the ultimate in luxury.

If you have Rolls-Royce taste but a Toyota budget, consider gold-filled wire as an alternative to pure gold. It’s brass at the core but at least 20 percent gold by thickness, and consequently much more durable than simple gold electroplate. It usually comes in 14k only. As a reference point, not long ago 12 feet of 24-gauge pure silver wire could be had for a little under $9. The same length of 24k gold in the same size was $1,050. The same length of gold fill was about $20. Save the 24k gold for times when you want to make a statement or your customer pays for the gold in advance.

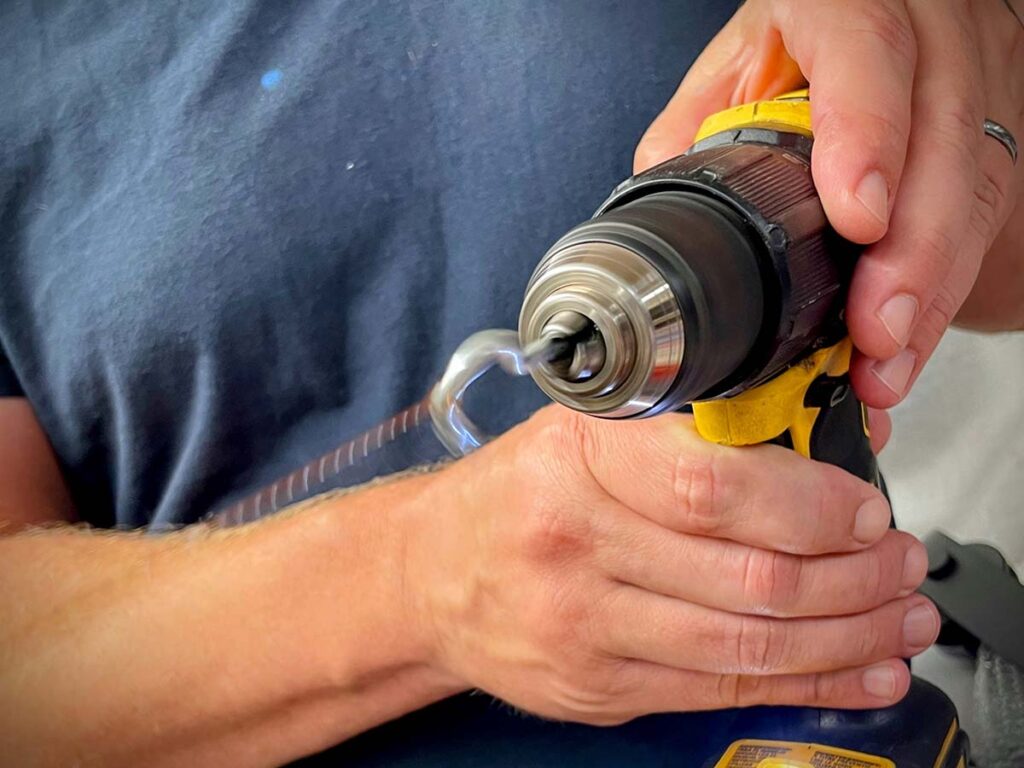
With a hook chucked in a hand drill, hook the resulting large loop, pull it tight and turn on the drill. Keep the tension constant—as you twist the wire it will pull you toward the vise.

Buy your wire dead-soft from your favorite supplier. You need about 20 percent more wire than twice the combined length of your wire grooves.

To twist the wire evenly, you must twist all of it at the same time. Clamp the two ends together tightly in a vise. With a hook chucked in a hand drill, hook the resulting large loop, pull it tight and turn on your drill. Keep the tension constant—as you twist it the wire will pull you toward the vise. If it breaks off at the vise, just re-clamp it and continue twisting. There’s no rule about how tightly the wire should be twisted, but tighter twists look better. If you aren’t sure it’s tight enough, twist it some more.

Annealing The Wire

Drill diagonal holes inside your groove, starting halfway between the broached hole and the edge.

The next step isn’t required but will make things easier. Most metals, including gold and silver, work harden. After all of that twisting your wire will be hard and springy, and it’s much easier to install your wires if they’re dead soft.

To soften the wire back to its original state, you must anneal it. To do this, coil it tightly around a 2-inch piece of pipe or something similar, and tie up the coil. Using a propane torch, heat the coil evenly until it glows slightly. One trick to make sure you don’t melt it is to color your wire thoroughly with a Sharpie® marker. When the ink burns off, it’s time to stop.

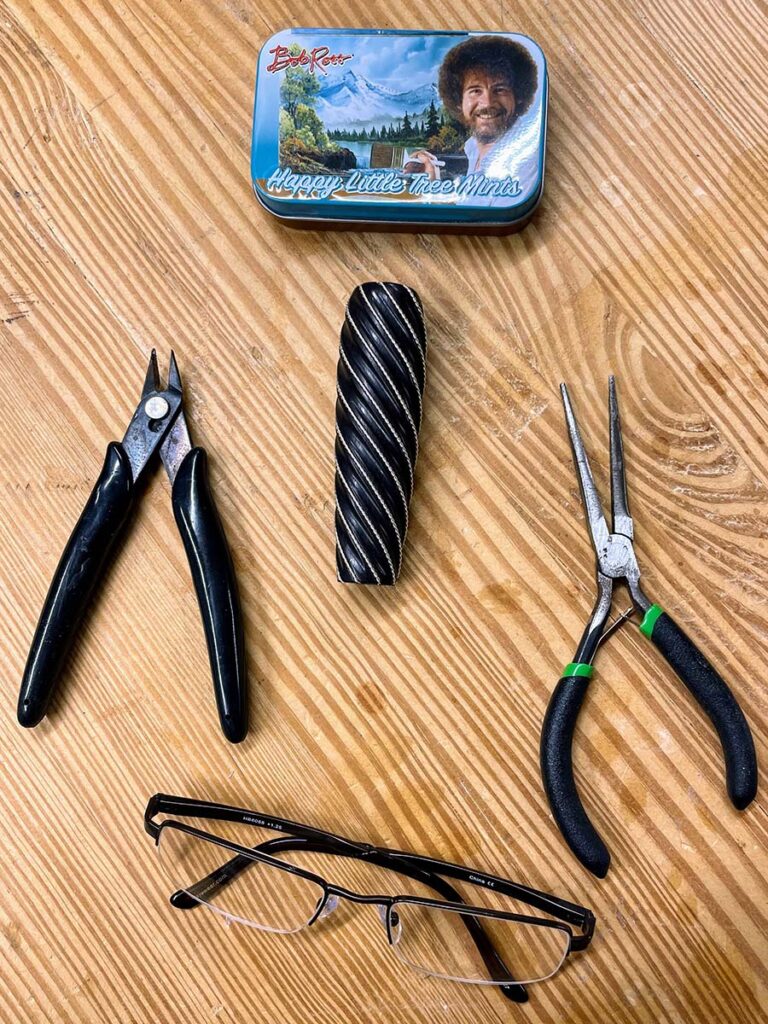
Don’t forget your essential tools—including your Bob Ross Happy Little Tree Mints.

Pick up the coil and drop it in water to cool it rapidly. It’s now dead-soft again but is likely discolored from oxidation. To remove the discoloration, let the coil sit in warm pickle solution that is available from any jewelry supply vendor. If you don’t want to go to the trouble of pickling, you’re better off dealing with the trouble of work-hardened wire.

Wire Installation

To install the wires, a little bit more work on the handle is necessary. Starting from the end points of your wire grooves, cut new grooves into both ends of your handle for at least half the distance between the outside of the handle and the tang slot. A Dremel or Foredom tool is best for this, but you can use a file also. If you use a file, go ahead and groove all the way to the tang slot—it’ll be easier that way and invisible on the assembled knife. These grooves need to be equal in depth to the diameter of the wire so that the handle will fit tight against the guard or pommel when the wire is installed and the knife is fully assembled. Cutting the line at an angle rather than perpendicular to the circumference will help when you pull things tight later.

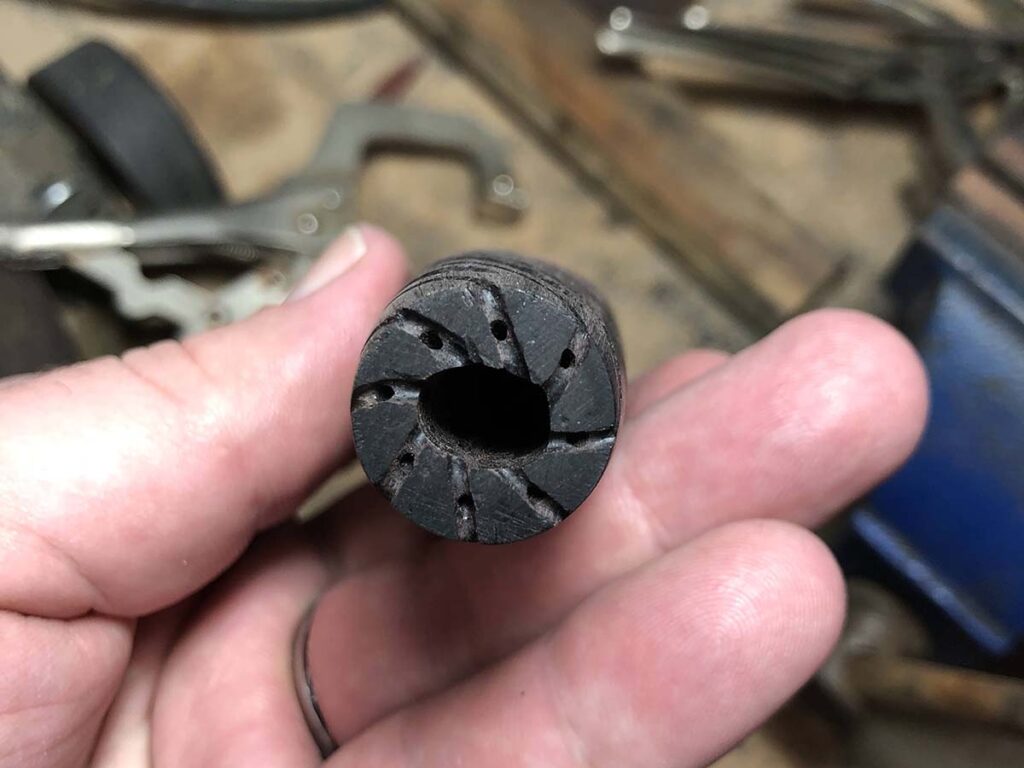
Drill diagonal holes inside your groove, starting halfway between the broached hole and the edge. Drill at an angle toward the center so that the hole for the wire exits into the tang slot about a quarter inch from the top and bottom of the handle, in line with the end of your groove. Make the holes slightly larger than your wire diameter.

After the handle is fully assembled and the glue is set up, perform a final finish check. The wires should be tight and fully seated in the grooves.

You’re almost to the fun part. Cut your wires at least an inch longer than the length of the groove to give yourself some extra to work with. To install the wire, thread one end through the hole you just drilled into the tang slot, grab the end with some small pliers, and bend the end back up toward the handle end, locking it in. Though not strictly necessary, you can pin the wire with a toothpick in the hole and a drop of CA Glue or 5-minute epoxy for extra security. This can be cut off and sanded flush later. Pull the wire tight, seating it in your groove, and repeat the process to lock in the other end. This method guarantees that your wires are as tight as they can possibly be. The wires and glue and toothpicks should lay flush with or below the surface of the ends of the handle. Cut off the excess wire inside the tang slot to ensure the wire doesn’t interfere with the final fit-up of your knife.

Finish Check

After the handle is fully assembled and the glue is set up, perform a final finish check. The wires should be tight and fully seated in the grooves. You can lightly buff the wires for extra shine but use a light touch to avoid unintended polishing of the handle. Tarnished wires can easily be brightened up with a Sunshine® Polishing Cloth. Don’t forget to give yourself a pat on the back.

That’s A Wrap

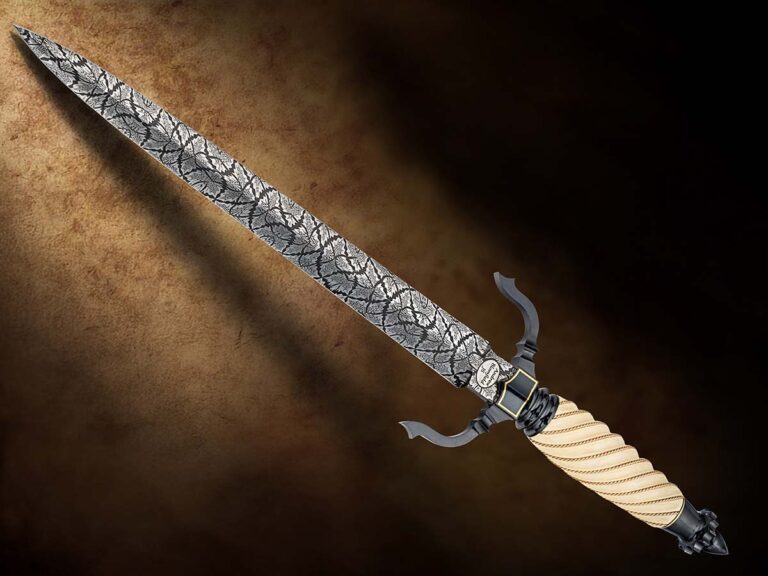
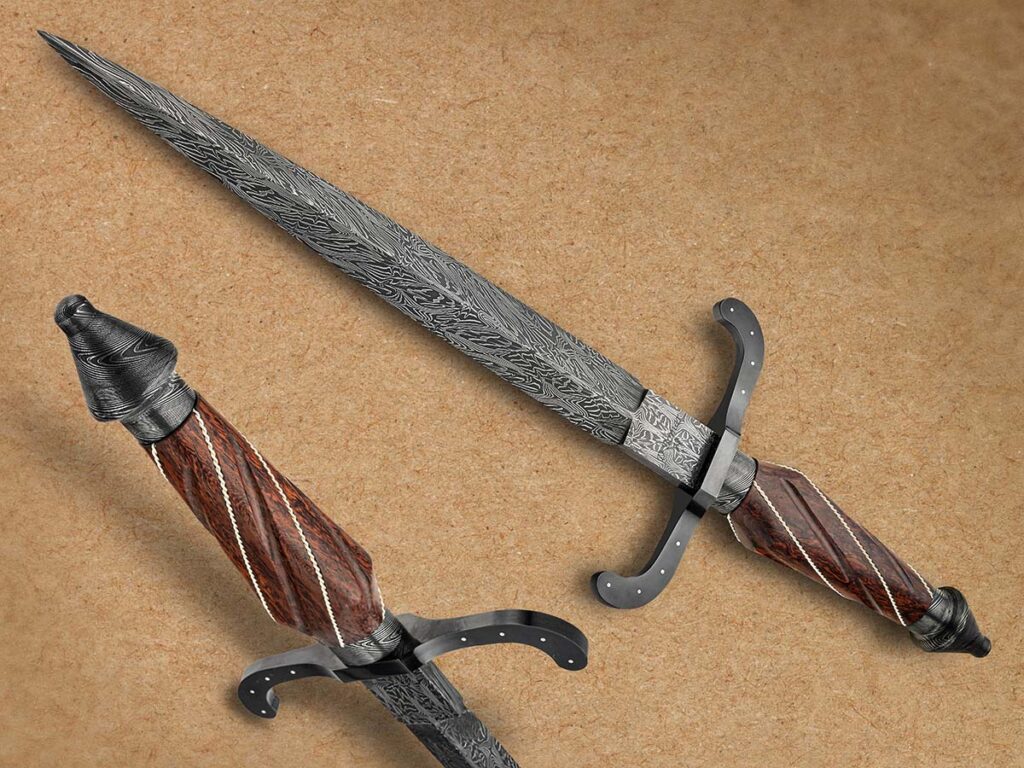
Silver wire wraps the rosewood grip of Duane Bomar’s dagger. The 10-inch blade is a damascus of 1084 carbon and 15N20 nickel-alloy steels. Overall length: 15 inches. (Jocelyn Frasier image)

Precision flutes and carefully inlaid twisted wires transform a utilitarian grip into a truly exemplary expression of craftsmanship. By selecting materials that balance luxury and performance, you anchor your design in both history and function. By following the instructions in this series, you’ll be able to master this exemplary style, and use the experience as foundation for future creativity.

Read More On Daggers:

Advertisement

Must Read Articles

Read this before you make a knife

Knifemaking 101 – Read This Before You Make a Knife

  by Wayne Goddard My experience has taught me that there's nothing like digging in and getting started. I've often said the hardest part of the...
how to forge damascus steel

How to Forge Damascus

Advertisement
Advertisement