
Knifemaking

Knifemaking is the building of a knife, which includes the blade, handle and other accouterments. Blades are made by either removing metal from a steel blank via a grinder – known as stock removal – and the forging to shape of hot steel into a blade in the process known as bladesmithing. Other parts, including bolsters, guards, pommels, etc., are needed to complete the finished knife.

Featured Knives – – Knife Collecting – – Tactical Knives – – Survival Knives

Damascus Steel: Mass Producing The Unique Knife Material

Damascus steel is produced on a mass scale by some of the best in the business

Forging damascus steel for knives and ancillary products on a broad scale makes the beautiful and highly popular knife material readily accessible to the marketplace, and drives the creativity of custom and factory knifemakers. The availability of the resulting damascus knives is reaching new levels while bringing on innovation at the same time.

At Nichols Damascus, owner Chad Nichols touts his willingness to put together “laminates of any kind we can think of.” Nichols Damascus is busy with titanium and copper alloys, carbon and stainless steels.

“We have a pattern called Boomerang, and any configuration we make it in sells very well,” Chad commented, adding that he believes the popularity of the material has increased dramatically due to the internet and social media.
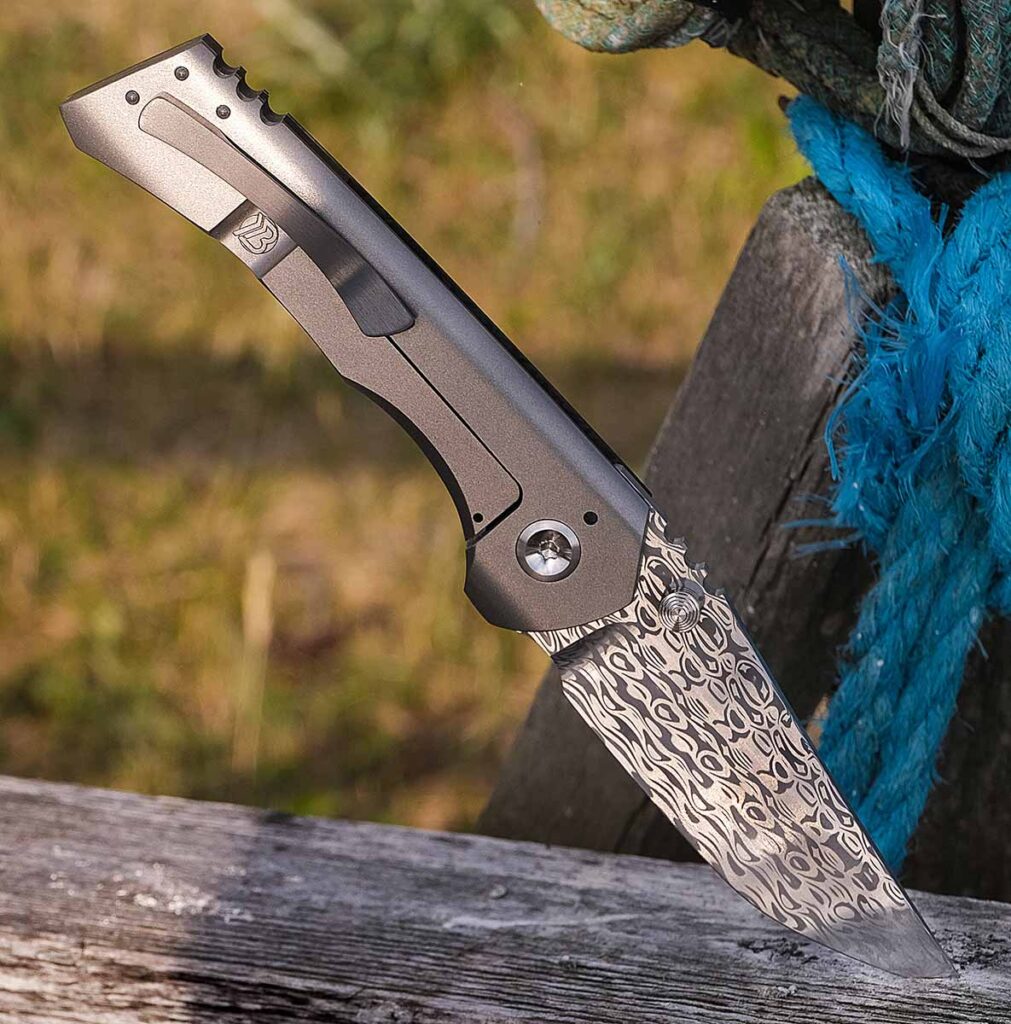
One of the latest patterns in Damasteel’s Dragon series
One of the latest patterns in Damasteel’s Dragon series, Svavner was used to create the blade steel for the Valyrian swords of the Targaryen family on HBO’s House of the Dragon. Brian Brown uses the steel here on one of his sporty folders. (Damasteel image)

He asserts that his forging operation charts its own course. “We’re just having a good time playing with hot stuff,” he smiled, “and we make a lot of core material. This is where we clad a homogeneous steel like Magna Cut with a damascus on the outside.”

WANTS & DESIRES MET
A family-owned business situated just north of Sweden’s capital of Stockholm, Damasteel has focused for years on making top-quality steel for custom knifemakers, among other lines of business. “Over the last couple of years we have released our Dragon family of damascus patterns, culminating with the release of Svavner, which we launched alongside the release of HBO’s House of the Dragon,” noted owner and iron master Per Jarbelius. “They used our steel to create the Valyrian swords for the Targaryen family. It was an amazing project to get to work on.”

Damasteel has also just released Drakkar, a patterned steel in sheet form. It’s a first for the company and Jarbelius says it has been well received, emphasizing its nesting options with the ability to go from bar to sheet. A product line called Damacore has been available in DC18N and DC21R steel for a few years now and signaled a major expansion in the company’s repertoire. “It’s becoming even more popular as the number of san-mai offerings grows on the market,” Per noted. “We’re hoping to eventually be able to offer every pattern we do in both the DC18N and DC21R.”
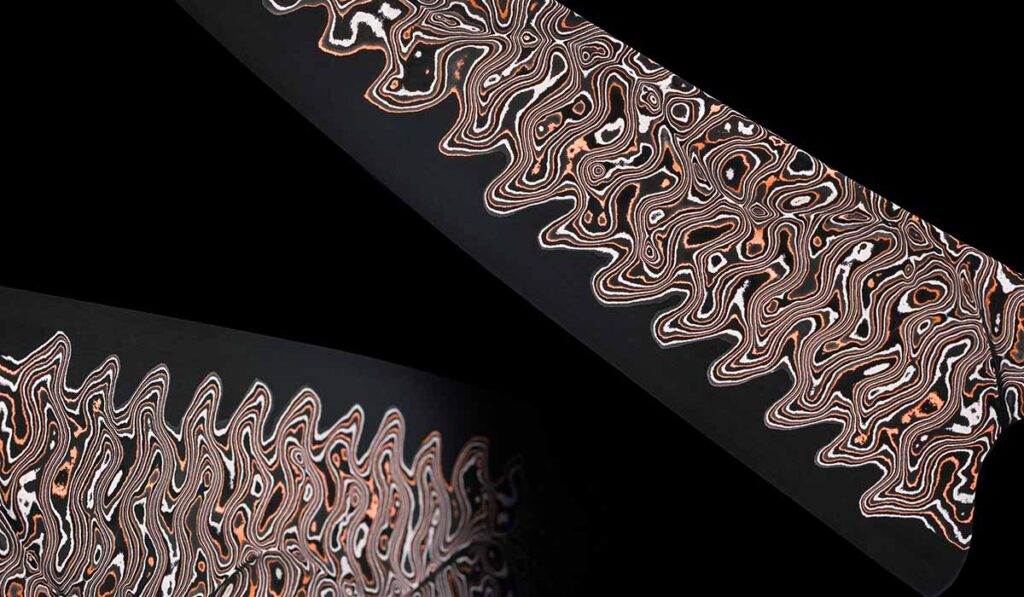
Baker Forge & Tool damascus patterns are the copper and bronze laminates.
Among the most popular Baker Forge & Tool damascus patterns are the copper and bronze laminates. A current hot one is Elite CopperMai, a damascus blend of copper, 1084 carbon steel and pure nickel over a solid core of 80CrV2 carbon steel that creates either a chevron or a ripple pattern (the latter here on a knife by JB Blades). (Baker Forge & Tool image)

Philosophically, Jarbelius relates that Damasteel has always paid attention to the wants and desires of its market. “We make patterned and un-patterned stainless steel, and our priorities have always been performance and beauty,” he explained. “Our artistry is core to our identity, and we want to make patterns that connect with users on an emotional level. Research and development is a big part of what we do. But hearing from makers is equally important; we value the opportunity to get feedback from people using our steel.”

Damasteel further connects with its user community each year in hosting the Damasteel Chef Invitational, showcasing the talents of top-class culinary knifemakers. The evening event provides a glimpse inside the shops and workspaces of incredibly talented artisans. “It’s absolutely world class,” Per concluded. “It’s a great learning experience, too, for people who have never used our products. They can ask questions and connect with our team as well.”

Forging An Industry

Vegas Forge concentrates on the production of high-quality damascus steel in a variety of exotic patterns and alloy combinations. “In 2016, we opened our shop in Las Vegas and quickly discovered that many of our potential customers were extremely hesitant to use damascus steel again due to some bad experiences they had had in the past with other damascus steel companies or makers,” explained owner Jesse Harber.
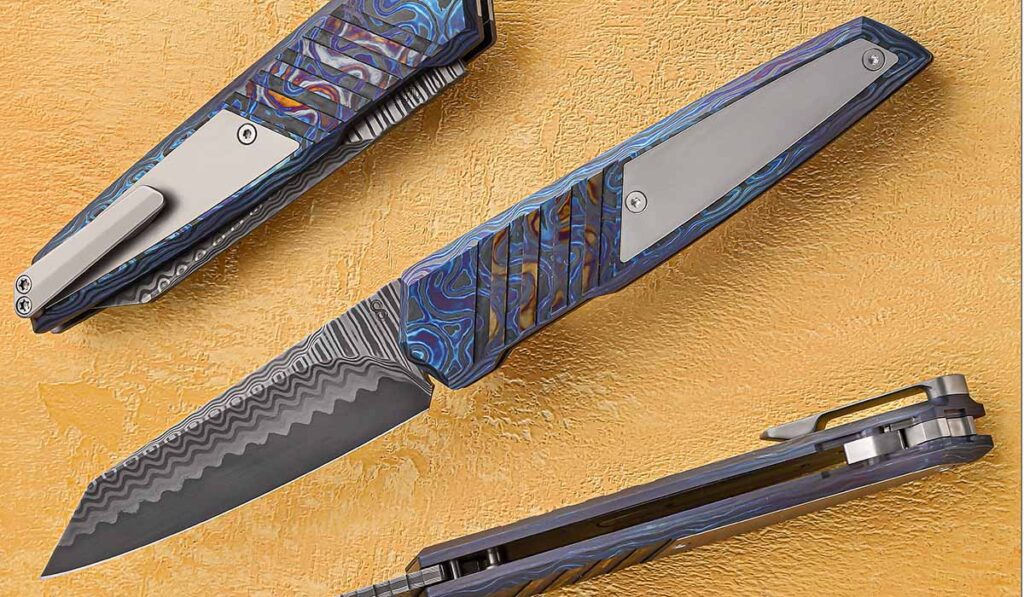
Damacore is available in DC18N and DC21R steels
Damacore has been available in DC18N and DC21R steels for a few years now and signaled a major expansion in Damasteel’s repertoire. Persevere by Princeton Wong sports a 3.5-inch blade of Damacore DC18N handled in black Timascus™. Closed length: 4.625 inches. Princeton’s price for a similar knife: $2,700. (SharpByCoop image)

According to Harber, customer service is a watchword at Vegas Forge. Returning customer calls, handling inquiries, responding to emails, and delivering orders in a timely manner complete the full circle from outstanding damascus to overall satisfaction.

“Once we had solved that, we turned our focus on creating new, interesting patterns, new billet shapes and different alloy combinations,” Jesse advised. “In the beginning, we had 10 damascus patterns that we offered customers, all flat billets which are what knifemakers primarily use. Today, we offer 26 flat-billet damascus patterns. We offer most of those patterns in stainless or carbon damascus as well as titanium damascus and mokume gane. In addition, we have eight round-bar damascus patterns that we sell to customers who make things out of round bar like custom rings, pens, razors and such. We also make blocks of damascus in six different patterns for manufacturers of guns, golf putters and other products.”

The most recent patterns to emerge from Vegas Forge include Virus, Lytic, Forged Koa and one that is so recent that it remains unnamed thus far. Virus depicts what most people would think a virus looks like under a microscope—sporadic circles and lines that are “beautifully chaotic.” Lytic has the look of lytic DNA cycles under the microscope.
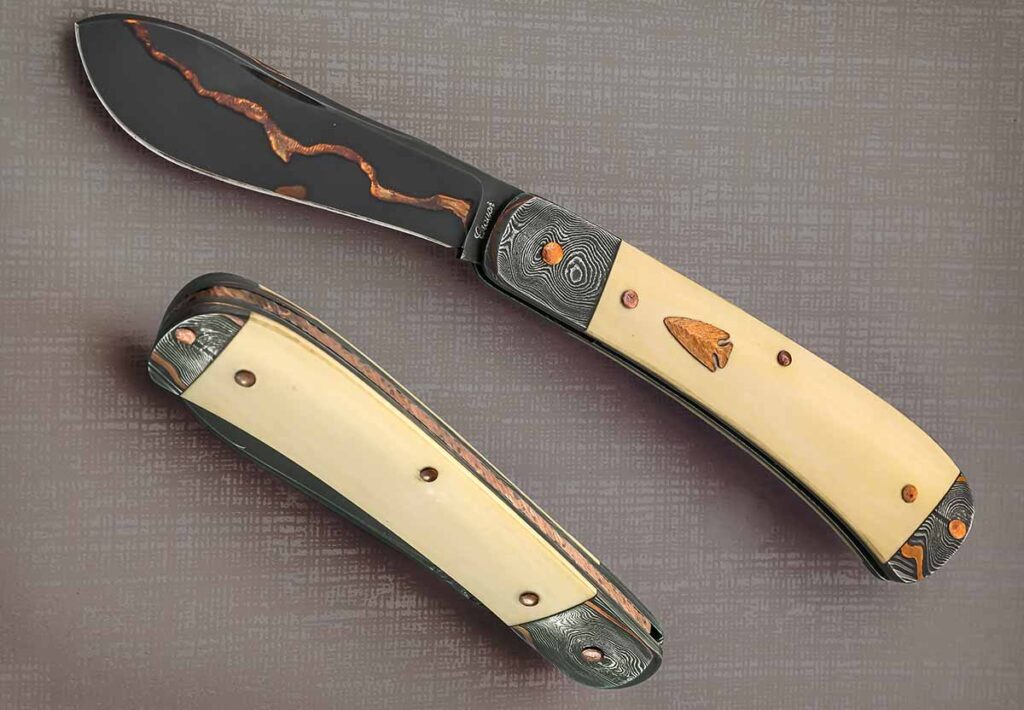
Baker Forge’s CopperMai
Baker Forge’s CopperMai was one of the first copper damascus steels to capture the imagination of custom knife enthusiasts. Bubba Crouch uses it on his trapper with an integral damascus frame and double-line antique Micarta® handle. Closed length: 4 inches. Bubba’s price for a similar knife: $3,000. (SharpByCoop image)

“Both of these patterns were created during the pandemic, so that’s where the inspiration—if you want to call it that—came from!” Harber laughed. “Forged Koa looks like a rare piece of twisted koa wood. It has multiple depths and contrasts to make it look like koa. It’s made by stacking 600-plus pieces of steel into a can and then lightly twisting it. As you grind into it, the pattern opens up and exposes all 600 layers, which is pretty spectacular.”

A few years ago, Vegas Forge began producing a titanium damascus that Harber dubbed Damtanium. The combination includes damascus with layers of Grade 2 and Grade 5 titanium. Almost simultaneously, the company introduced Zirmascus, an alloy of zirconium and titanium layers.

“We’re always trying out new steels in our san-mai damascus,” Jesse added. “San-mai is like damascus, but at the center of the damascus billet is a solid core. We have used Elmax, Magna Cut, and Nitro-V, to name a few.”
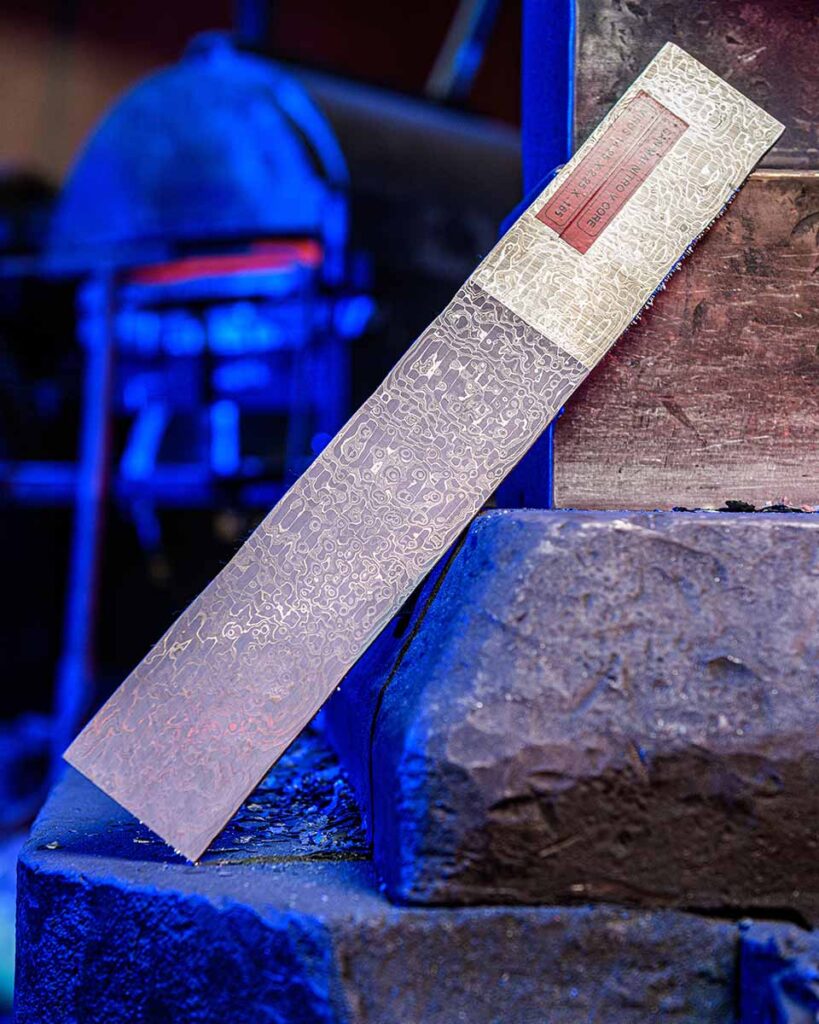
Vegas Forge san-mai damascus
Jesse Harber said Vegas Forge uses its san-mai damascus to try out a number of stainless-steel cores, including Elmax, Magna Cut and Nitro-V, the latter shown here in bar form. (Vegas Forge image)

All this experimentation and innovation is the product of an expanding horizon and an imagination that isn’t inhibited or afraid to step into some uncharted territory. Harber thinks the future is bright at Vegas Forge, and the new product array has brought ever-increasing interest to the doorstep.

“In the beginning, the knife world kept us alive,” he declared. “We were getting no love from other industries. Today, the knife world still accounts for half our business. There isn’t another industry that we love more. We’ve attended hundreds of knife shows over the years, and there is no doubt that knife people are our people. We sell to a lot of custom knifemakers as well as larger manufacturers. I love the custom world, and I don’t even know how many custom knives we own at this point.”

Incorporating Copper And Bronze

Coy Baker founded Baker Forge & Tool in 2019 with a focus on damascus and san-mai. That bedrock quickly elevated to include non-ferrous laminate steels. Baker Forge is now an industry leader in copper and bronze laminated steels with dedicated distribution centers in the United States, Canada, the United Kingdom and Australia.
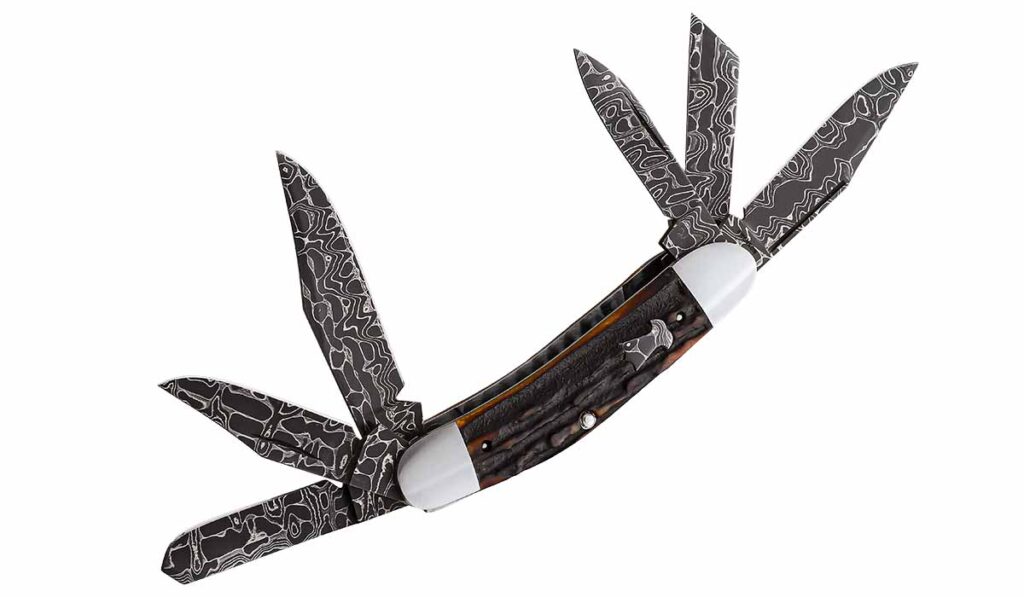
Chad Nichols Damascus
Chad Nichols Damascus offers a wide range of damascus patterns including the Intrepid on Luke Swenson’s six-blade stag sowbelly. Luke’s price for a similar knife: $4,000. (SharpByCoop image)

“Our current buying market is about 80 percent to the knifemaking industry, about a 50/50 split between retail custom makers and commercial knife companies,” Coy related. “We cut our teeth in the custom knifemaker market in the beginning and have slowly expanded into the commercial side. We aim to always be able to provide damascus steels to everyone from the hobby smith to the biggest knife companies.”

Among the most popular Baker Forge damascus patterns are the copper and bronze laminates. However, one-off custom runs generate real excitement. One trending steel group is Elite CopperMai, a damascus blend of copper, 1084 carbon steel, and pure nickel over a solid core of 80CrV2 carbon steel, creating either a ripple or chevron pattern.

“This layout is very appealing to customers due to the stark contrast between the layers and its ease of finishing,” Coy remarked. “We have been expanding into using new core steels in our laminates. Recently, we have used some Hitachi #2, which quickly became a crowd favorite for its edge-retention properties. Later this year we will be expanding into Apex Ultra steel and possibly some other stainless options.”
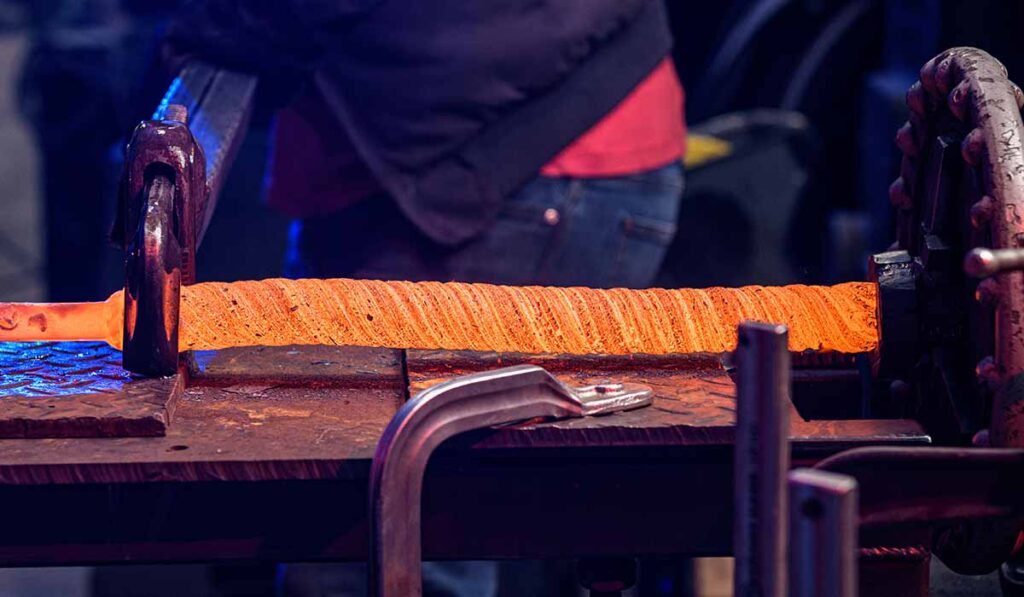
Forged Koa looks like a rare piece of twisted koa wood
“Forged Koa looks like a rare piece of twisted koa wood,” Vegas Forge’s Jesse Harber explained. “It’s made by stacking 600-plus pieces of steel into a can and then lightly twisting it. As you grind into it, the pattern opens up and exposes all 600 layers, which is pretty spectacular. (Vegas Forge image)

This quick look inside the damascus steel industry offers a glimpse of past, present, and future. The tried and true, the cutting edge, and what will be are coming together to keep pattern steels fresh and exciting among makers, users and then the wider buying market.

Read More On Knife Steel:

History of the Japanese Knifemakers Guild

0

In this clip (1 of 5 in a series), Murray Carter and his guest talk with Okayasu Kazuo in October, 2010, at his knife shop in Tokyo. Kazuo played a critical role in the Japanese Knifemakers Guild since its founding in 1978.

Make a Handle for a Bowie Knife in 10 Steps

0

Editor’s note: This article is the conclusion to Make a Bowie Knife in 10 Steps. Read that one first if you’re interested in making a complete knife from start to finish.

1) Choose the Material

tips for making knife handle
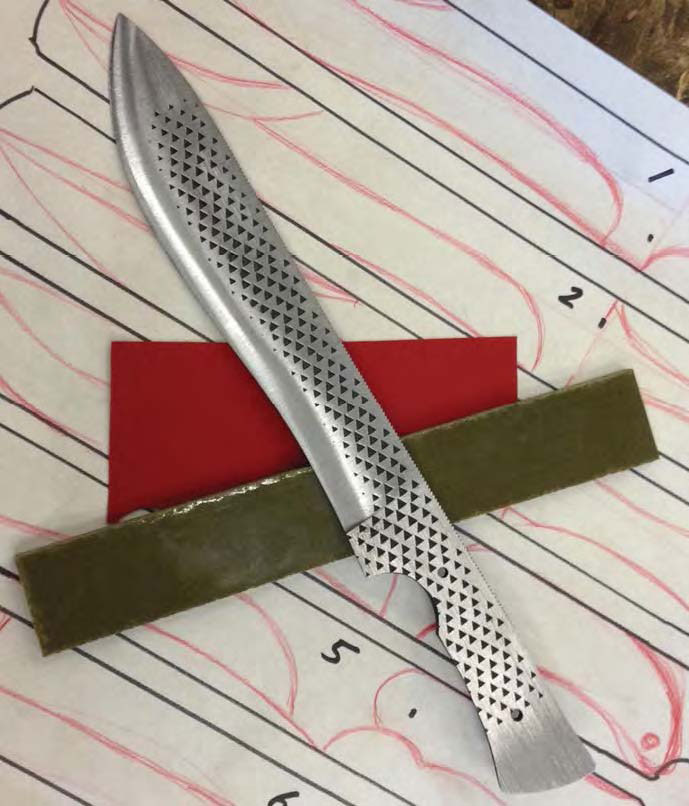
For handle material, I chose olive drab G-10 with a simple red liner for a little flair. The choice for your handle material is up to you.

While the material used, the rasp, is classic and traditional, the handle material will be more modern. I’ve chosen olive drab G-10 with a simple red liner for a little flair. Any material you like would be fine. It’s your knife and the handle is the easiest place to express your personal taste.

2) Lay Out the Scales

step by step make knife handle
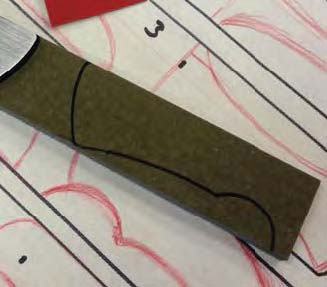
Trace the handle profile. I use a black magic marker since the G-10 won’t absorb the ink.

Now that we have our materials it’s time to start laying out our scales. Trace the handle profile. I use a black magic marker since the G-10 won’t absorb the ink.

If you use a natural or unstabilized material, a pencil might be a better choice to avoid staining or permanent marks.

3) Mark the Holes

drill holes for knife handles
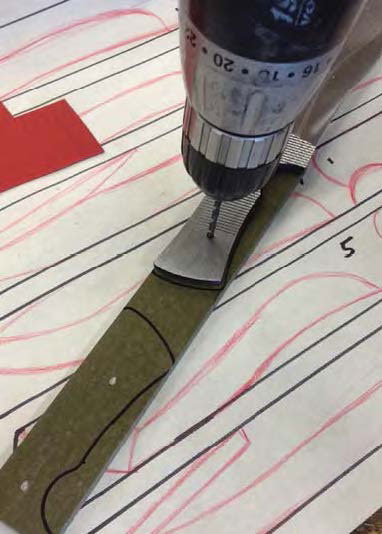
To help ensure your holes will line up, make a light mark with a hand drill and finish in a drill press to help ensure the holes are square and true.

Mark the holes you need to drill on one side of the pair of scales. To help ensure your holes will line up, make a light mark with a hand drill and finish in a drill press to help ensure the holes are square and true.

4) Sand, Drill and Glue

making knife handles
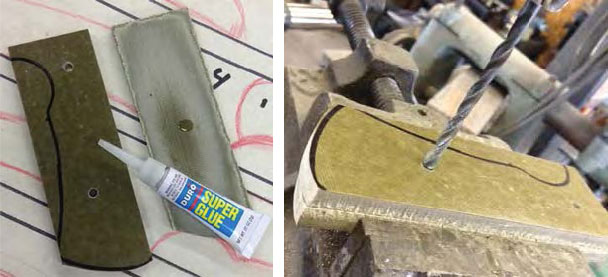
A simple light sanding will flatten the scales and rough up the surface for a better bond. Drill the holes in one scale, place a drop of Super Glue® on the flattened inside surface, and glue the two scales together.

One important thing to remember when doing anything is to never assume. While the handle scales look flat they in fact are not. A simple light sanding will flatten them and rough up the surface for a better bond.

Using the drill press I drill the holes in one scale, place a drop of Super Glue® on the flattened inside surface, and glue the two scales together. This ensures the scales will stay perfectly matched up as you drill your holes and do the rough shaping.

5) Profile the Scales

knifemaking scales
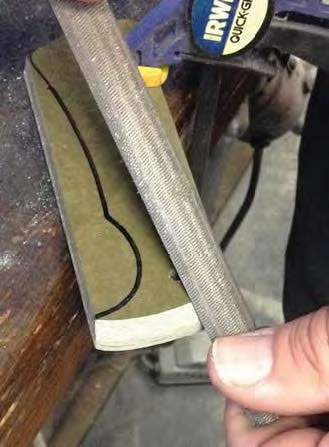
Profile the front of the scales while they are attached by the light glue bond.

Another important step is to profile the front of the scales while they are attached by the light glue bond. First, it is very difficult to clean up the front once it is attached to the blade without scuffing and scratching the blade. Second, it ensures that the faces of the scales will match up just like the holes do.

6) Pop them Apart

make knife handle spacers
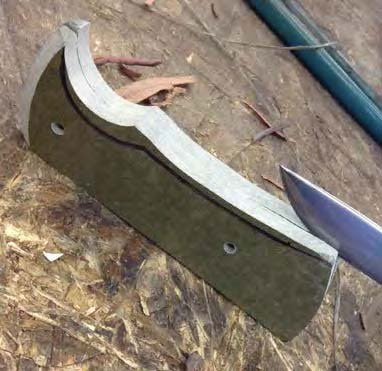
Place the edge of a blade on the seam between the scales. A light tap will pop them apart easily and you are ready to add any spacer material if so desired.

Once the holes are drilled and the rough shaping is complete, simply place the edge of your everyday carry blade on the seam between the scales. A light tap will pop them apart easily and you are ready to add any spacer material if so desired.

7) Trace, Cut and Glue

knifemaking handle
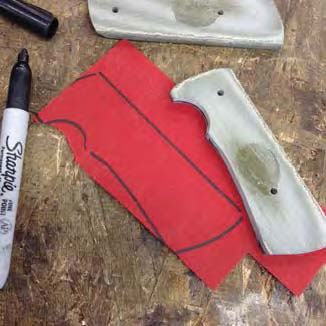
Trace the handle shape onto the spacer material, cut to rough shape and then glue to the inside of the scales.

Trace the handle shape onto the spacer material, cut to rough shape and then glue to the inside of the scales. Super Glue or epoxy is fine for this. Different materials will need different bonding agents. I use Super Glue here because the materials are very non-absorbent. If you choose antler or unstabilized wood, an epoxy is probably a better choice.

Once the material dries, clean up the edges and drill through to match the existing pin holes. A hand drill is fine for this as the holes in the scales will guide the bit.

8) Assembly

Knife handle pins
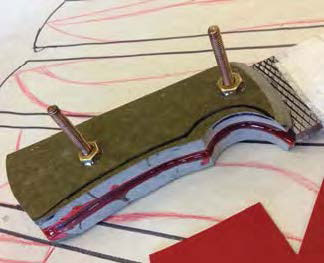
Now you’re ready for assembly. For pins the author uses two simple brass bolts. Use the pins themselves to clamp the scales in place by simply adding a nut and snugging it down after applying epoxy.

Now you’re ready for assembly. I’m going semi traditional and keeping the build simple. For pins I use two simple brass bolts. The advantage is I can use the pins themselves to clamp the scales in place by simple adding a nut and snugging it down after applying epoxy.

Also, the threads on the bolt help add an extra mechanical bond to the handle assembly.
Once you’ve checked the fit of the parts, give them a good spray with brake cleaner to be sure they are free of dirt and oil and to ensure a clean bonding surface.

9) Get the Pins Flush

knifemaking handles knives
Clean off the head of the bolt and then extra length of bolt body on the nut side, and your pins will be flush.

After the epoxy dries, take your angle grinder or whatever you have been using—a file or hacksaw will do as well—and clean off the head of the bolt and the extra length of bolt body on the nut side, and your pins will be flush. When doing this be sure to work slowly! Brass heats up very quickly and that can compromise the bond of the adhesive if you’re using power tools.

10) Clean and Shape

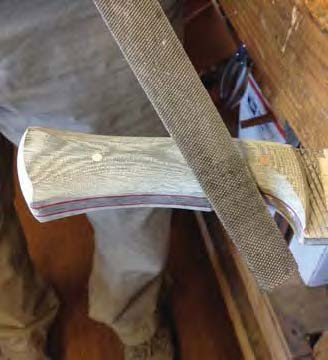
Learn how to make knife from a rasp file
Jump into the rich tradition of knifemaking with this collection of essential books from BLADE. You’ll save a bundle with this bundle!

You’re almost to the finish line. All that’s left is to clean up your handle and shape it to fit your hand. When you do this, again, take your time.

Once you remove any material, you can’t put it back. Go slowly and check the fit often till it fits like a glove, an extension of your hand.

Do some cutting and chopping with the knife—this will let you know what, where and how much material you need to remove.

Work through your sandpaper grits to whatever final finish you desire and voila! Your personal vision of knife perfection is in your hand.

I hope you enjoyed this journey of steel as much as I have. Now get out there and put that knife to work!

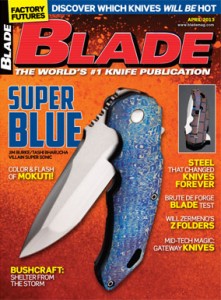
World’s Hottest Knives in April BLADE®

The steel that changed knives forever, the hottest custom makers’ hottest knives, how to build an emergency shelter, Chad Nichols’ MokuTi knife material, how to recognize future knife collectibles, these and much more highlight the new April BLADE®, on most newsstands NOW.

Bill Moran’s introduction of damascus steel at the 1973 Knifemakers’ Guild Show 40 yaers ago this year is the focus of “Steel That Changed Knives Forever.” Find out from those who were there what that was like and from others how the introduction transformed the industry and continues to do so today.

If you were stranded in the woods and needed to build an emergency shelter in a short amount of time, could you do it? James Ayres shows you how in “Shelter From The Storm.”

The custom knives most in demand change at any given moment. Get the latest installment of how they’re changing and what they are in “On The Boil!” The cover knife made by Jim Burke and designed by Tashi Bharucha is one of them.

If somebody asked you what factory knives you should collect now for the future, what would be your answer? See if it gibes with those who know in “Knife Pros Reveal What To Collect.”

There’s much more—a profile of knifemaker Will Zermeno, Ray Kirk’s giveaway knife for the upcoming Arkansas Custom Knife Show, the latest in mid-tech knives, how to clean hunting knives, part two of Ed Fowler’s step-by-step how-to on sheep horn knife handles, a test of Joel Worley’s “Woodsman” brut de forge knife and much more, all in the April BLADE.

For subscription information to BLADE click on BL0413CAN_finalwww.shopblade.com/blade-magazine-one-year-subscription-us?lid=ssfbbl013113

Moran Bladesmith Academy Dedicated To The Father Of Modern Damascus

0

by b.R. Hughes

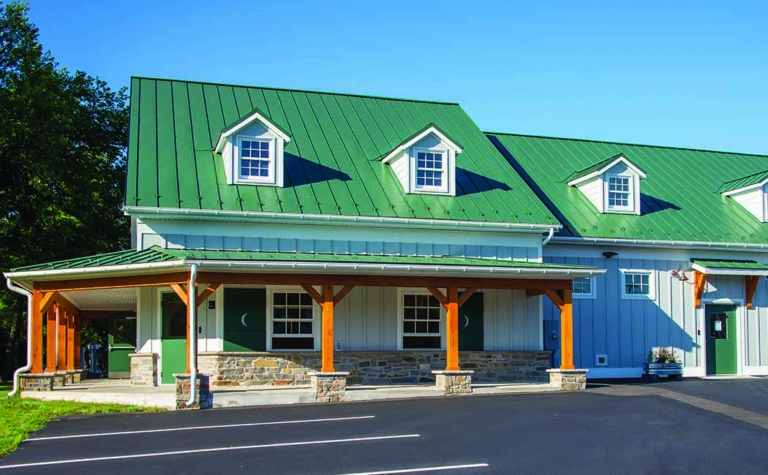
Dedicated in honor of the “Father of Modern” damascus—William F. Moran—the Moran Bladesmith and Artisan Academy is now a reality.

William F. “Bill” Moran, Jr., the first American bladesmith to successfully forge damascus steel blades and a founder of the American Bladesmith Society (ABS), was honored on October 16 in Middletown, Maryland, with the dedication of the Moran Bladesmith and Artisan Academy. Under the auspices of the Moran Museum & Foundation, the Academy is an impressive structure that stands less than 100 yards from Moran’s now idle knife shop.

The weather was virtually ideal as a large crowd assembled in front of the building. Director Nancy Hendrickson, mistress of ceremonies, welcomed the audience and introduced Robert Wilson, president of the Moran Foundation, who opened the proceedings with a prayer and gave an overview of the activities leading up to the dedication.

Mrs. Hendrickson next introduced the speakers for the afternoon: John Miller, burgess of Middletown; Jerry Donald, district commissioner; Jay Hendrickson, founder of the Moran Foundation and past ABS president; Joe Keeslar, past ABS president; Johnny Perry, past vice president and director of the Moran Foundation; and yours truly, a founder of the ABS and author of Master of the Forge, a Moran biography.

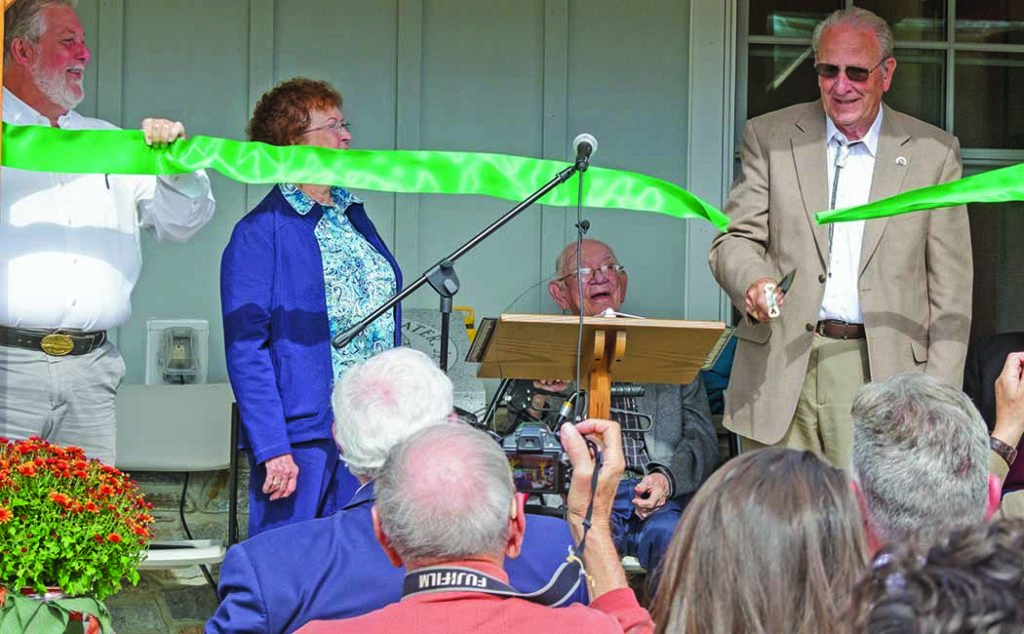
Jay Hendrickson uses one of Bill Moran’s favorite knives to cut the ribbon officially dedicating the Moran Academy. Looking on from left are Robert Wilson, Nancy Hendrickson and the author.

Following the oral presentations, a ribbon cutting done with a Moran knife was conducted by Jay Hendrickson, Robert Wilson and Gordon Conner, Foundation vice-president.

Mrs. Hendrickson closed the ceremony and the group enjoyed a round of refreshments that featured a cake cutting. The assemblage then toured the new building, which contains an office, classroom, museum and gift shop, and a large room where forging, grinding and related skills will be taught.
The Moran shop, which is in excellent condition, will be a museum and a working smithy. A knife show was held October 15 in the space between the Moran Academy and the Moran shop, followed by an auction conducted by Robert Wilson.

FATHER of MODERN DAMASCUS
Moran unveiled his eight damascus knives a half century ago at the 1973 Knifemakers’ Guild Show in Kansas City, Missouri. The knives were the hit of the show and rekindled interest in bladesmithing, which was a dying art form in America at the time. There were only about a dozen practicing smiths back then, including such notables as Bo Randall, Rudy Ruana and, of course, Moran.
Under Moran’s leadership, the ABS was formed in 1976, with Moran elected president, Don Hastings, treasurer, Bill Bagwell, secretary, and yours truly, director. Moran, Bagwell and Hastings were the first three American smiths to successfully forge damascus knife blades.

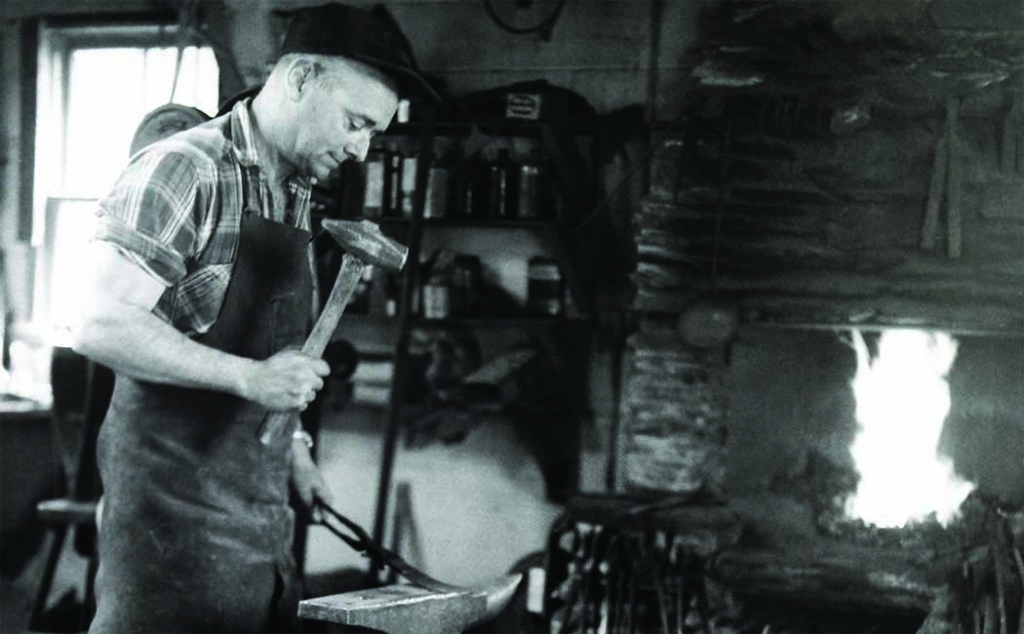
Bill Moran hammers away in his knife shop in this vintage photograph. The shop stands about 100 yards from the new Academy. The knife is the ST-24, considered one of the finest Moran knives ever. (Images from William F. Moran, Jr.: “Forever A Legend”)

As the meeting broke up, Moran turned to me and said, “If we play our cards right, Bill, one of these days we could have 25 members.” Today, of course, the ABS membership is many times that number and has gone global.
The Moran Academy stands as mute testimony to the fact that Bill played his cards very well indeed. Almost single-handedly, he preserved the art of bladesmithing not only in America, but around the world.

Author’s note: Jay Hendrickson, Hughes, Keeslar, Moran, Randall and Ruana all are members of the BLADE Magazine Cutlery Hall of Fame® and the ABS Hall Of Fame as well.

More Knife Collecting And Custom Knives

Eastern European Knife Makers Meeting Custom Market’s Value Demands

An overinflated market for forged blades at home caused the author to look elsewhere. Oftentimes this has been to Eastern European Knife Makers.

2024 Knives annual
This article originally appeared in the 2024 KNIVES Annual.

Since 2017, forged blades have taken the lead. Niche markets like chef’s knives, slip-joint folders, and tactical fixed blades retain enough interest to be powerful sub-markets. Price points and availability in primary and secondary markets lead to the demise of the front-runners. Popular market sectors inspire experienced and new makers to build that type of knife.

Two problems arise from this:

  • Makers will rapidly join a market sector, but collectors are slower to follow.
  • Pricing is primarily based on what other makers are getting for their work and not, for example, the quality of a maker’s knives, name recognition, status among the competition, etc.

Higher prices from less qualified knifemakers encourage the well-known makers to raise their prices, and the cycle continues until the knives become unaffordable. Currently, this is what is happening today in the forged blade market. I saw this trend emerging in 2020, and I started emphasizing makers who offer value for the money with their work.

Overpriced knives led me to increase my research for custom knives with good value in the United States and worldwide. Social media was a great help in this area. As I researched, I found myself saving photos of knives I was interested in. When I returned to re-look at the pictures I had saved, I found many of these makers were from Eastern Europe.

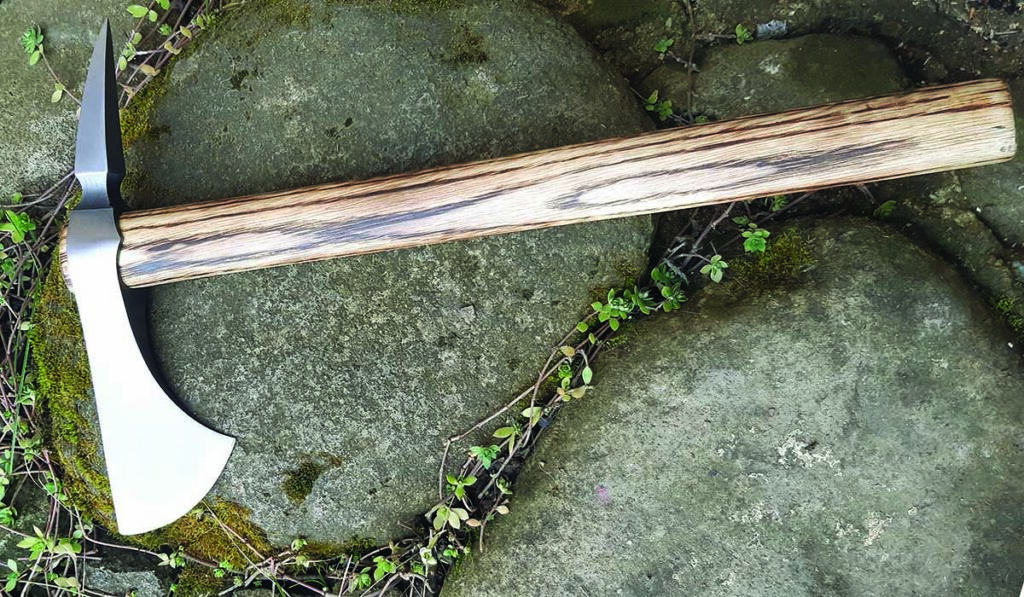
Csizmar Szilard tomahawk
In the spike tomahawk realm is this Csizmar Szilard model with a forged 5160 high-carbon steel head, a hickory haft, and a custom leather sheath. Szilard is a well-known maker in Romania. (Csizmar Szilard photo)

Much like in the United States, prices ranged from reasonable to what seemed extreme. I contacted well over a hundred makers asking questions about materials, construction techniques, pricing, and sheaths, and requested several additional photos. While there are other makers I plan to contact soon, the following are the seven makers I have already started working with.

Meet The Eastern European Makers

Maksim Tjulpin

Maksim Tjulpin has been making knives for 11 years in his home country of Latvia. His interest comes from the diversity of knives that can be made as well as the array of materials. Maksim builds knives utilizing both the stock-removal and forging methods of blade making. He favors forged blades as each has its own unique character.

He primarily uses stabilized wood for his handles, often combined with mammoth ivory spacers. I have found his craftsmanship to be impeccable. The knives feature excellent fit and finish as well as ideal balance and handle ergonomics.

Petr And Peter Dohnal

Petr Dohnal and his son, Peter, have been making knives for 21 years in their native country of the Czech Republic. Working as a computer graphic designer, Petr realized he wanted to build something with his hands. So, he chose to make custom knives. As with many makers, his favorite part is forging the blades, usually damascus. In addition to making his own steel, he uses Elmax, Vanadis 8, and M390, as well as other alloys. He understands that the knife’s intended purpose will often determine the most suitable steel. His handle materials of choice are stabilized wood and antler. I find Petr’s knives a joy to hold in my hand, being sleek, well-made, and exhibiting superior balance and handle ergonomics.

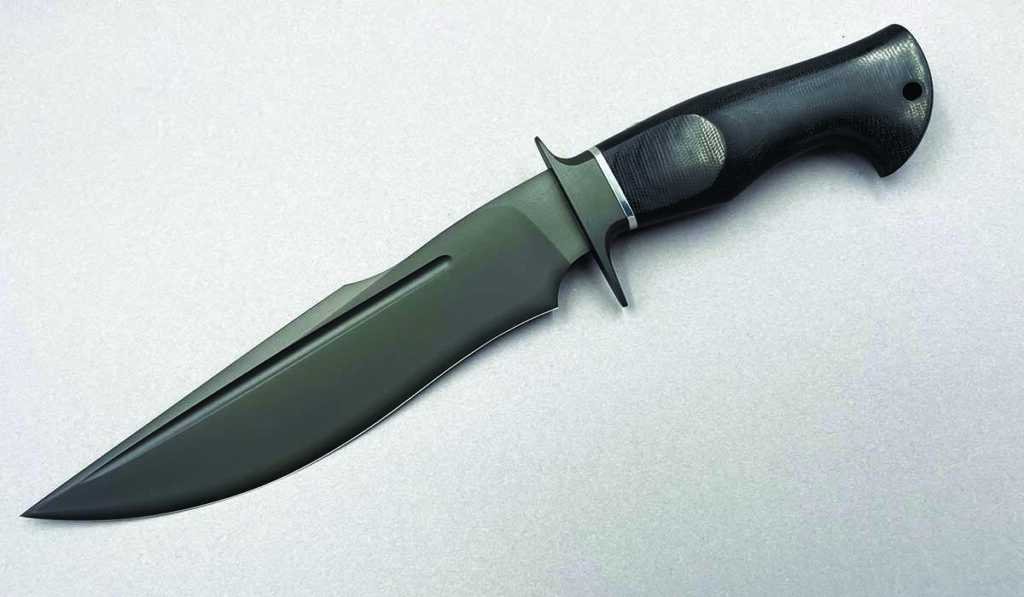
Eastern European Maker: Michal Komorovsky fighter
The sleek, stealthy, and sexy fighter by Eastern European knife maker Michal Komorovsky exhibits a 7.75-inch, black DLC-coated Elmax blade, a black canvas Micarta handle, and a leather sheath. The balance of the knife makes it deceptively quick, and a fuller reduces the weight while increasing blade strength. (Michal Komorovsky photo)

Michal Komorovsky

Michal Komorovsky started making knives, in 2011, in his home country, Slovakia, or officially, the Slovak Republic—doing so primarily because he wanted to try something different, and he never looked back. He favors Sleipner steel, which is a new-generation alloy like D-2, as well as M390. When time allows, he forges damascus for his knives, including a wide variety of fixed blades. Michal builds an array of knives, from hunting and tactical models to bowies and even an occasional art dagger.

Many of his tactical knives feature black DLC-coated blades, but he also offers sandblasted and bead-blasted steel, as well as satin- and mirror-polished finishes. Michal uses various handle materials, with desert ironwood being his favorite. I’ve taken a liking to his fighters that exhibit excellent fit and finish, have an outstanding balance, and feel great in the hand.

The Tactical Realm

Piotr Gosciniak

Piotr Gosciniak has been fashioning custom knives in his home country of Poland since 2017. Having a keen interest in the military, Piotr decided to focus his talent on making tactical knives. He occasionally uses high-carbon steel such as 80CrV, but most of his knives are built using quality stainless steels such as Elmax or Sleipner.

Piotr prefers synthetic handle materials like Micarta, G-10, and carbon fiber. He also offers Cerakote coating for his knives. As a former infantry officer, I appreciate the crisp, clean lines of Piotr’s knives. His designs are purpose-driven; these are tools meant to be used. The blade fullers, textured handle material, and thumb serrations add to each knife’s capability.

Petr Dohnal forged a damascus camp knife
Petr Dohnal forged a damascus camp knife, including the guard, adding a stabilized Karelian birch handle and fossil walrus ivory spacer. It comes with a custom leather sheath. (Petr Dohnal photo)

Jacek Hnatow

Also from Poland, Jacek Hnatow has been building knives for eight years. He started as a collector, then decided he didn’t want to buy knives anymore; he wanted to make them. As an avid outdoorsman, it should come as no surprise that Jacek’s specialties are survival and bushcraft blades. He prefers working with Bohler N690 and Elmax, as well as high-carbon alloys and san mai steel. Jacek’s handle material offerings include synthetics such as G-10 and Micarta, as well as stabilized wood at the customer’s request. His knives, many of which can be huge, are well-balanced with great handle ergonomics. His bushcraft blades are a perfect size to carry in the field, and all of Jacek’s knives are well thought out for the tasks at hand.

Csizmar Szilard

Romanian Csizmar Szilard has been a full-time knifemaker since 2007. When he was younger, he enjoyed video games and one of them allowed players to forge their weapons virtually. So, Csizmar decided to make that a reality. Forging is his favorite part of fashioning knives, hatchets, and axes. He prefers 5160 high-carbon steel for its simplicity and ease of forging. Handle materials are all-natural, with wood and antler being his favorites. Csizmar’s work is clean and balanced, precisely what you would expect from a maker who builds tools that are meant to be used.

Szymek Szlagor

A native of Poland, Szymek Szlagor has been making knives since 2017. Building a knife for himself led to making them for friends and eventually becoming a full-time knifemaker. He enjoys forging and machining carbon steel and damascus. He gravitates toward 5160 high-carbon steel and combines K720 and 15N20 to make damascus. His handle material preferences are natural materials such as stabilized wood and antlers. For his everyday carry (EDC) knives, he prefers to use Micarta. Szymek feels making knives is a beautiful job that involves taking a piece of steel, giving it shape, and improving on it until the blade becomes a tool that will be used and passed down from generation to generation. Having handled his work, he has accomplished his goal.

Working With Eastern European Makers

Language: There are several languages throughout Europe. While it is true that many Europeans speak English, it is equally noteworthy that they do not read and write the universal language well. This is important to know as, more than likely, collectors will be contacting the makers via email or social media. When writing, I often rely on an online translator for help. Understand that such online translating programs could be better. I always let the maker know upfront I am using a translator.

Eastern European Maker: Maksim Tjulpin’s camp knife
Eastern European knife maker Maksim Tjulpin’s camp knife features a 7.1-inch san mai damascus blade, a stainless guard, a black G-10 spacer, and a mammoth tooth and desert ironwood handle. It comes with a custom leather sheath. (Maksim Tjulpin photo)

When emailing or writing to makers, try not to use slang or acronyms, as these usually translate into something that might not have the intended meaning. Remember to be patient with this process, as both collector and maker must understand exactly what each is expecting.

Payments: The preferred method for knife transactions is PayPal. As with most makers worldwide, many are not set up to take credit cards. Those who have traveled to Europe know there are additional fees for using U.S. bank credit cards. Although wire transfers can be made, it is best to check with your bank to find out what the fee for an international wire transfer will be.

Lastly, Western Union is an option that usually comes with an $8 fee. Some buyers might find the process of paying upfront and then having to wait up to a month difficult. However, I have been buying knives regularly from Eastern Europe for the last three years and have never had a package go missing.

Shipping: The maker will generally ship the knife through his or her country’s postal service. Most countries work with the U.S. Postal Service, and once a package is accepted, you can track it coming from Europe. The delivery time frame will average between two and four weeks. While FedEx can be an option, the cost associated will generally eliminate this service from the ideal options.

Szymek Szlagor camp knife
The 13-inch camp knife from Szymek Szlagor showcases a forged Bohler K720 blade with hamon (temper line), a stainless guard and sambar stag handle scales. (Robertson’s Custom Cutlery photo)

Measurements: Europe uses the metric system. As foreign as the metric system is to you, the same is true for the imperial system the United States uses to makers in Europe. Fortunately, there are conversion programs on the internet. In conversing with European makers, please pay attention and differentiate between when they use centimeters (cm) or millimeters (mm), as 1 centimeter equals 10 millimeters, and when it comes to a knife, that could be a huge difference.

Forged In Fire Influence

Most of the makers in this article offer forged blades as part of the repertoire. However, Piotr Gosciniak is the exception, as he specializes in stainless and some high-carbon steel tactical knives. The U.S. market will see a resurgence of this category of knives in 2023-’24. For now, forged blades are the most significant market sector in the United States, partly due to increased interest in forging knives due to the TV show “Forged in Fire.” The interest created by this show was partly responsible for 38 makers earning their American Bladesmith Society (ABS) journeyman smith ratings at the 2022 BLADE Show.

Talking with several ABS master smiths, I was told they saw an increase in the number of makers taking their journeyman smith performance test before the 2023 BLADE Show as well. As a result, I anticipate the final numbers to show a record number of candidates testing for their journeyman smith stamps in 2023. With an increase in knife shows across the United States, hammer-ins, and the accessibility of in-person training and videos on social media, the number of forged blade makers will continue to increase over the next several years.

As these new makers enter the custom knife market, their pricing will be based more on what their peers charge for knives as opposed to a position in the market that their work has earned. In the short term, collectors will be the ones subsidizing too many who are bound to have short careers as custom knifemakers. Long term, the aftermarket will sort out the winners and losers. Therefore, it is incumbent on buyers to understand value pricing and that they should not buy a custom knife that will lose value.

Eastern European Maker: Jacek Hnatow tactical fixed blade
Eastern European knife maker Jacek Hnatow offers the “Wicher” tactical fixed blade in Bohler N690 stainless steel, a black G-10 handle and a custom Kydex sheath. Of full-tang construction, the contoured handle provides excellent grip even when hands are wet. (Robertson’s Custom Cutlery photo)

Over the last 37 years, I have bought and sold knives on every continent except Antarctica. Today, it is easy to find exceptional makers in Eastern Europe and worldwide. I understand that ordering from makers outside the United States can be a leap of faith.

My hints regarding purchasing knives from Eastern Europe should help you with your concerns. The styles, materials, and craftsmanship of makers worldwide have never been better. This is why I suggest you give the makers in this article and others around the world consideration to become part of your collection.

Editor’s Note: This article is from the 2024 KNIVES annual, available at ShopBlade.com

More Custom Knives:

How To: Dellana Dots Opening System

0

Dellana tells how she created and makes the Dellana Dots opening assist system—without a lathe.

Editor’s note: Full-time knifemaker Dellana created her Dellana Dots blade-opening assist system in 1994. The system consists of one or more elements raised above the surface of the blade to provide a gripping surface when opening a folding knife. Dellana Dots can be made using different techniques depending on your skill set. They can be any shape, from round to geometric to even gem set. There can be any number or shape of the Dots. Dellana most frequently makes them as round beads. In this tutorial, she shows how she does it.

Dellana Dots were invented for the same reason many things have been invented—a desperate need to solve a problem!

In 1994 I was a very new knifemaker studying under the mentorship of the great ABS master smith, Jim Schmidt. I was working on my second lockback folding knife, one of my own design. All was going well until I realized that the blade sat too far into the knife when closed because of the thickness of the handle scales. Due to my inexperience, I had not considered the scales’ thickness. It was evident that it would be very difficult for the knife to be opened without effort and annoyance.

Three Dellana Dots
Three Dellana Dots blend in perfectly on the blade of Dellana’s Magick lockback folding dagger in her Meltdown knife series.

What to do?

The obvious solution was the commonly used nail nick, the ditch grooved into the blade for a thumbnail to try to grab ahold of. I have always disliked the functionality—who else has broken or bent back a fingernail when trying to use one?—or the look of nail nicks. One of them would definitely not be visually appealing with the rest of the design of my knife, and that was unacceptable to me. So, I used my 17 years of experience as a goldsmith to figure out an acceptable solution.

I had used raised beads on many of my jewelry designs as decorative elements and thought that a raised bead might give enough surface area for a fingernail to grip—but how was I to attach the bead to the blade’s surface? The soldering that I would normally do would not work in this situation due to the blade needing to be heat treated. I thought that drilling through the blade and riveting might work if I could leave enough of one side of the rivet high enough above the blade surface to get a good grip.

I had never seen anything like it done on a blade before and wondered if there was some unwritten rule against that sort of thing. I decided to take the knife to Jim, explain the problem and my solution, and see what he thought.

Dellana and Jim Schmidt
The author with her mentor, the late, great ABS master smith Jim Schmidt.

Jim was a man of few words and his silence after I explained the issue was a bit nerve wracking for me. After what seemed an interminable amount of time he said, “That’s a great idea and I’m going to steal it. But I’ll call them ‘Dellana Dots.’” And that’s exactly what he did.

And there you have the story of how the Dellana Dots came to be. They have proven to be a popular solution for many makers of folding knives ever since.

Materials & Tools

I most often use an asymmetrical three Dellana Dot system because I find that configuration visually appealing with most of my designs. Here’s how I do it.

First are the materials and tools. You’ll need:

Materials to make the dots
The materials and tools you’ll need.
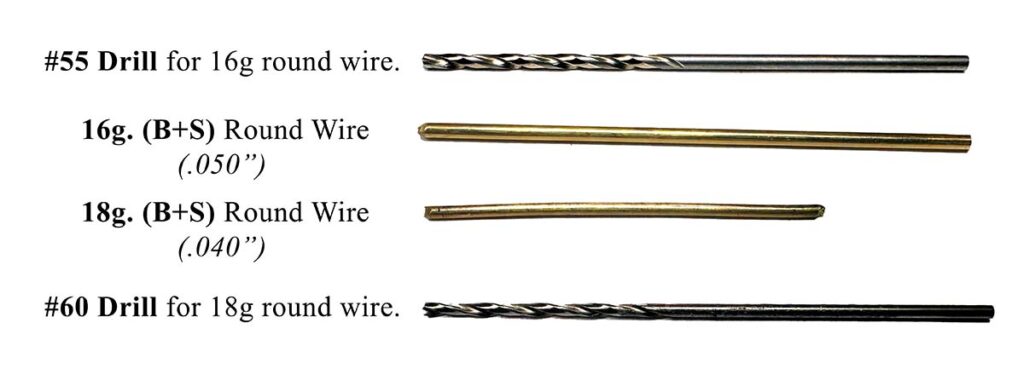
  • Pin stock (B&S Gauge): 16g. (.050”) 14k yellow gold round wire and 18g. (.040”) 14k yellow gold round wire.
  • Drills: #55 (16 gauge) and #60 (18 gauge).

Getting Started

Pro tip: Preparation is the key to creating anything efficiently and well. The more thorough the prep, the easier, faster and better the final process and end result will be.

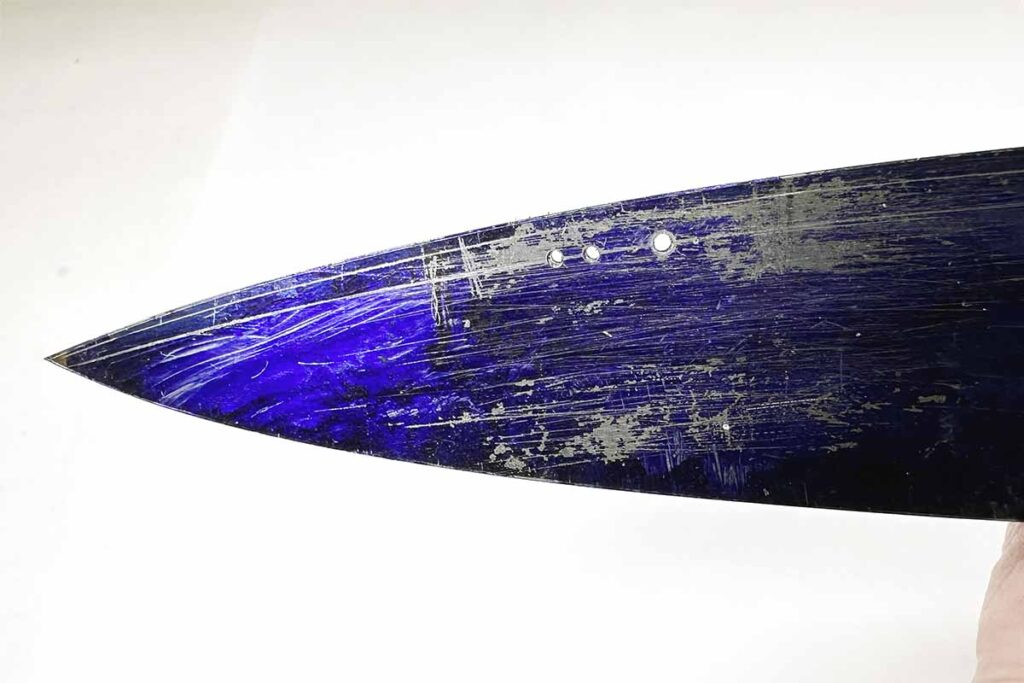
Step 1: Mark and drill the holes for the Dellana Dots’ round wires before grinding the bevels (Images 2 and 3).

Holes drilled into the blade
The holes have been drilled in the blade.

Special Note A: If you grind the blade bevels before heat treatment, countersink the holes so the spheres sit down below the surface of the blade to avoid anything catching on them.

Special Note B: If you grind the blade bevels after heat treatment, drill the holes prior to heat treating and use diamond drills (dental burrs) to countersink the holes after grinding.

I countersink the holes on the front side (where the spheres will be) deeper than on the back (riveting) side. This allows the balled end of the wire to sit below the surface of the blade bevel to keep it from snagging on anything.

Step 2: Finish the blade. Make sure the blade is fileworked, etched (if damascus), blued and polished prior to riveting the Dellana Dots in place.

Step 3: Double check that the wire fits through the drilled holes.

Step 4: Melt the ends of the wires to form spheres. I use a Smith Little Torch with propane and oxygen. This takes a bit of practice to know the correct heat and timing needed to form a smooth, round, symmetrical ball. As always, practicing first can be very helpful.

Step 5: Check the size and fit of the balled ends in the countersunk holes. Make sure that the previously drilled and countersunk holes in the blade allow the balled ends of the wires to sit down into them. This will ensure that nothing can become snagged under the spheres.

Step 6: Polish the balled ends of the wires. Doing this now will result in a better final appearance as well as save time. If you wait until after the Dellana Dots are set, it is difficult to get the dark oxide created during the melting process polished off the balled ends without affecting the blade finish. (Don’t ask me how I know this.)

Prep Blade For Riveting

Cover the back side of the blade
Cover the back side of the blade with the tape locating the holes over the wires.
  • Insert the wires through the blade, ensuring the balled ends protrude on the blade’s front side.
  • Cut off the wires on the back side of the blade not flush with the blade. Leave a little excess to file to the appropriate height for riveting.
  • Make two sections of three layers of masking or painter’s tape big enough to cover the entire blade.
  • Put one section of the tape over the front side of the blade covering the balled ends of the Dellana Dots. This will protect them during riveting and reduce clean up time.
  • Mark the hole locations on the second section of tape (for the back side of the blade). Make holes through the tape with a hole punch for the wires to go through.
  • Cover the back side of the blade with the tape locating the holes over the wires. This will protect the blade when filing and sanding the wires to the correct height.

Prep Dots For Riveting

Peel off the third layer of tape, leaving two layers of tape on the blade.
Peel off the third layer of tape, leaving two layers of tape on the blade. This leaves the perfect height of wire to form the rivet head.

Pro Tip: To get the correct height of wire for a perfect rivet head every time:

  • File the wire down flush with the three layers of tape;
  • Sand to 800 grit;
  • Remove any burr, and;
  • Peel off the third layer of tape, leaving two layers of tape on the blade. This leaves the perfect height of wire to form the rivet head while still protecting the blade during hammering and clean-up.
  • Rivet The Dots

Rivet The Dots

Hammer around the edges of each filed, sanded wire on the back side of the blade to spread, dome and secure the head of the rivet.
  • I use the ball side of a chasing hammer to rivet the wires;
  • Place the balled heads of the tape-covered Dellana Dots (the front side of the blade) on a polished steel anvil. Hammer around the edges of each filed, sanded wire on the back side of the blade to spread, dome and secure the head of the rivet.

Polish The Rivets

Polish the hammered heads of the wires, removing any sharp edges as you do. The author uses a small wheel with White Diamond-type compound and her Foredom hand piece for the task.
  • Leave the tape on the blade to minimize the polishing compound mess and cleanup time and effort;
  • Polish the hammered heads of the wires, removing any sharp edges as you go. I use a small wheel with White Diamond-type compound and my Foredom hand piece to do this.

Polish The Dots

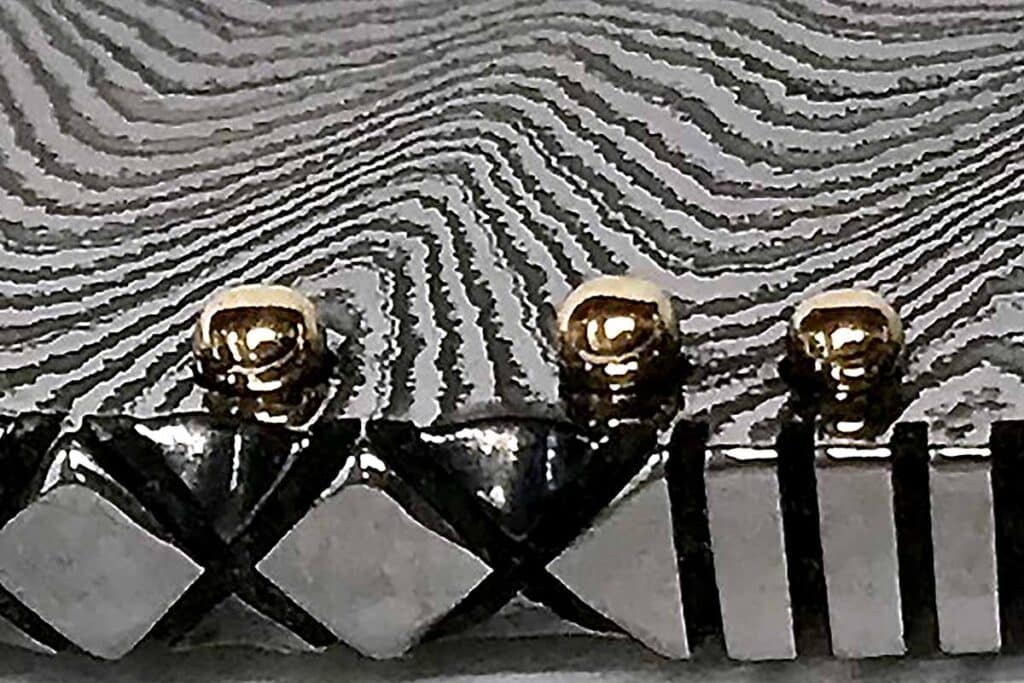
The finished rivet heads as they should appear on the back side of the blade  and a closeup of the finished Dellana Dots.
The finished rivet heads as they should appear on the back side of the blade and a closeup of the finished Dellana Dots.
  • Carefully remove the tape from both sides of the blade. Save the front-side tape until after you’ve ensured that the balled ends on the front haven’t been deformed and don’t need reshaping and re-polishing. If they do need reshaping and re-polishing, use a hole punch to cut away the tape around the balls and reapply the tape. This will minimize any polishing compound mess and save time in the long run.
    Clean the polishing compound from around the rivets and, if necessary, the Dellana Dots as well.Pro Tip: I cut down a welder’s acid brush so the bristles are really short and stiff. This works perfectly for cleaning the small, hard-to-reach areas. Then:
  • Clean the whole blade with lacquer thinner;
  • Wax the blade, and;
  • The riveted side of the Dellana Dots should be very smooth and only slightly domed above the surface, with no sharp edges.
  • And that’s how you make Dellana Dots without a lathe!

More On Knifemaking:

Advertisement

Must Read Articles

Read this before you make a knife

Knifemaking 101 – Read This Before You Make a Knife

  by Wayne Goddard My experience has taught me that there's nothing like digging in and getting started. I've often said the hardest part of the...
how to forge damascus steel

How to Forge Damascus

Advertisement
Advertisement