

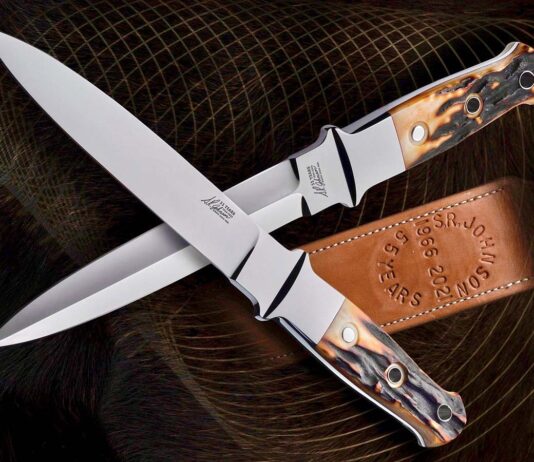
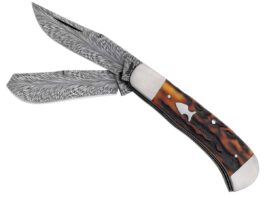

This is a great video of Kentucky knifemaker Bob Neal in action. I think you’ll enjoy it:
A Revolution in Slip-Joint Construction

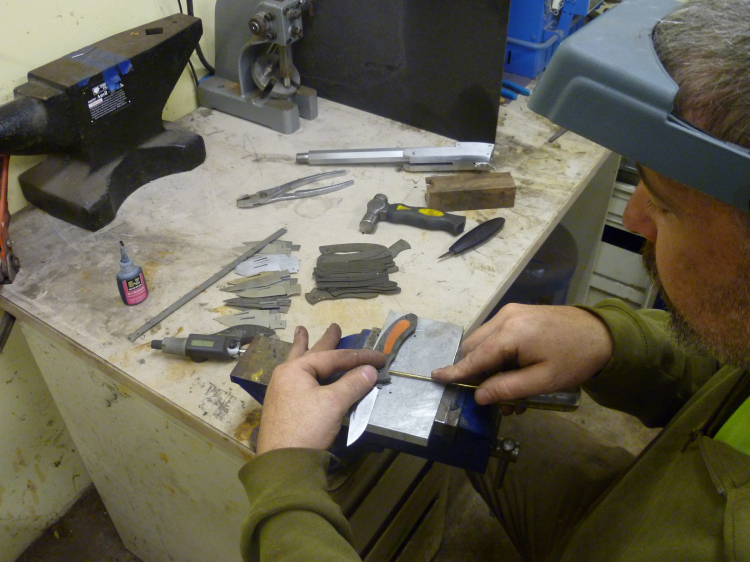
Unlike the traditional pocketknife in which the backspring rises and falls when the blade is opened and closed, the backbar of Tom Ferry’s model equipped with the Everflush Spring (top) remains flush when the blade is opened and closed. Ferry (above) works on a model with the mechanism in his shop.
The Everflush Spring takes the traditional pocketknife folding mechanism to the next level
By Lorien Arnold
As the traditional slip joint experiences a rebirth in favor among knife enthusiasts, there is increasing room for innovation in the knife’s classic, time-tested construction method.
Enter Tom Ferry and Mike Vagnino.
Innovators and educators, they have forged their paths in steel. Developing techniques and learning new skills, while at the same time teaching others, the two have collaborated on a concept that incorporates a generations-old method for assembling a slip joint, while bringing it into new worlds of materials and technology.
“[An] idea evolved from the desire to engrave the backbar of slip-joint folders,” Ferry began. “The reason this was all but impossible before was that slip-joint backbars or [back]springs are heat treated, making them difficult to engrave, and, due to timing issues, [the engraving] was not easily done prior to heat treatment.
“I had been bouncing the idea around trying to come up with a solution. One night while opening an automatic knife I noticed the internal kicker spring, which in many ways is similar in placement to a slip-joint spring. After doing some preliminary drawings, I contacted Mike for his input and assistance in developing the mechanism further. By sharing and combining forces, we cut the development time in half and have created a great working mechanism.
“In total there have been at least five variations of the spring,” Ferry continued, “and Mike has taken the development further by creating the first multi-blade slip joint with the [new] mechanism. Mike coined the name the Everflush Spring because the backbar is always flush with the top of the handle.”
You will notice the knives with the new spring in the accompanying photographs do not always correspond in form to the classic interpretation of the slip joint. Sporting titanium liners, bolsters and backbars, carbon fiber handles and high-alloy stainless blades, materials more common in the tactical category can be used to constitute the knives. To that end, the Everflush Spring allows for a completely solid handle configuration.
The standard slip joint, whose backbar is a spring and must be free to move, can develop play on either side of the spring. The Everflush Spring design can incorporate pivot bearings for an action that is smooth with a crisp half stop. “The Everflush Spring is unlike common slip joints where the blade causes the spring to rise and drop as you rotate the blade from the open to closed position,” Ferry observed. “This innovation allows the opportunity for engraving of the backbar as well as eliminating the timing of the blade to the handle, as all the timing is internal.
“[By] splitting the backbar in half, thus creating a lower spring upon which the blade rides and an upper tang stop which stays flush with the handle, the backbar does not need heat treatment. This allows a wider range of material choices and embellishing options.”
Being intrinsic with the backbar, the lower spring diminishes the pressure exerted upon the pin, which traditionally would be used as the spring pivot. This allows the use of more exotic or fragile handle materials without fear of them cracking at the pin. In addition, the mechanism provides the potential for assembling a slip joint using threaded fasteners that allow for easy cleaning and pivot-tension adjustments.
“The major disadvantage is that this design will not easily fit or adapt to many traditional designs,” such as folding patterns with three or more blades, Ferry noted. “The internal spring takes up more room and thereby creates issues with designing a knife for it.” Conversely, it challenges makers to devise new designs, which is always good for the knife industry.
Tango Foxtrot Knives
Ferry responded to the changing market with the creation of Tango Foxtrot Knives LLC, which he characterizes as his “new venture into the realm of semi-production knives” of his design.
“The first knife from Tango Foxtrot is a tactical slip joint with the new mechanism, but I will also be introducing other models and types of knives in the future,” he said. “Tango Foxtrot Knives was conceived years ago but the timing never seemed to be right for me to proceed with the venture.
“As with any new design or product, you can never be sure how it will be received by the buying public. Mike and I unveiled the Everflush Spring at the 2011 BLADE Show (www.bladeshow.com) and it was very apparent the design was a success, with both of us selling out of those knives prior to the end of the show’s first day. With the confidence of having innovated a great product, I decided to launch Tango Foxtrot Knives. The company’s first release was the prototype version of the T-1 folder at the 2011 USN Show, and again the design went over well.
“I am currently in production of the T-1 slip joint with the Everflush Spring,” Ferry maintained, “as well as designing other models of fixed blades and folders to develop a line of semi-production knives of my design. The components for the knives will be made out of shop, but all final assembly and fit and finish will be done in my shop. Most will be everyday user knives, but there will also be the occasional dressed-up model featuring my hand engraving.”
Another Level
The knife business tends to reward those who contribute to it. Moreover, there is always a connection to the past, as every maker builds upon the innovations, techniques and styles of those who came before. It is a rare cutler who introduces something completely new. It is an even rarer one who can take an innovation and bring it to the next level. There is always another level and, through Ferry and Vagnino’s innovation, the cutlery industry may be getting a peek at the next one.
For more information on the Everflush mechanism, contact Tom Ferry at [email protected] or www.tomferryknives.com , or Mike Vagnino at [email protected] or www.mvknives.com.
For more on the latest knives, knife legislation, knifemaking instruction, knife trends, knifemakers, what knives to buy and where and much more, subscribe to BLADE Magazine, the World’s No. 1 Knife Publication. For subscription information click on http://www.shopblade.com/product/blade-magazine-one-year-subscripti…?r+ssfb031712#BL1SU.
Knifemaker: A New Role for Johnny Strong
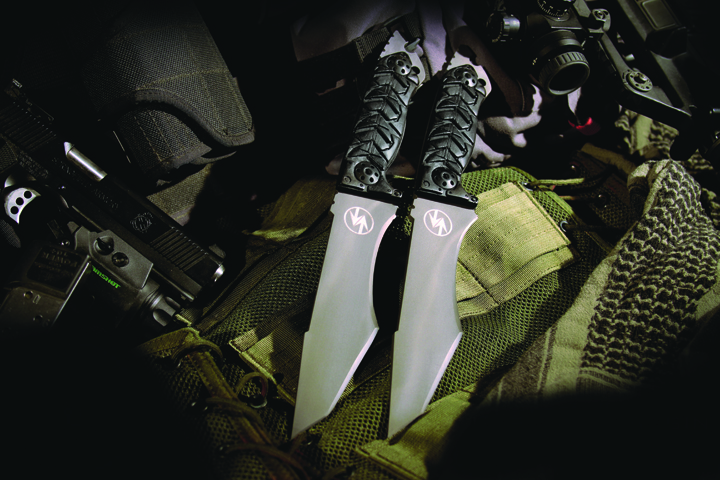

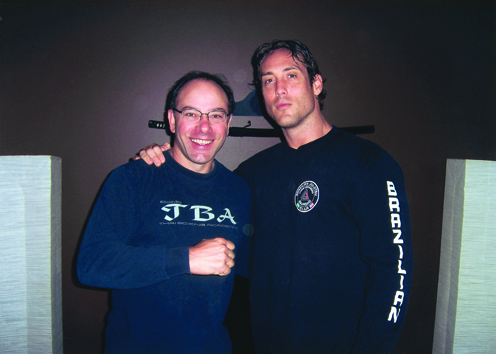
As with all Johnny Strong knives, the Urban Assassins (top photo) are flat ground from CPM-S35V stainless and heat treated by Paul Bos Heat Treating. Overall lengths: 11.5 inches. (Katie Summers photo) Johnny Strong’s latest movie Sinners and Saints (second photo from top) debuted in January. (Photo: Mark Rutledge; Poster: Dave Burton) The author [left] and Strong [right] (third photo from top) at the author’s house.
Star of Sinners and Saints also makes knives
By Wally Hayes
Through knives I have met some of the most amazing people, one of whom is actor Johnny Strong. Last summer I received an e-mail from Johnny. He was interested in my Dragon Waki he had found on Bladeart.com’s website. We exchanged e-mails about his new waki, music and his interest in knifemaking. I learned Johnny is an actor, musician, martial artist and artist. He has been collecting knives since he was 8.
“It was when I was on tour with my band, Operator, that I got serious about collecting custom knives. I would be on the tour bus searching the web for knife dealers,” he said.
After talking with Johnny and learning a little about him, I suggested he visit my shop and hang out for a weekend. He did—and he jumped in with both feet.
We started out forging two blades to shape. Then I taught him grinding and heat treating. The crash course was three long, fun-filled days. As Johnny told BLADE®, “It was a great experience coming to Wally’s and having him share all his knowledge with me. I learned how to manipulate steel and apply these skills to my edged art.”
As soon as Johnny returned home, he ordered a belt grinder, drill press and some steel. In the past year he has created some very original designs. His computer-drawing skills enabled him to develop a practical and aggressive-looking knife style. As he noted, “With my knives, I like to paint in tactical colors.” His blades are flat ground from CPM-S35V stainless steel and heat treated by Paul Bos Heat Treating.
Johnny has created some unusual blade finishes with a combination of bead blasting and etching. The blades are ground with a wide secondary bevel that makes his knives razor sharp, similar to those by Shiva Ki. Johnny hand carved a mold to make his handles. He casts them one at a time. The handle material is an impact/chemical-resistant resin. The cutouts in the handle butts are multi-purpose prying/shaping tools. He also designed and ordered custom-made black titanium handle fasteners.
Three of Johnny’s models are the Urban Assassin, Canine Assassin and Combat Assassin (this issue’s cover knife; see page 7). Respective blade lengths are 6.5, 8.5 and 11 inches. The blade of the Canine Assassin has a tiger-stripe finish, while the Combat Assassin blade features a sawback. Each blade has what Johnny calls his three-edge design, which was inspired by the knife-combat training he has received. All his knives come with custom leather sheaths.
Sinners and Saints
Johnny has starred in Black Hawk Down, The Fast and The Furious, Get Carter, The Glimmerman and his new action movie, Sinners and Saints. Johnny plays the lead role of Sean Riley, a New Orleans detective.
To prepare for one of the movie’s knife fight scenes, Johnny trained with Ron Balicki for three months. Balicki is well known as a practitioner and teacher of the martial arts, and is a student and son-in-law of Dan Inosanto, a legendary martial arts instructor who studied under Bruce Lee. Balicki is also a top Hollywood stuntman and plays the role of Rucker in Sinners and Saints.
Johnny learned both one-handed and two-handed combative drills. In a knife-fighting scene in the movie, Johnny uses an Allen Elishewitz “Phalanx” folder and a Cold Steel Tai Pan dagger. Balicki plays Rucker, a bad guy Johnny’s character must kill. The knife-fighting scene took two days to shoot. Balicki uses a Cold Steel Voyager folder in the scene.
“Ron has a ton of experience and was great to work with,” Johnny noted. “We wanted to make the knife fighting scene as realistic as possible.” Johnny has a strong background in martial arts with a black belt in Brazilian Ju-Jitsu and is training hard to get in shape for his next movie.
Movies, Music and Knives
This past fall I flew down to Johnny’s to help with his knifemaking and have some fun playing music as well. Music is a big part of Johnny’s life. When not acting, he works on music either for film scenes or his own CDs.
His new album is The War of Art on iTunes. It features two of his Urban Assassin models silhouetted on the cover. I was asked to bring my guitar so I could play lead on a couple of songs in his studio. What a blast—mixing knifemaking with recording music. We worked on edge geometry, sheaths and a new folder design coming out in 2012. Stay tuned for more movies, music and knives from a very talented guy.
For more on the latest knives, knife legislation, knifemaking instruction, knife trends, knifemakers, what knives to buy and where and much more, subscribe to BLADE Magazine, the World’s No. 1 Knife Publication. For subscription information click on http://www.shopblade.com/product/blade-magazine-one-year-subscripti…?r+ssfb030312#BL1SU
Carbon Steel Can Still Cut It
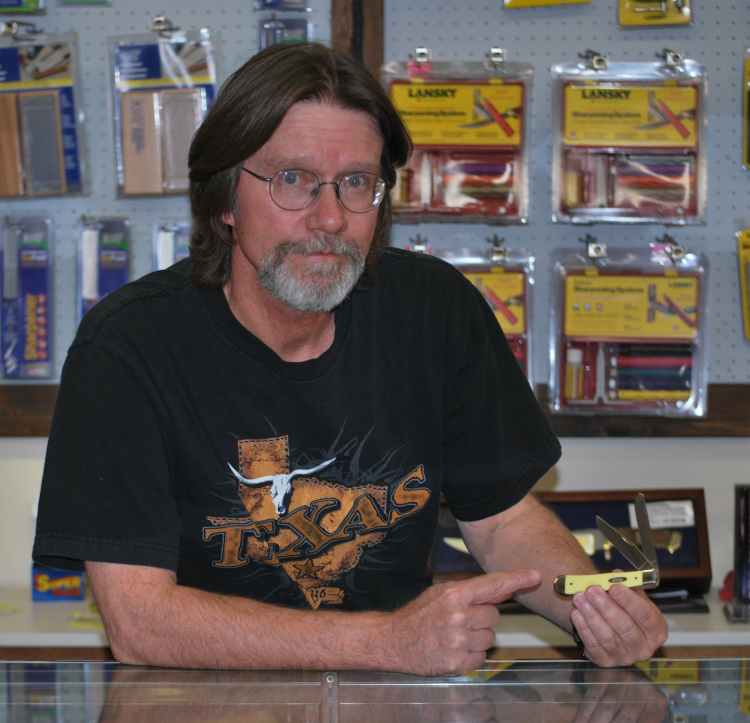
Troney Toler of Knives Plus in Amarillo, Texas, says his biggest seller by far is the Case model 161 yellow-handle trapper with blades of Case’s “chrome vanadium carbon steel”—which, according to a Case official, is 1095 carbon steel with added chromium and vanadium. (photo courtesy of Troney Toler)
There is snow on the roof but fire in the furnace of the most popular factory carbon steel knives
By James Morgan Ayres
With all the new, exotic alloys populating the knife industry in recent years, what about the sales of factory knives with blades of the “old faithful” carbon steels? To find out, I spoke with a selection of cutlery retailers from Texas to Canada and asked if carbon steel blades are still selling in the face of competition from the new alloys, and, if so, which of the non-stainless knives are hottest in terms of sales.
North of the border, Pauline Favreau of the Canadian Knife Zone says she sells carloads of carbon-steel knives. In the springtime her customers load up on Cold Steel kukris and machetes to clear weeds, vines and saplings from around their summer cabins. Given the riotous early season growth in the north, this is a big job and a tough one. According to Favreau, her experienced customers rely on Cold Steel blades of 1055 carbon steel for their ability to take a keen edge and be easy to sharpen. She sells them for around a modest 30 Canadian dollars ($29.50 American) each and says customers prefer them to expensive alloy blades and their reputation for being hard to sharpen. Moreover, when the blades get the inevitable nick or two, it is easy enough to repair the edge with a stone.
Favreau says 45 percent of her clientele generally are female, some of whom are members of the Royal Canadian Mounted Police, military and other professions. She adds that KA-BAR’s Becker Knife & Tool line in 1095 carbon steel is far and away the most popular with the Mounties, who buy models from the Becker Necker at 56 Canadian dollars ($55) to the Campanion at 106 Canadian dollars ($104.20).
The owner of Canadian Knife Zone indicates many northern outdoor enthusiasts favor the traditional Grohmann hunter and the venerable D.H. Russell Canadian belt knife, at about 75 Canadian dollars ($73.73) each, both in C-70 carbon steel. The classic Opinel with its XC70 carbon steel blade and beechwood handle priced at 11 Canadian dollars ($10.80) is a perennial favorite of backpackers and others looking for a lightweight folder, Favreau adds.
Though the carbon-steel knives mentioned are affordable, she says price is a minor factor in the choices of Knife Zone’s customers. They are looking for proven performance and usually opt for non-coated blades.
Fans of 1095
Tom Melago of Chestnut Ridge Knives in Latrobe, Pennsylvania, says he sells many Ontario kukris and machetes in 1095 coated carbon steel, with the basic Model C 1-18 being the most popular machete. According to Melago, “Ontario’s Spec-Plus 2502 kukri is one of the most popular knives of any kind in my store. It’s favored 10-to-1 by my customers over other brands of kukri.” He adds this is due to the Ontario kukris’ reputation for quality and because they are made in America, which is a strong selling point. At his list prices of $29.99 for the machete and $53.99 for the kukri, these big boys appear to be a bargain.
Melago says though the choppers see considerable use as utility tools, most of his customers who buy big blades do so for survival packs and bug-out bags (BOBs). With Chestnut’s list prices in parentheses, Ontario’s RTAK II ($94.99) and RAT 7 ($87.99) in 1095 carbon steel also are finding their way into many Pennsylvania BOBs, as is ESEE’s entire line in 1095. From the Junglas ($155.99) to the ESEE 3 ($89.99) and ESEE 6 at ($116.99) to the tiny Izula ($49.95), Melago says all sell as fast as they can be ordered, and all have proven to be tough and easy to sharpen. (Again, all parenthetical list prices are Chestnut’s).
Like Favreau, Melago states price is not a factor in his customers’ choices. He says all of them express a willingness to pay more for models made in America, and most opt for non-coated blades.
Tougher Steel
At J.T. Knives in Port Jervis, New York, Joe Tarbell says the entire Ontario Spec Plus line of 1095 carbon steel knives continues to sell as well as always, which is very well indeed. Like his retail counterparts, Tarbell indicates even though the Spec Plus line is priced affordably from about $45 to $100, price has little to do with his customers’ knife-buying decisions. He says customers who request carbon-steel knives seem convinced carbon steel is tougher than any stainless. Some are older customers who have used carbon steel for years and are not interested in changing. Ease of sharpening and toughness are the deciding factors.
Tarbell says many of his customers are outdoorsmen and into survival skills. They prefer carbon steel for its traditional qualities and because “they get a better spark with a flint fire starter” on it. While they are concerned with rust, they also understand the simple steps they can take to avoid it (keeping the steel clean, a little oil, storing the knife in a dry place, etc.).
The J.T. headman states he has seen an increased demand for the Dustar Israeli combat knives, which use D2 tool steel. At a list price of $225, it is a relatively expensive factory knife, but he says buyers seem to appreciate the qualities of D2 and its solid construction. Tarbell adds his store also does well with anything from the Benchmade Bone Collector series, all in D2 blade steel as well.
Have Blades, Will Rust
The story on carbon-steel knives is very different at Troney Toler’s Knives Plus in Amarillo, Texas. Toler says he sells many traditional carbon-steel pocketknives and few fixed blades. His biggest seller by far is the Case model 161 yellow-handle trapper with blades of Case’s “chrome vanadium carbon steel”—which, according to a Case official, is 1095 carbon steel with added chromium and vanadium. According to Toler, he orders the knives 50 at a time and, at a list price of about $50 each, he often runs out of them.
In general, Knives Plus has two classes of customers. “The first,” Toler said, “is the grizzled old farmer or rancher who won’t have anything but a blade that ‘will rust.’” Such a customer has been using the knives for a half century and figures “if the blade won’t rust, the steel is no good.” Of course, the customer knows how to care for carbon steel, so maintenance is not an issue.
The other kind of customer will return a knife if a spot of rust shows up. “Those folks are better off with a Spyderco,” Toler notes. “Occasionally, I’ll see one of the old guys come in and buy a Spyderco, but that’s unusual.”
Boker, Queen and Eye Brand pocketknives in carbon steel are also good sellers for Toler, with such Queen models as the mini trapper with D2 blade steel a special favorite. He says D2 is “almost stainless” but not quite. About the only fixed blades Knives Plus does much business with is the ESEE 3-P in “well-tempered 1095.”
Even in today’s world of hi-tech alloys, the age-old carbon steel still earns its keep. Maybe it will continue to do so for another thousand years or so. Who’s to say it won’t?
For more on the latest knives, knife legislation, knifemaking instruction, knife trends, knifemakers, what knives to buy and where and much more, subscribe to BLADE® Magazine, the World’s No. 1 Knife Publication. For subscription information click on http://www.shopblade.com/product/blade-magazine-one-year-subscripti…?r+ssfb020412#BL1SU
New ABS Journeyman Smiths in San Antonio at the ABS Exposition
Congratulations to the new Journeyman Smiths in the American Bladesmith Society!
The following new Journeyman Smiths had their five presentation knives judged by the Judging Panel and were awarded their new rating at the 9th ABS Exposition in San Antonio, Texas on January 27th.

Alex Daniels, Josh Fisher, Zack Jonas, Bill Kirkes, Scott MacCaughtry, Scott McGhee, Michael Tyre, and Jonathan Wick

The Alamo
San Antonio, Texas (The Cradle of Texas Liberty)
Congratulations to all!
Schools of Sharper Learning
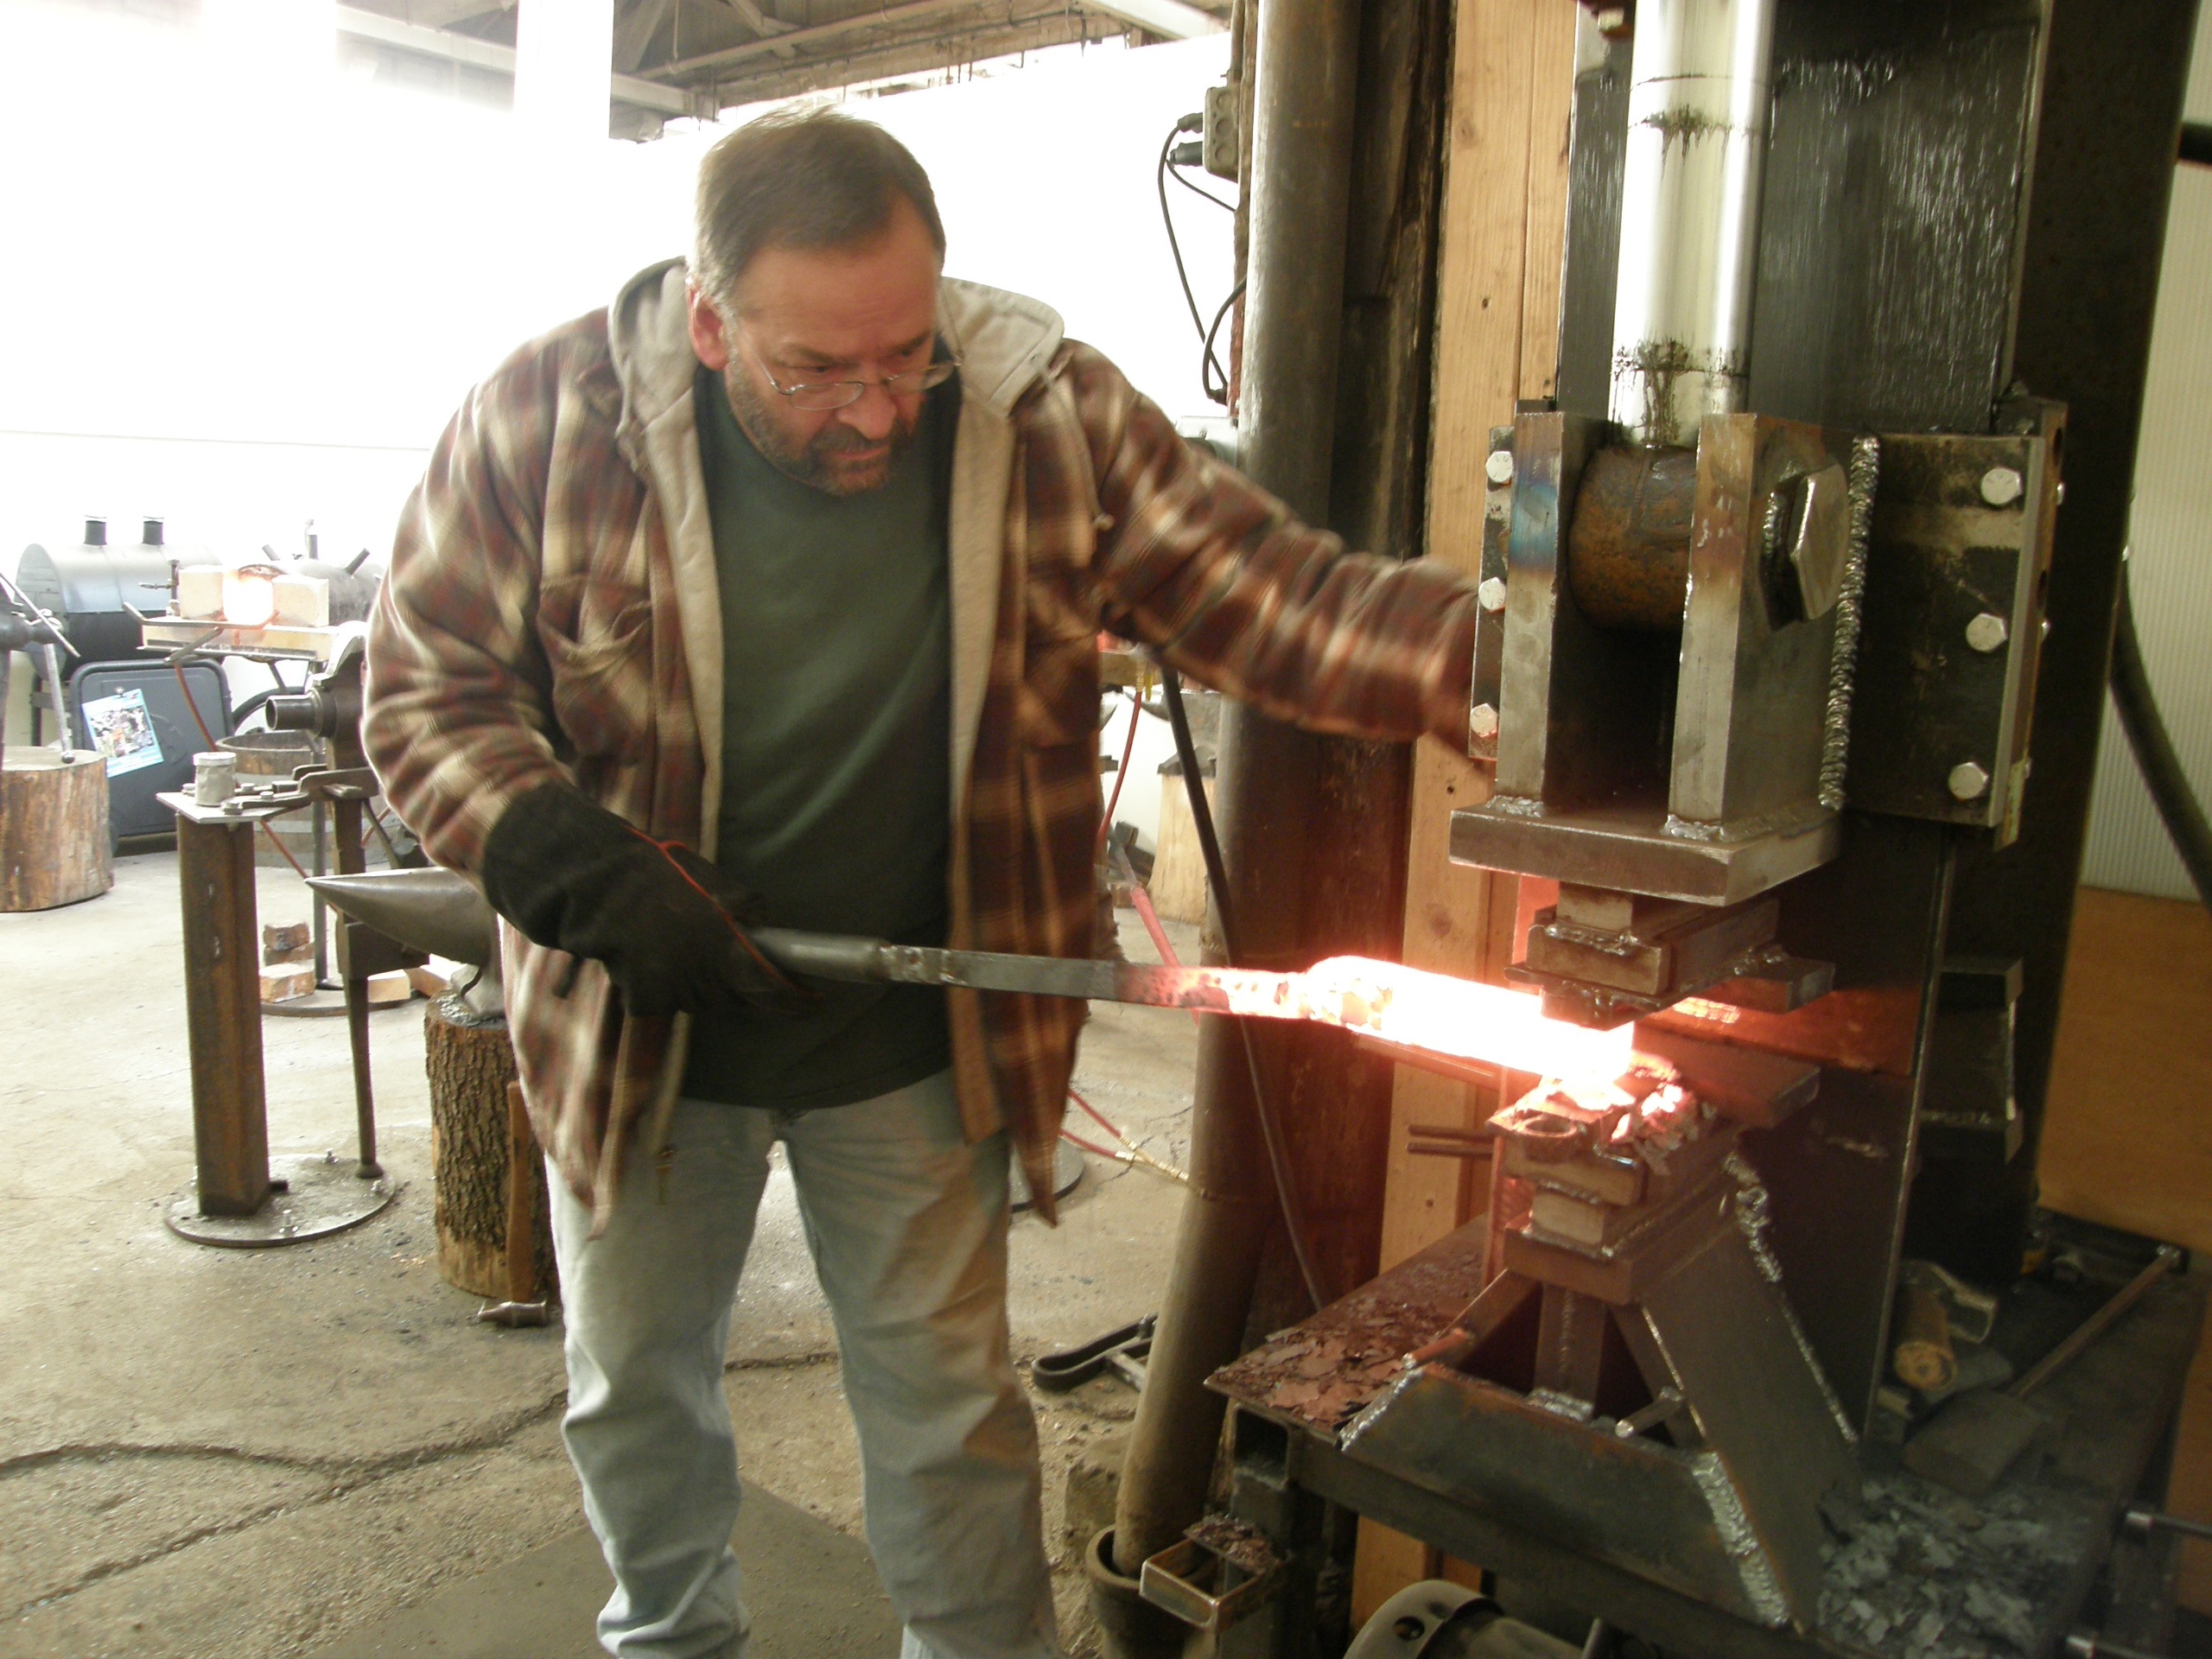 You can forge, grind, heat treat and finish a kukri at Dave Lisch’s Studio 4 Forging Facility in Seattle, Washington. (photo courtesy of Dave Lisch)
Talk to anyone in the know in the factory knife industry and he or she will tell you most of the hottest knife styles, materials, mechanisms and more seen on today’s production knives originated in the custom segment of the knife industry. In fact, with the growing amount of knifemaking learning centers and symposiums nationwide, an ever-increasing number of contemporary makers who set the trends in custom and factory knives are cutting their teeth in the schools of sharper learning. Consequently, no matter the hottest knife trends, chances are many of them come from the minds of those who teach and/or learn at today’s top knifemaking venues.
Those venues range from California to New England and many points in-between, and chances are one is near you. What’s more, each seems to offer something different, not only in subjects taught but in its overall philosophy and approach to knifemaking in general.
At the Branson Hammer-In & Knife Show in Branson, Missouri, knifemaker Gary Mulkey leaves the type of demonstration up to the demonstrator “so as to make it as enjoyable for all as possible. My goals in sponsoring this event are twofold: to provide a fun weekend for the knifemakers and to introduce new people to the world of custom knives.”
The Ashokan Seminar in Ashokan, New York, has been around as long or longer than any of them, started by the New England Bladesmith’s Guild in the early 1980s as a “non-sanctioned shadow organization.” “The sole purpose of the group is the education and improvement of the craft of knifemaking,” noted bladesmith and BLADE® contributor Tim Zowada. “With that goal in mind, the seminar is the only function of the group. There is no membership. There are no dues, nor newsletter. This lack of structure eliminates politics within the group. All the demonstrators and staff donate their time. This is a seminar covering all facets of knifemaking, taught by those with a strong desire to teach and share.”
BLADE field editor/ABS master smith Joe Szilaski’s approach at his Knife & Tomahawk Learning Center is tailored for each individual student. “My philosophy has been you will learn more if you work on the style of knife that interests you most,” he stated, “and as with most things in life, there is more than one way to skin a cat. A technique that works for one person may not work for another. I have almost 50 years experience in metalworking and am able to demonstrate several different techniques that will help the student find what method works best for him.”
Whether you want to make a knife from start to finish, focus on one or more specific techniques or knife patterns, forge steel, grind blades, inlay wire in knife handles, test knives to the brink of destruction or what have you, today’s learning centers have it. Meanwhile, some of them also conduct knife shows and auctions where you can buy and sell knives, equipment, materials and related items, and cutting competitions where you can watch the knives in action—all the while talking and trading ideas with top makers, the legends and the brightest young minds of knifemaking.
A number of the schools are located in picturesque and/or notable settings—the Moran School of Bladesmithing in historic Old Washington, Arkansas, the Batson Bladesmithing Symposium at the Tannehill Ironworks in McCalla, Alabama, and the Big Sky Country Conference near Glacier National Park in Frenchtown, Montana, to name but three—with lots of good food, local attractions, camping and/or comfortable accommodations, and good times to be had by all.
Things you should bring to each venue (if not already provided) include a notepad, pens/pencils and/or recording device, casual and work clothes, gloves, goggles, earplugs and a dust mask.
In alphabetical order, the centers of instruction are (please note in instances where dates and schedules have not been firmed up yet, past courses and instructors are listed to give you a taste of what to expect in the coming year):
Ashokan Seminar, New England Bladesmith’s Guild, Sept. 14-16, The Ashokan Seminar, Ashokan, New York
•Schedule varies (beginner to advanced level); past demonstrators include Phil Baldwin, Rick Barrett, Kevin Cashen, Delbert Ealy, Don Fogg, Rick Furrer, Jim Kelso, Dan Maragni, R.J. Martin, Jerry Rados, Jim Siska, Tim Zowada and others, all of whom donate their time “with a strong desire to teach and share”
•Casual clothing recommended; safety glasses required for demos; work clothes suggested for participating in open forge time
•Cost: $265 includes room and board (“The food is fabulous!”)
•Tim Neu (registration), Dept. BKG12, 511 Beaverkill Rd., Olivebridge, NY 12461 [email protected], or Tim Zowada (general questions) 231-348-5416 www.ashokanknifeseminar.com
Batson Bladesmithing Symposium, Knife Show, auction and cutting competition, spring, Tannehill Ironworks, McCalla, Alabama
•Past courses: Basic bladesmithing, damascus, handles and guards, folder construction, sheath making, scrimshaw and much more taught by Kevin Cashen, Wade Colter, Jim Crowell, Alex Daniels, Christoph Deringer, Rick Dunkerley, Ken Durham, Vince Evans, Jerry Fisk, Don Fogg, Rick Furrer, Wayne Goddard, Jay Hendrickson, B.R. Hughes, Joe Keeslar, Chris Marks, Charles Ochs, Mel Pardue, Al Pendray, Tim Potier, Steve Schwarzer, Devin Thomas and others; supplies, materials, knifemaking equipment and more
•Cost: Contact Jim Batson for more information
•Jim Batson, 256-971-6860 or 912-383-6776, [email protected]
Big Sky Country Conference, July 14-15, Josh Smith’s Knife Shop, Frenchtown, Montana
•Past instructors (mid-level to highly advanced classes; everyone welcome, especially collectors;): Harvey Dean, Rick Dunkerley, Larry Fuegen, Tim Hancock, Richard Rogers, Bill Ruple, Jurgen Steinau, Owen Wood, John Young and more
•Notepad and recording devices; everything else is available there
•Cost: $185 per person, $225 per couple; includes lunch and dinner Saturday; collectors encouraged to attend the Big Sky Country Knife Show Friday before the conference; the show includes 12 top makers specially selected to attend (contact Josh for an invitation)
•Josh Smith, 406-626-5775 [email protected], www.joshsmithknives.com
Branson Hammer-In & Knife Show and cutting competition, Sept. 29-30, The Shepherd of the Hills Farm, Branson, Missouri
•52-table knife show ($100 exhibitor table fee) runs concurrently with hammer-in both days; cutting competition on Saturday
•2011 demonstrators/courses (beginner to advanced level) included: Jim Crowell, bladesmithing hunters; Kyle Royer, bladesmithing bowies; Jerry Lairson, fitting guards; Brion Tomberlin, heat treating and ABS JS blade testing; Linda Ferguson, scrimshaw; Jason Burton, grinding a hunter blade; Bill Lyons, filework; and more
•Cost: Attendance free to the public
•Gary Mulkey, 417-348-0123, [email protected]
California Hammer-in (ABS), Oct. 19-21, College of the Sequoias, Visalia, California
•Past courses/instructors (everyone welcome): Basic forging, heat treating, grinding and finishing, and handles and guards to advanced forging of complex mosaic damascus patterns and folding knife construction; also, wire inlay, filework, sheathmaking, forge design and construction, the making of wootz and tamahagane, and more; instructors Bill Burke, Jon Christensen, Rick Dunkerley, Tom Ferry, Don Fogg, Joe Keeslar, Bob Kramer, Greg Neely, Michael Vagnino, Owen Wood and others
•Bring safety glasses, ear protection and long pants, and notepads pens/pencils
•Cost: $55
•Michael Vagnino, 559-827-7802, [email protected], americanbladesmith.com
Great Smoky Mountain Bladesmithing Symposium & Knife Show, March 9-11, Haywood Community College, Clyde, North Carolina
•Bill Wiggins, 828-226-2551, [email protected]
Guadalupe Forge Hammer-In & Knifemakers Rendezvous (includes a show-and-tell knife show), February and September, New Braunfels, Texas
•Past courses (everyone welcome): basic blade forging, advanced blade and damascus forging, mosaic damascus, grinding, handles and guards, mortise-tang construction, slip joints, locking liners, lockbacks, basic machining, surface grinders and pantograph mill, leather and metal sheaths, engraving basics, filework, choosing quality handle materials and more. Also Stout’s one-on-one basic, advanced and folder classes, and a tentative one on autos
•Basic tool-room attire
•Cost: $200 (noon meals included)
•Johnny Stout, 830-606-4067, [email protected] or Harvey Dean, 512-446-3111
Haywood Community College (ABS), February through December, Clyde, North Carolina; campus is a designated arboretum with many “natural” classrooms in the Appalachian Mountains of Western North Carolina
•2012 demonstrators/courses: Brute de Forge, Joe Keeslar; intro to bladesmithing (2 separate courses), Greg Neely (week 1) and Jim Batson (week 2), and Bill Wiggins (night classes); handles and guards, Jim Rodebaugh; damascus (2 separate courses), Tim Potier and Steve Dunn; and spring and fall hammer-ins
•Cost: Ranges from $65 (hammer-ins) up to $850 for each course
•Howard Tew, 828-627-4667, [email protected], www.americanbladesmith.com
Heartland Hammer-In, Oct. 6-7, Washburn Institute of Technology, Topeka, Kansas
•Steve Culver, 785-484-0146, [email protected]
Joseph Szilaski Knife & Tomahawk Learning Center, classes year round (mostly weekends) in Joe’s 4,400-square-foot shop
•Course schedule (everyone welcome; 6 students per class): blade forging, grinding (2 days; Jim Siska assisting); hawks (5 days); locking-liner folders (4 days); also, 2-day courses in bladesmithing, grinding, handles and guards (Siska assisting), carving ivory, steel and bone, engraving and inlay, and more
•Wear good shoes and long pants w/no cuffs or nylon; hearing and eye protection (though goggles, masks, gloves and ear plugs are provided)
•Cost: Most classes $200 per day (includes materials, supplies and meals)
•Joe and Lori Szilaski, Dept. BKG12, 52 Woods Dr., Pine Plains, NY 12567 518-398-0309, [email protected], www.szilaski.com
Mid-America Hammer-In, Aug. 24-26, Miami County Fairgrounds, Troy, Ohio
•Butch Sheely 419-832-5801 [email protected]
New England School of Metalwork (ABS), December 2011 through November 2012, Auburn, Maine
•Course schedule (contact Dereck Glaser for levels of expertise required): basic bladesmithing and American-style tanto, Nick Rossi; simple sheathmaking; basic damascus knifemaking, Christoph Deringer; intro to Japanese sword forging, Howard Clark; damascus, J.D. Smith; intro to bladesmithing (2 separate courses; each one includes dorm and kitchen use), Jim Crowell (1 week each) and instructor to be determined; handles and guards; Brute De Forge, Joe Keeslar; summer hammer-in; and more
•Cost: Ranges from $55 (hammer-in) up to $1,000 for each course
•Dereck Glaser, 207-777-3375, [email protected], www.newenglandschoolofmetalwork.com
Studio 4 Forging, dates to be announced, Seattle, Washington
•2012 demonstrators/courses: Mike Vagnino, lockback folders, 3 days; Jason Knight, kukri knife class, 3 days; David Lisch, shop rat knife, 1 day; David Lisch, in-depth damascus, 5 days; Tom Ferry, locking-liner folder class, 3 days; also, a wide range of bladesmithing classes throughout the year
•“Come get something hot and make something cool!”
•Cost: Ranges from $150 to $1,000 for each course
•David Lisch, [email protected], DavidLisch.com
Texarkana College Moran School of Bladesmithing (ABS), February through October, Washington, Arkansas (venue is a replica of a one-room school house and a stable/barn)
•2012 demonstrators/courses: intro to bladesmithing (4 separate courses) by Greg Neely and Dickie Robinson, Gordon Graham, Kevin Cashen and Mike Williams, and Jim Crowell and Tim Potier; handles and guards (4 separate courses) by Dan Petersen, Roger Massey, Mike Ruth Sr., and Joe Keeslar; damascus (2 separate courses), J.R. Cook and Steve Dunn; slip joints, Wes Davis; and spring and fall hammer-ins (both at Piney Woods; contact B.R. Hughes, 903-838-0134, [email protected])
•Cost: Ranges from $55 (hammer-ins) up to $850 for each course
•Debbie Bricker, 903-832-5565 ext. 3266, [email protected], www.americanbladesmith.com
Willow Bow Ranch Seminars, instruction offered pretty much year round, Riverton, Wyoming
•Courses (no experience necessary): Each student forges, heat treats and grinds a high-performance blade of 52100 or 5160 steel and tests it for cutting and toughness, with close to a week necessary to complete one blade; etching; advanced seminars on handles and guards and sheaths available on request; Ed Fowler and Chris Amos, instructors (both one-on-two and one-on-one instruction available when possible)
•Wear cotton shirts and pants; bring glove/gloves, shop apron if you use one, safety glasses, earplugs and your favorite hammer
•Cost: Contact Ed Fowler for more information
•Ed Fowler, 307-856-9815
Youth Hammer-In (ABS), June (dates to be announced), Smoky Mountain Knife Works, Sevierville, Tennessee
•Contact Houston Price, 865-397-0053, [email protected]
For more on the latest knives, knifemaking instruction, knife trends, knifemakers, what knives to buy and where and much more, subscribe to BLADE® Magazine, the World’s No. 1 Knife Publication. For subscription information click on http://www.shopblade.com/product/blade-magazine-one-year-subscription-us/?r+ssfb060112#BL1SU
Keys To The Best Elk Antler Handles
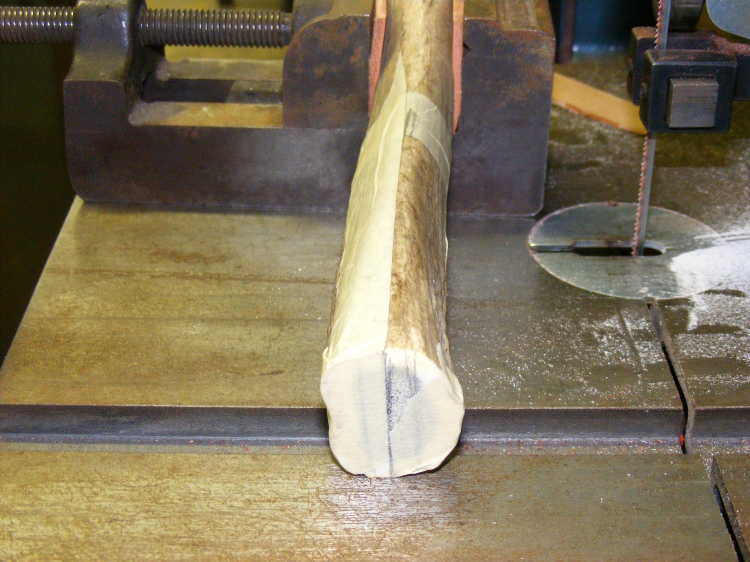 After cutting the antler section to size, cut it in half lengthwise to form slabs. Mark the centerline using masking tape along the antler’s top, bottom and ends. (photo courtesy of Joe Szilaski)
By Joe Szilaski, BLADE® field editor
1: I enjoyed reading and learned a lot from your story (page 52, July BLADE®) on using elk antler on hidden-tang knives. I have some nice elk antlers and would like to use them for the handle on a full-tang knife. You mentioned in your article that elk antler can be very porous in the center. What is the best way to go about cutting slabs from elk? (Johnny C., address n/a)
An elk rack is quite massive. Each time I hold one of these magnificent specimens, my mind wanders off to great childhood memories. I grew up in Hungary where elk were plentiful, and I was fortunate that my godfather was the forest ranger. One of his responsibilities was monitoring the elk herds, and I saw many majestic bull elks, especially during full rut season.
Elk antler can make an excellent handle for a full-tang knife. Before answering your question, I would like to tell BLADE readers what to look for when buying elk antlers for handles.
Try to buy a “seasoned” rack; otherwise, you will need to store it for a few years before use. You cannot be 100 percent sure it is a seasoned rack unless the seller knows and is honest about it. The only way to be sure is to cut into the antler and see if the core is sort of gooey or oily feeling. If so, this means the antler is still green and you should wait at least two to three years before using it. Using green antler is not a good idea because the shrinkage will be much greater. This is the case with most natural materials.
I look for an antler that feels heavy for its size. In other words, the heavier the antler, the more solid it should be. The heavier weight is a good indication the antler is less porous in the center and has a thicker outer wall. A lighter antler is usually more porous in the center and has a thinner outer wall.
Of course, the thinner wall does not mean you cannot use the antler for scales. You can but it takes a little more work. As I mentioned in the July BLADE, you must remove the porous section and fill the void with wood or other solid material.
When working with a more solid antler, by the time you grind your scales to the desired thickness and size, there will not be much porous section left to worry about—and that you can saturate with extra-thin Super Glue® in order to make it solid. Most likely you will need to repeat the application of glue a few times. Make sure the glue has completely dried before applying another coat.
As far as the best way to cut your antler, I can tell you what has worked for me. WARNING: Be safety conscious if you use tools such as a power saw.
Before cutting it, I study the rack from different angles and determine which sections would be more suitable for hidden-tang knives or as slabs for full-tang knives. I hold the different parts of the antler to find the sections that feel most comfortable in my hand. From there, I mark with masking tape where each cut will be.
After cutting the section to size, I cut it in half lengthwise to form slabs. I mark the centerline using masking tape along the top, bottom and ends of the antler (see photo above).
When positioning the antler into the vise, I use 10-ounce leather to line the vise jaws. The leather prevents damage to the antler and will result in a better grip because the soft leather will form to the antler’s irregular shape.
I use a small precision drill block to check the angle of the antler in the vise. The goal is to have the centerline positioned perfectly vertical for cutting.
Most of the time, I use a small wooden wedge to compensate for the irregularity of the antler and to help true up the centerline. If marked and cut correctly, the slabs should be similar in size and thickness, so not much effort will be required to grind or sand the scales flat.
If the antler is small, I may use a wide-faced, sheet-metal locking pliers instead of a machinist’s vise and slowly push the antler on the band-saw blade to cut lengthwise.
Only your imagination limits what you can make using elk antler. Dave Herman, my friend and ex-partner, made a knife and gave it to me as a present in 1989. It shows how creative you can be with elk antler. The handle is pieced together like a jigsaw puzzle. The top half is hidden-tang construction and the bottom half is slabs. I made a few sub-hilt fighters with similar “jigsaw handles.” It is a lot of fun but also a lot of fitting. As noted, you are limited only by your imagination—and maybe your patience.
Send your questions for Wayne Goddard or Joe Szilaski to BLADE, POB 789, Ooltewah, TN 37363-0789 [email protected]. Include a self-addressed, stamped envelope with your name and address for a personal response from Wayne, or e-mail him at [email protected]. To contact Joe by e-mail, his e-mail address is [email protected]. If you wish, BLADE will not print your name with your question.
Must Read Articles

Knifemaking 101 – Read This Before You Make a Knife
by Wayne Goddard
My experience has taught me that there's nothing like digging in and getting started. I've often said the hardest part of the...




