
Knifemaking

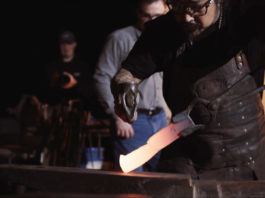
Knifemaking is the building of a knife, which includes the blade, handle and other accouterments. Blades are made by either removing metal from a steel blank via a grinder – known as stock removal – and the forging to shape of hot steel into a blade in the process known as bladesmithing. Other parts, including bolsters, guards, pommels, etc., are needed to complete the finished knife.

Featured Knives – – Knife Collecting – – Tactical Knives – – Survival Knives

The Best Knife Handle-to-Blade Ratio

0

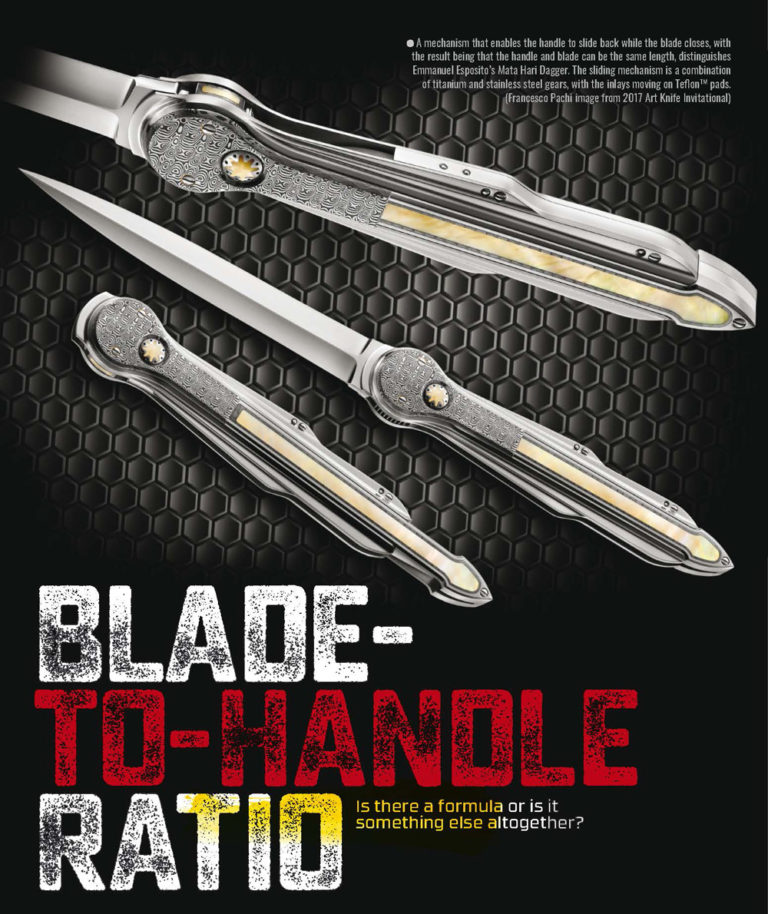
It’s the critical cooperation of handle and blade that makes the knife perform. One supplies the cutting edge, while the other allows you to exert control. So, then, the age-old question follows in finding the right ratio of length for each in a knife of proper construction.

In many cases, the experienced knifemaker follows his gut feeling to achieve the best knife handle-to-blade ratio, his understanding of just what it takes. Instinctively, the design brings balance and function to the piece.

Certainly, the process would be simpler if a formula existed to guide the maker in the optimal handle-to-blade ratio. However, according to those consulted for this story, there is no such formula.

The best knife handle-to-blade ratio, they reason, is driven by intended use.

Use, Not Size
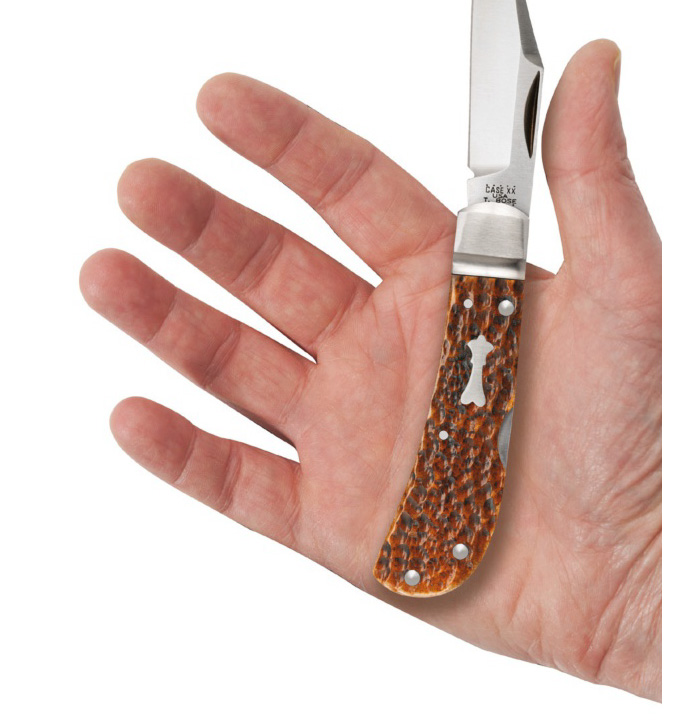
Best knife handle size
It’s hard to establish the best knife handle size because no two hands are the same.

“I base the ratio on use, not size,” explained knifemaker and BLADE® field editor Abe Elias. “For instance, when you look at the knife you carry every day, you’re not usually out there skinning animals or felling trees. You’re cutting open boxes and packages, snipping string or tape, and—if you trust the cleanliness of the blade—cutting a piece from a block of cheese or peeling an apple. In the end, everything is based on what you do with the knife.

“So when you look at all that, everyday use versus bushcraft or camp use, then you might say to yourself that you don’t need a lot of handle for torque or control if you’re cutting a piece of tape or your Amazon box open. If the blade is small, you don’t necessarily have to put a small handle on it; but, if the job doesn’t require a good, full grip, I’ll shorten the handle to make it easier to carry in an urban environment to do non-strenuous jobs.

“Bushcraft requires that you do strenuous stuff related to torque, and with carving or craft ing or skinning an animal,” Abe concluded. “Therefore, the handle must be full size to provide the ability to control the blade and put enough force behind it. Small jobs need control but not always a lot of force.”
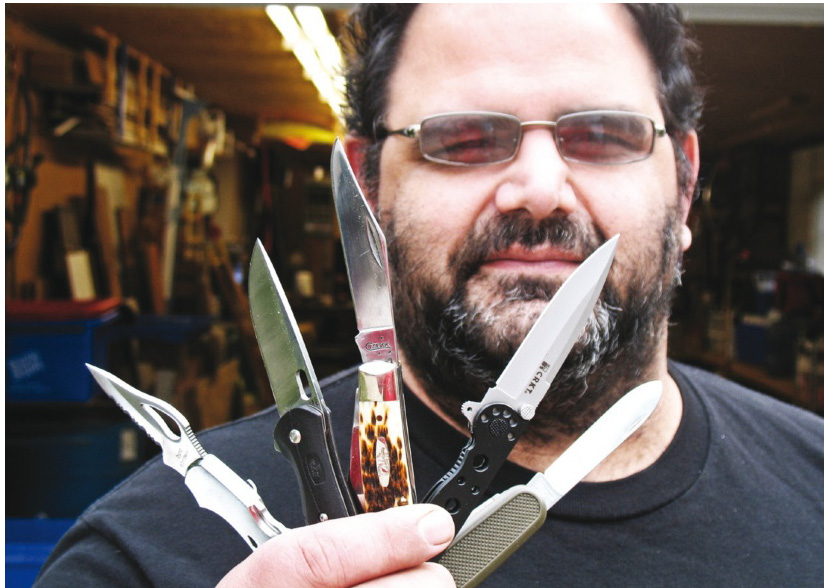
Best knife handles
Instead of the knife’s size, knifemaker/BLADE® field editor Abe Elias bases handle-to-blade ratio on its use.

What Pleases the Eye

Don Hanson, making knives for three decades with the Sunfish Forge mark, has no exact, best knife handle-to-blade ratio formula, and he readily asserts that any standard such as a “handle length an inch longer than the blade” falls apart pretty quickly.
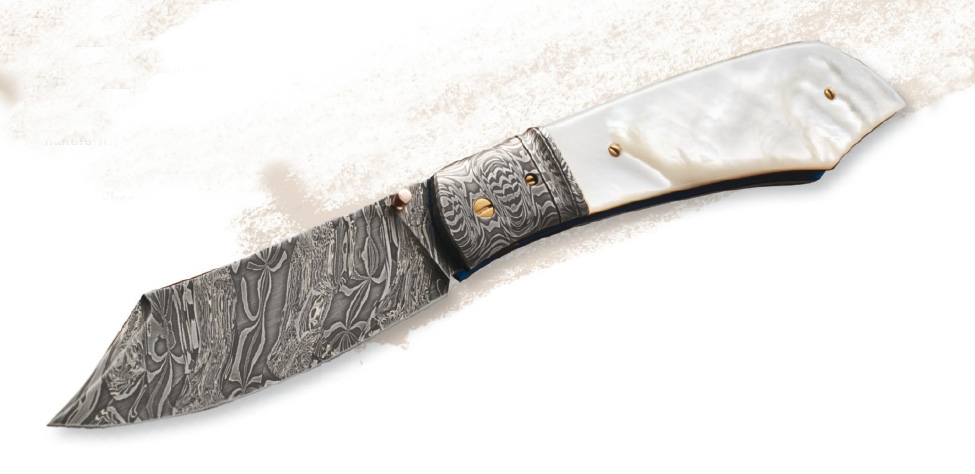
Ratio best knife handles
Don Hanson said he does not have a formula for the blade-to-handle ratio. “I just do what looks good to my eye,” he noted. “With folders I make the blade as large as possible to still be able to fit inside the
handle when closed.” (SharpByCoop image)

“I don’t have a formula for the ratio,” he commented. “I just do what looks good to my eye. With folders I make the blade as large as possible to still be able to fit inside the handle when closed. I don’t think making the handle an inch longer than the blade on a fixed blade is accurate. That would not work for bowies or fighters, where blades are typically seven to 12 inches. On these the handles are usually 5 inches.

Now, it could be true for a hunting knife if it has a 3.5-inch blade. A 4.5-inch handle would be perfect for that hunter.”

The Golden Mean

Hanson allows that the mathematical “Golden Mean” ratio may be helpful, though he does not specifically use it in his work. Without launching into a prolonged Algebra lesson, two quantities are in the Golden Mean if their ratio is the same as the ratio of their sum to the larger of the two quantities. Dust off that old high school math book for the actual formula and a clearer definition.

“Handle-to-blade ratio is function first,” Hanson added, “but in this time of images on the internet and magazines, the visual aspect is very important. Sometimes we see a knife that looks pretty good but just doesn’t seem right—and it’s not apparent why. In most cases the handle-to-blade ratio is off.

“The Golden Mean ratio is a good way to get handle-to-blade ratio right. I don’t use it, but most knives that look right will fall within the parameters of that ratio. Still, there is no rule or ratio in folding knives. The handle is always longer than the blade.

“A folder just looks bad when the blade is too small. I just design knives that function well and look good. I rarely measure anything or use any rules. The knife has to look good to get someone to pick it up. Then, if it feels good in the hand you have a winner.”
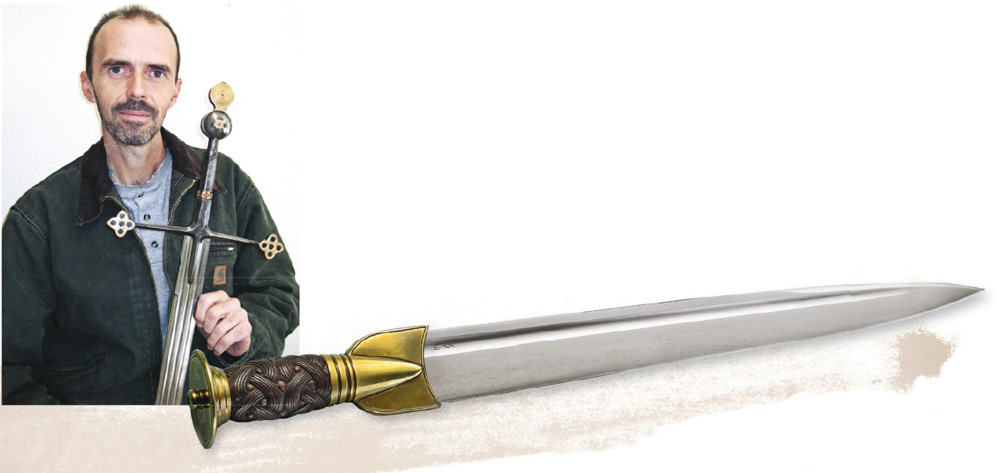
Best knife handle to blade ratio for knives
The old adage that the handle should be about 1 inch longer than the blade doesn’t work with large knives. “In period pieces such as an 18th century Scottish dirk, the grip was typically in the 4-to-5-inch range despite a blade length that could be up to 16 inches,” Vince Evans (inset) noted. His Scottish dirk repro was the cover for the March 2020 BLADE®.

Function, Comfort, Looks

According to Vince Evans, a full-time maker since 1981, some handles do require a certain length or shape depending on function, and some hunters prefer a small grip that is completely in the hand to avoid getting in the way when field dressing an animal.

“Personal preference probably plays a big part in that idea,” Vince said. “In period pieces such as an 18th century Scottish dirk, the grip was typically in the 4-to-5-inch range despite a blade length that could be up to 16 inches. Knives of the past tended to have more similar grips than modern ones.

“People carried a knife all the time for various purposes, so I would think that the ratio worked out naturally over time, and I would imagine that overall weight had a lot to do with the size.”

“Aesthetically, if you have a blade that is too big for the handle, it can become wonky,” Joe Flowers, a knife designer for Condor Tool & Knife, reasoned. “If you don’t balance the blade with the handle on a fixed blade, it can become messy. The human eye picks up on imbalance, so, if you have a short blade and a long handle, you’d better have a good reason.

“For fixed-blade bushcraft knives the most popular example is a 4-inch blade with a 4.5-inch handle, with a point down the center line. As a designer, especially recently, I’ve tried to jump out of the ‘rule’ rut that I’ve made more or less for myself.”
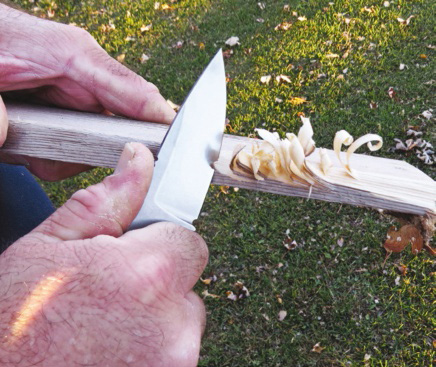
Best knife handle sizes
The White River Knife & Tool M1 Backpacker makes nice, tight curls. “Bushcraft requires that you do strenuous stuff related to torque and with carving or crafting or skinning an animal,” Abe Elias observed. “Therefore, the handle must be full size to provide the ability to control the blade and put enough force behind it. Small jobs need control but not always a lot of force.” (Abe Elias image)

Ergonomics are an integral component of the best knife blade-to-handle ratio, and the user surely appreciates that balance in the field.

“I’ve done a lot of research on human hands/tool use ergonomics,” Flowers offered. “More ergonomic knives have less geometry in their handle design for long-term use. Sometimes these handles don’t look very special, but after the third hour of whittling a kuksa [a Scandinavian drinking cup carved from birch burl] or an axe handle, you will appreciate them.”

Flowers adds that torque and dexterity dictate handle length in relation to a knife blade. In other words, if more force must be applied, then more surface area in the right points of contact with the hand allow the user to apply that torque.

“If it’s something like a neck knife,” he interjected, “you probably aren’t going to be applying that much torque, and are using it more for miniscule tasks such as cutting line rather than chopping down a tree. The handle length can sometimes dictate what the blade is capable of doing. An axe with a 3-inch handle would work differently than one with a 23-inch handle.”

The perfect combination of handle and blade is ultimately put to the test with intended use. In the absence of a formula, the true judgment may be found in the fatigue or the number of blisters on the palm when the job is completed.

Overthinking Handles?

Years ago, a well-known knifemaker offered Elias some advice.

“He said two things,” Abe smiled. “‘You’re spending too much time on your handles. You’ll never get your money back for it. And your handles are too long. They should be the bare minimum.’ Now, my whole thing is that the knife is only as good as your ability to control it.

“I will ask a customer what size their hand is. I’ll ask them to go to a store and find a pair of metric-sized gloves that fit and give me the number. That way I know the dimensions of their hand and can work from that accordingly.

“Still, it would be good to say that there is some kind of ratio that always applies, but like I’ve said, I don’t have a mathematical formula—I have a use formula.”

The best knife handle-to-blade ratio is, after all, the product of evolution, experience and the trained eye. Placing these elements in perspective produces the balance and control necessary for the knife to function as it should, while also making a pleasing presentation from a visual standpoint.
Midweek Maker Military-Style: Allan Reid

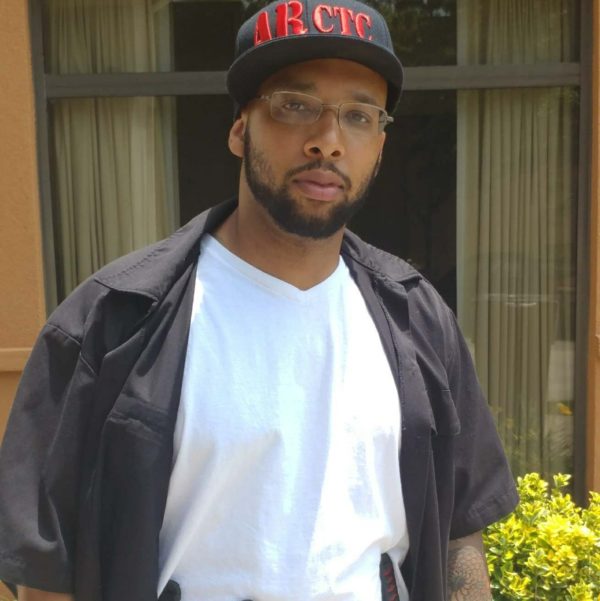
Allan Reid is the talent behind ARctc Knives.
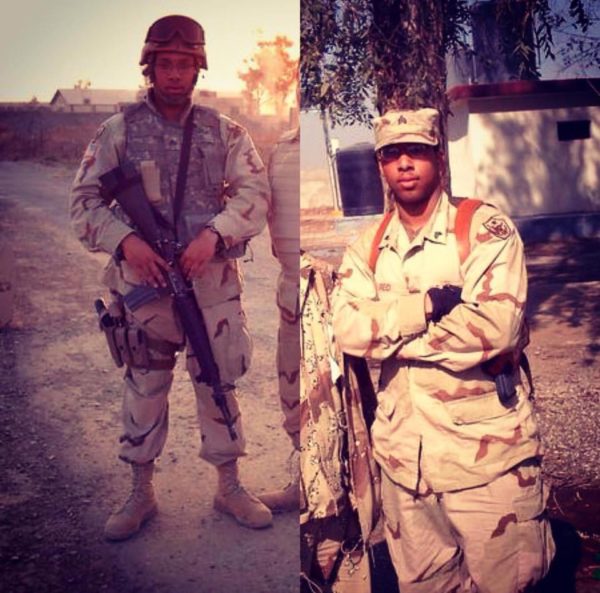
Allan Reid of Allan Reid Cut Throat Custom Knives is a part-time knifemaker who is a nurse by trade. He served in the U.S. Army. as a combat medic, obtaining the rank of sergeant.

Allan Reid of ARctc Knives, which stands for Allan Reid of Cut Throat Custom Knives, is a part-time maker who currently works as a nurse. He served for six years as a U.S. Army combat medic, achieving the rank of sergeant. In 2005-2006 he deployed on Operation Iraqi Freedom. Most recently, he earned his registered nursing credentials.

Allan Reid of ARctc Knives served in the U.S. Army as a combat medic.
Allan Reid of ARctc Knives parlayed his combat medic training into a nursing career. He has completed his schooling and is awaiting his state board certification.

Allan has been fascinated with blades and martial arts since childhood. “I was exposed to several custom knives while on deployment, which spurred my interest in knifemaking,” he noted. He learned about stock-removal methods by reading and asking questions on knife forums. He is now learning to forge blades under the mentorship of close friends James Helm and Tobin Nieto.

Allan is the father of four with another on the way. He and his family live in San Antonio, Texas.

  • Best-selling knife patterns: tactical, utility and bushcraft; Alpha-1, Nessmuk and Mini-muk models
  • Favorite blade steels: high-carbon and tool for edge retention; 1084 for ease of heat-treat and durability. “I also utilize 5160 spring steel for my larger blades, and often incorporate O1 and 1095.”
  • Blade grinds: full flat or saber
  • How he tests his knives: If Allan knows the intended use, those mediums will be cut, however, almost all of his blades are tested on 2-by-4s.
  • Favorite handle materials: G10 and Micarta for toughness, durability, color selection and low maintenance
  • Price range: $145-$400
  • Knife shows he attends: Texas shows, BLADE Show 2018
  • Forums he participates in: BladeForums.com when time allows
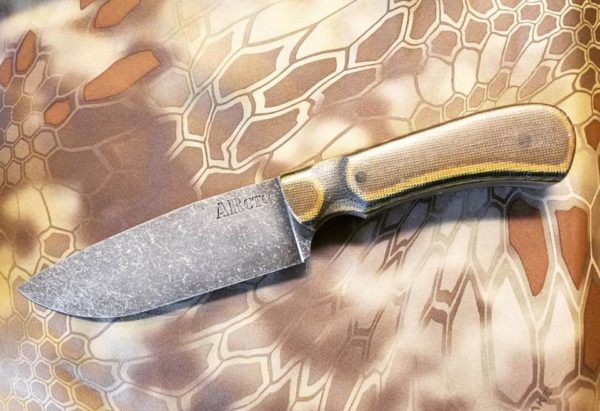
The Alpha-1 is just one of many knife designs offered by ARctc Knives.
As a former soldier, knifemaker Allan Reid of ARctc Knives is a fan of easy-to-maintain and cost-effective handle materials.

The Alpha-1 above has a 5-inch blade made out of 1084 steel with a full flat grind and acid stonewashed finish. The scales are Camo Micarta fitted with Black Micarta pins. Overall length is 9 ¼ inches. Maker’s list price: $165.

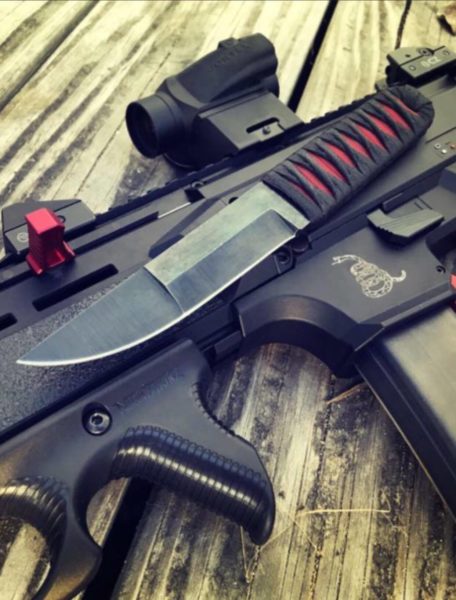
Allan Reid tried out a kwaiken design on his latest edged creation.
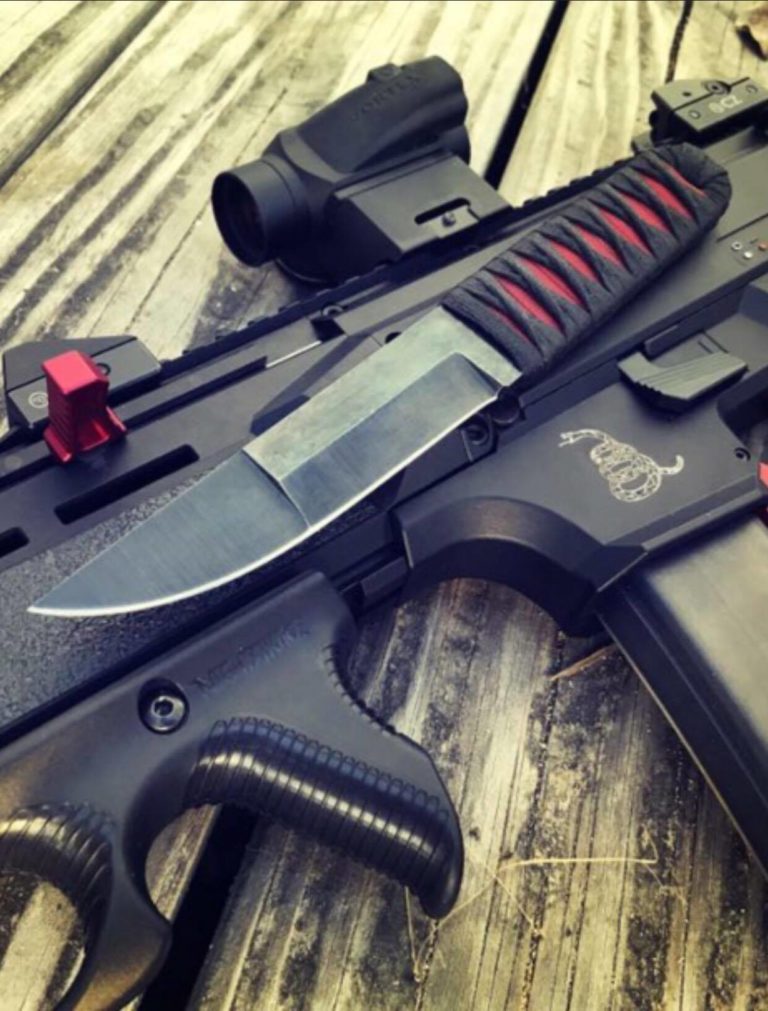
The ARctc Knives kwaiken-design knife has a 4.5-inch combination-ground blade made out of O1 tool steel. It’s 9 inches overall. The handle features an epoxy-sealed red paracord base under a black Japanese lace wrap. Maker’s list price: $180 with Kydex sheath and belt attachment.

Contact Allan Reid at [email protected], on Facebook at Allan Reid and on Instagram @arctc_knives.

Dagger Design: Fundamentals Of Dagger Construction

From maintaining symmetry to adding fullers, we break down the intricate process of making a dagger design into a physical knife.

A dagger is not a kitchen knife in disguise. It is a purpose-built instrument of thrust and that purpose demands precision at every stage of construction. Small errors that might pass unnoticed in a hunter or utility knife compound on the exacting canvas of the dagger. A centerline that begins drifting by a fraction at the ricasso becomes an off-center tip, an uncentered bevel a blade that twists, the result a thrust off target. The difference between success and failure is geometry, and nowhere does geometry matter more than in the making of a dagger.

The process begins with detailed design and planning. The execution begins with precise layout. The central axis is the spine on which the whole piece will rest, and without it symmetry is impossible—the whole blade will stand or fall on getting this right. There are some tricks that will help ensure success.

Dagger Half Template

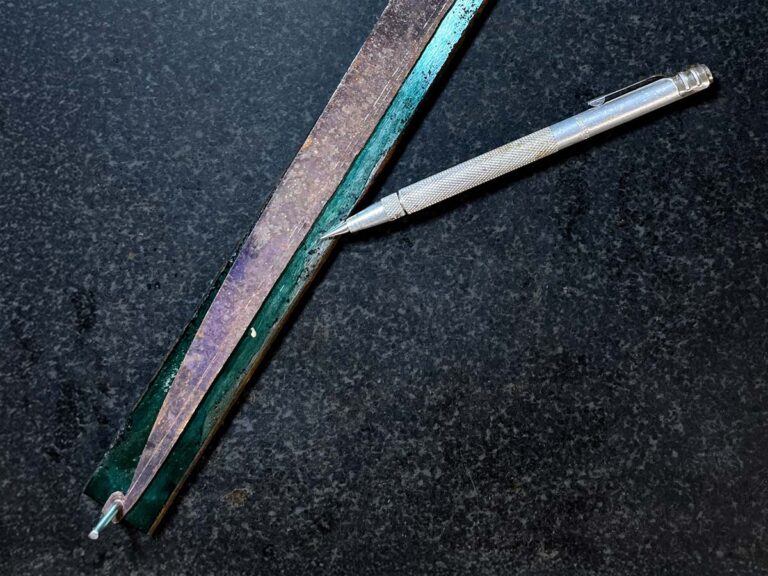
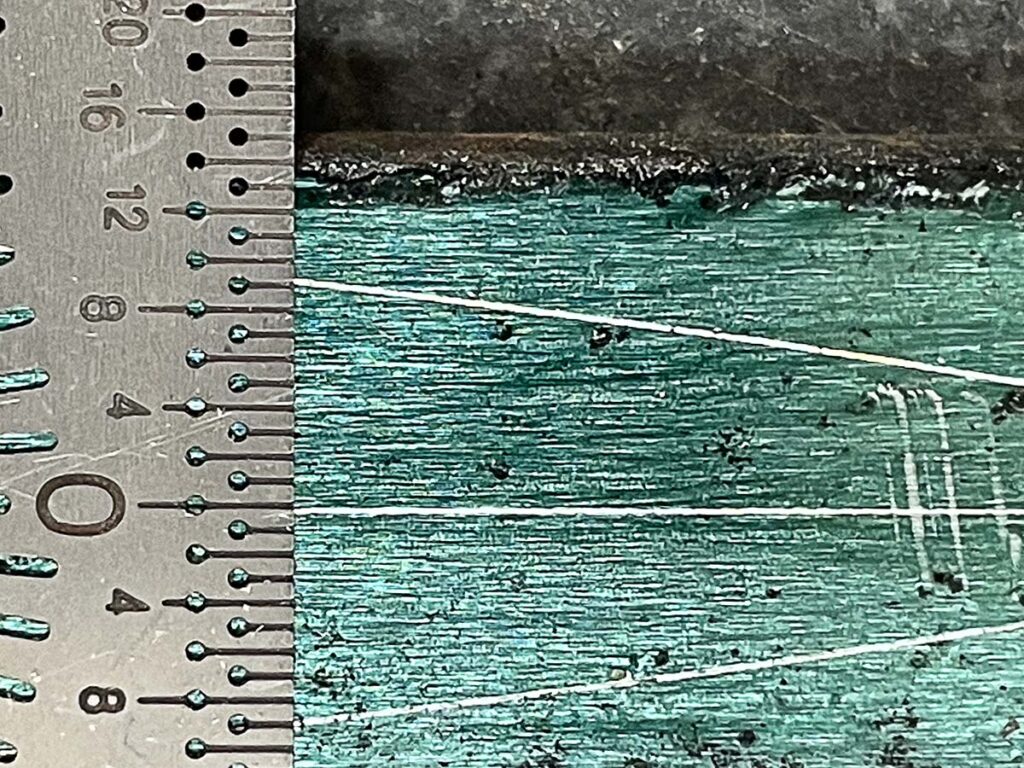
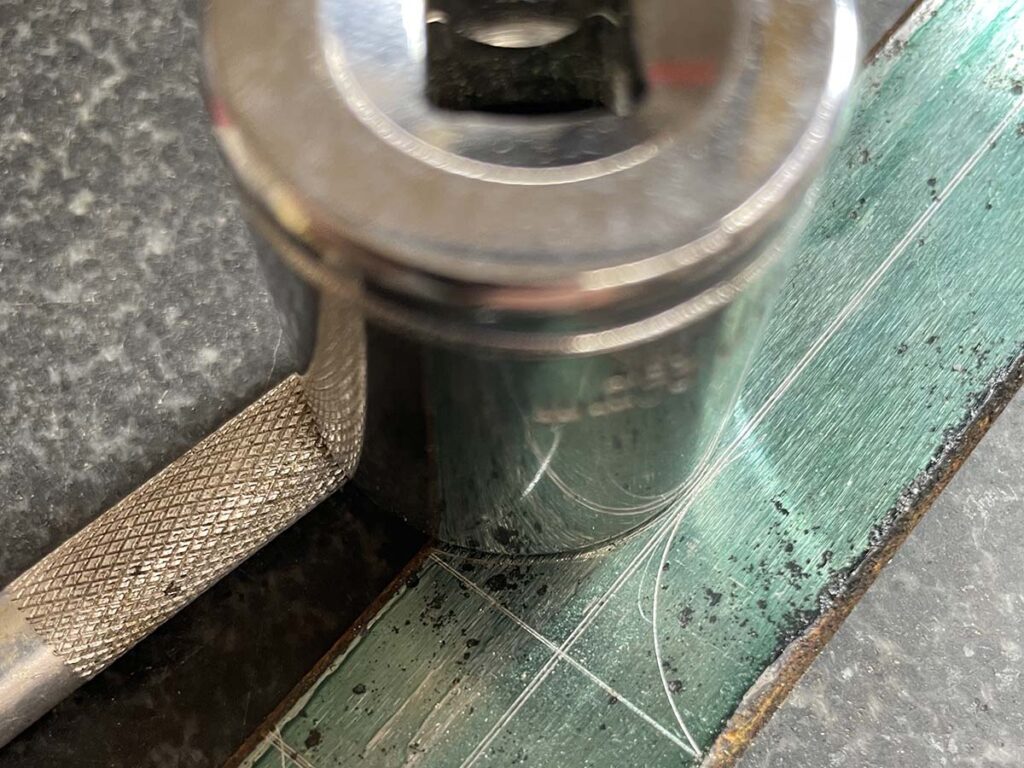
The Line That Rules Them All. A cleanly scribed centerline on both edge and flats sets the maker up for successful layout. A centering ruler can be a useful tool to check this.

Once you have determined the blade profile, preferably in some physical form like a drawing, make a template so it can be accurately transferred to steel. Here’s the thing, though: you only need half. A template representing only half of the blade profile will allow you to use it for each edge, ensuring perfect symmetry. Include the tang on your profile, not just the blade.

If you’re careful, your half template can be held on your blade stock aligned on a scribed center line and scribed on each side. If you’re less careful, oversize your blade stock and template so you can drill holes for alignment pins in the end of each that is outside the final profile. Using these holes to align the half template for marking each edge is the most precise way to lay out a symmetrical profile. If the stock is oversized, you’ll grind off the alignment holes when grinding the profile.

Planning Plunge Lines

Once you’ve accurately laid the profile out on the blade stock, take the time to scribe in the planned plunge lines on the blade flats and the edge. Sweeping, curved plunges are more visually appealing and careful layout will help ensure that your vision becomes reality. These lines are not decorative. They are the stops, targets if you will, that prevent the grind from slowly creeping toward the ricasso with each grinding pass.

Grinding the Plunges. Gradual, sweeping plunges are much more appealing to the eye than straight ones. Draw them in and grind to the drawing. This is more easily done on a wheel than with a flat platen but can be accomplished either way.

When it comes to grinding these sweeping plunges, hollow grinding on a wheel is easier than flat grinding on a platen—it’s easier to grind a curve with a curve—but by all means use a flat platen if that’s what you have. If you’re already grinding on a wheel, a 1-inch-wide wheel with a 1-inch belt will be an easier path to success than the standard 2-inch wheel and belt.

Sweeping plunges also will result in a thicker edge toward the ricasso. This is fine—you shouldn’t try to sharpen this part as doing so most likely will ruin all your careful design work. Will the unsharpened part of the edge impair the stabbing function? Perhaps, but only a little. Though it pains a serious knife person to admit it, most handmade modern daggers are for show. In most societies stabbing others is frowned on, and if you’re going to all this effort, choosing to focus on aesthetics is a good bet. However, if your dagger will be deployed in combat, ignore the aesthetics, grind sharper plunges and take the edge all the way to the ricasso.

Dagger Grinding And Stock Removal

Grinding and stock removal are the way to go for daggers. This is admittedly a hot take but in a game where winning is determined by symmetry, forging introduces unnecessary variables and distorts the base stock, making accurate layout more complicated—not impossible, just not as easy. There is little to gain by forging unless the steel itself or the situation requires it, or if you simply like doing it that way. If you want a damascus pattern to taper toward the tip, or if you’re making a dagger for American Bladesmith Society testing, by all means forge. It’s an impressive skill set. If you want to make the best dagger possible with an eye toward efficiency, and thereby your profit margins, grind it. Stock removal is the more predictable path, and predictability is the soul of symmetry. Every forged blade is a stock removal blade before it’s completed; don’t get hung up on this unless you have reason to.

Delicacy Of The Dagger Tip

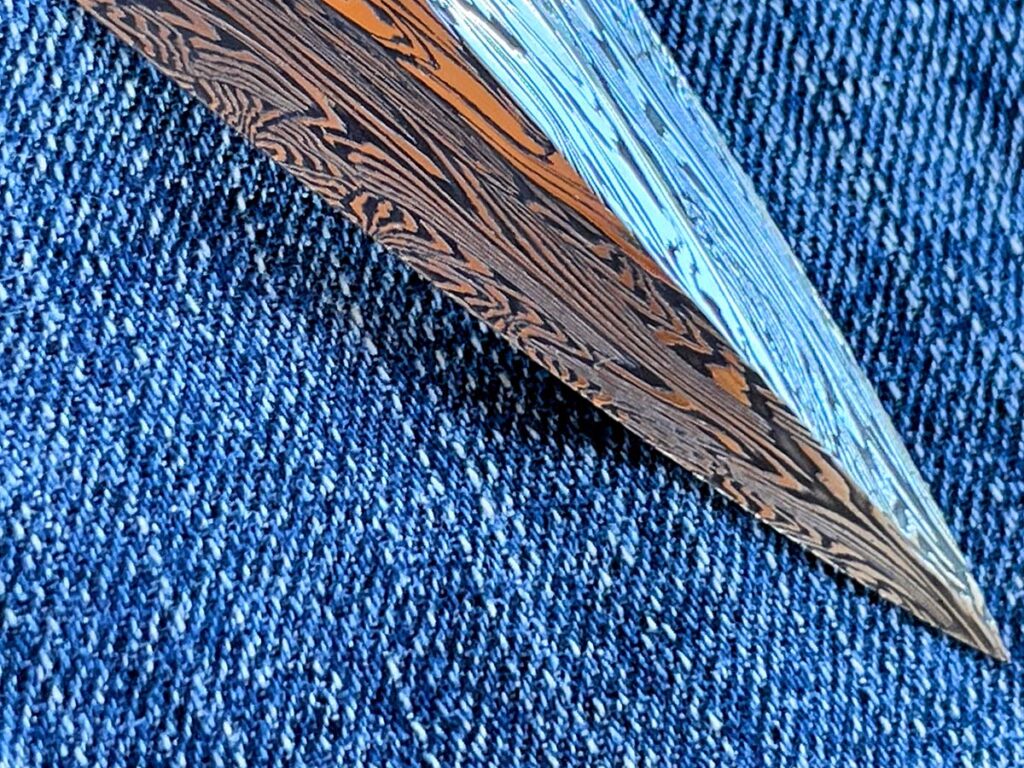
Forged for Continuity. An intricately patterned damascus dagger by Gregory Verizhnikov shows why sometimes forging is worth it—forging through the tip preserves the pattern’s flow.

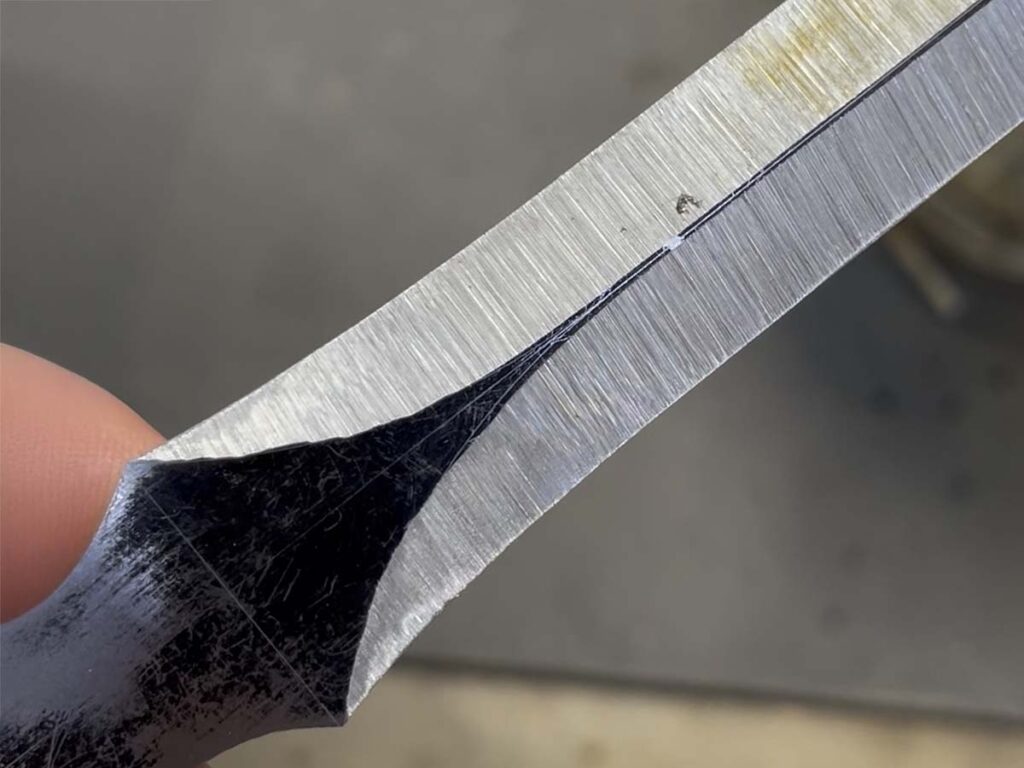
Where the mass of the ricasso anchors the entire weapon and provides strength at the critical juncture of guard and tang, the tip, by contrast, demands delicacy. Once your profile is carefully ground to shape and you turn to grinding the bevels, grind the tip first. More specifically, grind it at a steeper angle than you plan for the main bevels, and try not to cross the centerline even at that obtuse degree, except at the very end. After that, leave it alone.

Grind the main bevels like you normally would, paying perhaps more attention than usual to your scribed lines, and try to avoid that last inch toward the tip until everything else is pretty much done. This seems a bit odd at first, but consider that the final inch must maintain its thickness in order to be strong enough to pierce effectively without deformation or fracture. If you do it right, you’ll end up with a bevel at the transition. Some makers polish the transition so it remains crisp, while others blend it smooth while polishing. Either way, it should be deliberate. Neglect this and the point will be too thin.

When To Add Fullers

Lay Out Everything. Scribe curved plunge lines on the flats and edge mark exactly where each bevel begins and ends.

Fullers, if they are to be included, should be cut early while the blank still has parallel flats. Attempting them later invites misalignment, or at the least inserts a potentially unnecessary level of difficulty. Better machinists than this writer/dagger enthusiast will likely have little difficulty either way, but life has enough complications of its own without inviting them into play.

Dagger Balance

Balance matters as much as steel. A well-made dagger should balance at or just ahead of the guard, a neutral point where the hand feels neither burdened nor abandoned. This can be tested with nothing more elaborate than a rod beneath the mostly assembled knife, shifting it until it rests level. It’s really just as easy to adjust weight distribution by feel, removing or adding weight to the component parts until it feels right. Don’t forget to consider the added weight of your epoxy. When balance is right, the blade becomes an extension of the wrist, alive and responsive.

Tang & Spacers

How Not to Do It. This dagger blade poorly ground by the author clearly demonstrates that the easy way out usually leads back in. Off-center bevels and an off-center tip are predictable results of poor initial layout.

Even the tang deserves forethought. When profiling the blade blank, leaving the tang longer than necessary provides room for correction and fitting, and a threaded end can serve as both a work-holding aid during construction and a permanent anchor if a pommel or nut will close the assembly.

Spacers, fitted between guard and handle and again between handle and pommel, make alignment easier and allow pins to register each component precisely during glue-up. They’re also relatively easy targets for weight adjustment when working on overall balance. These details are seldom glamorous but are what let the final assembly come together without struggle.

Embellishments

What results from this attention is not decoration but readiness. The embellishments will come later… the fluted handles and twisted wires and all the flourishes that mark the master’s hand. But none of that matters if the design is poor, the execution haphazard, the details unconsidered.

More On Daggers:

Allure Of The Subhilt

1

The Subhilt Provides An Additional Element To Make A Knife One Of A Kind. These Makers Show What A Subhilt Can Be.

The subhilt adds a little extra. Its form is expressive and its function is useful. It takes its share of the spotlight and provides another avenue of artistic approach for custom knifemakers who choose to build it.

A few of the makers who accept the challenge of the subhilt put their finest work forward. They use bold, sleek lines, and high-quality materials to bring the best of the subhilt to the market, and the combination of aesthetic and utility blends in a delightful presentation.

Subhilts In Italy

Daniele Ibba was already a goldsmith and “transferred” his skills in that pursuit to making knives. He describes himself as an “autodidact,” a self-taught subhilt maker.

Residing in a small town near Milan, Italy, Daniele Ibba has been making knives since 2004. He finds the subhilt a perfect approach to both usefulness and beauty as evidenced by his integral Medusa Gorgona. 

“Although the knife has a clear artistic connotation, it was developed as a not-artistic knife,” he explained, “and the purpose of this subhilt is to have a stable grip, especially in the lunge, and consequently the possibility to hit the target/threat harder.”

Grip options are plentiful, and Daniele calls his subhilt pleasant to handle in any position, with the best control in the standard or reverse grips. The subhilt allows the user to always know where the blade and edge are located, and offers more protection to the hand.

In the Medusa Gorgona, Ibba collaborated with Lana Gorska and took home best in show from the September 2021 SICAC Knife Show in Paris. 

“We are very proud of this,” he smiled, “because in every international show the competition is always very high and winning such a prize is never easy.”

The Medusa Gorgona is made from a single piece of 440C stainless steel hardened to a Rockwell hardness of 58-59 HRC, and is embellished with 13 mother-of-pearl inlays—four on the front of the handle, eight in the spine and one in the pommel. It also has 20 green diamonds, eight yellow diamonds, two blue diamonds, and three rubies—one round cut and two marquis cut. The fine engraving was done by Italian master Roberto Bruci.

“Lana and I had done many models in Plastiline® [a high-precision modeling clay] searching for the best ergonomic shape,” Daniele related. “Being a subhilt, it was not simple to reconcile design and easy handling. I do not have a [pantograph] or automated machinery, so it was very difficult to realize the handle and the slots for the mother-of-pearl inlays, but with time and patience I was able to achieve a beautiful result. Before designing the knife, Lana and I decided to engrave the mother-of-pearl with the mythological theme of Medusa.

“The story tells that she was one of the three sisters called the ‘Gorgoni,’ daughters of the Gods Forco and Ceto, and they had the power to petrify anyone with their gaze. So, we decided to make the name of the knife with the theme of the engraving, and Gorgona is like a nickname.”

An exquisite award-winning showpiece, the Medusa Gorgona stands out. Ibba’s price for a similar integral presentation without diamonds and extensive engraving would be roughly $13,000.

Marc Aldrich 

Marc Aldrich mirror polished the undersides of the 416 stainless steel quillons of the subhilt on his bowie in a blade of 80CrV2 carbon steel and a handle of artificial ivory. Blade and overall lengths: 10 7/8 and 16 1 /8 inches. (Photo: SharpByCoop)

ABS apprentice smith Marc Aldrich has been making knives since 2013 after taking a couple of courses from ABS master smith/BLADE® field editor Joe Szilaski. Marc admires the work of Dave Loukides, Sam Lurquin, and Jan Hafinec which gave life to his ideas for a subhilt bowie with dazzling results. 

His featured piece includes a blade of 80CrV2 carbon steel finished to a grit of 1500, a stainless subhilt with copper spacers, and a handle of artificial ivory accented with a copper pin. Marc made the sheath of hand-stitched leather with a quilted and copper-studded front panel, copper-studded frog and pigskin lining. A trace of a hamon is visible on the blade, and he explained that he chose not to etch the line but appreciates the discerning eye that catches sight of such detail.

“Of course, a subhilt adds retention and looks cool,” he offered, “but it helps if it is placed and shaped well. If we think of a knife as a sculptural object, the subhilt is another compositional, visual and tactile element we can use to add interest and function. I think my subhilt bowie is a mix between a bowie and fighter. Although not having a sharp swedge, the slender blade profile, added retention of the subhilt and excellent balance would make it formidable. The blade finish is actually bright and nearly mirror.”

Marc says his goal with every knife is to distill the lines down to their “pure essence.” His formula is “lines, flow, proportion and a tasteful balance of detail backed up with quality workmanship.”

The subhilt, he added, is an interesting subset of the bowie genre that is also seen in other knife styles. However, in all cases it must be properly spaced and integrated to avoid a clunky look and awkward handling. His price for a similar piece would run about $2,200.

Japanese Influence

Robert Appleby based his subhilt on a Tom Maringer-styled-and-designed fighter. Exhibiting a strong Japanese influence, the takedown model is comprised of 17 parts as a reflection of the 17 syllables in a Japanese haiku poem.

When Robert Appleby started making knives 27 years ago, he did so as a self-taught craftsman. He studied the work of other makers in similar styles prior to launching a piece of his own, and contacted other makers in person or by telephone to exchange information and gain understanding.

Appleby’s featured subhilt is a Tom Maringer-styled-and-designed Haiku fighter. Exhibiting a strong Japanese influence, the takedown model is composed of 17 parts as a reflection of the 17 syllables in a Japanese haiku poem.

A customer approached Robert a few years ago asking to make a 6-inch version of the original Maringer knife. After gaining permission, Robert borrowed an earlier version from a gracious customer and studied it closely. Robert has since made two knives in this fashion. The featured one sports a 9-inch blade of 154CM stainless steel mirror polished and double hollow ground. 

Robert Appleby’s fighter (Photo: SharpByCoop)

The habaki is forged 416 stainless, while the tsuba (guard) consists of four layers of 410 stainless, and the handle sports 416 stainless fittings. The subhilt is formed of approximately 60 feet of twisted 304 stainless steel wire. 

The handle and blade are joined by a toggle or link, and a pin attaches the tang to the threaded toggle. A 10-24 socket head cap screw is fed through the pommel and threaded into the toggle. For pricing on a similar piece, contact Robert directly.

“In my opinion, a subhilt provides increased retention, a more secure grip and increased control,” Appleby commented. “I don’t see the subhilt as impeding any grip style, as the blade is also double edged, and the subhilt also provides more positive extraction from the sheath. Each spacer is marked by a series of dots, one, two, three, etc., to hold the upper right of the tang hole. As I fit them, only the top and bottom of the tang hole contact the tang so they are self-aligning, as well as the front endcap of the handle. Indexing pins are set into the handle and align the last spacer, handle and pommel.”

Subhilts For Rugged Use

Knifemakers’ Guild voting member Gary Langley said his reproduction of a Bob Loveless Big Bear subhilt fighter is the only Big Bear he’s seen with a rear bolster. Blade and overall lengths: 8 3/8 and 15 inches.

Gary Langley built his reproduction of a Bob Loveless Big Bear subhilt for action. 

“This was designed to be a fighter,” he said. “I have sold one that was going to be used to hunt wild hogs, though this particular piece resides in a collection in Florida. It’s pretty much a straight grip, but I suppose you could hold it however you’re comfortable with it.”

After building a new house, Gary started making custom knives in 1977. His new neighbor was Don Dollar, and it was Don who revealed fit and finish to Gary for the first time. 

“Don showed me a few books and The American Blade Magazine [today’s BLADE®], and I was off,” Gary smiled. “I haven’t built a lot of knives compared to some, and this one is number 603. I’m 68 now and hope to get to 1,000 before I’m done.”

His Big Bear has a CPM 154 stainless blade and 416 stainless guard and subhilt with a mammoth ivory handle. Alice Carter did the engraving. Langley said this is the only Big Bear with a rear bolster he’s seen.

“I’m basically self-taught,” he commented, “and I’ve had a lot of inspiration, but have never taken a class or worked with anyone. [Steve] Johnson’s DVD on building a fighter was a big help—lots of trial and error! It’s not a simple knife to grind, and the things I learned trying to grind it have reshaped my process and equipment.

“The challenge on this blade with a rear bolster is to fit eight edges without a gap,” Langley concluded. “You just have to slow down. I would use my flat disc and rather than turn the motor on, I would turn it by hand so I didn’t go too far too fast.”

Depending on the engraving requested, Gary said his price for a similar knife would be around $3,000.

Read More

Why The X-Rhea Knife?

1

The X-Rhea Is The Result Of Having A Curious Mind And The Ability To Explore Possibilities.

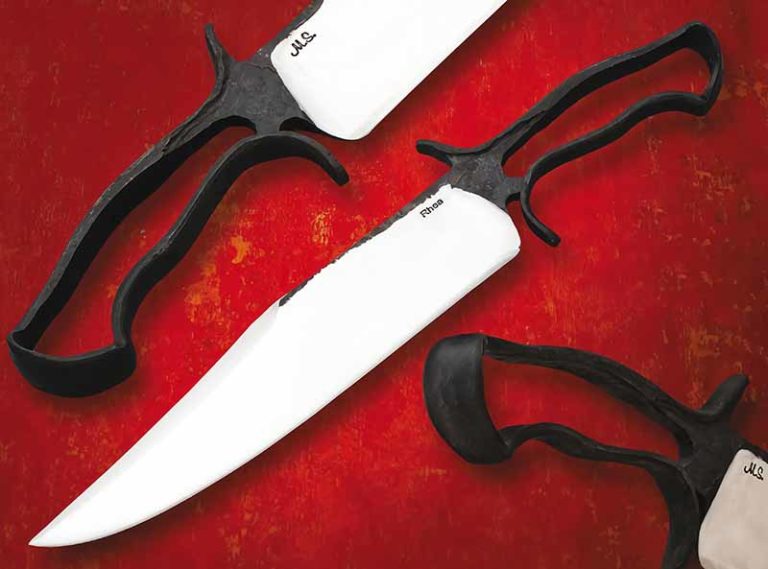
Why did I come up with the X-Rhea knife design? I’ve asked myself this several times and only recently have I been able to supply a reasonable answer. Th e X-Rhea started as a personal challenge. I wanted to make a knife, handle and all, from one piece of steel. Th at’s it: no scales, no added glues, pins, extra space fillers, inlays—nothing. Moreover, I wanted it to look good and be comfortable and as structurally sound as any good knife should be, without being overly heavy.

This challenge nagged at me. If I limited myself to steel and fire as my basic resources, could I forge a knife from one piece of steel, a knife that left no doubt about its viability? Could it look good, feel good and perform well? I also wanted a handle design versatile enough to fit different sizes and types of knives.

“A full tang knife is stronger than a hidden tang knife” is something I’ve heard many times. That statement oversimplifies the matter; which is better? I’ve heard some say, “At least with a full tang, if the scales fall off you still have a knife.” While I don’t agree with either statement, it indicates in some people’s minds a full tang blade alone qualifies as “a knife,” even without scales. And what qualifies as a knife, as well as what part strength plays, might differ from person to person.

In my visits with renowned historic blacksmith Peter Ross, my eyes were opened to the multi-dimensional vision the historic blacksmith needed in order to execute the complex forgings of everyday objects of the colonial era. The ability to understand how something is shaped, combined with the hand skills to actually shape it, are two separate things. The combination of those two qualities in one individual is rare. Peter showed me how to change the way I think about shaping steel. My mind raced with possibilities every time I worked with him. He taught me how to take a project from concept to reality.

Just as steel is shaped by the blows of a hammer, my thoughts were shaped to the challenge at hand. I felt I was in a unique set of circumstances that directed me to mix my forging with the mostly forgot ten techniques of historic blacksmithing. My years of training helped provide some ability to execute my ideas and theories. Theories? OK, it’s my “theory” that about 90 percent of tactile, meaningful contact between the hand and a knife handle is concentrated on the top and the bottom. Think pliers, wrenches, etc. The mind seems to understand the vacancy of the remaining areas between the top and bottom. Also, the hand “soaks up” and “fills in” to meet these vacancies to a degree. If I could add contouring and sculpting to the essential top and bottom, could the hand and mind fill in the rest? Can a knife with no scales be an option?

The Answer To X-Rhea

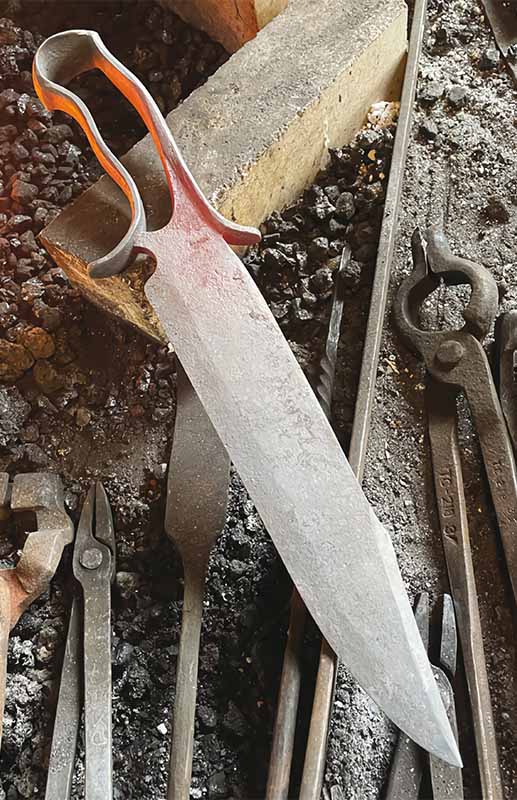
Finding the answer took significant effort and a lot of time. I worked out a forging sequence for my X-Rhea hunting knives that satisfied me, but I kept thinking it would be great to forge a bowie with top and bottom lugs. It took years to work out the stages of the process. While the accompanying photographs attest to my relative success, it leaves a lot unsaid about the adjustments I had to make in my thinking. I used the blacksmithing principle of eliminating things that hinder the process, and re-emphasizing and adjusting things that assist it. I also considered efficiency in timing, appropriate temperature, or other techniques** that are most practical.

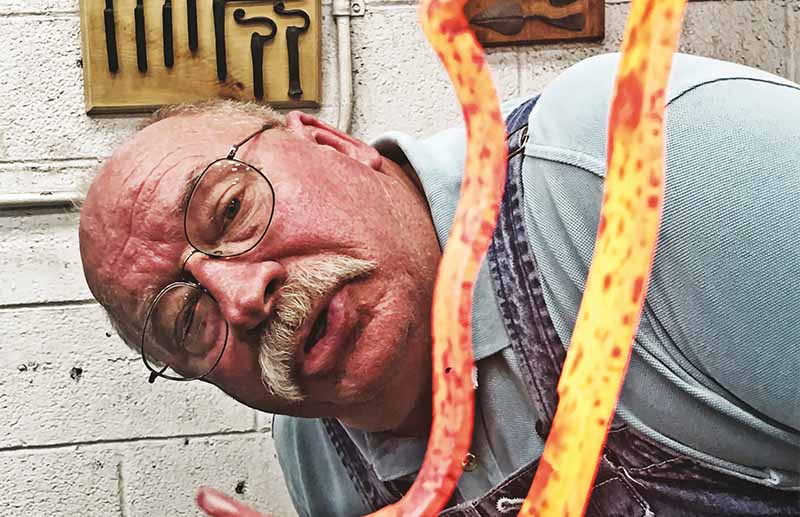
The author up close and personal with an X-Rhea Knife forged red hot.

While modern tooling could speed up some of the steps in my process, modern thinking and modern expectations would not. Aft er all, this process was being developed around the early 19th-century blacksmith tools: a coal forge, blacksmith leg vise, and the use of handheld hammers. This uncluttered my thinking and required me to face the same challenges as the early blacksmith. Elevating one’s skills with basic tools, improving understanding of the materials, and bearing full responsibility for the outcome was my expectation. While this might seem restrictive and limiting, the improved skill level and the readjusting of my views had a freeing effect. I am not as dependent on modern tools, which enables me to be more creative. The willingness to adjust one’s thinking was, and remains, an invaluable aid to the blacksmith.

Material Limits

When forging a complex shape, a smith must consider the limitations of the material, sometimes working near its limits but never exceeding them. Wisdom calls for choosing material suited for the extreme changes of geometry in the knife. Steels that are prone to air hardening must have special consideration or be avoided. Like some historic objects, the X-Rhea Knife is forged from one piece of steel, in this case, entirely high carbon steel. Those qualities and characteristics must be allowed for and considered.

Making an X-Rhea is a multi-step process. It must be pre-formed, with all needed parts and adjustments made before final shaping and peening the handle. Recognizing and maintaining a high standard of precision in the pre-form details is absolutely necessary to a satisfactory final result.

Even after I successfully made one of these knives, I found that part of the challenge was yet to come—acceptance. I showed up at a cutting competition with one of my X-Rhea bowies and sure got some stares. The safety judges looked it over as if it were a new species of animal. “Is it strong? Will it hurt your hand?” they asked. As I recall I placed well in the competition using it, but the initial reaction was still mixed.

Will it hurt your hand? I previously mentioned the handle contouring and sculpting. This is a standard part of the forging and filing process, as it is with any knife handle. Depending on the maker’s forging skill, it may require some filing in-between forging steps. Each step has some amount of adjustability to allow for correction, while leading to a beautiful profile and comfortable grip. It can be surprising to those who handle the knife just how good it feels, considering the remarkable difference in construction and the “open” appearance.

X-Rhea Strength

Is it strong? This is where the application of common blacksmith tool-making skills and logic are applied. Sufficiency was the guide for an early blacksmith. Making a piece overly strong for its intended use might sound impressive, but in use it becomes clear that this strength adds unneeded and undesirable weight for the intended use, and does not account for other desirable characteristics such as flex and toughness. I view heavy,
unwieldy blades generally as a mark of a novice. Unless the intended purpose calls for excessive strength, sufficiency should also, be the guide not only for blades but for knives overall.

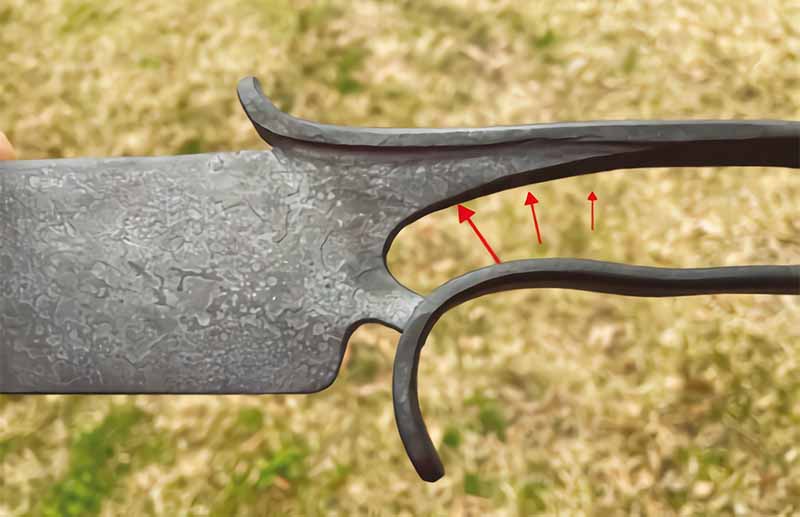
For those inclined to overthink a matter, look at the “T” cross section of the blade-to-handle transition. It eff ectively converts the stress loads in the needed directions.

Today when I see a thickly built knife, instead of looking at it and saying to myself “This thing sure is strong!” I ask, “Why does it need to be so heavy?” For the X-Rhea handle, I try to use sufficiency as my guide. Where it can structurally be lightened, I do that by forging and filing, leaving it sufficiently strong but not overly heavy. This distribution of strength serves to provide literal balance to the knife exactly as any conventional knife, regardless of construction. Either should have balance when properly built to a purpose and have sufficient strength to perform its purpose. That fact, while amazing to me at first, is testimony to the principle of sufficiency. In other words, the X-Rhea should compare well in balance and weight as well as function to any well-made conventional knife for the same application.

For those inclined to overthink a matter, look at the “T” cross-section of the blade-to-handle transition. It effectively converts the stress loads in the needed directions. Viewed from the profile, the slight rotation of the ricasso as an “X” instead of a vertical “cross” assists in adding strength with less material (weight) to the connection. The upper leg of the ricasso’s “X” tapers back to brace the upper part of the handle, which bears the majority of the workload. The handle then tapers in thickness slightly as it goes back to the forged integral pommel and proceeds to the handle tenon where it is peened. To further lighten the knife, the handle band is sculpted gently to taste. Taste? I try not to get so engrossed in the math and mechanics that I lose the necessity of making the knife look good. Like a scroll forged by a blacksmith, the application of math and mechanics are the basis for all aspects of proportion and form. To keep it simple, I want to make it graceful, not blocky, getting the absolute most out of a minimum of material volume.

The X-Rhea Process

In my situation, I set a challenge for myself and it led to the X-Rhea. For me, the process is as important as the knife itself. I made a lot of individual knives, some better than others, but what I was actually concentrating on was developing a forging process, so the one-piece forged knives could be repeated via a repeatable process with predetermined features, checkpoints and adjustability built-in along the way. To emphasize adjustability, whether by forging, grinding or filing, is key. It enables the smith to reach predetermined checkpoints before proceeding with the rest of the process. When following a well-designed process, the outcome will be consistent and meet a standard as would the product of a well-designed and adjusted machine.

While we are far from machines that guarantee specific outcomes, diligent attention to the execution of each heated and hammered step and making needed adjustments, when appropriate, will carry the project along. As aptly pointed out in David Pye’s book, The Nature and Art of Workmanship, “The quality of the result is continually at risk during the process.” Overcoming the risk by careful determination, as well as time spent in practice, is its own challenge and entirely rests upon the craftsperson.

Like some historic objects, the X-Rhea Knife is forged from one piece of steel, in this case, entirely high carbon steel.

I believe it is noble to preserve cultural objects, and it’s also my belief that preserving the processes used to make those objects is equally important. The hand of the individual craftspeople, following already established processes, can be seen in the objects of the past. A society or culture can lose appreciation for the craftsman’s touch. Pye stated, “The danger is not that the workmanship of risk will die out altogether but rather that, from want of theory, and thence lack of standards, its possibilities will be neglected and inferior forms of it will be taken for granted and accepted.” It would be a shame to neglect the possibilities or take for granted why we craft things the way we do.

I also believe there is room remaining to explore new designs and theories in today’s knifemaking. We can find new ideas and inspiration from places we don’t expect. With the ever-changing laws and shortages of materials such as stag and ivory, we may be wise to consider creating a market based on a process we develop using otherwise unexpected, but available, materials and techniques. This requires time and risk. Are we willing to apply time and effort to follow through with a concept without certainty that there will be a payoff? Is the payoff worth it in monetary or cultural dividends? One can really never know the answers to such questions, and those possibilities were not a serious factor in my efforts.

The X-Rhea is the result of having a curious mind and the ability to explore possibilities. It was an idea, turned into a challenge, turned into reality. The simple sequence is available to everyone. Its cultural value is a matter of opinion, but the process of the X-Rhea Knife shows that new and interesting ideas can be pursued in knifemaking.

Also Read:

Southern Grind Marine Pens Poem Of Combat

Zac Brown shares the stage with Southern Grind spokesman, Johnny Joey Jones.
Zac Brown’s Southern Grind deploys formidable spokesman, Johnny Joey Jones, a double amputee Marine staff sergeant.

Johnny Joey Jones, Triple J to his friends and Explosive Ordnance Disposal technician to his Marine Corps brethren, wrote a poem about a particular day, a particular explosion, a particular knife, while on patrol in Afghanistan.

Jones, a double amputee and motivational speaker, is the spokesman and more for Zac Brown’s Southern Ground, which is an umbrella company that represents numerous 100-percent American-made and -sourced products, including the knife company, Southern Grind. Proceeds from the sale of these patriotic items benefit Camp Southern Ground, which strives to give kids of all races and religions, and especially those with neuro-developmental challenges, the positive influence of a camp experience. The camp also helps military families by offering the same experience to children who are dealing with a deployed, injured or deceased parent.

In May 2010, about three months before Staff Sergeant Jones would step on an IED and lose both legs above the knee, he was on patrol with a group of Marines. (In the Corps, EOD units go where they are needed, with whom they are needed.) They came to a small canal. “There is always lots of learning,” Jones said, and in this case, it was that you don’t want to use foot bridges to cross waterways. Such crossings would create bottlenecks, ideal spots for the enemy to booby-trap.

Double amputee Johnny Joey Jones is a motivational speaker and Zac Brown Southern Grind spokesman.
Prior to losing both legs above the knee Johnny Joey Jones was an Explosive Ordnance Disposal technician in Afghanistan.

To get across, first the sweeper, the Marine with the metal detector, went and then the mine-detecting dog and his handler went. “We think the dog stepped on the mine,” Jones said. “The Water So Cold” tells the story.


The Water So Cold

By Johnny Joey Jones

They say it passes

The pain so cold

Even atlas shrugged

Or so I’m told


He was out of sight

Walking on water

A fallen tree bridge

A bomb rang louder


His steps stopped so abrupt

Smoke and dirt were to breath

Gone in an instant

His bloody face screamed


I still see his face

Bloody and scared

The water so deep

Wet blood in his hair


He was screaming so loud

When I jumped in

I grabbed his body

I reached for his hand


The water a mess

Water touching my chin

I opened my mouth

The water rushed in


He yelled and screamed

I panicked and pulled

This boy would not die

In water so cold


I knew I had to do it

I was so frightened beneath

I had to reach down through it

The water so deep


I stalled for a moment

Whispered,” it’s gonna be ok”

“I’ve got you, they’ve got you”

He quieted his bloody face


They came to the bank

Reached down and pulled

This time I didn’t think

Lifting him high once more


In water so cold

I grabbed at his knees

Scared and surprised

I felt legs beneath


My mind rejoiced

His bloody face still screamed

Yet, his hand, his face

Torn open and bled


In the mix of it all

His knife in my hand

I meant to cut off his gear

He was missing only a hand


The bird came loud

So fast and fluttered

The shots rang out

From afar, from cover


I couldn’t shoot back

The bird flew, scattered


Frantically I scratched


To climb out of the water


His gear still a drift

His knife in my hand

Miles still to sift

Of this mine filled land


Days later, I stalled

Reached down, nervous sweat

My legs were still their

His knife, still wet


I gave his knife to the man

“Tell me he lived” I begged

“He lost a hand and an eye-

But he’s still got his legs”


Joey Jones mentored other recovering veterans and went on to become a motivational speaker.
Joey Jones not only took the lead in combat, he became a mentor to recovering wounded veterans like himself.

The knife was a folder issued to Marines. “I was going to cut off his gear, but guys reached down to pull him out. Days later I realized I still had his knife in my cargo pocket,” Jones said. “I gave it to his first sergeant to give it back to him,” Jones said. That first sergeant is the man in the poem of whom the speaker asks about the Marine’s condition.

Jones has had a poetic streak most of his adult life. Since separating from the service, he has earned his Bachelor’s degree from Georgetown University in public policy. “I don’t go back and edit,” Jones said. He wants the poems to represent him authentically, as he was at the time.

Check back to read more about this inspirational wounded warrior.

To learn more about how Jones and Brown met and the knives made by Southern Grind, be sure to subscribe to BLADE® Magazine.


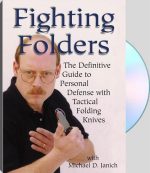
‘Fighting Folders’ Offers Class Instruction At Home

'Fighting Folders' is cheaper than a class and can be watched repeatedly from the comfort of your living room.
In “Fighting Folders” Michael D. Janich instructs viewers on the myths surrounding folding knives and how to employ them in a self-defense situation.

You don’t have to have been in combat to know that sometimes Plan B—the knife—can quickly become Plan A when it comes to self-defense. Often our everyday carry is a folder. This DVD can get you started on proper grip, one-handed openings and other tactics using folding knives. The $39.95 price is less expensive that a class and can be watched repeatedly in the comfort of your home.


Wicked Breacher: Ben Seward’s SWAT Axe

Ben Seward’s breacher SWAT Axe salutes officer’s 21 years of police service

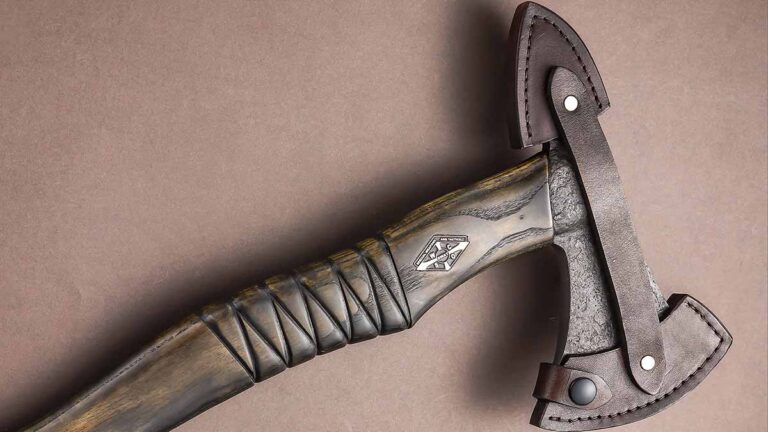
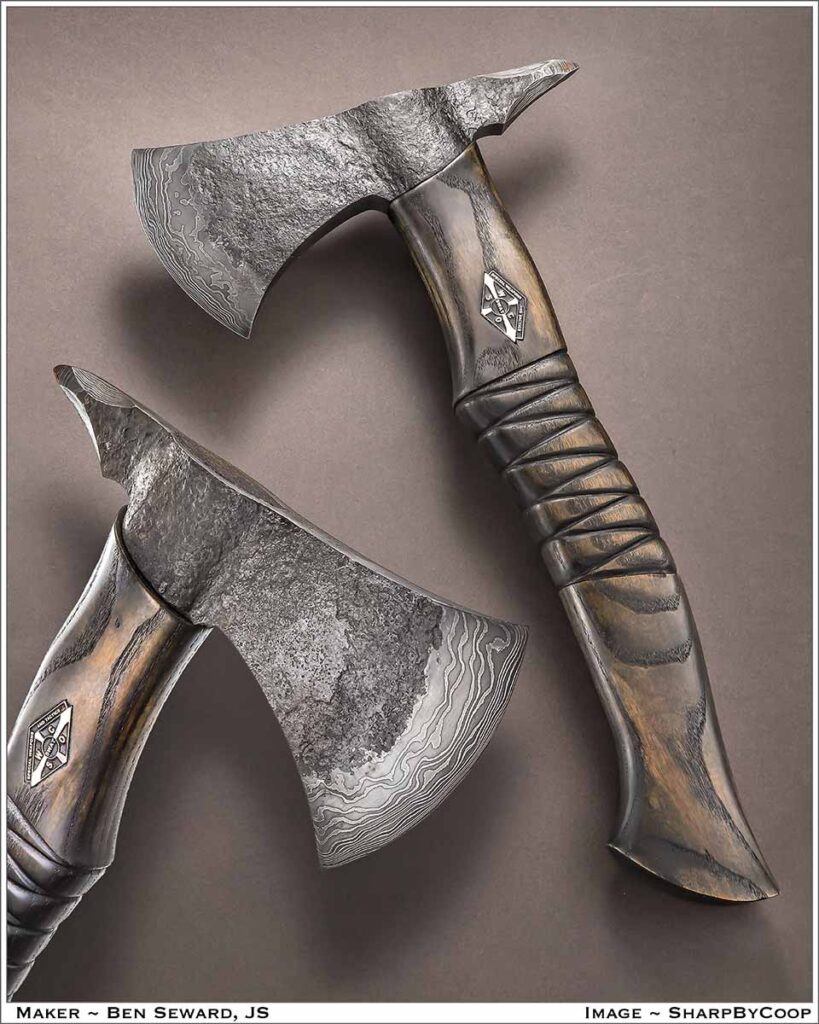
When ABS journeyman smith Ben Seward went to make his first axe, he didn’t settle for something easy—he went the whole hog on a special breaching model as a retirement gift for a 21-year law enforcement veteran.

Sgt. Magnus Gervol retired from the Whatcom County, Washington Sheriffs Office after a career that included 15 years on the SWAT team and 14 years as a sniper.

Ben Seward Swat Ax profile

Members of the Sheriffs Office contacted Ben, who forged the axe from the barrel of a Remington 700 SPS tactical sniper rifle. The idea was to make a tactical axe with a beard and a tomahawk spike. The handle is Ozark white oak. Ben’s dad, David, who specializes in sheaths, made the leather sheath.

Ben forge welded the rifle barrel into a bar and layered it up with other carbon steels. He forged the two flats of the head roughly into a triangle and pieced in the bit for the cutting edge. All of the head, including the edge and spike, is forged of the same damascus.

SWAT Axe Specs
Maker: Ben Seward
Head Size: 7.75”
Bit Size: 3.5”
Head/Bit Material: Damascus forged from the barrel of a sniper rifle and 1080 carbon and 15N20 nickel-alloy steels; includes a rough-forged finish
Handle: Ozark white oak
Handel Length : 14”
Maker’s Price For A Similar Breaching Axe (excluding the steel from the sniper rifle): $1,500

Check Out More Cool Custom Knives:

Advertisement

Must Read Articles

Read this before you make a knife

Knifemaking 101 – Read This Before You Make a Knife

  by Wayne Goddard My experience has taught me that there's nothing like digging in and getting started. I've often said the hardest part of the...
how to forge damascus steel

How to Forge Damascus

Advertisement
Advertisement