
Knifemaking

Knifemaking is the building of a knife, which includes the blade, handle and other accouterments. Blades are made by either removing metal from a steel blank via a grinder – known as stock removal – and the forging to shape of hot steel into a blade in the process known as bladesmithing. Other parts, including bolsters, guards, pommels, etc., are needed to complete the finished knife.

Featured Knives – – Knife Collecting – – Tactical Knives – – Survival Knives

Henning Wilkinson: Magician Of South Africa Knifemaking

Acclaimed, Talented Knifemaker Henning Wilkinson Is Making Beautiful Knives And Living A Life Worth Emulating.

I’ve been in the blade-making business right at 50 years. I’ve met and befriended hundreds of bladesmiths and knifemakers. I have a long history of designing and making knives and other edged tools in carbon steel and mosaic damascus. I have pioneered many of the modern techniques used in the production of these blades. The techniques are now in their third generation.

The newer smiths and makers — especially in the damascus end of the business — do things with steel and design that border on magical. Some of these modern magicians have been in the business only a few years. I feel very privileged to have met some of them and spent shop time with a few more. One is Henning Wilkinson.

I started following his social media posts a few years ago. Even then, the level of his work was nothing short of astounding. His blade designs and mosaic patterning are all well thought out and extraordinary. He and I began corresponding on social media and developed a friendship through our mutual interest in damascus blades. 

His blade designs and fitting of all the design parts is in my opinion some of the best on the planet. As a result, I wanted to see his methods firsthand. Meanwhile, Henning also had great interest in my methods of forging and pattern development. So began the plan to spend time in the shop.

We agreed I should go to South Africa and teach a couple of classes. The trip coincided with the Knifemakers Guild of Southern Africa Show. It was great fun meeting new friends and visiting with many old ones half a world away. The classes were a great success and I learned much, including that braai* has no equal and biltong+ is better than jerky. (I had to throw that in for my South African friends).

Henning is a deeply religious man who lives his faith as best he can in all he does. His knifemaking skills are a showcase of that dedication. He is an advanced martial artist and very skilled with firearms. Some of his techniques and skills come from a trained gunsmith background, and are a lot of what drove me to fly halfway around the world to see those handwork skills with my own eyes. I was not disappointed. I asked Henning to send me his biography to help with this story.

Henning Wilkinson: In His Own Words

wilkinson sword
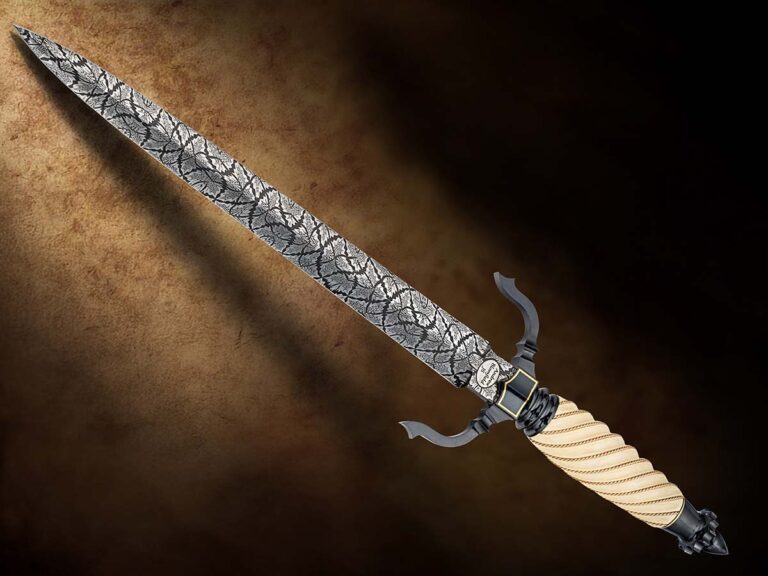
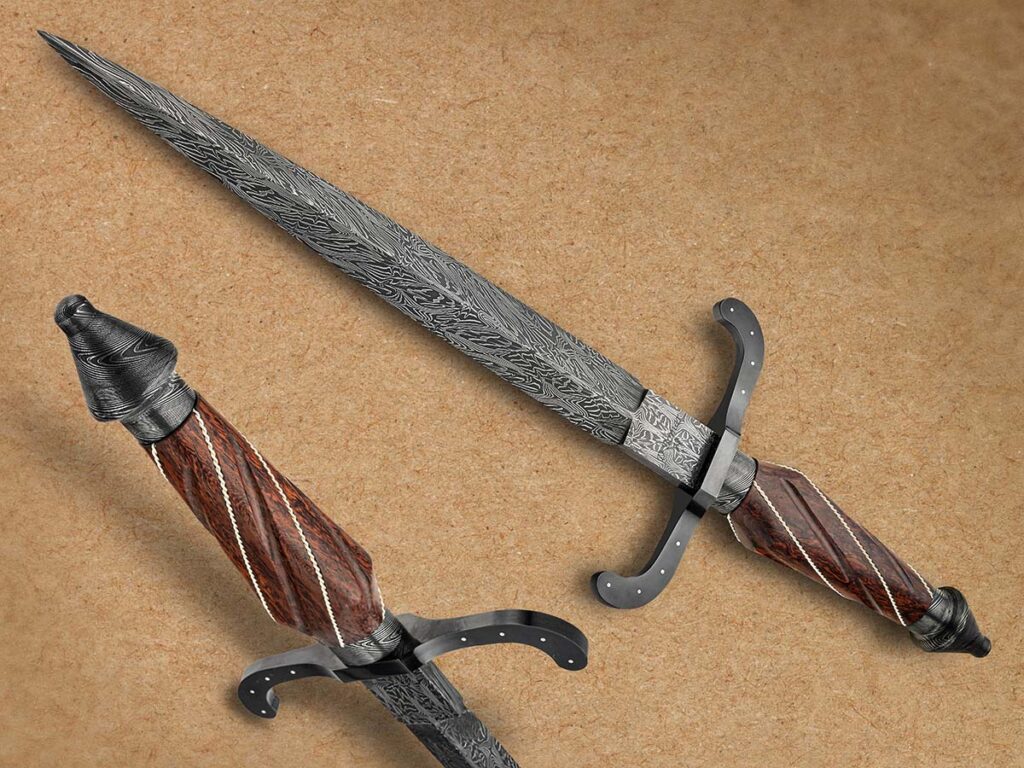
Damascus, ivory and gold engraving help highlight Henning’s dagger with a Renaissance flavor.

I was born Jan. 13, 1978, in the little town of Brakpan, South Africa. My dad was a blue-collar worker who started his working life at 16 doing an apprenticeship as a tool-and-die maker. He was always busy on weekends doing all sorts of jobs, from building concrete mixers to doing electrical work — pretty much anything you could think of. He now owns his own wood furnisher business. 

Growing up, using machines and tools for whatever reason was never a problem for me. My father believed that to work with your hands from an early age would give you a head start and an advantage in life.

My mother was always busy with something to generate extra cash. I remember from a very early age her making clothing as a seamstress, from wedding dresses to underwear. Even my wife had the privilege of having her wedding dress made by her mother-in-law. My mom was always carting all the kids around from one sports event to another. Both my parents supported us however they could, and still do.

My first recollection of Christ was growing up in a home where He was loved and honored. I can remember as a young child walking into my parents’ room in the early hours of the morning and finding them both on their knees praying. This has remained my foundation for every decision and my way of living.

I joined the family business in woodworking where I learned a great deal in all different fields, from electrical to mechanical, as we did all our own repairs and maintenance on the machines in the factory. I started my apprenticeship as a gunsmith in 1998. I learned a lot about the fine finishing and fittings of different materials to one another.

I started making knives in 2000 while doing my gunsmithing apprenticeship. I fell in love with a knife called the Commander made by Ernest Emerson, which at that stage I couldn’t afford (it would have been three months’ salary for me back then). Having a father who taught me whatever you cannot afford you can make yourself, I jumped to the task not knowing what I was getting myself into.

During the process I met a good friend, Carel Smith, who guided and still guides me in everything knifemaking related. Carel invited me to the Knifemakers Guild of Southern Africa Show and my eyes were opened to the possibility of real knifemaking. 

After I built a folder, Carel invited me to forge a blade and make some damascus. I was immediately hooked, captivated by the process of forging damascus, spending the first couple of years building and perfecting machines to make my own. In 2006 I was admitted into the Knifemakers Guild of Southern Africa, being only the second person to forge blades to be so honored.

Right from the start I attempted to make a better knife than the one before. I would not settle for anything other than my absolute best effort on every piece, from fit and finish to heat treatment and into the smallest detail, always trying to push my limit.

Then everything changed.

In 2012 I walked away from knifemaking as I believed I could not provide for my family the way the world told me to. I took on a job in the oil and petroleum trade as an underground utility surveyor. I thought I had it made. However, after a couple of years I was in a deeper hole than when I started—physically, emotionally and pretty much every way thinkable.

God slowly decided to drag me back into what I was made to do.

In late 2018 I decided to carry on as a full-time knifemaker. It was a leap of faith and the most rewarding decision of my life. Being able to do what you love can only be described as a massive blessing.

I am a Christian and I believe that God forms every piece through my hands, which is why I have a 9k-gold cross as a maker’s mark. My aim is to craft each piece in praise to God, and to make it so it will set itself apart and stand out as the best knife in any collection.

Picture In Steel

Wilkinson forging
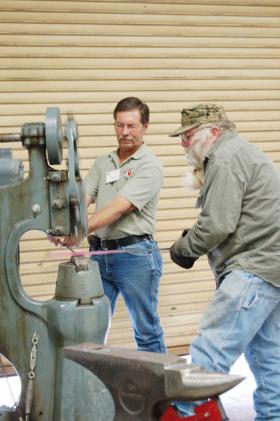
Henning (left) and Schwarzer (second from left) hammer hot steel while interested observers observe in the two friends’ forging class in South Africa.

On June 15, 2018, I did a Facebook video on how to grind a false edge. I received a comment from a gentleman whose work changed the way I looked at knifemaking. I used to think that because I could make damascus and drill a couple of holes, my knives were good. However, a “picture painted in steel” of a bird hunter with his rifle and his dog# made me realize that this could be far more—it could be an art that would leave people in awe of what can be done. The gentleman is Steve Schwarzer, whom I am now lucky enough to have as a close friend.

In 2019 I was able to exhibit at the BLADE Show, and was immediately accepted into the family of worldwide knifemakers. This has left me inspired to inspire those whom I see as my peers.

Shortly after BLADE Show 2019, Steve visited me in South Africa. We had the privilege of spending time together and learning from each other. It was a massive honor to stand shoulder-to-shoulder with him during a damascus course we hosted together.

During the visit I learned the definition of what a true master is. It is not a stamp on a knife or an award certificate. It is someone who never stops in striving to learn every intricacy of his or her art, perfecting every part no matter how big or small it might be, staying humble in the process and never assuming his or her own greatness. 

Among a thousand lessons learned during Steve’s visit, for me this was the most important. The second lesson is that we will only have this journey called life once, and the decisions we make will be the determining outcome of that journey. I have never laughed as hard in my life during Steve’s two-week visit. His friendship and guidance are an invaluable blessing to me. It is an honor to call him my friend.

To me, knifemaking is a way of life, constantly trying to perfect and add new aspects to the knives I make. Through the fashioning of these pieces I continue to learn more about myself as God wants me to be. Knifemaking has given me the freedom to be a father to my two children and a husband to my four wives (my loving wife and the best three dogs ever).

One of the memories I will always cherish is one of my son as a small child standing on a tin in front of a lathe machining some steel. He has recently started making knives and this next journey together as father and son working in the shop together is another great blessing for me.

I specialize in art knives and high-end exclusive pieces, from folding knives to swords, using only the best end materials. Bringing 20 years of knifemaking experience and a lot of passion to each piece, I am proud to be a 100 % sole authorship maker. I am a member of the Knifemakers Guild of Southern Africa and the American Bladesmith Society. I hope you can see the passion in my work and will enjoy every moment you spend with it.

*Braai is South African barbecue

+Biltong is a form of dried, cured meat that originated in Southern African countries.

#The “picture painted in steel” was Steve Schwarzer’s groundbreaking scene of hunter with rifle and dog done in mosaic damascus in the early 1990s that set the world of knives on its ear.

Read More

Dagger Design: Mastering Wire Wrapping The Handle

0

Wire wrapping the handle of a dagger is the finishing touch to the process, but requires a fine touch and patience.

Once the wire grooves and flutes are complete, the entire handle finished to its final state and the tang slot broached, insert the wires and lock them in tightly. As mentioned, 24-gauge wire looks good. If you want to use silver, Argentium or fine silver are both better choices than sterling, which tarnishes more quickly. Twenty-four-karat gold is terribly expensive but is the ultimate in luxury.

If you have Rolls-Royce taste but a Toyota budget, consider gold-filled wire as an alternative to pure gold. It’s brass at the core but at least 20 percent gold by thickness, and consequently much more durable than simple gold electroplate. It usually comes in 14k only. As a reference point, not long ago 12 feet of 24-gauge pure silver wire could be had for a little under $9. The same length of 24k gold in the same size was $1,050. The same length of gold fill was about $20. Save the 24k gold for times when you want to make a statement or your customer pays for the gold in advance.

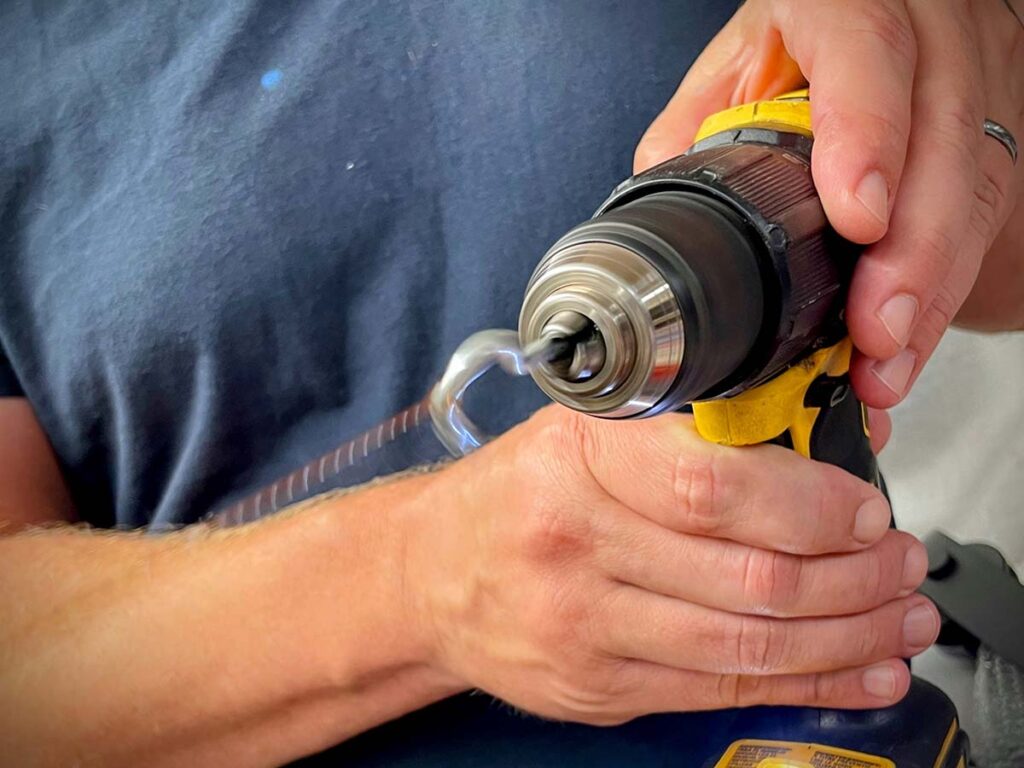
With a hook chucked in a hand drill, hook the resulting large loop, pull it tight and turn on the drill. Keep the tension constant—as you twist the wire it will pull you toward the vise.

Buy your wire dead-soft from your favorite supplier. You need about 20 percent more wire than twice the combined length of your wire grooves.

To twist the wire evenly, you must twist all of it at the same time. Clamp the two ends together tightly in a vise. With a hook chucked in a hand drill, hook the resulting large loop, pull it tight and turn on your drill. Keep the tension constant—as you twist it the wire will pull you toward the vise. If it breaks off at the vise, just re-clamp it and continue twisting. There’s no rule about how tightly the wire should be twisted, but tighter twists look better. If you aren’t sure it’s tight enough, twist it some more.

Annealing The Wire

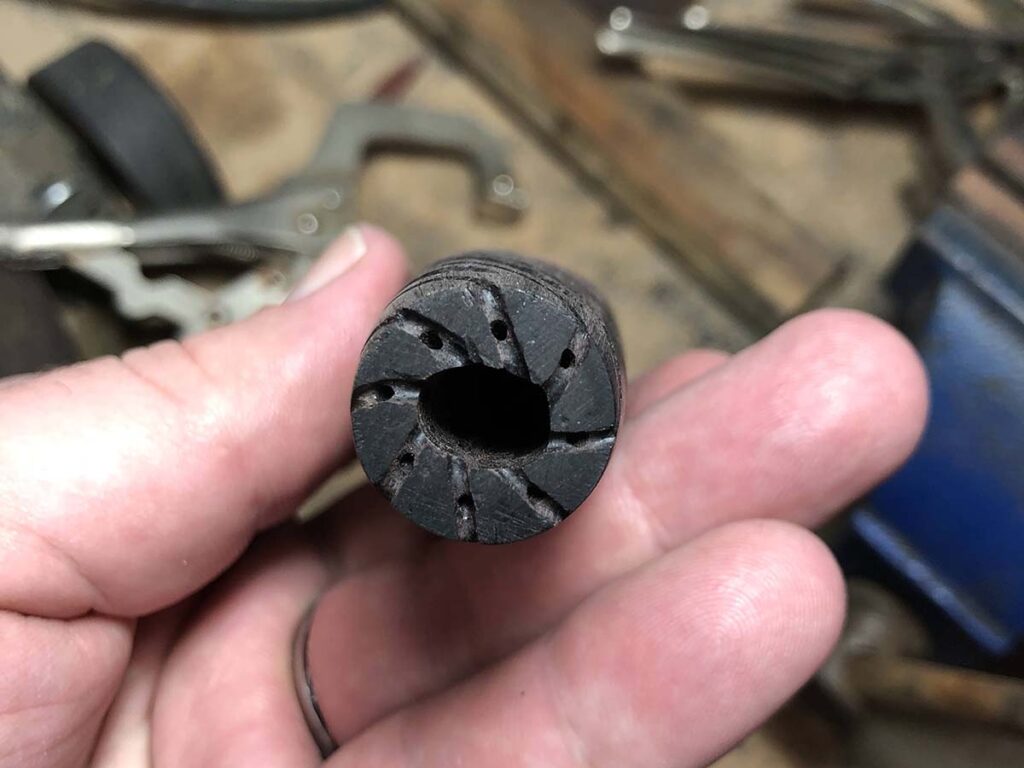
Drill diagonal holes inside your groove, starting halfway between the broached hole and the edge.

The next step isn’t required but will make things easier. Most metals, including gold and silver, work harden. After all of that twisting your wire will be hard and springy, and it’s much easier to install your wires if they’re dead soft.

To soften the wire back to its original state, you must anneal it. To do this, coil it tightly around a 2-inch piece of pipe or something similar, and tie up the coil. Using a propane torch, heat the coil evenly until it glows slightly. One trick to make sure you don’t melt it is to color your wire thoroughly with a Sharpie® marker. When the ink burns off, it’s time to stop.

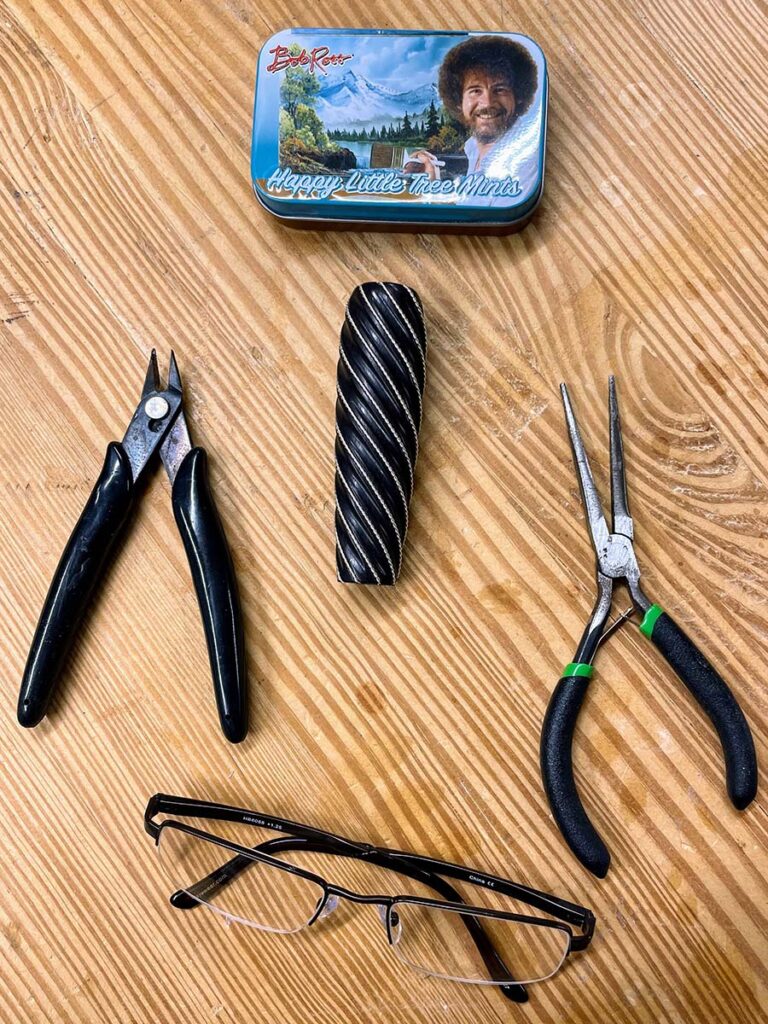
Don’t forget your essential tools—including your Bob Ross Happy Little Tree Mints.

Pick up the coil and drop it in water to cool it rapidly. It’s now dead-soft again but is likely discolored from oxidation. To remove the discoloration, let the coil sit in warm pickle solution that is available from any jewelry supply vendor. If you don’t want to go to the trouble of pickling, you’re better off dealing with the trouble of work-hardened wire.

Wire Installation

To install the wires, a little bit more work on the handle is necessary. Starting from the end points of your wire grooves, cut new grooves into both ends of your handle for at least half the distance between the outside of the handle and the tang slot. A Dremel or Foredom tool is best for this, but you can use a file also. If you use a file, go ahead and groove all the way to the tang slot—it’ll be easier that way and invisible on the assembled knife. These grooves need to be equal in depth to the diameter of the wire so that the handle will fit tight against the guard or pommel when the wire is installed and the knife is fully assembled. Cutting the line at an angle rather than perpendicular to the circumference will help when you pull things tight later.

Drill diagonal holes inside your groove, starting halfway between the broached hole and the edge. Drill at an angle toward the center so that the hole for the wire exits into the tang slot about a quarter inch from the top and bottom of the handle, in line with the end of your groove. Make the holes slightly larger than your wire diameter.

After the handle is fully assembled and the glue is set up, perform a final finish check. The wires should be tight and fully seated in the grooves.

You’re almost to the fun part. Cut your wires at least an inch longer than the length of the groove to give yourself some extra to work with. To install the wire, thread one end through the hole you just drilled into the tang slot, grab the end with some small pliers, and bend the end back up toward the handle end, locking it in. Though not strictly necessary, you can pin the wire with a toothpick in the hole and a drop of CA Glue or 5-minute epoxy for extra security. This can be cut off and sanded flush later. Pull the wire tight, seating it in your groove, and repeat the process to lock in the other end. This method guarantees that your wires are as tight as they can possibly be. The wires and glue and toothpicks should lay flush with or below the surface of the ends of the handle. Cut off the excess wire inside the tang slot to ensure the wire doesn’t interfere with the final fit-up of your knife.

Finish Check

After the handle is fully assembled and the glue is set up, perform a final finish check. The wires should be tight and fully seated in the grooves. You can lightly buff the wires for extra shine but use a light touch to avoid unintended polishing of the handle. Tarnished wires can easily be brightened up with a Sunshine® Polishing Cloth. Don’t forget to give yourself a pat on the back.

That’s A Wrap

Silver wire wraps the rosewood grip of Duane Bomar’s dagger. The 10-inch blade is a damascus of 1084 carbon and 15N20 nickel-alloy steels. Overall length: 15 inches. (Jocelyn Frasier image)

Precision flutes and carefully inlaid twisted wires transform a utilitarian grip into a truly exemplary expression of craftsmanship. By selecting materials that balance luxury and performance, you anchor your design in both history and function. By following the instructions in this series, you’ll be able to master this exemplary style, and use the experience as foundation for future creativity.

Read More On Daggers:

Why is CPM-154 So Popular with Custom Knifemakers?

john bartlow custom knifemaker
In CPM-154 stainless, John Bartlow said he found a steel that allowed for a flawless finish. At the grinder here in his shop, Bartlow uses the steel on his utility fixed blade equipped with his trademark line cutter in the ricasso. (SharpByCoop knife image)

stag lockback custom knife
A veteran of 30 years in the Knifemakers’ Guild, John Bartlow started out using 440C stainless steel for his knives, moved to ATS-34 and today has graduated to CPM-154. Raphael Durand uses the latter steel on his stag lockback. (SharpByCoop image)

Based in Sheridan, Wyoming, by way of Tennessee, 30-year Knifemakers’ Guild member John Bartlow uses CPM-154 for his bird and trout and hunting knives. When Bartlow first started making knives, he was also a hunting outfitter.

As a result, he gutted and skinned a lot of animals on a weekly basis. Having many of his guides use his knives, he got a lot of feedback over the years about design and function.

“I started out with 440C stainless steel a million years ago,” Bartlow remembered. “I quit that nearly 20 years ago and jumped to ATS-34 stainless and used it for years and years.”

He said that about a decade ago he started to become frustrated with the quality of the ATS he was getting. There weren’t major structural problems like chipping or breaking, but there were very subtle issues Bartlow observed under 10-to-12-power magnification.

“My customers never noticed it but it bugged me,” he continued. “I was trying to get some finishes in that stuff —and I was buying through normal channels from several suppliers—but when I would go to finish it, once in a while I’d get this little area that looked like it had pits in it, or it kind of had a little ‘road rash’ that I could not get rid of.”

He approached other makers about it at the time and they said they’d seen the same thing. That motivated him to jump ship to CPM-154, he said, which is very much a sister steel to ATS-34 and 154CM.

“They are closely related on the family tree of steel,” he said. In CPM-154, he found a material that allowed for a flawless finish. With the powder metallurgy process and the accompanying uniform distribution of carbides, it eliminated the “road rash” issue.

david sharp custom knives
Here grinding a blade in his shop, David Sharp said CPM-154 exhibits excellent edge retention, sharpenability and corrosion resistance.

Custom maker David Sharp uses CPM-154, including on his reproductions of the knives of BLADE Magazine Cutlery Hall-Of-Fame© member Bob Loveless. Since Sharp began building knives in 2010, he has specialized in fine-finished fixed blades.

“A large percentage of my knives have a very fine finish, polished or over-1200-grit hand satin,” the maker based in Hesperia, California, remarked. “CPM-154 is very fine, so when it’s finished to a high level you don’t see the steel’s grain.”

He added that CPM-154 is not quite as abrasion resistant as other of the relatively newer steels, so obtaining a fine finish is a bit quicker. He said that though steels are an oft-discussed topic online, he very seldom has customers request a steel type or brand, which could be seen as a testament that his choice of CPM-154 is a good one.

“I have not noticed a downside,” Sharp continued. “The upside is the finish and that it is, in my opinion, a balanced steel. For the majority of users it exhibits excellent edge retention, sharpenability and corrosion resistance.”

Learn More About Making Knives

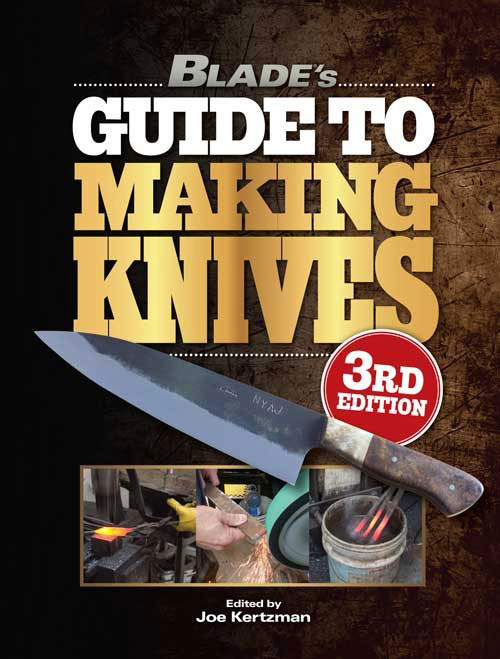
book about making knives

Bad And Beautiful

Few Patterns Are As Stunning And Audacious As Daggers And Fighters. These Four Makers From Around The World Show What Elite Craftsmen Are Creating Today.

Knives with attitude always have been popular among many makers and cutlery enthusiasts, and, if you’ve ever been to a BLADE Show, chances are you’ve seen some eye-popping examples. Many have in-your-face themes, with daggers and fighters getting lots of love among them.

Wardog Fighter By Samuel Lurquin

The Wardog Fighter by Samuel Lurquin includes a handsome leather pouch sheath with logo by Jeremy Guillaume, a sandblasted-then-blued blade, a tight-waisted bird’s beak handle, and a dog tag with appropriate verbiage and logo. Overall length: 12.8 inches.

If Samuel Lurquin’s Wardog Fighter looks familiar, that’s because it is—it served as one of three cover knives for the June BLADE®. However, due to space requirements, we were unable to give the knife its just due in that issue, so we correct that oversight here.

Sam is an ABS master smith from Belgium who makes bullet-proof tactical fixed blades ticketed for extreme “rough ’n tumble” use beyond the call of duty. Sam’s English is somewhat limited, so we turned to Dave Ellis, proprietor of Exquisite Knives, who specializes in upscale cutlery from around the world. Dave is California’s first ABS master smith who has since retired from hammering steel to become a purveyor of fine custom knives. Dave’s overview of the Wardog is insightful. 

“Sam’s combat knife was designed to be very concealable, nothing flashy that sticks out! Twenty years discussing the needs of end users helped him design a knife to be used hard in the field,” Dave observes. “Rather than taking credit for the knife’s design, Sam instead deferred to the many experts when it came to ergonomics, concealment, and design to ultimately come up with this sleek fighter.”

The beefy clip-point blade is 7.5 inches to go with the 5.3-inch black G-10 handle. 

“I asked Sam if he considered this to be the perfect combat/field knife,” Dave states. “His response was quite sincere. He said, ‘There’s never just one perfect knife.’ Use dictates the design of each piece, and this design Sam hopes is one that he could stake his own life on. This is very important to Lurquin—that if all else fails, his knife will prevail.”

Dave explained the Wardog’s finish process: “The blade was sand blasted then cold gun blued. The bluing produced a forced rusting [patina] that Sam removes with steel wool. The blade is stonewashed for the final finish, one that will stand up to hard use.”  

Sam designed the thick, all leather sheath and had his friend, Jeremy Guillaume of 8 Ball Leather, make it. “It’s double welted and has double latches to keep the knife secured on many media—belts, backpacks and the like,” Dave concludes. “Sam felt that Kydex is too noisy, thus the use of leather.”

Commando Dagger By Joe Israel

Joe Israel offers his Commando Dagger with the smaller Shrike EDC knife. A big fan of the Fairbairn-Sykes dagger of World War II fame, Joe patterned the handle on that of the F-S classic. The Kydex sheaths are by Harry Savage.

One of this issue’s cover knives, Joe Israel’s Commando Dagger is born out of Joe’s intense fondness for the armed forces knives with a double edge. 

“I’m inspired by all the great military daggers like the Case V-42, Fairbairn-Sykes, Gerber Mark II—these knives have always fascinated me,” he observes. “I wanted to create something both beautiful and a bit sinister which, after all, is what I think daggers are.”

Though very stylish, Joe’s knife is meant to be used. 

“For the Commando Dagger, I start with 3/16-inch CPM 154 stock that I flat grind by hand and heat treat myself, including a liquid nitrogen cryo. The blade is 6 inches long and the overall length is 11 inches,” he states. “It’s then hand sanded to 3,000 grit and mirror polished.” 

The blade is sharpened on both sides. If the curvaceous handle smacks of a certain famous World War II combat knife, it is purely intentional. 

“I always loved the shape of the Fairbairn-Sykes handles and I try to emulate their elegant shape in my Commando Dagger,” he comments. “The knife is full tang with a brass guard that I pin and solder in place old-school style.” The scales are black linen Micarta® with blood-red G-10 liners secured with brass pins.

Joe supplies his knives with no-frills, all-business black Kydex sheaths, and also offers them in leather. “Harry Savage makes the sheaths for the daggers and he’s just great to work with,” the maker opines. “His work is always top-notch. The small knife in the picture accompanying this story is my Shrike EDC. It’s available in a variety of steels and handle materials. I offer Kydex and leather sheaths for my other knives, too.”

The Toothpick By Matthew Roberts

Matt Roberts chose ladder-pattern damascus for his Toothpick dagger because it complements the symmetrical blade profile, and the coffin-handle design for its simplicity and flowing lines.

Matthew Roberts is an ABS journeyman smith with a passion for forging. 

“I modeled the Toothpick after the Gold Rush daggers and Arkansas toothpicks of the 19th century,” he explains. “I have no knowledge whatsoever of historical knives and their dimensions. I made this because it looks vicious. Utility was an afterthought for this build.

“I forged the blade from 15N20 and 80CrV2 steels,” he continues. “I chose ladder-pattern damascus because it complements the symmetrical profile. The blade geometry is very acute with a full distal taper—the point is ground to near zero.” The Toothpick has a 7.25-inch blade length and is 12 inches overall. The blade is 1.2 inches wide at the widest and has about a .165-inch maximum thickness.

Matt chose a coffin handle design for its simplicity and flowing lines. The radius of the handle profile mirrors the blade profile. The handle material is African blackwood that Matt faceted heavily. 

“Blackwood seemed to be an appropriate choice because I wanted the blade to be the focus of the piece,” he notes. “Also, blackwood is a very heavy wood which helped bring the point of balance well into the handle.” The guard and spacer are 416 stainless. The spacer fluting is mirror polished.    

Matt chose a simple sheath to reflect the clean lines of his dagger. “It’s buffalo hide over bridle leather,” he states. “The hide has a matte finish and is very soft.”

Coffin Dagger By Julian Sacco

Julian Sacco’s Coffin Dagger features a W2 tool steel blade made via the stock-removal method and an unusual smoky hamon he chose for an “ominous feel.” The African blackwood handle is configured in what the maker calls an “old-school-coffin” style.

Julian Sacco’s dagger redefines the word sleek—and that only begins to describe the distinctiveness of his take-down-construction Coffin Dagger. 

“The inspiration for this piece came from seeing a lot of other makers do coffin-style bowie knives,” Julian relates. “I felt a shape like a coffin would fit really well on this dagger, as it’s an entirely mirrored piece all the way around. Essentially I wanted it to have an old look and feel to it and I think the coffin style fit that profile perfectly.”

The blade is ultra-slim and has a notable hamon.

“The blade is W2 tool steel and is done in the stock removal method,” he notes. “I don’t have much experience with hamons but, as per the theme of this dagger, I tried to create a smoky pattern to give it an ominous feel.” The knife has a 7-inch cutting edge and is 13 inches overall. “I wanted this to be more of a nimble and easy maneuvering piece,” Julian states, “somewhat like a stiletto dagger, but not quite.”

The grip’s modified wasp waist exudes creativity as well. 

“The handle is shaped entirely to look like an old-school-style coffin, which I think it resembles quite well. I wanted to have an aggressive look to the overall construction, which is why I shaped the pommel with such sharp lines,” he remarks. “To match the guard I kept those similar shapes and lines on the outside while smoothing the areas that would be gripped in order to make it comfortable for the user. The brass pommel and guard were an excellent choice as I knew they would patina in a way that would fit the overall rustic look and feel I was going for, while the African blackwood handle complemented that look exactly how I hoped it would. It perfectly fits the profile of an old coffin with its rich lines and bold grain, tying the entire theme of the piece together.”

Read More

50 Years Ago In BLADE: Big Bucks Bowie

Harvey McBurnette etched his name in high-dollar knife sales.

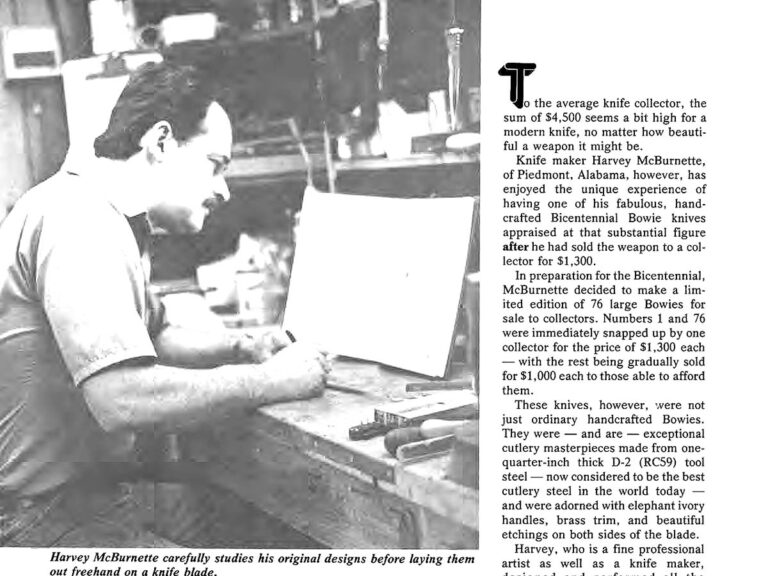
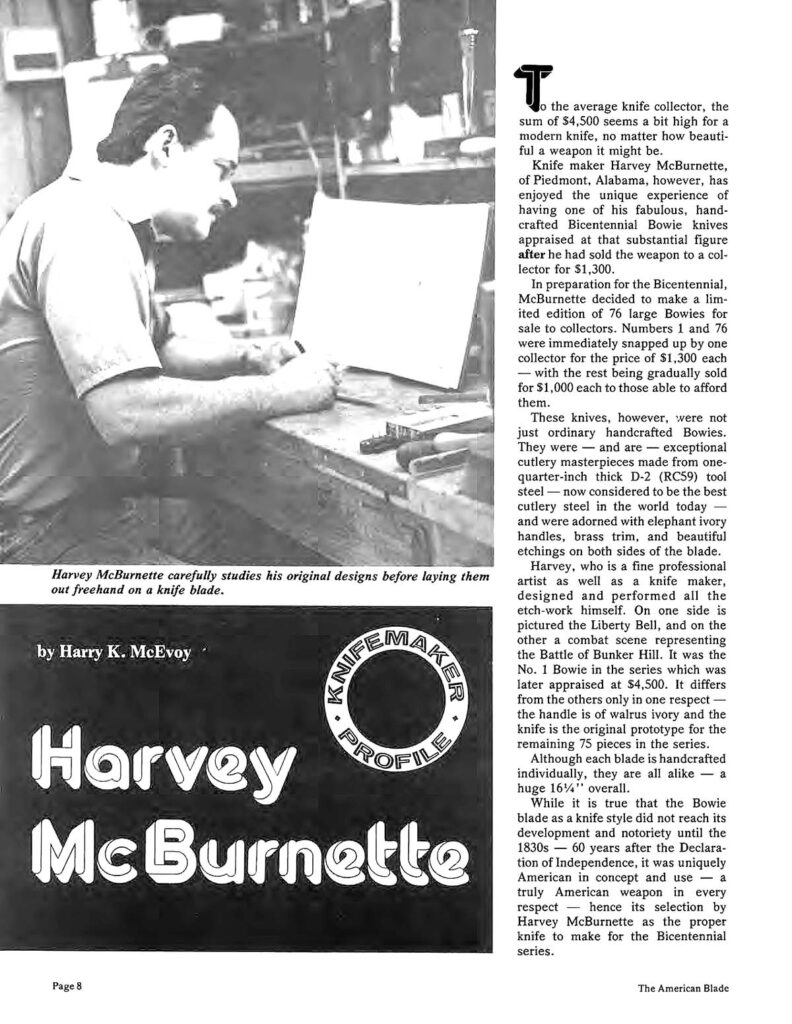
Harvey McBurnette of Piedmont, Alabama, landed in the July-August issue of the 1976 American Blade for somewhat patriotic reasons. Somewhat, because the lead of Harry K. McEvoy’s exposé on the maker was McBurnette’s celebrated Bicentennial Bowies. But there’s more to the matter than a simple commemoration of the nation’s birthday in steel.

McEvoy hooks readers by showing what the artistically talented knifemaker’s work commanded back when your dollar went a long way. In 1976, the exact sum was $4,500. As McEvoy wrote, “[O]ne of his fabulous, hand-crafted Bicentennial Bowie knives appraised at that substantial figure after he had sold the weapon to a collector for $1,300.”

The lead image of the profile on Harvey McBurnette shows him studying his original knife design and free handing it to the steel. The maker had a strong artistic streak and was known, in part, for the embellishments he etched onto his knives.

For context, that’s roughly $26,000 in today’s dollars. What likely made the run of 76 bowies desirable was McBurnette’s unique system of adorning the knives—etching. This system, seen on many of his knives, was a very conscious choice on the maker’s part, as the story reports, serving to differentiate his work from other custom craftsmen of the day.

“I wanted to do something unique, or at least different, with my knives,” McBurnette was quoted as saying in the article. “And since I was an artist I thought if I engraved or etched my blade, I would add a touch I felt was needed to make them stand out. I chose the art of etching because there were a few other knife makers who engraved their knives. Besides, even a master engraver cannot do what an etcher can do.”

McBurnette’s Bicentennial Bowies had quite a motif etched on either side of their D2 tool steel blades. On one side of the 16.25-inch knife is an image of the Liberty Bell, and on the other a battle scene depicting Bunker Hill. The images are the same on all 76 knives, and 75 of them had elephant ivory handles. The knife appraised for the then astronomical sum did differ; the No. 1 of the series was a prototype with a walrus ivory handle.

More Knife History:

Woman Carries Knife Made With Her Rib

Travis Payne decided on a spey design for this rib-handled everyday carry.
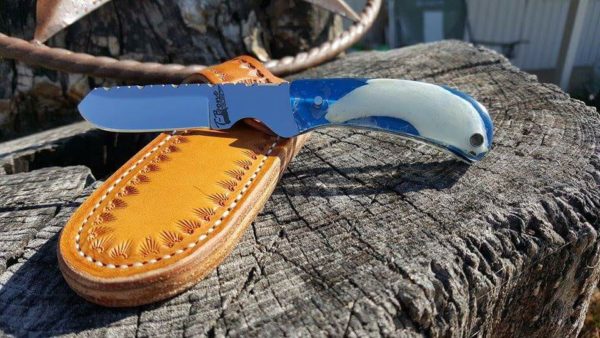
Travis Payne of T-Bone’s Custom Creations was hesitant at first, but when Kelly Pilcher asked, he made a knife with her rib. The overall length on this spey knife is 6.75 with a 2.5-inch cutting edge.

Kelly Pilcher of Collinsville, Texas, was 20 years old when doctors told her that hope of regaining feeling in her right side lay in having her first rib removed. She put the surgery off for as long as she could, but at 22 opted to go under the knife to alleviate her thoracic outlet syndrome. During surgery preparations Kelly asked, “‘What happens to body parts that come out of people?’” She was told that they were disposed of properly, but that if she wanted to take her rib home with her, she could. It was hers. She was adamant that she wanted to keep it. When she awoke from surgery, her dad was there and he had an idea of what to do with the bone. Shane Pilcher works at the New Gainesville Livestock Auction barn and when someone had mentioned making a knife with the rib, they knew just who to ask. Travis Payne, of T-Bones Custom Creations in Telephone, Texas, makes castration knives so all the cattlemen knew he could fashion a knife made from her rib. “Let’s do it!” Kelly remembers saying.

Travis Payne is known for this casration knives.
Travis Payne is renowned for his castration knife design. It is often copied by manufacturers using low-grade steel. Look for the T-Bone’s makers mark to ensure you’re getting the real thing.

TOS is a condition in which the surrounding soft tissue constricts nerves and blood vessels between the collar bone and first rib. Normally it is something diagnosed in people in their 40s to 60s, more commonly women, or perhaps mail carriers who consistently carry a heavy bag on their shoulder. Kelly was diagnosed when she was 14. It is believed in her case that years of catching slow-pitch softball as well as playing volleyball may have constituted the kind of overuse usually only seen in older patients.

By 17 Kelly had undergone a year of physical therapy. Although the therapy improved the symptoms of her TOS, it did not eliminate them. She went for an additional course of physical therapy a couple of years later, but the results were not as good. Her condition continued to worsen. “It’s different in each person,” she explained. She endured numbness that started in her arm, but then advanced to her whole side. Although she learned how to teach her body to move when numb, she was left with few options if she wanted to become fully functioning again. She decided to have her rib removed.

Shane Pilcher and his daughter Kelly McGuire are both happy that Kelly decided to keep her rib and have it made into a knife.
Shane Pilcher wasn’t sure about his daughter Kelly’s plan to keep her rib, but the cattlemen at the livestock sale barn convinced him that a knife might be the perfect solution. “I don’t leave home without it,” Kelly said of the knife Travis Payne fashioned from her first rib.

Shane had been at the livestock sale barn and was expressing some hesitation about Kelly’s decision to keep her rib. Someone pointed out that knives are made with animal bone and antler all the time, why not a human bone? “‘And doesn’t T-Bone make a knife?’” Travis said, recreating how the conversation may have gone at the barn. Since 1993 when Travis was still in high school he’d been making knives. His father and brother work the ranch where he lives in Telephone, Texas, but he makes knives full time. He is renowned for a style of castration knife that is frequently copied, most annoyingly by manufacturers using cheap steel. Since Travis’ father-in-law frequents the same sale barn where Shane works and the barn owner had purchased several of Travis’ knives and many of the cattlemen owned his knives, he was the first knifemaker that came to mind. Shane warmed to this idea and presented it to Kelly in the recovery room.

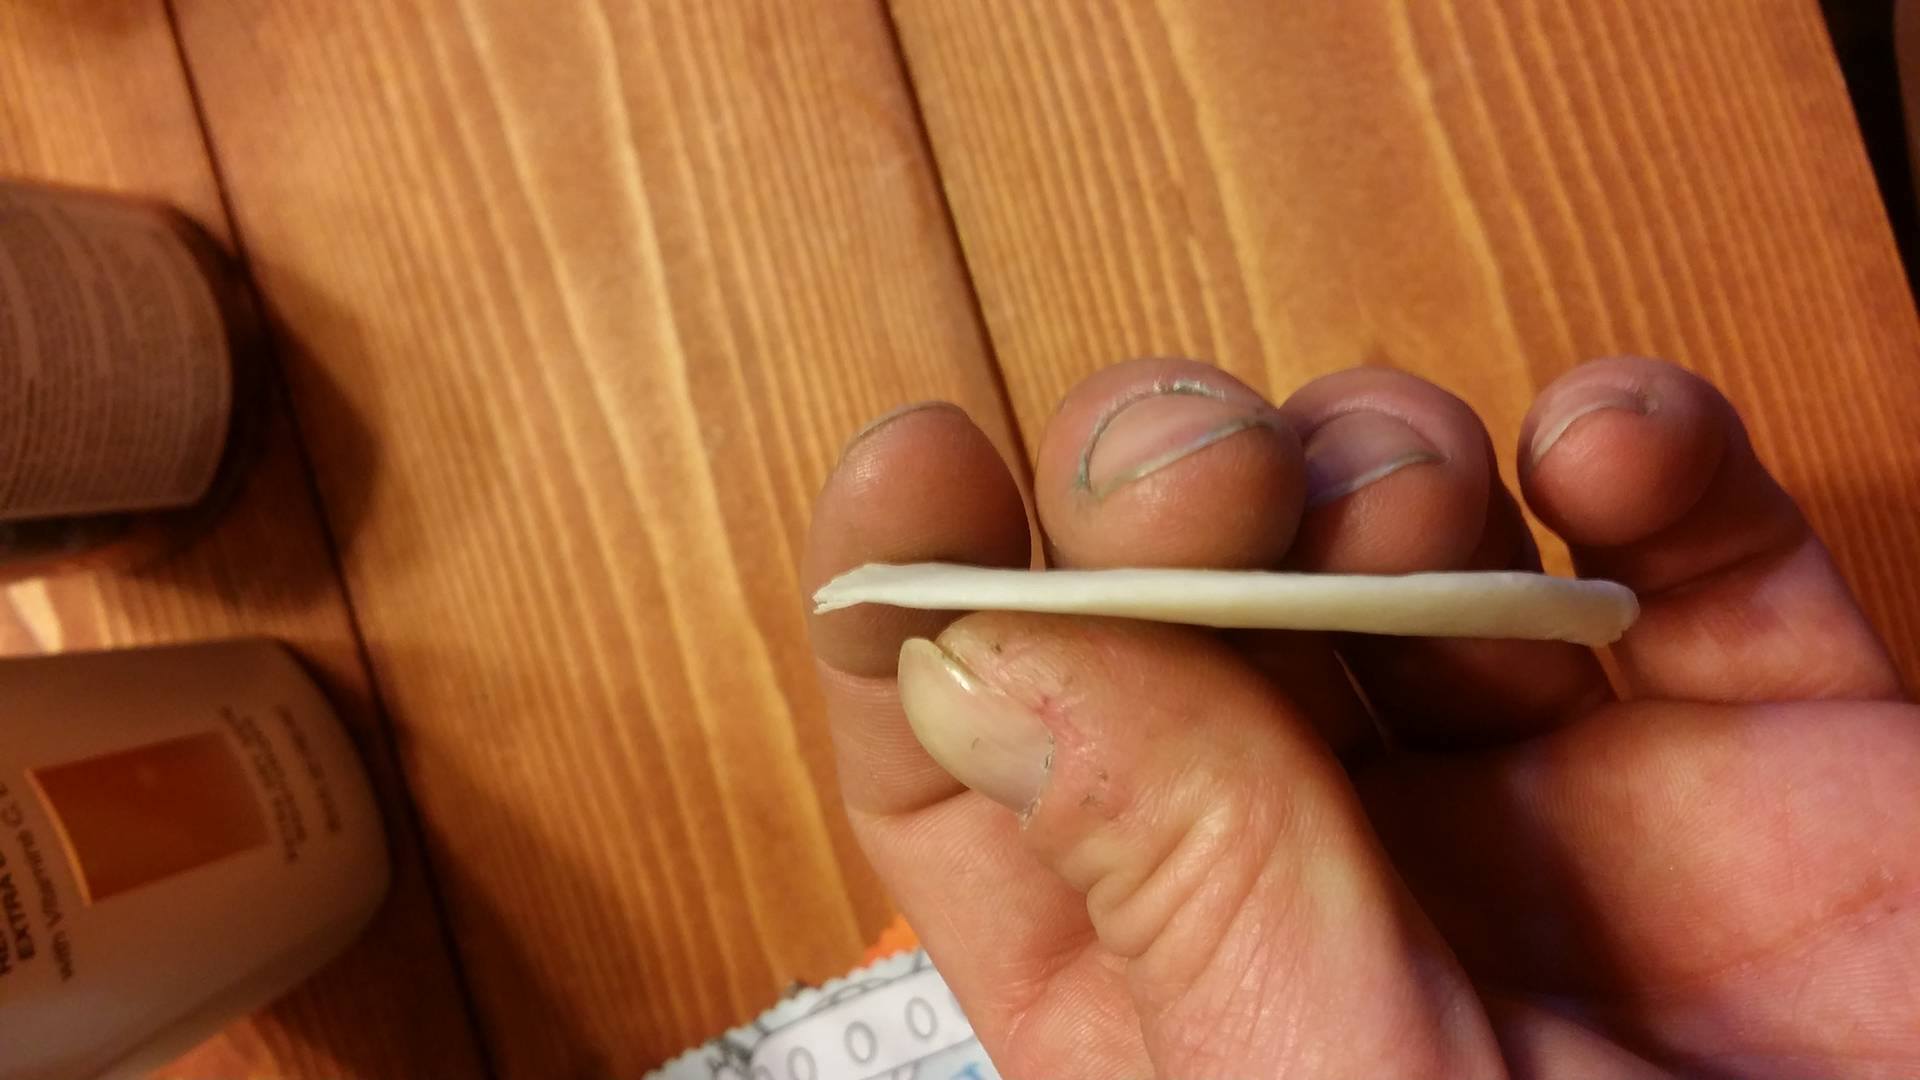
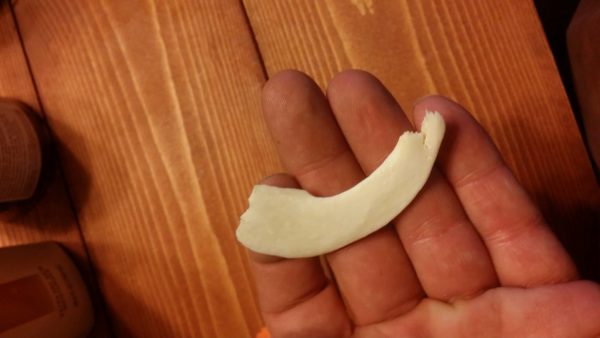
Kelly's McGuire's first rib was only 1/8-inch wide at its widest point.
Travis Payne was nervous about slicing Kelly McGuire’s removed rib. What if it broke?

Like everyone involved in the project—except Kelly—Travis was hesitant, but he agreed to make the knife. He decided on his 3100T everyday carry model, a spey in cowboy parlance, usually the second blade on an old-school slipjoint trapper. Only this would be a fixed version. “It came to me in a hospital specimen jar,” Travis said, taking a drag on his cigarette and waiting for the laughter. “With the meat still on it.”

He approached the project like he would any deer skull. “Only I knew I wasn’t going to be using my wife’s cook pot,” Travis said, laughing. He bought a throw-away pot and boiled the bone to get off any connective tissue. Although bleaching a bone works, it also can break the bone down. Travis soaked the 3-inch bone in hydrogen peroxide for a week. The same whitening was achieved without compromising the strength of the bone. Then he let it dry for several months, providing a convenient delaying excuse. The bone was very thin, only an 1/8-inch at its widest point. Travis feared breaking it.

Travis Payne thought long and hard about slicing such a thin rib bone.
Once the rib was clean and dry, knifemaker Travis Payne was able to see its true size. It would need to be cast in resin if it was going to be used as a knife handle.

“I had to regroup and talk to Kelly,” he said. She remembers the call. He explained to her that the bone was too small and thin to make a handle out of, but that he could arrange for it to be cast in resin. Only he would need to slice it down the middle to have bone on each side of the handle. He could break it in the process. “I told him to go for it,” Kelly said.

“Anyone who knows me, will tell you that I procrastinate,” Travis said. He continued to analyze the problem. Meanwhile, he needed to find someone who would cast a human rib. Travis figured if anyone would do it, it would be Robert Belcher of Mental Co. Robert eschews phones and social contact, but his resins like Plantstone are innovative. “‘No, but hell no. I can’t be touching that,’” Travis recalled him saying. Travis moved on and got similar responses, but at least there was no point cutting the rib if he didn’t have someone lined up. Finally, he took the rib to a show and unwrapped it for Pat Ankrom, of Ankrom Exotics in Centerville, Iowa, specializing in natural and cast scale materials. “Pat was like, ‘I’m leery, but I also think it’s kind of cool,’” Travis said. The men discussed the casting, and Pat agreed to do the job. Pat did not want something to happen to the bone in the process of packing up from the show, so Travis said he would mail the rib to him.

Travis Payne owns T-Bone's Custom Creations out of Telephone, Texas.
Travis Payne, 41, started making knives in high school before everyone had access to the Internet. He’s been a knifemaker for 20 years.

Now Travis had no choice but to cut the bone, but it was a nerve-wracking proposition. Travis wasn’t about to charge a young woman who didn’t have a lot of money and who had a debilitating condition more than the $200 he normally charged for such a knife, but in hindsight the cost to attempt something like this again would be closer to $500, Travis said. Kelly, of course, was excited to both see the knife and to have her rib back in her possession, so periodically she’d call for a status update. Finally, Travis got his courage up and sat down with a jeweler’s saw. “Even with a jeweler’s saw it was a tedious process,” he said. The whole project was “intense,” he said, laughing.

The two halves were packaged up and shipped to Pat, an exercise in trust in itself. Meanwhile, the blade awaited. It was made out of PSF27, a powered version of D2 that allowed for a true mirror finish. The lack of a point on a spey design means it’s ideal for active cattlemen, ensuring nobody stabs themselves or punctures a sheath. It has a hollow grind, and a finger groove for more controlled cutting. The file work on the spine increases a sure grip in what can be wet or messy work.

The bone was cast in clear resin so you could see it, but so that you couldn’t see the full tang Travis consulted with Kelly about colors. She was open to a turquoise or blue. Travis added a blue liner, which casts the clear with a blue tone. The knife was then sent to Jack Andress, who made a sheath in a yellow leather, complimenting the blue perfectly.

How’d it come out? “I love it,” Kelly declared. Shane and Kelly came together to pick up the knife from Travis. Kelly said that she’d had that rib her whole life and she saw no reason why she shouldn’t have it with her for the rest of her life. She carries it everywhere, either on her person or in her vehicle. Although she does use it, she tries not to. Her surgery was a success, and feeling has mostly returned. There is no cure for the many variations of TOS and symptoms can return, however, Kelly’s pluck and resolve are ever-present. “I can’t complain,” she said.

Which Knife Designs Work?

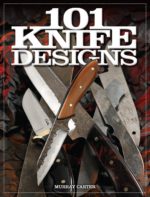
"101 Knife Designs" is available through ShopBLADE.
Do you want some fresh inspiration for your knife designs? The best inspiration is to look at the designs that have lasted and learn why.

“101 Knife Designs” gives you 101 scaled patterns that you can use to design your own knives. Learn how to compare patterns and understand how some designs survive the test of time. If you’ve enjoyed Murray Carter’s other writings, you will be sure to enjoy this one. On sale now for $19.53.

Want to Make Knives Full Time? Read This First

0

What is a Full-Time Knifemaker?

There are different definitions of a full-time maker. My definition is that of a maker whose sole source of income comes from the making and selling of his/her knives. This is no easy task.

In fact, by my estimate, less than 2 percent of the makers worldwide fit into this category. The reason the number is so low is it is very difficult to depend on knifemaking as your sole source of income.

I asked five full-timers what it takes to make a living making knives: David Broadwell and ABS master smiths Jerry Fisk, Daniel Winkler, Don Hanson and Shawn McIntyre. All agree the following are keys to becoming a full-time maker.

#1 – Treat Your Knifemaking Business Like a Business

Fisk’s advice is to take college courses on business management, accounting and marketing prior to going full time. McIntyre agrees. He recommends putting as much effort into learning to run a small business as you do into making knives.

I recommend adding a certified public accountant (CPA) to your knifemaking team. In addition to handling your books, a CPA can recommend which type of business entity you should form. Perhaps the CPA’s best skill: tax planning.

#2 – Invest in Equipment

What kind of equipment? As Winkler noted, he and his partner, Karen Shook, “invest money in new equipment that will make our work better and more efficient.”

#3 – Find Your Niche

This is where your marketing plan comes into play. The objective is to optimize how you introduce your knives to potential buyers. At a minimum, your plan should address how you will make the most of attending knife shows, advertising in print and on the internet, and the potential of working with a dealer and/or purveyor.

#4 – Communication Matters

How to Be a Full-Time Knifemaker
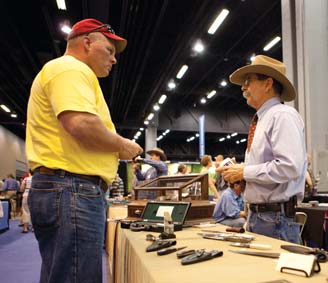
You must build time for interaction with your clients into your schedule. A basic rule of thumb: No customers, no business. The late John White (right) talks knives with a client during a past BLADE Show. (Point Seven photo)

For Hanson, it is one of the most important aspects of being a full-time maker.

“I answer phone calls and e-mails very quickly, and deliver on time or contact clients and let them know why there is a delay,” he stressed. “I listen to my clients.”

#5 – Create a Competitive Advantage

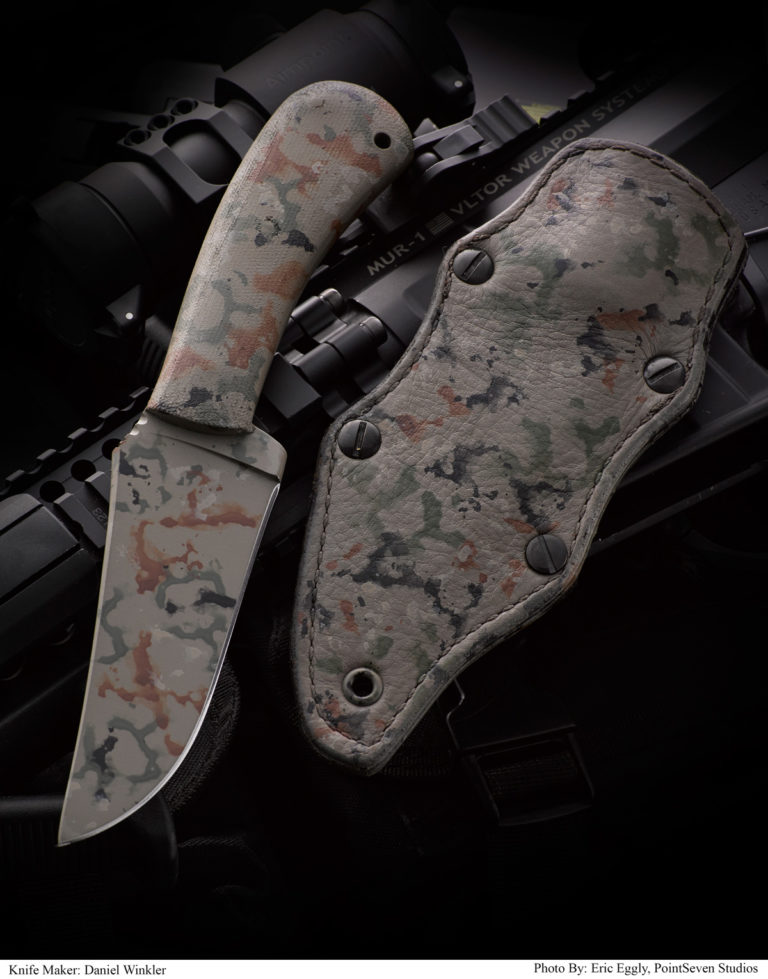
What separates you from your competitors? Winkler said adding Shook and her period style of sheathmaking to his operation years ago gave him a competitive advantage at the time.

“She brought a lot of business skills and makes sheaths that really put our work in a whole new league,” he observed.

More times than not your competitive advantage will come from being the first to adopt a new steel, handle material, design element, etc. You should incorporate such use of new materials or techniques into your business plan.

#6 – Delegate

No matter what their level of expertise, most makers realize they cannot do it all by themselves, though some try. Successful businessmen understand that utilizing the expertise of others frees them up to do the things they do best.

#7 – Use Professional Photography

One thing the makers interviewed all agreed on was employing a professional to photograph their knives.

#8 – Love What You Do (But Stay Grounded)

Enthusiasm and loving what you do are important factors in becoming a successful full-time knifemaker. However, understanding and implementing basic business concepts are equally important to building and maintaining a long-term, successful enterprise.

Final Words of Wisdom

Winkler may have summed it up best.

“I suspect very few makers are at [the full-time] level, as it’s the most difficult to survive in. It does not make your work more sought after. It does not put you in any kind of ‘exclusive club.’ But,” he observed, “if a maker can handle the pressure, it can be very rewarding mentally and somewhat rewarding financially.”

Advertisement

Must Read Articles

Read this before you make a knife

Knifemaking 101 – Read This Before You Make a Knife

  by Wayne Goddard My experience has taught me that there's nothing like digging in and getting started. I've often said the hardest part of the...
how to forge damascus steel

How to Forge Damascus

Advertisement
Advertisement