
Knifemaking

Knifemaking is the building of a knife, which includes the blade, handle and other accouterments. Blades are made by either removing metal from a steel blank via a grinder – known as stock removal – and the forging to shape of hot steel into a blade in the process known as bladesmithing. Other parts, including bolsters, guards, pommels, etc., are needed to complete the finished knife.

Featured Knives – – Knife Collecting – – Tactical Knives – – Survival Knives

2012 ABS Expo

0

The 2012 American Bladesmith Society’s All Forged Blade EXPO is the premier show for hand forged blades. From utility blades, to the finest forged and crafted art knives, the ABS EXPO has something for everyone. The show will be held in San Antonio, Texas, January 27 – 29, 2012 the home of the Alamo.See some of the world’s finest forged knives showcased in a unique and informative format for the enjoyment of the forged blade collector/enthusiast by American Bladesmith Society Mastersmiths and Journeyman Smiths.

Dan Cassidy has set up an Expo Photo Gallery so that the makers can exhibit their knives prior to the show, so that collectors may have a sneak preview of these works of art. I have asked the table holders to make knives especially for this show and to photograph them. Please post your photos in the ABS Exposition Gallery of the ABS Forum and ABS Webmaster Dan Cassidy will be available to assist you. Also post your knife photos on other knife forums so that prospective buyers may have a sneak preview to what they will see at San Antonio.

14 inch Thomas Wells Antique Bowie Progress Report.

To see previous posting,Click:Jim Batson on ABS Expo

 BLADE                                                                                                                                           A full scale pattern was made of aluminum from a tracing of the original Bowie. The blade as it was being forged could be laid on the pattern hot as an aide to forge the blade to shape. The steel in this blade was forged from a large coil spring from a rail car. Attached Image

 (Photo 1)

The blade was ground, set up for the guard, Spanish Notch filed , heat treated and finish ground. The maximum blade thickness is .355 inches at the hilt and .250 inches at the clip. The clip was ground and hand finished on one side of the blade as was the original. Attached Image

(Photo 2)
The large tang was used to give the knife a better balance and stronger handle. The tang is tapered from guard aft and from the top down. The pin holes were drilled in the tang.

GUARD
A brass 1/2 template was fabricated to the shape of the guard which fit snuggly on the blade.
Attached Image (Photos 3a & 3b)

 
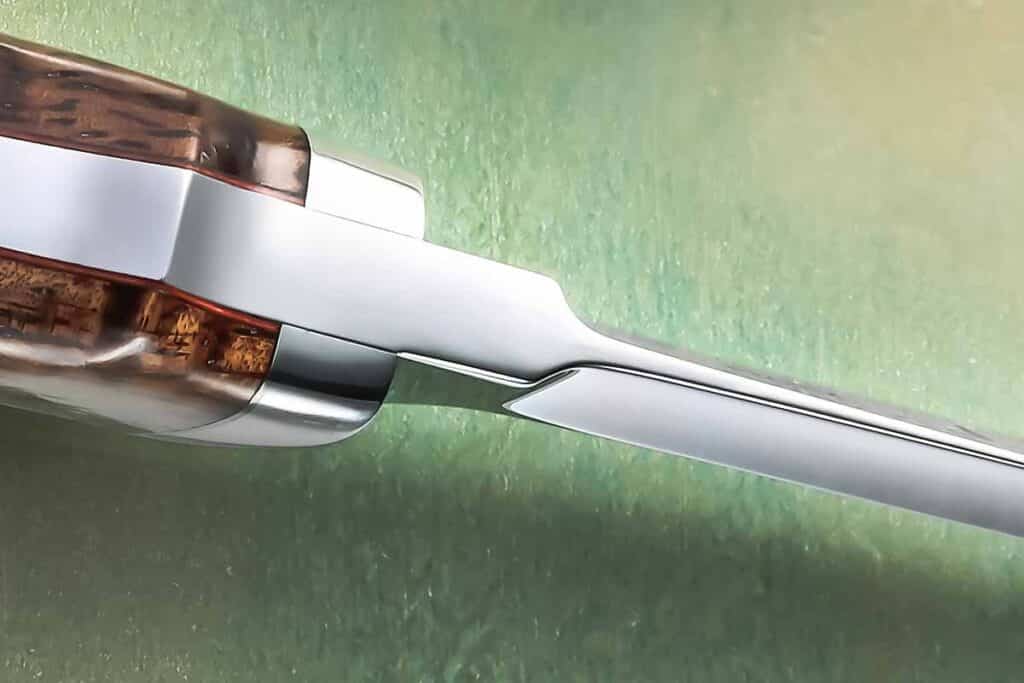
The guard was hand filed from a 1/4 inch thick piece of cupro nickel 715 , hand finished and polished. Cupro nickel 715 is 30% nickel and 70% copper and is more corrosion resistant than nickel silver which has only 18% nickel.

HANDLE CONSTRUCTION                                                                                                   Photo 4 is the end view of the handle that shows the basic handle construction.
Attached Image
Photo 5 is the handle
Attached Image
and Photo 6 is an exploded view of the handle showing all its components.
Attached Image

The handle was fabricated by wrapping the tang with Teflon tape. A piece of tin .007 inches thick was wrapped around the tang and drilled for the pin holes. Two pieces of Mastodon Tusk were shaped into a trapezoidal cross-section to fit against the tin liner. Holes were drilled in the Mastodon handle scales. The scales were shaped a little over size in the plan view. These scales were super glued with gel to the tin liner using pins to align the holes and a rubber band made of an inner tube as a clamp. The assembly was removed from the tang and a dam was made at each end of the handle with masking tape. The voids at the top and bottom of the handle above and below the tang were filled with JB Weld. The handle was ground to final shape in a rectangular cross-section with each scale being of equal thickness.
The handle is a little larger at the pommel than at the guard. I went to Microsoft Word and made a drawing of the rectangular cross-sections at the front and back of the handle. I drew an ellipse in the rectangles and printed them out.

 
Attached Image (Photo 7)
I then cut out the rectangles and pasted them on the front and back of the handle. The handle was shaped with new belts from 36 grit and 80 grit on the flat platen by holding the handle vertically against the platen. The handle was hand finished to 600 grit.
The front of the handle was taped around the handle the required distance from the end as a guide for the front ferrule. A course file was used to recess the handle .032 inches. The pommel was done the same way. A piece of cardboard .032 inches thick was used to measure the circumference of the ferrule. A rectangular of dead soft German silver .032 inch thick was sawed out a little oversize. The handle was used to form the ferrule with the solder joint at the bottom. The joint was overlapped. Both ends were sawed into with a jeweler saw while held in a vise to obtain a straight joint. The ferrule was opened wide enough to allow an eight inch mill bastard file to be used to file the ends. The file is held in the vise with the face up and both ends are filed at the same time by pulling the ends along the top and bottom faces of the file with a slight pressure. The ferrule and pommel ferrule are wired up, fluxed and hard soldered. The ferrule is suspended by the top; the solder is applied to the inside and the heat to the bottom or outside. When the solder appears on the outside, it is done.
The pommel ferrule was wired to an oversize .070 inch thick plate on one end. It was fluxed and pieces of medium hard solder were laid around the joint on the inside and heated from the outside.
The top and bottom straps were made from 1/2 inch wide by .070 inch thick German silver. The bevels were ground and hand finished on each side. The ends were hand file to fit under the front ferrule and pommel cap.
CHAIN KNUCKLE BOW
After some experimenting, I found that the original chain was called a rope chain that was twisted into a flat plane.
Attached Image (Photos 8a, b & c for construction details)
Eleven gauge (.088 inch diameter) fine silver wire was wrapped around a 3/8 inch diameter rod by hand. Thirty-six turns were made. Over 4 feet of wire was used. This coil was removed from the rod, fluxed and heated to a dull red, about 1250 degrees F., for about 30 seconds allowed to cool to a black heat and quenched in water. One loop was silver soldered with medium hard solder. The chain was constructed and soldered one loop at a time. After using about 10 loops, the chain was twisted flat to insure good solder joints, The chain was completed with 31 loops. A .093 inch internal diameter tube was constructed to make the hinge attachment to the pommel cap. The chain and tube are pictured in Photo 9 below.
Attached Image

 METAL SHEATH
Attached Image (Photo 10)

The all metal sheath was constructed of .032 inch thick German silver sheet metal. After the blade was finished a pattern was made of a piece of oak about 3/4 inches thick. The pattern was made oversize to allow for the liner which is about .040 inch thick. Also make the pattern about 3 inches longer than the blade, the edges were rounded slightly. The sides were cut out of the sheet approximately 3/8 inches wider than the pattern on top and bottom. The tip was notched to allow for the bend. The sheet metal I had was in an as rolled state which was hard. I had to anneal the edges that were to be bent.

 
To shape the sides, place the sides between the pattern and a steel backing in the vice and bend the edges over with a small hammer only hitting the edge in a bending motion. You will have to reset in the vise several times. Take thickness measurements along top and bottom of the blade. Grind the edges of the sides to the require thickness, making sure you have allowed for the metal thickness, the liner thickness and 1/2 the width of the blade. Lay the side flat on the table and measure the height with the depth gage on the back of a veneer caliper.

 Once the left and right side are made, flux the inside of each at the joint. Wire the two sides together with black wire at half inch increments. Flux the outside, use a metal spring clamp on a fire brick to present a joint in the up position to be soldered. Solder both sides with medium silver solder. I use a turbo torch and wire solder. Cut and pull the black wire off. I grind the extra solder off with about 80 grit. I use 120 grit to start the finish grinding on the sheath. It is easier to get the 120 grit scratches out than the 80 grit. You want to polish to 400 grit on a wheel. I use a 10 inch smooth 40 diameter wheel with a 3 inch drive pulley.
The sheath should be pickled to clean the inside. The tip and throat pieces were fitted, constructed and soldered with medium solder. These pieces were then soldered to the sheath body with easy easy solder. The belt loop was formed and tinned with soft 4% silver solder. It was then soldered to the sheath.

WHAT’S LEFT

1. Finish chain and pommel cap attachment with hinge. Polish chain in tumbler.

2. Layout incise carving pattern on handle and carve.

3. Assemble and finish knife.

4. Layout engraving pattern on sheath and engrave.

5. Line the sheath
James Batson, Master Smith
Chairman American Bladesmith Society, Inc.

Knifemaking: How To Build A Railroad Spike Jig

0

Building A Railroad Spike Jig Takes Time But Is Worth The Effort

Building the Railroad Spike Jig

Forged Knifemaking
This article is an excerpt from Forged: Making A Knife With Traditional Blacksmith Skills available at ShopBlade.com.

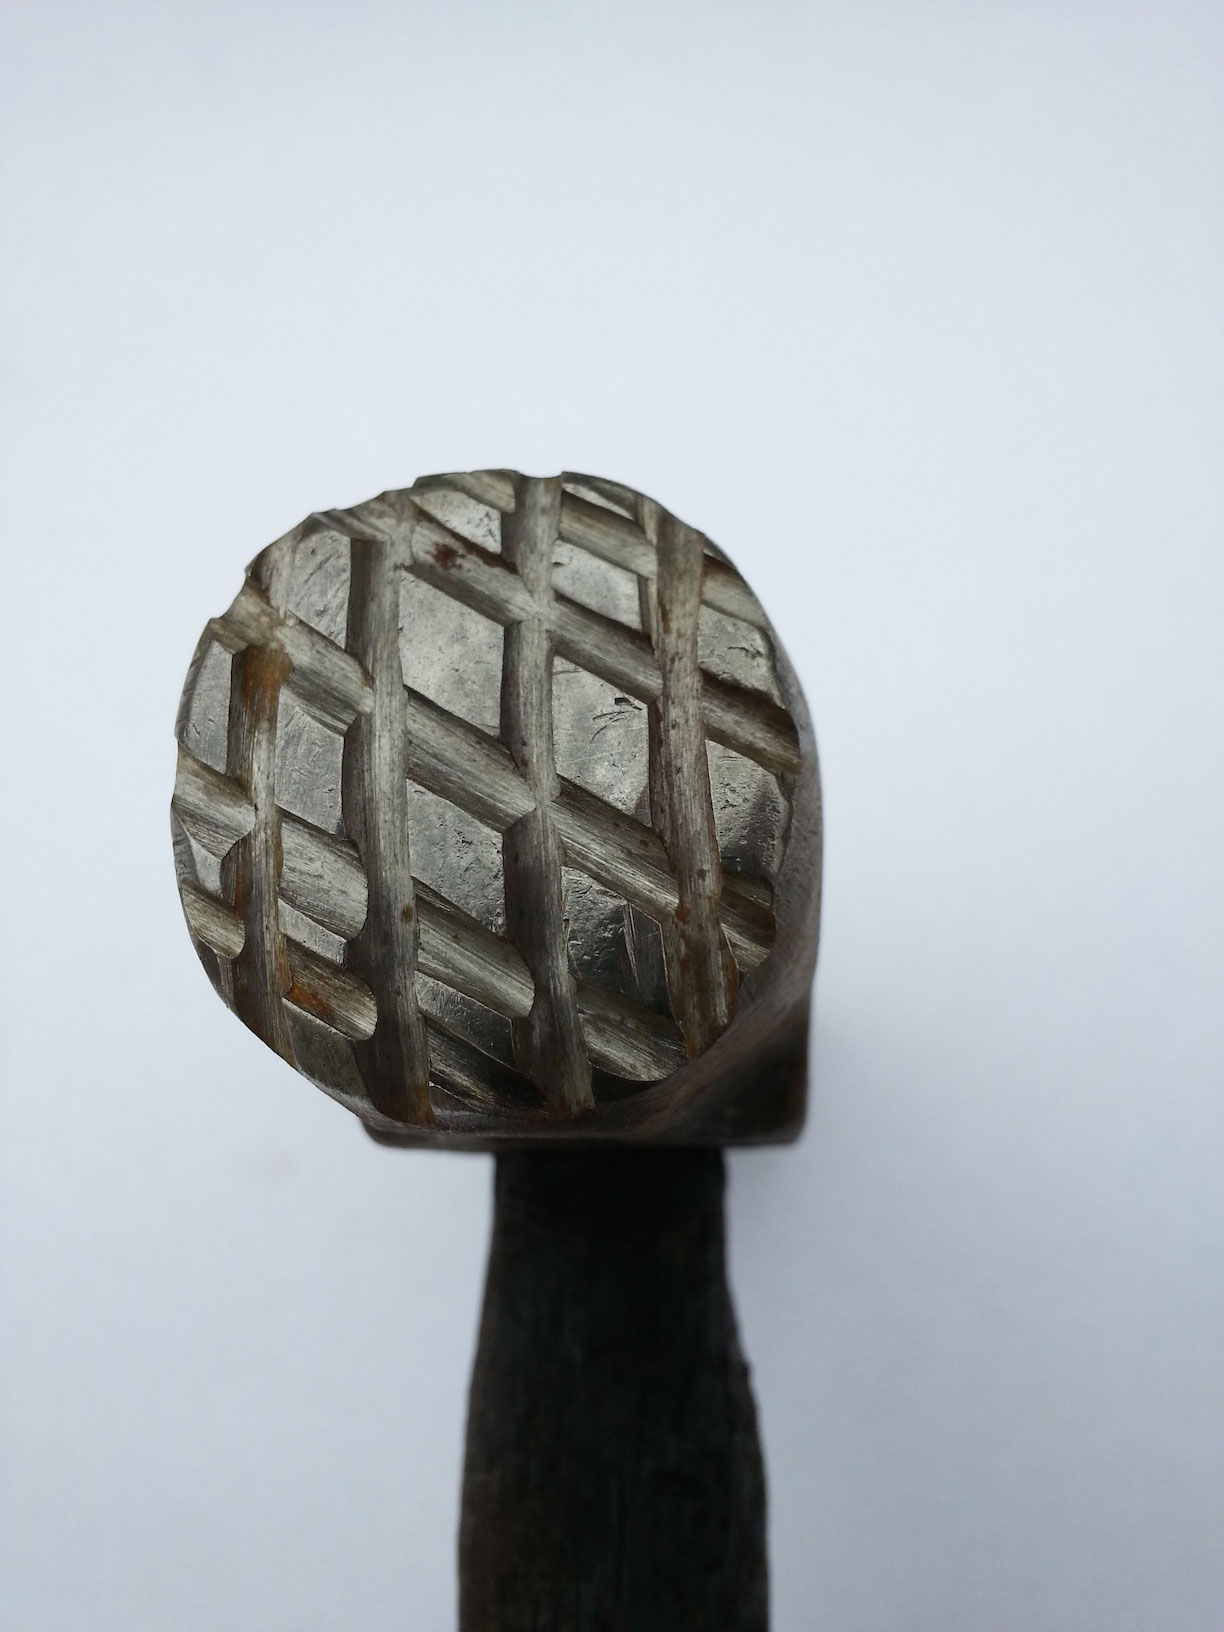
Counter-bending begins with the counter-bending jig. These are made by forging a steel bar .75-1 inch square and about five inches long into a “bottom swage” device. This looks something like a cradle. It can be placed into your anvil’s hardy hole or locked in a vise.

You don’t necessarily need to weld the hardy stud on the bottom, just lock it in the vise. A banana would fit nicely into this cradle. File a groove into the top-right edge to “catch” the point. I use railroad spikes to make this jig. As you make more knives you may choose to change that radius depending upon factors between you, your tools, and your steel.

Bending With The Railroad Spike Counter-Bending Jig

Place the counter-bending jig in the hardy hole or vise. Place the blade bar in the forge at the most convenient position for extraction and quick placement on the jig. Heat to orange.  Place the bar on its spine, with the choil and cutting edge looking up and the point at the groove. Keep the bar at the center of the jig.

Note the “air” between the billet and the spike. The blade is almost resting at the bottom of the jig. The next blow will force it completely into the concavity of the railroad spike jig.

NOTE: Blacksmiths will refer to shaping tools like this railroad spike jig as a swage. Sometimes as a bottom swage. Swages (sometimes called ‘swedges’) are concave in shape. Fullers, on the other hand, which are also shaping tools, are convex.

With the round hammer face strike the bar in the center. This will take one to several heats and hits depending on how hot the bar is and how hard you hit it. Rarely will it take one heat and one hit. Usually it takes many. Do not hit it any more than necessary. We want the entire blade in the concavity of the jig. When it’s there, stop.

NOTE: Remember that straightening blows are much lighter than forging blows. Straightening blows are just hard enough to bring the blade back to straight and flat.

Then, put the blade back into the forge, take a heat, and do the swage business again. Steel, when hot, is extremely malleable (like soft clay) and can be told what shape to take.

You can purchase Paul White’s Forged: Making a Knife With Traditional Blacksmith Skills here.

What Do Judges Look At In Custom Knife Competitions?

0

Know some of the criteria judges use to evaluate custom knives.

Artistic impression, technical merit, fit and finish, walk and talk: What are the standards and where are the attributes that lead to a judge’s conclusion when awards are on the line at a custom knife show? It goes without saying that sometimes the difference between a winner and runner-up is as thin as the edge of a sharpened blade.

Those who judge knife competitions are obviously obliged to employ their experience, skill, years of involvement with the industry and discerning subjectivity. As a result, looking at the criteria that some veteran judges employ helps observers develop a deeper perspective on the competition among the best custom makers in the business. Moreover, if you’re a collector, knowing what judges look for should help you improve your collection; if you’re a knifemaker, it should help you make better knives—or at least knives that are more likely to win judging competitions.

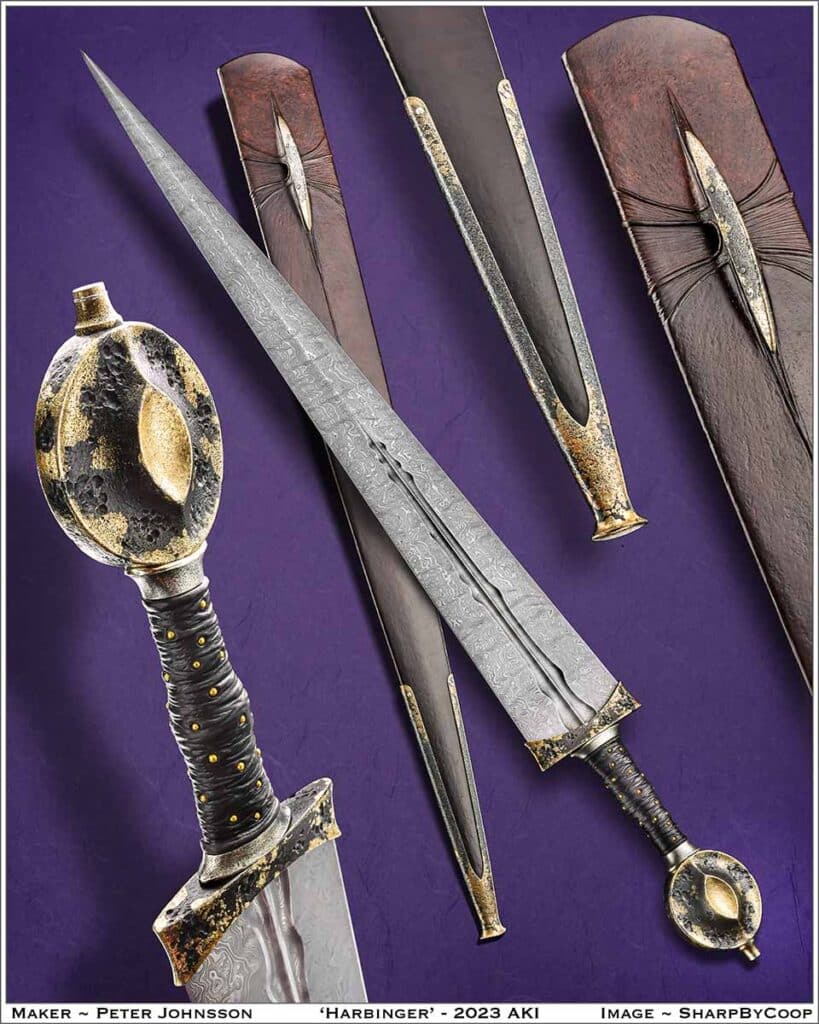
Peter Johnsson's Harbinger
It’s not unusual for a knife to win a category based simply on how hard it is to make—and when you make it as superbly as Peter Johnsson does with the Harbinger, so much the better. (SharpByCoop image)

“I use the four F’s,” advised longtime purveyor Les Robertson, “fit, finish, flow and function. Fit is the overall look of the knife, focusing on how well the guard/bolster fits the blade and guard. How well does the material fit up against the guard and spacers? If a full tang or tapered tang, how well does the handle material fit to the tang?” When it comes to finish, Les primarily looks for consistency and degree of difficulty.

“No matter what type of finish, is it consistent from the tip to the end of the knife? It can have no spots, scratches or other inconsistencies,” he explained. “The degree of difficulty comes in the form of the type of finish. A mirror finish is much more complex than a tumble or bead blast finish. I give bonus points for two-tone finishes, such as a mirror finish on the hollow of the blade and satin for the flat of the blade.”

Finishing up with flow and function, Robertson commented, “Flow—does the knife transition smoothly from one end to the other? Sometimes art knives become more about the art. The embellishments can take away from the basic design the knife was built on. Function: will the knife do what the design intended it to do? While there is always room for improvement on standard designs, the maker should temper the changes and base them on reality. Often, the design borders on or moves into the fantasy realm.”

Robertson adds that the first thing he notices when judging is whether the knife fits the category entered. Hunters, for instance, do not generally feature 10-inch bowie-style blades. Common errors or flaws, he observes, can usually be found in grind line symmetry in the choil area, whether a folder or fixed blade.

Complexity

Jared Oeser has been a custom knifemaker for 13 years and finds himself most familiar with folders. “Folders tend to be, more often than not, the more complicated knives to make,” he began. “Fit and finish are big factors, especially on a folder, and every detail has to be taken into account along with how hard the knife is to make. Adding a lockback feature or multiple blades makes the knife more complicated, and I have seen knives win in categories—even best in show—that might have a tiny flaw but win on the sheer complexity of the knife, just how hard it was to make.”

Oeser likes to take a broad view in the beginning, looking over each of the knives in a particular competition and moving from there. “In a process of elimination, I take some away and then give an overview of the ones that stand out with their level of detail, refinement and craftsmanship,” he said. “I try to leave style aside because everybody has a style of their own. But I do want to see that they have accomplished what they intended to do within their own style. It may not be to my taste, but if they have nailed it, that’s great! What does the entire package look like?”

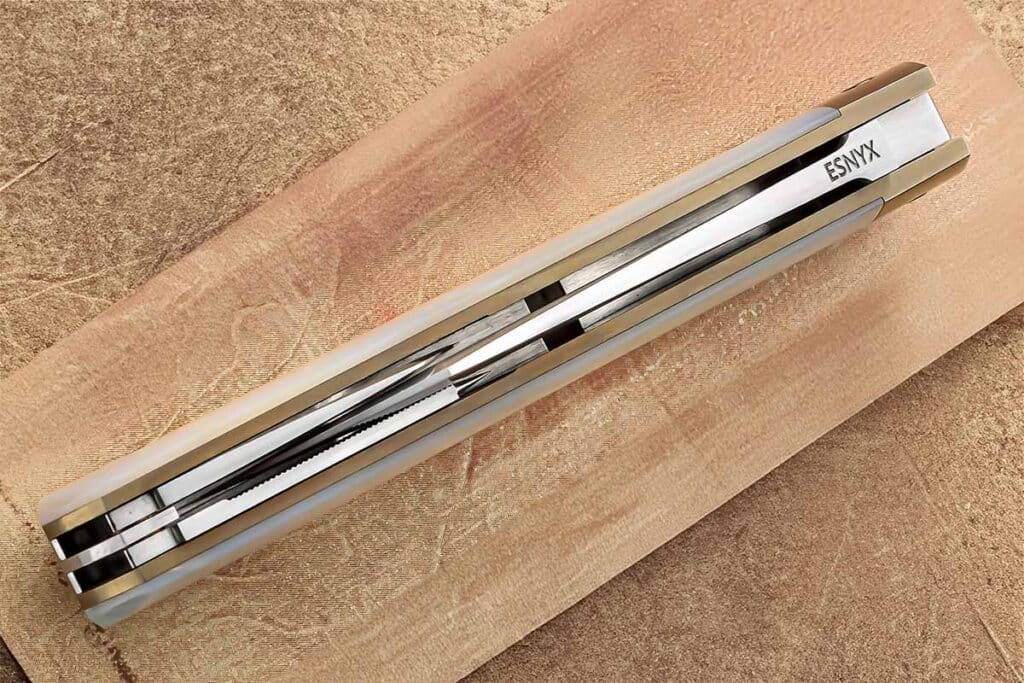
Top-down views of knives can reveal the good or the bad.
Top-down views of knives can reveal the good or the bad. Here it’s the good with the proper spacing between the closed blades on an Evan Nicolaides sportsman’s knives. (SharpByCoop image)

After judging for the first time at BLADE Show Texas in 2022, Jared has seen some entries that immediately fall out of contention. “There are automatic disqualifications if knives have massive flaws,” he related. “I was judging a competition with [ABS master smith] Jim Rodebaugh once, and there was a big bowie with the nut on the end of the pommel way off center. Jim put that knife down and said, ‘Well, that’s out.’”

Scale & Proportion

Scale and proportion are critical elements in the overall presentation of a custom knife, and these ideals apply to both fixed blades and folders, according to Jim Berkenfield of Forged in Thread, an apparel company that contributes revenues back to the knife industry. “I typically examine a knife from the tip of the blade to the handle,” he said, “but that’s just me. Right away your eye will pick up on common errors such as disproportionate size between blade and handle, major flaws in fit and finish, or any sort of material or structural flaw. In my opinion, line and flow are extremely important in both fixed blades and folders, yet as in most judging this is a subjective characteristic of a knife. Really, it’s no different than admiring a fine piece of sculpture or artwork and saying ‘I like that’ or ‘I don’t like that.’”

Fit and finish factor into the award-winning formula in virtually every judge’s point of view. Visual appeal and quality construction go hand in hand. “That’s extremely important in judging knives,” Berkenfield added, “because judges are always looking for perfection in whatever the category may be. Smooth transitions between materials, perfectly centered blades, and smooth locking mechanisms are all vital characteristics of a winning knife.

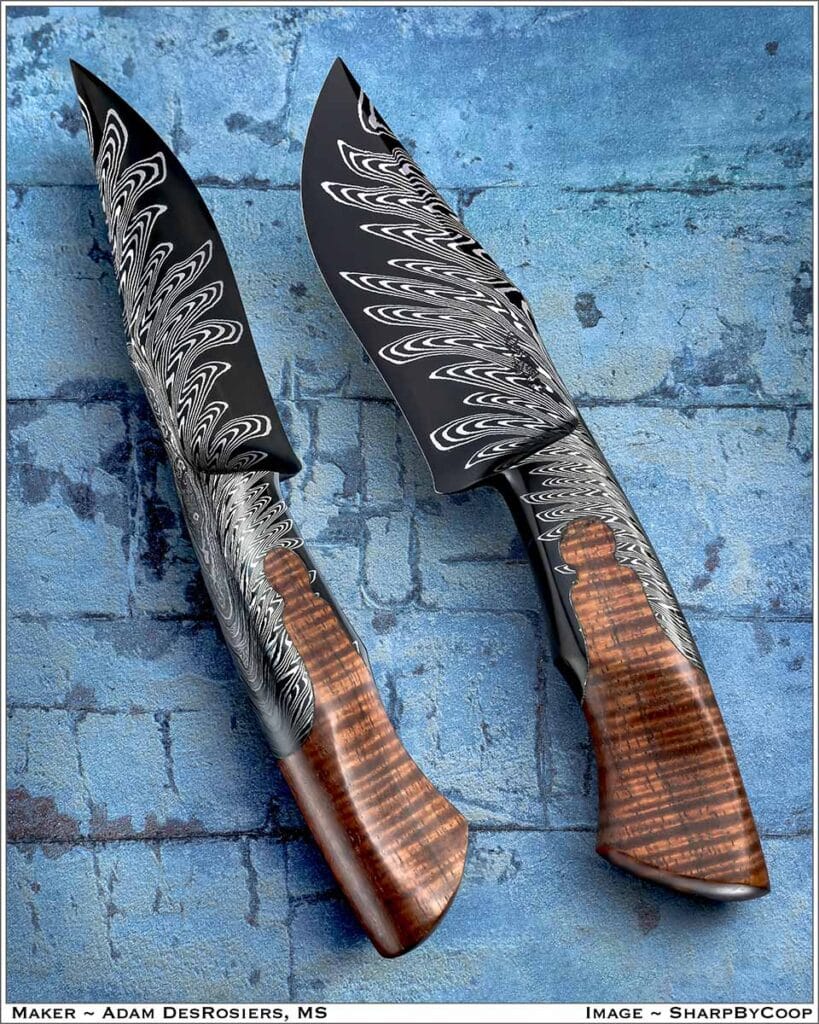
Flow is when the knife’s shape transitions smoothly from one end to the other.
Flow is when the knife’s shape transitions smoothly from one end to the other. ABS master smith Adam DesRosiers nails the concept with his damascus keyhole hunter. (SharpByCoop image)

“In categories that I have judged, the judging teams quickly have been able to reduce the submissions to the top one, two or three knives almost at a glance. Occasionally a piece can be overlooked by a judge based upon the fact that it’s a knife that doesn’t fit [his/her] general aesthetic or knowledge set, and therefore [he/she has] a hard time appreciating it. Obviously, this is one of the reasons that judging is done by a panel and not by an individual judge.”

When it comes down to a pair of high-quality knives, Berkenfield seeks a closer examination of each piece, sometimes with a magnifying glass if necessary. Bad welds and asymmetry in damascus steel can make or break a winning knife.

“A piece of advice I have given to a lot of aspiring and up-and-coming makers is to try and find a way to distinguish your work from the multitude of other incredible knifemakers out there,” Jim concluded. “I tell them to imagine a table with 100 knives on it and one of their knives somewhere in the mix. They should be able to quickly scan the table and identify their knife from all the others. This is easier said than done and sometimes is accomplished with a completely unique design or simply by a small detail that identifies a knife as their own.”

Half The Equation

After making custom knives for eight years, Pennsylvanian Jim Vandeveld sees the judging aspect of his involvement weighted heavily on fit and finish, and his perspective on the topic is pretty specific. “Fit and finish are absolutely critical, and honestly, to me encompass more than 50 percent of a knife’s virtue,” he explained. “Polishing, edge breaking, hand satining, etching, buffing, etc., all must flow just as the design must flow. Inspecting it is purely visual and deficiencies are often glaringly obvious. For me, light usually tells the story. How a finished surface catches the light will often show most imperfections.”

Common errors or flaws can usually be found in the grind line symmetry
Common errors or flaws can usually be found in the grind line symmetry in the choil area. Carl Colson matches the plunge cuts quite well on his Loveless reproduction. (SharpByCoop image)

For Vandeveld, the judging experience begins at first sight—literally. “I think the way the knife is perceived visually at a distance is very important,” he commented. “I personally look for balance, flow and symmetry. These are broad spectrum visual cues that tend to draw me in to take a closer look at a piece. When judging a knife, all views must be taken into account. Lateral, top down, down the point, and more, all propose a different perspective and opportunity for detail to be found or missed. The same is true for folding knives.”

Vandeveld’s judging eye gravitates toward high quality, but common and recurring errors in the knifemaking process do surface. “I think the most common flaws that pop up within custom knives tend to be both visual—related to plunge and grind symmetry as well as faceting on handles and other components, straight-line fit-ups as far as gaps and locations, finishing with etching, sandblasting and polishing—as well as ergonomic hot spots and unbroken edges. These tend to be more subjective based on the maker’s style, but when judging a knife, how it fits in the hand is just as important as the aesthetic in my opinion.”

Set Of Standards

Most judges would probably agree that the devil—or the delight—is in the details when it comes to evaluating the entries in a custom knife competition. It’s way more than a beauty contest. Accessories such as sheaths or pocket clips are not necessarily required. As more than one judge has said, “I’m judging the knife and not the sheath.”

The sheer weight of the knife may even come into play for some, while others make it only a minor consideration. Walk and talk in folding knives certainly demonstrates the proficiency of the folder maker’s tolerances, centerline and spacing, and ease of opening. The list goes on.

One thing is certain—in judging the merits of a custom knife, an experienced individual learns to apply a set of standards to which all makers aspire.

More On Knifemaking:

11 Tips For Starting a Knife Shop at Home

0

* All images courtesy of the author

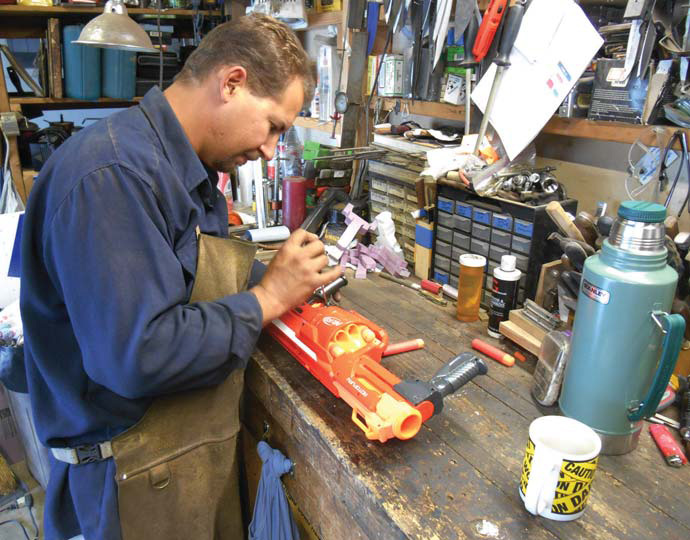
There have been tons of stories on how to be a knifemaker. Most are great and deal with subjects like taxes, suppliers, marketing, sales, bookkeeping and safety. Other great articles cover the technical side of how to make the knives you wish to sell, including stories on forging, grinding, heat treating, handles, sheaths and more.

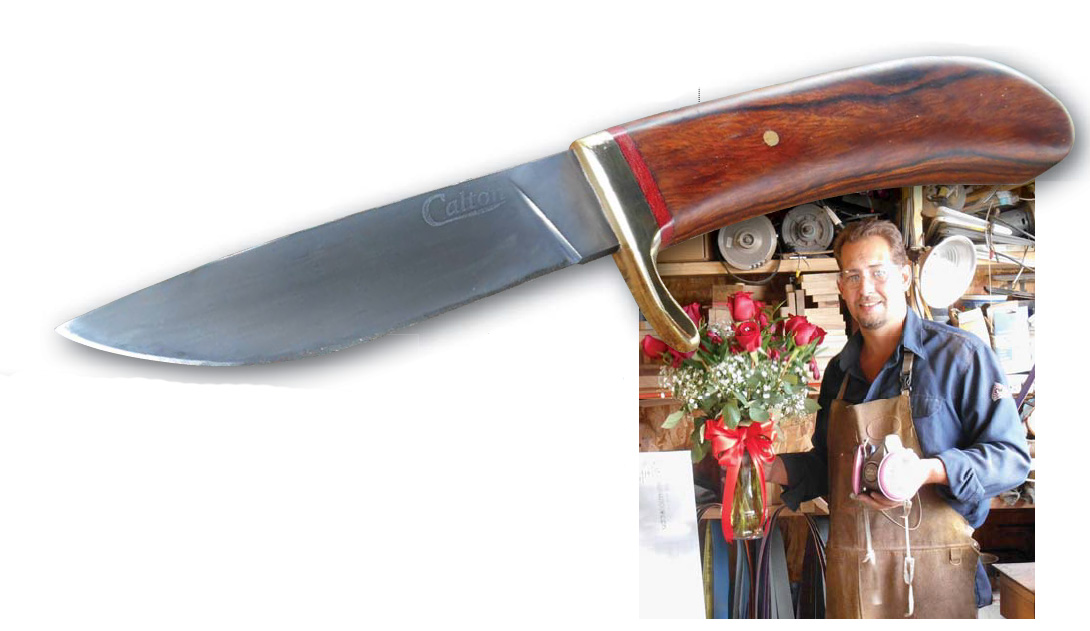
My story will outline some things I have learned over the years as a full-time knifemaker in a home-shop setting that I think will benefit you, your knives and, most importantly, your family.

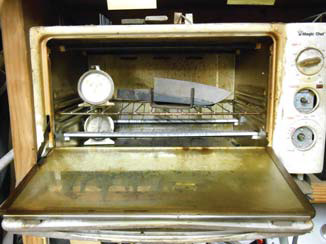
1) A Toaster Oven

Your kitchen will get messy in a hurry if you don’t take things outside. Buy a cheap toaster oven. Problem solved.

The kitchen is not the place to be tempering knives, warming up knife sheaths for waxing them, heating Kydex® for the molding, or burning out axe heads. A $5 toaster at the flea market will do all that in your shop and is a bargain.

2) Pots & Pans

Get a selection of pots and pans, cutting boards and a small scale from a thrift shop. Don’t be tempted to use a “good pan” for that one, little task.

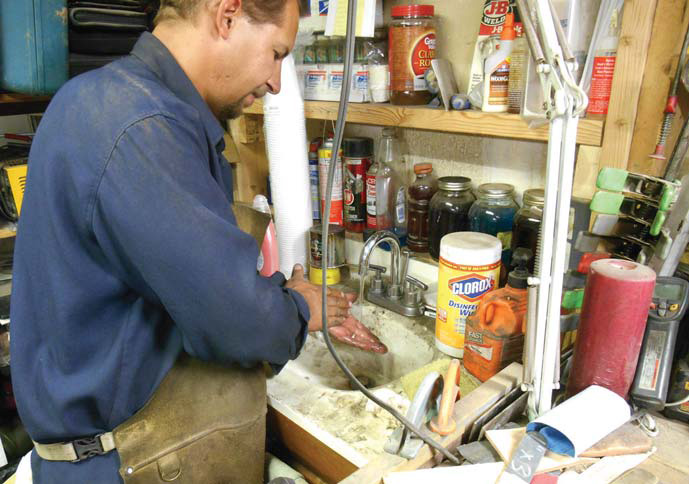
3) A Shop Sink

Would you want to eat out of this sink? No. That’s why it’s the dedicated shop sink, not the one inside the kitchen.

Install running water in your shop, or at least have a five-gallon bucket handy. Make sure there’s a countertop, too, in case of spills.

On that note, wipe your feet off before re-entering a home.

4) A Coffee Thermos

If who like your coffee as much as I do, get a big thermos, fill it in the morning, and take it to the shop with you. This cuts down on the trips away from the shop, as a trip inside the house to grab another cup can turn into an hour away by the time you get the cup, peek in the fridge, check for phone messages, etc.

Plus, every time you re-enter the house, you track shop dirt and oils in with you.

5) Discipline/Knowing When to Stop

Know when to quit for the day. This is one lesson I’m still learning. You get wrapped up in your work and the next thing you know it’s 2 in the morning.
Not only will you spend that night on the couch, but you may spend the next one there too if, as a result, you also forgot the plans you made, dinner, one or more of the kids’ school activities, etc. Besides, it’s tough to make good knives after a rough night on the couch.

6) Do Something Special for Your Family

Make knives, buy flowers, repeat.

Use some of your knife money to buy your wife/husband/partner/significant other flowers. Buy them on a regular basis. Put it on the calendar if you must so you will remember. Think of the flowers as supplies, like grinding belts.

This is very important!

7) Mind the Dust

Know that what happens in your shop does not stay in your shop, and act accordingly. Dust from exotic woods will make it into your home. You may not be allergic to the dust but your wife, kids or family pets may be.

Keep an eye peeled for anything out of the ordinary when introducing new woods or materials into your shop. This also goes for smoke from quenching. Use “green” quenchants when you can, including vegetable-based oils and water. And keep the door to the rest of the house closed until you clear the air.

8) Consider Where Your Shop is Located

If you’re considering moving your shop away from your house, think long and hard about it.

Yes, a home-based shop offers some challenges. However, it offers quite a few benefits, too. Namely, the morning commute is a thing of the past, and people know how to find you.

Move the shop away, as some friends of mine have, and you may end up moving it right back anyway.

9) Make the Most of Breaks

Maximize the time between your work by throwing in a load of laundry, starting supper, taking care of a household task, paying bills, etc. This helps your family’s day-to-day quality of life.

10) Test Your Knives in the Kitchen

If you make them, there is no better test of the kitchen knives you create than to use them in making dinner. This is a twofer in that not only do you get the immediate feedback from hands-on testing, but also the household benefit of preparing meals.

11) Double Up Your Shop

With your shop set up, you have all sorts of tools on hand you can use for other projects. From fixing your kid’s bicycle to tuning up a lawn mower, you’ll find taking care of these everyday things can reset your focus for knifemaking later.

Malaysian Men Of Steel

Lim Loong Hoi hammers steel in his old school knife shop in Selangor, Malaysia. (photo courtesy of Philip Lim Chin Guan)


     Every morning, Lim Loong Hoi is at his dirty workshop—it looks more like a shack from the front—at about 8 o’clock. Beyond the open door in the rear, the passage leads to a hallway and a few small rooms.

     The boneshaker of a wooden shop has been home to Lim and his family for decades. He said he has been making utility tools, including parangs, goloks, large fisherman’s blades and sickles, since his school days.

     His instructor and mentor was his grandfather. Back in the day, Lim found time after school to help his grandpa at the workshop. Picture a teenager’s delicate hands with a heavy hammer and a pair of tongs when, during morning hours, he was holding a pen or ruler in school. That was about 50 years ago.

     Called Sin Sam Hup Lee, Lim’s shop still stands firm against fluctuating economic conditions and the ravages of time. His back is slightly bent from the long, dreary years of standing before the furnace or hydraulic pump, pounding away at pieces of elongated steel.

     Pasir Penambang is a small village on the outskirts of Kuala Selangor in the state of Selangor, Malaysia. The locals, especially the Chinese, are mostly fishermen, shopkeepers or fish wholesalers.

     The Chinese fishermen are Lim’s regular customers. The edged tools he makes for them are larger than usual. The blades are similar to huge butcher knives, having a curvature that helps in slicing a big fish in two with one swift, downward stroke.

     The Malay farmers usually ask for long sickle blades used in dislodging oil palm fruits, a.k.a. kelapa sawit nuts. Each sickle is hollowed out at the handle to accept a long pole. The pole enables the user to extend the blade about 7 to 8 feet to harvest the nuts from the palm trees. Each sickle costs $2 to $2.60. The price depends on the quality of the steel and blade size.

     In Lim’s workshop, stacks of Jeep leaf springs used for blade steel rest in a corner. The four-wheel-drive springs are rusty and grimy. The haggard bladesmith likely sourced the spring steel pieces by the ton from an old junkyard. He probably got them cheap, too. Most of the time they are cut to required lengths. It is a low-tech, slightly primitive method of stock removal.

     Practicality and function rule the land. Almost nobody here has heard of CPM-S30V, VG-10 or ZDP-189. The most convincing line Lim uses is, “This is Jeep spring steel.” That alone gives his customers some assurance they are getting quality steel.

     Edged tools used by fishermen or farmers in the fields have no time to get rusty because they are used regularly and on a daily basis. After six to eight years, the parang, golok, fisherman’s blade or farmer’s sickle may be deemed unusable. The user simply buys another one from Lim. After all, it costs just a few bucks. Compared to its long-term usefulness and hardiness, the cost per blade is minuscule—which is why the agrarian folk in Pasir Penambang and nearby villages are Lim’s loyal customers.

     Lim’s assistant is taciturn, works like a well-oiled machine and knows the blade-making process intimately. Like his boss, the assistant relishes the feel of steel in his hands.

     Of course, the untidy workplace is not exactly ideal for a private conversation. Customers determine what they want, haggle over the price and depart with the edged tool they bought wrapped in a newspaper.

     Occasionally, some outsider brings a drawing of the piece he wants made. The bladesmith examines the drawing and then determines whether his outdated equipment and other machines are suitable for the order.

     The volume of edged tools he sells will not even make Lim a member of the middle class. He obviously is not making a fortune, as some people may suspect.


Ah Pee

     A couple of doors away along the same row of wooden shops is another knifemaker, Ah Pee. A sign at the front of his establishment says “Chuan Lee Chan.” Originally from China, he has aged before his time, though his eyes have a certain fire that belies his years.

     Pee said his children, especially his son, have absolutely no interest in knifemaking. “The young men today prefer air-conditioned offices and as little dirt on their hands as possible,” he told me.

     The long hours and intense heat from the furnace are enough to deter most from pursuing such a profession. It is backbreaking work with the added disadvantage of low and slow financial returns.

     After about five decades of using the hammer, tongs and grinder, Pee is long past set in his ways. He probably does not know how to do anything else. Perhaps he feels he is too old to learn and master another profession.

     Not all the edged tools sold at both shops are fashioned by the resident makers. They also stock production parangs and some made-in-China models, both more affordable than the handmade models. Lim’s and Pee’s knives cost more because they factor in labor, time and the type of spring steel used. The sharpness of the blade is guaranteed.

     Sometimes each bladesmith will ask the customers how the parangs or knives will be used. Then he might recommend another type of edged tool. The heavy-duty blades—those for chopping hardwood, the bones of livestock, etc.—are made to different specifications than those for skinning and other light work. The smiths’ skills with iron and steel are invaluable to those who need their tools to make a living.


Heat Treating and Sharpening

     Heat treatment consists of quenching the steel in a trough of water. There is no set formula for giving a hardened edge. Pee said it all comes down to “feel.” The long years of experimenting with quenching a red-hot blade in water have given him the intuition and the right recipe of crucial seconds of sinking a piece of hot steel into a trough, and then lifting it up at just the right moment. I have seen Pee do it on several occasions. He said without the special “water treatment” the blade would not hold an edge.

     Sharpening a parang or any kind of blade is done on a hand-held metal grinder. The way Pee does it looks easy—until you put the same grinder in your hands. A flat grind is apparently the way to go.

     First, he clamps the blade on a table vise, covers his mouth with a piece of cloth and dons plastic goggles. He moves the grinder side to side and applies just the right amount of pressure.

     A shower of bright orange sparks fly past his body but Pee pays them no heed. When he is fully satisfied the blade has the correct grind, he unclamps it and adds the finishing touches to the edge with a smooth stone.

     Again, it is all “touch and feel.” When a man has spent three-quarters of his life sharpening blades, you do not question his judgment. He said, “The blade can easily shave the hair on the arm.” I believe him totally.

     He then gives me a piece of invaluable advice. After the blade has been used, wash it in running water. Do not wipe the water off but put the knife out in the sun to dry. Allow the sun to dry the steel blade and it will remain sharp indefinitely.

     It took awhile before I realized the wisdom of his words. The tropical weather, coupled with the scorching Malaysian sun, acts as a form of heat treatment on the sharpened blade. Perhaps the sun’s rays strengthen the already hardened molecular structure of the blade’s edge? Who knows better—the bladesmiths of Pasir Penambang or me, the end user from the city?


Paying Homage

     There are only two bladesmiths along the main road in Pasir Penambang. Both are advancing in age. This is a dying trade. The youngsters are not interested. Those of us who appreciate all things steel and sharpened tools come to this tiny town, away from the hustle and bustle of the bigger cities, to pay homage to men of steel who live a life of quiet desperation.—By Philip Lim Chin Guan


To read similar stories and all about the latest knives, knifemakers, knife trends and much more, subscribe to BLADE®. For more information click on http://www.shopblade.com/product/blade-magazine-one-year-subscription-us/?r+ssfb141211#BL1SU


How Much Money Do You Need to Start Making Knives?

0

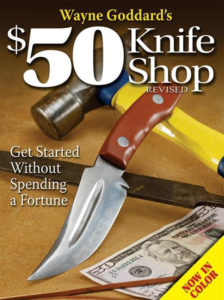
Editor’s note: This article was originally published in 2005, so be sure to adjust for inflation. That said, Wayne Goddard’s $50 Knife Shop book is the next step if you’re looking to get started on a minimal budget.

The short answer: A few thousand dollars if you want to get serious about knifemaking, and considerably less than that for hobby projects.

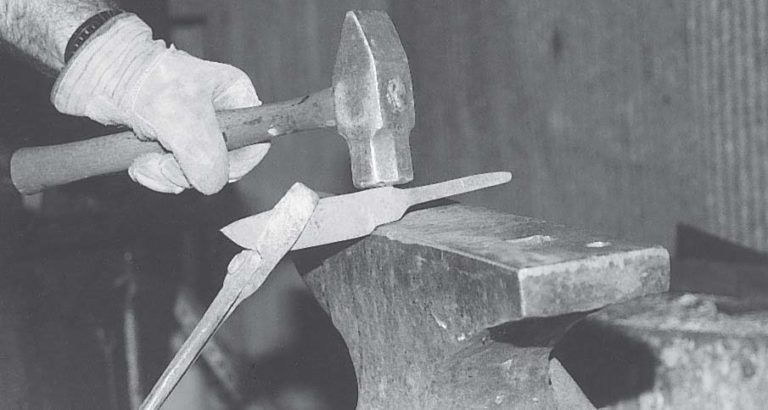
At most forging demonstrations I do, I try to use only minimal tools because I want people to see what can be accomplished with just a few basic implements—a hammer, a few tongs, a good anvil and a forge. Most folks are not set up with every type of tool that can be used in bladesmithing. As you have seen, with just a few basic tools you can make much more than just a basic knife or hawk.

Using only basic tools does require a bit more sweat. This may be fine if you are a part-time blacksmith or bladesmith, but may not be the most efficient avenue for someone trying to make a living at it. If the latter is the case, you can quickly run into thousands of dollars setting up your shop.

tips for how to make a knife
Next step: Learn how to get started making knives with just 50 bucks in tools in “Wayne Goddard’s $50 Knife Shop.”

For starters, if you do not already have a place to set up your forge, then the biggest expense will be for shop space. Obviously, the space cannot be an old woodshed. Keep in mind that you are working with hot metal and fire, and that you need to set up the forge where the metal sparks will not fly where they could cause trouble.

The room also will need good ventilation, no matter if your forge uses gas or coal.

If you already have such a place to use as your forge room, then you can start setting things up. Your next biggest expense will be the forge itself, either gas or coal. I recommend a gas forge because it is cleaner and you have more control of the heat. Such a forge could run about $600.

You need a good anvil; my preference would be at least a 125-150 pounder. You will need a sturdy worktable with a quality, heavy-duty vise, a bench grinder, and a few well-chosen tongs and hammers. This will be all you need to do most of your bladesmithing.

However, whoever told you that you can spend thousands of dollars setting up a shop with all the tools was not pulling your leg. Power hammers, various dies, a drill press and other tools of the trade will make your work easier. Specialized knifemaker’s grinders from Burr King, Bader or Square Wheel will cost you but will be worth the investment.

You could write a whole book on tools that would make your life easier and your pocket emptier. Visit a well-established blacksmith shop and you will be surprised how much tooling will be there. Of course, you do not have to purchase everything at once, but over the years as time and funds allow, you probably will.

My opinion is that you do not have to spend thousands of dollars to set up a shop where you can create a great variety of beauty and function. However, if bladesmithing is your chosen trade, to not invest in the equipment that will save you time and sweat is not a smart option.

Like they say, you need to spend money to make money.

What Makes A Good Hamon?

Know the visual tells of whether a hamon is done properly or not.

For centuries, the hamon has served as a mark of excellence in the forging of blades.

Conspicuous by its picturesque line generally dissecting the midsection of a differentially heat-treated blade, it demonstrates a skill set highly valued among top bladesmiths and swordsmiths. Moreover, the difference between a good hamon and one that doesn’t hit the mark can help the maker, owner and user in understanding the prospective performance of the blade itself.

Basically, think of a hamon as the equator between the hard and softer or more malleable areas of the blade. Everything above the hamon is softer, which translates as making the back of the blade malleable and thus tougher. In other words, the blade will bend but not break. Meanwhile, everything below the hamon is harder, which is better for holding an edge.

Francesco Piccinin and Denis Mura provide hamon on their bowie collaboration.
Emiliano Carrillo indicated a hamon should be continuous, with no areas falling off the edge of the blade. Francesco Piccinin and Denis Mura provide such a hamon on their bowie collaboration. Blade material is C130 carbon steel, according to Eurotechni (eurotechni.com) a grade that makes it possible to obtain “pretty hamons.” Overall length: 13 inches. (Jocelyn Frasier image)

“There are several things that make the edge pattern successful,” explained bladesmith Emiliano Carrillo of Sun and Stars Forge. “The first two are practical.

The hamon should be continuous; there should be no areas of it that fall off the edge of the blade. It should be high enough that the knife can support a lifetime of sharpening and removal of edge material without biting into soft material. For kitchen knives this can be somewhat low to the edge, as the geometry will have to be adjusted if a large amount of edge material is removed.

“The rest are my own opinion and are purely subjective. I’m a bladesmith who works in the historical tradition and therefore my work draws on traditional Japanese metalwork when it comes to hamon aesthetic and technique.

“I think a good hamon should be active and rippling, showcasing your imagination and artistic vision,” Emiliano continued. “It should have good undulations and look like it’s been drawn on the blade with an ink brush. There should be ashi [legs], which are areas of hardening within the hamon that drip down towards the edge. Sometimes a repeating motif, like sanbonsugi [three cedars] or choji [clove] can be utilized to guide the way you want to design the hamon.”

ABS master smith Mike Quesenberry agrees that there are hallmarks to a good hamon that are readily discernable.

“First and foremost, a good hamon will not come down to the cutting edge,” he remarked. “That is a no-no because it is bringing down soft steel where you want hard steel. I want a bigger transition area, and you can credit the Japanese for starting it. As the technology evolved over hundreds of years, they found bits and pieces coming down from the hamon, giving strength to the edge.”

ABS master smith Brion Tomberlin adds that the proper hamon is visible to the eye even when the maker is finishing the grinding process at 120 grit.

“The Japanese have many terms for effects you see and want to see in a nice hamon,” he commented. “And you can spend years studying these. For our purposes, you want it to be very visible and make a very visible demarcation from the hardened area to the softer area. Additional effects such as ashi, which are wispy cloud-like formations hanging down from the main line, are nice and show control.”

Steel Selection

Brion Tomberlin stated that low-alloy carbon steels such as W2, W1, 1095 and 1075 yield the greatest success in producing good hamons.
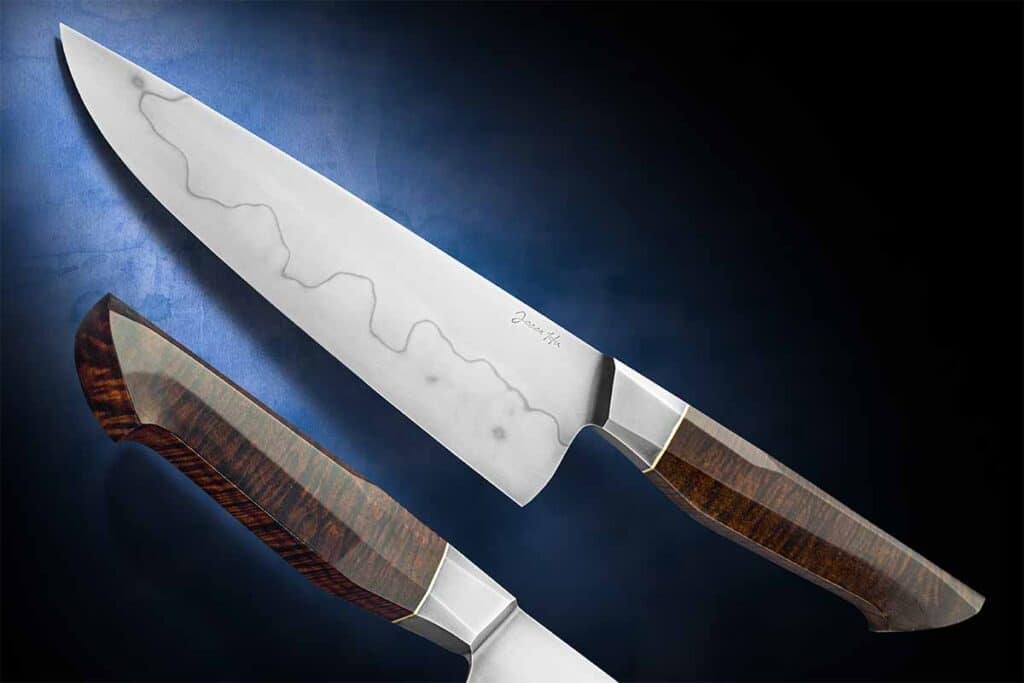
Brion Tomberlin stated that low-alloy carbon steels such as W2, W1, 1095 and 1075 yield the greatest success in producing good hamons. ABS apprentice smith Jesse Hu forged the 8.5-inch blade of his classic integral chef’s knife from W1. Overall length: 14 inches. (Jocelyn Frasier image)

Success or frustration in the hamon process begins with the proper steel, and BLADE Magazine Cutlery Hall-of-Fame® member/ABS master smith Steve Schwarzer emphasizes that point.

“Steel selection is critical,” he observed. “You want a simple carbon steel with .70 to 1 percent carbon, and guys are doing ‘gee whiz’ work using a formula with W2 steel, which is a very simple steel. The time-temperature-transformation curve is important, and alloy widens the curve. Too much alloy in the steel won’t transform fast enough to achieve the hamon pattern you want.”

Tomberlin added that low-alloy carbon steels yield the greatest success, and these include W2, W1, 1095 and 1075.

“The maker should look at the certifications for the steel to see the composition,” he recommended. “You want a steel low in manganese, as manganese promotes deep hardening instead of shallow hardening, which we want. We want the transformation of austenite to martensite to be fast upon quenching in order to achieve a hamon, and shallow hardening steels are what is needed. Can you achieve hamons with other steels? Yes, in some cases where the manganese is lower, but they usually do not have the activity or effects you would like to see. My go-to steel is W2.”

Creating A Hamon

Eliott Robinson provides ashi in ample supply on the 5-inch blade of his fighter.
Ashi, which Brion Tomberlin describes as “wispy cloud-like formations hanging down from the main line [of the hamon], are nice and show control.” Eliott Robinson provides ashi in ample supply on the 5-inch blade of his fighter. Blade material: U10A carbon steel. (SharpByCoop image)

After the heat treating and hardening process develops the desired hamon, bringing out the robust visual aesthetic is a process in itself that, according to Carrillo, varies from bladesmith to bladesmith.

“All makers have different ways of polishing out their hamon, and these methods evolve over time or to suit a particular project or aesthetic need,” he observed. “My technique has evolved over time but works for 90 percent of the work I do, and is a good way to practice bringing out all the activity you want to see in the steel.”

For his technique, Carrillo grinds the blade to 220 grit; polishes it to 800 grit using a hard backer for the sandpaper; cleans the blade completely using acetone, dish soap or rottenstone while making sure water does not bead up on it; etches it in ferric chloride; removes oxides completely using fine grit sandpaper; assembles; and then oils.

Quesenberry follows a similar protocol.

“I have a blade in front of me and I’m going to a hammer-in this weekend. I will take it up to 800-grit finish and dip it in ferric chloride,” he said, “and then I’ll wait until it turns black depending on the strength of the ferric. Once it’s black I neutralize it with Windex and then pull with a gray 3M polishing cloth in nice, even and straight lines, removing the black to get the white for the ashi to pop.”

Faux Hamons

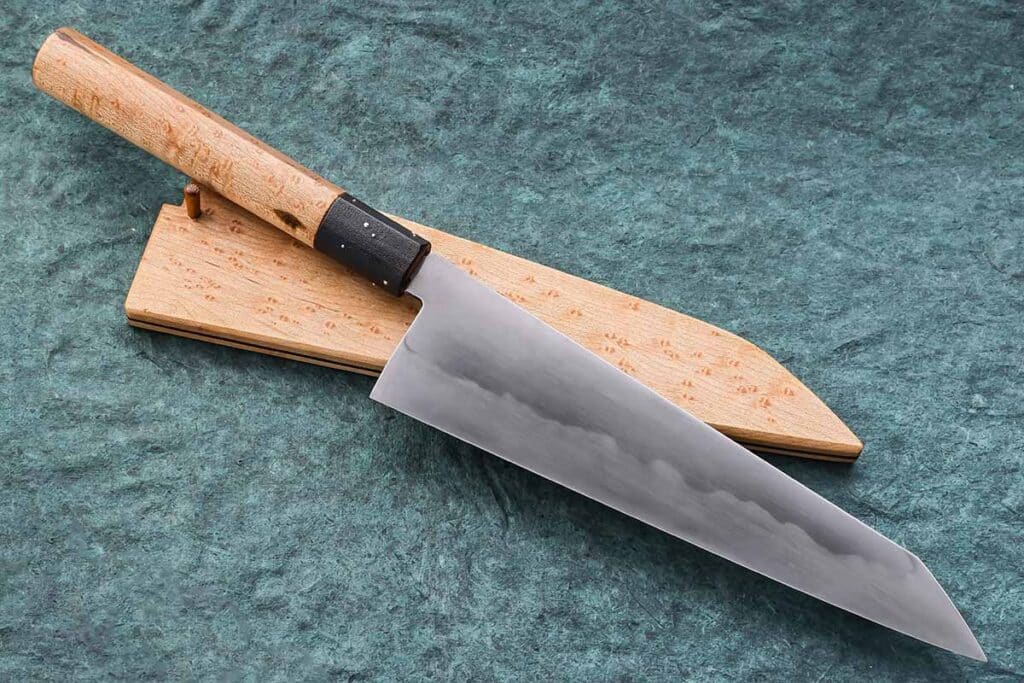
Emiliano Carrillo outfitted the blade of his K-Tip Gyuto with a clayed hamon.
Emiliano Carrillo outfitted the blade of his K-Tip Gyuto with a clayed hamon. The handle is bird’s-eye maple, as is the saya (sheath), which includes a black walnut liner and a bamboo menugi (ornament) to keep the blade in place. (SharpByCoop image)

To dispel one common question, bladesmiths confirm that all knives do not have hamons. As Carrillo says, “There may be areas of decarb on the blade that may be mistaken for a hamon, but it is only surface level.”

At the same time, some factory-produced blades may have a fake hamon etched onto the blade to make the piece more attractive to the potential buyer.

“If a hamon has been etched on, a perfectly clean line is generally seen,” he added. “It doesn’t have any of the cloudiness or desired fuzziness seen in the line on a real hamon. The fake ones are generally very white and too regular to be a metallurgical effect.”

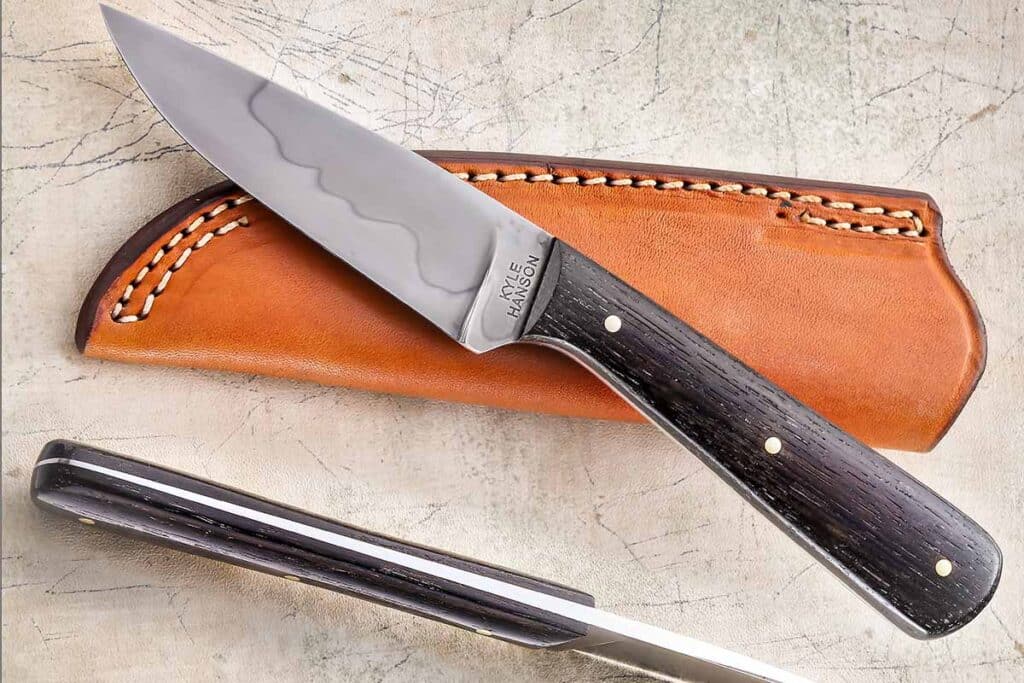
Kyle Hanson demonstrates a hamon here on his no-nonsense hunting knife.
The blades even of smaller knives such as folders and hunters provide a solid canvas for a hamon, as Kyle Hanson demonstrates here on his no-nonsense hunting knife. (SharpByCoop image)

Tomberlin has seen a false hamon from time to time and says the technique to achieve one is quite different from the genuine article.

“This is usually done by selective etching or different polishing techniques,” he advised. “It is hard to explain how to tell, but if you see one versus a true hamon it stands out immediately, usually as too regular with no effects at all. Also, there is usually a very sharp demarcation line from highly polished to etched, and this is especially prevalent in some pieces from overseas.”

What Makes A Good And Bad Hamon

Separating the good hamon from the bad hamon may require practice. In some cases the differences are obvious but in others, they are more subtle. The professionals have seen it all.

“The biggest issues of a poorly done hamon are things like fading away in some areas or, yes, going off the edge of the blade,” Tomberlin related. “If the hamon fades off the edge that means your edge is not hard in that area, which is not good. The main causes of this are clay coating being too thick and improper heating of the blade when bringing it up to quench temperature. The main issue I have seen is the hamon going off the edge. As long as you have the edge hard you have a hamon.

Will Newham achieved a hamon on his Best Chef’s Knife winner from the 2023 Sydney Knife Show.
According to Emiliano Carrillo, a hamon should be high enough that the knife can support a lifetime of sharpening and removal of edge material without biting into the soft material above it. Will Newham achieved such a hamon on his Best Chef’s Knife winner from the 2023 Sydney Knife Show. (SharpByCoop image)

“Poorly done polishing will show up also. A well done hamon takes time both before and after quenching. Trying to cut corners on polishing will definitely show. As for a lack of activity in the hamon, such as being straight instead of having hills and valleys, someone told me a number of years ago that one of the hardest things to do well is a simple straight hamon called a suguha.”

Schwarzer sees crispness in the boundaries of a good hamon and acknowledges that heat treating and polishing techniques are critical in bringing that out.

“In the early ABS [American Bladesmith Society] we used an edge quench to get a hamon, and that is the mainstay of the ABS today,” he said. “In testing now you rarely see a hamon because you don’t see as much polishing as necessary to get you through the test. You can’t bring it out with a buffer. It’s almost like a metallurgical polish so you can see the grain in the steel.”

The well done hamon represents an art form in itself, and Quesenberry is impressed with the current wave of artistic impression.

ABS apprentice smith Aidan Garrity outfits the hamon of the 10.5-inch blade of his V-44 repro with hints of ashi
ABS apprentice smith Aidan Garrity outfits the hamon of the 10.5-inch blade of his V-44 repro with hints of ashi. Blade material: W2 tool steel. Handle: carbon fiber. Overall length: 15.5 inches. (SharpByCoop image)

“People have ‘Americanized’ it I guess you could say, and I can do a decent hamon. But some guys out there have absolutely nailed it,” he smiled. “They can paint pictures with theirs using the clay and the heat treating process. You have to be careful not to over-refine the steel grain structure, especially in W2 shallow hardening steel, or you won’t get good results. There is a dance to it.”

The perfection of the hamon process, start to finish, steel and clay, temperature to quench and harden, has fascinated the bladesmith and the admirer of the finished product for centuries. Looking down the road, the possibilities are infinite.

Yet being aware of the good versus the inferior product adds even further to real appreciation of the process.

More On Hamons:

Advertisement

Must Read Articles

Read this before you make a knife

Knifemaking 101 – Read This Before You Make a Knife

  by Wayne Goddard My experience has taught me that there's nothing like digging in and getting started. I've often said the hardest part of the...
how to forge damascus steel

How to Forge Damascus

Advertisement
Advertisement