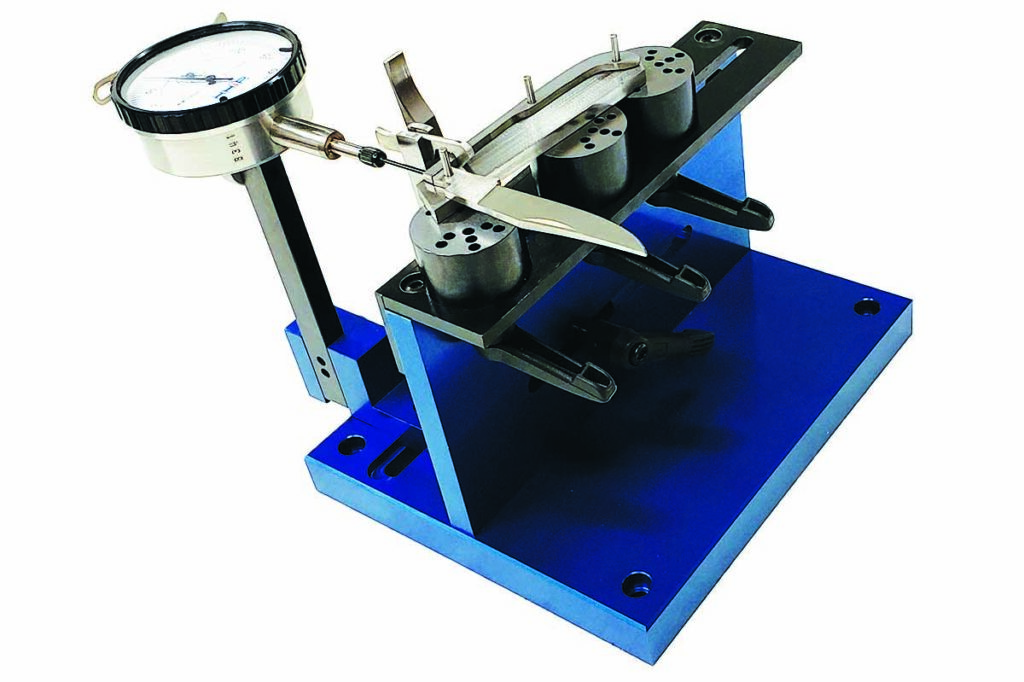
Knifemaking is the building of a knife, which includes the blade, handle and other accouterments. Blades are made by either removing metal from a steel blank via a grinder – known as stock removal – and the forging to shape of hot steel into a blade in the process known as bladesmithing. Other parts, including bolsters, guards, pommels, etc., are needed to complete the finished knife.
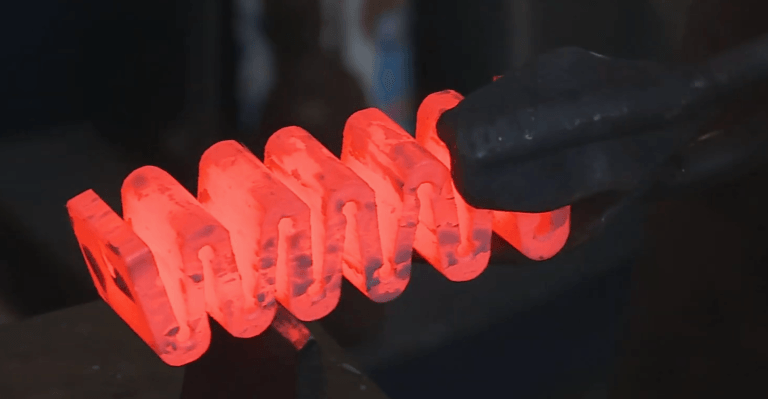
In this video, Tom Ward explains how to unfold forged mosaic damascus steel during the Wuertz Machine Works 2019 Hammer In. The event took place in March.
Ward’s overview provides a fascinating look at one of the critical steps in how mosaic damascus is made.
* Learn more from bladesmiths around the world each year at BLADE Show!
For Many Makers, Knifemaking Isn’t A Full-Time Job. Here’s How Some Fill Their Days When They Aren’t Sharpening Steel.
One of the more memorable henchmen of the James Bond series is the stout little fellow Odd Job, played in Goldfinger by Harold Sakata, and a popular character in the Nintendo series of Bond video games. He has a hat with a razor-sharp brim that decapitates a marble statue in the movie and guarantees an instant kill in the game.
He’s a master of body paint, a capable golf caddy, and can crush a golf ball with his bare hands. He’s a chauffeur capable of skilled pursuit and evasion in the inevitable Bond car chases. In the end, this man of many talents meets an untimely death by electrocution in the vault at Fort Knox.
Many who make knives choose not to make it a full-time career but a mega-hobby or part-time job instead. There are many of us, both known and unknown, who work “regular” and “boring” jobs to fund our knife passion. Though I write and make knives, I’m a behavior analyst in my day job. My brother Travis is a knifemaker and accountant—boring! I bet you’ll be surprised at some of the unusual talents that support some knifemakers in the daytime so they can pursue their blade craft on nights and weekends.
Michael Quesenberry
ABS master smith Michael Quesenberry is well known for his intricate integrals, precise damascus and meticulous attention to every detail. He’s a professional engineer in his day job but not one of the calculator-and-pocket-protector types; he drives a train. He’s been a full-time locomotive engineer for the past 27 years with the Union Pacific Railroad. Meanwhile, whenever knifemaking starts coming with medical, dental and 401(k), he promises to switch careers.
Ricky Bob Menefee
Ricky Bob Menefee describes himself as a “dog catcher.” For the past 24 years he’s been a full-time trapper for the U.S. Department of Agriculture. Sometimes his job is predator control, setting foot traps, snares or poison for calf-eating coyotes or lamb-snatching bobcats. Other times he hunts crop-destroying wild hogs via a helicopter or uses dynamite to blast out beaver dams.
“I’ve been lucky my whole life,” Ricky says. “The only thing I’ve ever done was hunt, fish and make knives. Knives have allowed me not to have to find a ‘real job’ because my federal job has good benefits to go along with bad pay.” Ricky specializes in fixed blades and slip joints well suited to outdoor tasks, and his tiny tapered tangs are legendary.
Jason Floyd
Jason Floyd describes himself as a “professional grass grower” after 20 years in the golf course business. The damascus and cocobolo knife is one he made in an integral construction. The Mickey Mouse golf towel is a memento from his grandfather.
After 20 years in the golf course business, Jason Floyd says he’s a “professional grass grower.” He started as a turf expert and ended up as a golf course superintendent. Now he works as a forge and blacksmithing tool fabricator for Well Shod Farrier Supply and supplements his income with knifemaking. He says knifemaking is better than watching the grass grow. Jason specializes in forged and damascus fixed blades.
Kelly Kring
I learned a new word from Kelly Kring, who used to work as a “diener” or autopsy technician. He was responsible for moving and cleaning bodies, assisting the pathologist with autopsies and collecting evidence. After that he became an occupational therapy technician in a hospital burn unit. Now he describes himself as “a full-time blacksmith who happens to teach smithing classes at a local college.” He says, “I’ve made knives for many, many people, but don’t call myself a knifemaker.” Kelly is well known in blacksmith circles for being an excellent hands-on instructor.
John Thunert
All the bugs and creepy-crawly varmints better watch out for John Thunert, a self-described “killer for hire.” John works full time as an exterminator. When the pandemic shut down his business, knifemaking took up the slack. John is a Forged in Fire runner-up from season six, episode 18, and has been making knives for four years. “I’ve gotten bored with the other hobbies I’ve been proficient in. Knifemaking and the challenges it presents should see me through another 20 years,” he observes, “and I still won’t accomplish all the things I want to do.” John prefers making fixed blades and forges his own damascus and san-mai.
Josh Howard
Josh Howard makes robots for the Polaris factory and also enjoys his Chambersburg power hammer.
Many knifemakers know how to weld. Josh Howard of Deerlick Ridge Forge can beat that—he teaches robots how to weld. In the daytime, he works for Polaris Industries in the factory where they manufacture the four-wheeled side-by-side Ranger robots and the three-wheeled go-fast Slingshots.
He writes the programs that drive the automated welding robots, placing precise welds at critical structural points on the vehicles as they are assembled. Josh is a Forged in Fire competitor from season six and specializes in damascus kitchen and hunting knives. He says “Deerlick” is the name of the creek down the hill from his shop, and that nobody actually licks the deer.
Jason Wilder
The apostle Paul was a tent maker and did enough of that work over the years to support his ministry. Jason Wilder is a Church of Christ minister and supplements his work with knifemaking. After all, the Bible does say “the Word of God is sharper than a two-edged sword.” Jason admits that he may occasionally carry a sidearm and a knife in the pulpit and on pastoral hospital visits.
“Nobody goes into church work or knifemaking to get rich, but my family gets by on the combination of the two,” he notes. “My ministry schedule allows me to make knives, and my knifemaking supports my vocation as a minister.” Jason makes Sunday-go-to-meeting-quality fixed blades, both forged and stock removal.
Terry Vandeventer
In addition to forging impressive fixed blades, ABS master smith Terry Vandeventer is an expert snake handler. Terry has enjoyed a long career as a professional herpetologist, an expert in reptiles and amphibians. He started out with snakes as a zookeeper, and eventually built a business breeding rare and unusual snakes for zoos.
While he says he’s past his prime in the snake business, he still has “only” about 75 snakes in his current lab. Terry continues to make knives as a source of stress relief, and says “When the knife business gets stressful, it doesn’t serve its purpose for me.” I don’t know about you, but I’d find the North American pit viper collection a bit more stressful than knifemaking.
Bryan Borton
Bryan Borton has spent nearly 30 years in the concrete-sculpture-casting business with his wife Kristy. Bryan crafted this fileworked hunter with stainless bolsters laser engraved by Tyler Poor.
Where do birdbaths come from, anyway? Besides, were birds dirty before people started making birdbaths? Do baby birds prefer baths and older birds prefer showers? My friend Bryan Borton has spent nearly 30 years in the concrete-sculpture-casting business with his wife Kristy. He claims to have made thousands of concrete birdbaths, and his most unusual casting jobs include giant mushrooms, his brother-in-law’s headstone, and some great big soda bottle replicas.
He began making knives seven years ago, learning first from me and then from Travis Payne and some members of the Texas Knifemakers’ Guild. His knives are popular among the rodeo and ranching crowd, as you might suspect given his West Texas location.
Robert George
Robert George is an electrical engineer. Boring, right? Not at all. Robert was the chief architect at AMD (Advanced Micro Devices) for the computer chips used in the Playstation 4, PS4 Pro and PS5 video games.
If you’re a gamer, you’ve probably used his work and didn’t know it. Robert describes himself as a “100 percent bladesmith” because he enjoys the artistic expression of forging close to the final shape. He studied with ABS master smiths Jim Crowell, Timothy Potier and J.R. Cook at the Bill Moran School of Bladesmithing in 2010 and has been passionate about knives ever since.
The List Goes On And On
There are some lists that will always be incomplete, and this is certainly one destined for deficiency. I didn’t have time or space to include BLADE Magazine Cutlery Hall-Of-Fame® member James Batson the rocket scientist, Les Adams the bomb squad technician, Jeremy Spake, who builds armatures for stop-motion animation films, or Grace Horne, who builds custom lingerie. I
also left out a bunch of knifemakers with exotic hobbies like ABS master smith Jordan LaMothe, who performs in musicals, Ryan Breuer, who does ballroom dancing contests, and I’m sure I left out plenty of great stories about people I haven’t met yet.
You and I may have different vocations from each other, and surely don’t have the same jobs as some of these knifemakers. Even so, one thing that joins us all together is our appreciation for knives. Handmade or user grade, for display or cosplay, for vegetable cutting or whitetail gutting, our love of knives brings all of us together in our occupational diversity.
The Appalachian spring helve hammer, including springs, hammer head/tup and more.
Some people find great joy in precision and following rules and plans. For those of you who do, this is probably not your power hammer series. I enjoy the creativity of making a thing from scratch. It’s not the precision that turns my crank, it’s that eureka moment of, “It works!”
In this installment I’ll talk through the process of building a junkyard hammer in the Appalachian style. Junkyard refers to the DIY-type build made with what you can find. Appalachian refers to a common design that uses a spring helve. The most popular earlier Appalachian hammer designs were called the “Rusty” and the “Dusty.”
Rocker-Arm Springs
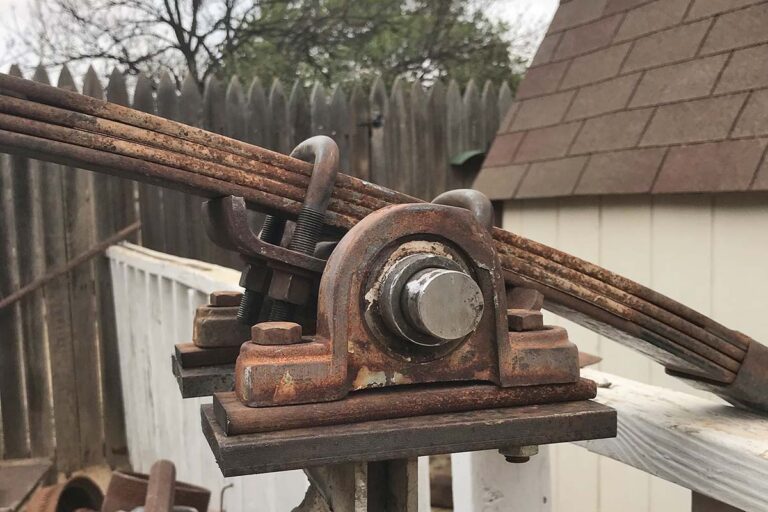
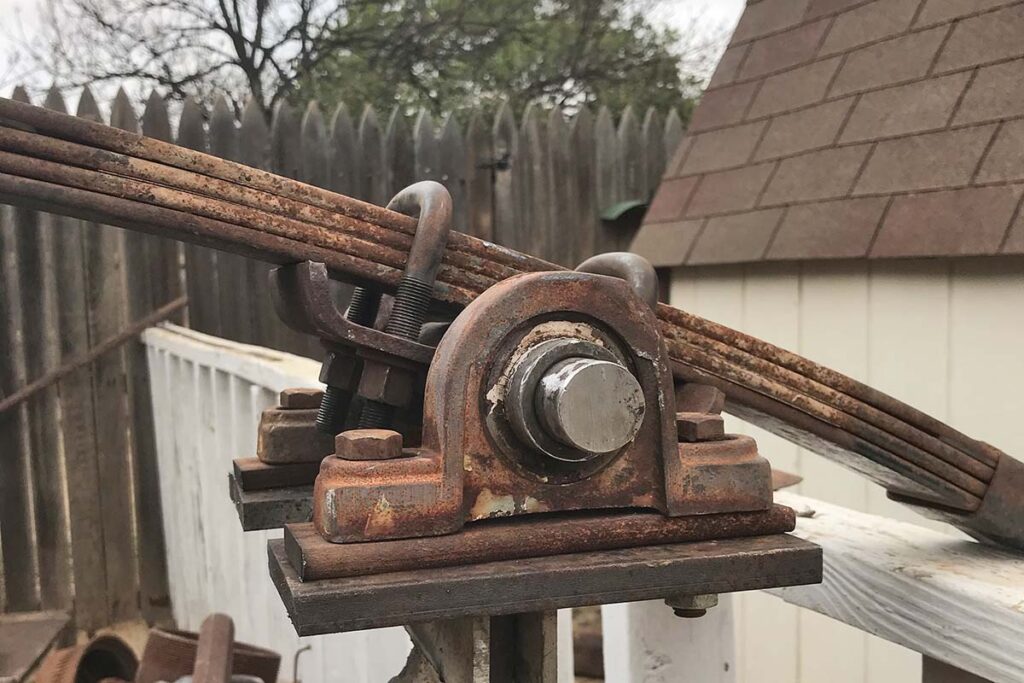
I used a set of leaf springs for my rocker arm. The arm is also called a helve. When it comes to selecting your springs, if you have several to choose from, choose a sufficiently stiff set. If you have the choice between sets that are more curved vs. those that are straighter, choose the straighter ones. If you have the choice between sets that are longer or shorter in overall length, either one will work, but you’ll have to consider whichever length you choose as you lay out the distance between the center post, the anvil and the drive wheel. The length of your spring pack coupled with your stroke length will impact the speed at which your hammer will safely run. The spring action and whip action of the spring set during cycling increase head speed at contact, which improves performance.
The author used a set of leaf springs for the rocker arm of his power hammer. The arm is also called a helve.
Your spring set needs to swivel or rock on top of your center post. I built my hammer with the springs riding on top of the shaft, and the shaft riding in pillow block bearings. Others are built with flange bearings, and others with the shaft above the springs. Any configuration is fine provided you have the clearance you need for the springs to rock back and forth as the hammer operates.
Your spring set will need a swivel on the end where it connects to the pitman arm (the rod that connects the spring arm to the drive wheel). Like the top pivot, there are as many different designs as there are guys building hammers.
The end of the spring set near the hammer head needs to be connected in a way where the arc of the spring travel is converted into direct linear up and down energy. Again, there are multiple ways to accomplish this. I went with a set of rollers on the hammer head, and the spring rides in and out on the rollers as it arcs up and down. I have seen designs with toggle linkage as well.
Hammer Head And Tup
The entire assembly that makes up the hammer head is called the tup. When a smith says he has a 25-pound power hammer, he’s referring to the tup weight. You are looking for a tup weight that is roughly 1/10 of your anvil weight. I built my hammer with a piece of 2-inch-solid-square stock long enough to make a 40-pound tup. For heads that weigh less, you can use a piece of solid stock for the contact area, and tubing or pipe to make up the extra length you need. While a solid anvil is critical to the function of the hammer, the hammer head itself only needs to be solid on the striking end to properly transfer the force.
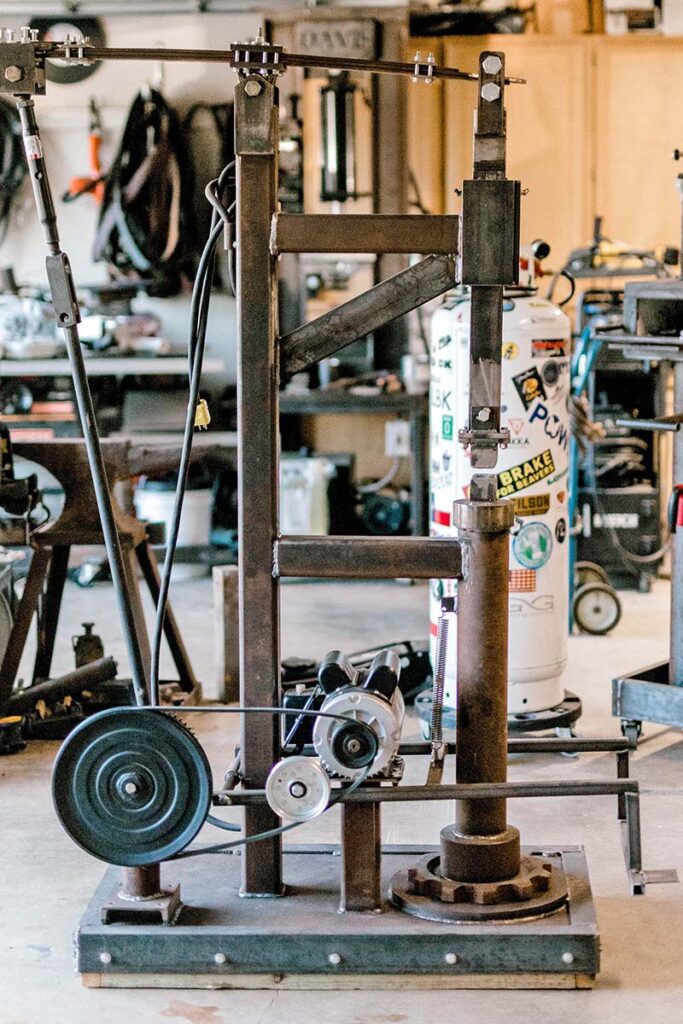
The DIY spring helve hammer built freestyle by Doug Davis of Lubbock, Texas, is shown in both instances here from the pulley side.
The tup rides up and down in a set of guides. You’re converting an arcing spring movement into a linear up-and-down hammer movement. One consideration is that your guides need to account for lateral movement in all four directions. The simplest way is for the guide to completely enclose the hammer shaft. Contact surfaces between the hammer head and guide should be lubricated, and steel on steel is not advised. Bearing surfaces should be made of UMHW (Ultra High Molecular Weight Polyethylene) plastic or of bronze. These surfaces benefit from a degree of adjustability to make sure that the hammer head is aligned properly with the anvil.
I used set screws and a UMHW plastic cutting board on my hammer, with lithium grease as well. My hammer runs well with fresh grease and less well without. I grease the hammer shaft at the beginning of every forging session. The vertical position and length of your guides should accommodate the various stroke lengths of your hammer. You don’t want the hammer head hitting the bottom of the guide on the upstroke, nor the spring connector hitting the top of the guide on the downstroke.
Pitman Arm
A stiff arm connects the spring pack to the rotating wheel, converting the rotary action of the flywheel to a straight up-and-down rocking motion. This arm is called a pitman arm. It is adjustable for length, as the dimension will ultimately be changed as you tune your hammer by trial and error, or as you adjust your hammer to accommodate varying thicknesses of stock, or the use of swages, or top and bottom tools. I used a toggle linkage on the top and for the bottom of the arm I used large bolts welded to a piece of plate, which I then bolted to the hub of the tire used for a clutch. This is another area where your available parts and mechanical experience will dictate your design.
Knifemakers From Around The World Share What Equipment They Can’t Live Without And How It Helps In Creating Their Knives.
There are high-quality knifemakers on every continent. We chatted with some of the world’s best makers about what equipment and tools are must-haves for them in their shop.
Bertie Rietveld
Bertie’s Legacy Roman pugio in Dragonskin damascus with a Stanhope lens just below the guard and lapis lazuli cylinders with titanium spacers in-between is spectacular even by his high standards. Overall length: 16 inches. (SharpByCoop image)
One of the world’s leading makers of art knives, South Africa’s Bertie Rietveld is known for magnificent custom daggers and fixed blades, many in his Dragonskin damascus and with a Stanhope lens at the ricasso, a peek into which reveals whatever image Bertie likes to put there—usually the Stanhope logo.
Among his knifemaking equipment that proves invaluable to building his award-winning knives are his Rosa Italian precision drill presses.
“I have three of them,” he wrote, “each one set up with a different-diameter drill bit so I don’t have to change bits. The speeds are set to match the ideal speed of each drill bit in the chuck of each machine. They are super accurate and an absolute pleasure to use when drilling small holes. Each one has a light that automatically comes on when you start the drill. They’re probably 30 years old but I have rebuilt them to their former glory.”
Next on Bertie’s list of top knifemaking machines is his Schaublin 102 plain lathe.
“It was manufactured in 1961, which makes it a year older than me!” he grinned. “I have a full set of collets and chucks for it and use it a lot to turn small pins and pivots for my folders. It’s one of those machines built in the golden area of mechanical excellence: the 1960s. I love working on it because it’s very accurate and just a solid, well-built machine.”
Third among his most valuable knifemaking machines is his Cutlermatic belt grinder, which he built about 20 years ago when he ran Batavia Engineering.
“We built some 300 of these grinders for knifemakers at the time,” he recalled. “This machine has a whole myriad of contact wheels, from 2 inch to 20 inch, and is fitted with an inverter speed control. I use it to grind all my knives and also for hundreds of other grinding jobs. It’s probably the most used machine in my shop. It has a foot pedal to change belts and also some really bright LED lights on stalks so I can see where I’m grinding.”
The fourth machine is “Shaya,” Bertie’s “famous” 500-pound Massey power hammer. It was built in 1941 and he completely rebuilt it in 2000, a process that took eight years.
“I make all my damascus on this hammer, Dragonskin, Nebula, and Fracture, as well as other laminar damascus. It is a gentle giant but packs a mean punch when at full speed. Hardly a week goes by when I don’t have two or three forging sessions.”
Murray Sterling
Murray makes nothing but folders, including slip joints, linerlocks, and lockbacks. Among the latter is this fileworked and engraved straight-edge model in mother-of-pearl.
Murray Sterling turned 93 the first day of Spring and still makes knives like he’s 39. What are the most important pieces of knifemaking equipment for the self-described “old-school machinist” on the low side of 100 who’s been making knives for over three decades?
First are his four 2×72 belt grinders. He made three of them, including one he built 25 years ago that he uses 90 percent of the time.
“I hollow grind and profile all my folders and finish all my folders with it,” he wrote. “The only other grinder I bought new was a square wheel in 1989. I only use it for 45-degree scales.”
Next on Murray’s list is his Taft Pierce surface grinder. “This is probably the most important machine in the shop for making folders, and that’s all I make now,” he wrote.
The machine is over 50 years old and Murray bought it 20 years ago when it came available from a company his son worked for that was in the process of upgrading its machinery.
“In making folding knives, everything has to be flat,” Murray observed. “This machine is one of the best ways to achieve that. It has upgraded the quality of my folders by 100 percent. It also has a 2×72 belt attachment and, with a 60-grit belt, you can remove a lot of material fairly fast.”
Murray has four disc grinders, including two side-by-side models with 9-inch and 12-inch discs, the former with a 100-grit abrasive and the latter with a 320-grit one. Murray made the tables for the grinders 20 years ago. The motor for the 12-inch grinder is the original one from his square wheel grinder, the latter which he reoutfitted with a DC motor a couple of years after he bought it. The grinder on the fixed 45-degree table he uses for knife parts that need to be made square, such as backsprings for slip joints and lockbars.
The handiest machine in Murray’s shop is his Burgmaster drill press. He bought it in 1967 and uses it to drill 90 percent of the holes in his knives. It has six spindles, each of which runs at a different RPM.
“I can set it up with a tap drill, clearance drill, and counter bore for .080-inch screws,” he wrote. “It makes things quick and easy. I would hate to do without any of these machines. I also have a lathe and make my own bushings and pivot pins.”
Brian Tomberlin
An example of Brion’s knives is his Nagabowie—a Japanese-style blade with hamon complemented by a bowie handle.
ABS master smith Brion Tomberlin makes a lot of hidden-tang knives in his shop in Norman, Oklahoma, and a set of handle broaches he got from fellow ABS master smith John Perry are a must-have for that style of knife construction.
“They do a great job of opening up the slot for the tang in handle blocks,” Brion observed. “I bought the first two from John way back when there was a Spirit of Steel knife show in Mesquite, Texas, probably his first or second batch of them. I still use them all the time. They’re very finely crafted tools.
“Another must-have tool for me and most makers is a set of calipers. In order to get things fitted correctly, such as guards and getting the measurements on things like the depth of clips even on both sides, you need to have accurate measurements. A good knifemaker thinks in thousandths and you need to be able to accurately measure them. So, I have calipers everywhere. I’ve got to have them.”
Brion uses a Foredom tool on every knife that leaves his shop.
“It’s a super versatile tool,” he noted. “I’m sure everyone has used Dremel tools, especially the variable-speed models. But the Dremel tools wear out and I hear all the time that people keep buying them every two or so years because the tools stop working. So, save money and get the standard rotary-flex-shaft tool used in the jewelry trades. Just get a Foredom tool and you will not regret it.
“Mine is variable speed and reversible and that is what I suggest. I bought it from an old name in knifemaking supplies, Mick Koval [of Koval Supply], over twenty years ago. It’s still going strong. There is so much you can do with them and they have so many attachments. Rio Grande and Gesswein jewelry supply are knifemakers’ friends. I use this tool for guards, contouring buttcaps to match stag, polishing things, carving, etc. It has so many uses.”
Another tool Brion uses on every knife he makes is his trusty file guide.
“The shoulder filing guide or just plain file guide should be standard in every maker’s shop,” he advised. “My main one is a carbide-faced model from Riverside Machine in DeQueen, Arkansas.
“You need to get the shoulders on a blade flat in order to get the guard to fit up correctly,” Brion wrote. A file guide will do that. “Also, with the carbide faces you can use the guide with grinding belts to get the plunges even. I bought this years ago when Uncle Al [Alton Lawrence of Riverside Machine] first started making them. It has served me well. You don’t have to have the carbide faces as there are hardened steel file guides too, but pay the extra money and get the carbide—you will not regret it.”
Rounding out Brion’s top knifemaking tools are his machinist squares.
“You have to be able to lay out lines and have them be true, everything from laying out guard slots to making sure things are 90 degrees, such as platens on grinders,” he advised. That’s where the machinist squares come into play. “You have to have them and they aren’t expensive. Making sure your layout lines are correct will help you make better knives,” Brion concluded. “Every knife shop should have them.”
The first and most logical approach is to select steel by doing some research on cutlery grade steel. Topics to especially pay attention to are the chemical composition of different steels and the effects of each chemical; isothermal transformation graphs for different steels; the effects and importance of thermal cycles, including annealing, quenching and tempering; the availability and cost of the steels and, perhaps most importantly, how easy the steels are to work by hand.
The above paragraph only took a few lines to write and a few minutes to compose, and yet many metallurgists will spend their whole lives researching those points. Pursue it to your heart’s content, and to that end I have included a thorough bibliography at the back of this book. However, to get you focused back on the task at hand, suffice it to say that there are some specifi cs you will need to concentrate on when selecting steel. These are:
• The amount of carbon in the steel
• Forging temperature range
• Annealing temperature, quenching temperature and tempering temperature
• Availability
• Overall workability
Let’s examine each of these in a little more detail.
Carbon is added to iron (Fe) to make steel. Carbon is the element that enables steel to harden when it is quenched at the proper temperature. Steel is unique in this aspect; all other metals soften when subjected to the same thermal cycle. The amount of carbon is very important. Too little carbon will fail to make steel harden when quenched, and too much carbon turns cutlery steel into cast steel. Generally speaking, less than 0.5 percent carbon is considered low carbon steel, and not suitable for blades. More than 1.6 percent carbon is considered extremely high carbon steel, and is very tricky to make into a blade. More than two percent usually equates to cast steel. Hence, most blades in the world have a carbon content between 0.5 percent and 1.5 percent.
In this range, all other factors being equal, the more carbon, the harder the blade gets when quenched. The harder the blade, the finer an edge and the longer it will stay sharp.
Forging temperature range is the temperature at which you can “work” or manipulate the steel. Most steel can be worked between a bright red heat and orange/yellow heat (approx .700~900 degrees Celsius, 1290-1650 Fahrenheit) and it will yield under the blow of the hammer, bend or twist etc.
Below this range the steel will cease to yield to manipulation and can be damaged by subjecting it to stress. Likewise, steel can be irreversibly damaged from working it at too high a temperature.
Annealing, quenching and tempering are the three phases of heat treating steel. These temperatures are very critical figures to commit to memory for the steel you are working. The heart and soul of a blade is the heat treat, as the final quality of the blade will be determined by how successfully these three operations are accomplished. Knowing the proper temperatures, and knowing what they look and feel like, is a critical skill for the bladesmith.
Availability determines whether or not you will be able to try forging that ‘super-steel’ you have been reading about. If you cannot locate or buy the steel in question, the pursuit becomes meaningless. Cost is another factor. Even if you locate the steel of your dreams, it may cost too much to have it shipped to your location. You want to know if you can acquire the steel for a reasonable cost and if it will be available in the foreseeable future.
Overall workability considers how the steel in question compares to other steels. Is it easy to manipulate under the hammer when you are forging it? How does it heat treat? Is it prone to warping, bending or cracking? Is it easy to straighten after heat treating? How does it take a final polish?
These questions are easier to answer once you have experience with a few of the common steels.
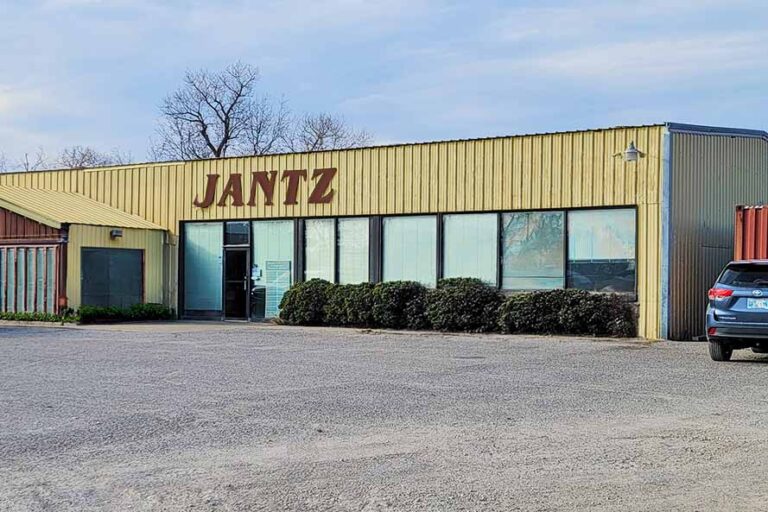
Jantz is a crucial source for many who fashion knives.
For 58 years Jantz Knife Supply has met the needs of cutlery craftsmen of all stripes, from green behind the ears to on up in years, with everything needed to make knives. This includes specialty steels, handle components, sheath materials, hand tools and sanding supplies, as well as the heavy equipment for knifemaking.
What started as a small mom-and-pop gun supply outfit founded by Ken and Venice Jantz in 1966 is no less than a U.S.-based juggernaut in today’s cutlery industry. The Jantzes haven’t left their humble beginnings behind, though, so no customer job is too small for the venerable knifemaking supply company in the heartland of America, Davis, Oklahoma.
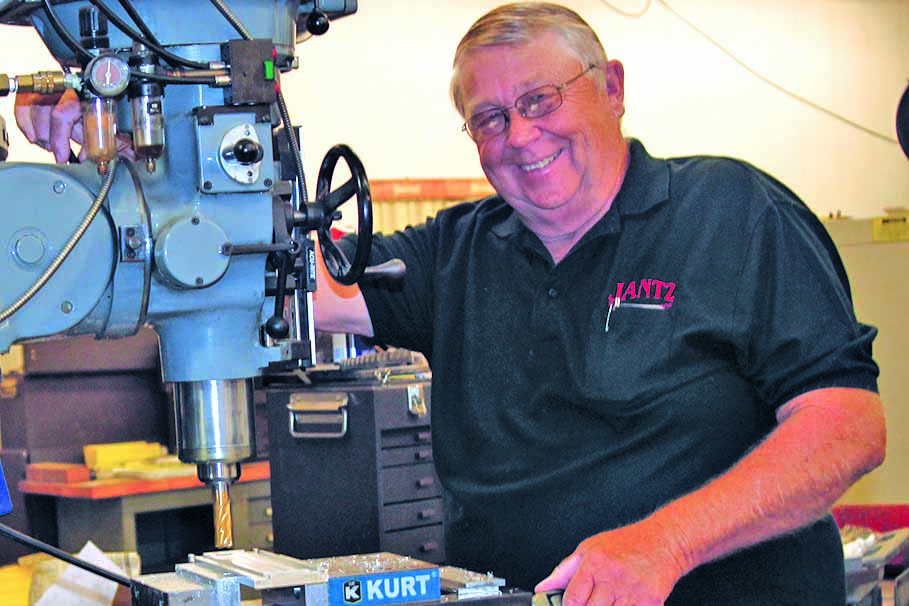
Company co-founder Ken Jantz works on a prototype for a new hollow-grinding fixture at the company facility.
Shanna Kemp oversees the marketing, financial and human resources for Jantz. She probably knows as well as anyone about the many specialty and other items available to the company’s legion of customers. “Our goal is to provide everything knifemakers could need for their project,” she begins, “whether you’re a beginner looking for a new hobby or a custom knifemaker stocking your shop to get ready for the BLADE Show. One thing we really love is creating fixtures and tools to make knifemaking more accessible for every skill level.”
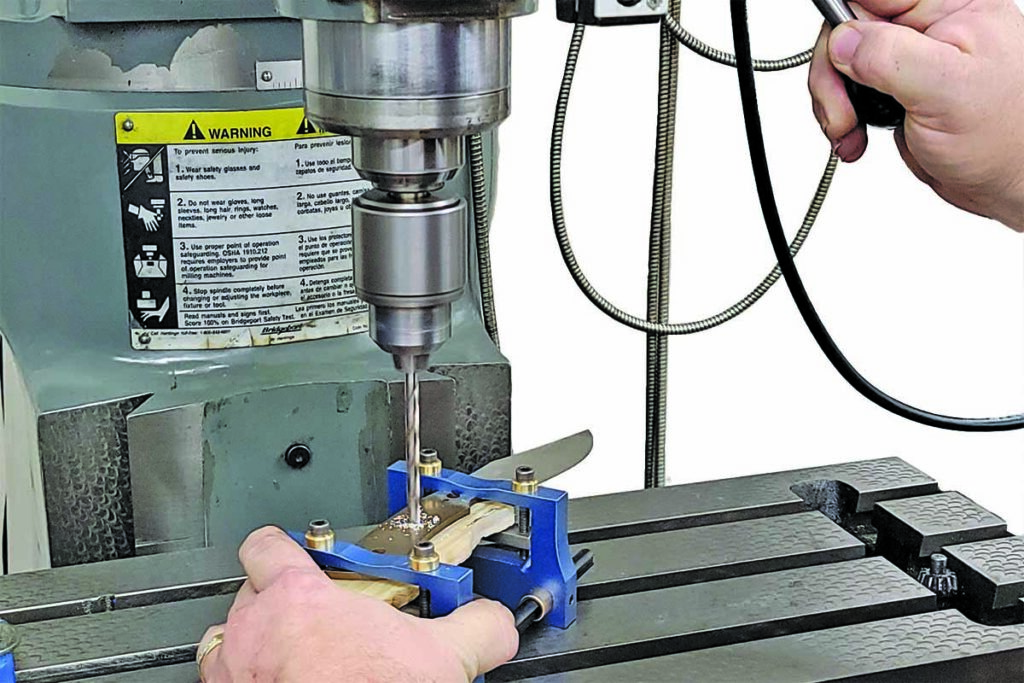
One of the company’s most popular new fixtures is the PDJ Knife Vise. “It’s handy for all levels of knifemakers as it allows you to drill perfectly perpendicular holes through your handle material” regardless of the material’s texture or unevenness, Shanna explains. Jantz stocks an abundance of parts for assembling and enhancing knives of all types. “Our most popular products are our Corby rivets, Loveless bolts and metal round and bar stock,” Shanna enumerates. “Our customers love the quality of our materials as we source directly from reputable mills with consistent quality and do our cutting and machining in house. One of our other popular products is our handcrafted mosaic pins. Each pin design is meticulously hand assembled right here in Davis, Oklahoma.”
Jantz Steel Stock
Jantz offers a range of knifemaking equipment. An example is the JS750 perpendicular vise with drill press.
An outstanding blade is the heart of any knife and Jantz offers all kinds of stainless and high carbon steels. “We carry a variety of knifemaking steels to suit both forging and stock removal,” she states. “1095 and 80CrV2 are very popular carbon steels and CPM 154 is our most popular stainless steel.” She added that the damascus forged by Brad Vice’s Alabama Damascus is very popular because of the quality and solid price point for the company’s patterned-welded steel.
“For Jantz, steel and other metals have always had a long lead time since we source from a variety of mills in the U.S., Germany, Sweden, Brazil and others,” Shanna observes. “We have strong relationships with our suppliers, and they have worked with us to keep material moving forward even when lead times began to exceed a year.”
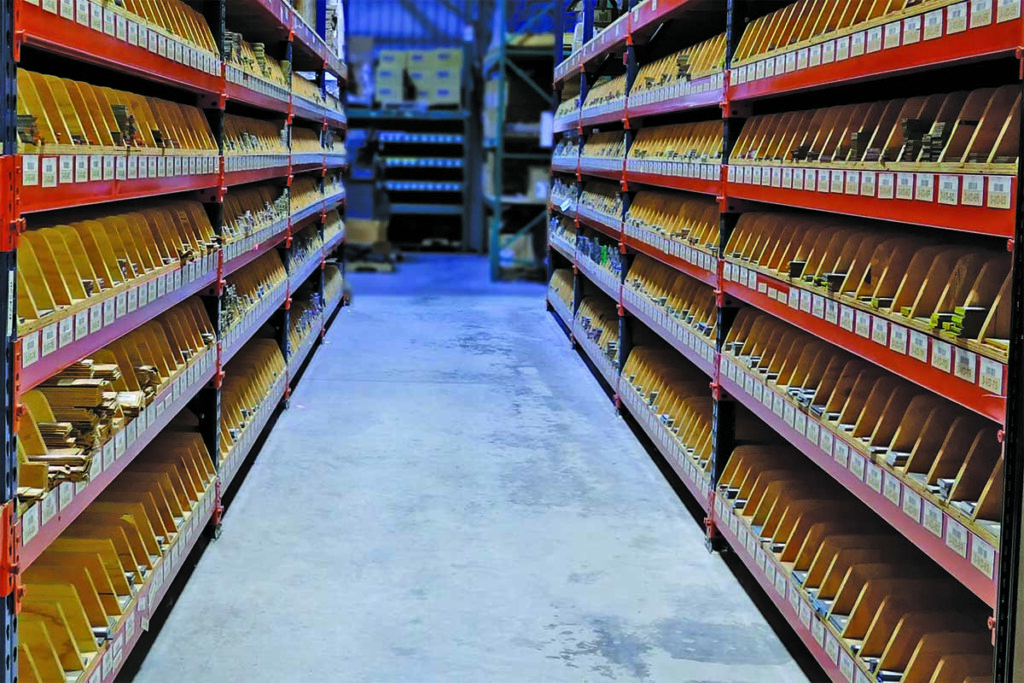
No matter the material, component or tool for knifemaking, Jantz probably has it somewhere in one of its well-stocked aisles.
Fixed blades will never go out of style, Shanna opines, and the Jantz business model caters to the mindset that drives the knives’ popularity. “We find that fixed-blade makers tend to use both stock removal and forging in their blade design and development,” she states. “The television series Forged in Fire certainly increased the popularity of forging, but we still see about the same divide between stock removal and forging. Fixed blades designed for hunting and survival are top sellers for our custom knifemakers as well as our hobbyists. There’s something special about using a knife in the field during hunting season that you made yourself that really resonates with the knifemaking crowd.”
When it comes to heat-treating ovens, Jantz recommends Paragon kilns above all others. “Not only do they make a quality oven,” Shanna assesses, “but they have a variety of ovens designed for beginners to pros. Their customer service is top notch and Burt Flanagan, who represents Paragon’s knifemaking ovens, is a custom knifemaker, so he truly understands what knifemakers need.”
Jantz-Made Blades
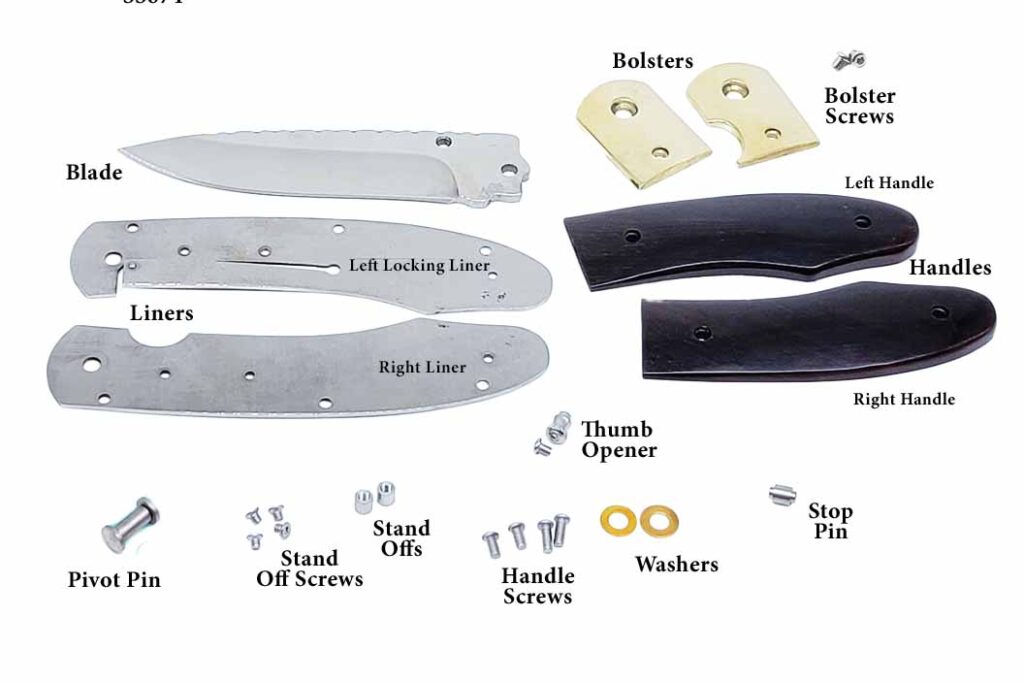
Knife assembly kits such as the Caballero are a great way to learn the ins-and-outs of folding knives. Jantz offers over a dozen knife genres, from traditional slip joints to modern tactical fare.
For those wanting to get their feet wet in the cutlery world, Jantz offers a cornucopia of pre-made blades for virtually any niche of the market, including household cutlery. According to Shanna, many custom makers order beautiful stainless damascus in various patterns from Damasteel for their kitchen knives. “Our Jantz-made line of household cutlery is especially popular with customers,” she adds. “Our santoku, cook’s and paring blades are favorites of makers using pre-shaped blades for project knifemaking. All the Jantz-made blades are manufactured in our facility.”
Jantz offers an abundance of both knife blades and knife kits. These are designed not only for the novice and hobbyist, but for those who want to tailor special knives for sale. The Jantz website offers links aplenty to a wide range of genres in both folders and fixed blades. Need a fixed-blade hunter in damascus? No problem. Like a kit to learn the ins-and-outs of folding knives? There are over a dozen styles available, from traditional slip joints to modern tactical fare.
Providing fixtures such as the JS500 for slip joints that make knifemaking more accessible to hobbyists and makers of all levels is a specialty at Jantz Supply.
If there is an innovation on the horizon, Jantz Supply will be on top of it. “One of the many things we love about the knifemaking community is how open and sharing makers are with each other,” Shanna observes. “Want to learn something [another knifemaker] is doing? Just ask. You will rarely find someone not willing to share.”
That spirit and willingness to help is what has made Jantz an important part of the cutlery industry for going on six decades now.
Frame Handles Remain Just As Useful In Making A Knife Today As It Was Centuries Ago.
Frame handle construction for knives has been around for centuries. Historical examples of many Eastern styles like the kard, khyber and yataghan often feature ornamented frame handles. Nineteenth-century knives attributed to James Black and some of the early American bowies also had frame handle construction. Though it’s been around a long time, the frame handle remains a viable modern construction method for today’s custom knifemakers.
There are many ways to crack the nut/skin the cat on frame handle construction. This article will walk through the frame handle process and point out particular problems and potential solutions for those who wish to pursue building a frame handled knife.
Why You Should Build A Frame Handle
Frame handle construction is best defined as using a wrap-around “frame” to conceal the tang of a hidden tang knife. The first question many people ask regarding a frame handle construction is, “Why would you want to do it that way?”
My first thought goes back to the earlier days of the internet when forums were at their peak, and fine makers like ABS master smith Bruce Bump took the time to document “work in progress” (WIP) threads. Bruce had a fine frame handle WIP on the KnifeDogs.com forum in 2013, and the consensus at the time was that you build a frame handle for quite a few reasons, though the first one is “because you can!”
An exploded view shows an ABS journeyman smith Karl Andersen frame handle construction knife before assembly. (Karl Andersen image)
A frame handle is a much more complex build process than your standard full- or stick-tang knife. However, in addition to the show of skill by the maker, frame handle construction has a few distinct advantages that make the complexity worth the effort:
1. A frame handle allows for the look of a full tang, but with the guard-fitting techniques of a stick tang. For a forged stick-tang-knife design that needs a guard, a frame handle allows the use of full-tang-style handle construction;
2. A frame handle is a good way to use scales or slabs on a stick-tang knife. If you have a good set of stag or mammoth slabs, or if you have stabilized wood slabs that might be too fragile for through-tang construction, the frame handle allows you to use the materials on a stick-tang knife; and;
3. The use of a frame handle gives the maker another area to embellish the knife. Some frames are great for engraving, while others may highlight a damascus pattern. Either way, the frame makes the embellishment stand out in ways that are harder to accomplish on a full-tang knife.
How To Build A Frame Handle
At a basic level, the frame of a frame handle is a piece of material, usually metal, that wraps around a stick tang and mimics the look of a full-tang knife. This presents some challenges that have resulted in a few different creative solutions.
•Challenge 1: The tang must fit inside the frame. Some makers insist on precision so there are no gaps and the fit is tight. Others concede that the handle will be held together with mechanical fasteners and sealed with epoxy, so a precise fit between the frame and the tang is not necessary.
•Challenge 2: All parts of the handle must be securely fastened together. I sat through a class with ABS master smith Mike Williams in which he admonished the students, “Don’t trust in the magic of chemistry” by putting your faith only in the strength of glue. Likewise, veteran bladesmith Jerry Fisk challenges makers to think ahead to what their knives might be like in 100 or 1,000 years, and recommends a mechanical connection that won’t fail over time.
One way to address this challenge is to use pins. If you pin the scales to the frame, pin the completed handle assembly to the tang and follow up with glue, there’s no opportunity for failure. Some choose to make all the pins visible as an artistic element, while others take advantage of hidden pins for all but the one through the tang. Another way is to use a threaded fastener.
Bladesmith Salem Straub recently illustrated the technique on a frame handle WIP on his Instagram feed. Salem used a threaded fastener in an internal slot in the frame to mechanically lock all the parts together tightly. The handle material is relieved on the inside to accommodate the fastener.
Another way to use a threaded connection is to thread the end of the tang and use a fastener on the handle butt. An advantage of this approach is that the fastener itself can become part of the embellishment.
•Challenge 3 is the complex fit-up between all of the knife’s elements. Frame handle construction naturally doesn’t excuse a poor guard fit, but it also provides other places for gaps and misalignment. Once again, there are several potential solutions to alignment problems.
One is the use of alignment pins to make sure everything is secure. Pins on the end of the frame go through any spacers and into holes in the back of the guard so that each part indexes the same during assembly. Some makers, including Bruce Bump in the aforementioned epic WIP, advocate for leaving metal tabs on the end of the frame and fitting the tabs into similar holes on the back of the guard
. In both cases, there’s a mechanical connection that prevents the guard, spacers and frame from rotating out of alignment around the center axis of the handle. Either way, when you build a frame handle, the construction will require you to assemble and disassemble the knife repeatedly, so you’ll need some mechanical way to keep things lined up.
Another fit-up challenge is the overall requirement for clean-fitting joints with no gaps. It sounds simpler than it is, but two surfaces that are dead flat will join together without a gap. The challenge of a multi-piece frame handle with a guard and a few spacers is that you are creating a multitude of surface joints, and every single surface must be dead flat.
At a minimum, you’ll have a joint between the guard and frame, and also between the frame sides and the handle material. Any bump or wiggle on any surface and you’ll have a gap in the final product. Flatness comes in degrees. You can get a fairly flat surface on a platen, flatter on a disk, and still flatter on a surface plate or surface grinder. You have to make the joints as flat as you can with the tools you have available if you want a gap-free fit.
I tend to prefer the look of a tapered tang on a full-tang knife, so I’ve started tapering the frame of my frame handles as well. Others stick with a full thickness frame, where the thickness closely matches that of the blade at the ricasso. Some add spacers between the tang and handle material, while others choose to go with the frame and handle slabs only.
ABS master smith Mike Quesenberry used frame-handle construction on his dog-bone bowie. (Eric Eggly/PointSeven image)
Another fit challenge is presented by the frame itself. In order to adequately finish the visible surface of the frame, whether by simple polishing, bluing or etching, or by engraving, the frame must be 100 percent at final-grit finish prior to final glue up.
Many makers learned to make a full-tang knife by finishing the front edge of the scales, gluing the knife together, shaping the scales down to the exposed tang, and then polishing the handle and the tang at the same time. That method will not work for a frame handle that needs to be blued or etched. Personally, I tend to use dummy pins to fit the entire handle assembly together, then grind the scales down to the frame. In his recent Instagram example, Salem Straub used small screws to hold the handle material to the frame.
With regard to the relationship between the handle material and the frame itself, some choose to leave the material slightly proud of the frame for a “museum” or “heirloom” fit. Others prefer the material to fit flush to the tang. Less commonly, some makers round the frame and leave it slightly proud of the material. Whichever you choose, it is important that the fit be maintained consistently all the way around the frame, from the joint at the guard on the top all the way down to the joint at the guard on the bottom.
Once the profile is set, I polish the handle and the frame together down to final grit, and then apply any surface finish to the frame itself. Once all parts are 100 percent complete, they can be glued together as a final step.
When To Make A Frame Handle
So when should you try making a frame handle? In my mind, if you can make clean full- and stick-tang knives, you could be up to the challenge. If you have slabs of exceptional handle material that deserve more than a simple full-tang knife, a frame handle is a way to step up and put the materials on full display. If you have a knife in mind where the frame and guard need to be blued, damascus or engraved, a frame handle is the way to go.
A frame handle knife has its advantages, but the complexity of the construction presents plenty of challenges. As a skilled maker, you may choose to rise to the challenge of a frame handle just to show that you can.