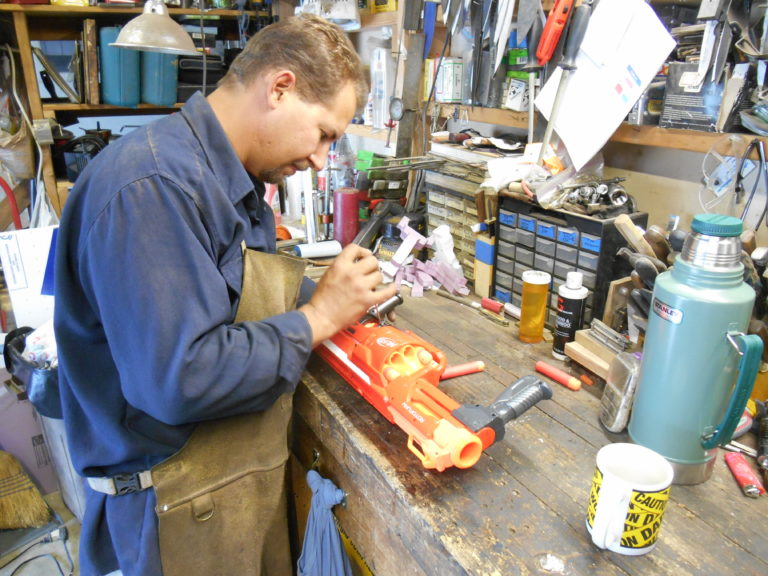
Knifemaking is the building of a knife, which includes the blade, handle and other accouterments. Blades are made by either removing metal from a steel blank via a grinder – known as stock removal – and the forging to shape of hot steel into a blade in the process known as bladesmithing. Other parts, including bolsters, guards, pommels, etc., are needed to complete the finished knife.
Awards Were Given Out In Nine Different Custom Knife Categories Including Best In Show At BLADE Show West In Salt Lake City.
Dozens of makers entered knives in competition across eight different custom knife categories. The skill on display was tremendous, and numerous knives wowed the judges. However, these were the blades that stood out from the crowd and took home the awards. All images are SharpByCoop Images.
Of the assorted American Bladesmith Society-sanctioned knifemaking classes I’ve attended, many pertained to the construction of a well-made knife. In one class, the subject of line and flow was a topic.
An ABS founder and a BLADE Magazine Cutlery Hall-Of-Fame® member, B.R. Hughes said, “A curve looks better than a straight line”—pausing for effect—“and a hint of a curve looks better than a curve.”
The human form and other objects in nature often have been used to illustrate proper execution of line and flow. Some of the simplest of things common in everyday life are there for our benefit if we would notice.
Taking Cues from Nature
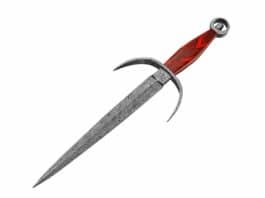
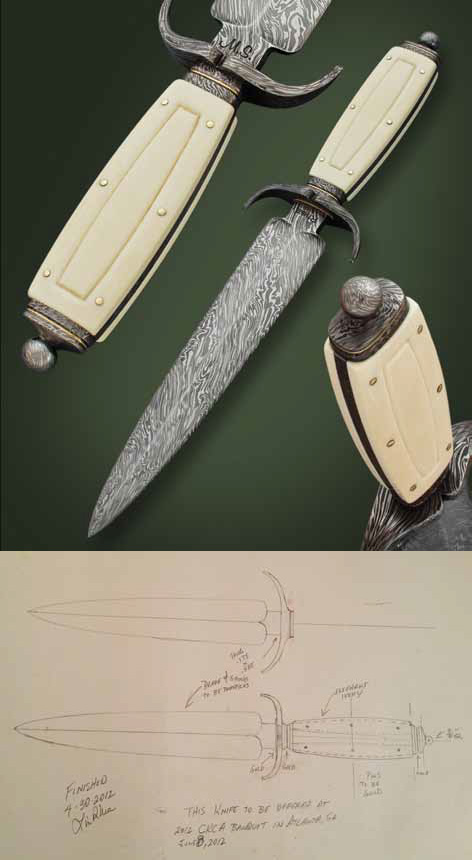
When flow is hard to achieve on a knife, Jerry Lairson puts the design on paper to figure out what does not look right. Once he has the general shape he wants, he starts changing things until the knife starts to flow. Lin Rhea also worked on his art dagger in drawn form (above) before arriving at the finished knife (top). (Chuck Ward knife photo)
An unfurling fern, drifting snow, a vine climbing to the sun—these things look alive and give the impression of fluidity even though they are at rest. Consider a falcon’s dynamic grace. Simply when perched it looks designed for motion. These are things the great masters studied and emulated, often applying mathematical formulae, yet concealing any and every hint of math within the object’s overt beauty.
We are all “wired” to be attracted to certain combinations of lines that flow into the whole dynamic appearance of an object, whether a person, a falcon or a knife.
Knifemaking long has been elevated to an art form. It’s a natural medium to express artistry in a functional tool. Knifemakers are the formulators, mechanics and artists who create from raw materials something static that also has dynamic character. It looks like it wants to be moving even though it’s not. Remember the falcon?
The object of this brief dissertation is to help makers wanting to improve their work find a perspective. I say “a perspective” knowing it would be uniquely each maker’s since each maker is different and can’t see things exactly the same. Michelangelo’s perspective was not Leonardo da Vinci’s and vice versa, but each developed an eye for his own work.
Also, it may not be possible to explain to another exactly how to have an eye for line and flow. My attempt is simply to rationalize that it is possible to cultivate its development.
Developing an Eye for Line and Flow
If this development is possible, then each maker should ask, “How can I cultivate it in my own work?” Considering the question requires a level of honesty that some are just not willing to attach to something they mistake for “a knife.”
Indeed, the question pertains to the process rather than the product. It is a way of thinking about the craft and not simply “a knife.” That mistaken thinking will never allow a person to elevate knifemaking to an art form, and it can’t help but to manifest itself in a maker’s work. Fortunately, there are many examples of makers who have enhanced their natural talent by honest self-improvement.
What do some of the world’s best makers do to cultivate their eye for line and flow? Where do they look for inspiration? What influences have shaped their perspective?
How the Master Smiths See Line and Flow
Jerry Lairson indicated embellishments such as carving should enhance the line and flow of a knife rather than compete with it. (Buddy Thomason knife photo)
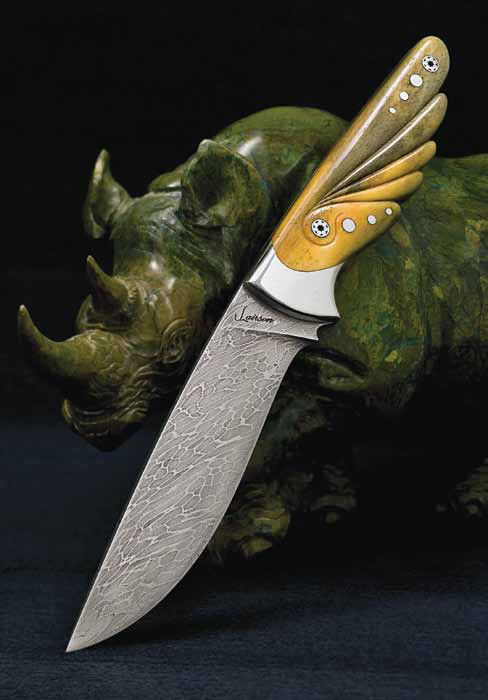
“Many of my best knife designs were inspired by nature,” such as a lily, a bird’s wing and vines, stated ABS master smith Jerry Lairson. “I think it’s good to follow a theme throughout the knife. An example is the fluting on French flintlock pistols combined with the other parts of the gun to create flow. If you see something you like, even if it doesn’t pertain to knives, try to use it as a theme to design a knife. If a knife is decorated with engraving, carving or filework, it should enhance the flow and line of the knife rather than
compete with it.
“Sometimes I see things in museums that have nothing to do with knives but have graceful lines that can help design a knife that flows. How a knife design starts and stops at the point and butt has a lot to do with flow. Sometimes flow is hard to achieve even when you have a good design in your head.
“When this happens to me,” Jerry continued, “I put it on paper and if it doesn’t flow, I start trying to figure what doesn’t look right. I always design a knife on paper. Once I have the general shape I want, I start changing things one at a time until it starts to flow. Sometimes one small line that isn’t right will throw the whole thing off. Sometimes simpler is better.”
Rodrigo Sfreddo’s eye for line, flow, and overall design and innovation shines in his “Dark Tulip.” (photo courtesy of Lin Rhea)
“What makes a knife more desirable than another? Good design,” he began. “Nobody spends hundreds or thousands of dollars on a knife just because they need a good knife for camping or cooking; they’re buying for collecting because [the knives] are beautiful, so good design and aesthetics are of the utmost importance.
“I always say to my students to think about the beauty when planning a knife, not what is easy or what not to make. It’s very easy to make the same blades, guards and handles we’ve already made and seen. The result is just a combination of designs we’ve already used before—one blade just like the one we made some time ago, combined with another guard we made in another project, with another handle, and even the filework, just new combinations of our same old ideas!
“That’s why it’s so important to pay attention to anything that’s beautiful and has great design,” Rodrigo maintained, “like cars, antiques, furniture, architecture and so on. We must refine our taste on everything so it will reflect on our work. It’s unbelievable how we can figure a knifemaker’s characteristics from his work, especially if he’s ‘thinking’ about his work or just following the crowd.”
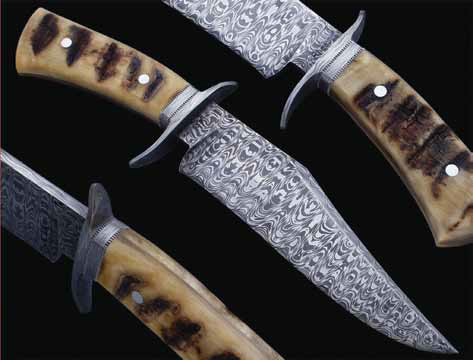
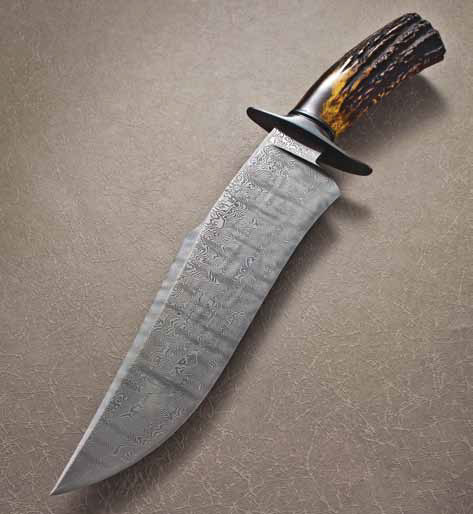
Jason Knight is a proponent of curves, and long and subtle arcs, in his knife designs. This recurve bowie in damascus and stag—winner of the award for Best Bowie in the 2012 BLADE Show custom knife judging competition—is an excellent example. (SharpByCoop.com photo)
ABS master smith Jason Knight’s knives are known for their superlative lines and great flowing execution. He spoke of the ancient ways of looking at and designing things, saying they work and that he won’t try to change them. He described his method as a “way of seeing” involving his eyes and his heart. He pointed out that makers have choices in materials that offer color and texture.
“Materials can limit or enhance design. Some designs might look cool but don’t work well. Usually,” he qualified, “if it looks good, it works well.”
He recommended taking inspiration from other art forms, such as sculpture and woodworking, adding that he likes curves and both long and subtle arcs.
Open Your Eyes
Trying to express the causes and effects of something whose nature is so intangible requires some degree of interpretation, and I’m not sure I am the one to carry this task to completion. However, most makers are in the same boat. Who would have thought so much would be involved in the making of a knife?
Do I understand it all? Not by a long shot. Am I overthinking the matter? Maybe. But it could be that considering these points will help my perspective become a little clearer. Besides, considering that the above three makers give serious attention to advancing line and flow in their work, I feel I’m in good company.
Learn how to spot flaws in Damascus steel blades, like delamination and inclusions, with expert tips from master bladesmiths.
They may be small and insignificant or obvious and glaring, but the skill that is involved in forging damascus steel and then fashioning blades and furniture that adorn custom knives like no other component naturally produces the potential for flaws in the steel itself.
Ironically, the structure of damascus steel, the allure of its beauty and texture, images and etched artistry, is brought together with the potential for a flaw. The production of billets that contain welded elements of 1080 carbon- and 15N20 nickel-alloy steels or other variations involves the marriage of metals. And like any union there is the possibility of a fault. The flaws may be serious or inconsequential. For the buyer, the ability to spot an imperfection and make a value judgment is highly beneficial in the ownership experience.
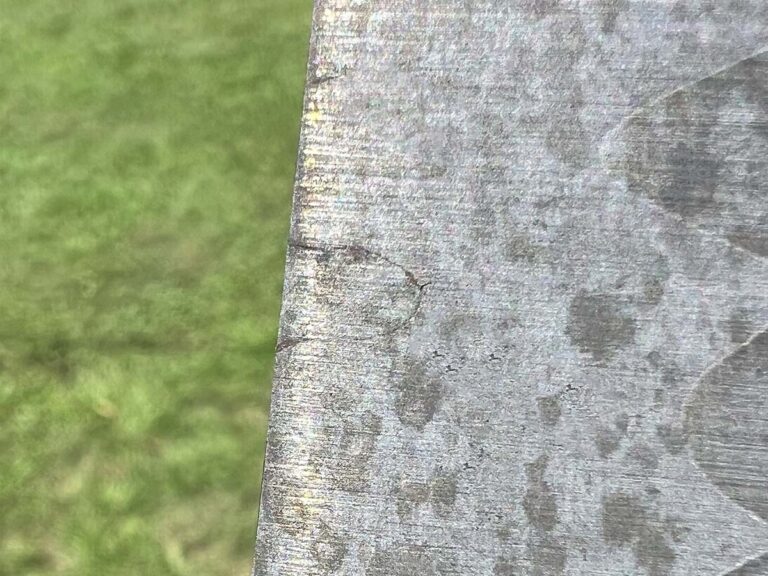
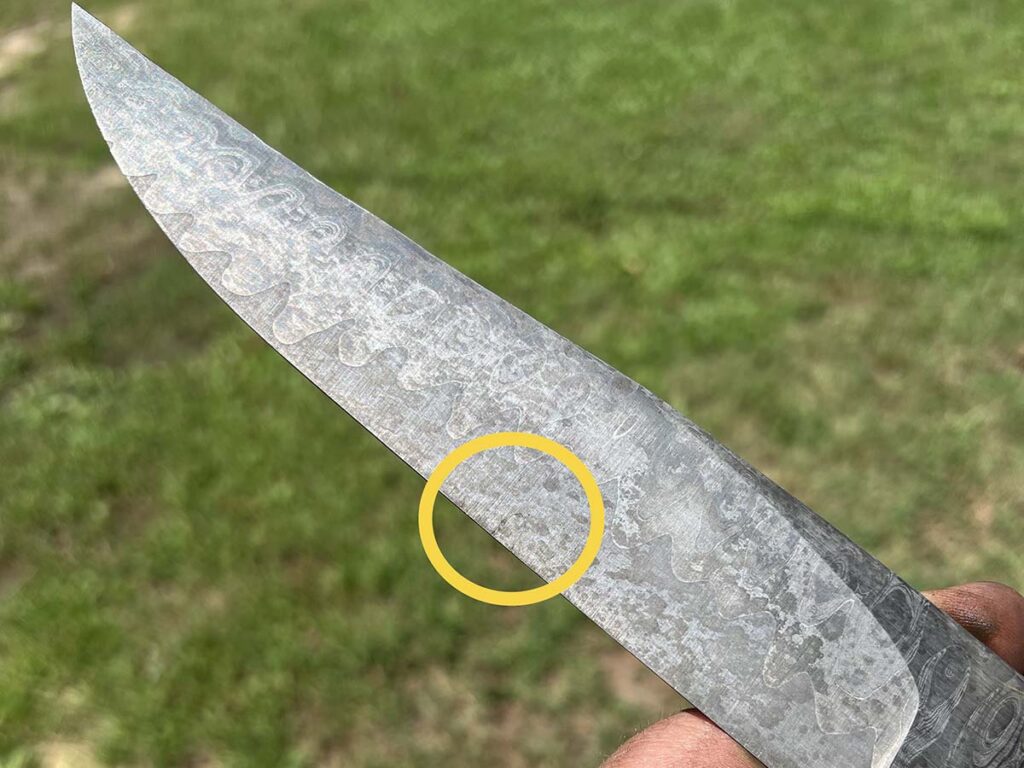
“I would say the most common flaw in a damascus blade is delamination,” ABS master smith Lin Rhea opined. “This shouldn’t be in a knife that is offered for sale. It’s usually evident as a hairline void in the layering and could occur anywhere on a blade. But I see them mostly in the deepest part of the blade as they are revealed in the bevel grinds. I believe this could be prevented by being sure the billet is up to proper welding heat before extracting it from the forge for the first weld in the particular stage of pattern development.”
In a similar perspective, ABS master smith Bill Burke sees imperfections as “a closed shut or incomplete weld that can be found anywhere on the blade. It can be seen as a dark or silvery line in lightly etched damascus or becomes a deep crevasse on heavily etched damascus—and it is caused by the smith not letting a billet soak at heat long enough before welding, or by manipulating a weld that has not been fully set and then working this tear back into the pattern.”
Fortunately for knife enthusiasts, most quality damascus knives are free of flaws, such as Eliot Maldonado’s saddlehorn trapper in Blackbird damascus by Chris Zimmerman. (Jocelyn Frasier image)
ABS master smith Steve Randall agrees and sees these types of imperfections and other potential flaws as well.
“The most common flaw on a damascus blade is the cold shut or an area where the pieces did not weld,” he observed. “It is not so much where it occurs on the blade such as the tip, edge or spine, but where the two different steels meet in the pattern. It’s the two steels that didn’t weld together that creates the flaw, and sometimes they aren’t noticed until [the maker starts] grinding into the blade.
“I would say another common flaw for damascus, mosaic specifically, would be shadow lines from the tiling process,” Steve continued. “Structurally they don’t change the steel, but they can detract from the mosaic visually.”
Both Rhea and Burke have encountered other flaws related to the fusion of the two steels in damascus.
“Less common is an inclusion of some kind,” Burke explained. “Twenty years ago flux inclusions were fairly common. Now one sees inclusions of weld filler material, though, overall, inclusions are less common now than 20 years ago. Inclusions are always found in between the elements that make up the pattern in a bar of damascus.”
Lin added, “I’ve also seen where the maker has left a bit of welding rod material within the damascus blade. This appears as a cloudy gray area and is pretty distinct in appearance from the hardened damascus. In the event wrought iron or mild steel is mixed with high carbon and the layering is of a relatively low number count, this could be part of the intended pattern, so it might be acceptable.”
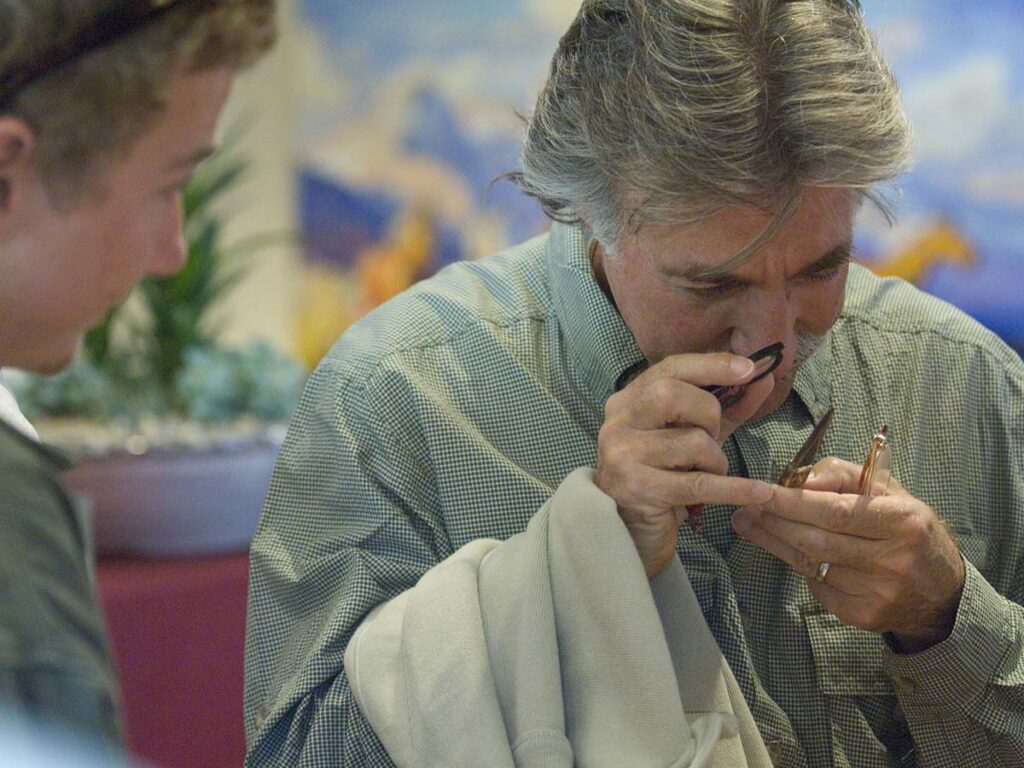
“If you’re at a show and feel you want to look at the blade under a magnifier, then you should ask the maker if he minds,” Bill Burke noted. “If he says ‘no’ or gets upset, then thank him and walk away.” (Eric Eggly/PointSeven image)
According to ABS master smith/BLADE Magazine Cutlery Hall-of-Fame® member Steve Schwarzer, the particular combination of steels might raise the prospects for a flaw to develop, especially when the skills of the maker are evolving. He commented.
“The worst flaws are the delaminations and inclusions,” he said. “These might come from poor welding practices and the choice of alloys involved. Some welds are much easier to make than others and a higher level of skill may be required. Most of it is visual—bad welds are bad welds and don’t have the necessary molecular bond.”
For a potential buyer the ability to spot a flaw is an attribute that pays off when dollars are exchanged for the finished product. Although a flaw may have no impact on the structural integrity of the damascus steel itself, the degree of impairment—if any—ultimately lies with the potential buyer who assesses the level of discrepancy. Approaching a maker’s table, discussing the damascus, and taking a closer look at the blade will sometimes generate relevant conversation and exchange of information. Flaws can show up anywhere in damascus construction, so visual inspection comes with the territory.
Schwarzer advises buyers to check the knife thoroughly.
“Using magnification helps. If the blade doesn’t look right, it probably isn’t. A flaw may show up as a bright spot in a dark area, and some skilled people can reweld their billets. I do that regularly and especially when I do guards and stuff, taking a light hammer and welding heat to fix it, but not everything can be repaired. Sometimes there is no way to repair it, and that is one reason why I hardly ever sell damascus steel—[and if I do] only to skilled professionals.”
Visual Signs
When a buyer’s interest is piqued, the next steps involve courtesy and cordial exchange with the knifemaker.
“Flaws in damascus can range from very hard to see to blaring and obvious,” Burke remarked. “An experienced eye in good light and magnification are the best ways I know to detect them. Some can be felt, but feeling the blade and running your fingers up and down and across it are not reliable and can cause rust and tarnish. If you’re at a show and feel you want to look at the blade under a magnifier, then you should ask the maker if he minds. If he says ‘no’ or gets upset, then thank him and walk away.”
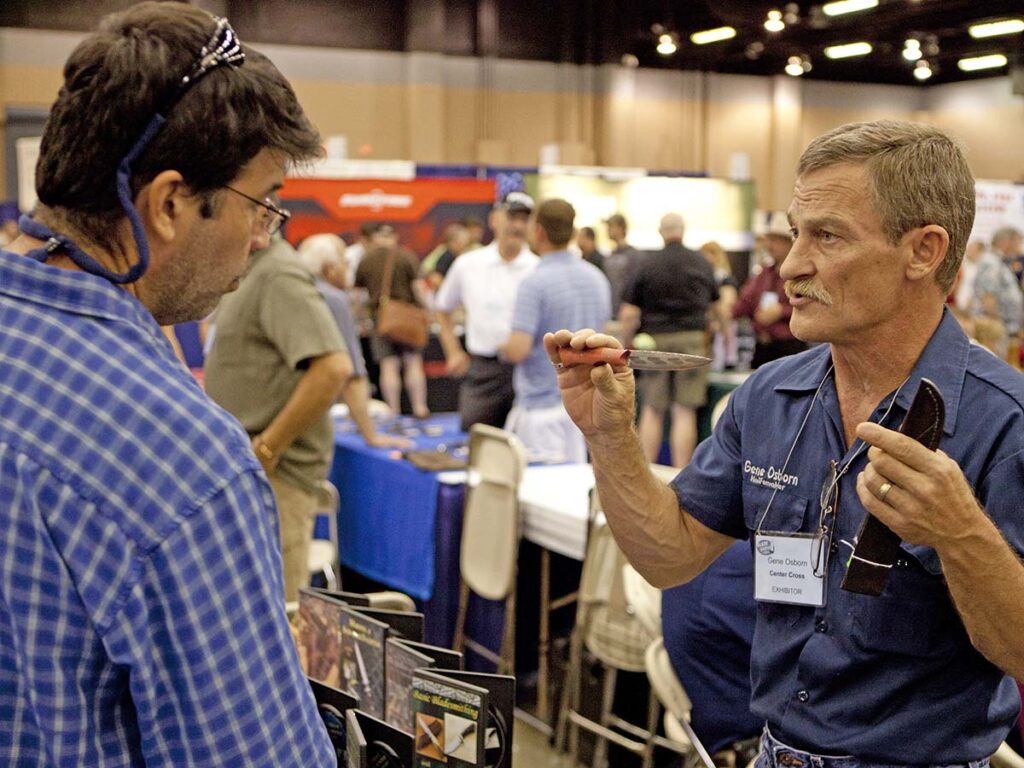
Steve Randall said most makers would not intentionally sell a knife knowing it had a flaw or without first pointing it out to the buyer. Gene Osborn (right) discusses a damascus knife with a customer at a past BLADE Show. (Eric Eggly/PointSeven image)
Randall concurs with that point of view.
“Bright light sure helps,” he observed. “It is difficult to find small flaws once a damascus blade has been etched. Running your fingers over the blade won’t tell you anything, and if you’re at a show I advise not doing it. Using a magnifying glass at the maker’s table could be awkward, and I would suggest respectfully asking before doing it.”
Historically, skilled makers and smiths have assessed their own work and identified flaws, correcting them or chalking up a flawed blade to the hazards of the craft. When ABS master smith Mike Quesenberry considers the flaw in context, he is frank in his response.
“The smith sees the weld lines with flaws before the steel is etched. To me that is something the smith has to deal with. I don’t have any problem scrapping a blade if [a flaw] shows up in the process. The hand sanding and grinding are where the time is really invested, and makers should be honest with their work. If you see a flaw, scrap it,” he stressed. “The best way to fix a flaw is to throw that blade away and start over again.”
Schwarzer smiles when he relates the style of an ancient practice.
“Japanese smiths worked out a way to hide a flaw if it didn’t mechanically affect the viability of the blade. They would do a nice little gold inlay. That was done in Persia, too, and a lot of other places. They would put artwork over something that was unseemly. If you have $300 in a blade and there is no mechanical problem, then that is a way to make it go away. It’s been said that the difference between a journeyman and a master smith is the size of the screw-up you can fix.”
Rhea acknowledges the human side of the situation. There may be a temptation to continue working on a knife with a flaw in the damascus, but then comes the realization on the part of the maker that causes him to refrain from that option. “When a buyer sees any odd discoloration in the form of surface treatment, color or texture, ask questions and give the maker the opportunity to explain or rethink his position,” he noted.
Resolving Situations
Bladesmiths and custom makers are genuinely committed to excellence. However, at times there may be a situation involving a flaw. When a purchaser detects something that may or may not be an imperfection, talking with the maker can resolve the situation to mutual satisfaction.
A welding flaw might pass a cursory glance, which is why you should always inspect any damascus blade you plan to buy closely.
“If you buy a blade and then find a flaw, you should contact the maker and ask them about it,” Burke advised. “If it is something you cannot live with, ask for a refund or allow the maker to replace the flawed knife. In most cases, the maker is going to be unaware of the flaw. If the maker is aware of the flaw or refuses to do anything for you, then you either have to keep it and say, ‘Oh well’ or sell it to someone else with full disclosure of the flaw.”
“When I have a buyer who experiences issues of any kind, I would prefer that they contact me and give me the opportunity to evaluate, discuss and make it right,” Randall noted. “I’m sure most makers would not intentionally sell a knife knowing it had a flaw or without first pointing it out to the buyer.”
Rhea sees the interested parties taking the high road in almost every case. “Most makers will honestly make a sale with good intent and in good faith,” he reasoned. “If there’s a problem just contact the maker and let him or her explain or make it right. Ultimately his reputation is on the line and he deserves the chance to make it an overall pleasant experience.
“When it comes to flaws and issues,” Lin concluded, “we all have them and we handle them in our own ways. To the degree we act to prevent problems for the buyer we also prevent problems for ourselves as makers, as well as enhance our reputation. Leaving flaws in damascus will reflect on our honesty and our attitude toward the buyer. This is something to think about very seriously. So, will there be problems? Yes, but we should go to great effort to prevent them rather than having to correct things that might be perceived as an oversight. In the end, we are human and will want to use common courtesy and humility in our dealings.”
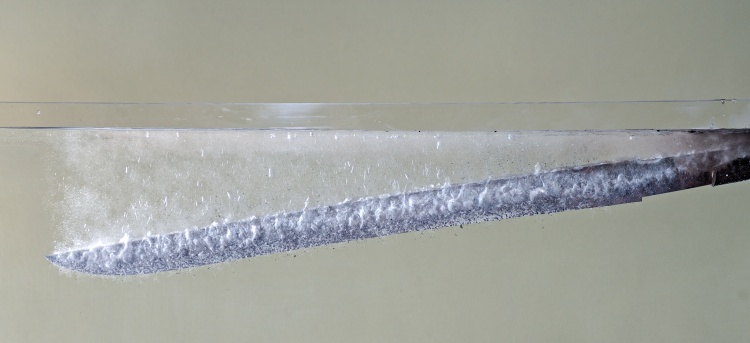
A tanto is plunged into the water during the hadaka-yaki process—yaki-ire, or heat treating, with no clay coating on the blade. (Yoshikazu Yoshihara photo)
Reader questions BLADE® story description of Japanese-style heat treatment
By BLADE staff
Question: Regarding part three of the “HAMON!” series, page 46, in the November BLADE®: Bladesmithing articles written by observation sometimes lack accuracy. To heat treat tool steel you anneal first, then harden and then temper to change hardness into toughness. That temperature is usually 400°F to 435°F and it is called tempering for about 30 minutes.—Bob Rupert, Pittsburgh, Pennsylvania
Answer: The author of the series, Leon Kapp, was kind enough to provide the following comments on Mr. Rupert’s letter:
I described the process exactly as Yoshindo Yoshihara and other swordsmiths in Japan do it (and as I have done it myself). The process is at least 1,200 to 1,400 years old in Japan. It was developed and used for tamahagane—a raw steel made of Japanese iron-bearing sand that requires extensive refinement—and works beautifully for that steel. However, I think a main difference between tamahagane and modern steels is that tamahagane contains only small traces of anything except iron and carbon. Manganese or other elements in the steel might require changes in this process. If done right, the Japanese process hardens the blade all the way through the hamon, and not just near the surface.
In fact, since all my experience is with Yoshindo and Japanese swords, I am very surprised and do not understand the technical reasons for the complex hardening methods I read about in BLADE or hear about from modern U.S. makers. It appears that Japanese-style yaki-ire (heat treatment) is a relatively simple process, but it does take years of experience to get it right.
After yaki-ire, the blade is annealed by heating it in the forge, again as described in the story (that is, yaki-modoshi). If that is not done, the blade will be very brittle and even very difficult to polish.
I think this is a reasonable answer to Mr. Rupert: The article is a detailed description of the process exactly as used in Japanese swords. The process and the steel are both very old and traditional in Japan, and it is done exactly as described—but the yaki-ire process was developed specifically for tamahagane steel. Anthony Dicristofano (page 12, September BLADE®) has experimented with yaki-ire (Japanese style) for both tamahagane steels and for modern knife steels and told me he can see the differences. (Anthony works with Yoshindo in our backyard forge often during Yoshindo’s visits.) I think an important point to take from this is there are many ways to obtain great results with variations in materials and techniques.
Oh, and one more point: There is another goal in Japanese and Western hardening. The Japanese method is designed to specifically harden only the edge region. As far as I know, the Western approach usually seems designed to harden or heat treat the entire blade. If yaki-ire were used to harden the entire blade, Yoshindo says the thin Japanese blades would crack or shatter immediately in use.
Question: How much forging is enough? Is there a point of no return, or even a negative return? I typically start with 1-inch-diameter O1 drill rod for my knives, which I first must reduce to a flat piece of steel in the basic knife shape I want. This takes three-to-four heats to accomplish, and sometimes more depending on the size of the finished knife. Once the basic shape is attained, I then start working in the bevels.
Is the reduction from 1-inch round to a quarter-inch flat going to give me all the benefits from forging that can be gained? Is the bevel forging simply gratuitous at that point? It occurs to me there must be a point in the process when additional heating and forging causes enough carbon loss to start degrading the steel rather than improving it. (Joshua States, a letter via e-mail)
Answer (graciously provided by BLADE® field editor Ed Fowler): Starting with a 1-inch round bar should get you up into the 80-point rate of reduction range, depending on the size of the blade. This rate of reduction can definitely get you into the high-endurance performance realm, providing the steel you are using is of decent quality and you do not exceed a temperature of 1,725°F while forging. Forging at low temperatures equals fine grain and no measurable loss of carbon below the surface of the blade—about .002 inch, which is scale that comes off anyway. Forge the blades a little oversized and leave the edge of the blade about the thickness of a nickel for the heat treat (hardening and tempering).
In our work at my Willow Bow Ranch, we have forged and tested to destruction many 5160 blades from 1-inch round bars (John Deere Load Control Shafts), and can get within 10 percent of the high performance of the blades forged from larger round bars.
The more forging heats under 1,725°F, the better the performance potential of the steel. I take my bars to only 1,625°F to provide a margin of safety to prevent grain growth. Most of the benefits of forging will come from the round bar to quarter-inch flat bar. Merely forging the bevels only adds another two or three points if you are practicing reduction by forging. You are better off leaving the blades thick to protect the best edge, which will lay under the surface of the “as-forged blade.”
When I start grinding, I take about the thickness of a dime off the edge of the hardened and tempered blade. The edge surface goes through a lot of thermal cycles and sometimes the best edge lies under the surface.
As far as I know there is no “point of no return,” but the potential benefits between an 80-point rate of reduction and 99-point rate of reduction are not as significant as a difference between a 10-point rate of reduction and a 30-point rate of reduction. In other words, there is a decreasing rate of benefit, but always a benefit. Picture an ant crossing a table. The first trip he goes only halfway, second trip he goes half the remaining distance and the third trip he goes only half the remaining distance. How long will it take him to get to the end of the table?
The answer is never. He will always be half the remaining distance to travel to the end, but the length of his trips becomes less each time.
Send your question to “Ask BLADE,” c/o BLADE, 700 E. State St., Iola, WI 54990, or e-mail [email protected]. We will not print your name if you request it. If your question concerns the value of a knife, please understand it will be almost impossible for us to determine a value from a picture or e-mail image without being able to examine the knife from all angles in person.
For more on the latest knives, knife legislation, knifemaking instruction, knife trends, knifemakers, what knives to buy and where and much more, subscribe to BLADE Magazine, the World’s No. 1 Knife Publication. For subscription information click on http://www.shopblade.com/product/blade-magazine-one-year-subscripti…?r+ssfb041912#BL1SU.
Custom Pocketknives Always Seem To Make Us Feel Nostalgic. These Models From Talented Custom Makers Are All Gems.
There’s something about classic custom pocketknives that tugs at the heartstrings. Once you get bitten by the bug it’s an itch you can never quite finish scratching. It becomes indelibly etched in the DNA.
Fortunately, custom knifemakers never tire of building them and every year provide new offerings and fresh looks. Meet four of those makers, each highly skilled at the craft who build exquisite knives with personalities all their own.
With its beefy bolster and no-nonsense stout handle, the barlow slip-joint pocketknife is designed for hard use. Adam Rogers gave his two-blade iteration all the right stuff for a million-dollar look.
“I see the barlow as the perfect example of a gentleman’s folder, very universal and great as an everyday carry,” the Aussie maker observes. His upscale workhorse is 3.35 inches closed with a 2.2-inch spear-point main blade and a 1.57-inch secondary pen pattern. He chose CPM 154 stainless steel to do the cutting chores and the fluted bolsters are 416 stainless. “The long pull works well with the shape of the spear blade, whilst giving easy access to open,” Adam notes.
The upscale liners are jeweled and the backsprings are CPM 154.
Why did he choose giraffe bone for the scales? “Giraffe bone is a great product to work with, easy to use with a large variety of colors available,” Adam assesses. “Paired with the fluted 416 stainless steel bolsters it gives the folder a clean, sophisticated look.” Other traditional pocketknife patterns Adam offers include the sowbelly, saddlehorn trapper—both single and twin blades—small and medium trappers, wharncliffe trapper, Lanny’s Clip and the muskrat.
Trapper By Bubba Crouch
Bubba Crouch goes the unusual materials route for his dress slip-joint trapper, including a 4-inch blade forged from old Schrade trapper blades and handle wood from the pole that held up the original telephone lines from the house to the office of famed Texas cattle baron Charles Goodnight. (SharpByCoop image)
You might say custom knifemaker Bubba Crouch doesn’t walk the straight and narrow. Instead, he infuses interesting stories and twists in his slip-joint pocketknives that make them truly remarkable. Take, for instance, his dress trapper.
“A customer gave me the wood for the handle he bought at a fundraiser auction from the estate of Mr. Charles Goodnight,” Bubba says. “The historical wood was holding up the original telephone lines from Goodnight’s house to his office.” Just so you know, Goodnight was a living legend among cattle barons in the latter half of the 1800s.
If that isn’t enough to set Crouch’s trapper apart, the 4-inch clip-point blade with the deep belly is forged by Jason Fry from old Schrade trapper blades. The integral bolsters are made to resemble the beaten copper pots Bubba’s mom acquired in New Mexico when Bubba was a child. “I’m always hunting for something unique with a historical past,” he states. “It’s really challenging trying to find these items.”
Like Tom Ploppert (read on for more on him) and many other slip-joint makers, Bubba gets no small part of his inspiration from BLADE Magazine Cutlery Hall-Of-Fame® member Tony Bose.
“I build mostly trappers in three sizes but I have also built Saddlehorn trappers from the Tony Bose design,” he says. “I’ve built a few lockbacks too but my market is mainly the trapper.”
The Lincoln Folder
Eugene Shadley’s Lincoln Folder is a reproduction of the six-blade congress pocketknife that was on President Abraham Lincoln’s person when he was assassinated. The blades are CPM 154 stainless steel and the handle is smooth white bone. Maker’s price for a similar knife: $5,000.
Custom knifemaker Eugene Shadley is royalty among slip joint aficionados, so it’s only fitting we feature his reproduction of a pocketknife owned by one of our most famous presidents.
“The Lincoln Folder is my rendition of the congress pocketknife Abraham Lincoln had in his pocket the night he was assassinated,” Shadley notes. “A customer asked me to make a copy.”
The Lincoln Folder is only 3.5 inches closed yet features six blades inside its compact frame. The liners and bolsters are 416 stainless steel with smooth white bone scales topped with a gently curved round bar shield. The blades include a large spear, large sheepsfoot, a cutoff pen, two pen blades, and a manicure blade with a nail cleaner and a file on either side.
Just how tough is it to make multi-blades, especially one with six blades? “Anytime you make a knife where blades pass each other, everything really does need to be in its place,” the award-winning maker and a past president of The Knifemakers’ Guild explains. “A lot of factory knives had a little longer and thinner blades that passed each other. Those knives tended to be more utilitarian and rubbing was the norm. We custom makers are expected to make sure blades do not rub each other.”
Wilbert Saddlehorn Trapper
The Wilbert Saddlehorn Trapper by Tom Ploppert is a lockback with a rich factory history. BLADE Magazine Cutlery Hall-Of-Fame® member Tony Bose introduced Tom to the knife many years ago. Tom’s price for a similar reproduction: $2,100. (Mitchell D. Cohen photography)
Tom Ploppert’s Wilbert Saddlehorn Trapper is a reproduction of a lockback with a rich factory history.
“Wilbert Cutlery Co. was located in Chicago and was a retail brand sold by Sears Roebuck & Co. through a contract with Napanoch Knife Co. and Empire Knife Co.,” he explains. “They were made from approximately 1908 to 1921. Tony Bose introduced me to this knife and its history many years ago and shared the pattern with me as well.”
The scales are a gnarly premium stag and the integral bolsters are 416 stainless steel. Closed length: 4.5 inches. The Wilbert’s 3.75-inch clip-point blade of CPM 154 stainless steel features a classic nail nick. “There is a lot of blade to fit into a narrow handle and bolster area,” Tom states. “It requires a lot of adjustments along the building process.”
Another notable feature is the blade’s well-defined grind. “I hollow grind all my blades with a 20-inch Burr King grinder using a 1-inch-wide wheel,” Tom notes. “I get crisp grind lines using fresh new belts. Bill Ruple [page 12] taught me early on that nothing cuts like a fresh new belt—along with years of practice.”
Bruce Barnett’s Peanut Pocketknife
Australian ABS journeyman smith Bruce Barnett likes serpentine pocketknife patterns. His peanut with its curvy handle is an example. (Rod Hoare knife image)
Australian knifemaker Bruce Barnett found the peanut pocketknife pattern to his liking and fashioned a striking example of it.
“I really like the subtle and serpentine-shaped knives, and took it upon myself to stretch it to 3.5 inches and reshape the pivot end,” he related. “Shaping up a nice, long wharncliffe for the second blade was challenging in itself, and I think this one looks pretty cool.”
Barnett’s peanut features a blade of his damascus forged from 1080 carbon and 15N20 nickel-alloy steels in a ladder pattern, mammoth ivory scales, and a 410 stainless frame and bolster. He wanted to make a working knife true to the classic peanut style and succeeded, commenting, “I realize it was generally a small two-blade that fit in your money pocket, but so does this one in today’s working man’s jeans.”
This particular knife is available for $1,350 from Bruce, and a similar piece would run roughly the same price. He uses his forged damascus in about half the knives he produces, both in traditional work and for specific custom orders. His 410 or 416 stainless frame and 154CM stainless spring materials are common, and he appreciates the understated surprises sometimes present in mammoth ivory.
“I find these materials easy to use and can trust them not to fail,” he commented, “and with mammoth ivory, it’s very stable and durable, and you never know what colors are hiding under the bark.”
After 12 years as a part-time knifemaker and working as a mining maintenance manager, Bruce began making knives full-time in 2017. His farming and mining background had always involved knives, but the catalyst for a move into making his own came from another passion.
“I was introduced to custom-made knives by Max Harvey, who donated a large bowie for me to raffle to help fund my drag racing habit running a nitro-methane-powered Harley-Davidson, which I went on to win the Australian championship on,” he remembered. “After a pretty serious accident, I gave up racing and was instantly looking for something else to do. I had never forgotten that knife. I decided I would try and make one—and here we are.”
Harvey Dean’s Texas Tornado
ABS master smith Harvey Deanmarries 24k-gold engraving and escutcheons, antique shell and Dellana Dots on the blade of Texas Tornado pattern damascus to cap off his ornate Coke bottle pattern. (SharpByCoop knife image)
The famed Case Coke bottle pocketknife took on a new twist when Harvey Dean paired the well-known handle shape with a sleek dagger blade in his Texas Tornado damascus of 1075 carbon and 15N20 nickel-alloy steels.
This beauty sports a blade of 4-3/8 inches, closed length of 5.5 inches, and lustrous scales of antique shell. Distinctive Dellana Dots accent the blade to assist in opening, while Harvey did his own engraving in 24k-gold overlay with 24k-gold escutcheons. The bolster and guard on each side are integral 416 stainless steel pinned together.
The dagger blade and Coke bottle handle are traditional, but Harvey’s variation marries them in a stunning display that literally makes the “old” something new and exciting in this custom pocketknife.
“I just thought it looked good,” Harvey commented. “I kind of modified the Coke bottle shape from the Case pattern as their bolsters are straight. Dellana is the first person I know of that instead of using a nail nick or thumb stud, put gold-raised pins in the blade so you could open it with them. I liked that when she started with it.”
Harvey made his distinctive Coke bottle dagger for the Art Knife Invitational (AKI) and said it sold for $9,600. So, with the pricing benchmarked, another similar knife would sell for around the same. In addition, however, the owner receives not only the knife made by one of the premier makers in the world today, but also a fine example of Harvey’s engraving skills.
“I don’t remember how many years ago I started engraving,” Dean mused, “but it’s been close to 10 since I went to the GRS Engraving School [grs.com]. This engraving is overlaid gold instead of inlaid, and the background is also engraved. I called [engraver and AKI coordinator] Barry Lee Hands when I was doing it and told him the pucker factor was very high. This is the first knife I’ve ever done with that much stuff on it, and one of the most ornate knives I’ve ever done. If you look closely, the leaves are actually shaded with round cuts instead of regular cuts like most shading is done to catch the light and get a lot of glittering in the look.”
Tobin Hill’s Custom Cheetah
Tobin Hill said the tough part about reproducing the old Case folding-guard Cheetah pattern is getting the guard to lock tight in the open and closed positions with no rattle or play. (SharpByCoop knife image)
Another tribute to the Case brand comes in the form of Tobin Hill’s version of the venerated Cheetah folder. His take on the Cheetah features the folding guard that made the pattern famous. Both the 3.5-inch blade and guard are CPM 154 stainless steel, while the handle is a superb amber red stag. Closed length: 4.3 inches. The spring and lock guard are also CPM 154, while the liners are 410 stainless and the bolsters are 416 stainless.
Tobin said this particular Cheetah sold at BLADE Show 2022 for $1,100, while its twin, handled in mammoth ivory, sold at $1,200. Pricing would be similar for another such piece.
“I chose to build the swing-guard Cheetah because of the uniqueness of the mechanism,” Tobin said. “I haven’t seen many other custom makers try it and I like the challenge. The tough part is getting the guards to lock up tight in the open and closed positions with no rattle or play. I’ve seen several production models over the years that did rattle.
“Case has produced several versions of the swing guard. The pattern has always been called the 11½ series. They started making them between 1896-1915. I’ve seen models stamped ‘Case Brothers,’ ‘Case Tested,’ and ‘Case XX.’ The Cheetah pattern I copied was first made in 1973. They also produced the Cheetah Cub, a three-quarter version. The blades were mainly flat ground but I’ve also seen dagger grinds, some with crescent nail nicks and some with long pulls. I hollow ground my knife and thought it would be cool to put both a crescent and long pull in.”
Tobin has made knives for about seven years now and completed his first work on April 16, 2016. While he is still a part-time knifemaker, he hopes to devote more hours to it after possibly retiring soon from his own insurance agency following 42 years in that industry. Prior to making knives, his hobby was no less challenging—restoring violins to their original condition.
Tyler Turner’s Custom Pocketknife
“I was wanting to make a slip joint that was not made by custom makers often and that had some sex appeal to it,” Tyler Turner smiled. “And the graceful curves of the toothpick fit that bill perfectly.” (SharpByCoop knife image)
When Tyler Turner took on a toothpick project, he was looking for a certain flair that he knew was otherwise hidden.
“I was wanting to make a slip joint that was not made by custom makers often and that had some sex appeal to it,” he smiled. “And the graceful curves of the toothpick fit that bill perfectly.”
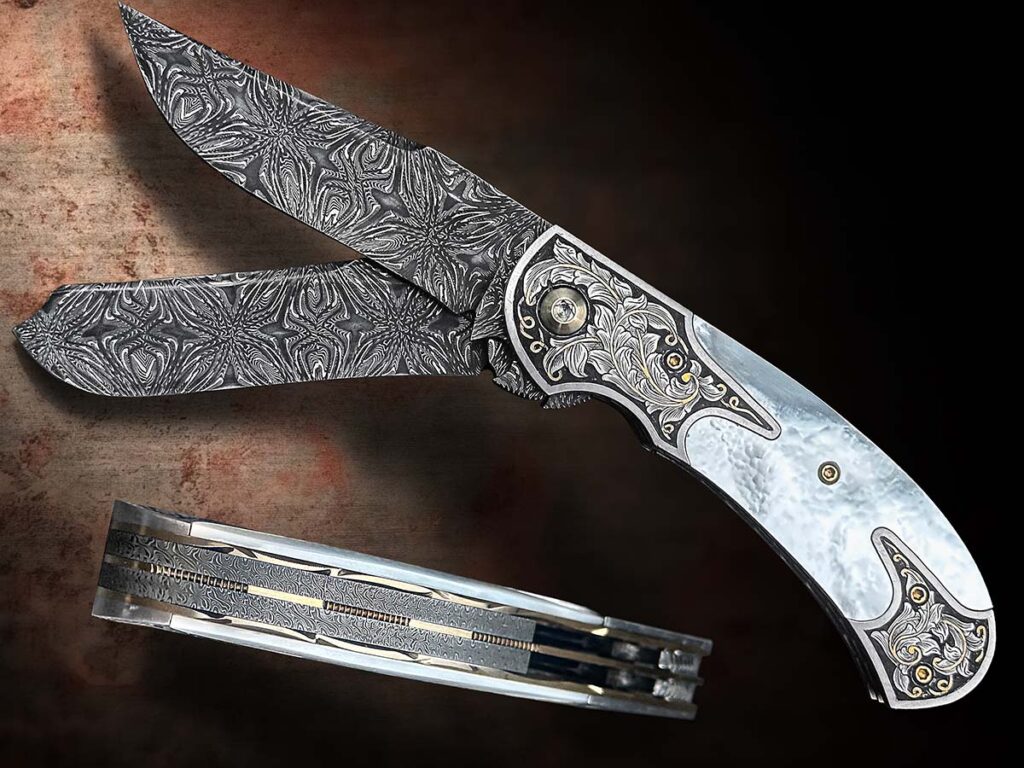
His long, smooth toothpick features a 3.25-inch blade of damascus forged by Damasteel in the Fafnir pattern, with integral bolstered liners in 416 stainless steel, a CPM 154 spring, top-grade mother-of-pearl scales, and 24k-gold engraving and inlay by Jody Muller. Tyler said the handsome toothpick sold for $2,200, and another in a similar composition would command about the same price.
“The materials were chosen to accentuate one another,” he explained. “The most challenging aspect to the build was grinding the blade. My design led to a very acute angle at the tip. I always grind post-heat treatment, so a lot of care went into grinding it slow and cool so the tip did not turn color and ruin the temper.”
Tyler indicated the toothpick pattern, custom versions of which are less often seen than other patterns nowadays, originated in the early 1900s. It became popular with its easy carry and useful clip blade. And the blend of an older, traditional pattern fit in nicely with the maker’s perspective on his art.
“I would say I have a very eclectic style,” he remarked. “I invite the challenges of making a wide variety of knives so that it always pushes me to be better. Plus, it keeps people guessing!”
A resident of Hopkins, Missouri, Tyler is a part-time custom knifemaker and fourth-generation farmer. He grows amylose corn and soybeans with his father and has been making knives for about nine years now, primarily in the summer and winter. For Tyler, the family farming tradition goes hand in hand with another vocation, a foray into traditional knife patterns with the imprint of his own style.
Editor’s Note: Mike Haskew contributed to this piece.
Read More
Sharp In Reverse: 5 Reverse Tanto Blades Worth Your Time
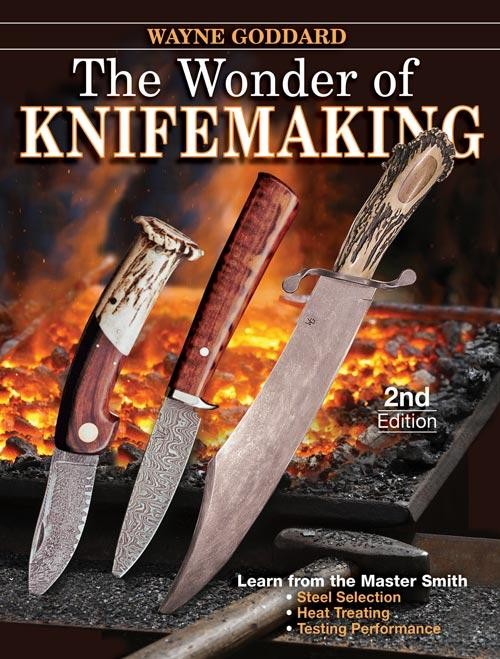
Learning how to make knives from someone who has done it for over 60 years and written about it professionally for about 30 years is exactly what you get with Wayne Goddard’s The Wonder of Knifemaking.
In The Wonder of Knifemaking he takes you on a fascinating journey explaining most everything every knife fan wants to know about knives and how they are made. From imparting his wisdom on how you should approach knifemaking in general, to getting started, insider tips, developing your own unique style, the pitfalls each maker must beware of and much more, Goddard guides you through the process in his measured, forthright writing style.
He tells you what steel is and how each of its constituent elements affects it; working with such old-fashioned materials as files, saw steel and horseshoe rasps; what you should know about heat treating, quenching, and selective hardening and tempering techniques; the best hardnesses for blades; clay back hardening; handles, guards and tangs, including narrow tang vs. full tang; grinding and finishing; material for pins; logo etching; tools for the knife shop; and more.
A huge proponent of knife testing, Wayne explains exactly what a testing program should consist of and what it should gauge: slicing cuts vs. pull cuts; the differences in the types of ropes to cut; tests for chopping ability and edge strength; and more. He also covers sharpening comprehensively, including methods and hones. Sharpening is a subject he knows extremely well, having taught it at many seminars over the years at the BLADE Show, BLADE Show West and many other events.
How to keep your shop in operating order and maintain a safe and happy family life in the process
By Joe Calton
There have been tons of stories on how to be a knifemaker. Most are great and deal with subjects like taxes, suppliers, marketing, sales, bookkeeping and safety. Other great articles cover the technical side of how to make the knives you wish to sell, including stories on forging, grinding, heat treating, handles, sheaths and more.
My story will outline some things I have learned over the years as a full-time knifemaker in a home-shop setting that I think will benefit you, your knives and, most importantly, your family.
The author’s home-based shop is a two-car garage attached to the house by a single door. Sure it’s cluttered—but how much do you want to bet he knows where every tool, piece of equipment, grinding belt, spec book, etc., is?
The GREAT 8
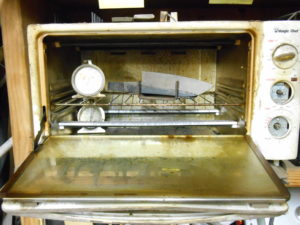
1) Buy a toaster! Your wife’s kitchen oven is not the place to be tempering knives, warming up knife sheaths for waxing them, heating Kydex® for the molding, or burning out axe heads. A $5 toaster at the flea market will do all that in your shop and is a bargain at twice the price.
Buy a toaster! Your wife’s kitchen oven is not the place to be tempering knives, warming up knife sheaths for waxing them, heating Kydex® for the molding or burning out axe heads.
2) Along with the toaster, while at the thrift shop get a selection of pots and pans, cutting boards and a small scale. Trust me, the lure of using one of your wife’s pots or pans for “just this one little project” will be too great—and that is not a road you want to travel! Forget this one and dinner may taste a little “off”—even if you were able to sneak the pan out of the kitchen and into the shop and back again.
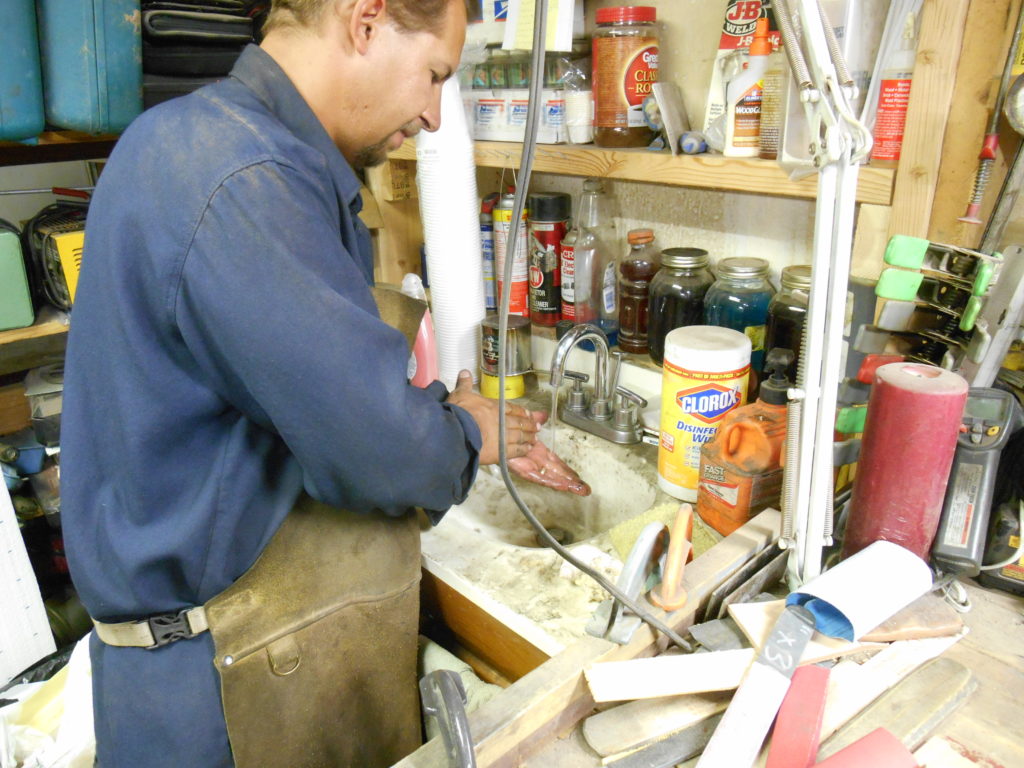
3) Install a sink in the shop. At the very least, put a five-gallon bucket of water on a stand for washing your hands before you head into the house. You may not mind grease, oil and dust prints on your clothes, but one time of leaving a smear of quenching oil on your wife’s nice clothes and your knifemaking will take a big hit. Spilling acid on a concrete floor also has far fewer ramifications than spilling it on the countertop in the kitchen. Oh—and don’t forget to wipe your feet on the way into the house.
Installing a sink will help keep things clean.
4) If who like your coffee as much as I do, get a big thermos, fill it in the morning, and take it to the shop with you. This cuts down on the trips away from the shop, as a trip inside the house to grab another cup can turn into an hour away by the time you get the cup, peek in the fridge, check for phone messages, etc.
5) Know when to quit for the day. This is one lesson I’m still learning. You get wrapped up in your work and the next thing you know it’s 2 in the morning. Not only will you spend that night on the couch, but you may spend the next one there too if, as a result, you also forgot the plans you made, dinner, one or more of the kids’ school activities, etc. It’s tough to make good knives after a rough night on the couch.
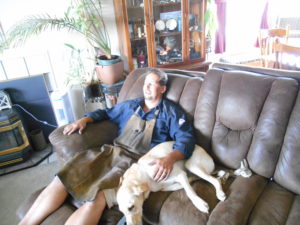
When working in the shop, don’t lose track of time and work too late or else you could forget to do important family jobs—and wind up being relegated to sleeping one or more nights on the couch with Fido as a result.
6) Use some of your knife money to buy your wife flowers. Buy them on a regular basis. Put it on the calendar if you must so you will remember. Think of the flowers as supplies, like grinding belts. This is very important! Not if but when you forget one of the preceding tips, hopefully you will have gotten her flowers recently—and it just may save your bacon. For the home-based knifemaker, buying flowers for the wife is at least as important as safety glasses. You can continue to make knives with only one eye but you cannot make knives if you have been dispatched with a heavy frying pan.
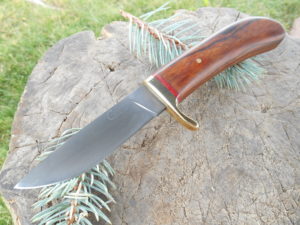
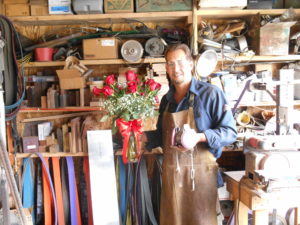
In order to have the wherewithal to make such knives as his drop-point hunter, the author keeps peace with his wife by buying bunches of roses on a regular basis.
7) Know that what happens in your shop does not stay in your shop, and act accordingly. Dust from exotic woods will make it into your home. You may not be allergic to them but your wife, kids or family pets may be. Keep an eye peeled for anything out of the ordinary when introducing new woods or materials into your shop. This also goes for smoke from quenching. Use “green” quenchants when you can, including vegetable-based oils and water. And keep the door to the rest of the house closed until you clear the air.
8) If you’re considering moving your shop away from your house, think long and hard about it. Yes, a home-based shop offers some challenges. However, it offers quite a few benefits, too. Among them: the morning commute is a thing of the past so you save fuel and time, you have a good place to fix toys and household appliances, and everyone always knows where to find you. If you are a workaholic like me, the home-based shop keeps you at home instead of at the office. Move the shop as some friends of mine have done and you may end up moving it right back.
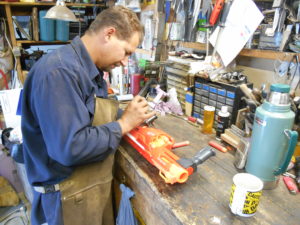
A benefit of a home-based knife shop is that you can also repair appliances, junior’s toys, etc. And don’t forget to buy a big thermos for plenty of coffee so you don’t have to make return trips to the house for that extra cup.
Also, when you take a break, throw a load of clothes in the washer and they will be ready for the dryer by your next break. Or, you can start a crock-pot meal for that evening’s dinner. By the way, there is no better test of the kitchen knives you make than to use them in making dinner a couple nights a week. This is a twofer in that not only do you get the immediate feedback from hands-on testing, but also the household benefits of cooking a couple meals a week will go far toward keeping your knifemaking in the good graces of “The Boss.”
2 BIGGEST CHALLENGES
My list of tips is not complete. It is based on my experiences in working from a home-based shop, which is a two-car garage attached to the house by a single door. You may be in a detached shop or a basement. Whatever your setup, I hope I have helped with two of the biggest challenges faced by a knifemaker in a home-based shop: keeping the shop in operating order and maintaining a happy home life in the process.
Install a sink in the shop. You may not mind grease, oil and dust prints on your clothes, but one time of leaving a smear of quenching oil on your wife’s nice clothes and your knifemaking will take a big hit. The sheath knife with blade hamon and wood handle and brass rivets is by the author.