by Wayne Goddard
The One-Brick Forge
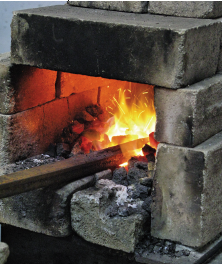
The one-brick forge I created started out with one brick and proved to be incredibly useful. As I learned more about working with soft bricks and found a better torch, what I call the “Extendo Forge” evolved. The Extendo Forge employs one and a half bricks to gain a longer chamber.
The main thing is that the bricks have to be of a soft, high-temperature type. A BernzOmatic-style propane torch furnishes the heat for the little forge. This little forge is not just a novelty item; mine gets used almost every day. It has replaced my medium-sized Dragon Breath forge for many heating jobs. Typical uses are for forging blades, annealing, heat-treating blades and occasionally tempering with the soft-back tempering jig. The photo shows the Extendo Forge with the JTH-7 hose torch.
To make it, you’ll need two types of firebricks—one or two of the soft, high-temperature type, and two or three of the hard, low-temperature bricks that help hold the soft bricks in position. If you don’t have any bricks, lying around you will find them in the yellow pages under “Refractories”. If that doesn’t get results, call a brick mason to find results, call a brick mason to find out where he gets firebricks.
The common hard bricks will not work to make the little forge. The high temperature bricks, sometimes called “insulating bricks” are absolutely necessary. The temperature range for the soft bricks is 2,800-3,000 F.
There is only one brand and model propane torch that I recommend. It’s the BernzOMatic JTH-7 “hose torch.” It’s named a “hose torch” for the 4-footh hose with a torch tip on the end. There is also a regulator valve on the bottle.
A regulator valve is necessary because it allows the temperature to be adjusted. The hose torch runs extremely hot on the high end but can be adjusted back to run cool enough to use for annealing and hardening small parts. When running on the high end, you’ll like the extra heat because it makes for quick heating of the chamber.
The firebrick forge with the JTH7 torch will easily heat 1/4-inch-by-1-inch bar stock to forge blades from 4-6 inches long. Most other torches can only be used “on,” without any way to regulate the heat. The photo shows the project blade being heated.
Test your one-brick forge by placing a piece of 1-inch-by-1/4-inch bar stock in the heat chamber. Fire up the torch and see how long it takes to bring it up to forging temperature. It shouldn’t take more than 5-6 minutes to get 3 or more inches of the bar up to the forging temperature.
It’s important to have a safety holder for the 16-ounce propane bottle. The small, propane torches can be dangerous if dropped or knocked off of a workbench. The valve unit can break off and the propane will be quickly released causing a dangerous situation. The safety holder is made from a large-size juice can that is mounted to a plywood base. The holder is then held to the workbench with a wood screw.
A safety holder for the torch would have saved a roof that partially burned off a house in our neighborhood. A bicycle fell against a workbench and knocked a propane torch off and onto the floor. The torch wasn’t running but when it hit the cement floor the torch broke off the bottle, releasing the gas. The escaping gas was ignited by the pilot light on the water heater. The flames went up the wall and into the attic through the access door that had been left ajar.
To make the mini forge, carve the 1-inch-by-1-1/2-inch heat chamber hole lengthwise completely through the brick with a junk knife blade. Or drill it out with an old drill bit and then scrape it out to make the rectangular hole. The 1-inch hole in the side is named the “fire hole;” it goes in only far enough to reach the heat hole.
You want the flame to wrap around the bottom of the work so as to heat it more uniformly. The line on the brick shows the bottom of the heat chamber. Don’t put the torch tip directly in the heat hole, keep it an inch or so from the opening. Experiment with your torch to see where the flame is aimed to get the most heat.
The heat chamber doesn’t need to go all the way through the length of the brick if you are forging only small blades. A half-brick that is drilled partway through is positioned at the back end of the forge. With the open end of the half brick against the heat chamber, blades as long as 10 inches can be heated for forging or quenching. The solid end of the half brick is butted up against the end of the heat chamber when shorter work is being heated.
Carve a notch in the side of a soft fire brick to make a cavity large enough for heating parts that are larger than the hole in the mini-forge. This works for straightening out coil springs or other curved pieces. The part to be heated is held in the recess where the flame can wrap around it so that it is being heated from all sides.
Oxygen/Acetylene Torch
The oxygen/acetylene (A/E) torch is an excellent source of heat for the quenching process and one that I used for many years. I have used it to harden 3,000 or more blades. I stopped using it once I started building my homemade gas forges and using the one-brick forge. The only disadvantage to using A/E is the cost of the gas. Propane, when compared to acetylene, gives four times or more heating time. Although propane won’t get as hot as A/E, it is more than hot enough for our use.
The A/E flame is over 5,000 degrees F, but it is easy to learn to manipulate the torch and blade to get an even heat. It is wise to practice getting an even heat on a junk knife blade or piece of scrap steel.
The A/E torch is perfect for an edge-hardening quench in which only the edge portion of the blade is heated to the hardening temperature. The back of the blade remains at a temperature where it does not fully harden in a quench where the whole blade is submerged in the oil. Blades that are edge heated with the A/E torch can be edge quenched or fully quenched.
The Regulator Block for Edge Quenching
When it is desirable to do an edge quench in oil, it is good to use a regulator block. I use a heavy chunk of steel adjusted so that the edge of a blade placed on it is about half an inch under the surface of the oil. The oil is heated to 90-140 F. The blade is heated and placed in the oil, point down, at about a 45-degree angle, and then rocked down on the regulator block. The blade is then rocked quickly back and forth a few times to be sure that the whole edge gets the “fast cool” that is necessary. The regulator block can be raised or lowered to adjust the amount of hard edge created in the quench.
Tempering
Tempering is a low temperature heat cycle or cycles necessary to soften (temper) the martensite a bit, and at the same time relieve the stresses developed in the quench. The final form of the steel in a finished blade is tempered martensite. Tempering of knife blades made of carbon or carbon alloy steel is in the range of 375-500 F.
It is important to have the correct degree of hardness as a result of the tempering process. In the case of a knife blade, it is essential to have a fine grain structure. A weak, coarse-grained blade may be the result of over heating during forging or heating for the quench. A blade with a fine grain structure will always show superior strength to one of the same hardness that has a coarse grain.
In supervising the American Bladesmith Society journeyman smith and master smith cutting, chopping and flex-test activities, I’ve noticed that the few broken blades all had a coarse or questionable grain size. Blades fail because of poor quality heat-treating; it’s usually not the fault of the steel itself. Poor steel with good heat-treating can make a superior blade when compared to one made of good steel with bad heat-treating.
You’ll need a toaster oven for tempering the freshly quenched blades, or else use the house oven. It’s important to temper immediately in order to relieve the highly stressed condition of the martensite formed in the successful quench. I used the oven in the house for many years and the family didn’t like the smell if I didn’t get all the oil off of the blades. It was good when I finally figured out I could do my tempering in a toaster oven kept in the shop. Any oven that will give a uniform temperature over the range from 325-500 F will work.
A $4 oven thermometer is mounted to the rack as a visual indicator of the temperature. Do the following to test your oven before tempering any blades: Turn on the oven and set the control at 375 F; allow 20 minutes for the temperature to become uniform; put a freshly ground piece of steel into the oven; leave it for 45 minutes; remove the steel; let it cool; and note the color.
The hue of carbon steel should be somewhere between straw color and brown. It should be of a uniform hue over the length of the steel. The color that appears is oxide formed by the heat, and the hue is a fairly accurate indication of the temperature within the same types of steel.
You might need to put a piece of steel between the heating element and rack if it appears that one part of the blade got hotter than the rest. Adjust the heat control so that you are getting a dark straw or brown color. You should be able to cut into the edge with a file.
I’m now using a Farberware Convection oven for tempering carbon and carbon-alloy steels. (That is anything up to 550 F.) I purchased the Farberware oven from a thrift store for $5. It has a large capacity, and since the heat source is outside the chamber, the heat is uniform.
An alternate tempering method is to use what I call a tempering jig. See the photo. The jig is made of copper but could be stainless steel or mild steel. Mild steel will scale away and not have as long a life as copper or stainless steel. The copper sides are 3/8-inch-by-1-inch by 5 inches. The gap for the blade is 1/4 inch, or as wide as the thickest blade you want to temper with the tempering jig.
The tempering jig must be heavy in order to hold enough heat to do an adequate selective temper on larger blades. An extension on the spacer of the blade is necessary as a place pinch with tongs or pliers to take the blade and jig in and out of the forge. With practice, a nice selective temper can be achieved. Practice with it before using it on a hardened blade. As said earlier, most of the skill used to make a finished knife is only developed by practice.
The tempering jig is made small enough to fit into the heat chamber of the firebrick forge. The jig is heated to an orange color, pulled out and placed on a firebrick. The back of the blade is set into the jig.
The blade is kept in motion by drawing it back and forth in the slot, with more attention given to the ricasso area. The point, being thinner, will overheat if you are not careful. The idea is to get a blue color on the back of the blade and a dark straw color, not more than brown, at the edge.
You should have a pan of water handy to cool the edge if the color moves towards the edge too fast. The edge should be cooled with a very quick dipping in and out of the water. Don’t just stick the edge in and leave it, the thermal shock could start a microscopic crack that will cause a failure at some future time.
Annealing
Annealing is a heat-treating process that results in steel being in the softest condition possible. It can then be more easily worked with files or shaped by milling and turning. New steel as it comes from the supplier is usually in the form of rectangular bar stock. It would be in the hot-rolled, annealed (HRA) form. Hot rolling and annealing was the first step in the heat-treating process, and as such, the steel is ready to be worked by the stock removal process.
Heat-Treat Sequence for the Project Blade
1. Have the tempering oven on and running with sufficient time for the heat to be steady;
2. Have the quenching solution close by and ready to go. No time can be wasted getting the hot blade into the quenching solution. If you waste a few seconds full hardening may not be accomplished;
3. Heat the blade for the quench using the one-brick forge, or whatever source you have. Heat slowly and uniformly until the blade no longer attracts a magnet touched to it;
4. Quickly quench edge-first into either warm oil with a regulator block or a pan of goop. Be sure to get at least a half-inch of the full length of the edge into the quench as soon as possible. I use the goop quench exclusively for single-edged knives. (The formula for goop is found in the materials section.) Double-edged blades need a tip-first, straight-in quench in oil, deep enough to cover the whole blade and tang.
5. Keep the edge in the quenching solution until the back of the blade shows no color. As the goop melts, I will often quickly lift the edge out and make another track in the goop. This is necessary to keep the cooling rate steadily coming down;
6. Keep the cooling of the blade going until the blade can be handled with the bare fingers;
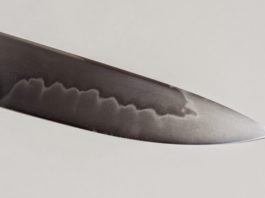
7. Wipe the residue from the quench off of the blade, testing the edge with the corner of a worn file. The quench process is a success when the file does not bite in but only slides on the steel. I have a container of sawdust and a stiff wire brush to clean the excess oil or goop from the blade. Throw the blade in the sawdust and scrub it around real good, then give it a good work over with the wire brush. The light gray area of a freshly quenched blade indicates the hard section. See the photo. A blade that does not exhibit this color at the edge may not have responded to the quench process;
The Brass-Rod Test Setup
8. Quickly sand down one side of the blade to the bare metal, and place it in the tempering oven for 45 minutes to an hour. Leave the oven running but take the blade out and place on a rack to cool to room temperature. When the blade is cool enough to handle with the fingers, place it back in the oven for another temper cycle of at least 45-minutes;
9. Turn the oven off and take the blade out when it reaches room temperature;
10. Test the edge with the file used previously. The file should bite slightly but not too deeply; and
11. Complete the finish-grind on the blade and give it the brass rod test.
The Brass Rod Test
Glue a piece of 1/4-inch-diameter brass rod onto a piece of hardwood, or hold the brass rod in a vise with the top half above the jaws. Apply the edge of the knife to the brass rod at the same angle used for sharpening, which is approximately 15 degrees. Apply enough pressure so that you can see the edge being deflected by the rod. If applied similar pressure to the rod while it was on a scale, you would find the “pressure to deflect” to be 35-40 pounds.
A good light source behind the test area is necessary so that you can see the deflection. If the edge chips out with moderate pressure on the rod, the edge will most likely chip out in use. If the edge stays bent over in the deflected area, it will more than likely bend in use and be too soft to hold an edge. The edge of a superior blade will deflect on the rod and spring back straight.
The brass rod test can quickly determine if the blade has a good balance of flexible strength and hardness sufficient to hold an edge. The test is intended for knives in the hunting knife class. Thin fillet knives or thick camp knives will not respond to the test in the same way.
The brass rod test as I present it is not intended to replace a hardness test to determine that a blade was fully hardened. You might think of it as a substitute for a Rockwell tester. The brass rod test is only a comparison test to determine what is, in my opinion, a hardness that will hold up in normal use. I started using is about 27 years ago and still think it is the best non field-use test I’ve found.
Finishing the Blade
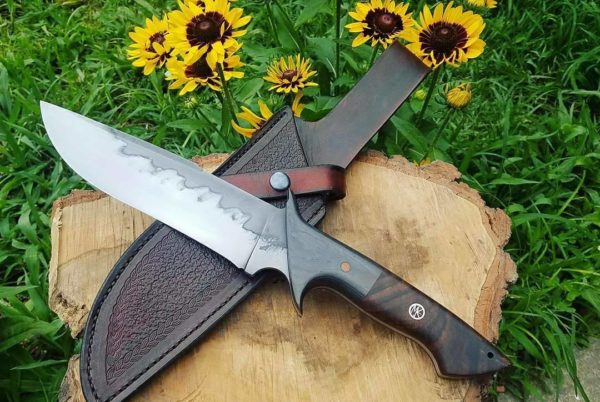
There are a variety of ways to finish the blade once it has been hardened and tempered. The project knife was worked down to a 240-grit finish with a flexible disc and then hand finished to about an 800-grit finish. I then gave it a five-minute etch cycle in ferric chloride to bring out the temper line. The gray color from the etching process was left on the blade because it gives it a slight oxide layer of protection from tarnish and rust.
The temper line was highlighted with a quick hand rub with 2,000-grit 3M polishing cloth. My best photo does not do the blade justice in bringing out the beauty and fine detail of the complex temper line.
Following are some of the many ways to finish blades. Each different finish gives the blade a distinct personality. Experiment with the different finishes so you will have the most suitable ready when the right blade comes along.
Hand-Finished Blades
Japanese sword makers who did their work 300-plus years ago had no power equipment. They forged the blade close to shape, and then used a sen (scraper) to level it. After heat-treating, completely with handwork, they brought the blade to a high degree of polish. All the abrasives used were from stones found in nature or made from oxides of metals.
I was amazed when I first observed such a high degree of polish and was told it was all done by hand. My power grinding and polishing equipment was not getting me anywhere close to the hand-finished sword blades. Hand finishing, when done well, results in a crisp and clean definition of the surface. It gives a true appearance to the grind lines and elegantly defines the blade shape.
The reflections from the surface of a mirror-polished blade can cause a distortion of the lines and can reveal that the surfaces are not usually as fl at and true as first believed. A well-done, hand-rubbed finish is the ultimate treatment for a blade.
A hand-finished blade starts out with a belt or disc finish to at least a 320-grit finish. The first step is working out the machine-made, 320-grit scratches with either a 320- or 400-grit wet or dry paper backed up with an ergonomic push stick. The photo shows the style of push stick I use for hand finishing.
The first hand sanding is done in line with the length of the blade, and that will be at a 90-degree angle to the machine finish. You may find some ripples in the finish that are caused by a platen that isn’t flat or by stacking of the grit on the belt. You’ll need to drop back to a 240-grit paper to get rid of them if they don’t quickly come out with the 320-grit or finer paper.
Work under a good light and use a headband type magnifier to check your progress. Once the ripples are out, you can go back to the 320-grit paper and get back on schedule. It’s not so much what specific grits you use but that the changes in grit sizes between steps are not too great. For example, it would be a waste of time to go from 120- to 320-grit paper.
When all the scratches are worked out, switch to 600-grit paper and sand at 90 degrees to the 400-grit surface. Then use 800-grit paper at 90 degrees to the 400-grit finish. You might decide not to go any further; it’s your knife and your decision. Or, you might want to keep up the process to 2,000 grit. The final rub should be running parallel with the length of the blade. The finer grits of wet or dry paper might not be found in the average hardware store. If not, try automotive paint supply places, or go to one of the knifemaker supply companies.
Abrasive stones are also used for hand finishing. I use EDM stones purchased from Manhattan Supply Corp. These are available in a variety of grits. I use 240, 320, 400 and 600. At times I use medium Crystalon and fine India bench stones to level the surface on large blades. I make handles for the stones or epoxy them to a handle of some type. The photo shows two stone holders made of Micarta.
Try this for a super hand-rubbed finish: Take a clean scrap of sheath leather, just enough to hang on to, put a dab of Simichrome or similar polish on it, and give the blade a rub-down with it. Add polish compound as necessary but do not over do it. This will bring up a shine on the final lines left by the final abrasive paper rub that is unbelievably nice looking.
Using Natural Stones
Builders of Stone Age weapons were the first stock-removal makers. Their only choices for abrasives were natural stones, sand or dirt. The “grinder” of choice would have been any rock that was harder than the object being shaped and finished. I’ve always thought that there were probably different “schools” of grinding, with some preferring round rocks and others choosing rocks of the square or rectangular type.
When I wrote the BLADE Magazine series, “The $50 Dollar Knife Shop,” I used pieces of broken wheels from old-time, foot-powered grindstones to finish the forged blade. I had pieces from two different stones, one somewhat coarse, the other a medium-grit size. I measured the grit size with an optical microscope and estimated that the coarser of the two was an 80-grit stone, the finer a 150-grit stone.
The 80-grit stone was used for getting out the scratches left from draw filing. The 150-grit stone was used for the finish prior to heat-treat. The photo shows a blade being smoothed up on a piece of natural sandstone. These stones are used with water to keep them from plugging up.
Natural stones fine enough for up to a near-mirror finish will be of the type known as Arkansas stones, which are a grit size of 600-1,000. I don’t like Arkansas stones for sharpening because they cut too slowly; however, they are a good choice for fine finishing blades. Japanese water stones are available in grits that will take you to a near mirror finish. Some are natural stones but most of the modern water stones are manmade.
A Quick Hand-Rubbed Finish
A nice finish for a working knife can be done rather quickly with all handwork. It’s quick because the strokes are all lengthwise with the blade. The quick-rubbing process results in a nice, although not perfect, finish because there are usually some coarse lines or ripples under the final finish. The trick is to keep the scratch pattern all going in the same direction with the length of the blade. I may take the surface to a 400-grit finish and then use polishing compound on leather to finish it off.
Using Wet or Dry Paper
Wet or dry paper is useful because, when used wet, it does not clog up and quit working. Although some applications for it in knifemaking are best done wet, for others it is used dry. Wet or dry paper has silicon carbide grit, which is superior for metalworking. The waterproof paper backing is stronger than the non-waterproof, paper-backed sandpaper that is made for woodworking. All types of sandpaper are more economical when purchased in a 50-sheet sleeve.
Here is my procedure for preparing a sheet for use in blade or handle finishing. Fold it in half lengthwise and you have it ready to clamp to a steel plate for hand finishing a flat surface. The photo in the section on blade finishing shows this operation being employed to smooth the ricasso on the project knife. By keeping the paper folded while in use, the abrasive side that is down helps to keep it from slipping out of position on the backing surface.
Fold another sheet of sandpaper lengthwise and then cut it in half along the fold with a sharp shop knife. Fold that piece again lengthwise and cut. Fold that piece but don’t cut it, and the wet or dry paper will then be ready for hand sanding. If you folded and cut right, you’ll have a folded piece as long as the 11-inch sheet and it will be 1 1/8 inches wide.
Build yourself a cutting jig as illustrated earlier to make 1-inch-wide strips for hand sanding. When you want to form a radius on edges of a knife handle, the strips are not doubled but used as-cut to width. These are used with a backing layer of masking tape to keep the paper from tearing from the pressure used. To apply the tape to the sandpaper, lay the paper over your vise, grit side down. Tear off a piece of masking tape that is near the same length as the sandpaper. Apply the tape in the center and work it down and around, following the gentle radius of the top of the vise.
This will form the sandpaper into part of a slight circle and will help to keep it from wrinkling when pulled over the rounded surface being finished. When sanding rounded surfaces, it is good to work the paper by pulling it back and forth over the surface. The action is similar to polishing shoes with a strip of cloth.
The Mirror Finish
Some collector-grade knives look good with a mirror finish. At one time, a mirror finish was the ultimate. However, the hand-rubbed finish is more popular today for high-dollar collector knives. And, it does show a higher degree of skill, in my opinion.
My version of a mirror polish starts out by hand finishing the blade to a 600-800-grit surface, and then I use a buffer. The hand finishing gets out all the ripples and leaves a true flat surface to set up the mirror finish.
Be careful with buffing wheels, they are probably the most dangerous tools in the shop. I run 10-inch-diameter, stitched buffing wheels at 1,750 rpm. Anything faster than that is too dangerous for me. I keep the last two rows of stitches cut so that the face of the buffing wheel is not so hard. There are times when a hard face is desirable, but most of the time a slightly softer buffing-wheel face is better. The soft face is good for getting in the corners where the guard meets the blade.
It will save you a lot of work to have the face of the guard polished prior to attaching it. This also eliminates the danger of buffing it while on the knife. Loose buffs are dangerous for knife work because they have the bad habit of grabbing blades and other knife parts.
I was holding a folding knife blade with my bare fingers one day when the buffer caught it and flipped it to the cement floor. The blade bounced back up into the buffing wheel and was propelled back down to the cement, then made a second trip up and stuck in my finger. I wasn’t badly hurt, just enough to draw a drop of blood or two.
I immediately placed two layers of old carpet on the floor under the buffer. The padded area on the floor will slow down a flying blade and, at the same time, give the blade some protection from damage. Small blades should be held with ViseGrip® pliers for buffing.
Safety Note
In my opinion it is not safe to have a buffer sitting directly on a table or bench. When a buffing wheel catches a blade, it is propelled at 75 miles an hour or more towards the bench top. The sharp missile can bounce back and then be propelled by the wheel in the direction of the operator.
Mount the buffer on an extension of the workbench that is no longer than the base of the motor. The idea is that there is nothing between the buff and the floor. Some type of pad should be placed under the buffer so that a blade thrown down by the buffing wheel isn’t damaged, or worse yet, deflected back up into the wheel or operator.
Many years ago, I taught a friend to make knives. He got in a hurry and mounted his buffer directly on top of a bench. The buffing wheel caught the guard on a dagger and flipped it down against the bench top. The knife bounced off the table and back into the wheel where it was propelled around and directly through the palm of his hand.
I don’t think he incurred any permanent damage, but he missed a lot of work and had the expense of getting his hand repaired. I have more true horror stories about buffer accidents but will not tell them here. I’ll just state my opinion that I think the buffer is the most dangerous machine in the knife shop.
Buffing wheels should have guards over them. See the photo that shows the way I do it. Even if nothing is ever propelled around the wheel and into your face, it is nice to have the fluff and excess compound projected down to the floor instead of up into your face.
My buffing-wheel guards are made out of 3/4-inch plywood, then glued and screwed together. My theory is that a knife blade propelled around the wheel might stick into the wood before it gets to me. A lip at the front of the guard can be adjustable so that it can be lowered when the wheel gets worn down. The top of the buff guard is handy for storing compounds and other junk.
The Satin Finish
The most practical finish for a working knife is a satin finish. It shows a pattern at a 90-degree angle to the edge and is usually not much finer than 300-400 grit with light buffing.
Here’s how I do my version of a satin finish. The blade can be flat, convex or hollow ground. I work the blade down to a half-dull, 240-grit finish, or if you prefer, use a sharp 320-grit belt. I’ve done the satin finish starting with a flexible disc finish but it is never as nice looking as when set up with a belt.
Carefully buff the blade with Number SF 300 (satin finishing, 300-grit) glue-based compound. This type of compound is available from most knifemaking supply companies. I use the compound on a 10-inch stitched muslin buffing wheel that runs 1,750 rpm. This buff will be used for only the SF greaseless compound. It takes some practice to get a uniform scratch pattern. At this stage the blade surface will be fairly open.
The next step is to buff the blade lightly with a medium cutting compound. Easy does it with this step. Once or twice down each side of the blade is enough. Finish the blade by buffing lightly once or twice down each side with a finish compound like RCH Green Chrome.
Over-buffing with the final finish compound will wipe out the scratch pattern that sets up the satin finish. The result will be a nice looking, slightly shiny satin-finished blade. The finish buffing is done on a different 10-inch, sewn-muslin wheel that runs at 1,750 rpm. With practice, you will be able to get a nice, but not too shiny, satin finish.
Satin finishing compound is held together by water-based glue. The SF compound is also called “greaseless” because most buffing compound is grease based. SF compound is applied to the wheel while it is running, but not at full speed.
I turn the buffer on, then off, and apply the compound as the buffer slows down. This process is repeated until a light coating is applied to the whole surface of the wheel. If the compound is applied in a thick layer, the buffer acts more like a fine-grit grinding wheel and it will not make a good satin finish.
The wheel is left running until the compound hardens. That will take 15 minutes or more, depending on the humidity and temperature. A freshly loaded and dry buff should be broken in by lightly buffing a scrap piece of steel. The object is to dull the satin effect just slightly. This whole operation will need to be practiced to get good at it. Like a lot of other things in knifemaking, it can’t be broken down to a formula that works the first time, every time.
Protective Coatings for Blades
Blades made of high-carbon and carbon-alloy steel, and most tool steels, will stain and rust if not kept clean and dry. There are two treatments that I use as protective coatings on working knife blades.
The first is Cold Blue. This is the product made for touching up the blue finish on firearms. Birchwood Casey makes one called Super Blue, which costs a bit more than the standard Cold Blue but is well worth the money. It is easier to get an even coat of blue with the Super Blue and the blue is a deeper color. Used as directed, it will make a nice finish that gives the blade a fair amount of protection against tarnish.
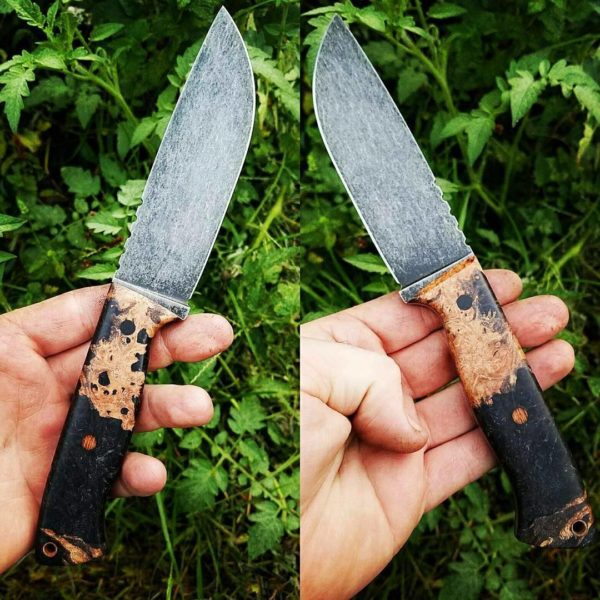
The other method I use is an oxide layer developed with mustard. It gives a finish that makes the knife look like it’s been used for some time. It makes the knife more user-friendly because there is not the constant worry about frequent cleaning and keeping fingerprints wiped free. Blades with the mustard finish can be handled and then put away in the sheath without much fretting.
The blade being readied for a mustard patina should have a fairly fine finish on it, 400-grit will do. I’ll usually make swirls and a variety of lines going different directions with 400-grit wet or dry paper. This will help give the finished blade the appearance of having been used.
Making a new knife that looks like it has been used might sound a bit goofy. All I can say is that my customers seem to like the goofy idea.
I’ll never forget selling the first knife onto which I applied an aged finish. It was 1973, and I was selling my knives at an outdoor craft show called The Saturday Market. The young man who bought the used-looking camp knife made the following comment as he picked it up for the first time: “I always hate taking a new knife out and getting it messed up; this one’s already messed up!” I’ve been messing them up every since.
There’s a bit of a trick to applying the mustard finish. It won’t look right if the mustard is simply rubbed onto the blade. The correct way to do it is to make lots of little drops with your fingertip. The drops can almost touch one another or be spaced out a bit. Let the initial treatment work for four-to-eight hours. Rinse the blade with water and scrub it lightly with the finest steel wool you can find—that is usually coded “00000.”
Next, apply a second and third coat. Finish the final mustard treatment as before and seal it with paste wax or penetrating oil, like Liquid Wrench® or WD-40. Use the wax as per the directions on the container. Let the Liquid Wrench or WD-40 work on the blade for a few minutes and then wipe it dry with a clean rag. If you were going to use the knife for preparing food, it would be better to use a vegetable oil to seal the blade. The photo shows a close-up view of the mustard patina.
It’s a good idea to practice on a junk knife blade. Try some combinations with the Cold Blue, and think about testing horseradish, perhaps combining it with mustard. The horseradish will make a black patina with which I’ve only just started to experiment. A knifemaker friend, Richard Veatch, turned me on to the horseradish finish, saying it came from sword maker Michael Bell.
Getting a Handle on It
BLADE Magazine editor Steve Shackleford once asked me to participate in a point-and-counterpoint article covering narrow-tang versus full-tang knife construction. I told him that the only way I could do it was to argue both sides. There are advantages and disadvantages to each method, and I can make a wonderful argument for either of them.
Nevertheless, after 42 years of putting knives together, I pick narrow-tang construction for the majority of my work. I like the feel and balance with the narrow-tang knives. They will always be lighter than full-tang knives. I don’t want to argue for my position; I’ll just say it’s my way of doing it and I’m comfortable with it.
I like making the Scagel-style bowie and camp knives that require narrow tangs in order to accommodate hardwood spacers and deer antler crowns. For hunting- and utility-sized knives, I prefer the narrow-tang construction that calls for two halves of a knife handle to be carved to fit around the tang. Some call it a mortised handle. I’ve worked out a way to carve the cavity in the two handle halves that makes it fairly simple.
There are several reasons why narrow-tang (N-T) construction is the easiest for the new maker. The N-T requires less steel, which is not an issue if you have 50 pounds of old files lying around. It can be an issue to consider in making knives of damascus steel that you’ve welded up with your own two hands. N-T construction requires a fraction of the finishing that a full tang does because there is no steel exposed in the handle. This makes the finishing much easier for those without power tools.
The full tang, in comparison, requires that the tang and handle material be exceedingly flat, which calls for either a belt sander or a flat-disc machine. A disadvantage of most N-T construction is that it usually requires a knife guard to hide the tang hole. The project knife’s handle style, with the guard and grip as one, solid, integral piece, also hides the tang hole.
Handle Materials
Micarta has been called the steel of the plastics world. I won’t go that far even though it’s a material that will outlast most knife blades. Micarta is an often-used material, very versatile and available in a good assortment of colors. I use it a lot because of the durability factor. Its only real disadvantage is that it doesn’t have the organic feel of natural handle materials. A young man was handling one of my Micarta-handled hunting knives and remarked, “I don’t like it; it’s not organic.”
Antler, both domestic and the imported Sambar stag, are good handle materials but are better suited for knives made after the maker has more experience. Stag is one of my favorite materials to work with but availability is not good. There is currently an embargo on Sambar stag. Elk and deer antlers are not easy to come by and not all are suitable.
Whenever possible, purchase antler and stag when you can pick it out yourself. That is the only way to be absolutely sure you get usable material. If you order stag or antler through the mail, be sure that you have return privileges for any of it that isn’t acceptable.
Domestic hardwoods are an economical source of material. Domestic wood types I like to use are maple, walnut, Osage orange and desert ironwood. Osage orange and ironwood are the hardest and most durable. I’m fairly lucky to have a good source for Osage orange. The pioneers that came to the Willamette Valley in Oregon by covered wagon brought starts with them. There are many Osage orange trees still growing along the old Territorial road north and east of Eugene.
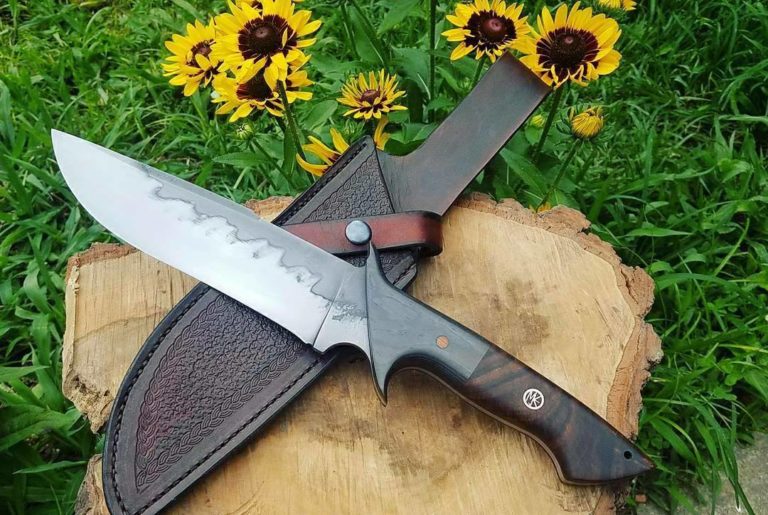
I often use fiddle-back maple and walnut, sometimes called “curly”, or “tiger tail.” The maple used for the project has a lot of special memories that go with it. It came from an old-school craftsman named Gillman Keasey. He made bows and arrows, and with them, won the National Archery championships in 1935 and 1936. That means that there will be fond memories every time I see a picture of the project knife.
Keeping Wood and Stag Dry
Western Oregon has a reputation for being wet and it’s well deserved. Our average rainfall is nearly 60 inches. Wintertime here finds moss growing on everything that doesn’t move. Keeping wood in my shop dry enough to put on knives was a problem until I built a heated storage box.
The box has a 100-watt bulb in the bottom that runs with a thermostat set at 75 degrees F. This keeps wood and stag about the correct moisture content so that it doesn’t shrink when put on a knife and taken into the nice, dry climate of a warm house.
Vents at top and bottom allow circulation of air through the box; the shelves are heavy pegboard as to allow for some air movement. There is a 1-inch air space at the back, from top to bottom. The box works well and has not only solved my problem with wood but gives me a place to store welding rod, which works better when warm and dry.
Handle Attachment Sequence
The procedure is as follows for the handle style where the guard is part of the handle material. Making the mortised-tang handle goes like this:
1. Choose a piece of wood large enough to make the handle that is at least 1-inch thick. Make it a real nice piece of wood. Take time to find something distinctive with unique colors and grain, or use something with a memory attached;
2. Take care to orient the handle pattern to the flow and pattern in the wood grain and clamp in place;
3. Use a sharp lead pencil to mark the outline of the pattern. Do not use ink markers as they will penetrate the handle material and make an ugly stain that won’t always come out when the handle is worked into the finished shape;
4. Cut the outline of the handle slightly oversize;
5. To use the blade as a drill guide, clamp it to the handle material. Be sure it is oriented properly by laying it on the pattern for the whole knife. Drill one hole, place a trial pin in it and drill the other hole. Pin diameter is 1/8 inch (.125) and the drill bit should be a #21 (.128). There will always be an interference problem in the assembly if the holes are drilled with a bit that is the same size as the pin stock. The roughly .003-inch clearance the #21 drill creates will make the job much easier;
6. Mark the centerline on the block and cut in half lengthwise. The grain matches closer by cutting a block to get the two halves;
7. Put arrows (with pencil) on the edge of the handle halves so that the orientation does not get mixed up. From this point on, there will be a front side and a back side. The front side of a knife is the side showing when the point is to the left and the edge is down.
8. Flatten the rough-sawn surfaces by sanding. The finished handle will have a taper in it but that will be put in after the slots for the tang are finished. When sanding material, it is important to keep it cool. The surface of a handle slab expands when it gets hot from power sanding, thus causing it to expand and bend into a slight curve with the center being ground more than the ends. Two pieces of material that are allowed to got hot during sanding, when placed together (by matching the arrows), will show daylight in the center with the ends together. Alternate the sanding between the two pieces and cool the resting one by placing it warm-side down on a cool piece of steel. Handle materials will be truly flat if kept cool while being flattened;
9. Put the two handle halves together and check for flatness by holding them up to a light. Then assemble with trial pins and round out and smooth up the surface that meets the ricasso;
10. Finish the radius on the front edge at that point. It’s not easy to do once the blade is fixed in place;
11. Lay the tang on the inside surface of one handle piece, put the trial pins in place and mark the outline of the tang with a sharp pencil. Mark it close to the tang;
12. Measure the thickness of the tang and pencil it in on the inside of one handle piece. Find or assemble a spacer that is half the thickness of the tang;
13. With the handle material in place, bring the drill bit down so that it just touches the handle material and lock the down-feed nut. I use brad point drills that are common in the woodworking world. These drills do not tear out or splinter the wood when breaking through the back side and they make a somewhat flat bottom hole. Care must be taken to feed the drill slowly so that good control is maintained. The flat bottom cut they create is excellent for rough cutting the grooves for the tang;
14. Place the spacer that is equal to half the thickness of the tang under the one handle piece. This raises the handle material to the correct relationship with the end of the drill. If set up correctly, the drill will cut to a depth that is close to half that required to fit the tang into the two pieces when put together;
15. Carefully drill out the wood between the lines marking the shape of the tang. Keep the drill 1/4-inch away from the area at the front of the handle so that it cannot split the wood. This area will be carefully finished with a safe-edge rasp, file or sharp chisel;
16. Once both halves are roughed out, use a rasp, file or chisel to clean up the groove for the tang. To make this type of handle look right, the blade should grow right out of the handle material with no gaps;
17. An alternate method that is quicker and more accurate is to use a jig to hold both pieces of the handle at the same time, giving good control of the handle material;
18. The handle jig is used with high-speed, carbide, drill/mill bits in a milling machine, or a drill press that is set to run as fast as it will go. With this setup, it is fairly easy to completely clean out the slot for a fine fit. Use a vernier caliper or depth micrometer to check the depth, and if it needs a few more thousandths-of-an-inch removed, slip a piece of paper under the jig and mill out the excess;
19. When both sides are finished, clamp the two halves together and see if the tang fits;
20. If you worked carefully, the fit should be fairly good. If the slot is too narrow, use a file or sharp chisel to slowly and carefully open up the slot to get a near perfect fit;
21. If the slot is too wide, it can be narrowed up by carefully sanding the handle halves until you have a nice fit. Take an equal amount off of each side so that the glue joint stays in the center of the handle;
22. With the trial pins in place, clamp the handle halves together. Remove the trial pins and check to see if the tang fits and the trial pins line up. It’s time for the glue-up when all is fitted up all nice and fine.
The Glue Up
I use Loctite adhesive products almost exclusively. Loctite Super Glue is wetter, dries faster, sticks better and has more foolproof tubes when compared to the competition. I use Loctite “Quick Set” Epoxy for handle glue up; it is easy to mix, stronger than most (if mixed properly) and available almost everywhere.
Before mixing the epoxy, it’s best to make sure everything is aligned. Assemble the two handle halves on the tang with the trial pins in place. Once the epoxy is half-cured, it becomes real messy when you get into a fight with pins that don’t align.
Always have cotton-tipped swabs, toilet paper or paper napkins and a small container of acetone close by for clean up. You should wear disposable latex gloves during the glue-up process. Too much exposure of bare skin to uncured epoxy and acetone can be dangerous.
Epoxy, for best strength, should be warmed to between 70 and 80 F prior to mixing. If epoxy, in general, or the quick set, specifically, is mixed when cold, it will not reach the full strength of which it is capable.
The photo on page 61 shows a mixing platform made from a piece of steel mounted on a pivot. The platform sits about 6 inches under a light fixture with a 100-watt light bulb in it. About 15 minutes before it’s time for glue up, a piece of clean paper is put on the heating platform, light turned on, and the epoxy tubes are placed on the paper. This furnishes the heat necessary for heating the epoxy and a place for the knife to sit while curing.
With clamps and trial pins ready and the epoxy warm, mix it carefully as per the instructions. The epoxy is mixed on the paper and the handle halves glued up to the tang held with spring clamps. Work the trial pins out one at a time and clean them with acetone. Dip a cotton swab in acetone and wipe off any excess epoxy that comes out of the holes and from around the blade.
Give the pins a quick acetone wash and insert them back into the handle. Keep the paper you mixed the epoxy on as a witness that the epoxy hardened properly after allowing the allotted time. If you remember it, take time to work the trial pins out while the epoxy is still tacky, it might save a fight with them later.
Epoxy doesn’t cost that much so don’t cut yourself short when you mix. I find the Quick Set more than adequate for assembly of most knives; the exception being big knives with narrow tang handles where I want to be sure that all the air space between the tang and handle material is filled. The slow-cure epoxy found in cans is wet when mixed warm and gives the time element necessary to creep into the deepest recess of a tang hole.
When the epoxy has cured, run a sharp drill through the holes to clean out any excess hardened epoxy. Cut the pin stock to length (slightly longer than the thickness of the handle), rough up the pins with coarse sandpaper and glue them in place with Loctite glue. Use a back-up block when sanding down the excess pin stock, or use 320-grit paper on the flat disc machine. Always take care to not undercut the handle material around the pins or an attached guard.
Finishing the Handle
Handles should be roughed in with 80-grit sandpaper, finished out with120-grit pager, then 240-grit paper, and finally, 320-grit paper. From there, the finish can be done with 00000 steel wool or the finest available.
Push sticks for handle finishing are a necessity. It’s necessary to have a firm and flat surface backing the sandpaper to keep from undercutting the softer handle materials like wood. The shape of the work dictates the shape of the push stick. The stick type is used for handle work and is rectangular, round or with a slight radius. In use, the abrasive paper is wrapped around the push stick, either end-to-end, or around the circumference.
Maple should be brushed down with water and allowed to dry prior to the final fine sanding. This raises the grain and will result in a better final finish. In order to bring out the grain in fiddle-back wood, it is common to use some type of stain. I used potassium permanganate dissolved in water, which can be swabbed on while the handle is still somewhat wet from raising the grain. It gives a natural brown without the red tinge that most brown dyes have.
The handle is sanded with 240-grit paper while still damp, then 320-grit paper, stained, and then sanded again lightly using the penetrating finish on the sandpaper. If you don’t have potassium permanganate, you can stain maple with most any wood stain or leather dye, and then treat it with Deft Danish Oil or Minwax Tung Oil Finish.
Any sealer/finish that is wet and penetrating will work. Maple will absorb a lot of a wet, penetrating finish. I like to apply the finish over a two- or three-day period. As it soaks in, I add more. If the surface gets tacky, you should use enough finish to dissolve it and get it wet again. Use fine steel wool to help get the tacky finish off of the surface.
When no more finish will soak into the handle, it should be lightly worked over with the finest steel wool you can find, then rubbed to a high shine with an old wool sock. The finish should be in the wood and not on the surface. For a high shine, use a wax such as Johnson’s paste wax or similar.
Potassium permanganate can be found at Sears in the department where supplies for water softeners are sold. And, I have no idea what it has to do with water softening. It comes in the form of purple crystals that dissolve in water. This makes a stain that goes on purple but turns brown from oxidation. Potassium permanganate is an oxidizer, whatever that means.
Handle material can be burned from the heat created from dull abrasive belts and buffing wheels running too fast. The heat can cause discoloration, cracking or raised grain in some woods. Excessive buffing will undercut the softer parts of wood. It’s best to finish wood without buffing.
The Finished Project
The project knife is finished except for sharpening it. I did the grinding and blade finishing with my homemade grinder that cost less to build than the cost of three Norton Hogger abrasive belts. The fit and finish wouldn’t have been much better if I had used my more sophisticated equipment. The point I am making is that the new maker should get started with what they have with which to work. It’s not the equipment that makes a skillful maker, it’s the practice with what they have.
The simple knife is finished, and for those who want to continue, the following sections have some of the more advanced knifemaking techniques explained. My hope is that the things presented will make the journey to mastering the craft a bit easier.