Built like a top-shelf Spyderco, but at a fraction of the price the Tenacious more than lives up to its name.
Spyderco’s knives are about as high-performance as you can get in a production knife. They look at things from all angles, from blade grinds to handle ergonomics and how each plays an important role in the other. It’s a symbiosis of sorts. Therefore, most of their knives are on the pricey side but very well worth it.
The use of high-end materials with superior ergonomics and cutting-edge blade steels get everyone drooling, but there is one factor that spoils it for some. The high price.
“No thank you”, some might retort. Then resort to looking at other brands, whose offerings might be a bit cheaper and more within their budget range. Still, they crave Spyderco.
Fear not my penny-pinching friends.
Spyderco had exactly you in mind when it unleashed the C122GP Tenacious. An excellent value folder from incorporating all the hallmarks of a Spyderco design and execution but without the scary high price tag. Essentially, it’s an everyman’s knife, with the elite performance the company has built its name on.
How’s that for value?
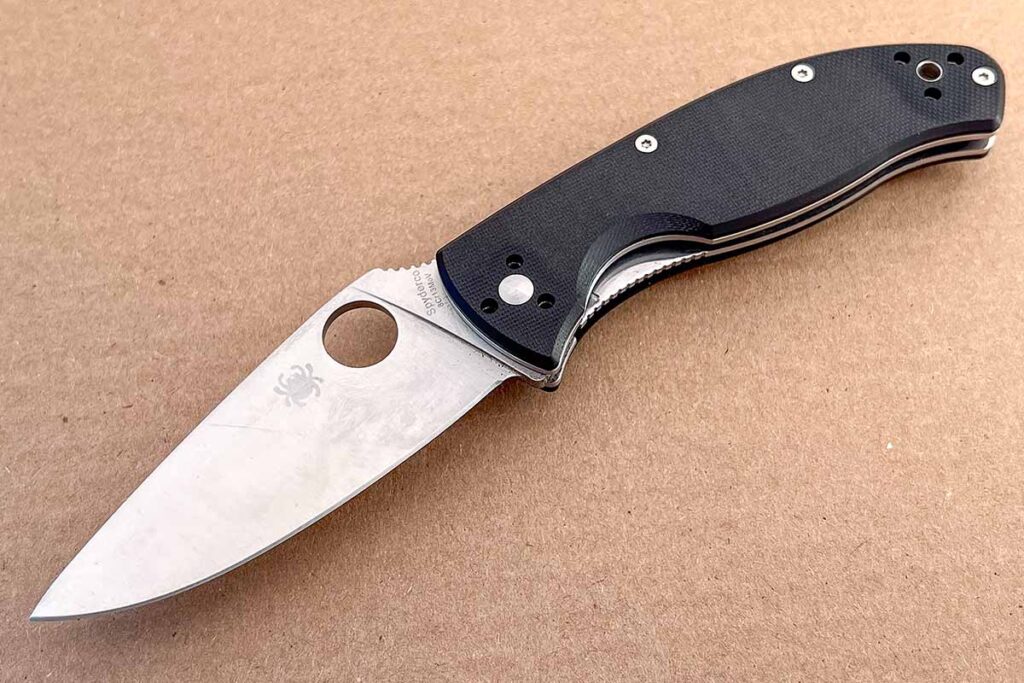
Spyderco Tenacious Blade
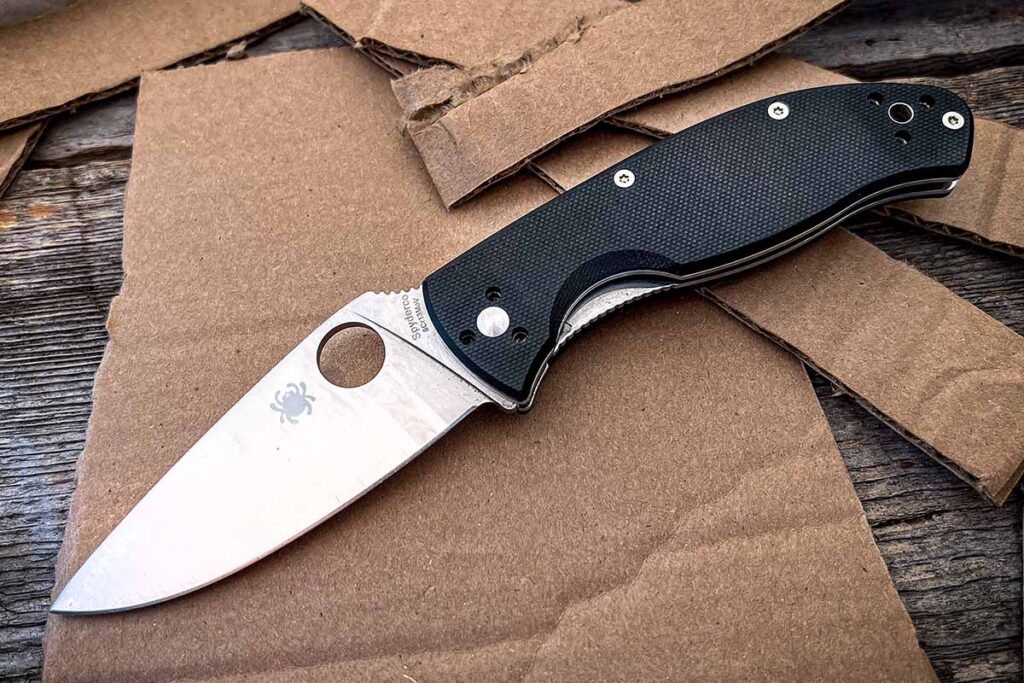
Starting with the modified clip point blade of the Tenacious, 8Cr13MoV stainless steel was chosen because of its great balance between edge retention, ease of sharpening and low cost. For those not familiar, 8Cr13MoV is the Chinese equivalent of the Japanese-made AUS-8. A lot of entry-level to mid-range knives have this steel. It makes a great choice for a working folder as 8Cr13MoV is relatively easy to resharpen and takes a good edge in minimal time.
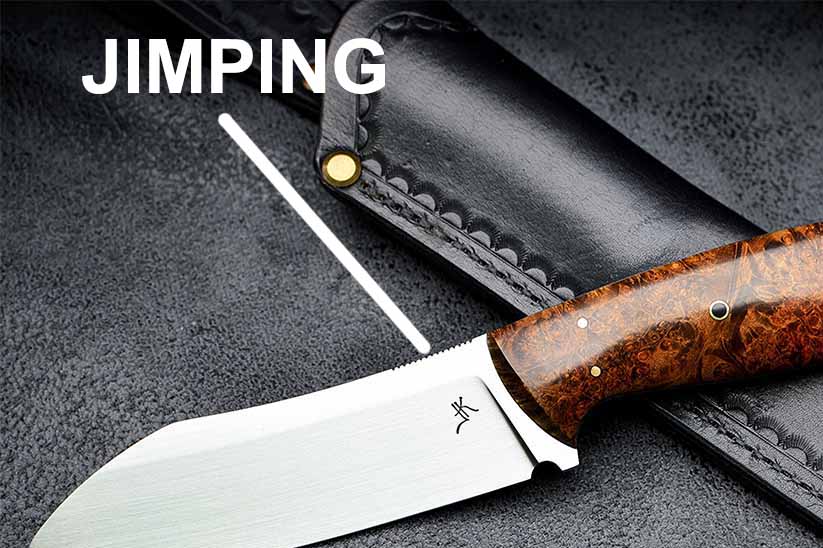
The blade length is 3 ⅜ inches, long enough to for serious work but short enough to carry easily in the pocket. Jimping on the thumb rest allows you to place your thumb there to apply downward pressure on the blade. The rest sample we were sent has a satin-finished blade, though, Spyderco offer the Tenacious with a black coated blade for low visibility, as well.
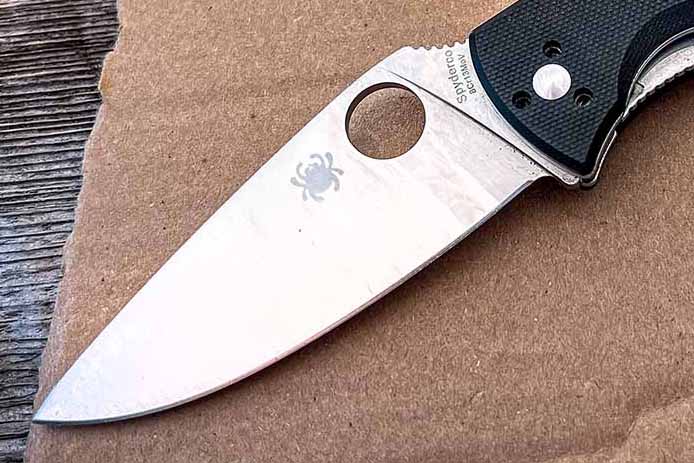
Additionally, partially serrated edge formats are available for enhanced cutting power. This blade design is a workhorse, with its flat grind and distal taper, which allows the blade to become a voraciously efficient slicing tool. Honestly, Tenacious in hand, you’ll be able to slice through your biggest and toughest cutting tasks with ease.
Spyderco Tenacious Handle
Look at some other budget folding knives on the market and you can tell where corners were cut. One evident area is handle design. No so with the Tenacious.
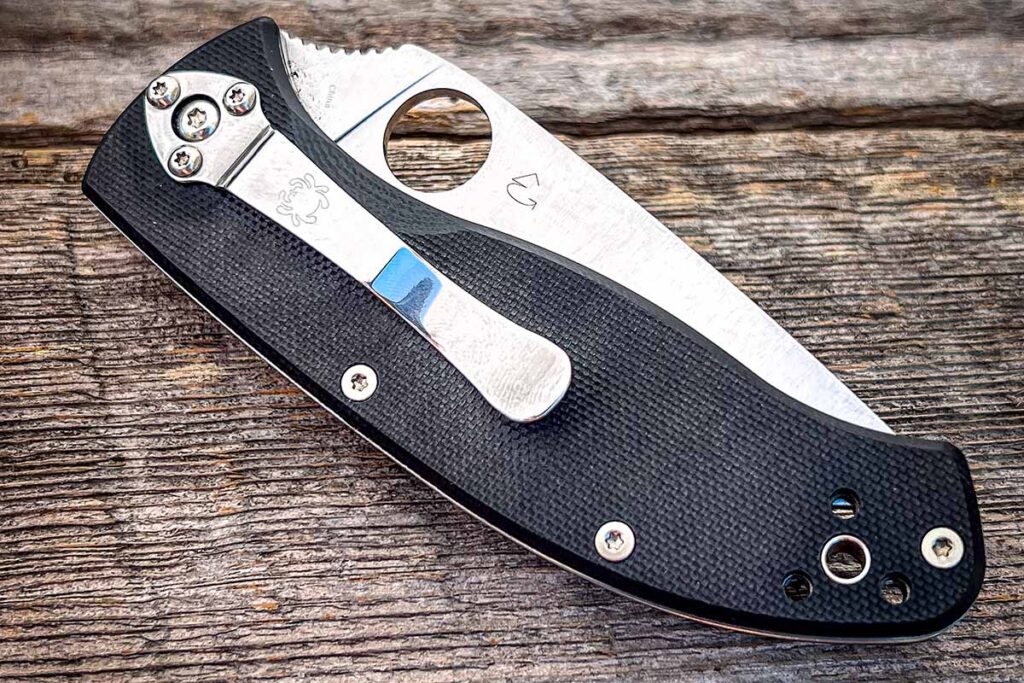
Spyderco has some of the best handle designs on the market, the company has an intimate understanding of how to design a comfortable interface comfortable for extended hard usage. In this case, the knife uses a black textured G-10 phenolic resin handle for both reduced weight and an excellent grip. As a side note, the handle length is 4 7/16-inces long and overall, well thought out. In the hand, it proves comfortable, important with any knife. There are no hot spots to speak of and it seem designed for long periods of use without fatigue.
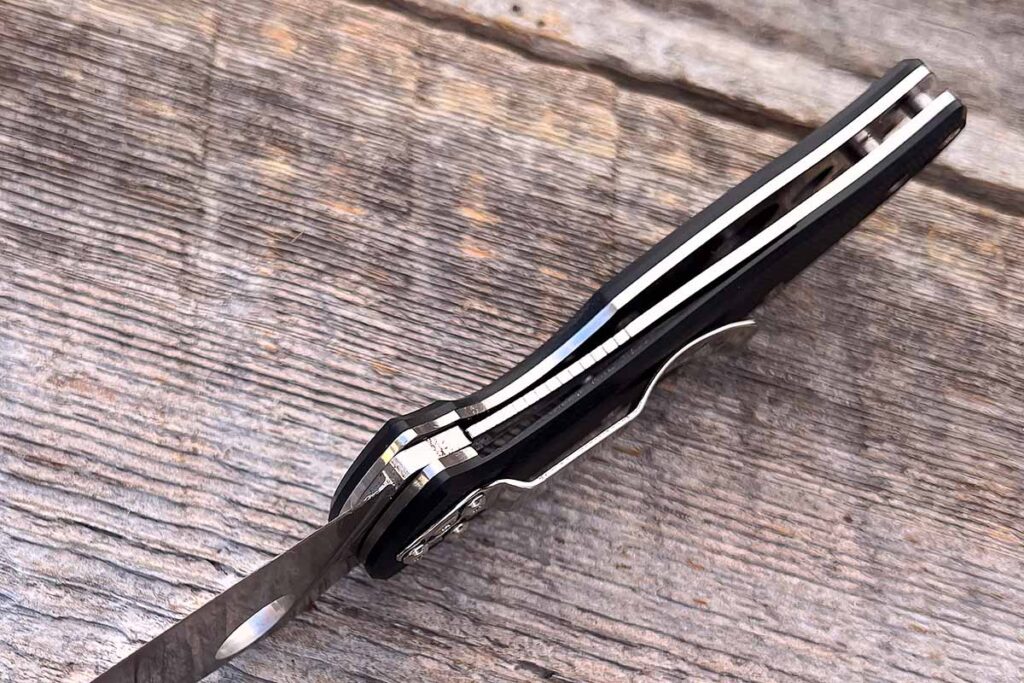
Double stainless-steel liners provide a solid backbone for the handle, and a sturdy liner lock secures the blade in the open position for ultimate user safety. A radiused gripping area accommodates the fingers well and the perimeter of the G-10 is chamfered to reduce sharp corners for a comfortable grip.
Four sets of clip screw holes are drilled into the handle, offering a have-it-your-way approach to pocket clip mounting. You can mount the clip for left-hand use or right-hand use and within these two, you can have either a tip-up or a tip-down configuration. The clip comes from the factory set up for right-handed, tip-down configuration.
Practicality Of The Spyderco Tenacious
If you are in any of the trades and use tools in your job—a knife being one of them—it’s very important to select your work knife carefully not just from a budget/financial standpoint but feature-wise as well. Just because it is a budget knife doesn’t mean it’s stripped down and basic.
Budget knives can include some creature comforts that make work easier. The Tenacious packs in one hand ambidextrous opening, a secure blade lock, open handle construction with dual steel liners and textured G-10 handles. Furthermore it boasts a pocket clip with user-selectable modes of carry, and a properly designed blade that will cut efficiently. All this, in one knife.
With this being said, the Tenacious lives up to its name as it is eager to tackle any cutting task that awaits. The MSRP for the Chinese made Tenacious is $86, which means it probably can be purchased online for around $60. This makes it a great bargain for a sturdy, well-designed work knife. And if you lose it, you are not out a lot of money.
If you have more expensive knives in your collection and are hesitant to beat on as a work knife, then the Tenacious fills that role well. What you have here is a midsize folding knife that feels good in the hand and cuts exceptionally well.
Final Cut
As an owner of quite a few high-end Spyderco models such as the Military, Paramilitary 2, Manix 2, Shaman, and a few others, I can honestly say the Tenacious performance-wise is almost identical. Bold statement, I know. But all Spyderco knives just have that feel to them—no matter the price. If you are a fellow Spyderco owner, you know exactly what I am talking about.
The 8Cr13MoV steel holds an edge well but don’t expect it to be like S30V and hold an edge for a long time. Maintenance in the field is possible with the right sharpener and the steel responds well to routine touch-ups.
Just do yourself a favor and purchase a Tenacious and put it to work. You won’t be disappointed. Spyderco did their homework with this budget-conscious folder that’s packed with features that also are found on their more expensive knives.
More Spyderco Knives:
- Cutting Critique: Spyderco Presistence
- Spyderco Yojimbo 2: Fantastic Straightedge Folder
- Spyderco Tenacious Review: The Relentless Workingman’s Knife
- Spyderco Paramiliary 2 Review: Still A Cut Above The Rest