Knifemaking is the building of a knife, which includes the blade, handle and other accouterments. Blades are made by either removing metal from a steel blank via a grinder – known as stock removal – and the forging to shape of hot steel into a blade in the process known as bladesmithing. Other parts, including bolsters, guards, pommels, etc., are needed to complete the finished knife.
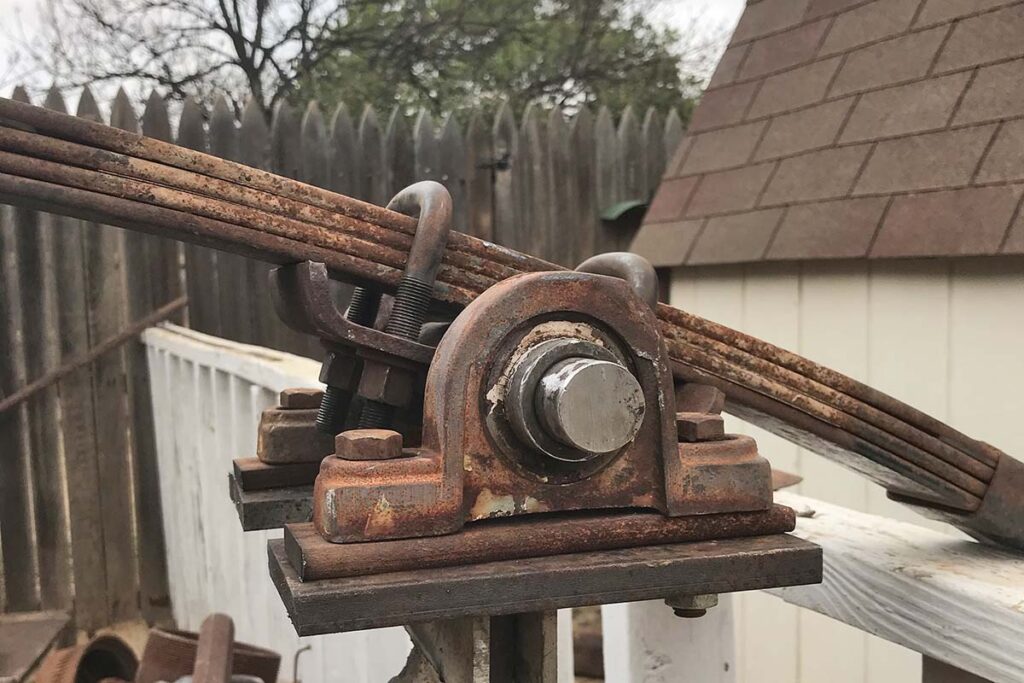
The Appalachian spring helve hammer, including springs, hammer head/tup and more.
Some people find great joy in precision and following rules and plans. For those of you who do, this is probably not your power hammer series. I enjoy the creativity of making a thing from scratch. It’s not the precision that turns my crank, it’s that eureka moment of, “It works!”
In this installment I’ll talk through the process of building a junkyard hammer in the Appalachian style. Junkyard refers to the DIY-type build made with what you can find. Appalachian refers to a common design that uses a spring helve. The most popular earlier Appalachian hammer designs were called the “Rusty” and the “Dusty.”
Rocker-Arm Springs
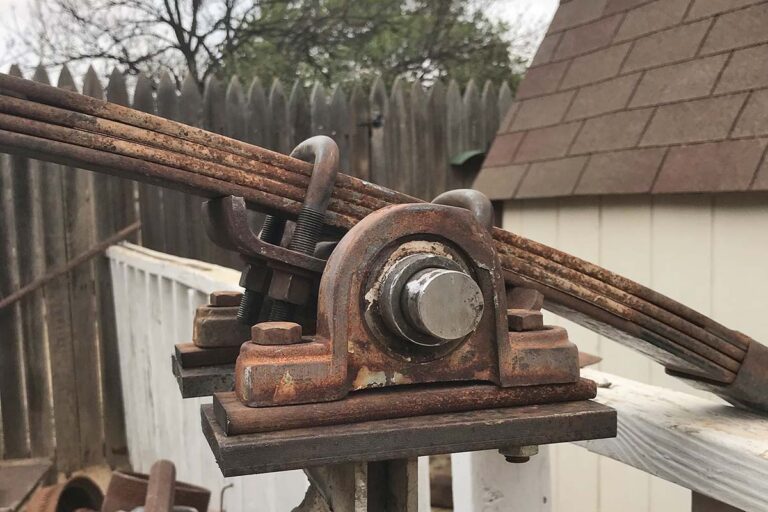
I used a set of leaf springs for my rocker arm. The arm is also called a helve. When it comes to selecting your springs, if you have several to choose from, choose a sufficiently stiff set. If you have the choice between sets that are more curved vs. those that are straighter, choose the straighter ones. If you have the choice between sets that are longer or shorter in overall length, either one will work, but you’ll have to consider whichever length you choose as you lay out the distance between the center post, the anvil and the drive wheel. The length of your spring pack coupled with your stroke length will impact the speed at which your hammer will safely run. The spring action and whip action of the spring set during cycling increase head speed at contact, which improves performance.
The author used a set of leaf springs for the rocker arm of his power hammer. The arm is also called a helve.
Your spring set needs to swivel or rock on top of your center post. I built my hammer with the springs riding on top of the shaft, and the shaft riding in pillow block bearings. Others are built with flange bearings, and others with the shaft above the springs. Any configuration is fine provided you have the clearance you need for the springs to rock back and forth as the hammer operates.
Your spring set will need a swivel on the end where it connects to the pitman arm (the rod that connects the spring arm to the drive wheel). Like the top pivot, there are as many different designs as there are guys building hammers.
The end of the spring set near the hammer head needs to be connected in a way where the arc of the spring travel is converted into direct linear up and down energy. Again, there are multiple ways to accomplish this. I went with a set of rollers on the hammer head, and the spring rides in and out on the rollers as it arcs up and down. I have seen designs with toggle linkage as well.
Hammer Head And Tup
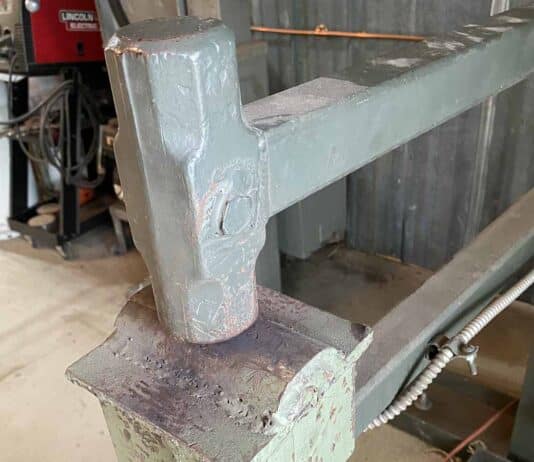
The entire assembly that makes up the hammer head is called the tup. When a smith says he has a 25-pound power hammer, he’s referring to the tup weight. You are looking for a tup weight that is roughly 1/10 of your anvil weight. I built my hammer with a piece of 2-inch-solid-square stock long enough to make a 40-pound tup. For heads that weigh less, you can use a piece of solid stock for the contact area, and tubing or pipe to make up the extra length you need. While a solid anvil is critical to the function of the hammer, the hammer head itself only needs to be solid on the striking end to properly transfer the force.
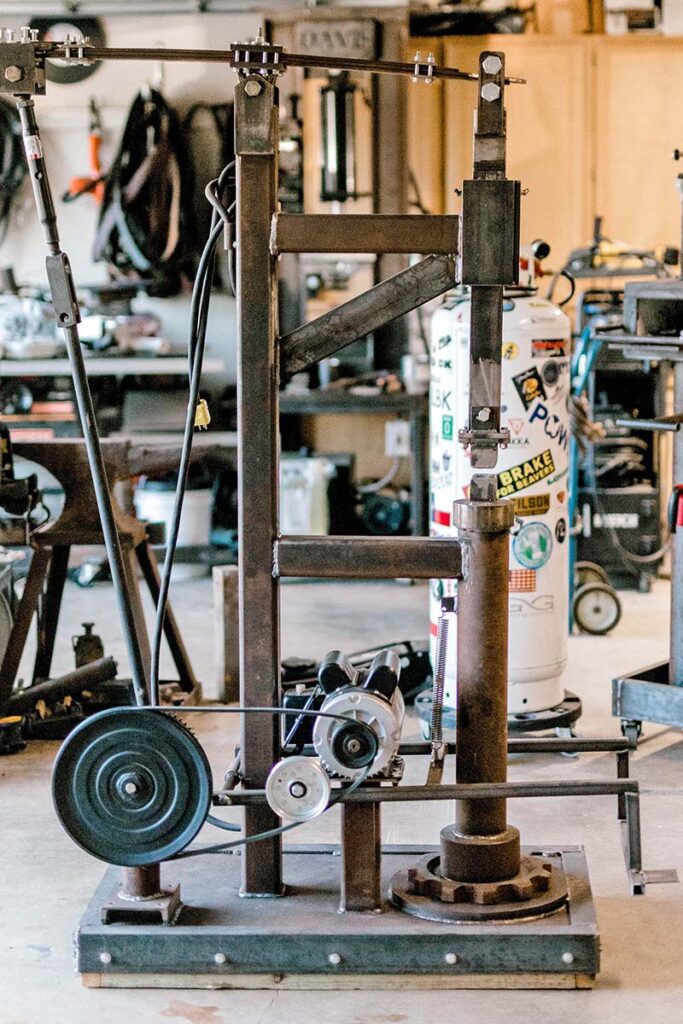
The DIY spring helve hammer built freestyle by Doug Davis of Lubbock, Texas, is shown in both instances here from the pulley side.
The tup rides up and down in a set of guides. You’re converting an arcing spring movement into a linear up-and-down hammer movement. One consideration is that your guides need to account for lateral movement in all four directions. The simplest way is for the guide to completely enclose the hammer shaft. Contact surfaces between the hammer head and guide should be lubricated, and steel on steel is not advised. Bearing surfaces should be made of UMHW (Ultra High Molecular Weight Polyethylene) plastic or of bronze. These surfaces benefit from a degree of adjustability to make sure that the hammer head is aligned properly with the anvil.
I used set screws and a UMHW plastic cutting board on my hammer, with lithium grease as well. My hammer runs well with fresh grease and less well without. I grease the hammer shaft at the beginning of every forging session. The vertical position and length of your guides should accommodate the various stroke lengths of your hammer. You don’t want the hammer head hitting the bottom of the guide on the upstroke, nor the spring connector hitting the top of the guide on the downstroke.
Pitman Arm
A stiff arm connects the spring pack to the rotating wheel, converting the rotary action of the flywheel to a straight up-and-down rocking motion. This arm is called a pitman arm. It is adjustable for length, as the dimension will ultimately be changed as you tune your hammer by trial and error, or as you adjust your hammer to accommodate varying thicknesses of stock, or the use of swages, or top and bottom tools. I used a toggle linkage on the top and for the bottom of the arm I used large bolts welded to a piece of plate, which I then bolted to the hub of the tire used for a clutch. This is another area where your available parts and mechanical experience will dictate your design.
Top bladesmiths discuss the three hottest damascus patterns.
As damascus patterns emerge through the years, their popularity waxes and wanes. The steel itself, layers of intrigue and interest, experimentation and innovation captivate the steel forger, the custom maker and the knife-buying public like nothing else. The patterns abound and in recent reviews of photos, commentary from those in the business and observation it appears that the feather and mosaic, with twist not far behind, have been and continue to be hot.
“I agree that feather and mosaic patterns are predominantly what is made, or certainly what is getting photographed [a lot],” related ABS master smith Steve Randall. “Both patterns are popular because they have lots of character and can be pretty dramatic. Feather patterns are very cool because they can be unique yet still hold true to the feather pattern. The mosaics can move off into so many different styles. They allow the maker to be really creative.”
Feather Damascus Pattern
ABS master smith Bill Burke praises the versatility of the feather pattern and its breadth of presentation.
“I think that you see a lot of feather pattern because it is so striking and looks good on almost any knife style,” he commented. “It is also quite a challenge to produce. A well-done feather will have a flow from end to end with nicely curved veins, while a feather that has interruptions in the pattern or has the center area drawn out into a long ‘V’ shape then curves out rather sharply to the edge is not done so well. I don’t feel a feather pattern is difficult to do after one has mastered pattern welding. It becomes difficult when an inexperienced smith rushes into trying to make a feather before mastering basic pattern-welding techniques.”
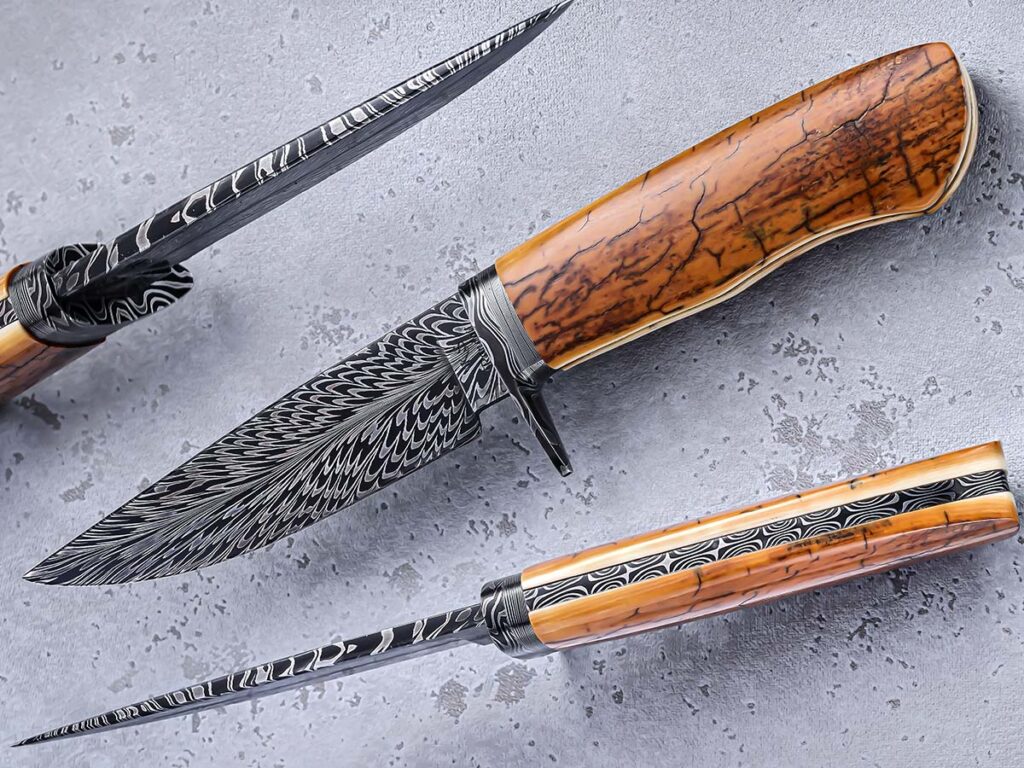
“Feather patterns are very cool because they can be unique yet still hold true to the feather pattern,” Steve Randall observed. He matches up the feather pattern with a mastodon ivory handle on his frame-handle hunter. Overall length: 9 inches. (SharpByCoop image)
BLADE Magazine Cutlery Hall-of-Fame® member and ABS master smith Steve Schwarzer sees the artistry in the feather pattern as well, and when he considers the magnitude of its relative surge concludes, “Absolutely. What you don’t see much of is images and the forge skill required to put that in damascus. Both the feather and mosaic damascus are fairly easy to do, and with the internet there are thousands of recipes out there with visual step-by-step instructions. I did the first feather pattern ever done in a folding knife, and [Cutlery Hall-of-Famer] Don Fogg in his Life and Death Dagger was the only one who did a feather pattern before me. I did the first that was recognizable in the folding knife.”
Degree of difficulty is and will forever be a matter of individual perspective and opinion. Randall stresses the experience level of the maker in fashioning the feather pattern.
“I would say that feather damascus can be a difficult pattern,” he offered. “There are a lot of pieces that have to forge weld together, which opens the opportunity for cold shuts or poor welds. Once that happens, you’ve pretty much got a paper weight.”
Mosaic Damascus Pattern
The perspective on mosaic damascus is similar to that of the feather pattern. Its uptick in popularity is driven by the skill of the maker and the diversity of the presentation. Mosaic makes its statement in both subtle and bold blade aesthetics.
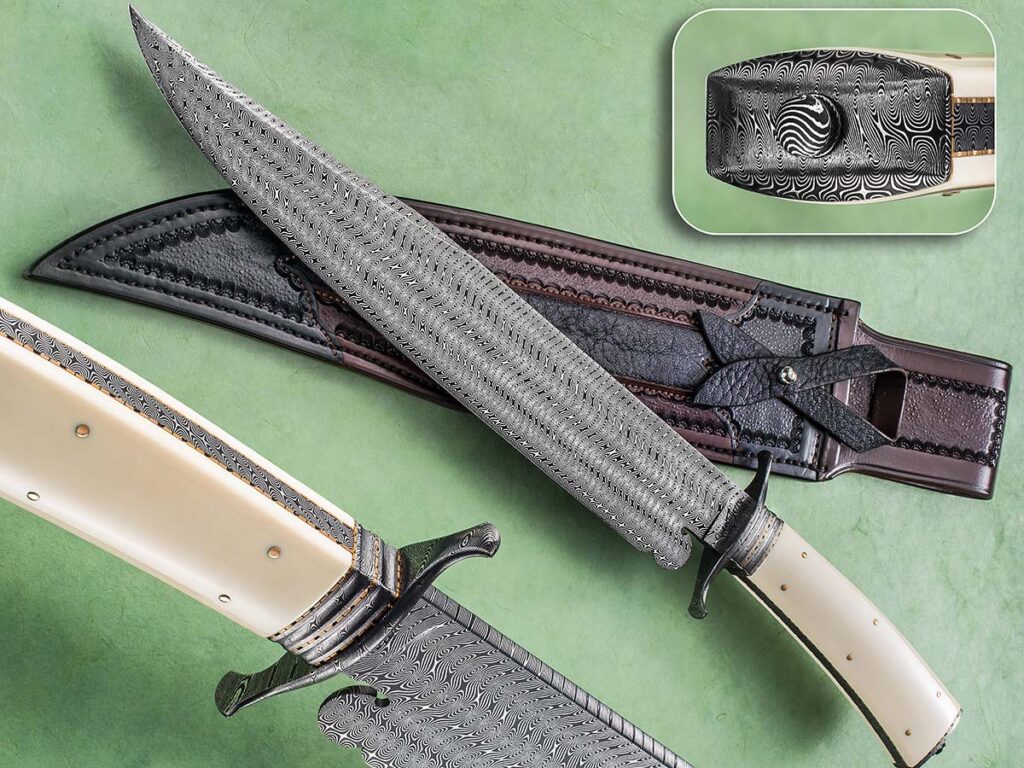
“While a simple twist pattern is rather mundane,” Bill Burke noted, “when four or more bars are twisted in opposite directions and stacked one on top of the other to create a Turkish twist, the result can be striking.” A lavish five-bar Turkish-twist damascus comprises the blade, including the Spanish notch at the base of the edge, on Mike Quesenberry’s Mediterranean bowie. (SharpByCoop image)
“Mosaic patterns do lend themselves to individual creativity,” Burke remarked. “They can vary from not too hard to extremely difficult to do. Mosaics are limited only by the smith’s skill and imagination. Mosaics that are done well will have the patterns lined up with no unintended interruptions in the elements and all the individual tiles matched up well.”
Tiles, incidentally, are the small, angled pieces of steel that are carefully assembled and then forge-welded together to create the distinctive, repeating mosaic pattern. The tiles are cut from the billet or block of welded steel that forms the basis for the creation of any damascus pattern. The tile cuts are made with a scarf joint that facilitates the joining of the surfaces to be mated during the forge welding process.
ABS master smith Mike Quesenberry is a big fan of the mosaic pattern, particularly its possibilities for expression.
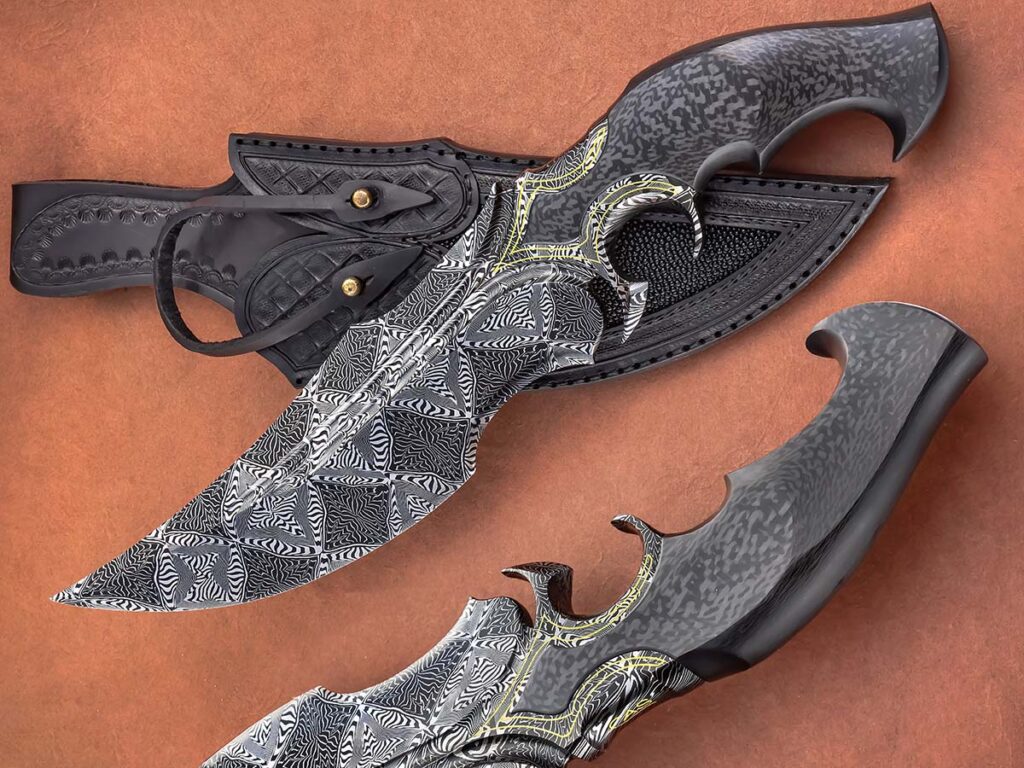
Mike Quesenberry stated the black and silver contrast of mosaic patterns can do “all kinds of crazy, wild things. It is huge with so many possibilities, and it turns out to be a really good pattern that some like in a fine look and others prefer in a bold statement.” The Sobral Brothers go bold with the pattern on their keyhole subhilt fighter. Overall length: 13 inches. (SharpByCoop image)
“I love mosaic and its creativity,” he declared, “along with the fact that smiths can take mosaic and make it bold or fine and there are all sorts or variations that make it fantastic, from W’s to many others. You can add different layers to fine and thick material, 1080 or 15N20 or whatever alloy. That black and silver contrast can do all kinds of crazy, wild things.
It is huge with so many possibilities, and it turns out to be a really good pattern that some like in a fine look and others prefer in a bold statement.”
Things To Look For
Assessing the quality of the individual feather and mosaic product is an exercise in discernment and preference along with the display of basic skill that is evident. Randall takes a subjective point of view.
“One of the most important signs of a feather pattern that is well done is its flow through the blade,” he observed. “The feather should flow from the center of the ricasso through the blade and out the tip. Both feather and mosaics being well done are in the eye of the beholder. Layer count has a big impact. The higher the count does not always make the pattern better.”
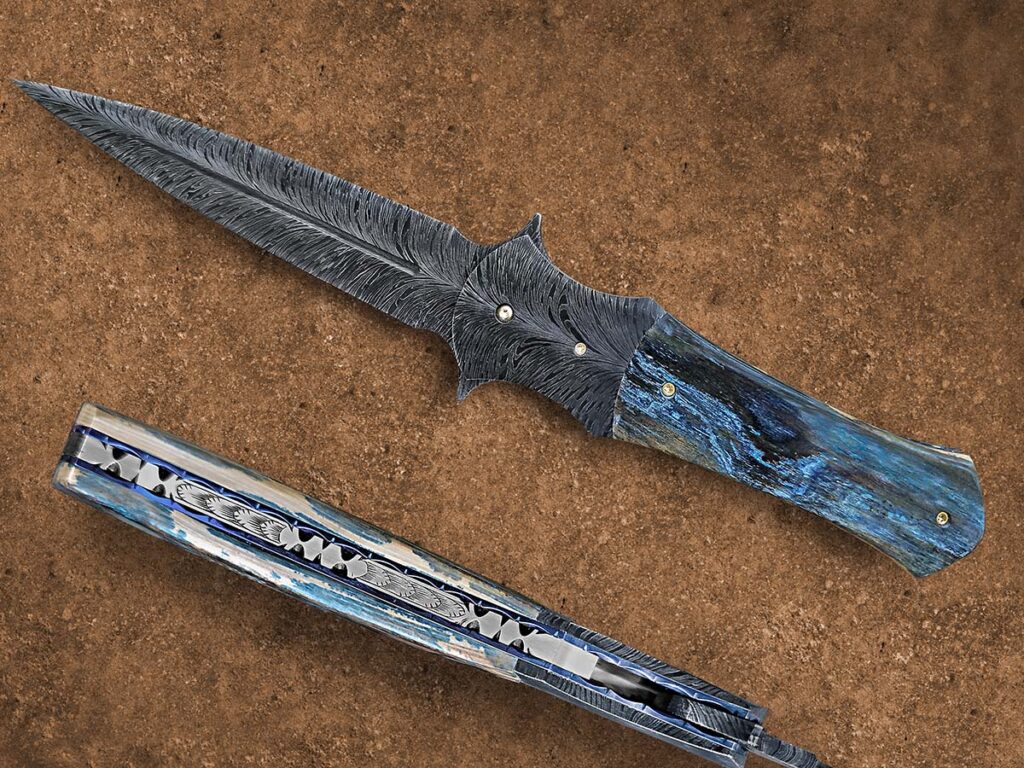
Bill Burke indicated a well-done feather pattern will have a flow from end to end with nicely curved veins. ABS master smith Scott Gallagher nails the concept in the feather-pattern blade of his Dolan Dagger Folder. Closed length: 5.25 inches. (Jocelyn Frasier image)
Schwarzer agrees that the individual’s taste has a tremendous weight in the interpretation of well-done damascus.
“It’s all subjective,” he related. “It involves how pleasing to the eye the fine or bold patterns are. The whole thing can’t be just a hodgepodge of stuff stuck together. It has to tell a story, and if it tells a story, then it is art—and to a lot of people it is great art. There is stuff out there that is incredibly complicated to do that looks simple on the face of it, but it isn’t. We are in the infancy of pattern welding, and a lot of it has come from Daryl Meier.
“There have been patterns out there with faces and images in them since the 1700s,” Steve continued, “and now we are painting with steel. When Bill Moran showed up with random-pattern blades in the early ’70s, he was continuing something that had never stopped. Pattern welding has probably been going on for 4,000 years, and you have to forge, fold and weld the iron to clean it. Then, when you get the alloy in there, it shows the pattern. Pattern welding, including feather and mosaic damascus, is a technique and a skill set that is developed. Once you develop that skill, the trick is to get it back together without flaws, turning something mundane into something striking. Mosaic requires more planning and skill than feather.”
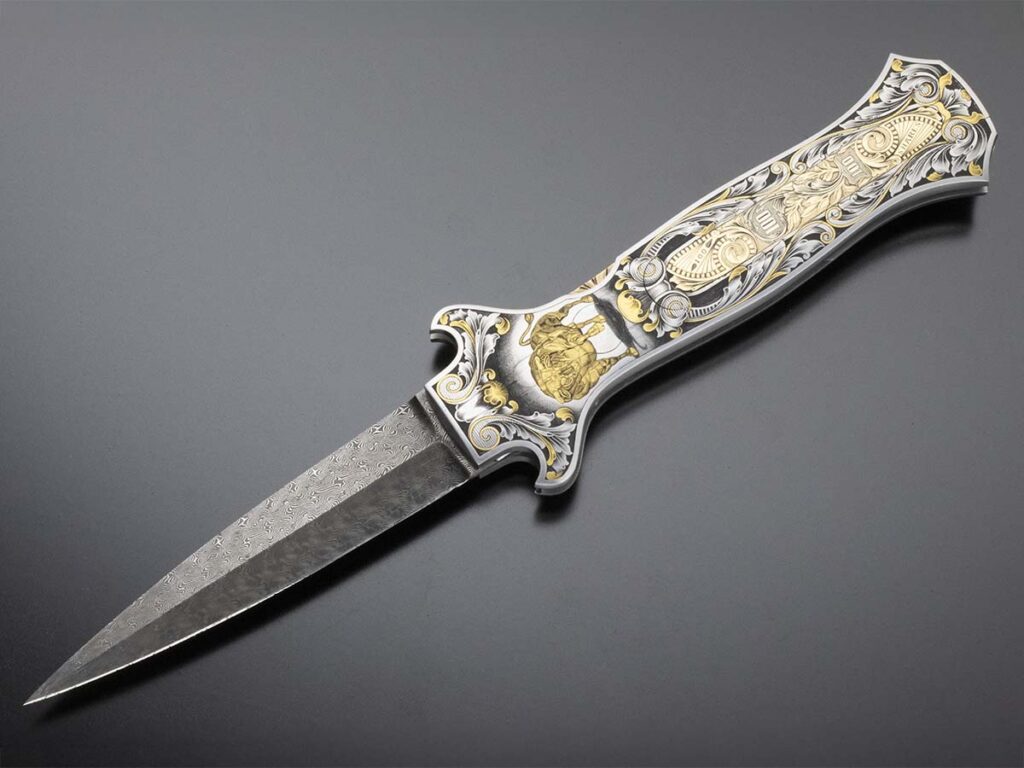
One of the pioneers in—and a most outstanding forger of—Turkish twist damascus is Jerry Rados (inset), who forged the steel for the Wall Street Knife by Joe Kious. Jerry’s Turkish twist has what Steve Schwarzer calls a kaleidoscopic appearance. (KnifePurveyor.com knife image)
Twist Damascus Pattern
Although some patterns may stand out from others for a while, there are always those that maintain their place among the most popular. Twist patterns and specifically Turkish twist are regularly in the conversation when collectors are seeking their prize blade.
“Twist and Turkish twist are the same and totally different at the same time,” smiled Burke. “While a simple twist pattern is rather mundane, when four or more bars are twisted in opposite directions and stacked one on top of the other to create a Turkish twist, the result can be striking. However, like almost all other patterns these two can also be drawn out or stretched too far, which detracts from the looks of the pattern. While a simple twist is relatively easy, the Turkish twist billet is wrought with potential for failure and is very labor intensive.”
A key element in producing twist patterns is control, and Schwarzer respects the precision required.
“Very precise control is necessary in the twisting so you get that twisting the same in fine or coarse layers,” he said. “Jerry Rados was the American guy who did the most of that, and we both learned from Daryl Meier in Carbondale [Illinois]. The early blades made by Daryl in the 1980s are beautiful, but you’ve got to be almost [obsessive compulsive] to produce that stuff. It involves a lot of planning and the turns have to be precise. You can twist mosaic and make it look like a kaleidoscope.”
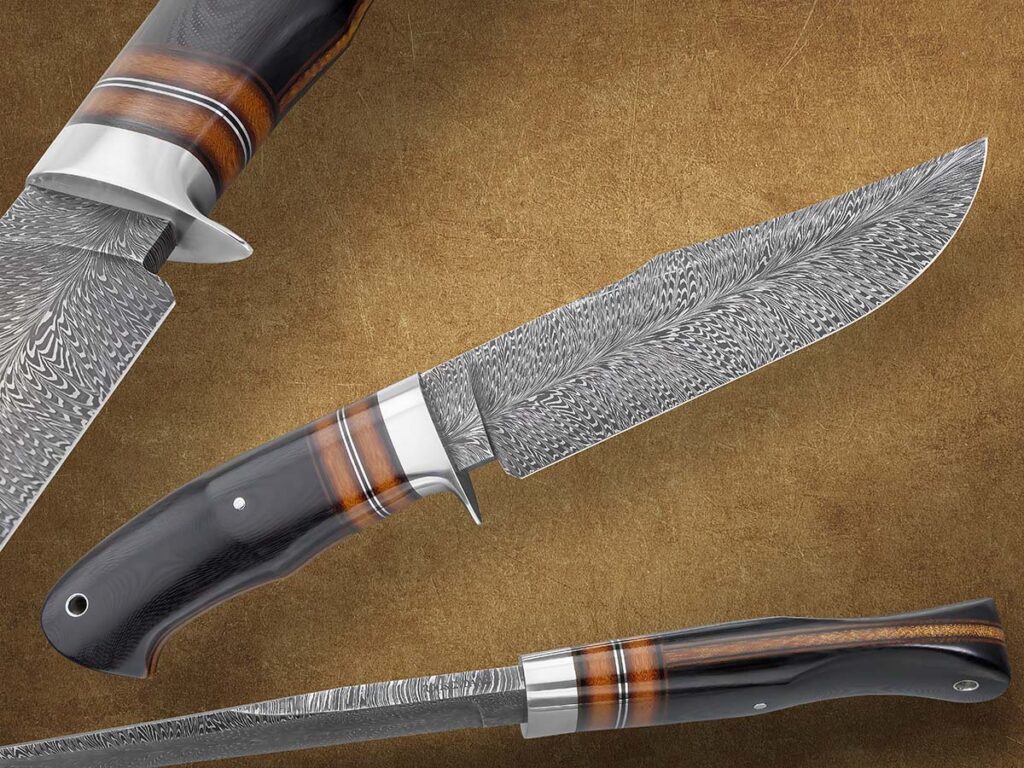
Chris Roosendaal’s feather pattern in 1084 carbon- and 15N20 nickel-alloy steels borders on the mesmerizing. The scales are black G-10 and Micarta®. Overall length: 11.22 inches. (Rod Hoare image)
Randall says that a Turkish twist done right is “very classy.” Its degree of difficulty is a cut above basic twist, but in his experience, it isn’t quite as demanding as feather pattern work due to the requirement of fewer pieces to “cut, flip and weld together.”
When Quesenberry talks Turkish twist, he affirms his love of the look but decries the amount of waste he sees in its production.
“I’m a huge fan,” he commented, “and I love the fact that it’s an appealing pattern. But I don’t like the huge amount of waste. To me, the cool pattern is in the middle third of the bar. There aren’t really a lot of American and European guys into Turkish twist, but some of the South Americans are really pros who are turning out some bold patterns.”
Shifting Damascus Pattern Preferences
Of course, the shifting preferences and envelope of creativity that is constantly pushed keep the damascus conversation going. And it is likely to remain lively long into the future.
“Trying to say one pattern or another is more popular is always subjective,” Randall concluded. “There are some great classic patterns that are very appealing. For example, the ladder, twist, crushed W’s and others. Sometimes the mosaics get visually busy, so some people don’t enjoy them as much, but who doesn’t love a feather or explosion pattern? They are too cool. Some of it does depend on the overall knife design. The blade design and size with guard and handle can enhance—or take away—from a pattern.”
Considering damascus pattern popularity past, present and future, one element is certain. The driving force of creativity and the artistry of the forge will keep this ancient steel relevant for generations to come.
More On Damascus:
Damascus Steel: Experts Forecast Growth In The Knife Industry
Mosaic Damascus Can Be Made Numerous Ways, And These Master Smiths Are All Putting Their Own Spin On The Craft.
The many moods of mosaic damascus provide the bladesmith and custom knifemaker with an ever-changing form of artistic expression. The possibilities of a new pattern, a different look, and yet another lasting impression are endless.
For several makers, mosaic has become a signature steel in their presentations, and these imaginative artists are pushing the envelope in an already dazzling array of motifs for blades and knife fittings.
Kelly Vermeer-Vella
Kelly Vermeer-Vella said she initially called the mosaic damascus of her fighter Riptide because it looks like “calm waters, but also because the forging process is pretty brutal. So, now I call that process ‘ripping it!’” Blade and overall lengths: 7.5 and 12.5 inches. At press time the knife was available through Arizona Custom Knives for $3,800. (SharpByCoop knife image)
In her Riptide pattern, American Bladesmith Society Journeyman Smith and past Forged in Fire champion Kelly Vermeer-Vella provides a great example of the new frontiers being explored with mosaic damascus.
“It’s initially called that because it looks like calm waters,” she commented, “but also because the forging process is pretty brutal. So, now I call that process ‘ripping it!’ Sometimes I win and sometimes I make hunters!”
Kelly showcases the Riptide pattern on her 12.5-inch fighter with a 7.5-inch blade and mammoth ivory handle sporting a long, modified “S” guard.
“I really enjoy swooping forged guards that complement the curves of the blade and handle. And I love mammoth ivory, so I make a lot of frame handles,” she added. “I think the best-looking frame is in a low-layer twist, 25 layers or so.”
The Vermeer-Vella mosaic involves a commitment to hard work to produce the desired results.
“The pattern is not san-mai,” she revealed, “rather, different layer counts of stacked W’s with heavy 1075 steel on the edge. The wing effect comes from forging. I push and pull the pattern with a hand hammer and forge to shape so that the pattern flows with the edge.”
The blade material is the 1075 carbon steel, which appears as the dark areas, and 15N20 nickel alloy, which shows as the grey, shiny areas. “I etch in 3-to-1 ferric chloride and also do a coffee etch,” she added. Her power hammer is an Anyang 88 and she uses a Riverside 24-ton press.
Jack Rellstab
Jack Rellstab said he wanted the blade of his Western Chef’s Knife to “look alive.” As he noted, “My idea was with the taper in layers to give it an organic look that appears as if the elements are actually growing.” Thus, the pattern’s name of Frogs and Flowers seems most apropos. His price for a similar knife: $2,600. (SharpByCoop image)
Like Vermeer-Vella, Jack Rellstab is an ABS journeyman smith who enjoys the creative process of forging mosaic damascus. His Western Chef’s Knife brings a robust profile to life in a mosaic pattern called Flowers and Frogs.
“The pattern is one of my styles of W’s explosion,” he noted. “I started the original billet with the layers of both 1080 and 15N20 getting progressively thinner from one side of the billet to the other. After using square dies to resquare the billet for W’s, I drew it out with a taper so the W’s would get tighter towards the end. Then I did a restack and a four-way to finish it. So, the steel is 1080 for the dark portion and 15N20 for the bright.”
The handle is amboyna burl, bronze and G-10. He says the grip is designed around most Western-style kitchen knives on today’s market, though the belly/underside might be a bit shallower.
“With this mosaic pattern, I wanted the knife to look alive,” he offered. “My idea was with the taper in layers to give it an organic look that appears as if the elements are actually growing. I used a 165-pound hammer belonging to New West Knifeworks, and I also used their Anyang hydraulic press for resquaring.”
Jack began his bladesmithing journey with mosaic damascus by watching a YouTube video, and then let his imagination kick in to develop the exciting pattern that is sure to generate conversation in any kitchen.
Will Stelter
The Serpentine Multi-bar Santoku by Will Stelter sports a mosaic damascus pattern of the same name. He used 1080 and 15N20 steels for the pattern-welded twisted bars and Cruforge V for the edge. The Cruforge V etches darkly, and its wear resistance and high working hardness make it ideal for culinary knives. Blade and overall lengths: 5 7/8 and 10.75 inches. His price for a similar knife: $3,500. (SharpByCoop knife image)
The Serpentine Multi-bar Santoku by ABS Journeyman Smith Will Stelter sports a mosaic damascus pattern of the same name. The handle is ivory paper Micarta®. He used 1080 carbon and 15N20 nickel-alloy steels for the pattern-welded twisted bars and Cruforge V for the edge. The Cruforge V etches darkly, and its wear resistance and high working hardness make it ideal for culinary knives.
“I started by forging up 28 layers of W’s,” he recalled, “and then worked that billet down to a half-square twisting stock. I twisted three bars right hand and two bars left hand, lining up my twists as best I could before forge-welding them together. After they were stuck, I forge welded on a solid Cruforge V edge bar that was around 40 percent as wide as the multi-bar billet, but the same thickness. With my final stock stuck together, I then laid out and cut away several three-quarter-inch-deep grooves or divots from the profile of the rectangular 2-inch wide bar, which still left Cruforge V on the edge, and two full twisted bars at the thinnest parts of the patterned area on the spine.
“I then flattened down the billet, which took the previously straight layers and gave them the bold ‘serpentining’ that came out in the blade. I then forged my blade to shape and forge welded on some of the base W’s stock that I twisted from as bolster material. This is a very similar technique to how the classic ‘River of Fire’ pattern is done, but with a different base pattern other than the usual feather pattern.”
Will used his 1924 400-pound ram Beaudry hammer to do the majority of the forge welding and a twisting machine to twist the five bars. He learned his pattern-welding technique and the ability to visualize the way the steel moves from bladesmith Salem Straub, crediting Straub with teaching him how to design patterns “with intentionality behind them.” The pattern itself is sole authored by Stelter, who has done some serpentine multi-bar patterns prior to the subject piece. However, this was his first attempt with a monosteel-edged bar.
“The serpentining is purely aesthetic,” Will said. “It’s meant to give a bold line for the eye to dance down rather than the straight, more classic intersection of the edge bar that is normal for a composite construction. This also means that from far away you see an interesting pattern, and then when inspected up close the explosions of the twisted W’s really pop out, which gives the overall piece an interesting level of depth.”
Will considers this particular mosaic “an intermediate-level pattern, easy to try, though somewhat difficult as well. The most challenging part is building a high-quality multi-bar pattern with adequate layer density and well-matched twists. The rest of the pattern is fairly simple.”
Brent Stubblefield
Brent Stubblefield’s integral chef’s knife has an 8-inch blade of his shimmering Crossroads mosaic damascus, and a stabilized Hawaiian koa wood handle with mammoth tooth spacer. Overall length: 13 inches. His price for a similar knife: $1,500. (SharpByCoop image)
At the Join or Die Knives Forge in Richmond, Virginia, Brent Stubblefield hammered a beautiful blade in his Crossroads mosaic pattern—and did so with multiple techniques.
According to Brent, “There is the initial damascus forging, crushed W’s, twisting, four-bar-squaring welds, ferry flip tilting, edge bars, and a ‘fish mouth’ tip to make the edge bars meet. There are multiple elements that are forged on the edge or corners to manipulate the pattern, and finally the knife shape and integral bolster are forged to shape.”
The mosaic is comprised of 1084 and 15N20 steels, with the 15N20 appearing as a silver white on the blade while the 1084 blackens with a ferric chloride etch.
“The shapes in this pattern reflect a desire to incorporate all the different techniques of mosaic damascus making I have learned over the years,” he explained. “I’m always trying to find a way to create never-before-seen patterns in order to add something totally new to the American bladesmithing tradition.”
Stubblefield used an Anyang 88 power hammer and homemade 30-ton press to create the Crossroads mosaic. A Bridgeport mill was helpful in the squaring-up process and flattening pieces for rewelding. A Miller welder assisted in tacking materials up before they went into the forge, while an Evenheat kiln and Broadbeck Ironworks grinder were key tools in the process as well.
“Although I did not have any single mentor,” Brent mused, “many knifemakers have gone out of their way to share tips and tricks with me. While they didn’t teach me directly, [bladesmiths] Mareko Maumasi and Salem Straub have been very generous with sharing their processes through social media. I certainly have referenced them among others.”
Stubblefield continues to challenge himself as his career advances, and he sees no slowdown in the creative process. “This knife is very difficult to do simply because the higher number of forge welds create more opportunities for failure,” he reasoned. “Any complex damascus blade is actually just many simple techniques combined together. The hardest part for me is understanding how manipulating the pattern early in the process will affect the outcome, and visualizing the end pattern.”
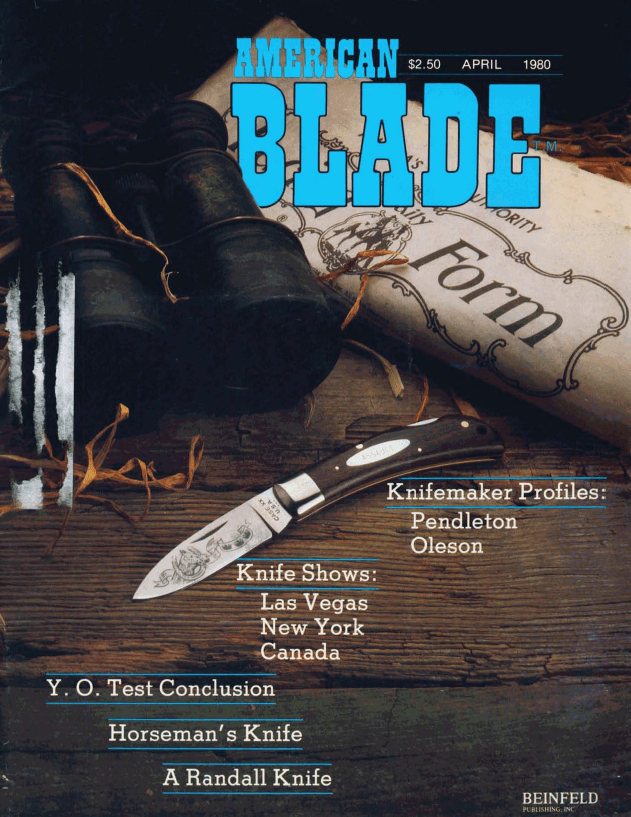
Editor’s Note: The following article by Pat Crawford was originally published in the April 1980 issue of BLADE, but the advice still holds true today.
New Knifemakers: You’re Not That Special (Yet)
The cover of the April 1980 issue of BLADE.
Any knifemaker can make almost any kind of knife, but some knifemakers are better than others. Knowing where you fit in the scheme of things is important, especially for developing a pricing structure that is compatible with the quality of your work.
Those makers who can command big bucks for anything that leaves the shop have paid a lot of dues for this success. And just because your work looks just as good doesn’t necessarily mean that you’ll be able to compete with the big names and legends whose work is priced at the higher end of the spectrum.
Remember, even today’s legends got their start by turning out quality work at fair prices.
Make Up Your Mind: Why Are You Here?
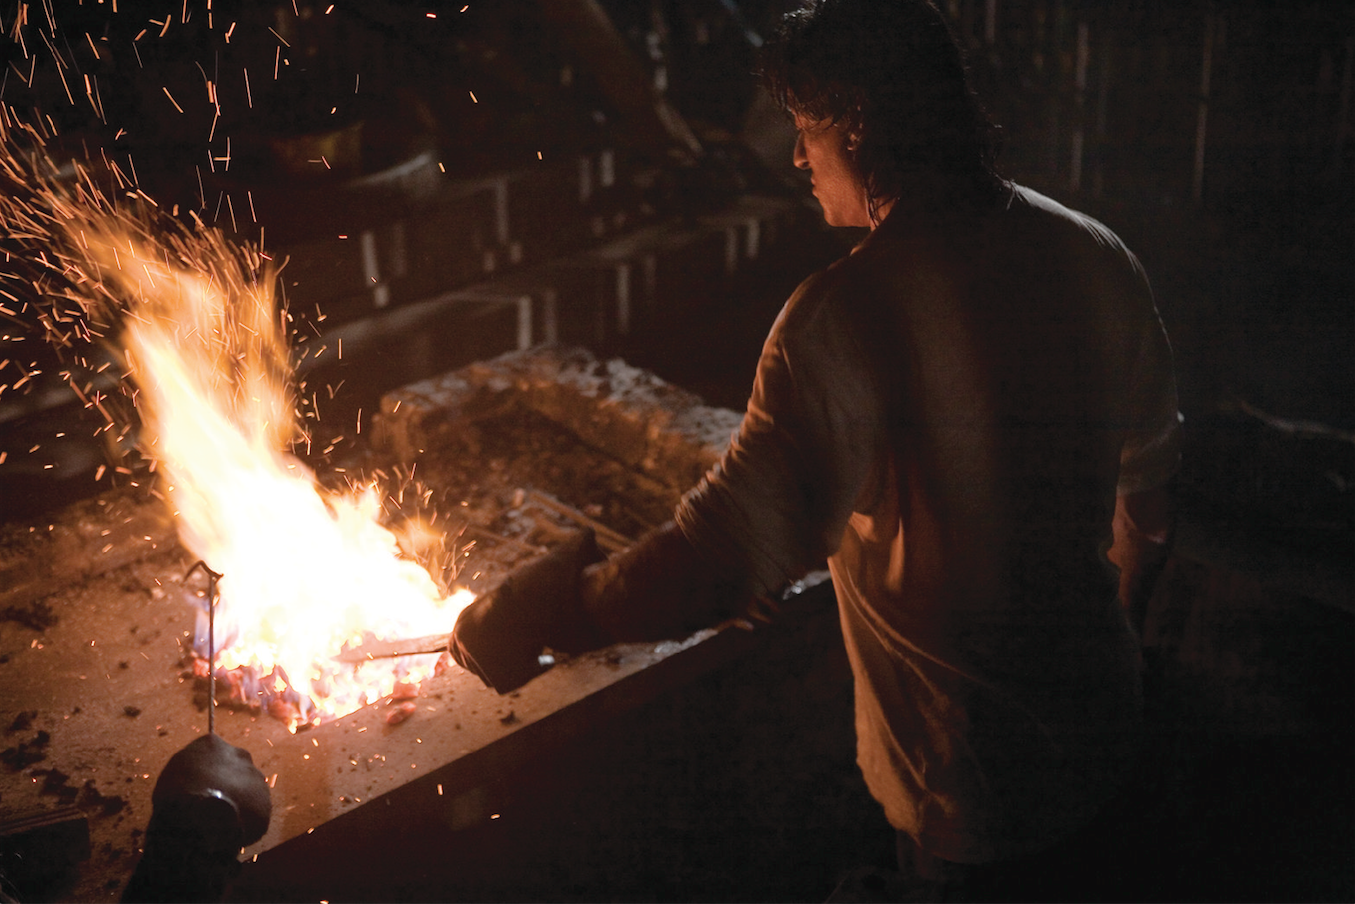
TV and movies can drive a lot of interest in knifemaking. That’s good, but it can also mean naive knifemakers wind up sinking their personal and financial lives. You’d better figure out your purpose in this market. This still from a deleted scene from “Rambo III” shows the titular character forging a knife.
Decide where you want to compete in the market. Should you specialize in something unique or should you offer a wide range of products?
The latter strategy has the potential of appealing to a larger share of the knife buying public. One example of this approach is the addition of folding knives to many makers’ offerings.
However, this type of market coverage won’t work for everyone making knives. You will have to decide whether diversification will capitalize on your strengths or spread your resources too thin.
Whatever you decide, the wrong choice could end you up making something that nobody wants. “Being there” at the right time with the right product takes as much hard work as it does luck, whether that product is one knife or a whole line of knives.
Knifemaking Isn’t A Romantic Business
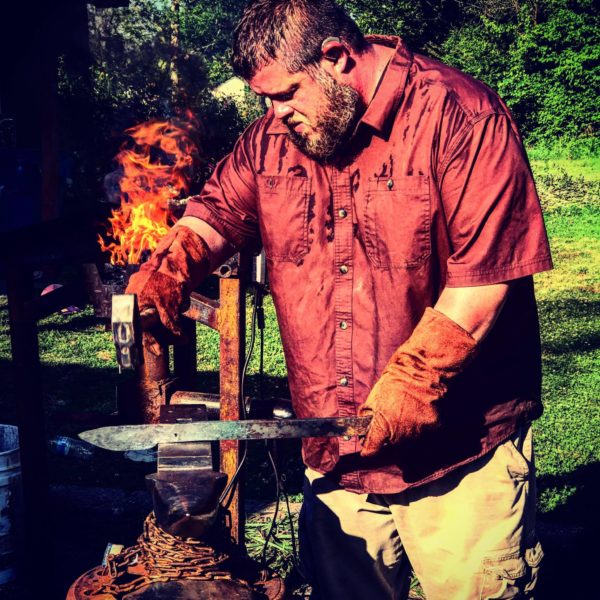
Knifemaking is tough work. Here, Norman “Buddy” Thomas, of Tree of Liberty Bladecraft and Forge, hammers on his latest project.
If you think making knives is a fun, romantic way to make a living, you may be overlooking a very important point. Making knives is enjoyable, but it is hard work.
There is a big difference between hobby knifemaking and doing it full-time. Hobby knifemakers (and there are some super part-timers) don’t have to depend on their knives for a living, while full-time makers do.
And the transition from part- to full-time can be a traumatic experience. For the first time, there’s the pressure of getting the work out and meeting delivery dates just to put bread on the table, and what used to be an activity you enjoyed in your spare time is suddenly a job you must do to exist.
Living with a constant backlog, increasing demands, and monthly quotas takes a certain amount of nerve and self-discipline. Roses wilt and so do some knifemakers under this kind of pressure. But, if you enjoy the challenge of a sink or swim kind of life, you may not want to do anything else for a living.
You’re Not Setting Trends, So Jump On One To Get Noticed
Remember when “zombie knives” were red hot? A new knifemaker could hop on that trend to get noticed. This Kharon Tanto Folder is from from KA-BAR’s Zombie Knives line. (KA-BAR image)
It’s a business world fact that some products are more popular than others, and what was popular yesterday may be a dog tomorrow. However, makers who are unable or unwilling to make what the people want have seen once loyal customers flock to those who do.
People will not automatically knock down your door just because you make knives. You have to let the public know what you have to offer; then if you’re lucky, they’ll knock down your door.
Of course, word of mouth advertising is great and it’s free, but a lot of mouths would have to do an awful lot of talking to reach as many people as are reached by a good magazine in even one issue.
Customers’ Attitudes Aren’t The Problem; You Are
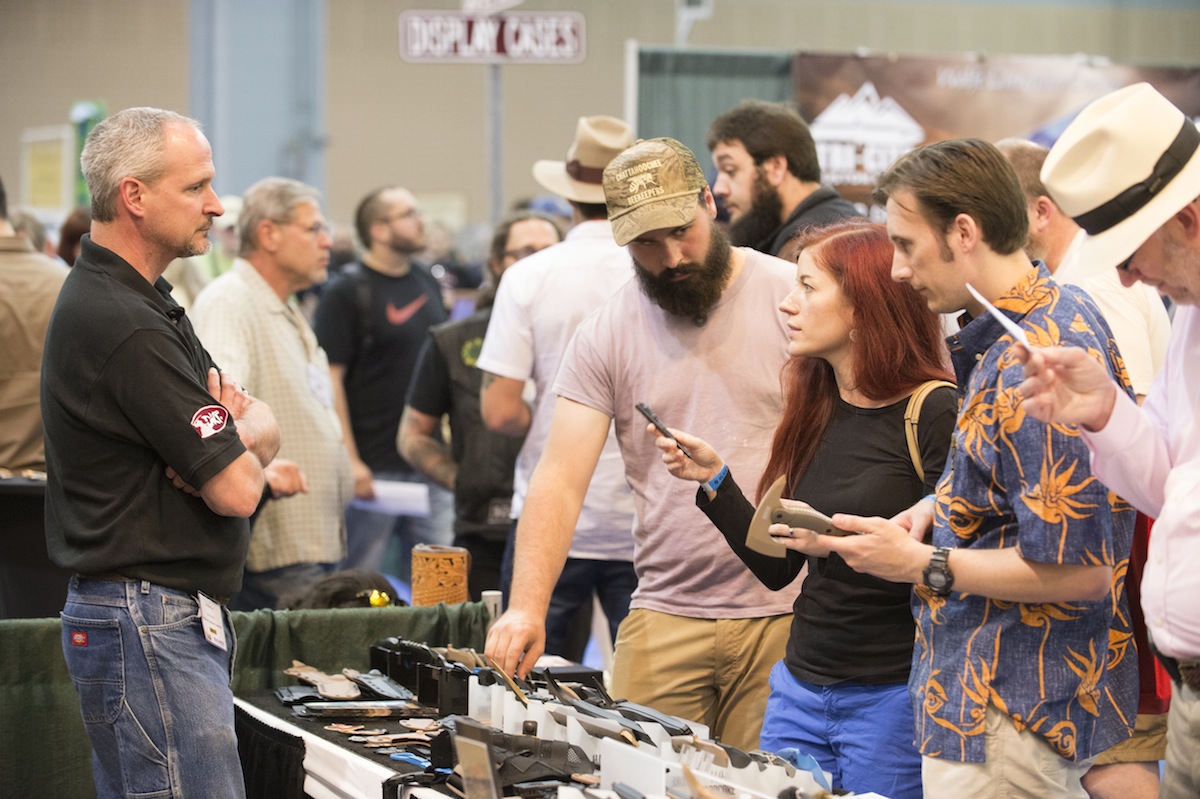
When you exhibit at a knife show, you’re not only there to sell knives. You’re also there to sell yourself. (PointSeven image)
People are more likely to buy your knives if they like you as a person. A personal relationship is one of the most important parts of the custom knife trade.
Knifemakers who are unfriendly, too busy to answer questions, too sold on themselves, or just plain rude to potential customers are shorting themselves as well as other makers.
Buckle Up, You’ve Got A Long Way To Go
Even the greatest knifemakers are constantly striving to better their product. Whether it’s a new design, material, or method of construction, there is always something you can do to perfect your product. And believe me, if you don’t, the competition will.
The One Thing That Sinks More Knifemakers Than Anything Else
Sure, you can make knives, but can you work a calculator? (Pexels photo)
No knifemaker can get away from the fact that he or she is a small businessman as well as a craftsman. Neglecting the business side of knifemaking has probably put more makers out of business than any other single factor.
You don’t have to be a business whiz to know you can’t have more money going out than you have coming in. To keep track of cash flow, accurate recordkeeping is imperative. This includes knowing the cost, both in time and materials, to produce one knife so the revenue from its sale is enough to cover costs and produce a profit.
See You At BLADE Show
If you’re serious about getting into knifemaking, there’s only one place you need to be: BLADE Show. See you in Atlanta.
The American Bladesmith Society (ABS) Hammer-In season for 2013 is about to begin with the Great Smoky Mountain hammer-in event in Clyde, North Carolina, on March 15-17. That’s followed in April by the Spring Piney Woods hammer-in at the Moran School Of Bladesmithing in Washington, Arkansas. The ABS Hammer-In Directors have some exceptional demonstrations and special events planned for 2013.
The setting for the Great Smoky Mountain Hammer-In is Haywood Community College, and demonstrators include Adam and Haley DesRosiers, Greg Neely, Butch Sheely, Jason Knight, Scott McGhee and Shane Maust. Click here to download the event flyer.
Renowned Makers Across The World Talk About The Tools They Use To Craft Their Metal Creations.
A good craftsman needs good tools. Without a well-stocked shop, knifemakers are held back from creating to the best of their abilities. This trio of makers from around the globe talk about what they use and how it affects their knifemaking.
Jim Crowell
Look close and you can see the faint hamon on this tactical model by Jim Crowell
American Bladesmith Society master smith Jim Crowell has been making knives for over 40 years. A member of the ABS Hall of Fame, he is known for his masterfully hand-forged blades. His Mountain View, Arkansas, shop is well stocked, and he leads off with the Wilmont TAG and Beaumont KMG belt grinders.
“Wow!” he said of the Wilmont. “You talk about smooth running and great and easy tracking, with a swing-out work rest it doesn’t get any better. I really like the work rest, as you just swing it out and lock it—no wrenches or Allen wrenches, adding or removing parts. Worth every penny and then some.”
He continued with praise for the Beaumont KMG.
“I have used many of these in different schools and have had three myself, to include the one I am using now. These are great grinders and the broad range of excellent attachments makes them top contenders in my book. Both have 1.5-inch tool arms, which means you can switch tooling between the two—a good idea, I think. The small wheel attachments for both are great, and the Beaumont rotary platen is something special.”
Broaches and file guides by machinist/ABS master smith John Perry are next.
“When John designs and makes a tool for knifemaking, there is no compromise, nor anything you don’t need,” Crowell commented. “He knows what the tool needs to do and makes sure it performs in an exemplary manner. There is no reason one’s tools should not be pleasing to the eye. Just hold the gingerbread, please!”
Jim credits the broaches for definitively solving the age-old problem of fitting a square peg—or really a rectangular hole—into a round hole. He calls them indispensable in the shop and they are available in numerous widths. The filing guide eliminates concerns with getting the guard to fit flush to the shoulders of the ricasso.
“Oh, the stories I’ve heard,” Jim smiled. “John’s shoulder fixtures are precise and have several other uses besides filing the shoulder on the tang, but that’s how I use mine the most.”
Crowell tipped his hand a bit in identifying the “Widget” as one of his favorite tools. “This is a handy little thing I added to my slack belt assembly on the Beaumont KNG grinder,” he remarked. “It fits in such a manner as I can run the belt underneath it and use the slack belt feature. You can also run the belt over the top and have a radius that, if properly used, will make minor adjustments to the plunge lines, as well as the choil area under the ricasso. An added benefit is that the sanding lines are lateral now and alleviate trying to sand longitudinally in the radius of the plunge line that was created vertically. Love it!”
The maker summed up his preferences for each of his top tools by identifying their best characteristic. “Realistic design by folks who are intimate with making knives,” he reasoned. “My tools and equipment are not fashion statements. They are not necessarily ‘pretty.’ They were made to do a job and do that job well. There is a subtle beauty in that.”
Jens Anso
]Jens Anso is probably best known for his folders, including this framelock flipper.
Danish custom knifemaker Jens Anso zeroes in on a combination of purchased and self-made shop tools that give him the edge in a full day’s work. He describes his shop as sometimes cluttered, though that’s often a hallmark of a busy and productive craftsman.
The first tool he cites is his horizontal grinder he built about 20 years ago.
“At that point in time I was used to building grinders and put this one together from parts I had lying around, including a two-speed motor with about 2.2 horsepower, so it will not slow down regardless of what I throw at it. This grinder was fundamental in creating the career I have,” he noted. “Even though I now have new, fancy machines, this one just performs really well. I finished more than a thousand folders using this grinder, especially the frames. It uses a Hardcore small wheel attachment and is super fast to change wheels and belts. It has a small platen that goes on and off really fast, too. This is what all my handles with ANSO texture were ground on!”
The purchased tool side of Anso’s shop is occupied by, among other implements, a Hardcore Maximizer.
“It’s kind of the industrial version of the grinder I described above, though this can do a lot more,” he remarked. “Lots of wheels and platens. It’s slower to change belts and wheels on, but once done will perform! Between this and my other two conventional Hardcore grinders, I am pretty much set. I used to build all my grinders because good commercial grinders for knifemaking are not available in Denmark, and it used to be difficult to import them from the U.S. But I have imported two of these Maximizers and two conventional grinders since then because I prefer making knives rather than making machines.”
A lengthy search also produced the ideal drill presses for Anso’s knifemaking. Though it took a while, they fill the bill to his exacting standards.
“I had been on the hunt for a great drill press for ages and finally found these vintage Danish-made CLOU machines,” he recalled. “They are heavy duty but precise, have excellent depth stop and two-speed motors, as well as pulleys for changing speeds. This is a fantastic machine for knifemaking. I have had as many as eight of these at the same time but am down to three in active use. With CNC making its entrance into my shop, I still need a few good drill presses but I don’t need eight.”
Lucas Burnley
Asian-style folders with crisply ground blades are a Lucas Burnley specialty. (Eric Eggly/PointSeven knife image)
Lucas Burnley takes a philosophical approach to the development and use of functional implements.
“Like any skill, time is one of the most valuable assets you have,” he observed. “However, buying or building the right tools and equipment will go a long way in speeding your improvement. My tool purchases usually come down to application or interest. The tools I list are considered necessary at a base level and would be able to work well in almost any shop regardless of what type of knife is being made.”
He points to his burly Bader B3 2×72 variable-speed belt grinder as a key player in the day-to-day function of his shop.
“When someone asks what piece of machinery they should buy first, this is usually my answer. For me, the grinder is the single most important tool in a basic knifemaking shop. With this machine, you can profile blanks, grind blades, shape handles, and about 100 other small steps that make it worth its weight in gold. Buying a quality machine is going to pay off more than you can imagine in the long run.”
Lucas recently added a TW-90 grinder from Wuertz Machine Works and advises that if a maker’s budget allows for it, the TW-90 is a fantastic addition that allows even more complementary functionality to the 2×72 platform. Also, he noted, “If you’re on a limited budget the KMG 1 from Beaumont Machine is a great option. You can skip the variable-speed drive and use the step pulleys and add the VFD [variable frequency drive] down the road.”
A 15-inch belt-top drill press is another valuable component of Burnley’s shop. “One thing the belt grinder can’t do is drill holes,” he laughed. “While you can use a hand drill, a bench-top drill gives you a lot of capacity for short money. Adding a keyless chuck will increase your speed with tool changes. I’ve had a number of these machines over the years, and there are a number of good options on the market. I currently have a model from WEN but will be replacing it with a comparable model from Jet Tools shortly. Quality here matters but much less so than with the grinder. These are not meant to be precision machines, but for 90 percent of the tasks you give them they will be just fine. When I first started building folders, I didn’t have a milling machine and was able to use my drill press to cut the lock relief, lock slot and face on a number of knives with a little creative problem solving.”
A metal cutting band saw and CAD (computer aided design) capability round out the top pieces of equipment for Lucas. The band saw delivers greater speed and efficiency. He has a 14-inch Delta wood/metal band saw made in 1951 that his dad found at a yard sale 17 years ago.
“The only reason I have it in third place is that your belt grinder will allow you to profile both blades and handle parts if you start with a narrow bar stock,” he related. “With a band saw you will be able to buy larger sheets of material, nest your parts more efficiently, and ultimately use less abrasives, saving time and money through every step.”
Taking time to learn CAD can be a game changer. “One of the best pieces of advice I could give any maker is to learn CAD,” Lucas noted. “Even if you don’t have the money to buy tools or a shop to work in, if you have a computer you can start building a skill set that will help you for years to come. Fusion360 offers free software for hobbyists, and there is an endless number of tutorials available online.”
I was watching American Pickers on the History Channel last night, and the stars were looking at an anvil, and Mike said something to the effect of, “More and more people today are going back to the basics and learning to forge, and learning the art of glass blowing and things like that …”
And it got me thinking about how my wife, Tricia, and I do this art tour every year where they give you a map and you go to artisans’ houses for kind of an “open house” art tour. And there’s usually a glass blower every year.
And then there’s that other History Channel show, Forged In Fire, and it seems like new knifemakers keep coming out of the woodwork …
What do you think, are more people forging today than in recent past?
Shown in the image are Finnish brother knifemakers Jakob (forging) and Simon Nylund.