
Knifemaking

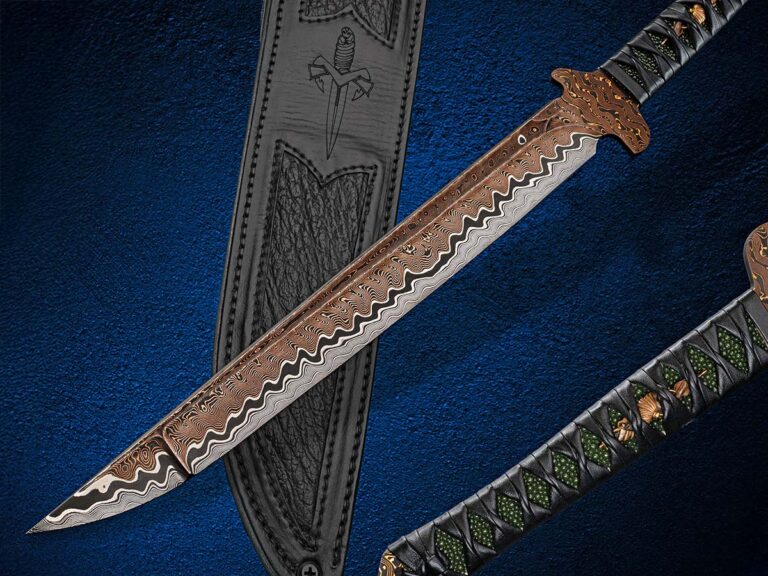
Knifemaking is the building of a knife, which includes the blade, handle and other accouterments. Blades are made by either removing metal from a steel blank via a grinder – known as stock removal – and the forging to shape of hot steel into a blade in the process known as bladesmithing. Other parts, including bolsters, guards, pommels, etc., are needed to complete the finished knife.

Featured Knives – – Knife Collecting – – Tactical Knives – – Survival Knives

Hottest Damascus Patterns, According to Top Bladesmiths

0

Top bladesmiths discuss the three hottest damascus patterns.

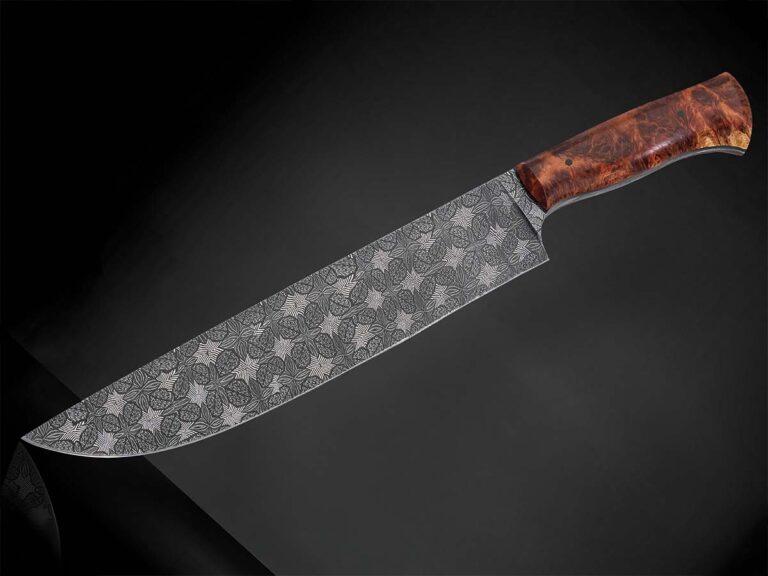
As damascus patterns emerge through the years, their popularity waxes and wanes. The steel itself, layers of intrigue and interest, experimentation and innovation captivate the steel forger, the custom maker and the knife-buying public like nothing else. The patterns abound and in recent reviews of photos, commentary from those in the business and observation it appears that the feather and mosaic, with twist not far behind, have been and continue to be hot.

“I agree that feather and mosaic patterns are predominantly what is made, or certainly what is getting photographed [a lot],” related ABS master smith Steve Randall. “Both patterns are popular because they have lots of character and can be pretty dramatic. Feather patterns are very cool because they can be unique yet still hold true to the feather pattern. The mosaics can move off into so many different styles. They allow the maker to be really creative.”

Feather Damascus Pattern

ABS master smith Bill Burke praises the versatility of the feather pattern and its breadth of presentation.

“I think that you see a lot of feather pattern because it is so striking and looks good on almost any knife style,” he commented. “It is also quite a challenge to produce. A well-done feather will have a flow from end to end with nicely curved veins, while a feather that has interruptions in the pattern or has the center area drawn out into a long ‘V’ shape then curves out rather sharply to the edge is not done so well. I don’t feel a feather pattern is difficult to do after one has mastered pattern welding. It becomes difficult when an inexperienced smith rushes into trying to make a feather before mastering basic pattern-welding techniques.”
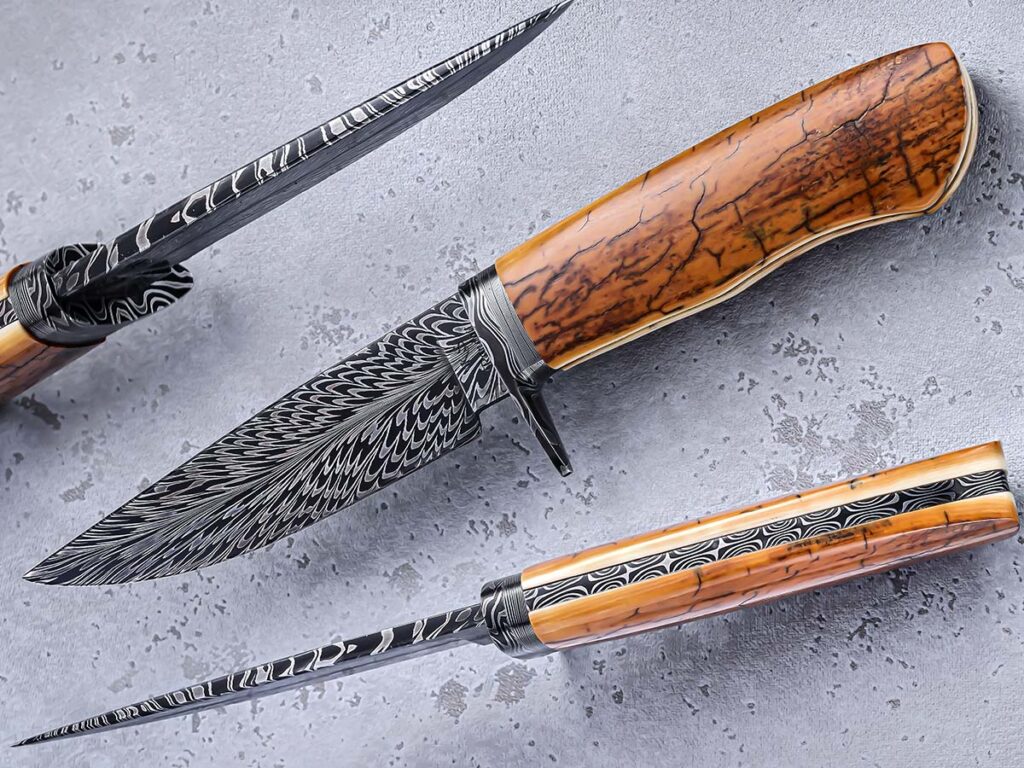
“Feather patterns are very cool because they can be unique yet still hold true to the feather pattern,” Steve Randall observed. He matches up the feather pattern with a mastodon ivory handle on his frame-handle hunter. Overall length: 9 inches. (SharpByCoop image)

BLADE Magazine Cutlery Hall-of-Fame® member and ABS master smith Steve Schwarzer sees the artistry in the feather pattern as well, and when he considers the magnitude of its relative surge concludes, “Absolutely. What you don’t see much of is images and the forge skill required to put that in damascus. Both the feather and mosaic damascus are fairly easy to do, and with the internet there are thousands of recipes out there with visual step-by-step instructions. I did the first feather pattern ever done in a folding knife, and [Cutlery Hall-of-Famer] Don Fogg in his Life and Death Dagger was the only one who did a feather pattern before me. I did the first that was recognizable in the folding knife.”

Degree of difficulty is and will forever be a matter of individual perspective and opinion. Randall stresses the experience level of the maker in fashioning the feather pattern.

“I would say that feather damascus can be a difficult pattern,” he offered. “There are a lot of pieces that have to forge weld together, which opens the opportunity for cold shuts or poor welds. Once that happens, you’ve pretty much got a paper weight.”

Mosaic Damascus Pattern

The perspective on mosaic damascus is similar to that of the feather pattern. Its uptick in popularity is driven by the skill of the maker and the diversity of the presentation. Mosaic makes its statement in both subtle and bold blade aesthetics.
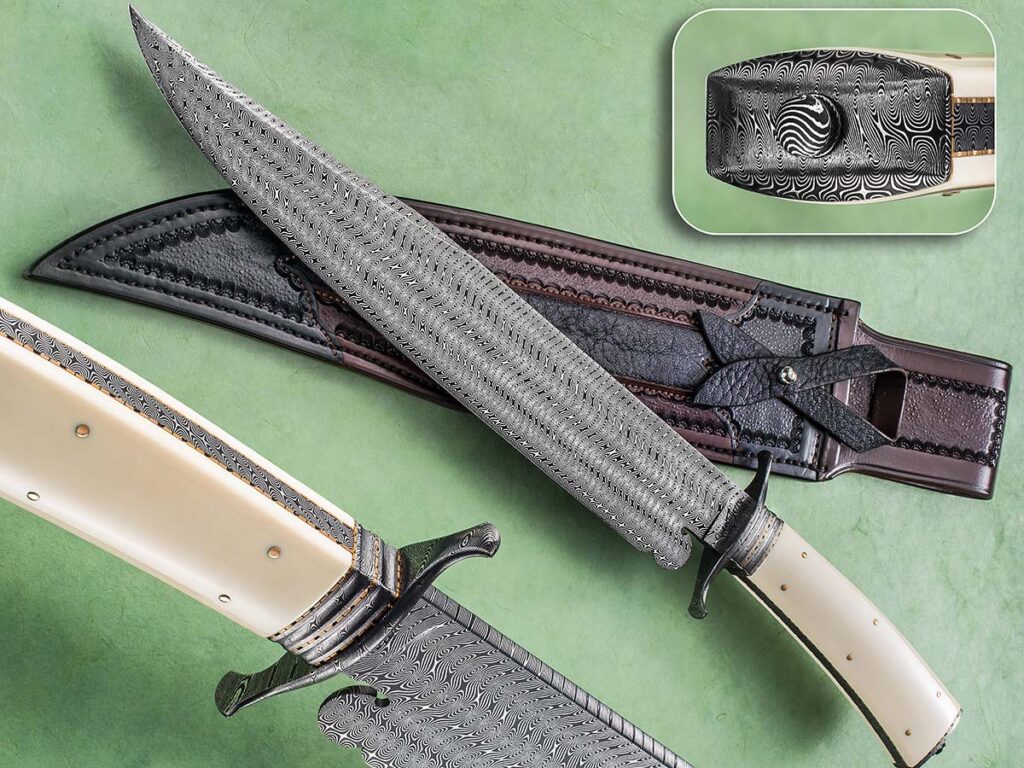
“While a simple twist pattern is rather mundane,” Bill Burke noted, “when four or more bars are twisted in opposite directions and stacked one on top of the other to create a Turkish twist, the result can be striking.” A lavish five-bar Turkish-twist damascus comprises the blade, including the Spanish notch at the base of the edge, on Mike Quesenberry’s Mediterranean bowie. (SharpByCoop image)

“Mosaic patterns do lend themselves to individual creativity,” Burke remarked. “They can vary from not too hard to extremely difficult to do. Mosaics are limited only by the smith’s skill and imagination. Mosaics that are done well will have the patterns lined up with no unintended interruptions in the elements and all the individual tiles matched up well.”

Tiles, incidentally, are the small, angled pieces of steel that are carefully assembled and then forge-welded together to create the distinctive, repeating mosaic pattern. The tiles are cut from the billet or block of welded steel that forms the basis for the creation of any damascus pattern. The tile cuts are made with a scarf joint that facilitates the joining of the surfaces to be mated during the forge welding process.

ABS master smith Mike Quesenberry is a big fan of the mosaic pattern, particularly its possibilities for expression.
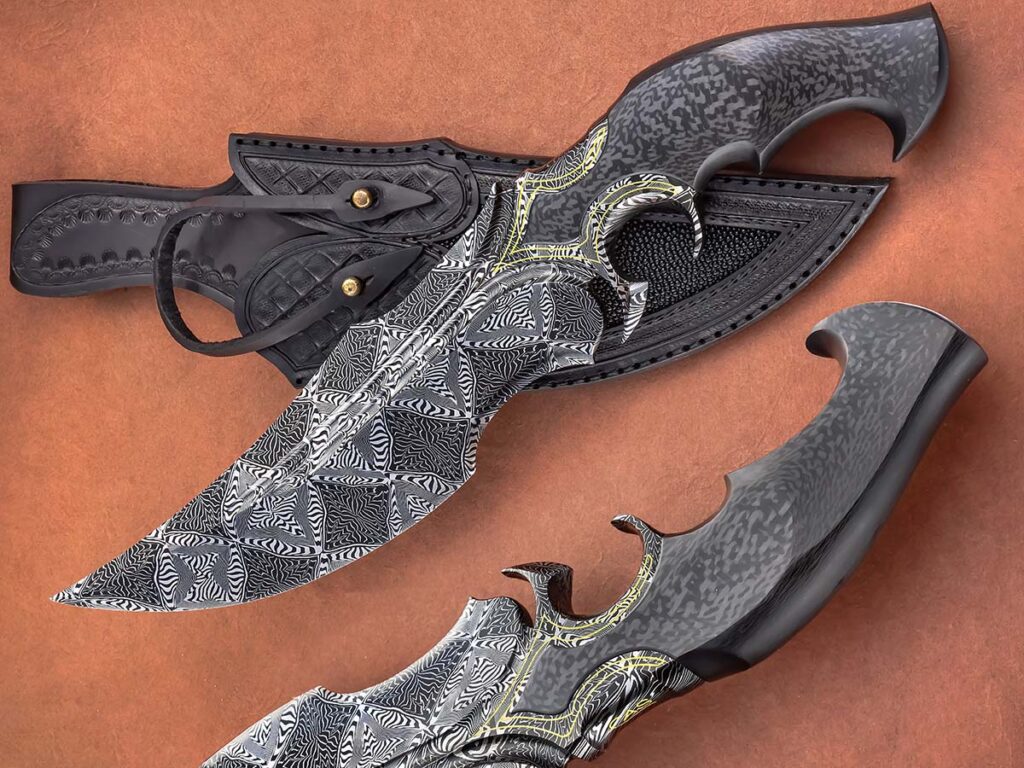
Mike Quesenberry stated the black and silver contrast of mosaic patterns can do “all kinds of crazy, wild things. It is huge with so many possibilities, and it turns out to be a really good pattern that some like in a fine look and others prefer in a bold statement.” The Sobral Brothers go bold with the pattern on their keyhole subhilt fighter. Overall length: 13 inches. (SharpByCoop image)

“I love mosaic and its creativity,” he declared, “along with the fact that smiths can take mosaic and make it bold or fine and there are all sorts or variations that make it fantastic, from W’s to many others. You can add different layers to fine and thick material, 1080 or 15N20 or whatever alloy. That black and silver contrast can do all kinds of crazy, wild things.

It is huge with so many possibilities, and it turns out to be a really good pattern that some like in a fine look and others prefer in a bold statement.”

Things To Look For

Assessing the quality of the individual feather and mosaic product is an exercise in discernment and preference along with the display of basic skill that is evident. Randall takes a subjective point of view.

“One of the most important signs of a feather pattern that is well done is its flow through the blade,” he observed. “The feather should flow from the center of the ricasso through the blade and out the tip. Both feather and mosaics being well done are in the eye of the beholder. Layer count has a big impact. The higher the count does not always make the pattern better.”
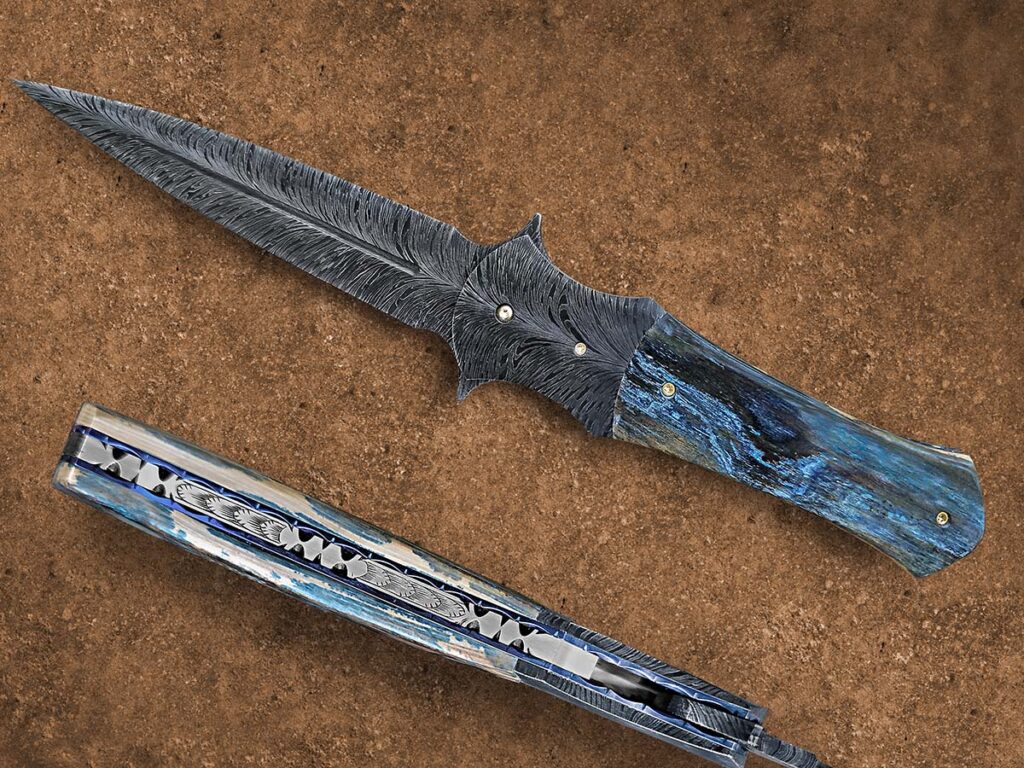
Bill Burke indicated a well-done feather pattern will have a flow from end to end with nicely curved veins. ABS master smith Scott Gallagher nails the concept in the feather-pattern blade of his Dolan Dagger Folder. Closed length: 5.25 inches. (Jocelyn Frasier image)

Schwarzer agrees that the individual’s taste has a tremendous weight in the interpretation of well-done damascus.

“It’s all subjective,” he related. “It involves how pleasing to the eye the fine or bold patterns are. The whole thing can’t be just a hodgepodge of stuff stuck together. It has to tell a story, and if it tells a story, then it is art—and to a lot of people it is great art. There is stuff out there that is incredibly complicated to do that looks simple on the face of it, but it isn’t. We are in the infancy of pattern welding, and a lot of it has come from Daryl Meier.

“There have been patterns out there with faces and images in them since the 1700s,” Steve continued, “and now we are painting with steel. When Bill Moran showed up with random-pattern blades in the early ’70s, he was continuing something that had never stopped. Pattern welding has probably been going on for 4,000 years, and you have to forge, fold and weld the iron to clean it. Then, when you get the alloy in there, it shows the pattern. Pattern welding, including feather and mosaic damascus, is a technique and a skill set that is developed. Once you develop that skill, the trick is to get it back together without flaws, turning something mundane into something striking. Mosaic requires more planning and skill than feather.”
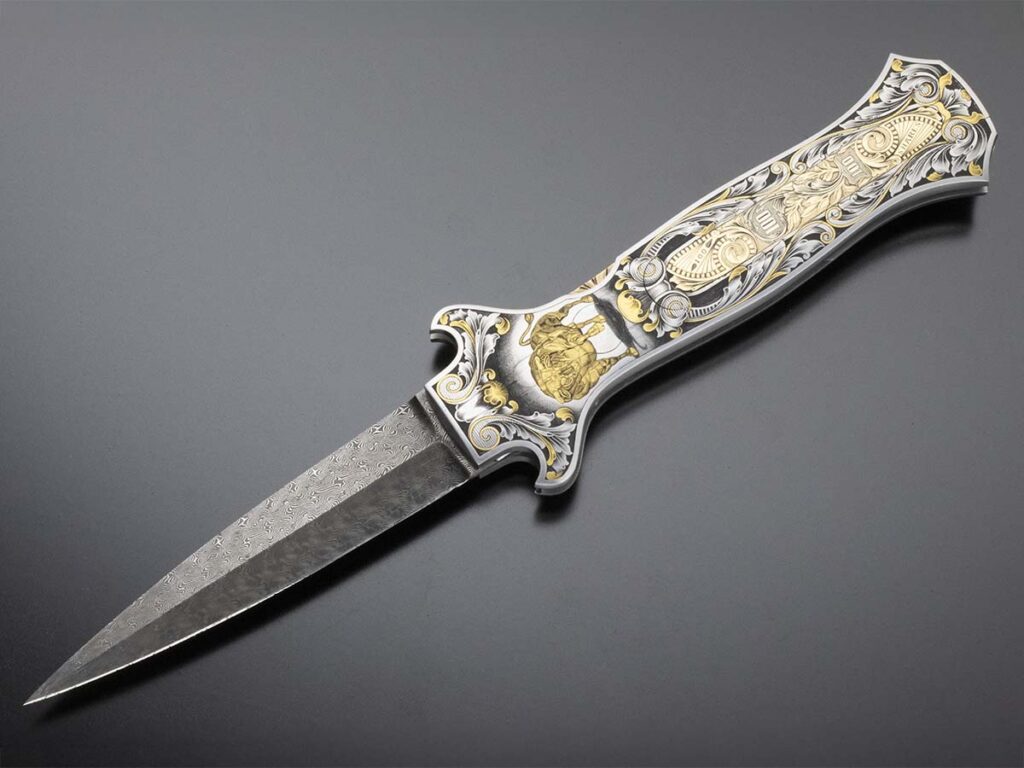
One of the pioneers in—and a most outstanding forger of—Turkish twist damascus is Jerry Rados (inset), who forged the steel for the Wall Street Knife by Joe Kious. Jerry’s Turkish twist has what Steve Schwarzer calls a kaleidoscopic appearance.  (KnifePurveyor.com knife image)
One of the pioneers in—and a most outstanding forger of—Turkish twist damascus is Jerry Rados (inset), who forged the steel for the Wall Street Knife by Joe Kious. Jerry’s Turkish twist has what Steve Schwarzer calls a kaleidoscopic appearance. (KnifePurveyor.com knife image)

Twist Damascus Pattern

Although some patterns may stand out from others for a while, there are always those that maintain their place among the most popular. Twist patterns and specifically Turkish twist are regularly in the conversation when collectors are seeking their prize blade.

“Twist and Turkish twist are the same and totally different at the same time,” smiled Burke. “While a simple twist pattern is rather mundane, when four or more bars are twisted in opposite directions and stacked one on top of the other to create a Turkish twist, the result can be striking. However, like almost all other patterns these two can also be drawn out or stretched too far, which detracts from the looks of the pattern. While a simple twist is relatively easy, the Turkish twist billet is wrought with potential for failure and is very labor intensive.”

A key element in producing twist patterns is control, and Schwarzer respects the precision required.

“Very precise control is necessary in the twisting so you get that twisting the same in fine or coarse layers,” he said. “Jerry Rados was the American guy who did the most of that, and we both learned from Daryl Meier in Carbondale [Illinois]. The early blades made by Daryl in the 1980s are beautiful, but you’ve got to be almost [obsessive compulsive] to produce that stuff. It involves a lot of planning and the turns have to be precise. You can twist mosaic and make it look like a kaleidoscope.”
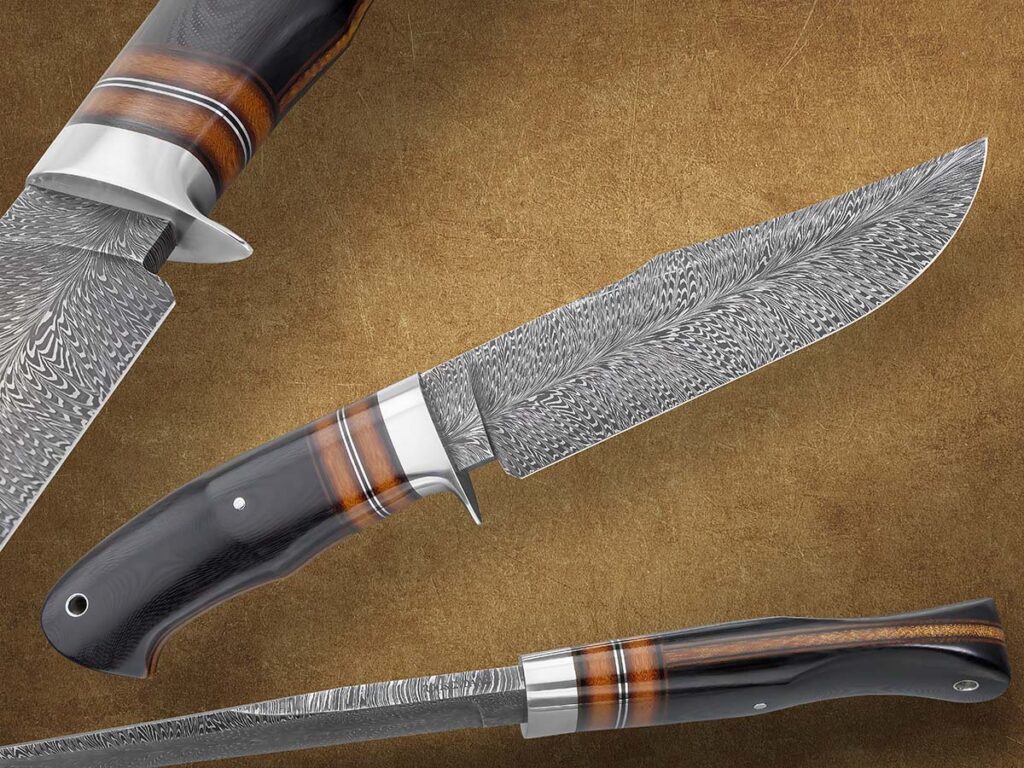
Chris Roosendaal’s feather pattern in 1084 carbon- and 15N20 nickel-alloy steels borders on the mesmerizing. The scales are black G-10 and Micarta®. Overall length: 11.22 inches. (Rod Hoare image)

Randall says that a Turkish twist done right is “very classy.” Its degree of difficulty is a cut above basic twist, but in his experience, it isn’t quite as demanding as feather pattern work due to the requirement of fewer pieces to “cut, flip and weld together.”

When Quesenberry talks Turkish twist, he affirms his love of the look but decries the amount of waste he sees in its production.

“I’m a huge fan,” he commented, “and I love the fact that it’s an appealing pattern. But I don’t like the huge amount of waste. To me, the cool pattern is in the middle third of the bar. There aren’t really a lot of American and European guys into Turkish twist, but some of the South Americans are really pros who are turning out some bold patterns.”

Shifting Damascus Pattern Preferences

Of course, the shifting preferences and envelope of creativity that is constantly pushed keep the damascus conversation going. And it is likely to remain lively long into the future.

“Trying to say one pattern or another is more popular is always subjective,” Randall concluded. “There are some great classic patterns that are very appealing. For example, the ladder, twist, crushed W’s and others. Sometimes the mosaics get visually busy, so some people don’t enjoy them as much, but who doesn’t love a feather or explosion pattern? They are too cool. Some of it does depend on the overall knife design. The blade design and size with guard and handle can enhance—or take away—from a pattern.”

Considering damascus pattern popularity past, present and future, one element is certain. The driving force of creativity and the artistry of the forge will keep this ancient steel relevant for generations to come.

More On Damascus:

Damascus Steel: Experts Forecast Growth In The Knife Industry

From copper-infused patterns to stainless steel sheets, discover the innovations driving the red-hot market for production damascus.

Are we seeing a bit of “global warming” in the knife industry, where red-hot damascus steel is getting even hotter? BLADE® spoke with some industry leaders, and 2025 and beyond looks good to them when it comes to production damascus in both carbon and stainless steels.

There are many individual makers who make high-quality damascus in simple and complex patterns in their home shops, backyards or shared maker spaces. This article focuses instead on production damascus forged by specialized outfits such as Baker Forge & Tool, Damasteel, Chad Nichols Damascus and Vegas Forge. At a level beyond “regular” damascus makers, these companies make steel for the masses, for production companies, and specialize in innovative new materials that are sure to delight the industry.

BLADE readers will be familiar with Baker Forge & Tool, a prolific producer of innovative damascus patterns that include copper, such as CopperMai, TigerMai, GoMai and others.

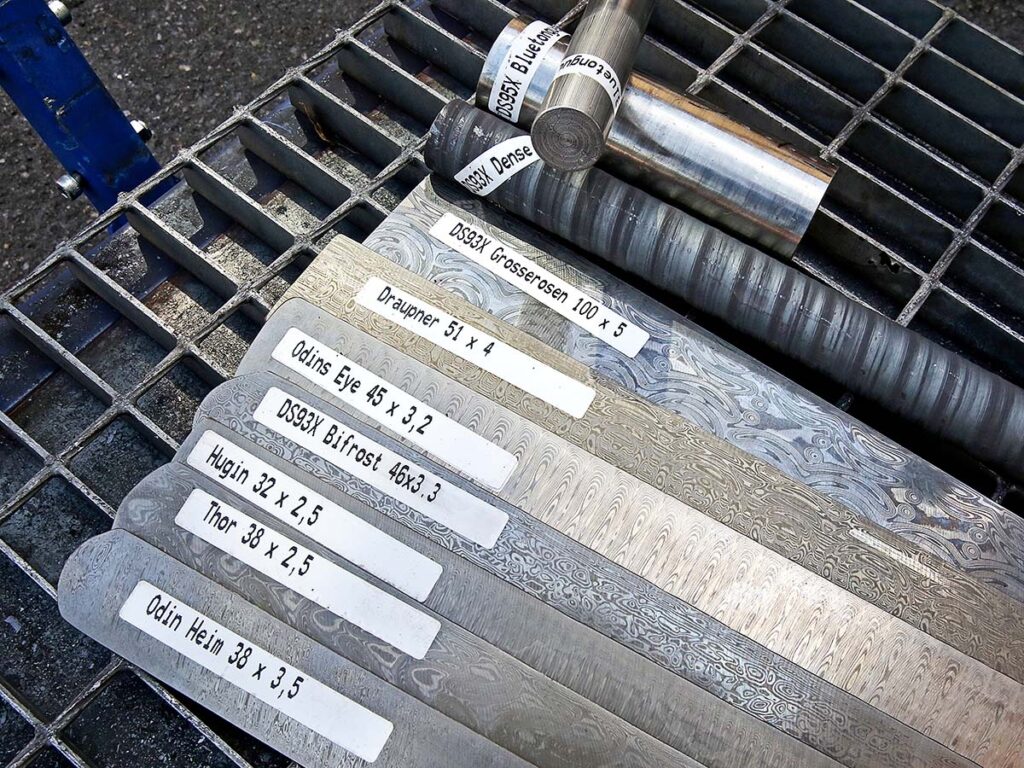
DS93X steel—fourth from bottom in bar form—is Damasteel’s standard mix, “combining good performance with good looks.” “For us it’s more about expanding the patterns than about trying new steel combos,” noted Per Jarbelius. The other patterns in bar form are representative examples of what you can expect from the Swedish steel maker.

“We make carbon steel damascus patterns with copper, and they’ve been hot. We expect them to stay hot through 2025,” Coy Baker said. When it comes to steel selection, the company most often sticks with the gold standard combination of 1084 carbon and 15N20 nickel-alloy steels.

Baker also has been experimenting with Apex Ultra as a core steel for its copper san-mai. For those unfamiliar, Apex Ultra is a tungsten steel alloy, kind of a super-52100 carbon steel. It’s made in small batches and is hard to get in the USA, but Baker has found that the material makes a great damascus core.

“Demand for our Apex core billets far outpaces supply,” Coy noted.

Baker has also been experimenting with stainless and copper damascus and san-mai, using 154CM and AEB-L stainless steels. This writer also makes knives and that combo sounds quite challenging to forge. Baker confirmed that it was very challenging and wouldn’t reveal any secrets, other than the 154CM etches light and the AEB-L etches darker.

Growth In The ‘Sip

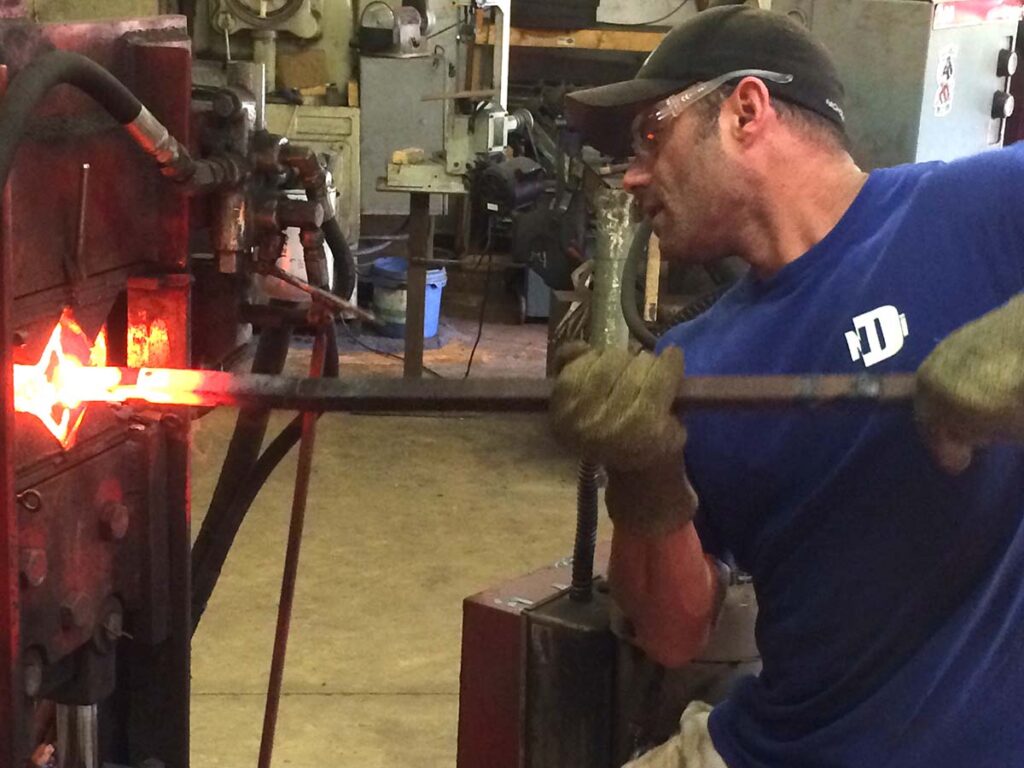
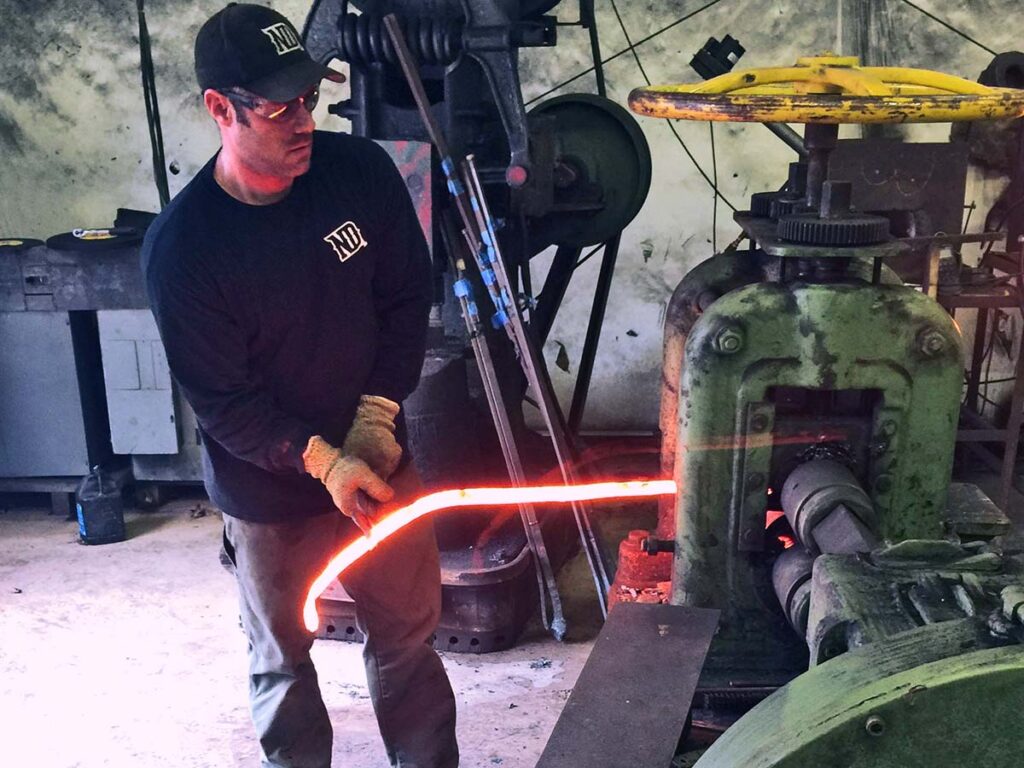
Down in beautiful Bush Springs, Mississippi, Chad Nichols makes traditional carbon steel damascus at a production level.

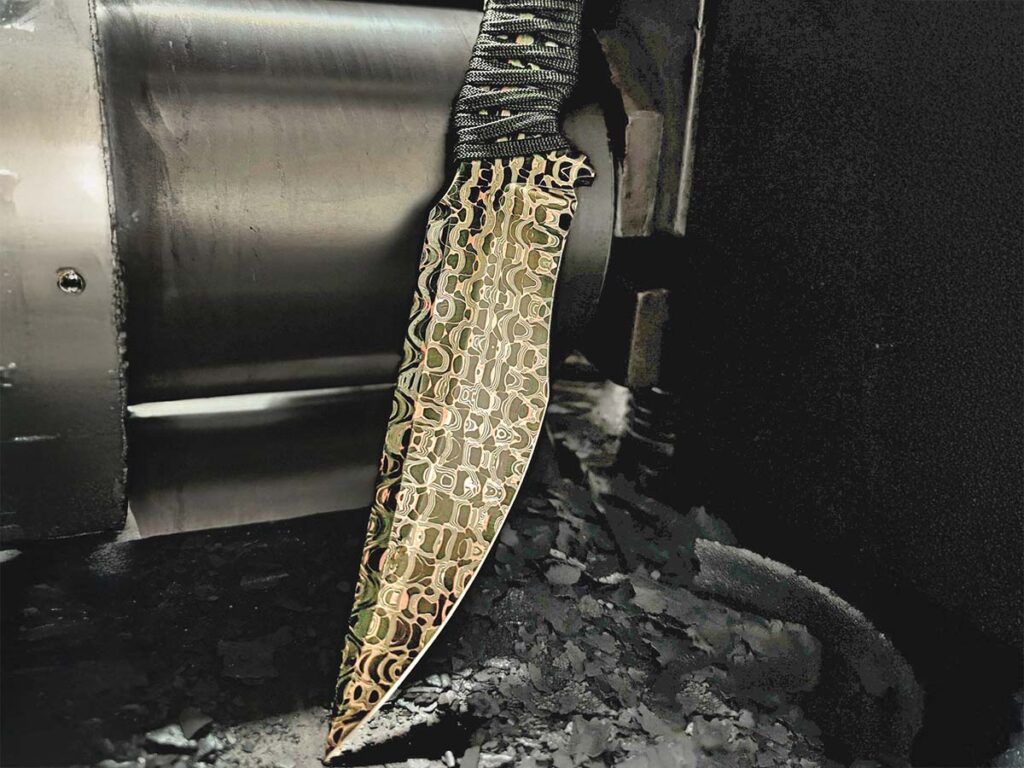
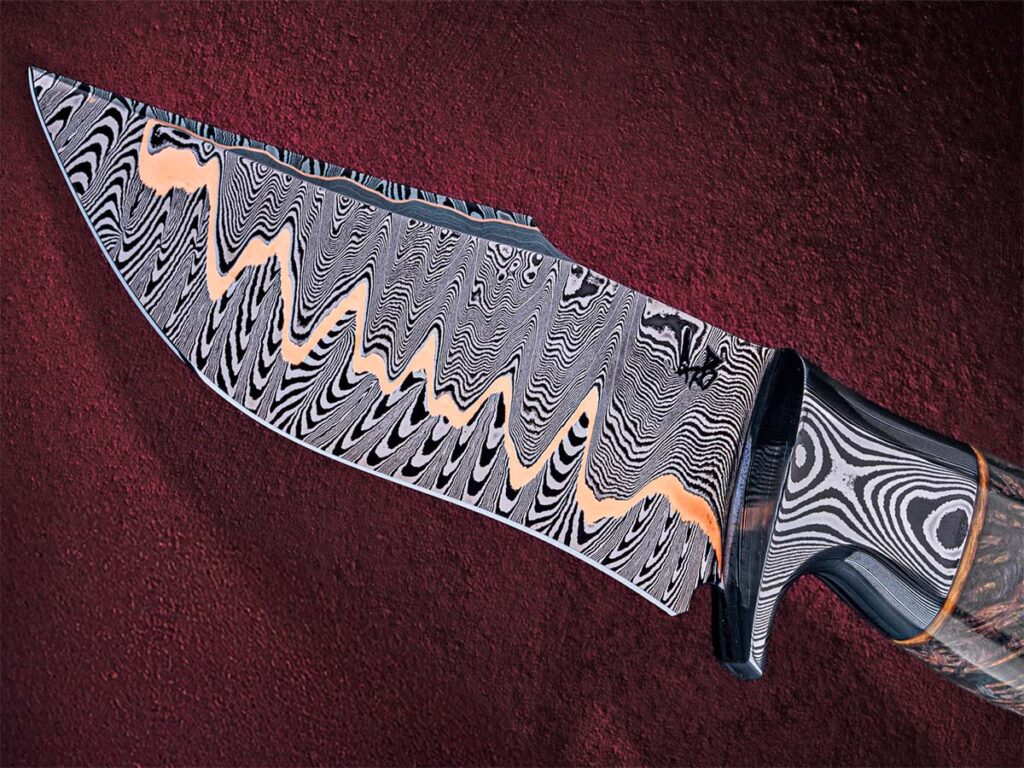
Vegas Forge has always been innovative and 2025 will be no exception. “We’ve figured out how to do copper in with the damascus pattern manipulation, not just as a line between san-mai,” Jesse Harber noted. (Vegasforge.com image)

“I stick mostly to carbon steel 1075 or 1095 plus 15N20 with occasionally a little bit of 3V,” Nichols explained. “I’ve got my process down and these steels go together well.” He makes a variety of mosaic patterns, most of which go to a single manufacturer. “The carbon steels are so much more organic,” Nichols said. “You can do so much more with them in a cost-effective way.”

Nichols’ goal for 2025 is to increase his production of mosaic patterns.

“There just aren’t many people doing production mosaics,” he said. “It’s a great opportunity for growth.”

Another area he’d like to see grow in 2025 is the use of exotic and historical materials. He’s made a run of steel for Boker with steel from a German Tiger tank, and has a run coming for William Henry with some leaf springs sourced by WH.

Collab Designs

Damascus isn’t just a U.S. product. Damasteel produces high-quality stainless steel damascus in Sweden.

Chad Nichols (above) stated the goal at Chad Nichols Damascus for 2025 is to increase the production of mosaic patterns.

“Our DS93X steel is our standard mix, combining good performance with good looks,” Damasteel’s Per Jarbelius remarked. “For us it’s more about expanding the patterns than about trying new steel combos.”

DS93X is described as a “patented powder metallurgy product” that includes “two different hardenable steel grades.” “We use only stainless steel,” Jarbelius explained, ‘because it doesn’t rust and has the same or better performance.”

Damasteel historically produces a new pattern each year. For 2025 it also has begun a special project to collaboratively design patterns. Benchmade collaborated with Damasteel to make a steel pattern called “Monarch” exclusively for the Benchmade Gold Class Necron balisong. Jarbelius is excited for the potential to expand the collaborative effort with other companies who want proprietary patterns.

In another innovation, Damasteel has developed the capability to produce stainless damascus in sheets, not just bars. This will come in handy for small-batch and mid-tech production. The sheet steel pattern is called “Drakkar,” which is the old Norse word for the dragon-shaped Viking longboats.

Copper In The Pattern

What happens in Vegas may stay in Vegas, but that’s not the slogan for Vegas Forge, whose damascus is well known worldwide. It is a consistent producer of high-quality carbon and stainless damascus in complex patterns.

Baker Forge & Tool has been experimenting with Apex Ultra as a core steel for copper san-mai. This integral fighter by Greyson Weltyk features Baker copper damascus for its recurve harpoon blade. (Bakerforge.com image)

“One of our most popular patterns is ‘Reptilian,’ which has three alloys included: O1, 1075 and nickel,” observed the company’s Jesse Harber.

Vegas Forge has always been innovative and 2025 will be no exception.

“We’ve figured out how to do copper in with the damascus pattern manipulation, not just as a line between san-mai,” Jesse noted. “We can take our Reptilian pattern with copper in it, and then clad that billet over an O1 or 1095 core.”

As far as stainless goes, Vegas Forge continues to push the complexity of its patterns. Its most popular pattern, “Virus,” begins with a single stack of 1200 pieces! The company uses 154CM cores for most of its stainless san-mai, along with CTS XHP when available.

Ultimate Hotness

What kind of knives do the manufacturers predict for ultimate hotness in 2025?

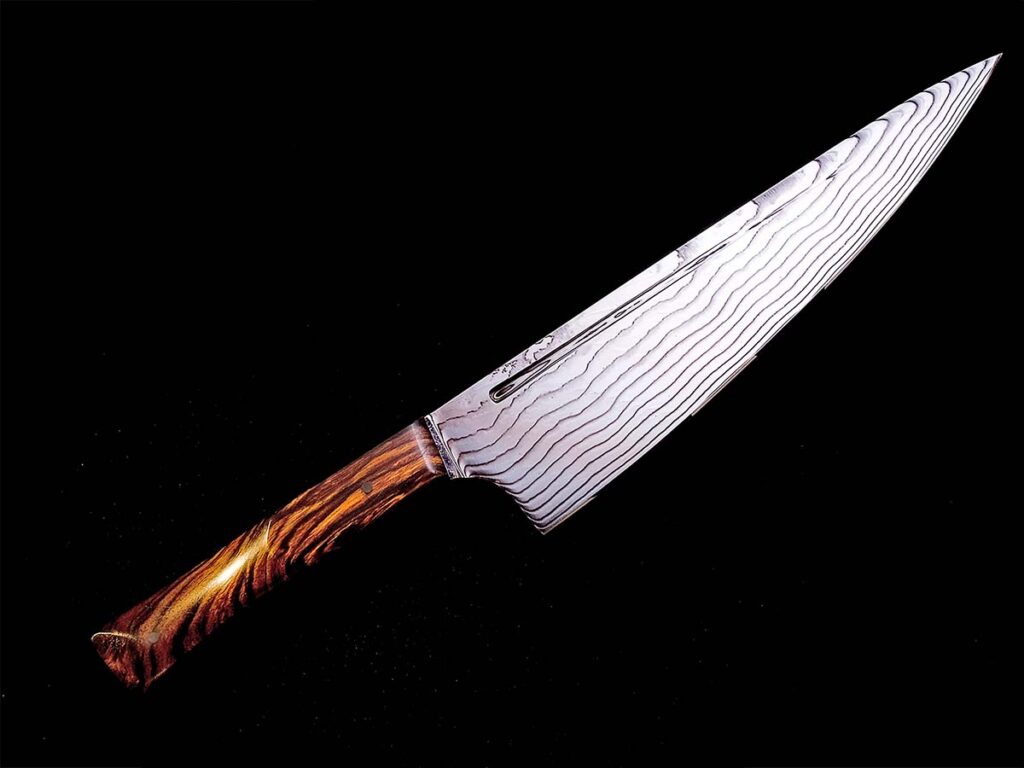
Damasteel has developed the capability to produce stainless damascus in sheets, not just bars. The sheet steel pattern is called “Drakkar,” the old Norse word for the dragon-shaped Viking longboats, and is used here on a chef’s knife by a local Swedish cutler.

Both Baker and Jarbelius indicated culinary knives will stay hot, especially in stainless. Baker pointed out that stainless steel handles kitchen abuse better, and this writer agrees. Per said Damasteel’s Damacore and DC18N nitrogen steels are top of the line, and the company has a culinary knife coming in partnership with BLADE Magazine Cutlery Hall-of-Fame® member Ken Onion and CRKT. Both Damasteel officials and Chad Nichols agree that complex patterns are expected to do well for the pocketknife and one-off makers.

Jarbelius “expects growth in the complex pattern market” even as Damasteel’s basic traditional rose, ladder and twist damascus patterns remain best sellers. Nichols states that the mosaic niche he addresses will continue to grow.

All four steel makers expect growth in the production side of the market. Even in a slower economy, the big knife manufacturing companies are still producing limited runs of high-quality damascus knives. Baker looks for growth in his damascus-core san-mai steels.

“They’re easier to get a consistent etch on than the mono-steel cores,” he explained.

Chad Nichols stated that he expects growth in the use of mosaic damascus steels by factory knife companies in 2025.

Manufacturing is all about consistency and efficient processes. Damasteel achieves consistency by using the same steel combo for all its patterns. Nichols gets there by batch building for specific manufacturers so that each run is internally consistent. Harber mentioned that he was approached at BLADE Show West* by multiple production companies looking to order steel for 100-to-200-piece runs. He indicated he expects the mid-range sub-$800 production folders to stay hot.

Gonna Be Intersting

The new year is going to be an interesting one for the economy and politics, both of which are inextricably entwined. Fortunately, thanks to the work of those in the damascus industry, it’ll also be an interesting year in the world of knives. If nothing else, knife enthusiasts will have plenty of beautiful damascus production knives coming off the assembly lines to keep them entertained.

More On Steel:

IT’S ALIVE! The Living Knife by Jean-Marc Laroche will grab you—literally

“A knife capable of movement and gifted with intelligence …”
—Jean-Marc Laroche

“On fitting your hand into that of the knife, you already feel a strange clasping in response when, suddenly, the mechanical fingers close! You can’t get free! With the same movement, an eye opens and stares at you intensely. It’s awake! Now you are under its control, and the knife is master of you who dared to take it in your grasp.”

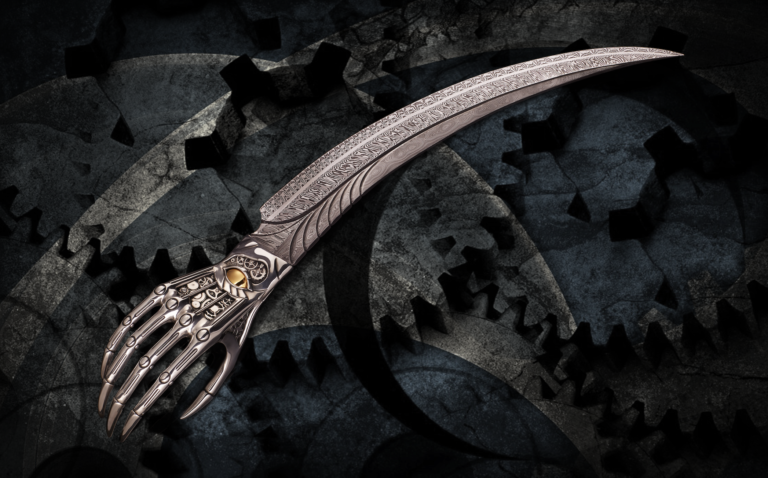
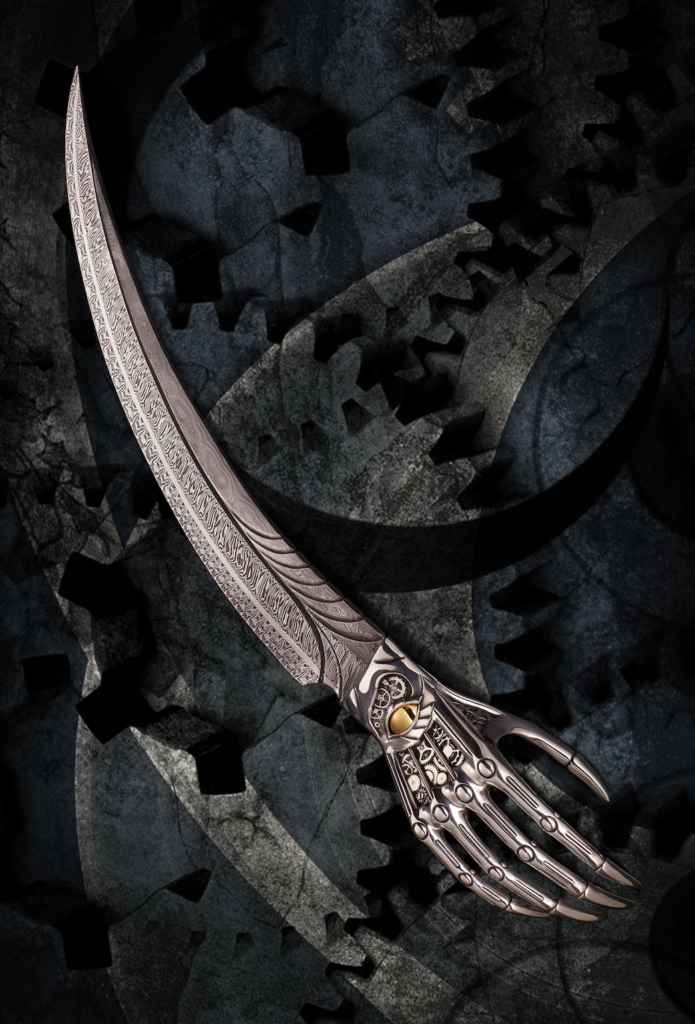
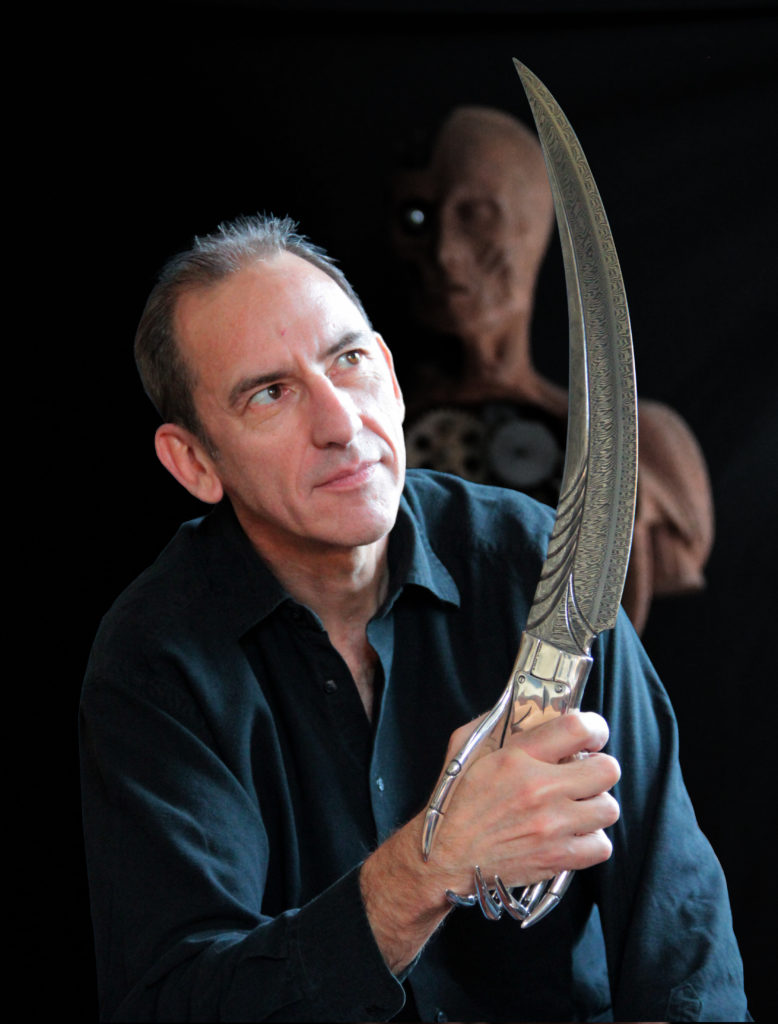
Above: The Living Knife by Jean-Marc Laroche features a mechanical hand for a handle that, as you grab it, literally grabs you back. The damascus blade is a composite of 15N20, 15LM and UHB11 high-alloy nickel and carbon steels in explosion, twist and random patterns forged by Swedish maker Roger Bergh. Overall length: 25 inches. (images courtesy of Jean-Marc Laroche)

In addition to the above, French knifemaker/artist Jean-Marc Laroche refers to his latest creation—this issue’s cover piece—as “The Living Knife.” Since it has a “hand” for a handle with “fingers” that close, an “eye” and an overall lifelike appearance, who are we to argue? As you grab the handle, the “fingers” actually grab back so that it’s hard to tell who’s holding whom. And, as the fingers grab your hand, the “eye” opens. The hand also is embellished with gears in the Steampunk style.

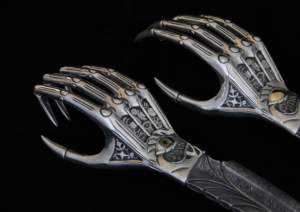
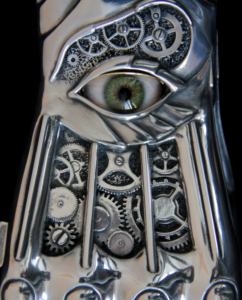
A close-up of the silver-plated bronze hand shows the detail of the gears in a Steampunk motif. (image courtesy of Jean-Marc Laroche)

The opening eye.

The Living Knife is indeed a most unusual creation—but then Laroche has been making otherworldly pieces for over two decades. Even by his standards, though, this one takes his knife art into uncharted territory.

“It was from the cinema of fantasy films that I drew my inspiration,” he notes. “It took me 12 years to implement my idea, six months to carry it out and a fair number of technical difficulties had to be overcome.

“Yet here it is, like a cunning thing from another time that a mad inventor out of the 19th century would have dreamed up. This biomechanical being activates its workings to move its fingers; it seizes control of the situation with its eye’s intelligence.”

The Living Knife is an assembly of mechanical parts, the prototype having been made in resin. A few rare versions in bronze, gold and silver are in the process of being forged.

“Swedish knifemaker Roger Bergh participated in this project. Indeed, I have been talking to Roger about it for 10 years and he has always been enthusiastic,” Laroche observes. “Roger first forges damascus steel to obtain various types of structures; he then assembles them into magnificent combinations. A world-renowned knifemaker, he has remained down-to-earth and open. Working with him is a real pleasure.”


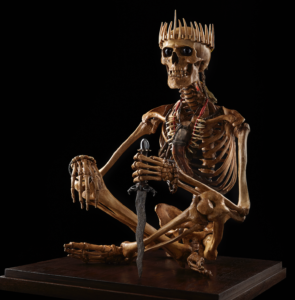
In addition to knives, Jean-Marc Laroche sculpts skeletons on a lifelike scale. An example is his “Warlord,” a kind of Javanese king holding a kris.
The skeleton is resin on a steel structure. The crown is assorted animal bones, the eyes are natural quartz crystal, and the necklaces and bracelets are from “different ethnic tribes.” The knife is made from an old Indonesian kris blade, some teeth and hematite.

KNIFE SPECTACULAR

BLADE® first learned of Laroche at the 1992 East Coast Custom Knife Show, where his knives with “alien-head” handles were a show hit. The alien heads were those of animals he customized and coated with a special resin.

In 1997 Laroche’s “Mother Ship with Fighters”—a set of four knives including one large one and three smaller ones with dagger blades and curved, claw-like guards—was a winner of the annual BLADEhandmade Best In Show Award. His “Byakhee,” a spectacular knife with a handle resembling a large, bat-like bird inspired by the science-fiction stories of H.P. Lovecraft, won Best Fantasy Knife at the 1998 BLADE Show West.

Laroche introduced The Living Knife to an appreciative audience this past June at the FICX, an invitation-only knife show in Paris that also featured a few U.S. makers, including Kevin Casey. It was Jean-Marc’s first knife show since 2002. Since then he had been involved in other forms of sculpture and exhibiting them worldwide.

Actually, The Living Knife is not Laroche’s first attempt at such a piece, his “Devil Hand” predating it. However, the Devil Hand did not have the mechanical grasping capability, the same materials or other select features of Laroche’s newest rendition. Laroche said he also has made two knives similar to The Living Knife, the first being sold to the Instituto Ricardo Brennand (http://www.institutoricardobrennand.org.br/index2.html), a museum in Recife, Brazil.                   

For a video on how The Living Knife operates, watch the video below:

Factory Friday: The Inventor Who Daydreamed A Trainer Knife

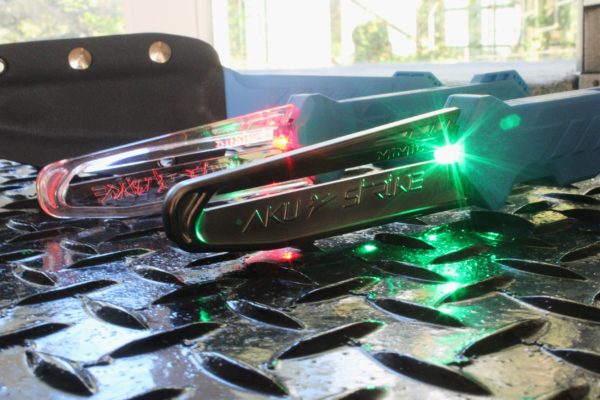
“I was born a tinkerer,” Dwayne Horvath of Aku-Strike Knives of Pittstown, New Jersey, related. He was always taking things apart, from his father’s reel-to-reel video recorder to his car. By his own admission he was not great at school, but it was during those moments looking out the window, daydreaming, when ideas came to him—lots of ideas. It carried over into his car-racing days, his career as a successful fix-it man and now in retirement as a full-time inventor who daydreamed a trainer knife.

When you get immediate feedback from your training knife, you automatically up the intensity of your training.
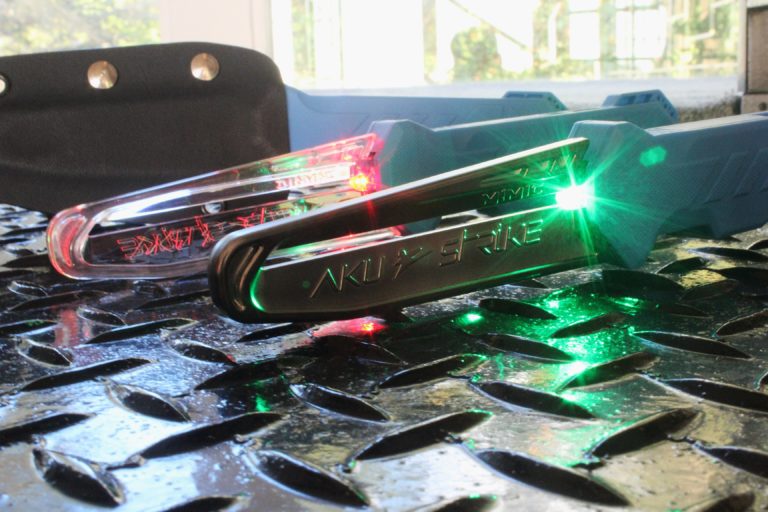
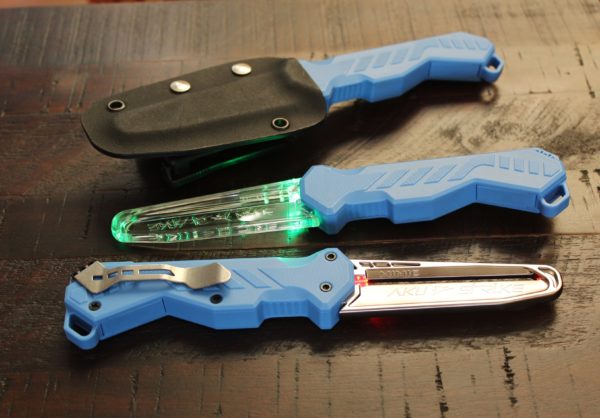
The Aku-Strike Mimic T-16 confirms contact with a red or green LED light and different tones for daytime use when lights are not as visible. Available in nickel or clear. MSRP: $41.95-$43.95. Contacts for Aku-Strike Knives appear at the bottom of this article.

The Aku-Strike Mimic T-16 came to Dwayne in a vision driving home one night from a training session at Alex Wilkie’s Martial Arts Academy in Bridgewater, New Jersey. “It was not a thought before it was a vision. The vision was possibly stirred by an emotion or feeling from training that night,” Dwayne explained.

Dwayne knew about the Shocknife, which is indeed useful for inducing fear in combatives training, but it’s is not something you want to learn on or use every day. Chalking the edges of training knives indeed leaves a mark to inform you and your training partner of a strike, but it’s messy and may not fully wash out of some shirts. There was a real need for another alternative.

The instructors at FCS Kali like using the Aku-Strike Mimic 16-T in their training.
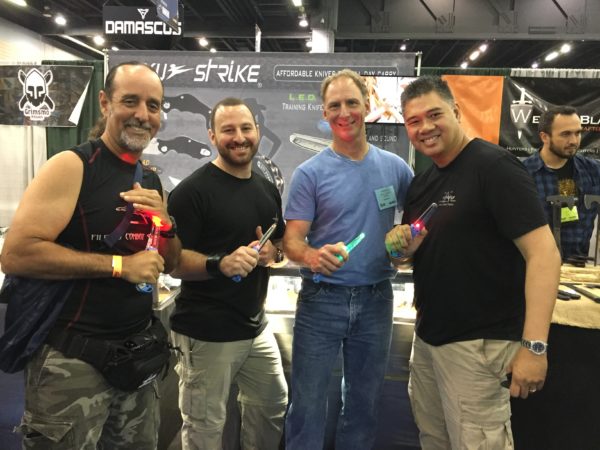
Carlos Pipo Lopez and Samuel Yaron Brill, on the left, and Ray Dionaldo, on the right, all of FCS (Filippino Combat Systems) Kali, give Dwayne Horvath’s (second from right) Aku-Strike Mimic 16-T, an LED training knife with tones, resounding thumbs-up.

“I noticed some students going through the motions of training with the knife and wondered if they realize how deadly a knife can be. I then asked myself, ‘How could I be more aware of being cut and the danger of the blade and also convey to my partner that he is in danger or is being cut? We need something to alert us when contact is made, or what I coin, ‘confirmation of contact,’ while training,” Dwayne explained.

When you take away shock and chalk, you have light or sound left. “Now how do I make this work?” Dwayne asked himself. He had some knowledge of patents. He knew that if he designed something simple, he could get a broad patent. That would in turn mean he would need to minimize parts and keep the construction of the training knife simple. That is a challenge with all the patents out there. He knew he needed at least one switch to turn it on. Any more and he might be infringing on someone else’s design.

Then Dwayne asked himself, “What would be the best way to make the blade send a signal to the electronics? I started drawing and one hour later I figured out the basics. Of course, there were many thoughts and designs in between,” he added.

The immediate feedback provided the lights and tones of the Aku-Strike, making combatives training more realistic.
With the Aku-Strike in the sheath, the battery tray angle also serves to register your fingers to hook the handle for a quick draw. This is one feature that attracted Ray Dionaldo, of FCS Kali, as the feel was similar to his quick-draw knife. The knife also has a secure feel when your hands sweat. Contacts for Aku-Strike Knives are listed at the bottom of this article.

Dwayne was on his last chance with the U.S. Patent and Trademark Office. After reading many patents and going through a few attorneys, he got the patent worded appropriately. He then contacted an attorney who secured a patent. Two months later, Dwayne received the kind of broad patent he had hoped for. Then he got an additional patent.

The Aku-Strike Mimic T-16 has received endorsements from law enforcement agencies whose members must be thoroughly trained for whatever they might find on their beats, including an aggressor with a knife. Martial artists like Ray Dionaldo of FCS (Filipino Combat Systems) Kali, Doug Marcaida of “Forged in Fire” fame and Funker Tactical, the home of all kinds of fighting videos, have all given the Aku-Strike their nod of approval. Even, Setcan, the company that invented the Shocknife, has endorsed the Aku-Strike. The two training knives are not really competitors since one can be used on a more regular basis, while the other can be used periodically to maximize the intensity of a particular training session.

Dwayne had originally envisioned an aluminum blade. “I took it to an Airsoft range. Kids were swinging for the fences. OK, not safe with aluminum for teens, plus you know it hurts—that’s a given,” Dwayne commented. He moved on to polycarbonite. “The polycarbonite had limitations with flex and strength, but overall it was a win, and much more forgiving,” he emphasized. “As a matter of fact, it hurt much less than many rubber trainers and, of course, aluminum.”

Dwayne’s goal was to appeal to a wider, younger demographic that was just starting out with their combatives training to hardcore adult players of Airsoft and paintball. He also wanted to reach law enforcement and martial arts professionals. He finds the inventing to be easier than the marketing. But without that creativity, there would be nothing to market. Dwayne received the kind of encouragement and validation he needed throughout his life, later when his business was a success, but also earlier around the race tracks of New Jersey.

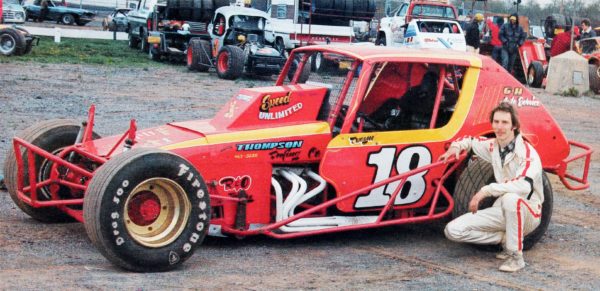
Dwayne Horvath of Aku-Strike Knives spent his early years working on race cars.
Dwayne Horvath of Aku-Strike Knives spent his formative years on the dirt-track speedways of New Jersey. He was given the encouragement and leeway to tinker, to daydream and now in his retirement he has invented a training knife that gives instantaneous pressure-based feedback through LED light and tone during combatives training. (Photo by Bob Snyder)

“At an early age, I loved racing and would go to Flemington Speedway, a local dirt track…It was a family event every weekend, consisting of fast cars sliding around the dirt track and a bucket of fried chicken,” Dwayne recalled.

“One night my favorite driver crashed real bad, destroying the starter’s stand,” Dwayne felt terrible and wanted to help. He got his father’s permission, and Howie Cronce took Dwayne to his house and let him help. “After school I would ride my bike about 10 miles to his shop, work to the wee hours.” Dwayne would eventually fall asleep and Howie would wake him, put his bike in the back of his pickup and take him home.

Aku-Strike Inventor Helped Race-Car Driver Howie Cronce

“In high school I wasn’t the sharpest tool in the shed. I usually wanted to look out the window and daydream, but I did rebuild a teacher’s engine on his Studebaker and built go-carts from scratch.

“In my racing days, I had what some would call some crazy ideas (probably from daydreaming) about the workings of a car suspension,” he explained. He needed to learn more, but from where? In those days, access to the Internet wasn’t readily available. He decided to sneak into the library at a technical college and hit the books and microfiche to research the effects of tire-slip angles and G-force on race cars.

“I then saved money to buy a G-meter to put in our dirt car, which had never been done before. When uploaded to a laptop, this would show all the forces of breaking, acceleration and cornering in real time so we could see what and when things were happening.” Then adjustments could be made to the shocks, springs and geometry on the car. “I was invited to the Penski shop to study the new shocks we used and got to know Ray Evernham before he teamed up with Jeff Gordon and Hendrick Motorsports.”

And it’s been like that ever since. If grades were given out in daydreaming, Wayne would score an A-plus.

Contact Dwayne Horvath, Aku-Strike Knives, 429 Mechlin Corner Road, Pittstown NJ 08867; 908-200-1638, [email protected], www.akustrike.com.

A Digital Subscription To BLADE Is The Answer

Save $4 off the print price of a annual subscription to BLADE Magazine with a digital subscription.
You can read your digital issues of BLADE Magazine anywhere you have your phone, tablet or computer, and there’s no need to find storage for all your old issues.

If piling-up issues of magazines seems like a waste to you… If you feel like you don’t have time to read a magazine… If you like the stories we offer in BLADE, but want a more economical option, then a digital subscription is the answer. An annual subscription to BLADE is $17.98, $4 off the print price.


The Tony Test: Lockback Whittlers

Tony Bose said if you can make a lockback whittler, you have arrived as a knifemaker.

While the whittler is a classic pocketknife pattern that dates back at least to the 1850s, a variation on the theme incorporating both the lockback and slip joint mechanisms offers a challenge to the custom knifemaker and a delight to the owner of this intriguing style.

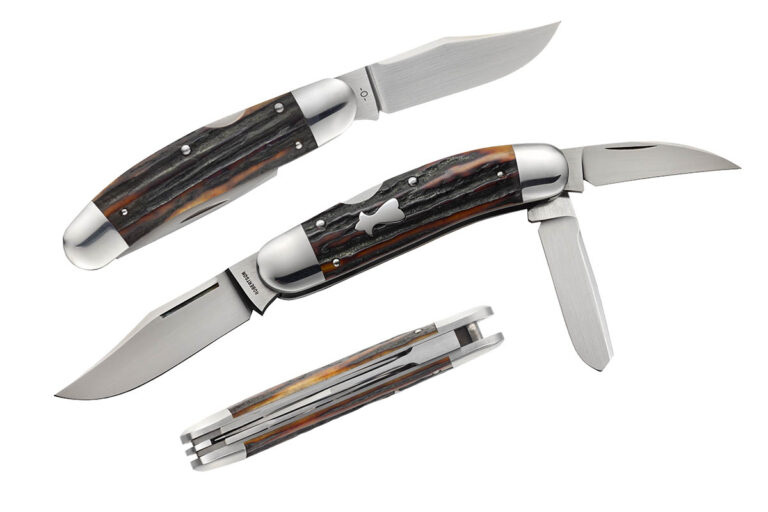
Custom knifemaker David Taber explains his take on the whittler as a three-blade knife with the main blade on one end and two secondary blades on the other. Simple as that. However, from definition to completed construction it’s a bit more complicated, particularly when the lockback mechanism is thrown into the mix.

“The whittler as originally designed was very functional in that the larger main blade is used for making larger cuts and the two smaller blades are for more detailed cutting,” Taber advised. “The knife is necessarily thin by design with the two small blades nestled on either side of the main blade in the closed position, which makes for a slim, pocket-friendly knife.”

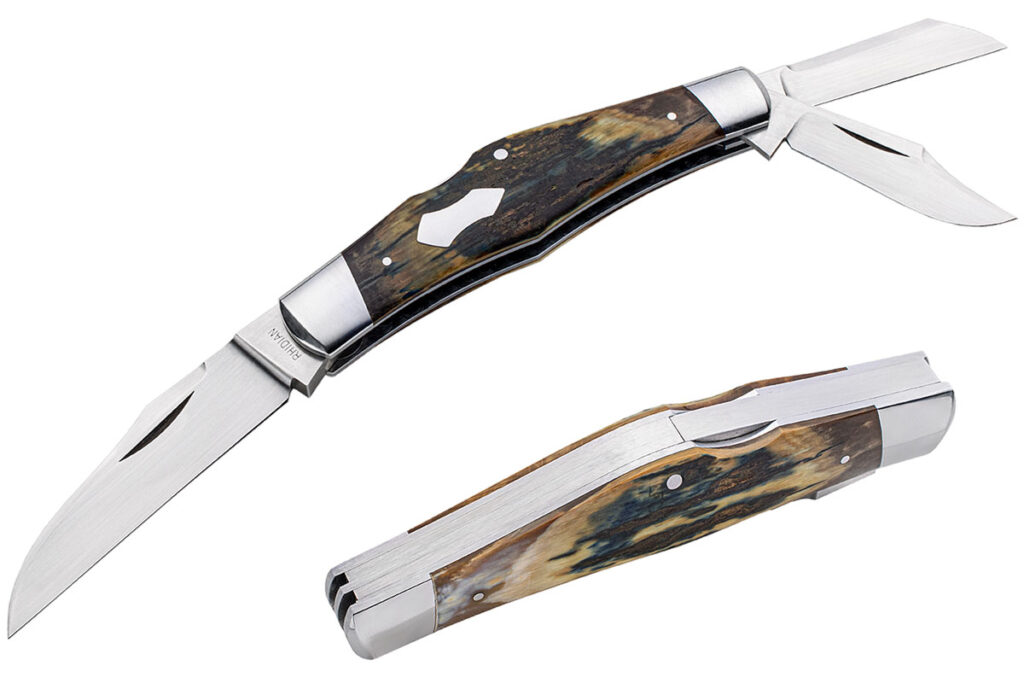
Taber’s rendering of the lockback whittler features hollow-ground blades of CPM 154 stainless steel and a mammoth ivory bark handle. The main locking blade length is 3 inches and his price for a comparable piece would be $2,100. He attributes an early interest in the lockback whittler to comments made by BLADE Magazine Cutlery Hall-Of-Fame® member Tony Bose in a 2008 issue of BLADE® relating to the skill level required to make one.

BLADE Magazine Cutlery Hall-Of-Fame® member Tony Bose (Kerry Hampton image)

“I was intrigued and called Tony,” David remembered. “That single conversation started a lasting friendship and started me collecting and eventually making knives. In later years he challenged me to make a lockback whittler and shared his pattern with me. He said, ‘If you can make one of these, David, you will have arrived.’”

Taber took on the task with gusto and through personal experience describes the challenge. “The difficulty, in my opinion, lies in centering the main locking blade in the closed position between the two slip-joint blades at the opposite end without rubbing during function. Equally difficult is balancing the two springs that operate the two slip joints on the one end and the underside of the lockbar on the other end. Think of it like a sophisticated teeter-totter,” he explained. “Care must also be taken to maintain the length, particularly the end that controls the lock tab. It has been my experience that to shorten it even the slightest amount will increase the load deflection rate and thereby make the lock tab not function properly.”

David Taber’s lockback whittler sports hollow-ground blades of CPM 154 stainless steel, stainless bolsters and a mammoth ivory bark handle. His price for a similar knife: $2,100. (SharpByCoop knife image)

The level of difficulty in making the lockback whittler contributes to its collectability, Taber says, which in turn makes the design rarer in the marketplace. “The typical collector of the lockback whittler is usually aware of the skill required to make such a knife and achieves great satisfaction from owning one,” he reasoned.

MOST DIFFICULT?

Knifemaker Luke Swenson shares a connection to Bose with Taber. The Case-Bose collaboration effort introduced Swenson to the design. “The blade configuration and the smaller blades being half the thickness of the main blade set it apart from other patterns,” he commented.  “Some whittlers have a ‘catch bit’ or a piece of liner material to hold the blades apart at one end so the main blade clears, and some have a tapered wedge, commonly called a splitback. In the case of the lockback whittler, there is a full spacer that rests between the rear slip-joint blades. Also, in a lockback whittler the small blades and spacer are exactly one-third the thickness of the main blade. The main blade locks, and I believe this is for safety and allows for harder use.”

Swenson’s lockback whittler features a hollow-ground 2.8-inch blade of feather damascus forged by Mike Tyre. The fittings are 416 stainless steel and the handle is natural stag. Luke’s price for a similar piece is around $3,000. He describes the lockback whittler as “the most difficult pattern to build, even more so than a six-blade. I believe it isn’t just the combining of elements, but the springs are somewhat tricky in that you have to be paying attention—one false move, or even one over-aggressive pass on your grinder, and you’ll be making new springs. Grinding the small blades isn’t easy and requires a developed feel for getting them right. Very challenging! But if it’s right, the results are magic.”

Feather damascus forged by Mike Tyre comprises the hollow-ground blades of a lockback whittler by Luke Swenson (inset)in natural stag and integral bolsters and liners of 416 stainless. Closed length: 4 inches. Luke’s price for a similar knife: $3,000. (SharpByCoop knife image)

According to Luke, the construction of the slip joint and the lockback are completely different, at least in the opening stages. Putting the two mechanisms together with tiny parts, delicate springs and narrow tolerances tests the skills of the knifemaker in an extraordinary way. “The blades have to sit in the handle to make their tips sit in the handle,” he concluded, “and yet the nail nicks have to be accessible. That takes time and patience to get right.”

Renowned custom knifemaker Wolfgang Loerchner happened past Swenson’s table at the East Coast Custom Knife Show some time back and asked if Luke could make a lockback whittler. “This was in the March of that year, and we agreed on a BLADE Show delivery in June,” Luke laughed. “Keep in mind I’m an unknown maker, and starstruck doesn’t quite describe what I was feeling. I said, ‘Sure, I can get one built.’”

From there, Swenson went to “The Maestro,” Cutlery Hall-Of-Famer Bill Ruple. “He was quite amused and laughed, a little more than was polite I thought, but he agreed to help me through the process,” Luke recalled. “Like all my slip-joint making, anything I learned to do right was in Bill Ruple’s shop. He was key. I don’t believe I would have made the deadline if he hadn’t helped me. I’d send him pictures, and he’d say, ‘remake this and fit it like this instead.’”

The bottom line for the Swenson lockback whittler is its tremendous appeal. “It is a sleek, streamlined beauty,” he offered. “Like anything Tony Bose decided to do, it is elegant and feels comfortable in the hand.”

COMPLEX SIMPLICITY

When knifemaker Tim Robertson envisions his next lockback whittler project, he knows what he’s getting into. “What truly makes the lockback whittler so difficult to build is the way the springs operate,” he noted. “The slip joint is a standard arch spring pushing down on the blade tang while also lifting up at an equal force on the rear of the lockbar, keeping the blade firmly in position. Too much load on either end loosens the opposite end. In a nutshell, the springs have to be balanced between lockbar function and slip-joint function.”

According to Tim Robertson, “The lockback whittler is appealing due to the complexity of the multiple parts and simplicity of design and operation.” Note the spacer that separates the two smaller blades Robertson mentions in the story at the bottom of the closed knife at right. (Mitchell Cohen knife image)

Robertson has become well known for his lockback whittler proficiency, and two recent examples have won awards. His winners of Best Locking Folder at BLADE Show West 2022 and the 2023 Knifemakers’ Guild Best Multiblade Folder both sport CPM 154 stainless blade steel, 416 stainless frames and stag handles. His prices for similar knives would be about $2,500 each.

With a simple explanation for his foray into lockback whittlers, Robertson remarked, “I just wanted to see if I could do it. The lockback whittler is appealing due to the complexity of the multiple parts and simplicity of design and operation.”

Defining the whittler as a knife with three blades and two springs, Tim commented, “The most common types are the splitback variety with a tapered spacer separating the two pen blades. The reason for the tapered spacer is to allow clearance for the blade to fold into the handle without having to have the main blade thickness increased, and then offset ground for the clearance so that one pen blade falls on each side of the main blade.”

SIDE-BY-SIDE KNIVES

Knifemaker Rhidian Gatrill consulted friend and historian Neal Punchard on the origin of the lockback whittler. In response, Rhidian learned that the earliest examples of it were probably made in Sheffield, England, a major center of European cutlery, and later by German and American cutlers.

“It is a premium pattern and difficult to make, so not many companies took on the challenge,” Gatrill explained. “Some of the early Sheffield multiblade sportsman knives and a few rare jackknives had lockback main blades and slip-joint blades, but they are basically two knives side by side. There’s nothing quite like the lockback whittler. There are a few other pocketknives that have locking main blades and slip-joint secondary blades, but they’re not lockback knives. The electrician knives, for example, have a [locking liner] on the screwdriver blade. And there are pen-blade-release knives where the small secondary pen blade gets pushed in to unlock the main blade.”

Rhidian Gatrill’s Lockback Rhiddler captured Best Folder in the custom category at last year’s BLADE Show West. The cleverly named lockback whittler features a locking 2 7/8-inch flat-ground wharncliffe and 2-inch hollow-ground slip-joint clip and coping blades of CPM 154 stainless steel. His price for a similar knife: $2,600. (Jocelyn Frasier knife image)

Motivation to make the challenging pattern was easy for Gatrill, who won Best Folder at BLADE Show West 2023 for his lockback whittler cleverly named Lockback Rhiddler. “I like interesting mechanisms and figuring out how to make them work,” he related. “I wanted to challenge myself and see how hard it was to make. Plus, I was attending my first knife show ever, which was the Oregon Knife Collectors Association show in Eugene, Oregon, and I wanted to take something that would possibly win an award. That knife ended up winning Best Folder and Best of Show.”

Looking for examples of lockback whittlers that were striking in appearance and function, Rhidian did some research and recalls, “Like most pocketknife makers, I admire the knives of Tony Bose, Bill Ruple, Ken Erickson and other masters that came before me. I traced photos of their knives and read forum posts that give a few tips, and I asked a few questions from other maker friends that have made lockback whittlers.”

That research led to an opportunity to present a lockback whittler interpretation that resonated with the collector community. “I believe knife collectors like them for their rarity, complexity of mechanism, and interesting function of combining the lockback blade with the slip-joint blades,” Rhidian concluded. “They also look cool with the thick tang on the main blade that steps down thinner and tapers to a point. A locking blade is always a little safer than a slip joint technically, so there’s that for the user. Not many custom makers have made them, and those who do don’t make many!”

Read More

Finishing Curly Maple Knife and Tomahawk Handles

0

This video shows how to finish Curly Maple knife and tomahawk handles. ABS Associate member RW Wilson demonstrates how to sand, stain, and finish curly maple handles.


BLADE Recommends
For further instruction on making tomahawks, click here to check out this BLADE download.

Make a Bowie Knife in 10 Steps

0

bowie knife guide to knifemaking
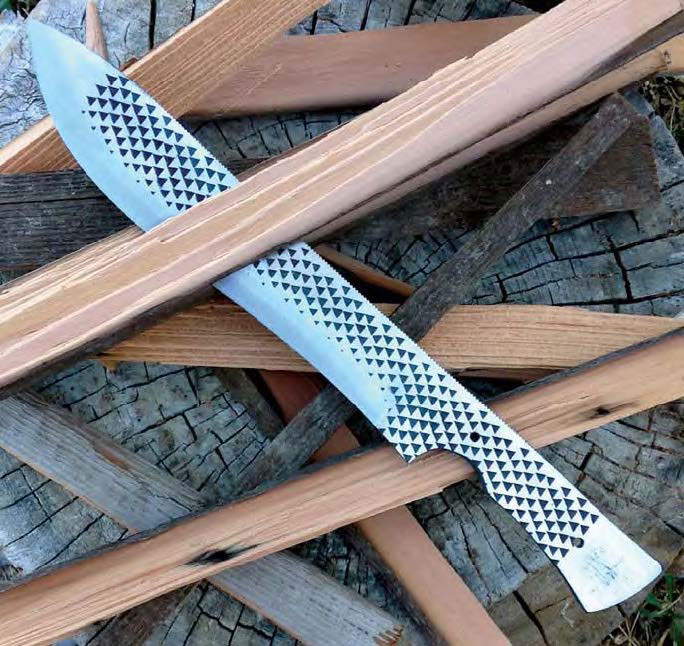
This is what the finished project looks like. The handle is not covered in this tutorial, but the design is ready to take any number of options. (All images by the author)

I’m going to walk you step by step through making a bowie from a common farrier’s rasp, as simply as possible, with a few tips to save time and improve the finished blade as we go. It is a simple bowie-style camp knife useful for all sorts of tasks.

1) Pattern Sketch

knifemaking bowie
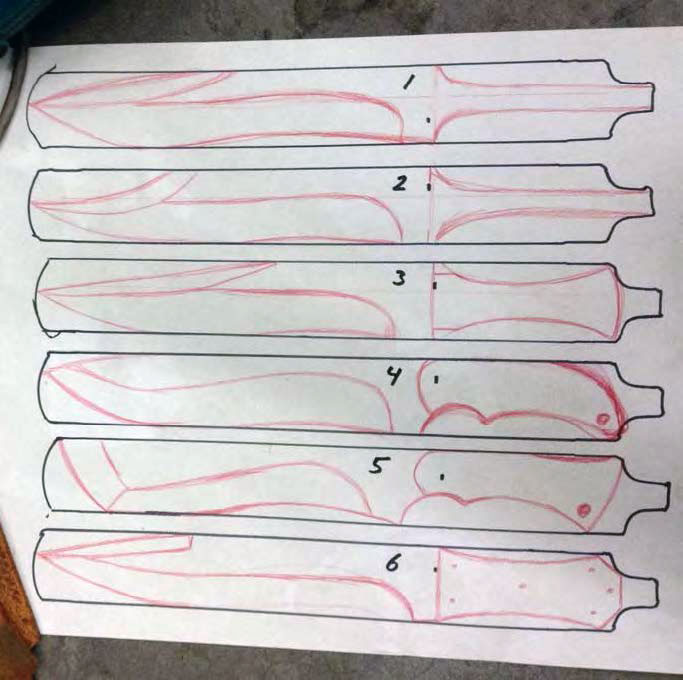
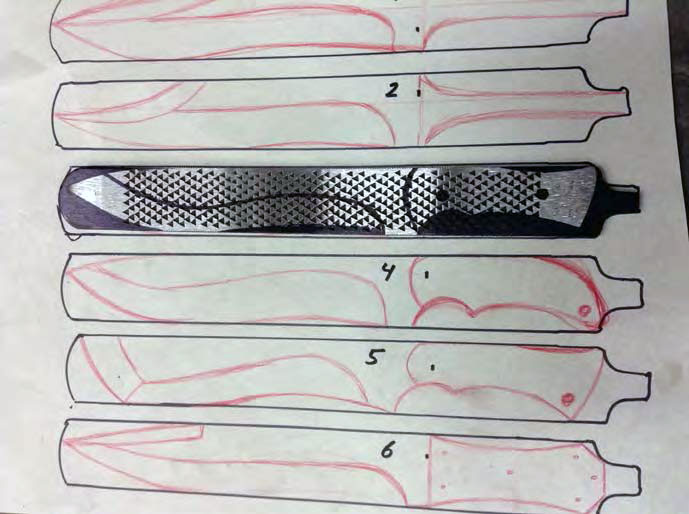
The author traced assorted patterns on the rasp images on a large sheet of paper so he could compare each style side by side and see what works and what doesn’t.

The first thing you need to do is decide on a style that suits your needs and your purpose. I find that visual aids are the easiest way to get the results I’m after, so I often do several sketches and drawings to decide what I’m trying to accomplish.

For this I traced the rasp multiple times on a large sheet of paper so I could compare each style side by side and see what works and what doesn’t, as well as what the maximum potential of my material was. I decided on blade shape #4 with handle shape #5. The combo should be a good general chopper and comfortable in the hand.

By visualizing this way I can mix and match infinitely. Don’t be afraid to get creative, especially when using recycled and often-free materials. This is a chance to express yourself and your vision in steel.

2) Annealing

tutorial for making knives
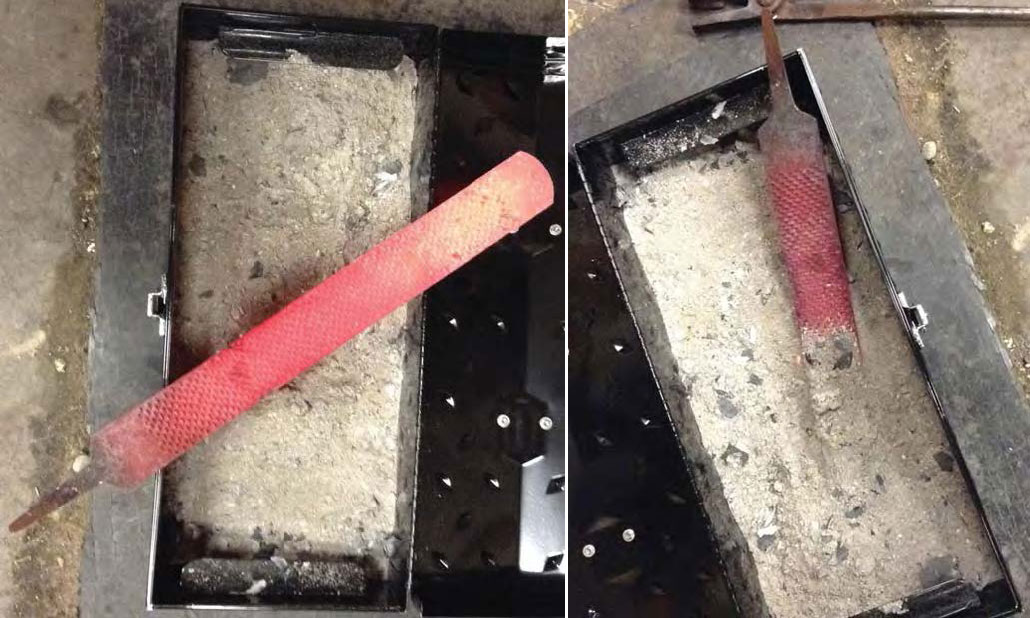
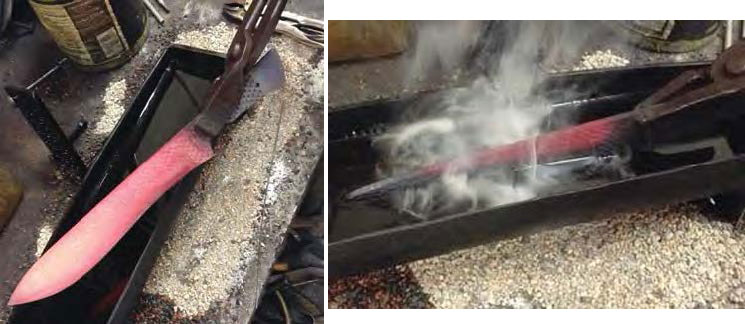
Heat the rasp to nonmagnetic and then bury it in a simple metal toolbox filled with clean wood ash.

Now you have a design in mind, but, before you can achieve bowie knife greatness, you must anneal the rasp so it can be shaped, drilled and ground more easily.

It is certainly possible to make a rasp or file knife without annealing, but great care must be taken not to get the steel too hot and ruin the temper. Moreover, the high hardness of the file in its current state means a blade made this way would be very brittle and prone to breaking under hard-use conditions.
If you have access to a heat-treating oven, by all means use it to anneal your steel. This is a very simple and basic build, so I’ll be heating the rasp to nonmagnetic and then burying it in a simple metal toolbox filled with clean wood ash. Burying it insulates the steel, allowing it to cool very slowly. The slow cooling softens the steel so it’s easier to work.

Vermiculite is also great for this step if you don’t have access to wood ash. Vermiculite can be purchased at most garden centers and insulates very well. It will take several hours for the rasp to cool. Don’t rush it! It will be well worth it once you start filing, drilling and grinding.

3) Design Transfer

how to make a knife
Once the teeth are cleaned off, transfer the blade design to the rasp.

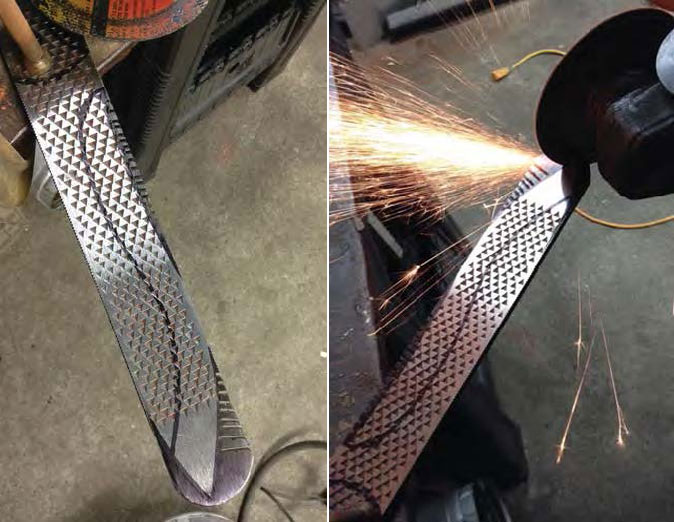
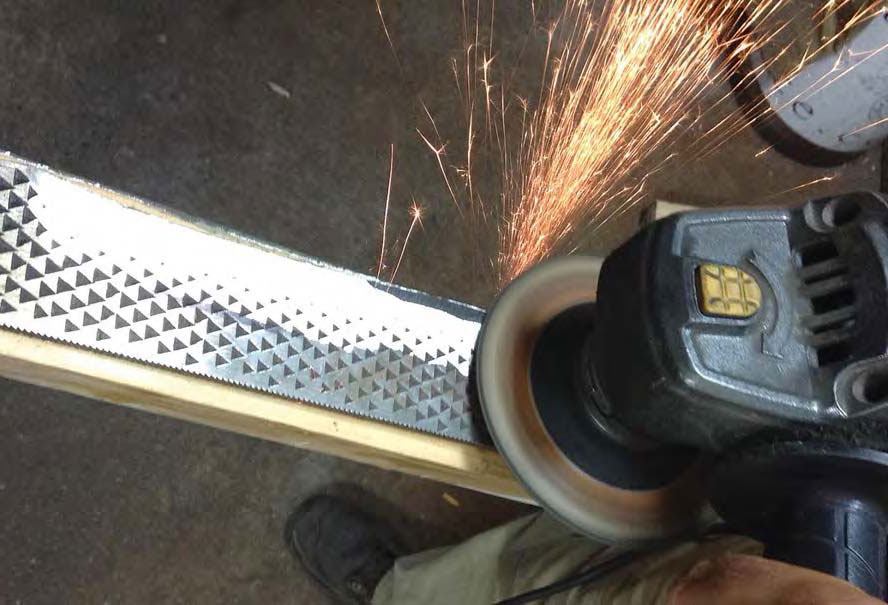
The rasp has cooled and it’s time to go to work. The first step is to grind the teeth off both sides. This leaves a nice, flat surface to work with but the memory of the rasp is left behind, which gives the knife a distinctive, rugged look.

An angle grinder will work great for this task, but any number of basic tools will suffice. Use whatever is readily available to you. Once the teeth are cleaned off , transfer the blade design to the rasp. Cutting out the pattern and over spraying it with black paint works very well.

However, since this design is fairly simple, I drew it out with a permanent marker.

4) Notched & Cleaned Up

steps for making a knife
When you go to cut out the profile from the rasp (left), notching out the shape with a hacksaw or cutting wheel (right) makes the job much easier.

Now you can start cutting out the profile. Notching out the shape with a hacksaw or cutting wheel will make the job quite a bit easier. I find that removing small pieces of metal is easier then trying to make large cuts.

After the bulk of the steel has been removed, the final profile can be shaped out with files or an angle grinder.

5) Drilling Pins

guide for making a knife
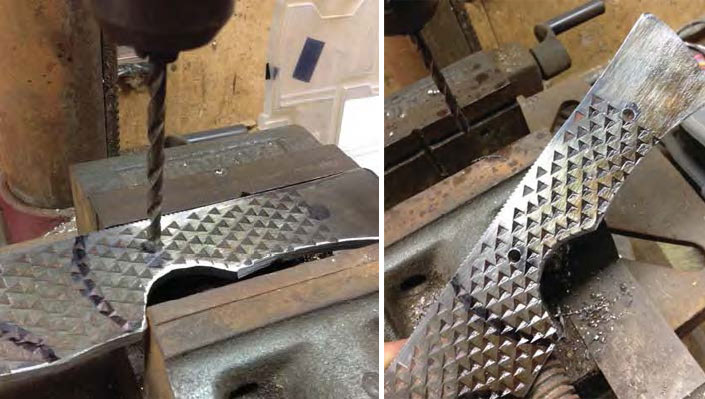
Drill a couple of holes for pins. The author uses brass bolts for the latter.

The blade is starting to take shape. Now is a good time to consider what handle material is best for your creation.

There’s no wrong choice. With the seemingly limitless options available today, you can truly express yourself from mild to wild. If you’re feeling traditional you can go with antler or perhaps stacked leather.

If you want to go more cutting edge, there are hybrid burl blocks with every color resin in the rainbow. Shredded money and eggshells are even finding their way into knife handles these days.
I’m going more traditional, so now is the time to drill a couple of holes for pins. I’m going to use brass bolts as pins. They are inexpensive and can be bought at any hardware store. The threads add an extra mechanical bond when they are epoxied into place, and also act as built-in clamping devices to ensure a solid, tight fit-up when the scales are applied.

6) Grind the Bevels

guide to how to make a knife
Rough grind the bevels. The author used a 4-inch angle grinder. Leave the edge about the thickness of a penny.

With the profile cleaned up and all necessary holes drilled, it’s time to start grinding in the rough blade bevels in order to get your blade ready for hardening.

The trusty 4-inch angle grinder goes to work again, though a bench-top grinder or even a good, sharp file will get the job done. The goal here is simply to remove the bulk of the metal on the sides of the blade evenly so there is less work to do after hardening.

Don’t grind all the way to sharp at this point! Leave the edge about the thickness of a penny—this will protect the steel that will become your cutting edge from overheating and decarburization, helping to ensure your finished knife will live up to its maximum potential.

Once the bevels are roughed in, finish up with sandpaper or a flap disc to 220 grit. Be sure to remove any deep, heavy scratches, as these could lead to cracks during hardening.

7) Heating and Quenching

Bowie knife tutorial step by step
After you heat the blade to nonmagnetic, quench the edge. 

Now you’re ready to harden some steel! I’m going to use a forge to heat the blade to nonmagnetic—aka the critical temperature—though a torch works equally well.

Slowly bring the blade up to temperature and check it oft en with a magnet. When nonmagnetic is reached, edge quench to harden the cutting edge, and leave the spine slightly softer for additional strength and toughness.

Submerge the blade in the quench oil once all the color has left the blade and it goes to black. Allow the blade to cool to room temperature in oil. This will take an hour or so.
A variety of things will work as quench oil and everyone has a favorite. Depending on the types of steel used, I’ve had good luck with canola oil, ATF transmission fluid and mineral oil. I quenched my blade in Texaco type A.

WARNING! Mixing hot steel with oil can and will cause a fire! Be sure to take appropriate safety precautions. A well-ventilated space free of other flammable materials, as well as personal protective gear and a fire extinguisher, are musts!

8) Check for Hardening

knifemaking process bowie knife
Once the blade has cooled, remove it from the oil and clean it off. Brake cleaner works well for this, as well as simple dish
soap and warm water.

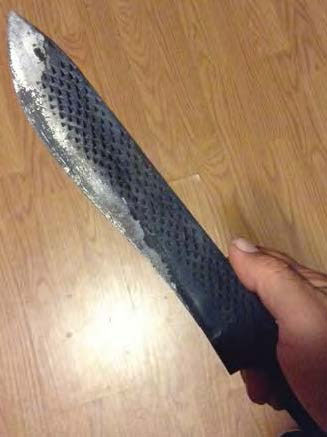
Once the blade has cooled, remove it from the oil and clean it off . Brake cleaner works well for this, as well as simple dish soap and warm water. If the hardening was successful, you should see an area of clean steel on the cutting edge where the carbon scale has popped off the blade.

A second simple and easy way to check for a hardened blade is with a fresh, sharp file. Run the file over the knife’s cutting edge. The file should skate easily and not bite into the edge. If this is the case, you are ready to temper the blade.

9) Tempering

tempering heat treating knifemaking bowie
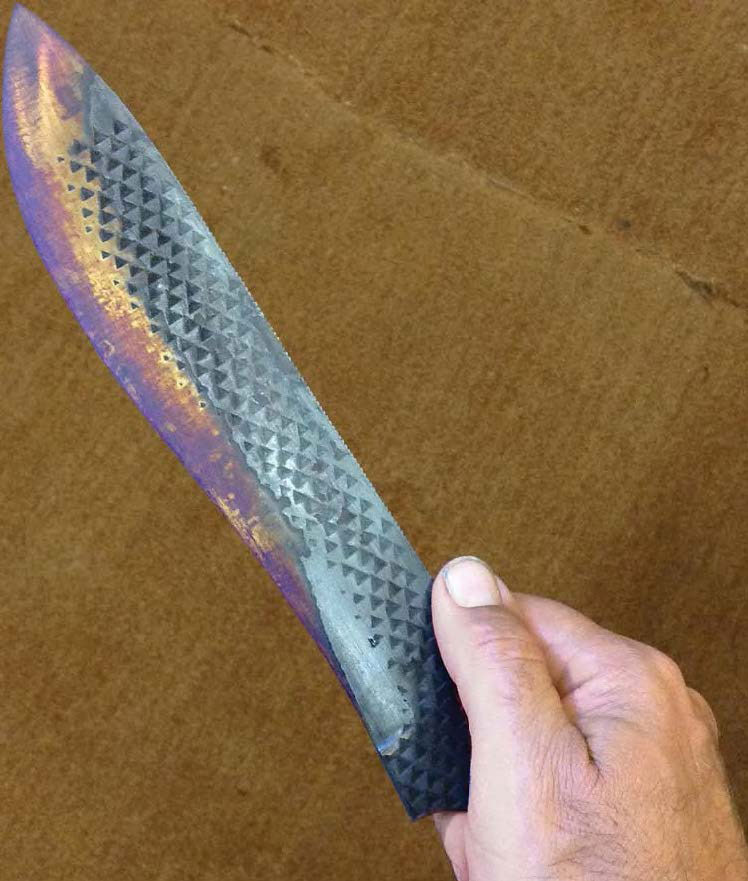
During the basic heat treatment and tempering process, the steel oxidizes and the clean portion changes color.

Tempering is a fairly simple process. Basically, in order to reduce brittleness and increase toughness, tempering is heating the blade to a lower temperature than you did in the annealing step.

Again, if you have access to a heat-treating oven, by all means use it. However, a toaster oven or basic household oven will work just as well. Oven temperatures vary greatly—especially toaster ovens—since they lack heavy-duty insulation. This means the exact temperature you need to use will vary as well.

I start by putting my blade in the oven for an hour at 375°F. As the steel heats it oxidizes, and the clean portion changes color. This is a simple, basic heat treatment and temper, so the color change is your indicator rather than an exact temperature.

As the heat rises the color goes from a bright gold to a shade of bronze straw, then a light purple to a blue on its way to a dark blue/almost black. The dark bronze to purple is your goal. The blade should be hard enough to hold a good edge but soft enough to not chip or break during use.
I did three one-hour cycles, each 25°F hotter according to my oven, and 425°F was the temperature that gave me the desired result. A simple trick to get a more even heat in a regular household oven is to put a sheet pan on the bottom rack.This holds heat closer to the element and keeps the temperature fluctuations to a minimum.

10) Finishing and Final Edge

Learn how to make knife from a rasp file
Jump into the rich tradition of knifemaking with this collection of essential books from BLADE. You’ll save a bundle with this bundle!

Now you have a hardened and tempered blade ready for finishing and a final edge.

You need to remove only a small amount of steel to get down to the final edge. Don’t rush at this point! Go slowly to keep from getting the steel too hot and ruining all your hard work up to now. As long as the steel stays bright and shiny you will be fine. Any discoloration at this stage means overheating and the risk of losing the blade temper.

You also are working down to the final, finished and sharp edge. Stitches aren’t cheap! Be aware of where your fingers are.

Some light grinding or fi ling as in the previous steps will bring your bevels down to the finished edge. Polish to at least 220 grit. A higher-grit polish will look more finished, as well as be less prone to rust, and provide smoother, more fluid cuts.

Once you get to 220, it’s time to apply an edge and see how you did. Some simple test cutting and chopping will tell you if you need to change anything, such as the thickness of your cutting edge or if you need to re-temper perhaps a few degrees hotter. Use the materials you originally planned on cutting with your new bowie to decide this.

For example, since the blade primarily will be a camp knife, simple tests such as splitting kindling, cutting rope and twine, and making the all-important hotdog stick will tell you what you need to know.

Time to Make the Handle

Click here to read how to make a handle for this knife.


Advertisement

Must Read Articles

Read this before you make a knife

Knifemaking 101 – Read This Before You Make a Knife

  by Wayne Goddard My experience has taught me that there's nothing like digging in and getting started. I've often said the hardest part of the...
how to forge damascus steel

How to Forge Damascus

Advertisement
Advertisement