
5 Angle-Guide Knife Sharpeners That Make The Cut

1

The proper angle is key to a sharp blade. Here are the angle-guide sharpeners that ensure you’ll always get it right.

A big part of sharpening, aside from proper sharpener selection, is how to select and maintain the proper angle of the blade to the sharpener. In fact, the key to successfully sharpening any blade regardless of the grade of steel is being able to maintain that angle. Ever try sharpening freehand on a bench stone with little experience doing so? The reason folks get frustrated with learning to sharpen is they don’t keep the angles consistent. It’s all about the angles. You must take into account what use your knife will see and sometimes that determines the specific angle to use.

You probably know of the angle guide kits with a metal clamp that affixes to the blade and has uprights on either end with a series of holes that correspond to various degrees of angles. Such kits all help instill confidence and the ability to subtract guesswork at maintaining the desired angle.

SHARPENER TYPES
There are plenty of sharpeners capable of reproducing keen edges. Avoid the pull-through types that require you to drag the blade through. Those are set at one angle and use carbide to get the job done. These will ruin a blade in time, and I don’t recommend them. You need a sharpening kit that’ll help establish and hold a consistent angle. All you need to be concerned with is making the motions to get the edge sharp.
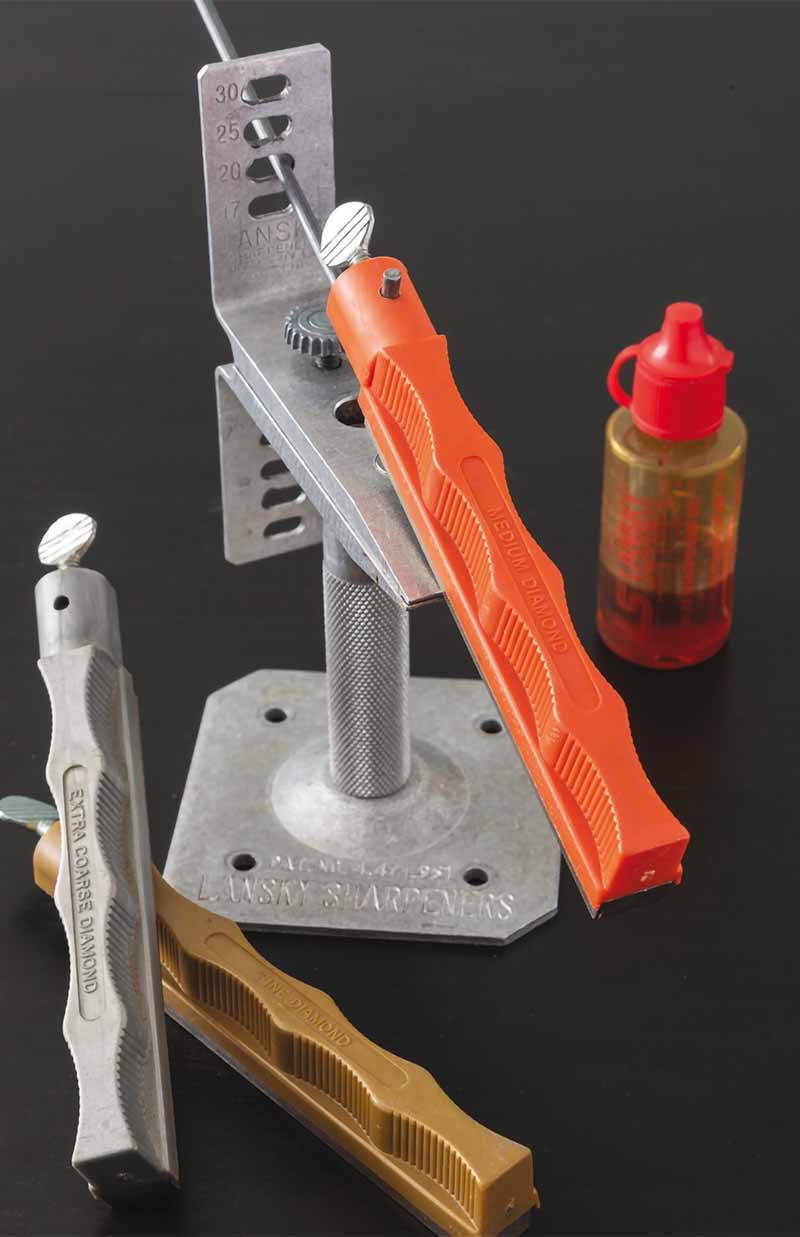
The Lansky Deluxe Diamond Knife Sharpening System is one of the oldest angle guide kits on the market. Four various grits of diamond-coated hones are featured, including extra-coarse for fast work of reviving dull blades. The sturdy aluminum clamp holds the knife securely.

Lansky’s four-stone Deluxe Diamond System Precision Knife Sharpening Kit is the best the company offers in angle guide clamp units. It includes an extra coarse hone great for reprofiling edge angles. It also has coarse-, medium-, and fine-grit diamond-coated hones for fine-tuning the edge once it’s been established. The aluminum clamp is sturdy and offers four edge angles: 17, 20, 25, and 30 degrees. The kit stores in a sturdy plastic storage case. MSRP: $114.99.

GATCO offers the Ultimate Diamond Hone Sharpening System, which is similar to the Lansky. Featuring coarse-, medium-, and fine-grit diamond-coated abrasives, the kit includes Ultimate Finishing and triangular-shaped serration hones, too. It works on plain, serrated, and partially serrated edges. The hones are wider and longer for more effective use and have molded-in integral handguards for safety. There’s also a plastic storage case. MSRP: $119.99. 


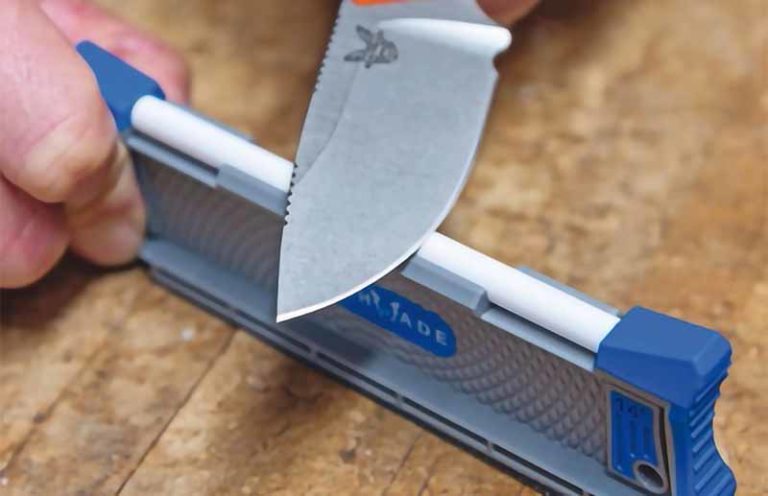
To sharpen the CPM S90V blades with the SelectEdge 14 degree angle of its Hidden Canyon Hunter and Saddle Mountain Skinner, Benchmade offers the model 50082 14 Degree SelectEdge Guided Hone Tool. Designed in conjunction with and manufactured by Work Sharp, this compact sharpener incorporates a fine grit ceramic rod and a leather strap on the backside. Built-in guides set the blade at the correct 14-degree angle. The idea with this one is to apply frequent edge touchups. A premium steel, S90V is notoriously difficult to resharpen, a difficulty negated via frequent edge maintenance sessions with the 50082. MSRP: $25.
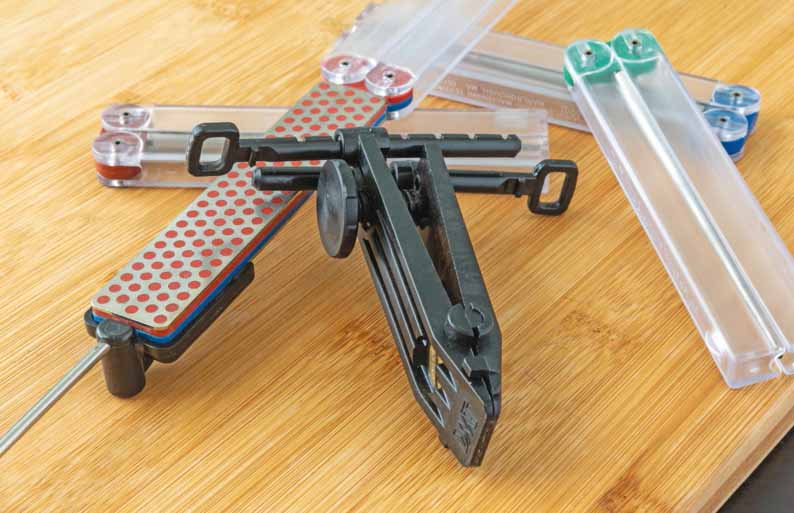
DMT’s Magna-Guide angle kit includes a magnetic guide rod and sturdy blade clamp with adjustable angles. Use  any model DMT Double Sided Diafold folding fi le and you have two sharpeners in one—a freehand fi le and an  angle guide kit.
DMT’s Magna-Guide angle kit includes a magnetic guide rod and sturdy blade clamp with adjustable angles. Use
any model DMT Double Sided Diafold folding fi le and you have two sharpeners in one—a freehand fi le and an
angle guide kit.

For knives without the SelectEdge technology, Benchmade offers the Edge Maintenance Tool, also designed with and manufactured by Work Sharp. It uses a fine-grit ceramic rod and a leather strop but in a more compact folding format with a pocket clip for easy carry. As with the 14 Degree SelectEdge Guided Hone Tool, built-in guides assist in achieving the optimal angle for edge restoration. The Edge Maintenance Tool works well with pocketknives, fixed blades, and tactical folders—pretty much any knife. MSRP: $50.

DOWNSIZED 2X72
For the more advanced sharpeners among you, Work Sharp offers the Ken Onion Elite Sharpening System, a variable speed motorized unit employing long-lasting flexible abrasive belts made by Norton Abrasives. It’s pretty much a downsized version of a larger and much more expensive 2×72 slack belt grinder used by many knifemakers.
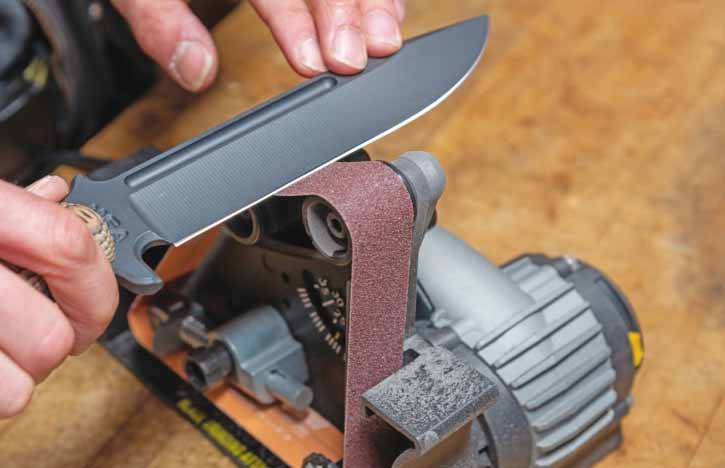
The Work Sharp Ken Onion Elite sharpener is pretty much a downsized version of a larger and much more  expensive 2x72 slack belt grinder used by many knifemakers.
The Work Sharp Ken Onion Elite sharpener is pretty much a downsized version of a larger and much more expensive 2×72 slack belt grinder used by many knifemakers.

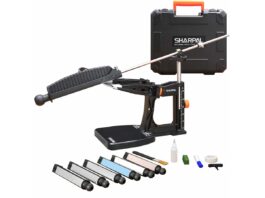
Designed by BLADE Magazine Cutlery Hall-Of-Fame® member Ken Onion, the Elite makes quick work of bringing completely dull and/or damaged knife edges back to life and is fully adjustable for applying edges between 10 and 35 degrees. The abrasive belts measure 1 by 18 inches and make quick work of any sharpening task. Once you become comfortable with how the sharpener operates, you can consistently grind an even edge on your blades. (Author’s note: Motorized sharpening is best left to those with sharpening experience.) MSRP: $199.95.

Diamond Machining Technology (DMT) offers the Double Sided Diafold Magna-Guide Sharpening System centered around the company’s Double Sided Diafold folding diamond files. The Magna-Guide System features the Aligner Blade Guide clamp with integrated, adjustable angle guides. A metal guide rod affixes securely to the Double Sided Diafold file via a large rare earth magnet. Attached to an FWCX Extra Coarse/Coarse Double Sided Diafold, the manual system can easily reprofile an edge to any one of seven pre-set angles.

DMT’s Double Sided Diafold diamond files are built well, highly effective, and among the best compact sharpeners on the market. One of the best things about the Magna-Guide is you can use the Double Sided Diafold files as stand-alone sharpeners without the guide rod and angle guide clamp. Consequently, you get a guided sharpening system and a standalone sharpener for the price of one. The Magna-Guide Kit’s MSRP: $27.49 (works with any Double Sided Diafold file).

Get More Knife Sharpening Info:

BIG Blades: 4 Monster Choppers for the Bush

BY JAMES MORGAN AYRES

Wherever folks live close to the earth, they use big knives

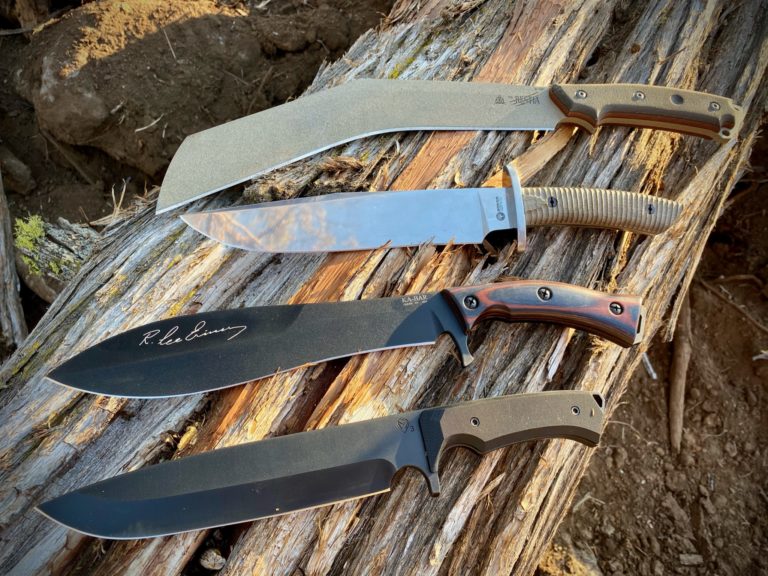
Little knives are convenient to carry but, if you have a lot of work to do, big knives are it. I’ve lived and worked with indigenous peoples in Latin America and Southeast Asia and found that wherever folks live close to the earth, they use big knives—machetes, parangs, goloks, bolos and the like. They use them for everything from rough work such as cutting poles and opening coconuts, to dressing out pigs and game, to delicate work such as slicing mangoes.

The advantage of the big blade was illustrated to me one day when I was working alongside a villager who, with his bolo and its 14-inch blade, cut wood for a fire, bamboo poles for a cooking rack, lopped off a banana leaf on which he filleted two large fish and sliced them thin as a sushi chef—all in the time it took me to bring down a few stalks of bamboo with my hair-shaving-sharp Randall Model 1.

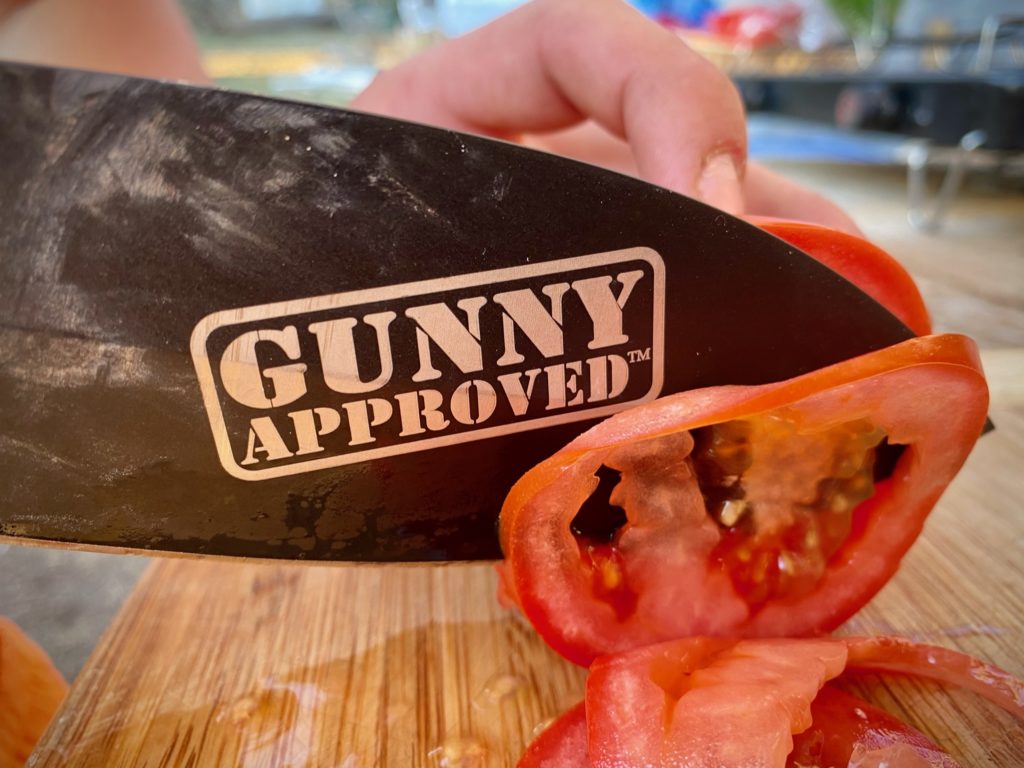
We reviewed the test knives with that standard in mind. We chopped and split wood and sliced meat and tomatoes. We also, just because, cut hanging rubber hose and slashed through water-filled plastic bottles.


LONG, TALL & HANDSOME: Boker Arbolito El Gigante


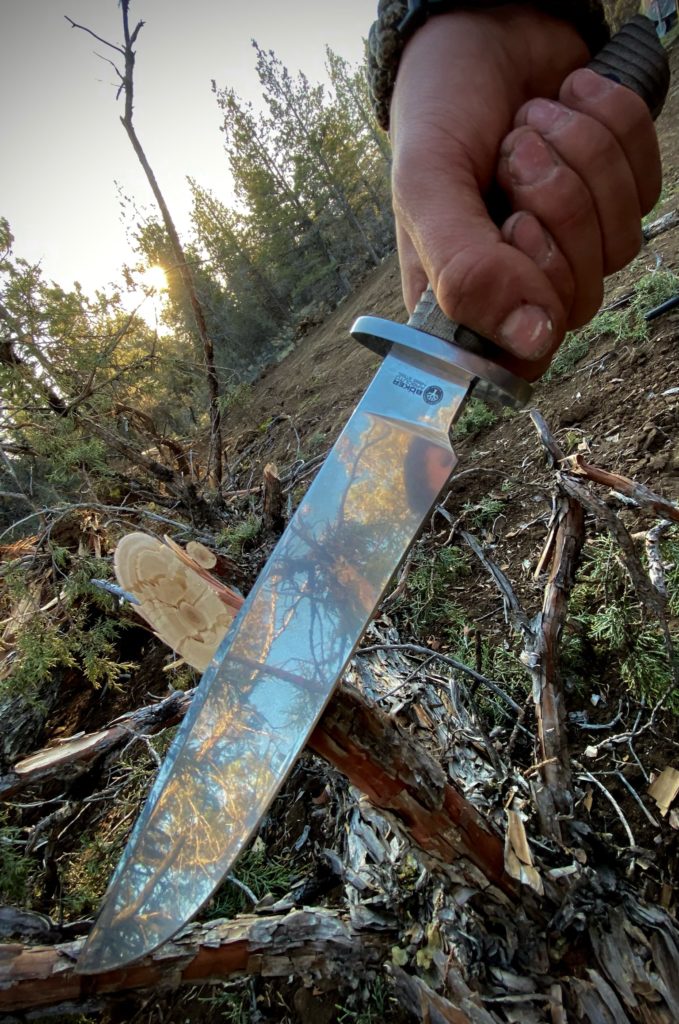
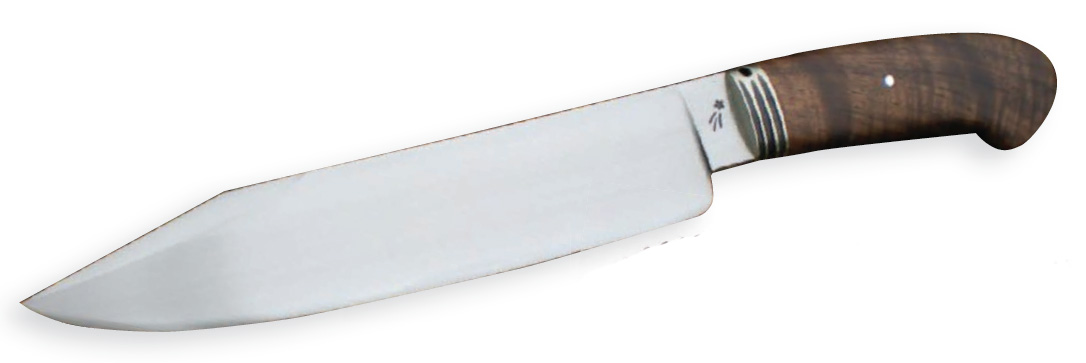
The Boker Arbolito El Gigante is a handsome classic bowie with a stonewashed blade, comfortable handle and nice leather sheath. Balance is excellent, all very much in the bowie tradition. Construction is top quality; so is performance. It cleaved 2-inch pine saplings with one stroke. The quarter-inch-thick spine was brought down to a well-supported edge fine enough to slice tomatoes, and slice meat thin enough to see light through the slices. We slashed rubber hose and the water bottles with ease.

Like all well-designed and crafted bowies, this is a versatile all-around knife.

A tree branch succumbs to the reflective blade of the Boker Arbolito El Gigante. It cleaved 2-inch pine saplings in one stroke.

BOKER ARBOLITO EL GIGANTE
Blade Length: 9.25”
Blade Steel: Bohler N695 stainless
Blade Thickness: .24”
Blade Grind: Flat
Blade Finish: Stonewash
Handle Thickness: .94”
Handle Material: Green Micarta®
Weight: 15.75 ozs.|
Overall Length: 14.75”
Sheath: Leather
Country of Origin: Argentina
MSRP: $229

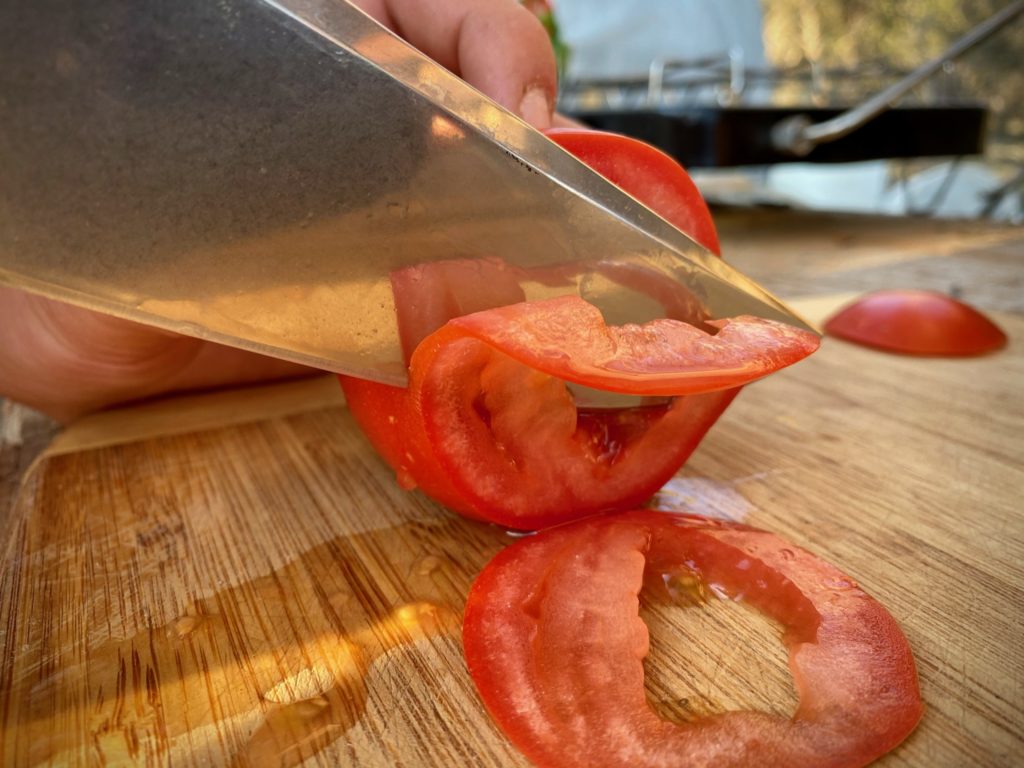
The El Gigante also proved its mettle after chopping wood by slicing a tomato nice and thin.


SEMPER FI! The KA-BAR Gunny


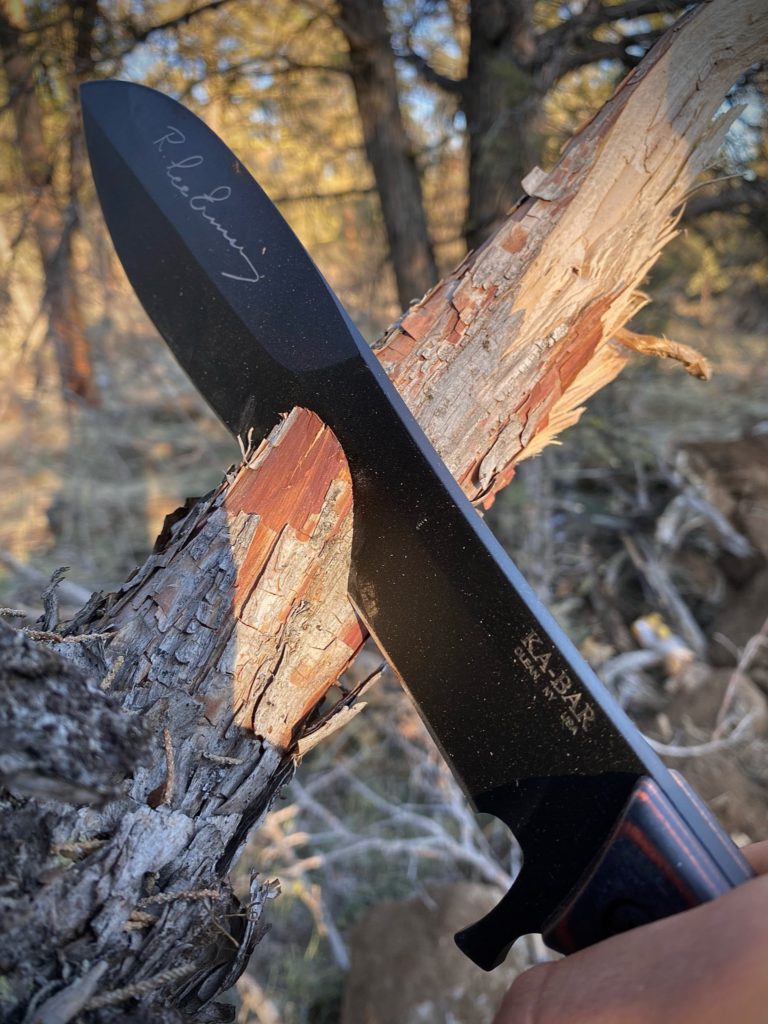
The KA-BAR Gunny is a hybrid design that resembles a bolo. I suspect R. Lee Ermey, the unforgettable Gunny who serves as the knife’s namesake, spent some time in jungles because this combination chopper/slicer’s performance is on par with village-forged bolos I’ve used in Southeast Asia, and that’s a high compliment. Its forward weight and terrific blade design promote efficient chopping.

The KA-BAR Gunny chomps into dry pine. Its forward weight and blade design promote efficient chopping.

We cut through 3-to-4-inch-thick saplings with two strokes. We took down a tree with a 6-inch-thick truck just because we could. After the chopping the blade was still sharp enough for camp kitchen work. The belly, good balance and fine edge combined to make slicing meat and vegetables a pleasure. Slashing hanging rubber hose and the water bottle were a piece of cake. The comfortable handle lends itself both to heavy chopping and fine meat cutting, which is unusual.

The Gunny is an excellent all-around bush knife. The sheath has a pocket for a sharpening stone, which was not included with the review model.

After chopping wood, the Gunny sliced tomatoes like a chef’s knife.

KA-BAR GUNNY
Designer: R. Lee “Gunny” Ermey
Blade Length: 9.75”
Blade Material: 1095 Cro-Van carbon steel
Blade Width: 2”
Blade Thickness: .2”
Blade Grind: Flat
Handle Width: 1.5”
Handle Thickness: .94”
Handle Material: Wood
Weight: 15.29 ozs.
Overall Length: 15.5”
Sheath: Leather
Country of Origin: USA
MSRP: $292


RAZOR SHARP: Medford Knife & Tool Bonfire


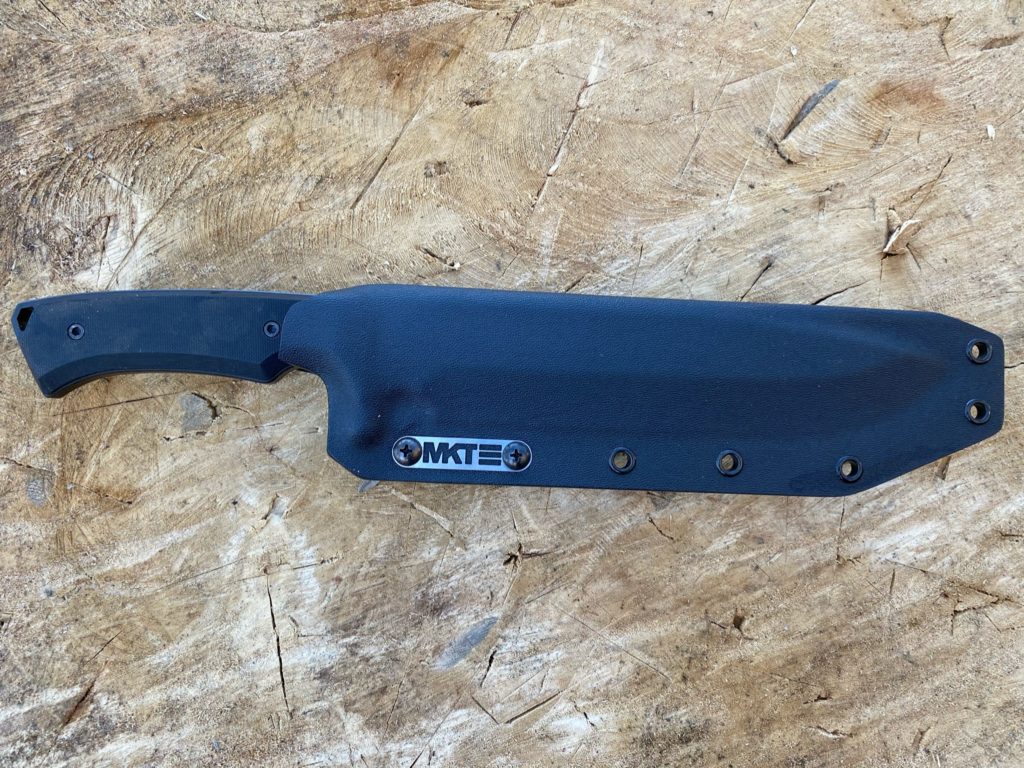
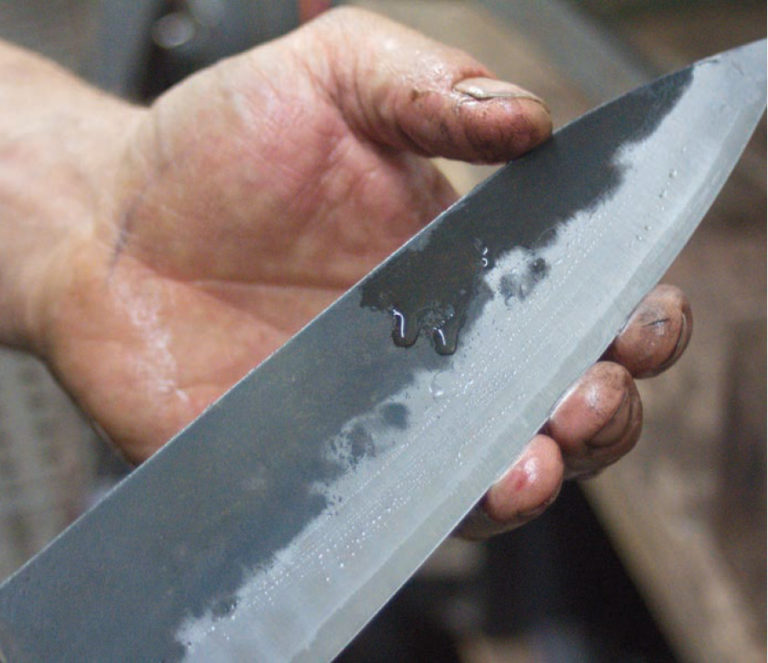
The Medford Knife & Tool Bonfire came from the maker absolutely razor sharp! The blade design is interesting in that we do not often see a contemporary styled drop point and hollow grind on such a big blade. I don’t know the Rockwell, but the steel is hard and tough. It was just as razor sharp after we put it through its paces as when we started.

The Bonfire comes with a well-fitted Kydex sheath.

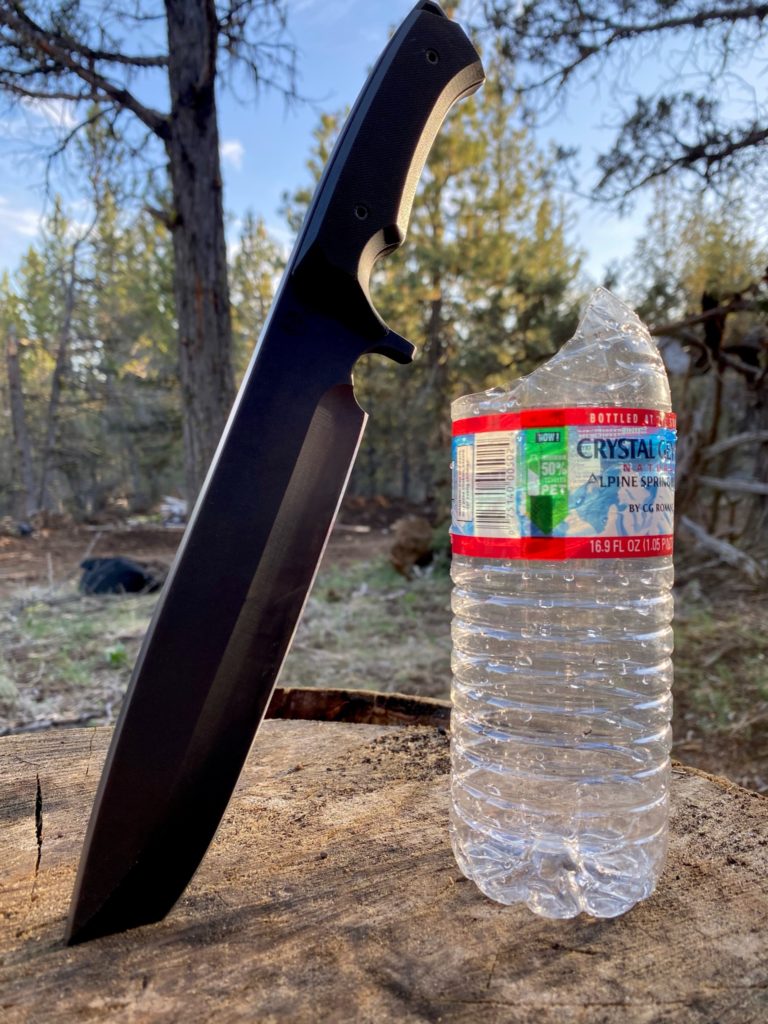
The fine edge made for a very good slicer and slasher and lopped off thin branches with one cut. The hollow grind tended to bind when chopping wood, though that’s to be expected—hollow grinds aren’t chopping designs. It’s better to think of this knife as a well-designed and crafted big knife rather than a bush tool such as a panga or kukri. It sliced rubber hose with a snap of the wrist and slashed through water bottles with more consistency than the other review blades and cut meat just fine. You probably could dress out a bear with it.

Use it as a big knife on soft materials and you won’t be disappointed. It comes with a well-fitted Kydex sheath.


The Medford Knife & Tool Bonfire slashed through water-filled plastic bottles with more consistency than the other review blades.

MEDFORD KNIFE & TOOL BONFIRE
Blade Length: 8.25”
Blade Material: CPM 3V carbon steel
Blade Thickness: .24”
Blade Grind: Hollow
Handle Thickness: .64”
Handle Material: G-10
Weight: 19.16 ozs.
Overall Length: 13”
Sheath: Nylon
Country of Origin: USA
MSRP: $450


CHEF’S CHOPPER: The TOPS Bestia


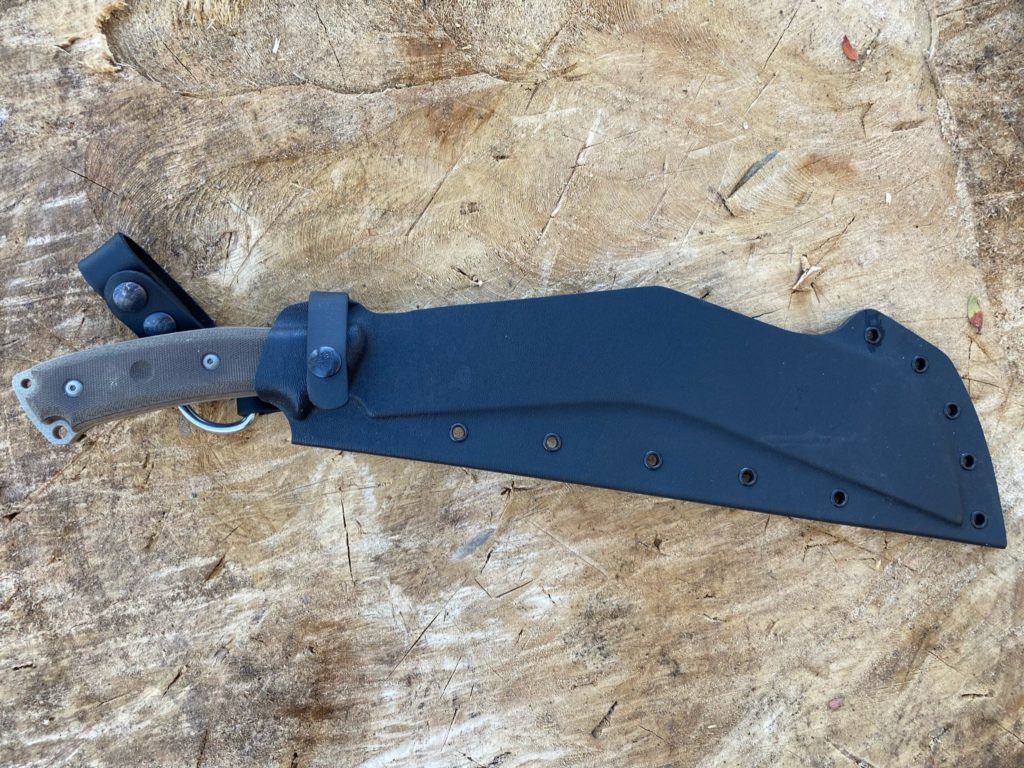
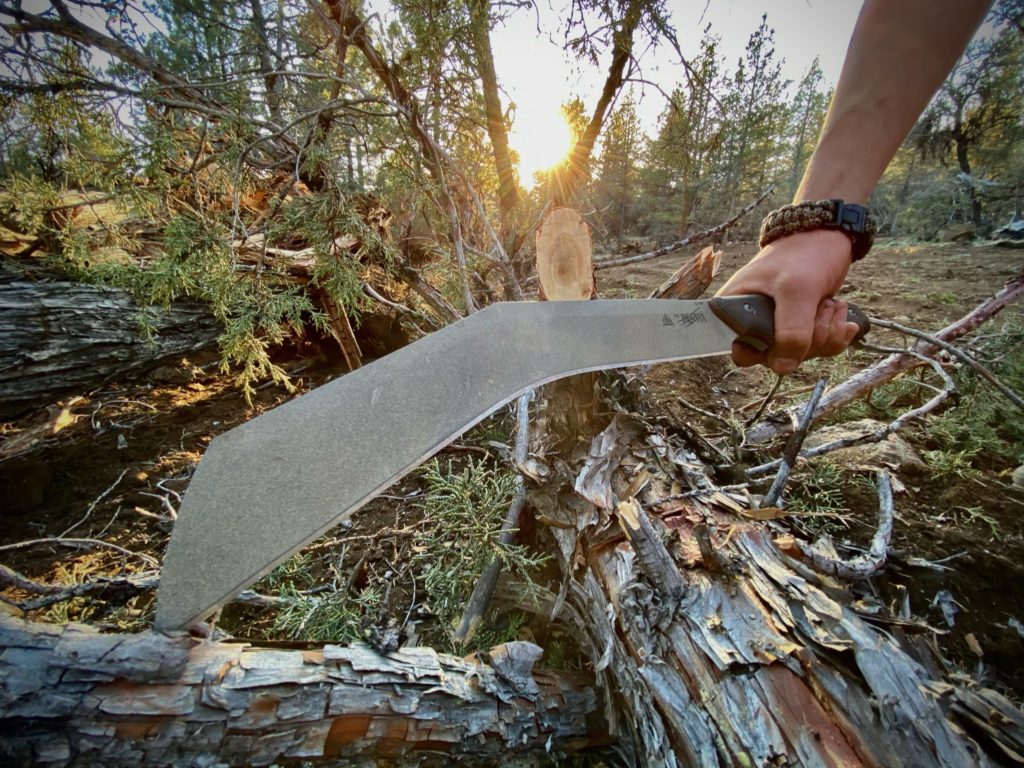
The TOPS Bestia is just a beast. A kukri-styled 13-inch blade and hefty weight make it the blade of choice for serious chopping or zombie cleaving. We hacked though a 3-inch sapling with one stroke, and used it to clear a stand of saplings and brush. The handle remained comfortable during an hour or so of work. Heavy as a small hatchet, it is more versatile and safer in use, especially in thick brush. During many survival classes, I’ve seen more injuries from hatchets than from big blades with their longer cutting edges.

The Kydex sheath is formed to fit the unmistakable kukri-style blade of the Bestia.

Given its heft, blade design and chopping ability, the Bestia is surprisingly usable in the camp kitchen. We found it could slice meat quite well, allowing for adjustments in maneuverability due to its blade length.

The TOPS Knives Bestia’s kukri-styled 13-inch blade and hefty weight made it the blade of choice for serious chopping or, as the author puts it, “zombie cleaving.”

TOPS KNIVES BESTIA
Designer: Leo Espinoza
Blade Length: 13”
Blade Material: 1095 carbon steel
Rockwell Hardness: 56-58 HRC
Blade Width: 2.25”
Blade Thickness: .25”
Blade Grind: Flat
Handle Width: 2.125”
Handle Thickness: .97”
Handle Material: Green Micarta®
Frame/Liner: Micarta
Weight: 1 lb., 13.18 ozs.
Overall Length: 19.5”
Sheath: Kydex
Country of Origin: USA
MSRP: $300


VERSATILE BUSH TOOLS
If you haven’t spent much time with a big blade, try one. Work with it for a while. Direct close attention to your work and you’ll find a good big blade to be a terrific, versatile bush tool.

African Blackwood is on the Rise as a Custom Handle Material

Maybe it’s a bit of a contradiction, but both elegance and simplicity are elements of African blackwood, a handle material with a rapidly rising profile in the custom knife industry.

The color of the material combined with properties that make it a pleasure to work with has resulted in an explosion of interest. Ranging in luster from a reddish to a deep black hue, the wood is the product of a flowering tree also known as granadilla or mpingo. A relatively small tree, it grows primarily in the forests of Senegal east to the horn of Africa and in some parts of South Africa. Long used in musical instruments and high-end furniture, African blackwood is protected in order to prevent overharvesting.

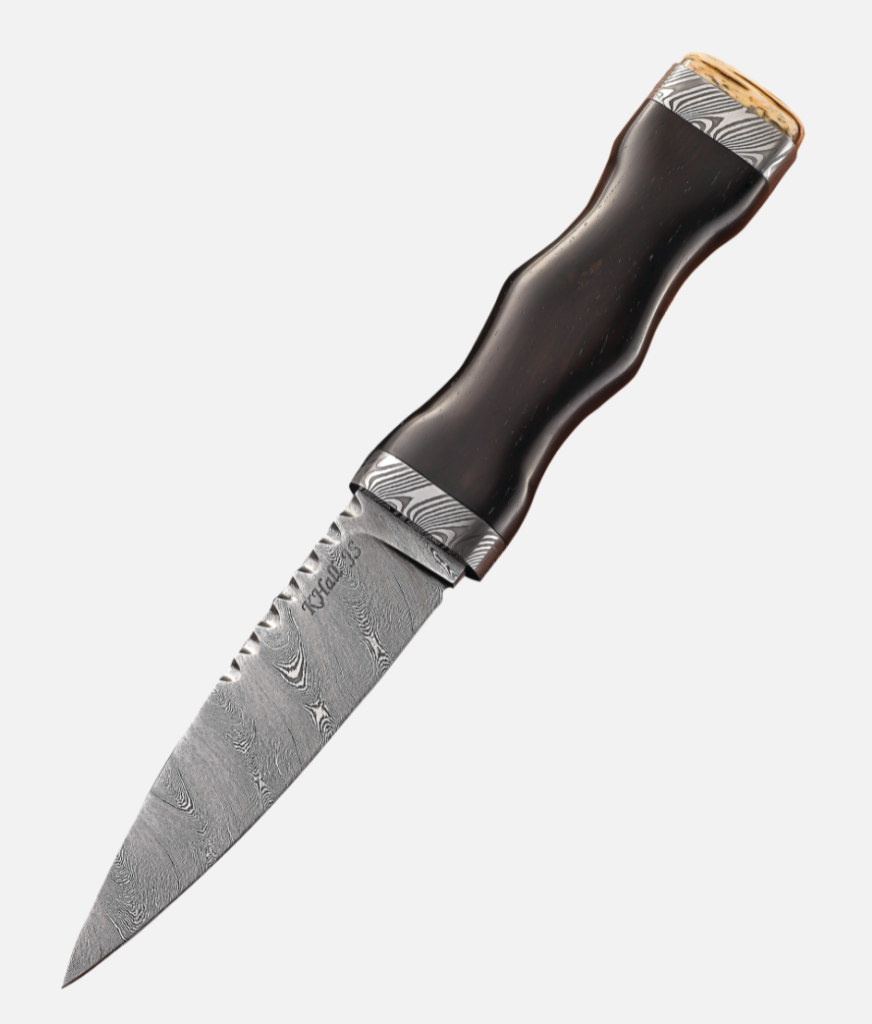
Ken Hall’s sgian dubh features a 4.25-inch blade of twist damascus in a blend of 1075 spring and 15N20 nickel alloy steels. The pommel is formed from stone and giraffe bone. The African blackwood handle not only is ideal for its carvability but also in keeping with the sgian dubh’s name, which is Scottish for black knife.

When the material finds its way to a knife handle, something dazzling happens, and the makers who use it sing its praises. “I’ve always loved black-handled knives, especially with brass,” related Abel Price of Fayetteville, Arkansas, a part-time maker who is completely self-taught. “The black and gold combo just pops and gives it a beautifully elegant Art Deco feel.”

In the mountains of western North Carolina, ABS master smith Andrew Meers finds African blackwood a pleasure to work with. “It’s a dense and stable wood with a consistent grain structure that is excellent for handle material. It is workable and carves well,” he noted. “It has a rich, dark color and finishes out beautifully when sanded, and I haven’t noticed any cracking, shrinking or expanding, especially compared to the cracking I’ve noticed at times in similar looking wood such as ebony. I think these qualities contribute to its growing popularity among makers.”

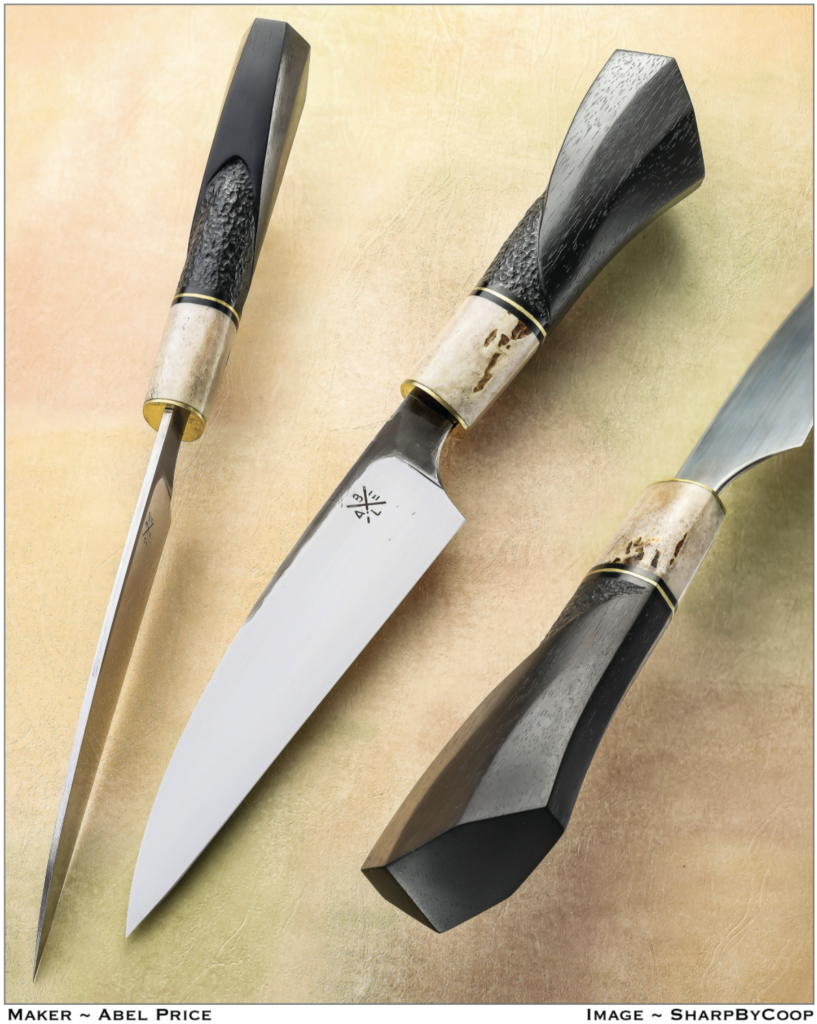
Abel Price used African blackwood for the handle of his Deco Petty kitchen knife. He said the handle “was sculpted to contain design elements of the Art Deco era while hitting several notes of contrast: smooth and stippled, round and flat, black and white, and straight and sweeping lines.”

Andrew uses rasps and files for shaping, a flex shaft for carving, and prefers to sand and buff to finish his handles of the material. Last of all, he applies a coat of Danish oil. So, the finished product is just what the maker wants, and getting there is most often a pleasurable journey rather than an arduous trek. African blackwood exhibits excellent stability and takes a shine quite well. Custom makers agree that the material is ideal for carving, though whether it carves easily or not is open to the interpretation of the individual maker.

“I think the main reason for its carving ability is that it is hard,” commented Pekka Tuominen, a 17-year maker from Keitele, Finland. “Wood has to be hard if you wish to carve it with sharp and tight curves, and also polish those curves. Let’s say it’s not easy to carve, but when wood is hard you can get a good finish. Of course, it’s popular, too,” he observed. “Everybody knows that if some famous knifemaker uses a material, then the rest of the makers at least want to test it.”

MORE ATTRIBUTES

Waynesville, North Carolina-based ABS journeyman smith Ken Hall appreciates additional attributes of African blackwood. “I like using it because it’s a very dense wood, doesn’t require stabilizing, is hard and does not crack easily,” he stated. “It has a tight grain structure, so you don’t have to fill voids, and it can be carved or shaped without difficulty and provides a dark contrast to a steel blade.”

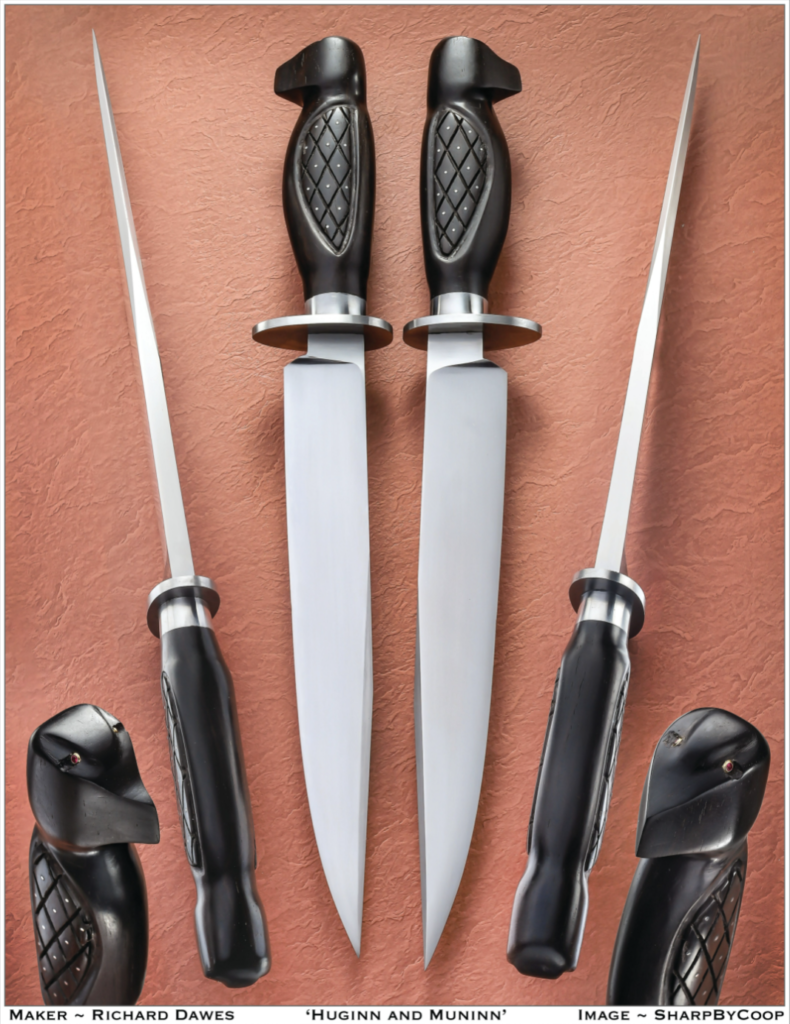
Huginn and Muninn are the names for two bowies by Richard Dawes. Huginn and Muninn are two mythical ravens that attend Odin. Dawes carved the African blackwood handles in a bird’s-head motif based on the style of bladesmith Bill Bagwell, one of the founders of the American Bladesmith Society.

Securing the handle to the blade most often involves a quality epoxy and a combination of pins, depending on the type of knife under construction. “I use rivets, pins and epoxy,” Pekka said, “but I don’t use African blackwood for full tangs. With hidden tangs sometimes just epoxy will keep the tang solid inside the handle.”

When Price went to work on his Deco Petty, a kitchen knife creation with a 6.5-inch blade of AEB-L stainless steel, overall length of 12 inches, and a handle of African blackwood, deer antler and a copper spacer, he knew just what he wanted to achieve. “The goal was to hit form and function,” he commented. “The ultra-thin cutting edge flexes with lateral pressure, and a Rockwell hardness of 61 [HRC] makes for a laser sharp tool in the kitchen. The handle was sculpted to contain design elements of the Art Deco era while hitting several notes of contrast: smooth and stippled, round and flat, black and white, and straight and sweeping lines. African blackwood does everything you want it to do with a perfect finish.”

Hall fashioned his sgian dubh as an interpretation of a historical Scottish knife. “African blackwood is the ideal wood for the sgian dubh because it can be carved and shaped to the hourglass design of the traditional sgian dubh handle,” he noted, “and provide an eye-catching contrast to the stainless steel bolster and pommel.” He added that blackwood is his preferred wood for a handle with a keyhole design because it can take the force applied to pressing the wood into the keyhole.

AESTHETICS & FUNCTION

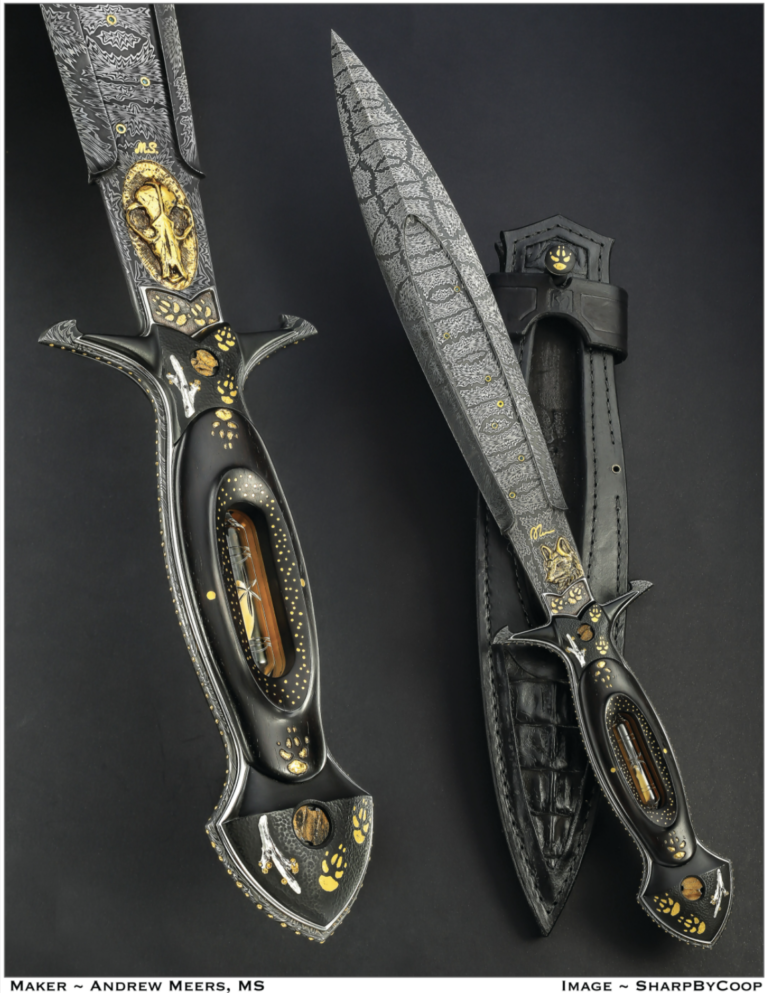
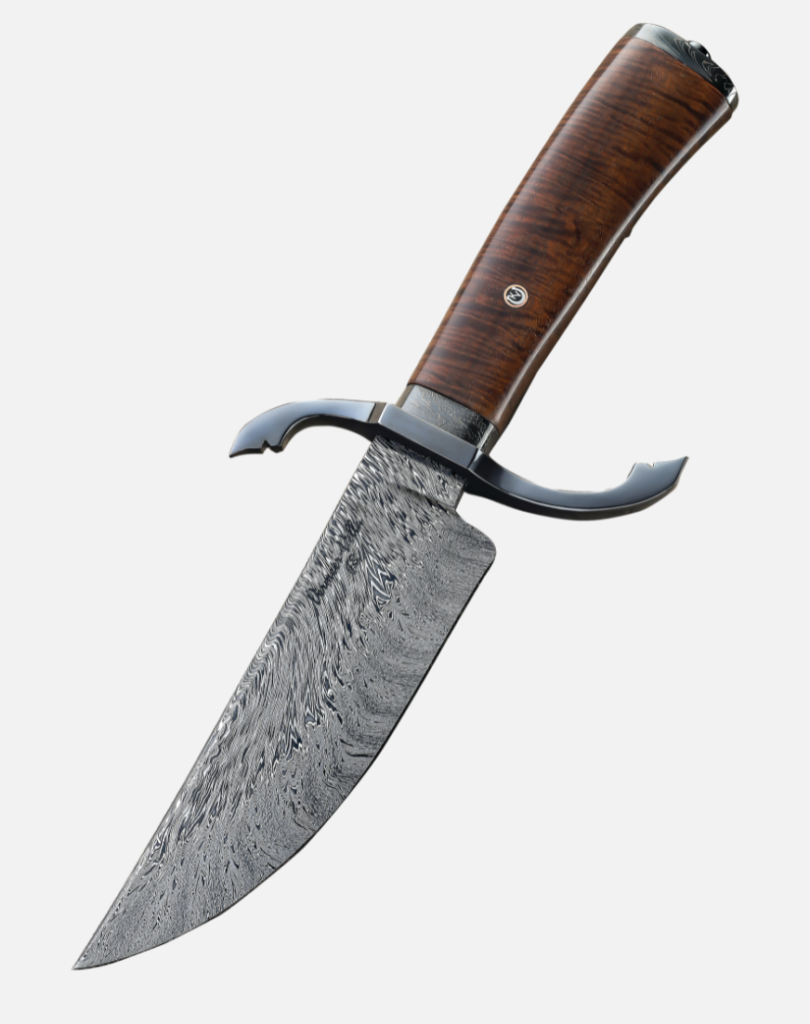
Meers made the striking Vulpecula with a 12-inch damascus blade of 1084 carbon and 15N20 nickel alloy steels. Meanwhile, something of a surprise is embedded in the African blackwood handle.

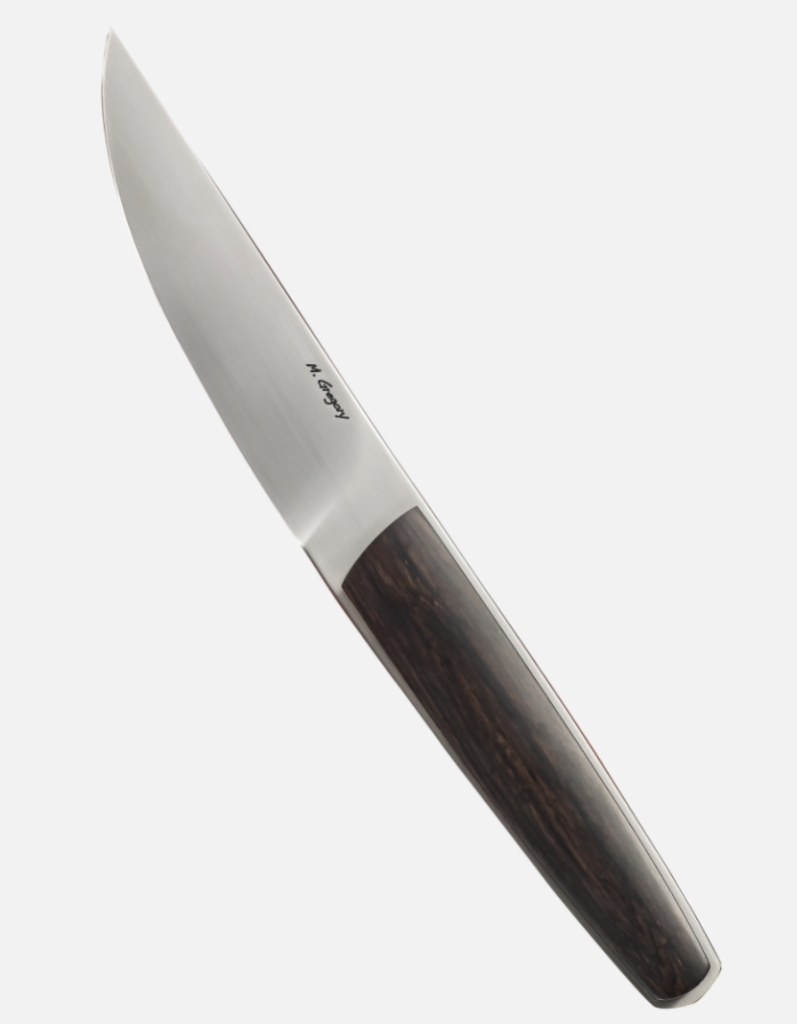
Matt Gregory’s LWT (Lum-Walton Tanto) is based on a design by Mike Walton inspired by the late Bob Lum. The African blackwood handle is polished to a mirror shine and tapers slightly in reverse of the tang, and has a delicate bulge in the center to provide for a subtle yet improved grip. The sheath (not shown) is by Jill Gregory.

“Vulpecula is a reliquary dagger,” Andrew explained. “It is inspired by the tradition of keeping objects, often hair or remains, in an embellished vessel. I found a fox tooth and had it sealed in a glass vial by a friend. I then built this dagger to house the vial as a reliquary.

“The blade fittings and handle are adorned with 24-karat gold inlay depicting a large fox, its skull and paw prints. The hardware is torch-cut steel plated with gold that is brushed back. Vulpecula, the ‘Little Fox’ constellation, is set into the blade with blue diamonds.

“It was a combination of aesthetic and functional choices that made me choose blackwood for this piece,” he concluded. “The wood machines and carves well, so for this handle it was the ideal choice. The blackwood’s depth serves as a rich contrast to the bright gold used in small inlays to represent a starry sky and the fox prints as well.”

Tuominen built his Protector, or Suojaleijee, dagger with a 5-inch welded damascus blade of 1080 and 80CrV2 carbon and 15N20 nickel-alloy steels, a guard of Nicorros (a copper/nickel alloy), African blackwood handle, and a handmade leather sheath with stainless clip. The blade is 7 inches and overall length is 12 inches. “It’s a custom order for an American collector,” he noted. “I used African blackwood because it’s black and more stable than other black-colored woods.”

SOURCES

While African blackwood remains protected, it can be found through various sources. However, Abel has a warning.

“I stocked up at a Rockler store a few years ago,” he remarked. “I’m not looking forward to finding another supplier. I believe the demand is outpacing the supply, and as conservation efforts increase, as they should, so will the price.”

Kelly Vermeer Vella em-
ploys African blackwood
and sterling silver for the
handle of her dagger. The
blade is a damascus of
1075 spring and 15N20
nickel-alloy steel.

Hall searches eBay for African blackwood and makes his selection based on what is available. Pricing, he says, runs $20 to $30 for a handle block or set of scales. While Pekka often sources his African blackwood from European knife shows, he also checks the internet for block-size pieces. Meers has had success with retail suppliers and finds a broad range of dimensions.

The custom knifemaker and the consumer alike have taken a new interest in African blackwood, and that fascination is not likely to fade in the near future.

What is a Drawknife? Three Examples

Whether for bushcraft, carving, or just straight woodworking, drawknives are handy tools that range quite a bit in size, function, and style. There are large drawknives to peel bark or hew small logs, as well as models for specialty purposes such as coopering or making chair seats. There even used to be specialty drawknives for shaping round handles small in diameter for brooms, rakes, and other implements.

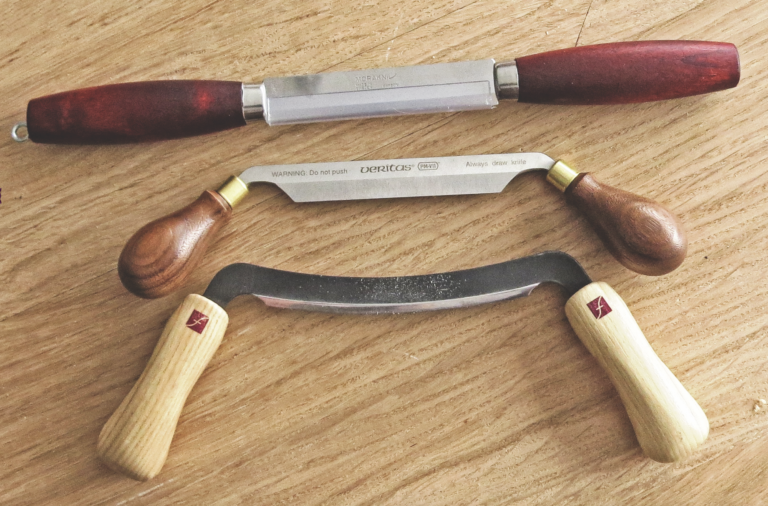
Three small drawknives for carving and crafting are the focus this time: the MoraKniv Classic wood splitting knife, Flexcut Drawknife, and Veritas Drawknife. They are great because they are relatively compact and portable, and help comprise part of what you could call a portable rustic tool kit.

DUAL BEVEL

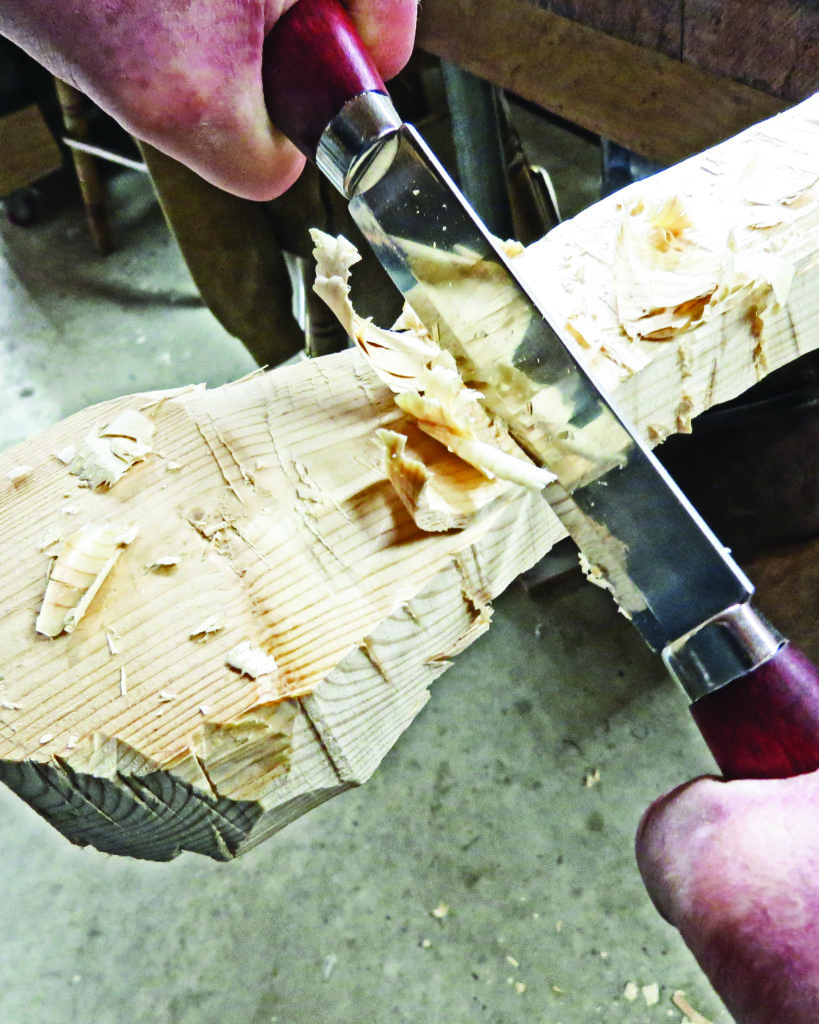
I know, right off the bat the MoraKniv Classic is called a wood splitting knife and not a drawknife. I thought this model would be interesting to test because it departs from the regular one-bevel blade geometry. The handle positioning is straight, giving the tool a compact configuration for transporting. It also comes with a sheath.

The author uses the MoraKniv Classic wood splitting knife in a push-cut motion to perform a stop cut while contouring the grip on a paddle.

Over the years, I’ve seen many a bushcrafter try and find a way for a standard knife to act as a drawknife. You can do many bushcraft chores with the MoraKniv Classic, from spoon work to shaping a tenon on a stool leg. You can do some of the same things with a regular knife, but with a drawknife it can be easier.

The 4.5-inch carbon steel blade has a dual bevel. An advantage of such a bevel is it makes the knife more versatile. A disadvantage is you don’t have depth control on a cut like you do with a single bevel. Single-bevel blades provide control similar to using a woodworking plane or a chisel. You shear through the levels you need to and, once you establish your depth of cut, you can remove material without bogging down by using a bit of depth control. Given that the dual bevel is a Scandi grind, it makes control easier than, say, a grind with a micro and major bevels on both sides. Control is most certainly easier than, for instance, with a convex grind. In the end, it is no big deal. Having to control a blade only becomes a problem when its design is not conducive to the job at hand.

Having in-line handles and a dual bevel, the Mora allows use like a sheath knife. It adds to the tool’s versatility and saves time, as you don’t have to put one knife down and pick up the other.

For the most part, control affects how much energy you put into making the blade do exactly what you want. In the case of a convex-ground blade, if you want to make a long, straight cut at the same depth, you will expend more energy than you should trying to keep the blade from “porpoising” (that is, front to rear bouncing of the blade). The alternative is simply getting used to making shorter controlled cuts more frequently.

The Classic cuts extremely well. Due to the straight handles and dual-bevel blade, you can switch and use it like a sheath knife in a split second.


WESTERN TRADITIONAL

Flexcut has a variety of tools covering chip, relief, and decoy carving, just to name three. The company also has a couple of drawknife styles. The Flexcut Drawknife is more of a traditional Western version. The 5-inch blade is 1095 carbon steel with the bevel brought to a mirror shine.

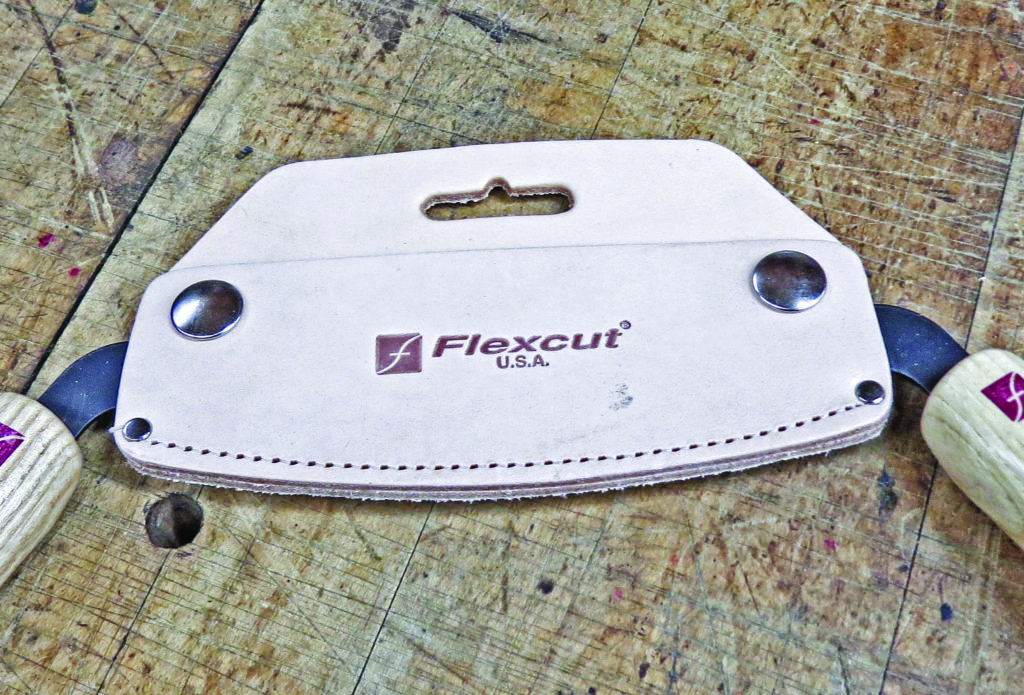
The Flexcut comes with a well-made sheath. It is always nice to have something protecting the edge—if not for safety’s sake, for that of preserving the edge from accidental harm.

Right out of the box, this thing is wicked sharp. It comes in a leather case with a peg-hole loop. It has a curved blade, which gives it a natural tendency to skew in a leading edge cut. If you haul the spine up a bit on your cuts, it will make more of a scraping action for a hollowing effect. It is a thin blade and not suited for hogging off large amounts of wood at one time. It is great for detailed jobs like the subtle contours you might find in a canoe yoke.

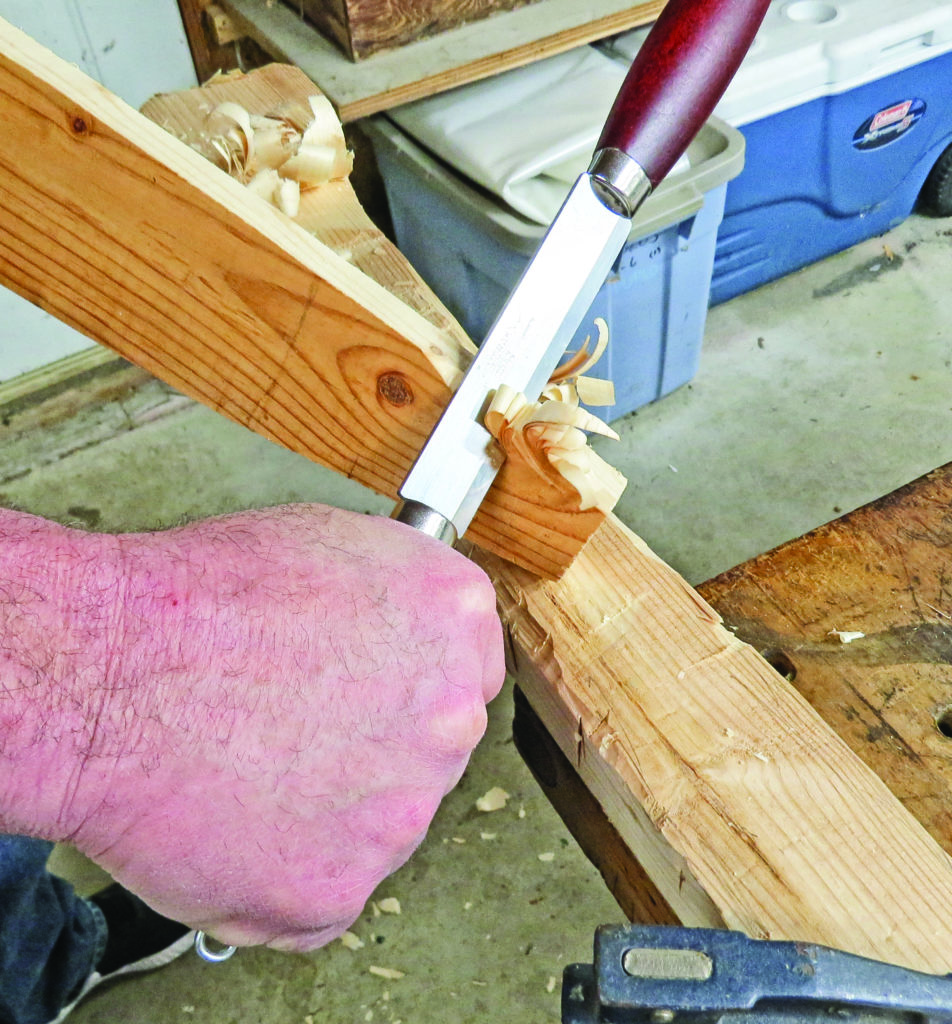
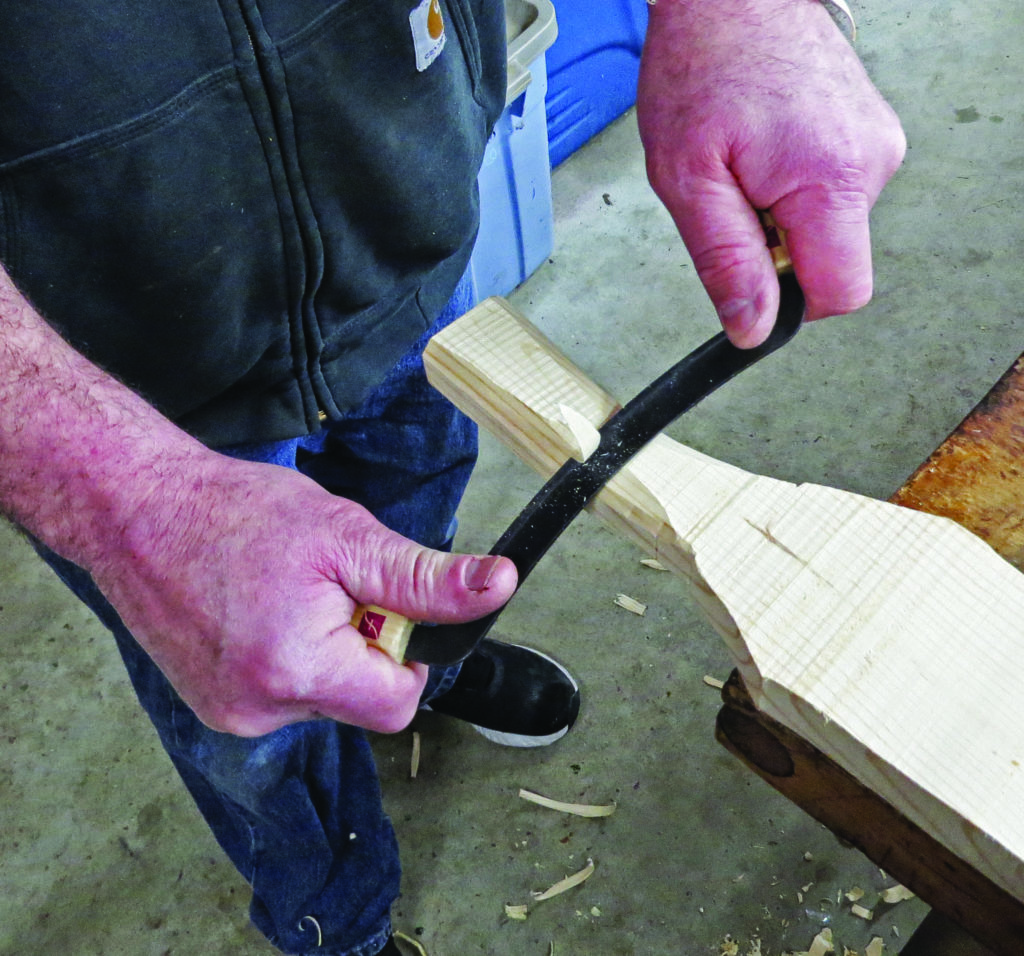
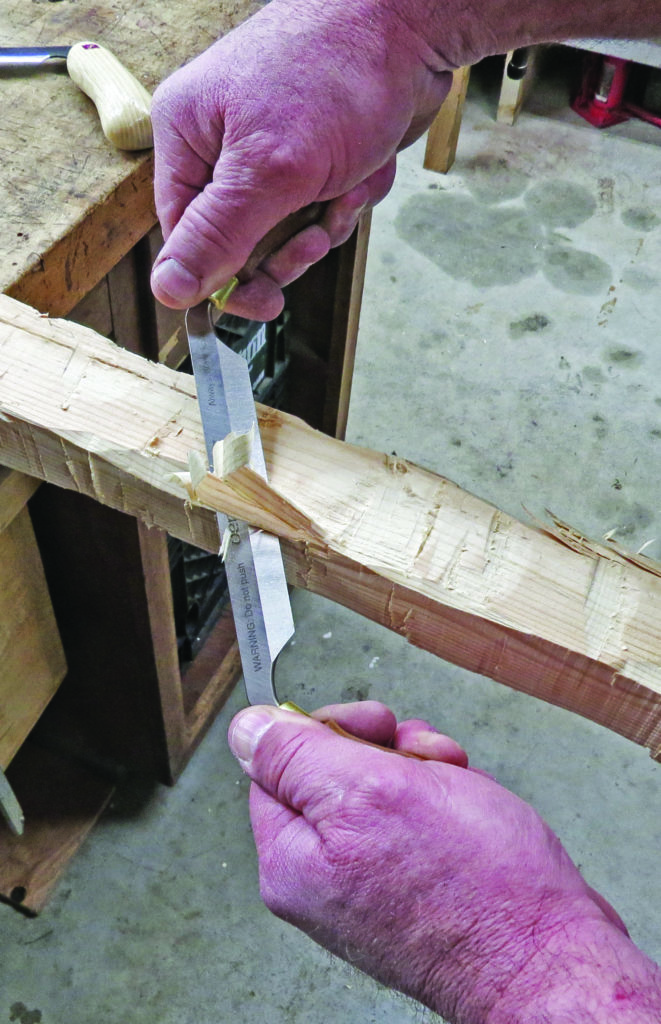
Using the Flexcut Drawknife, the author shapes the handle for a flat-board atlatl. The efficiency you gain using a drawknife is hard to beat for control and energy.

Such a small drawknife is a good tool not only to create art but to make utilitarian items. Given its Western-style handles, it doesn’t make a streamlined package for carrying in a pack like the Mora does, but it still has very little bulk and weight. The arched blade can be sharpened with a flat stone, though I find sharpening it with a small handheld stone and using a dynamic sharpening method easier. The Flexcut Drawknife is the kind of tool that suits the creative mind.

HOB-KNOBBER

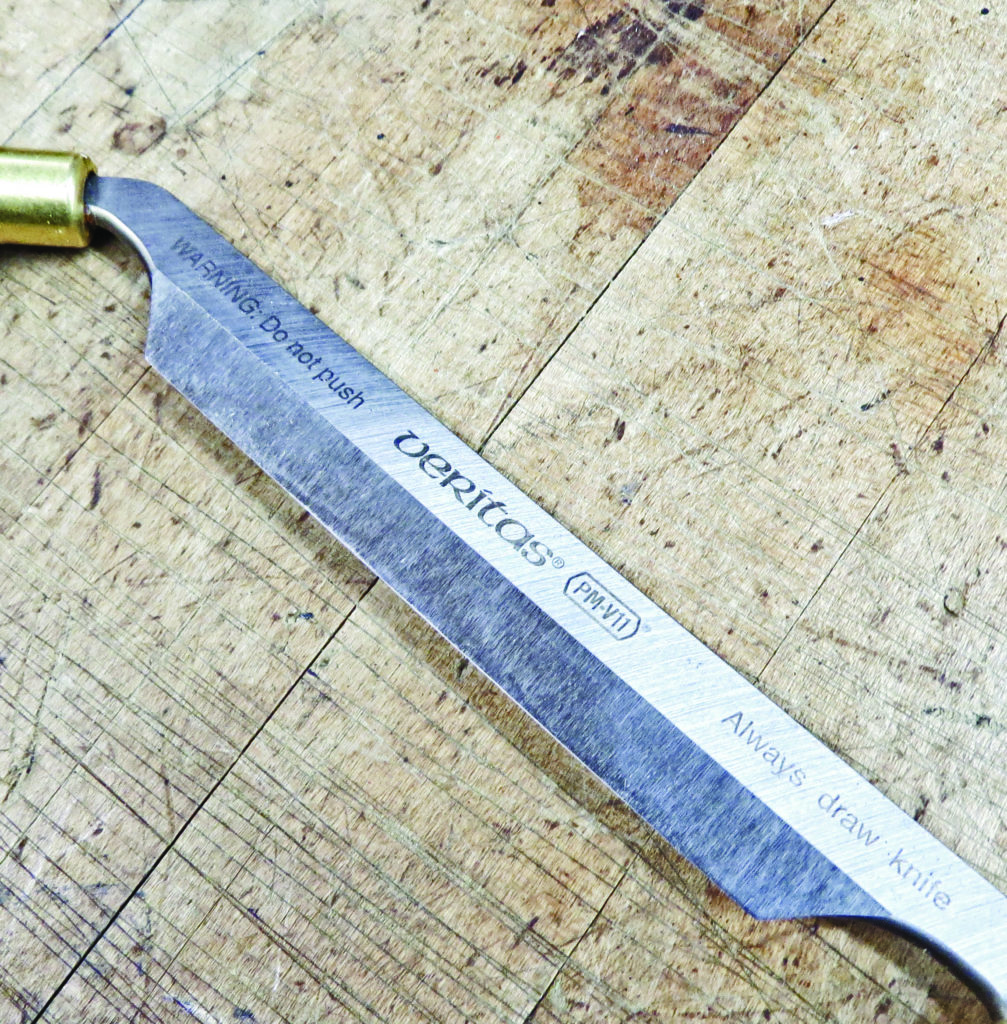
The Veritas tool company manufactures the last of the test drawknives in Ottawa, Canada. Sporting a 4-inch blade, it is a small carving-style model. Steel is PMV-11, a stainless with a Rockwell hardness of 61-63 HRC. Veritas made the switch from traditional tool steels like O1 and A2 to up cutting performance and edge retention. A case for the knife sells separately.

The Veritas Drawknife’s 20-degree angle cuts aggressively and you have complete control with the well-shaped handles. Here the knife is skewed compared to its cutting path. Skewing the knife provides a leading edge to the cut, reducing resistance

The company’s technical information says the bevel is ground at 20 degrees. To sharpen the Veritas, be sure the sharpener is of a flat design. Given the knife’s size, you can sharpen it in either a dynamic or a static style*. To cover/sharpen the entire bevel, you will need a flat surface. There is no micro bevel on the Veritas, though that’s not to say you can’t apply one. However, if you want to keep it original, you will need to cover the bevel.

The angling of the handles is a traditional Western style, though they have more of an elongated knob shape to them. The shape helps reduce fatigue. Because of the handle angling the Veritas does not offer as compact of a carry as the Mora, but the .125-inch-thick blade makes it a bit sturdier user than the
Flexcut. Handle material is torrefied maple. Due to the kilning process, the material has a greater stability to it without the use of chemicals. At the top of each handle is a brass ferrule.

The author stated he has been known to push a drawknife to make a quick cut. The Veritas Drawknife clearly warns not to do that. At a 20-degree bevel, you take a chance of damaging the edge if you were to catch and roll it.

It is a good-looking product and out of the box is ready to work. It is the most expensive of the review knives, yet is not so much more that you wind up scratching your head. A drawknife like this can be put to work doing a number of things limited only by your imagination. Veritas promotes it more as a carving tool and actually shows it making a decoy in the company’s marketing media.

Staying within the bounds of this tool, I can’t think why you couldn’t get chores done or entertain yourself by making pieces of art with it. Keeping you busy in the woods and not necessarily only during a survival situation promotes better mental health. It is a great little package and a good tool—I just think the company could include the sheath. When you hold the knife you see where the extra cost is as the precision work shows in the fit and finish.

EXPLORING OPTIONS

Once you leave the big city behind, in order to thrive you must know how to make what you need. Many of the tools you carry will depend on what you plan on doing. If you’re building up a getaway spot, you might need to build items for the camp. When planning to build a more substantial base, you will need more tools. Again, it all depends on what you plan on doing. A good drawknife can greatly increase your cutting and carving options—not to mention that being able to use two hands greatly reduces fatigue. If you haven’t tried a drawknife yet, I highly recommend doing so.

*Static sharpening is when the stone is stationary, and dynamic is when the stone is moving.

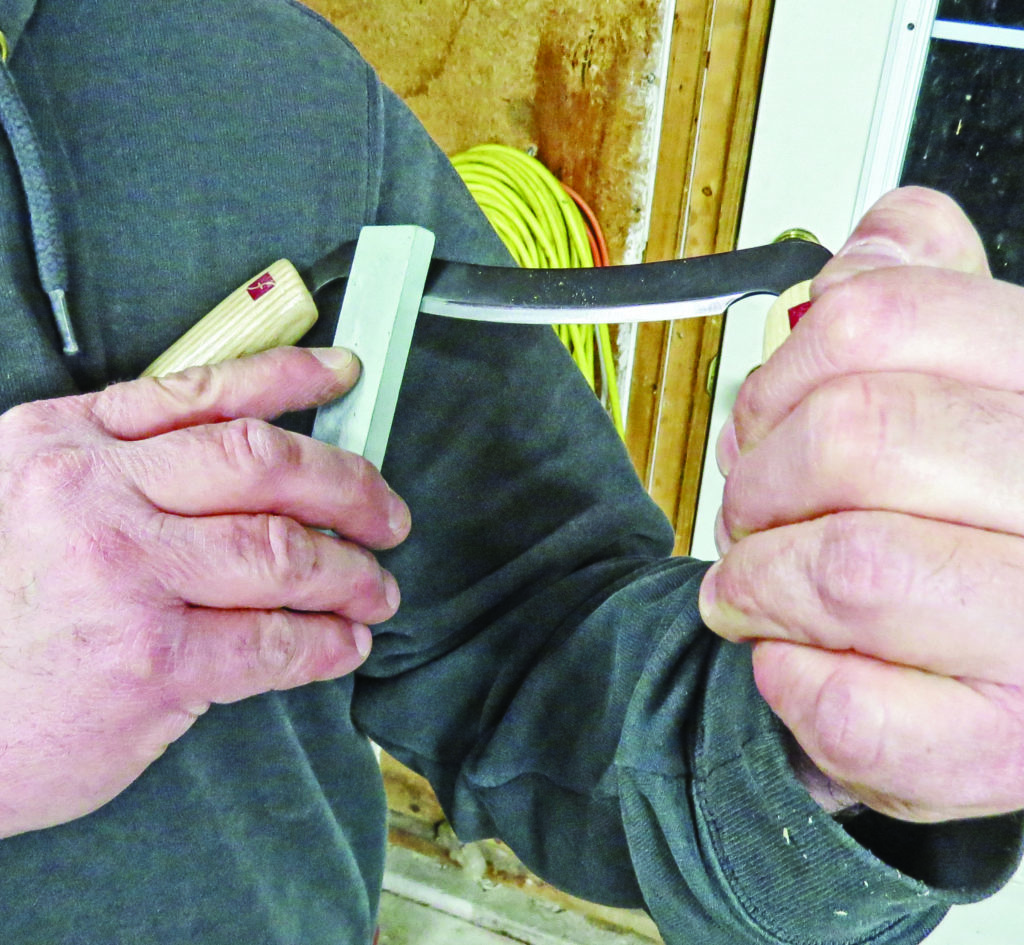
A trick to sharpening drawknives both in the shop and field is to brace one handle against your armpit or chest. After bracing the knife, simply use a dynamic sharpening method with a small stone running parallel to the edge.

The Latest EDC Multitools

People Who Like to be Prepared Will Love the latest EDC Tools

Knife guys love gadgets, fix-it people love gadgets and DIY-ers love gadgets, so it’s easy to see why multi-tools do so well in the knife market. Though not knives per se, they off er more versatility than just cutting ability by offering on-board tools. With broader appeal than knives, multi-tools have a further reach and encompass more markets, too. They appeal to folks who like to be prepared.In addition to DIY-ers, campers, hunters, fishermen, hikers, mountain bikers and anyone who enjoys outdoor activities benefits from owning and using a multi-tool. It performs in-fi eld repairs on equipment when you do not have access to regular tools.  It can mean the difference between bowing out of a camping trip because of equipment failure, or performing an expedient in-field repair or adjustment and carrying on with your adventure. As with knives, advances in multi-tools have made them stronger and more user friendly and versatile.


FLASH in the HAND: Coast’s LED150 multi-tool 

When you think of multi-tools, what immediately comes to mind is a pliers-based tool with little fold-out implements nestled inside the handle. Truth is, multi-tools can take on any form as long as they incorporate the implements necessary for field-expedient repairs and adjustments.

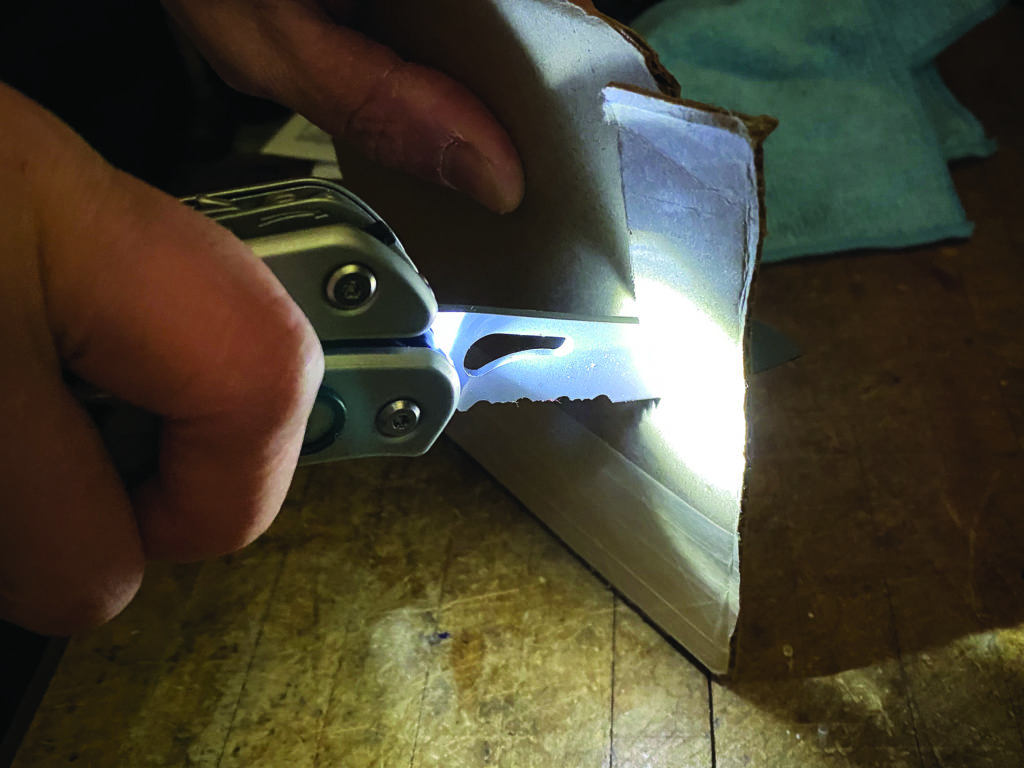
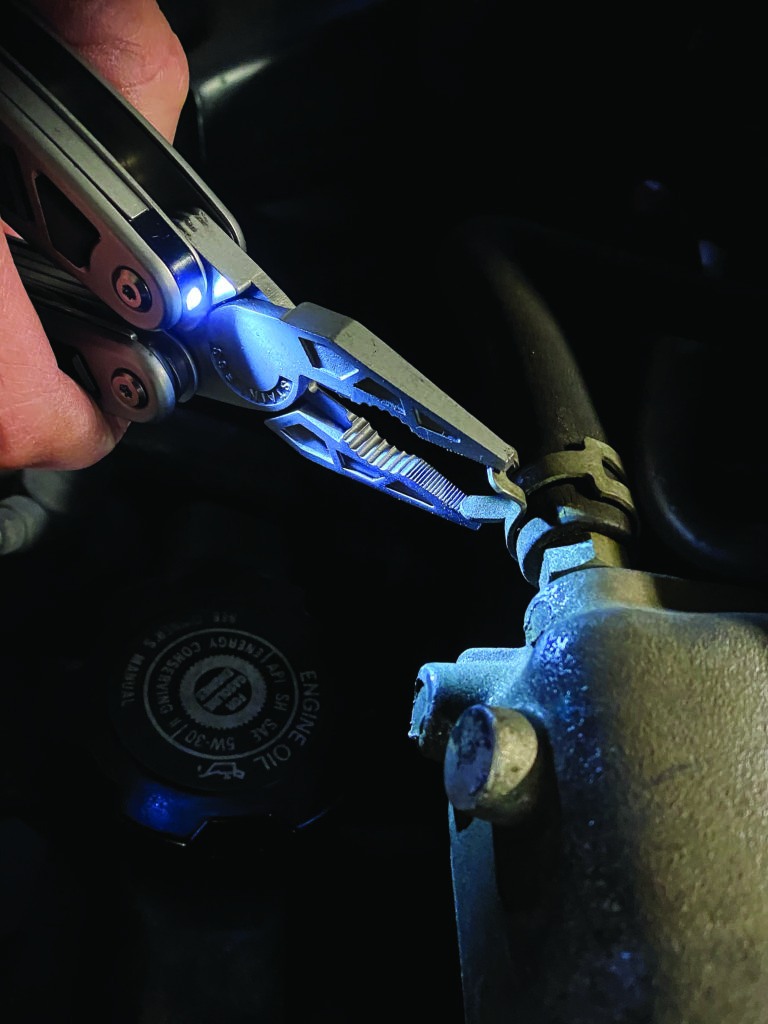
At first glance, Coast’s LED150 multi-tool might appear like any other pliers-based multi-tool, except for one thing: it incorporates not one but two LED lights. One LED is on the pliers jaw end and the other is on the partially serrated end of the knife blade. This way, you can confidently work in tight and dark spaces with confidence thanks to the illumination. The lights are activated by a recessed push button located on one side of the handle. Press once to activate the light by the main blade. Press again and the light turns off and, at the same time, the light on the pliers jaws end turns on. Press again and the jaws light turns off. With the multi-tool closed, you can use either light as a stand-alone flashlight, further expanding the multi-tool’s versatility. The lights are powered by two CR1616 lithium button batteries. The batteries replace easily.

The light on the end of the Coast LED150’s handle illuminates what you’re cutting.

The pliers jaws have different gripping surfaces for smaller objects and larger nuts/round objects. The jaws themselves are spring loaded, which helps to open them by spring tension, reducing hand fatigue. When closed, all the fold-out tools are easily accessible: a partially serrated main blade that works on a linerlock, spring-loaded scissors, large and small flat-head screwdrivers, can opener, Phillips head screwdriver and the pliers jaws—most all the common implements necessary for field repairs and adjustments.

The handles are aluminum and feature raised hard rubber for a non-slip grip. The LED150 has a good heft and the heavy-duty build will withstand normal use. The sturdy ballistic nylon belt pouch has a fabric-fastener flap closure. Manufacturer’s suggested retail price (MSRP): $49.  

One of the LED lights on Coast’s LED150 multi-tool shines on the pliers jaws end so you can effectively work in dark areas easily without the need for a separate flashlight.


AFFORDABLE SOLUTION: Gerber’s Armbar

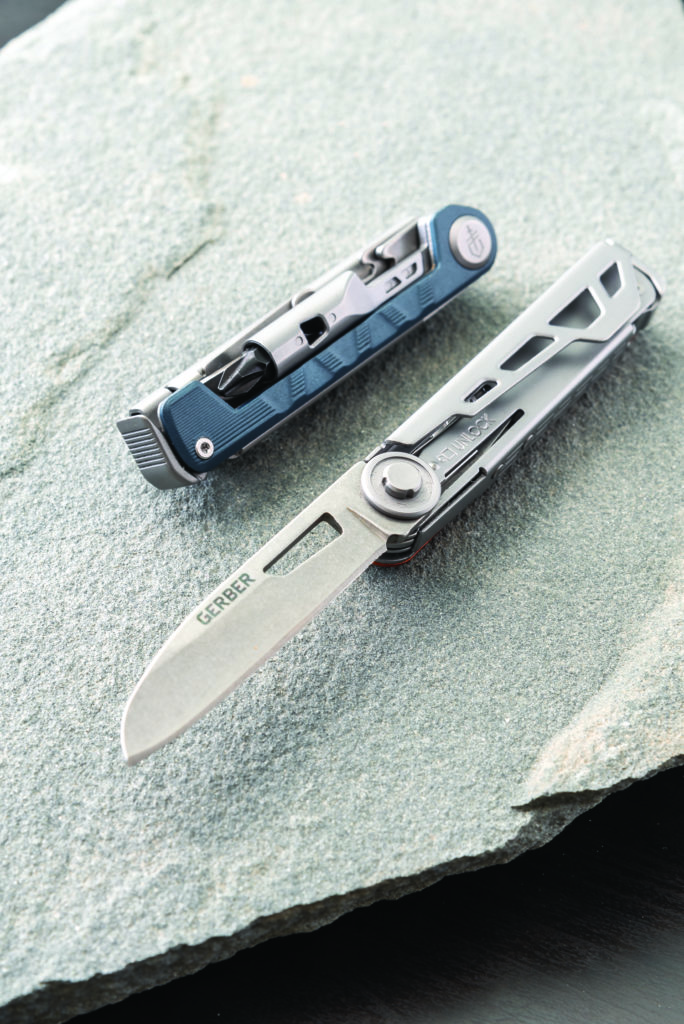
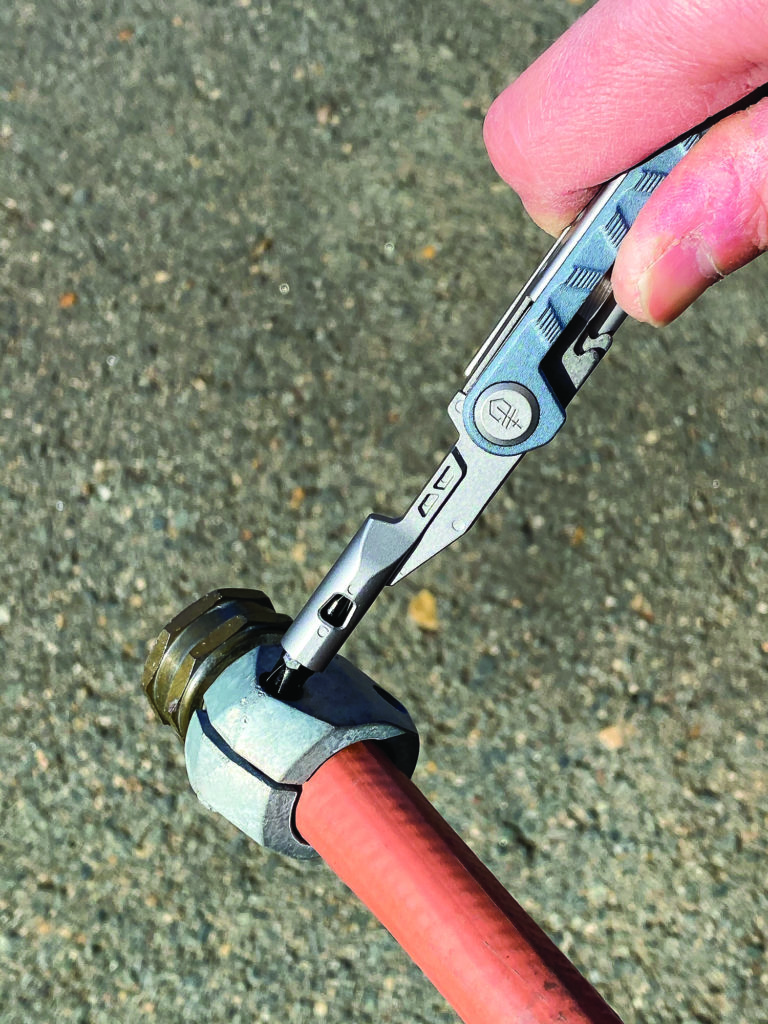
Gerber’s Armbar series incorporates the fold-out implements of pliers-based multi-tools like the Coast LED150—minus the pliers. Sometimes, you just need the versatility of screwdrivers, a knife blade and scissors. About the same size as a large multi-blade pocketknife, the Armbar Drive features seven on-board fold-out tools: 2.5-inch plain edge sheepsfoot blade with opening hole and framelock, 2.5-inch extension driver with a double-sided bit of Phillips and flat-head screwdrivers, a prybar, bottle opener, hammer, scissors and awl.

The Gerber Armbar Drive features a sturdy main blade. The entire package has about the same dimensions as a medium-sized traditional pocketknife.

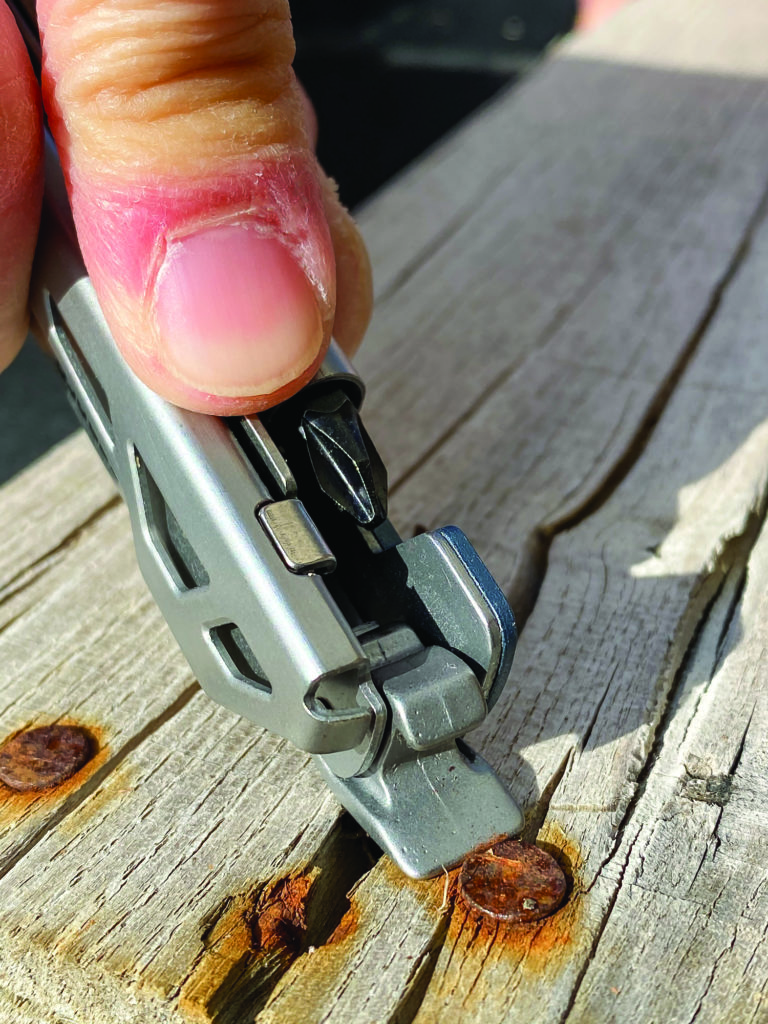
The extension driver has a magnet that holds the double-sided bit and allows for fast flip-over when transitioning to different screws. The driver socket can accept aftermarket quarter-inch drive bits, too. Hence, you can customize your Armbar Drive just about any way to fit your tasks. The spring-loaded scissors provide enough blade length for cutting coupons, stray threads and duct tape. The plain edge sheepsfoot blade thumbs open easily like any lock blade. The blade is mostly exposed even when closed, but the metal channel protects it from damage and you from accidental cuts.

Perhaps the neatest implement is the combination hammer/prybar/bottle open-

er, which in the closed position is in the hammer mode by default. The squared-off back end takes care of light hammering. The prybar function is rather limited as you’re not going to get a ton of leverage. However, if you need staples removed or to pry open a casing and such, it does the job. 

A fold-out prybar/bottle opener on the Gerber Armbar Drive performs light-duty prying when needed, saving the blade tips on your standard knives.

One thing I wish Gerber would have included is the ability to lock the screwdriver in the fully open as well as the 90-degree position. When you torque down with the driver, your hand may move and this will cause the screwdriver to fold a bit. Also, when you use the tool in the 90-degree position, you apply more torque. Having it lock in the 90-degree position would make it easier to use—if not lock in both positions, then a strong detent and a half stop, like a slip joint, would be better than nothing. The form factor permits easy carry in your pocket, toolbox, glove box or a backpack.

At 3.1 ounces the smallest multi-tool in the Armbar line, it comes in an aluminum handle anodized in a choice of urban blue, orange or onyx. With an MSRP of $39, it presents an affordable solution to a typical pliers-based multi-tool by reducing bulk and weight—that is, if you don’t need pliers.

The screwdriver tool on the Gerber Armbar Drive is easy to manipulate. The magnetic socket allows you to flip the double-end bit over, as well as use most any aftermarket quarter-inch driver bit.


TINY TOOLBOX: Utica Minimaster

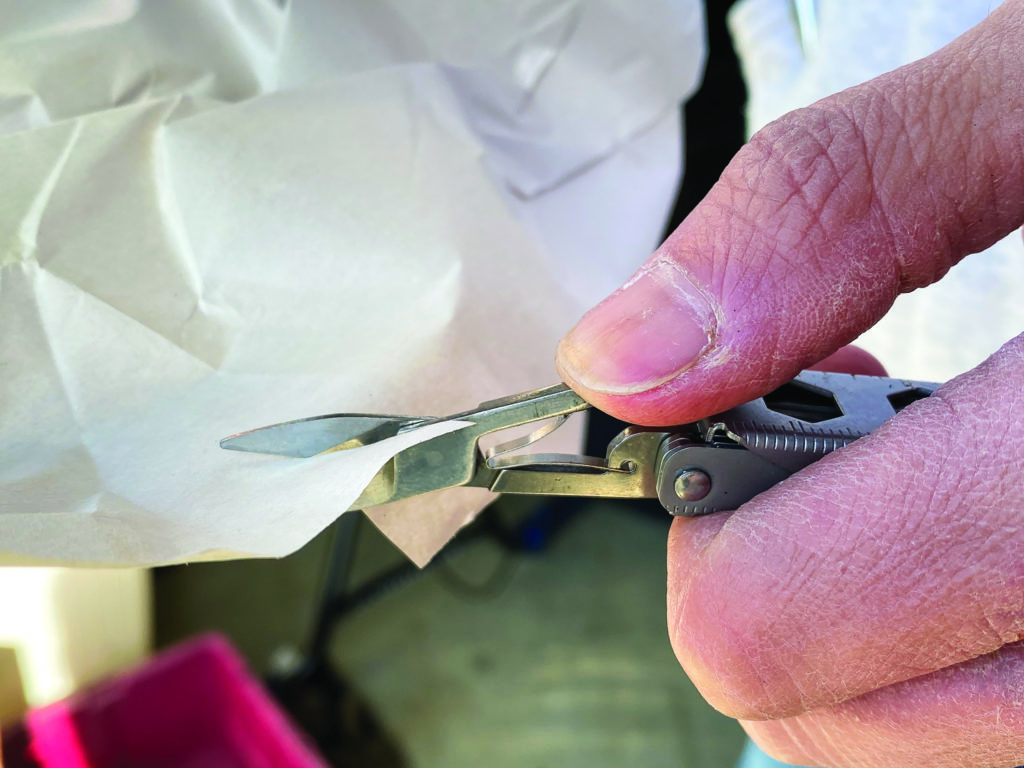
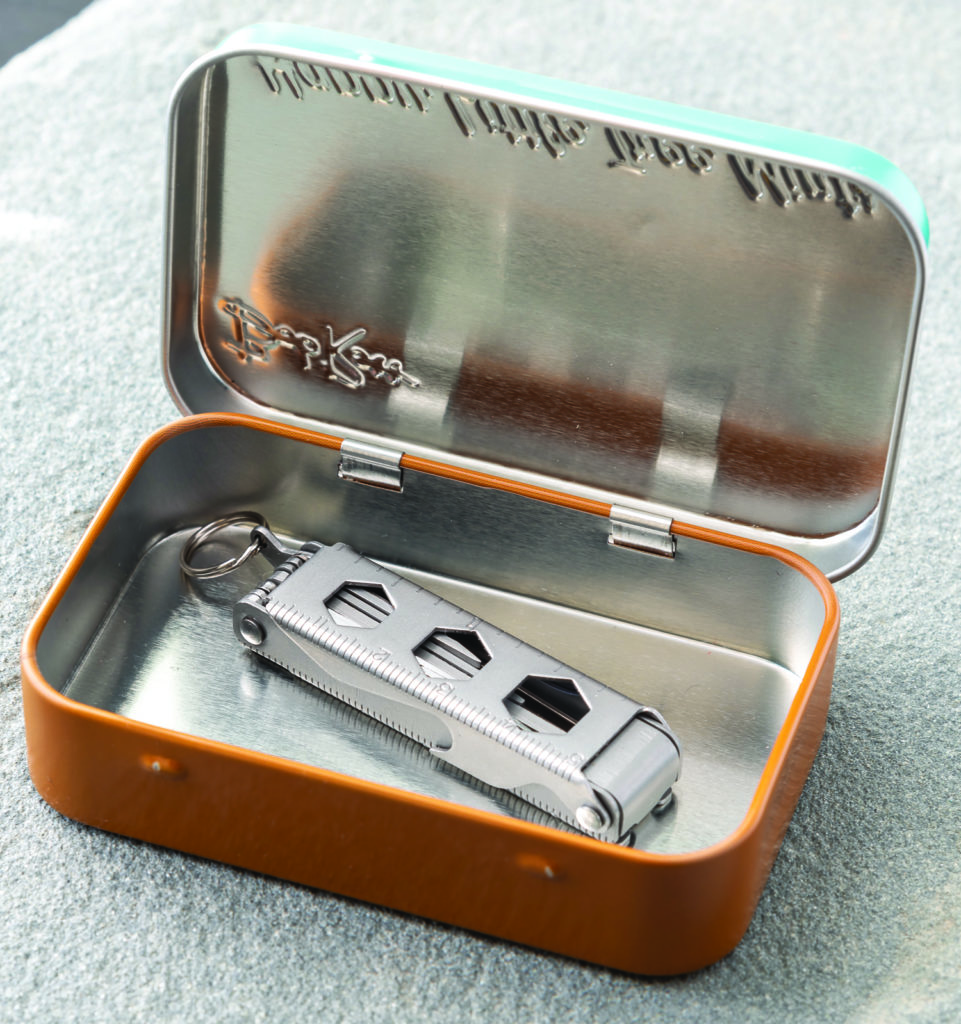
Utica primarily manufactures knives for hunting and tactical but also makes multi-tools. The Minimaster is the smallest multi-tool of the test bunch. It’s loaded with many small fold-out implements: a pair of tweezers, large and small flat-head screwdrivers, a Phillips screwdriver, scissors, fingernail file/cleaner, knife blade, bottle opener, and -, 11/32- and -inch wrenches integrated into the folding cover. Made in the USA, it’s roughly the size of a Victorinox Classic, so it fits well on a keyring, its preferred method of carry.

The scissors may be tiny on the Utica Minimaster but it is effective.

None of the tools lock in the open position. You pull one out and then close the cover; the cover held closed by your grip acts as the lock so the tools won’t fold on you. The tweezers are pretty neat—this is the only compact multi-tool I know of that integrates one. The tips are not textured or ground precise like regular tweezers, so grasping some things with it can be a bit difficult, though having one is better than not. As for the rest of the tools, they are handy to have and definitely will work in a pinch when you need them.

The ultra-compact size of the Utica Minimaster makes it a great candidate for improvised tin-based survival kits.

The only down side to the Minimaster is the hinged cover. It needs to detent tighter in the closed position, as the sample sent to us for review had a tendency to open partway easily. This could present a safety issue, especially if the tools open inadvertently. MSRP: $60. There’s also an imported version that retails for $9.95. Same construction and implement selection, except the multi-tool is made overseas.

MAPPED MULTI-TOOL: Leatherman Signal

When it comes to an article about multi-tools, I would be remiss to not include Leatherman Tool Group, the brand that pioneered the concept. It is the originator of the pliers-based format, and still among the best of them after all these years.

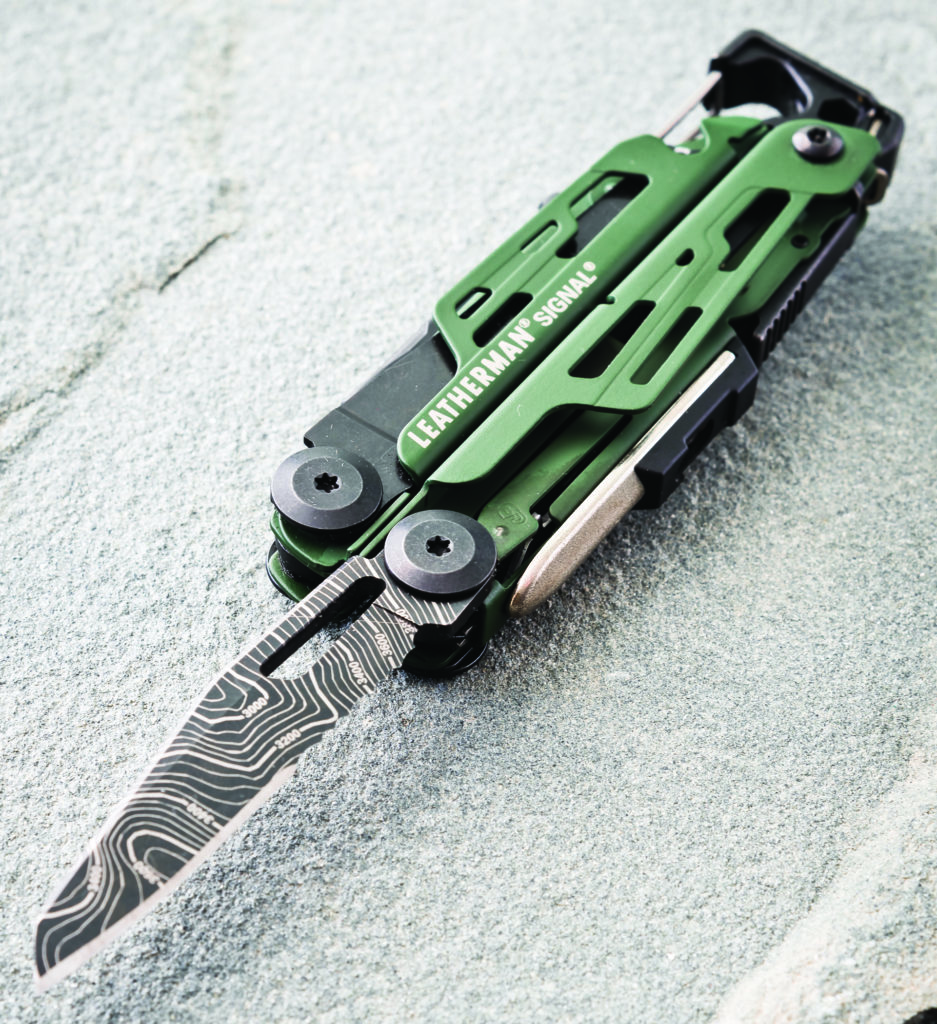
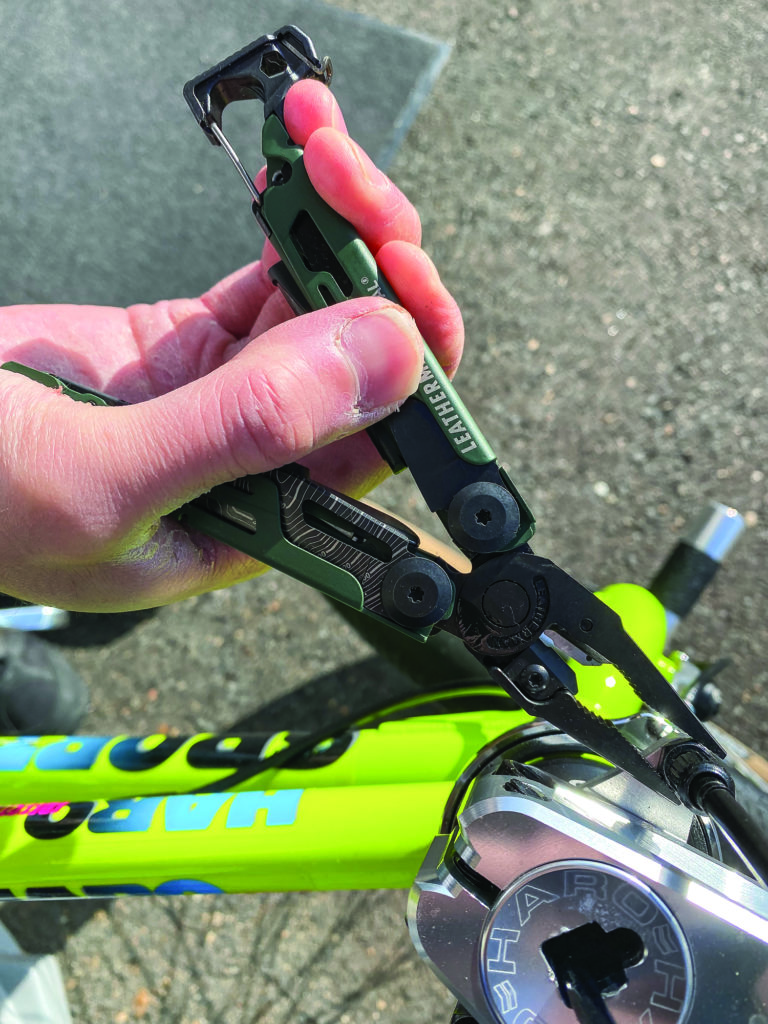
The main blade of the Leatherman Topo Signal features a map-topography laser etching, hence the multi-tool’s name.

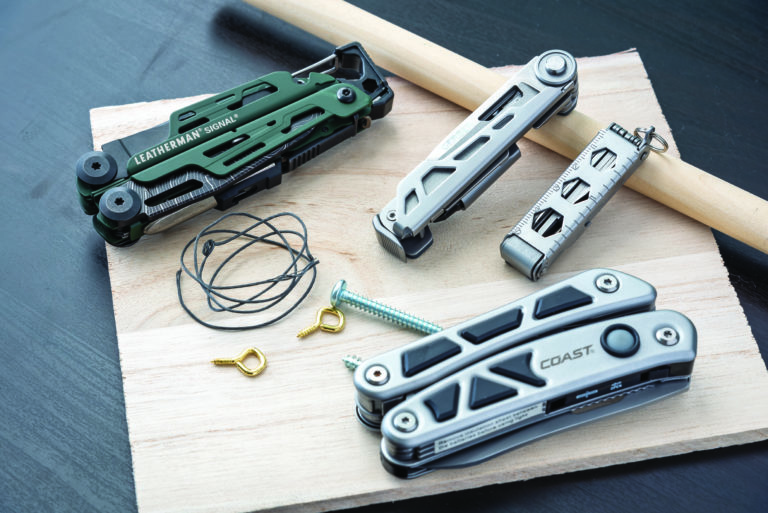
The limited-edition Topo Signal is a variant of Leatherman’s Signal multi-tool. The Signal was developed specifically for the outdoor enthusiast, integrating features like a ferrocerium fire starter rod, saw, survival whistle, diamond sharpener and hammer, along with standard Leatherman features such as pliers jaws with replaceable cutting inserts, fold-out driver with reversible bit, awl and can opener. There’s also an integrated quarter-inch-bit socket built into the hammer portion of the handle, which will accept any standard quarter-inch bit driver.

The main blade is a partially serrated 420HC stainless sheepsfoot pattern that locks open via a linerlock. The blade features an oblong opening hole, while the partial serrations eat through tough and fibrous materials with ease. The blade has a map-topography-style laser etch, hence the name. The distinctive appearance is pretty neat and fits in perfectly with the outdoor theme. Speaking of outdoor theme, the Topo Signal comes in a nice dark green Cerakote coating for the aluminum handles and pliers jaws, fold-out implements, and all-black hardware.

Making on-the-spot repairs and adjustments are a multi-tool specialty. The needle-nose pliers of the Leatherman Topo Signal works great at accessing small nuts in cramped places.

Each one comes with a nice ballistic nylon belt sheath with  button snap closure. It has a steel pocket clip. There’s also an integrated carabiner in the hammer portion so the tool can be clipped on a D-ring, etc.

Comparatively speaking, a Leatherman multi-tool is engineered better than most on the market. MSRP: $119.95. Country of origin: USA. It is the most expensive of the test group, but the quality of the manufacture and fit and finish justifies the price.

Knife Performance: Is Steel Type Really the Most Important?

It’s easy to use steel type as shorthand for quality, but that’s only one factor when it comes to the performance of a knife. Heat treating, Rockwell hardness and geometry also matter.


Sure, it’s all about the steel. Blade steel makes the knife world go ’round, right? Well, further analysis just might reveal a few additional elements that weigh in on the sharpness of a knife blade, and custom knifemakers already account for these factors when they complete their stock in trade.

In Search of “True Sharpness”

Considering heat treat, edge geometry, handle ergonomics, Rockwell hardness and other contributors, the comprehensive analysis of “true sharpness” is an eye-opening experience.

“Assume that all knives are sharp when you get them,” said maker Jerry Hossom. “The question is more about what you want to cut, and is the edge geometry and ­finish one that will do the work you want done. For example, a sharp but coarse edge will not hold up well with hard blade materials.”

Frankly, the ingredients are intertwined, and the path to true sharpness makes frequent stops along the way.

Experience in making and cutting with various materials and knife designs brings knowledge of the process and the expected results.

Physical Features

Best knife steels
ABS master smith Jim Crowell has won a number of cutting competitions through the years, including the first ABS/BLADE Show World Championship Cutting Competition in 2003. Here is the knife he used and his championship belt buckle. (Jim Crowell images)

“I can and will only speak from personal experience,” commented ABS master smith Jim Crowell, winner of numerous cutting competitions through the years, including the fi­rst ABS/BLADE Show World Championship Cutting Competition in 2003. “Since it would be difficult if not impossible to tell by looking, I would consider the reputation of the maker and his or her history.

“Not knowing who made the knife, I would consider the following: Visualize the geometry and edge treatment. The intangible here is the heat treat. If I’m looking at a knife I know nothing about, the physical features that herald sharpness and performance are blade grind/geometry and the edge. If the blade is ground from the spine to the cutting edge, it achieves the smoothest transition from ‘zero’ at the cutting edge to the full thickness of the spine.

“In my opinion, a flat-ground blade with a convex edge is the best geometry. This is the smoothest transition from cutting edge to spine irrespective of spine thickness or width.”

Steel Type & Blade Performance

Best knife blade steels
“Buying a knife from a reputable maker should be simple,” Tim Britton noted. “My questions would be steel type, Rockwell hardness, and what kinds of tools the maker has in their shop.” Tim’s gentleman’s slippy boasts a 2.5-inch blade of BG-42 stainless steel. Closed length: 3.25 inches. (Eric Eggly/PointSeven image)

Of course, a quick nod to the steel has to ­figure in. Without the steel itself, nothing else matters.

“How often have I heard that a knife holds an edge very well but is too difficult to sharpen?” Hossom offered. “They are opposite sides of the same coin. Wear resistance in cutting is the same attribute as wear resistance in sharpening, and again, it depends on the intended use.”

Discussion also surrounds standard versus premium steels, given that either is properly prepared.

“So-called standard steels have their place, but I’m not sure where,” explained maker Tim Britton. “I started with O1 in 1972 and Blackie Collins talked me into using 440C. Peer pressure… Ted Dowell, Frank Centofante, Jimmy Lile and Bob Dozier had settled on D2. New stuff like S35VN leaves them all in the dust. It takes twice as many belts to grind the blade and is max stain resistant. I’ve had great field reports from guides who dress a lot of deer, and one who is a pest control hunter and kills a lot of hogs and nutria.”

According to Crowell, everyone probably agrees that quality steel is a must.

“Some steels lend themselves to cutlery more so than others,” he reasoned. “There are some ‘exotic’ steels that truly outperform, but they are usually more expensive and harder to work with. Then, there are inexpensive steels used in cheap manufactured knives sold in bargain stores.”

Crowell looks at the long-time rub between carbon and stainless steels and likes the “10” series spring steels, 5160, O1, W2 and L6, among others. He prefers steels with 75 percentage points of carbon or more, though 5160 with 60 points of carbon is workable as well.

Rockwell Hardness

For some makers, Rockwell hardness sets the bar in potential sharpness for knife blades. Other factors are important but the scale tells the tale.

“Rockwell hardness has a huge influence on how sharp you can get a knife and how it will hold an edge,” asserted maker Murray Carter. “There may be a rebuttal out there, but I believe it is a universal truth. If hardness is related to how sharp you can get the blade and how it will hold an edge, the element of carbon is responsible for the hardness you can achieve.”

Hardness is forever linked to heat treating. Blades that are not heat treated properly just won’t stay sharp—and they are likely to fail in other performance metrics as well. Game over!

Heat Treating

Best blade steel for knives
“Unless it is heat treated properly, a steel is an undefined mass of metal with uncertain performance qualities,” custom knifemaker Jerry Hossom pointed out. “In fairness, it should not even be labeled as a specific type of steel because such a label implies proper heat treatment.” The blade material on Jerry’s fighter is the
high-performance CPM 3V carbon steel. (Eric Eggly/PointSeven image)

Proclaimed Britton, “Heat treating is critically important for any steel.”

Added Hossom, “Unless it is heat treated properly, a steel is an undefined mass of metal with uncertain performance qualities. In fairness, it should not even be labeled as a specific type of steel because such a label implies proper heat treatment. I have my blades professionally heat treated by Paul Bos Heat Treating because I simply can’t do it as well as he can, especially with high alloy, high performance grades of steel.”

Carter echoed that sentiment.

“Heat treating is so important,” he emphasized. “All our blades are quenched in water, while some quench theirs in oil. Others are just air hardened. Water quenching is severe, an extreme form, and the only one harder is brine quenching.”

Geometry

Crowell ups the ante with the bold statement, “My strong opinion is that heat treat and geometry are more important to the performance of a knife than the specific type of steel. ­The best steel in the world would not fare well if the heat treat was bad and the geometry poor.”

Stressing edge geometry, Crowell further advises, “Edge geometry is particularly important. If a maker tests his work and is confident about the heat treat but the knife is not cutting well, the edge can be adjusted or ‘rolled’ to a different shape.”

What Factor is the Most Important?

So perhaps the most important takeaway from a discussion on sharpness is the advice the pros give to prospective buyers. Assessing the sharpness and relative quality of the future cutting experience involves a discerning eye and some attention to detail. What advice do custom knifemakers over the buying public?

“I would start by looking at the knife and seeing if the geometry looked good and how well made the knife appeared to be,” Crowell advised. “­That would show the maker was paying attention to detail and would be a positive sign to me. I would ask what kind of steel was used and how it was heat treated, and by whom. ­There are several very good heat treaters out there. If the maker did the heat treat, I would ask how—oven, forge, kiln, torch? I would want to know if the maker tests his work and if he has chopped, whittled, and cut stuff.”

The inquiry is basic, Britton says, and the maker should be forthcoming with reasonable responses.

“Buying a knife from a reputable maker should be simple,” he noted. “My questions would be steel type, Rockwell hardness, and what kinds of tools the maker has in his shop. I’m a dinosaur. I won’t buy a production knife that was made by machines in batches of 20 or 30. I’m a proud member of the ABS and don’t know any steel beaters who mass produce any design.”

The sharpness of a knife blade goes well beyond the steel. The combination of steel, hardness, heat treat, edge geometry and handle ergonomics feeds the finished product. However, these are only as supportive of the knife’s function as the skill set of the maker’s hand in action.

Tsuba Time: Make a Guard for a Japanese Sword

Wally Hayes Japanese style sword
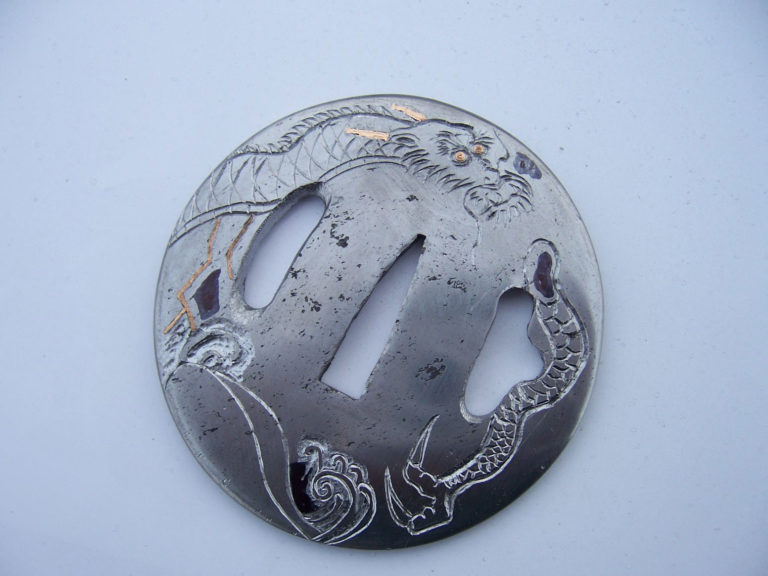
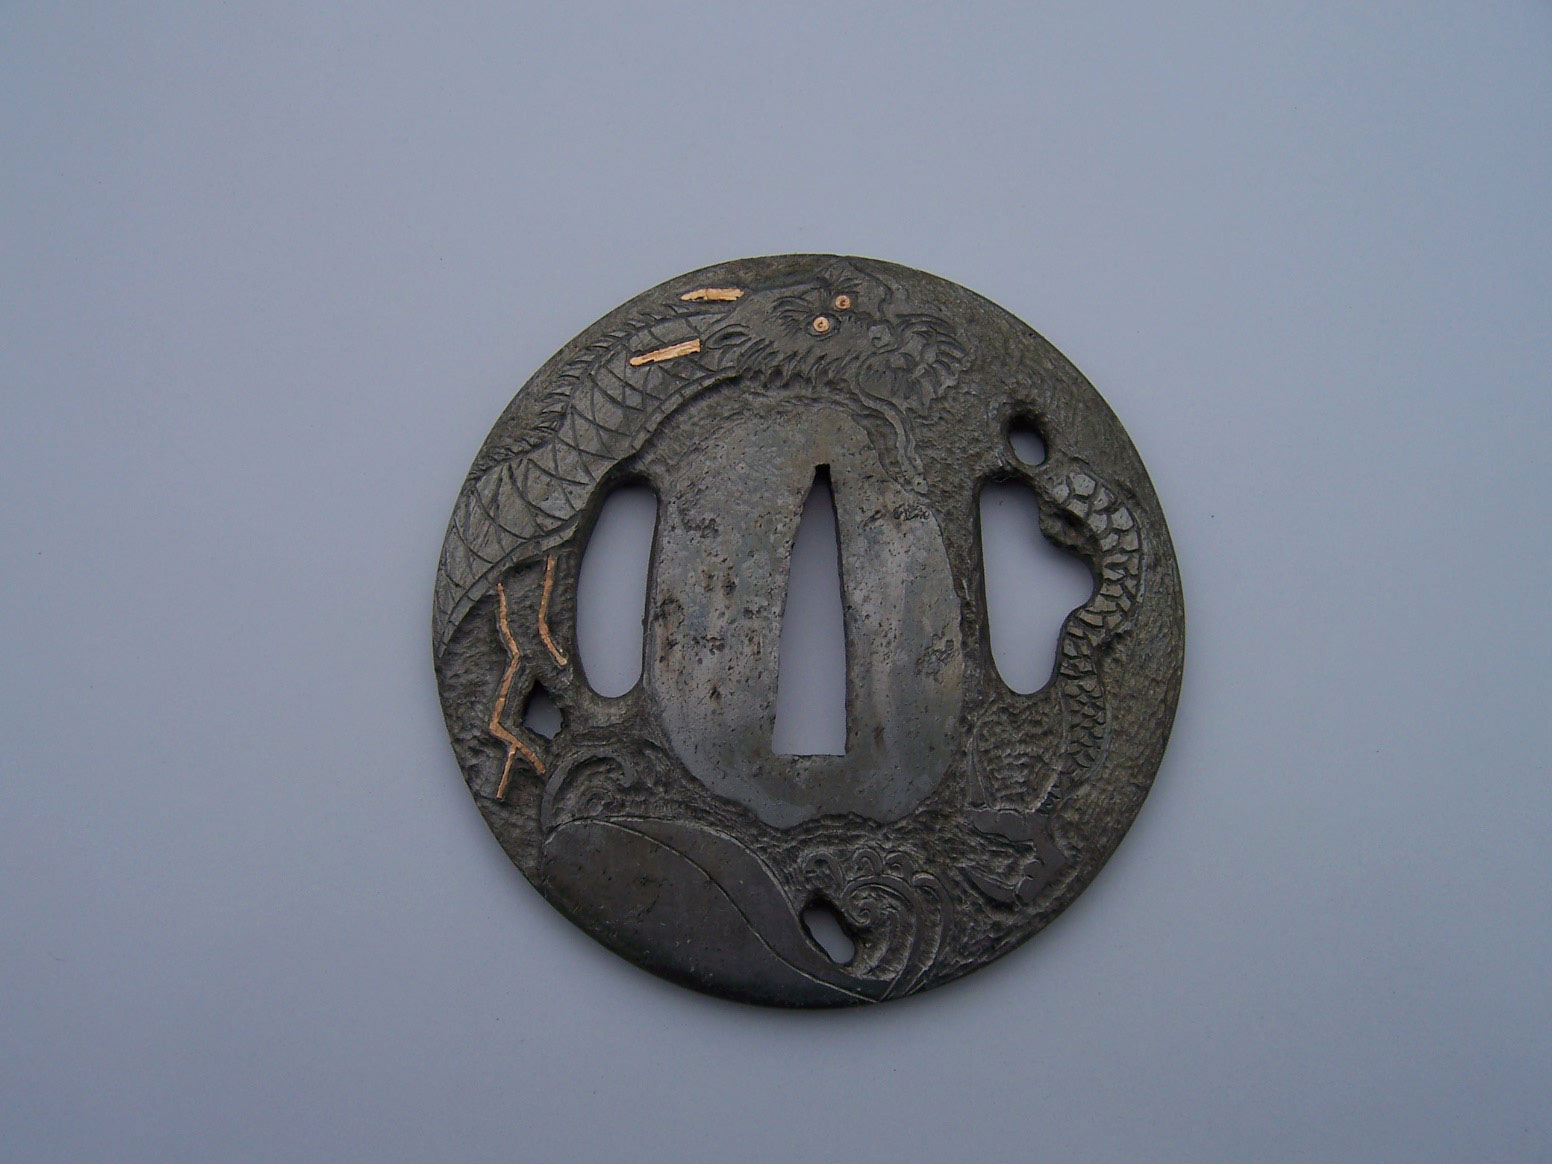
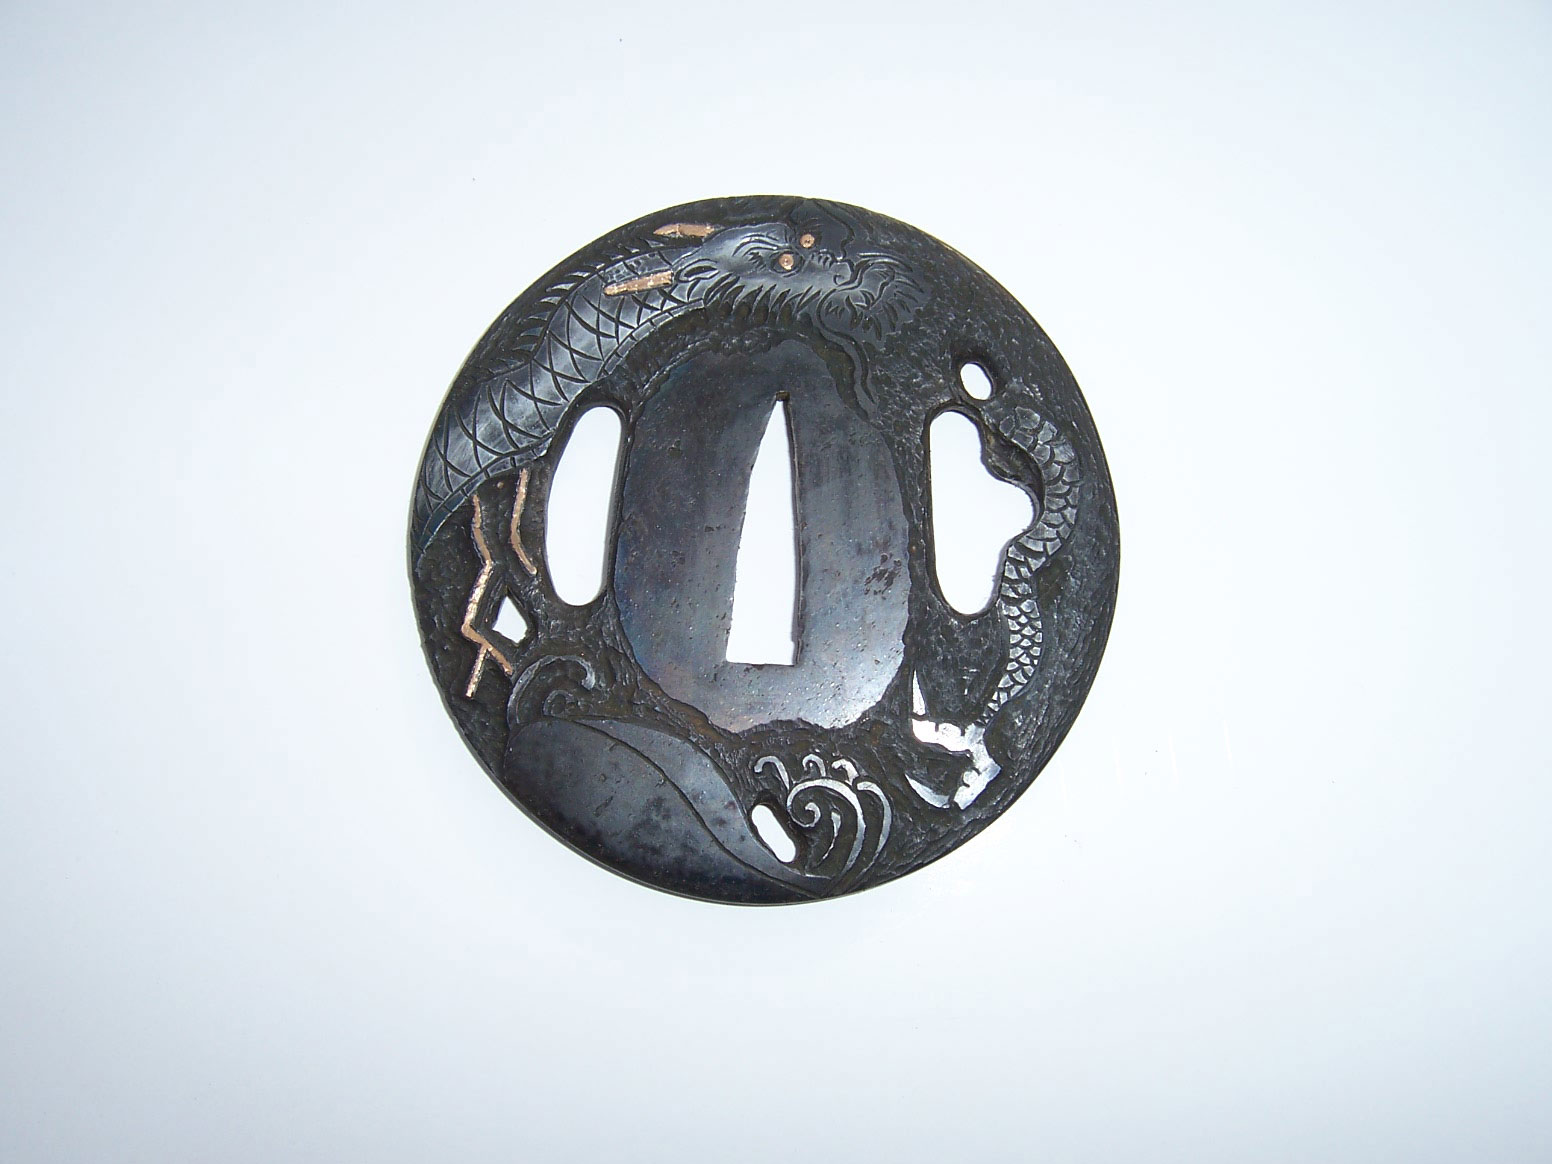
The tsuba the author made for this story appears on a katana he said he made for Axl Rose of Guns ‘N Roses fame. All photos via the author.

Making a “tsuba,” Japanese for “guard,” is one of my favorite steps in sword making. You have a chance to build something as simple or as complicated and artistic as you like.

I first started making the tsuba (pronounced SUE-ba) way too thick and heavy, and learned over the years how to refine all of my sword parts. I hope this overview helps shed some light on the subject and gives you some ideas.

I have made tsuba from damascus, mild steel, high-carbon steel and antique wrought iron. Many traditional tsuba were made from folded Japanese steel called “tamahagane.” I used wrought iron for this demonstration.

Step One: Thin it Out

Wally Hayes
Photo 1: Wrought iron forged out and rough cut round for the tsuba.

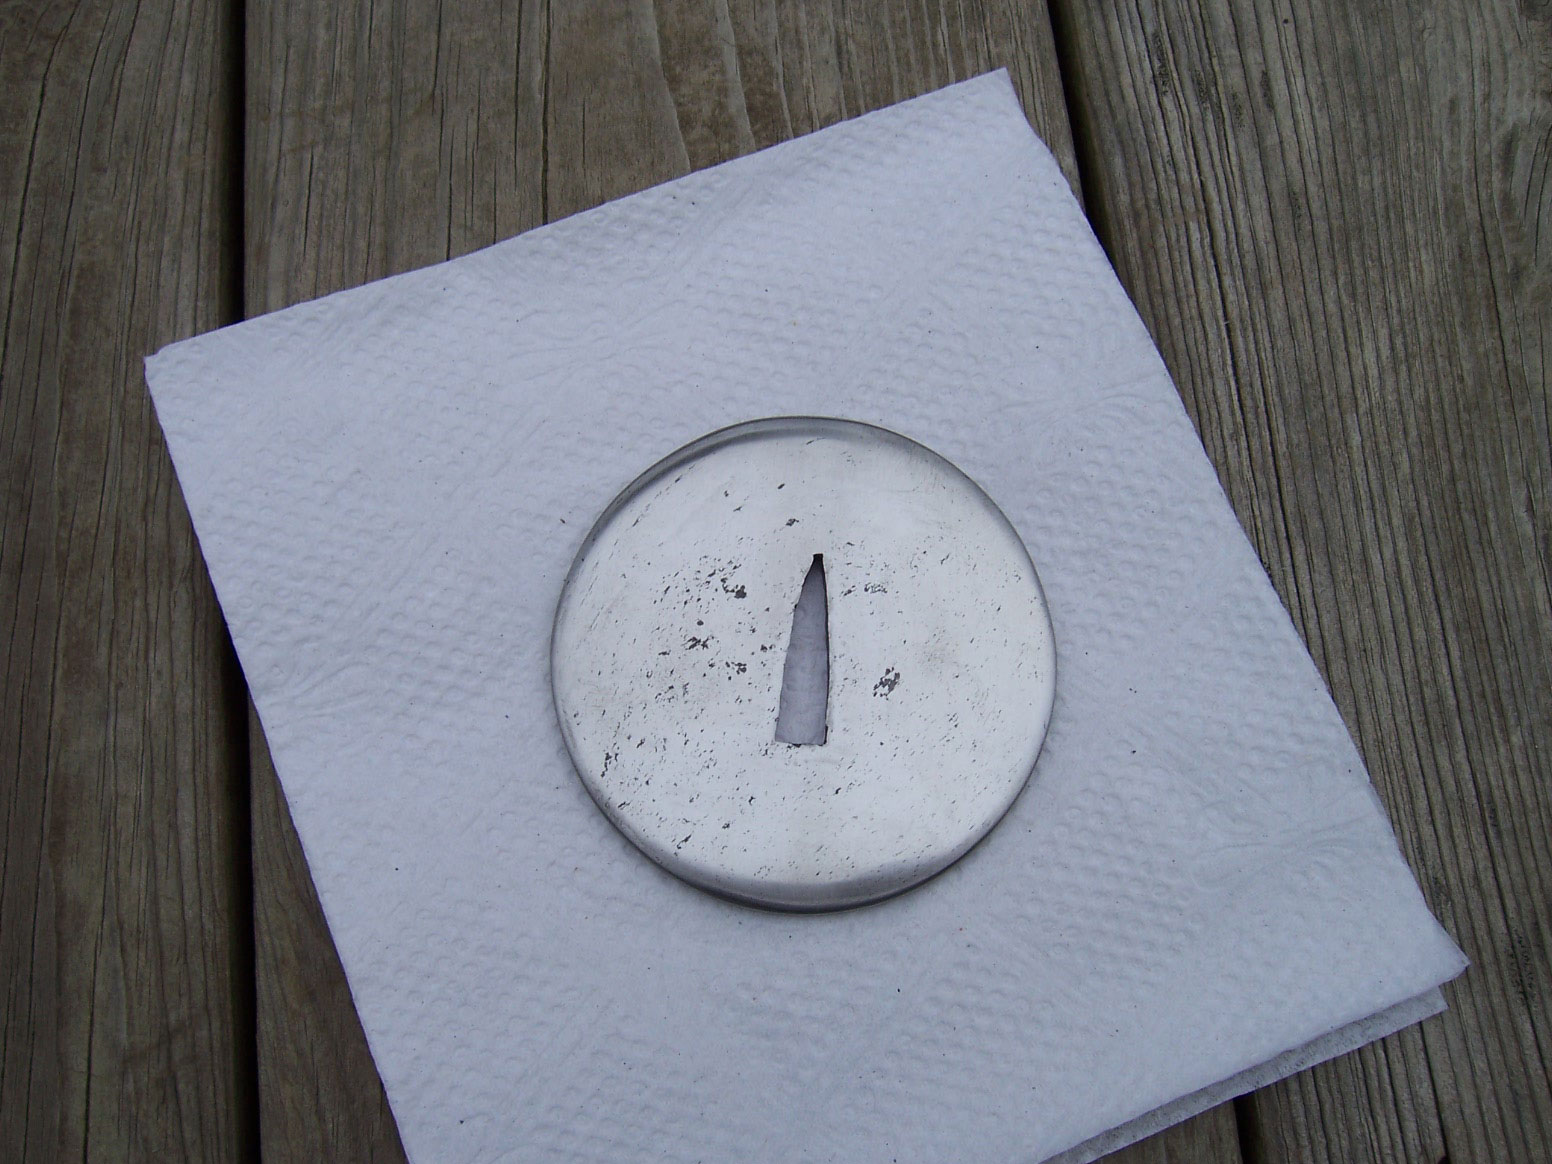
To begin, cut 3.5 inches of steel from an old wagon wheel. Forge it thinner and wider, and taper the edges thinner all the way around (Photo 1). If you leave the center a little thicker and taper the edges, it looks more balanced and is lighter. Wrought iron is soft and forges out easily and is simple to cut, sand, file and drill. Using the spray from a can of WD-40™, trace around your steel. Cut it out on a band saw and grind the shape round. Sand the tapers even, gradually progressing to finer-grit belts.

Wally Hayes tsuba
Photo 2: Sand the tsuba and start cutting the holes.

Before polishing, I drill the holes (Photo 2). I use a Dremel cut-off wheel to cut out the webbing between the holes. You can also try a jeweler’s saw. I use both.

Employing needle files, make the tang hole big enough to slide up to the “sepa” (washer) on the sword. At this point I polish the tsuba to an 800-grit finish.

Wally Hayes tsuba
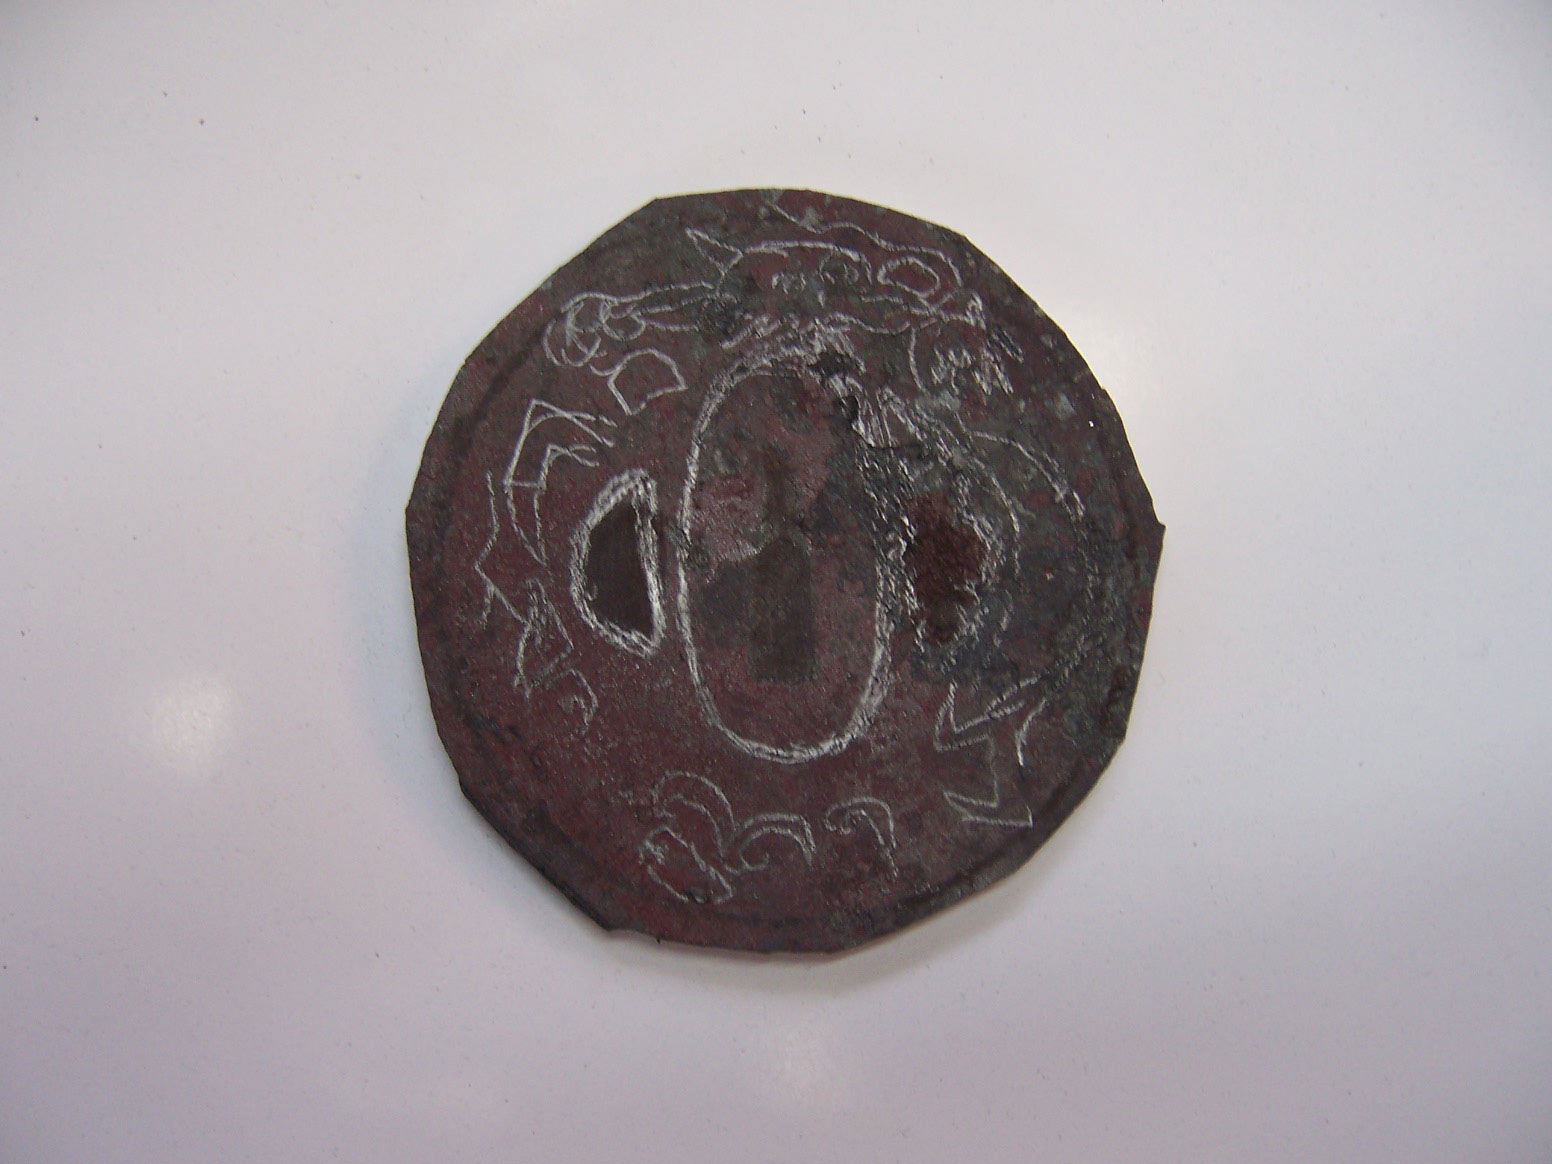
Photo 3: Draw the design with a Sharpie® and start engraving.

Depending on how detailed the engraving is, I draw my design on or transfer the design onto the tsuba (Photo 3). This one I drew the design on with a Sharpie® marker. I printed out some of my favorite design pictures to use as a reference.

Engraving and Etching

Wally Hayes tsuba
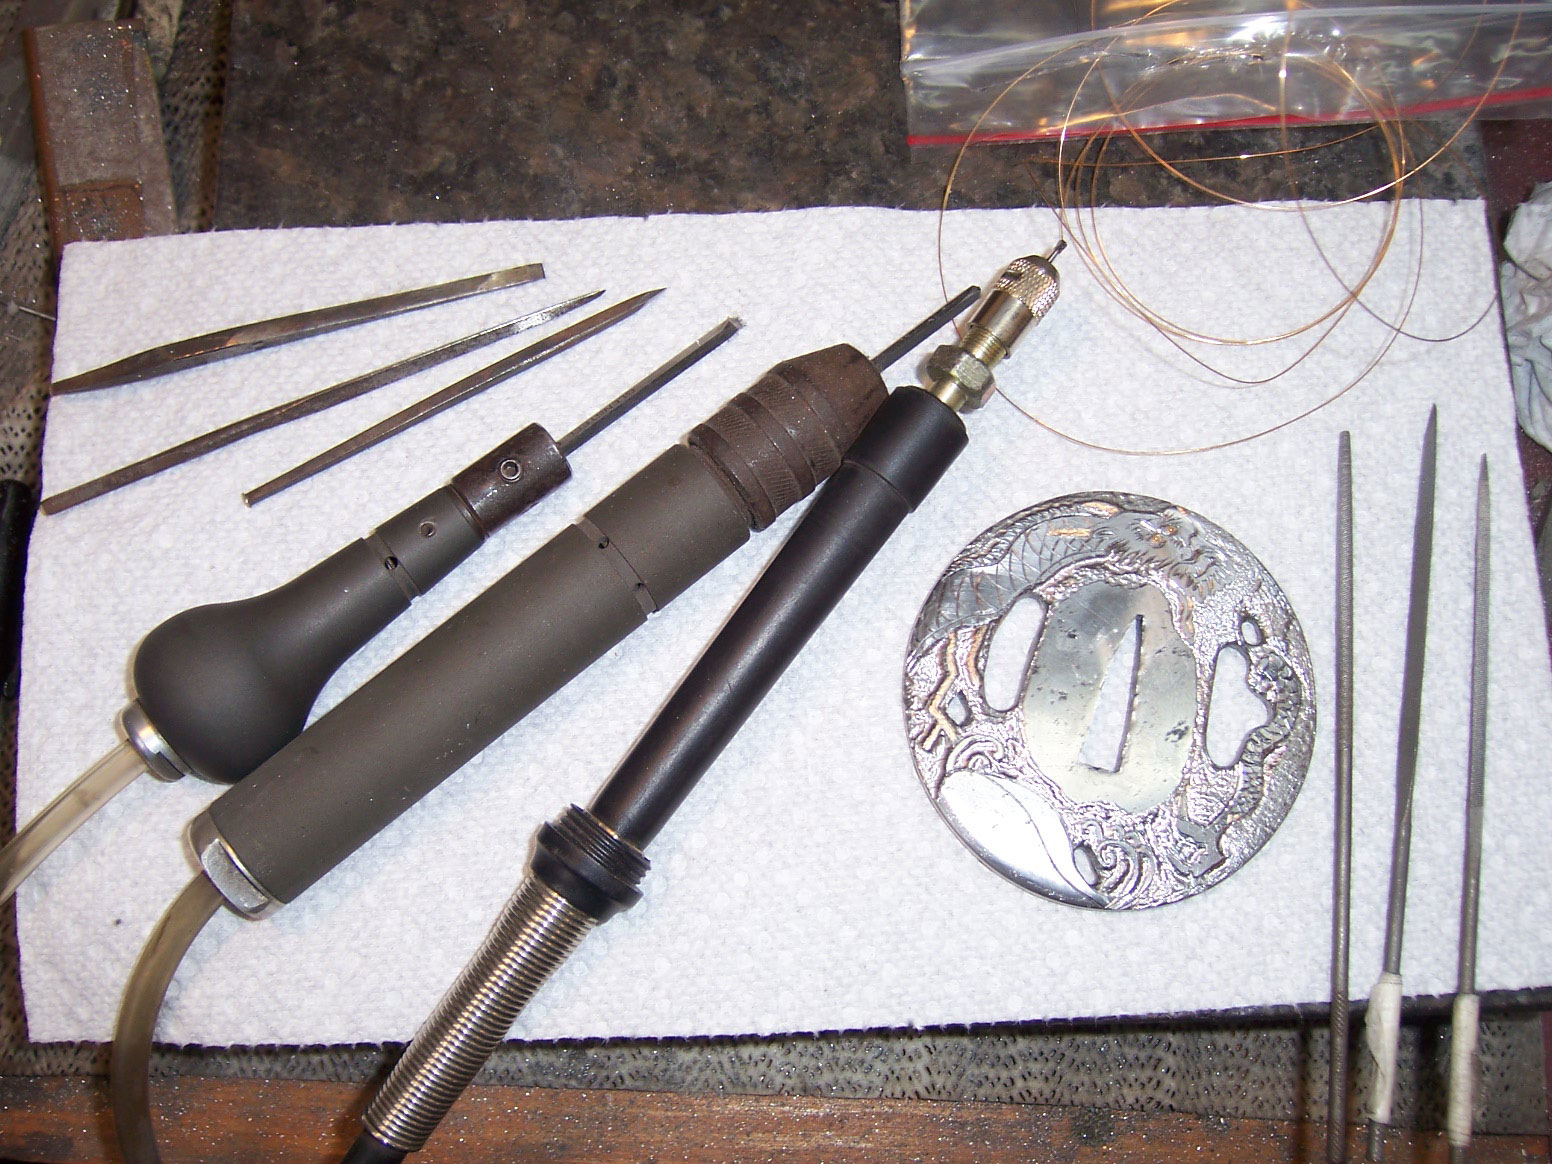
Photo 4: Tools of the trade: gravers, chisels, and high-speed air and Dremel® tools.

Now the fun begins: engraving the lines. I use square gravers from GRS and from engraver Steve Lindsey. The new gravers both work great and Steve’s Carbalt gravers got me back into engraving. The tips of standard high-carbon gravers break too often. The new gravers last a long time and take a real beating. I use a Dremel Tool and a high-speed air hand grinder to texture the background (Photo 4).

Wally Hayes tsuba
Photo 5: Inlay the gold into the tsuba.

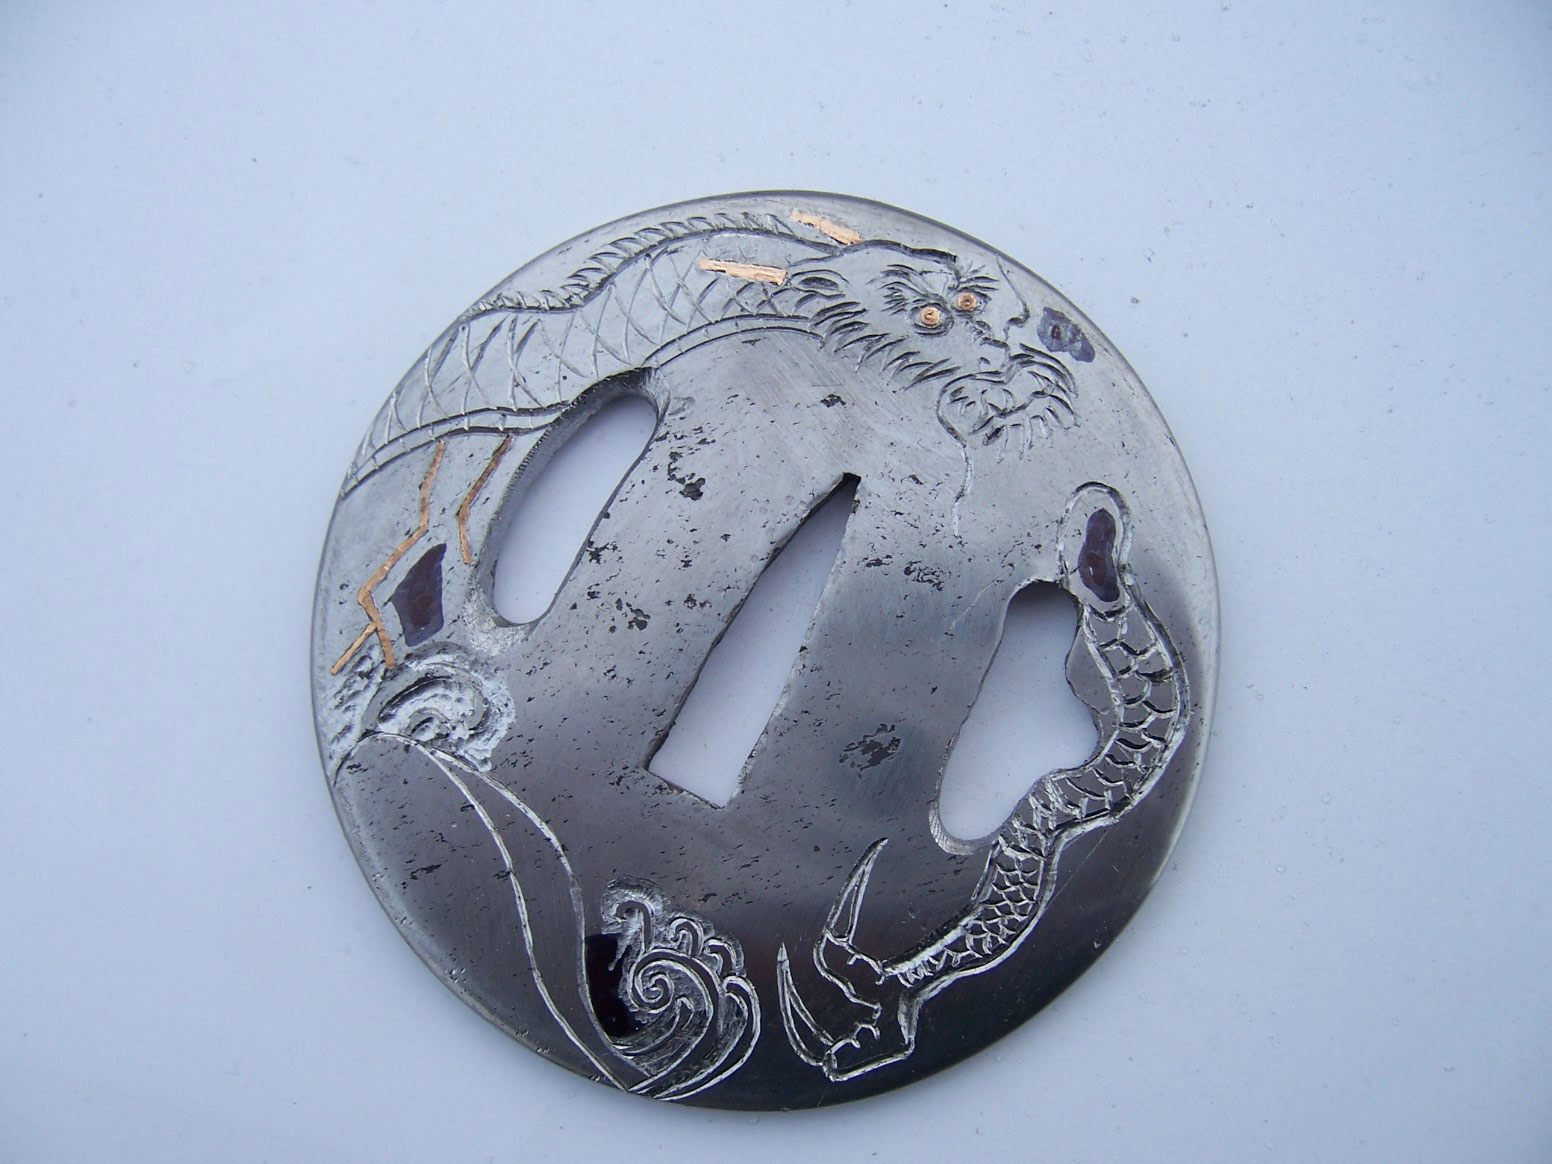
If you practice it a lot, gold inlay is easy (Photo 5). First, cut your line with a square graver, then take a small flat chisel and tap it perpendicular along the line to undercut the groove. Raise some burrs along the bottom of the groove, then tap in the 24k-gold wire.

Wally Hayes tsuba
Photo 6: Texture and carve the background.

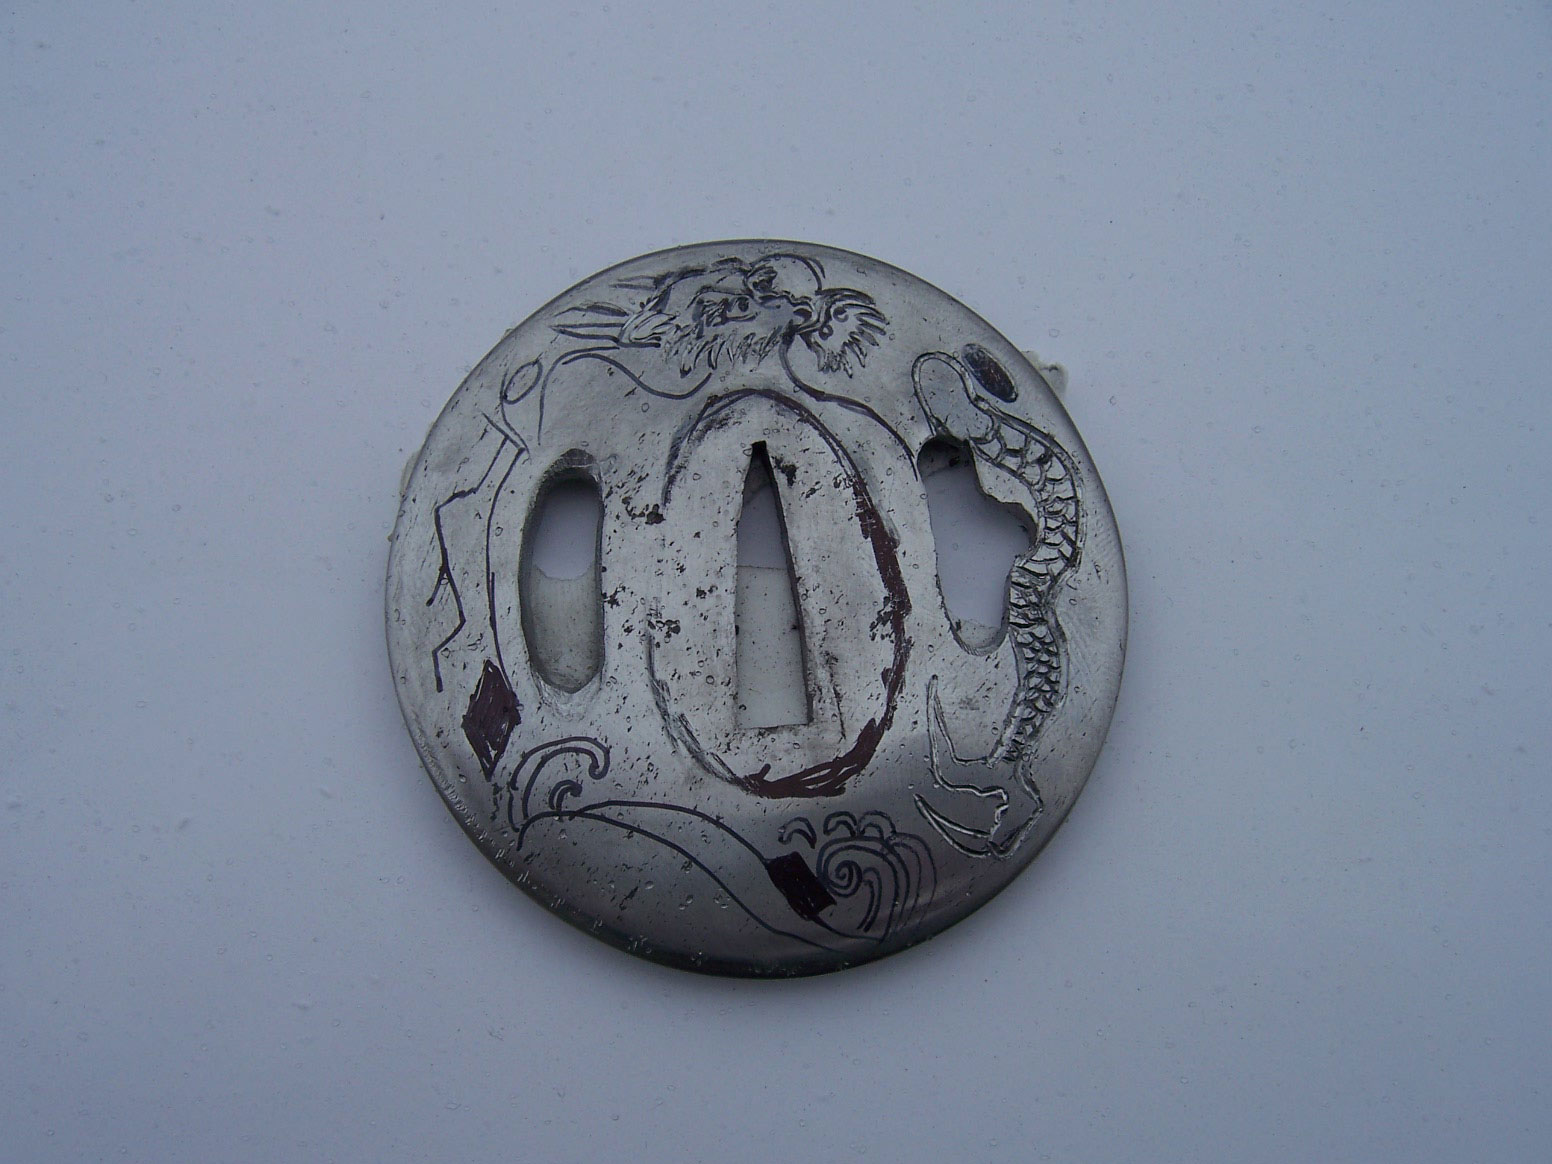
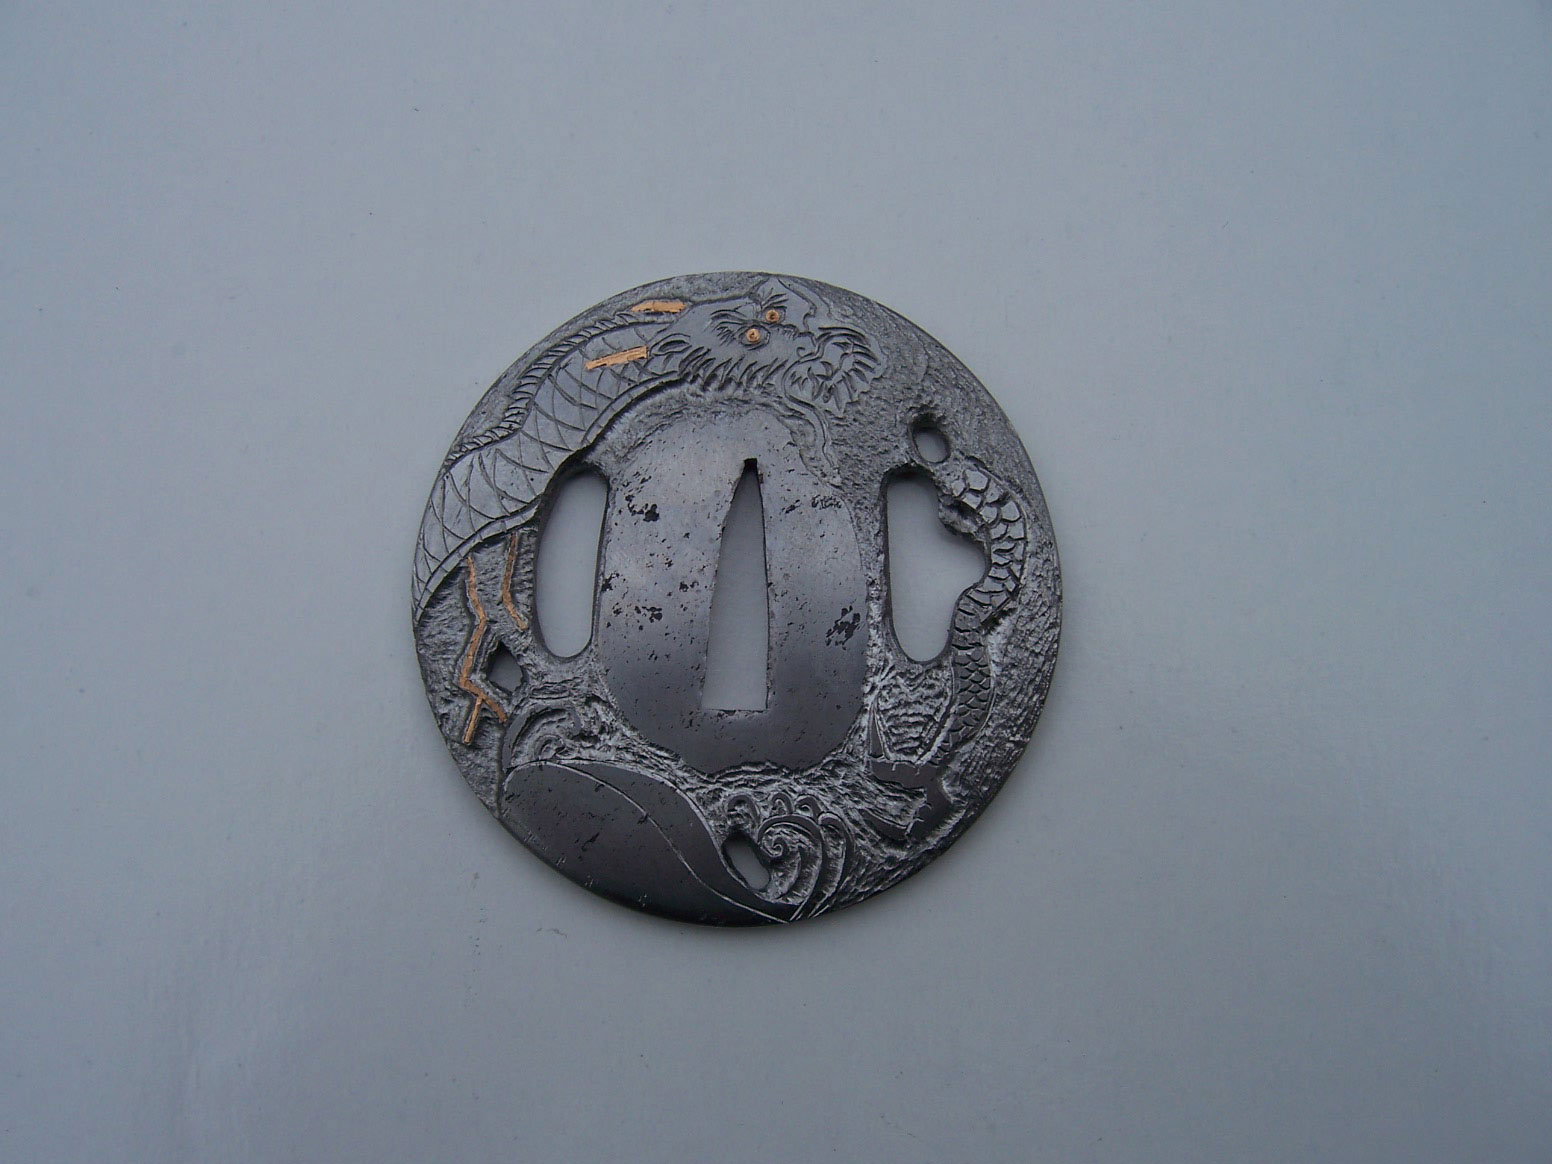
After engraving, I etch the tsuba in acid. This brings out the pattern in the wrought iron and resembles damascus somewhat. It gives an old look and feel to the piece. I mix four parts distilled water to one part muriatic acid or ferric chloride. I neutralize the etched steel with Windex® and then lube with WD-40. To bring out the highlights on the engraving, I use a small Cratex® rubber wheel and polish the surface by hand.

When done, I apply Renaissance Wax to keep the tsuba from rusting.

Wally Hayes tsuba
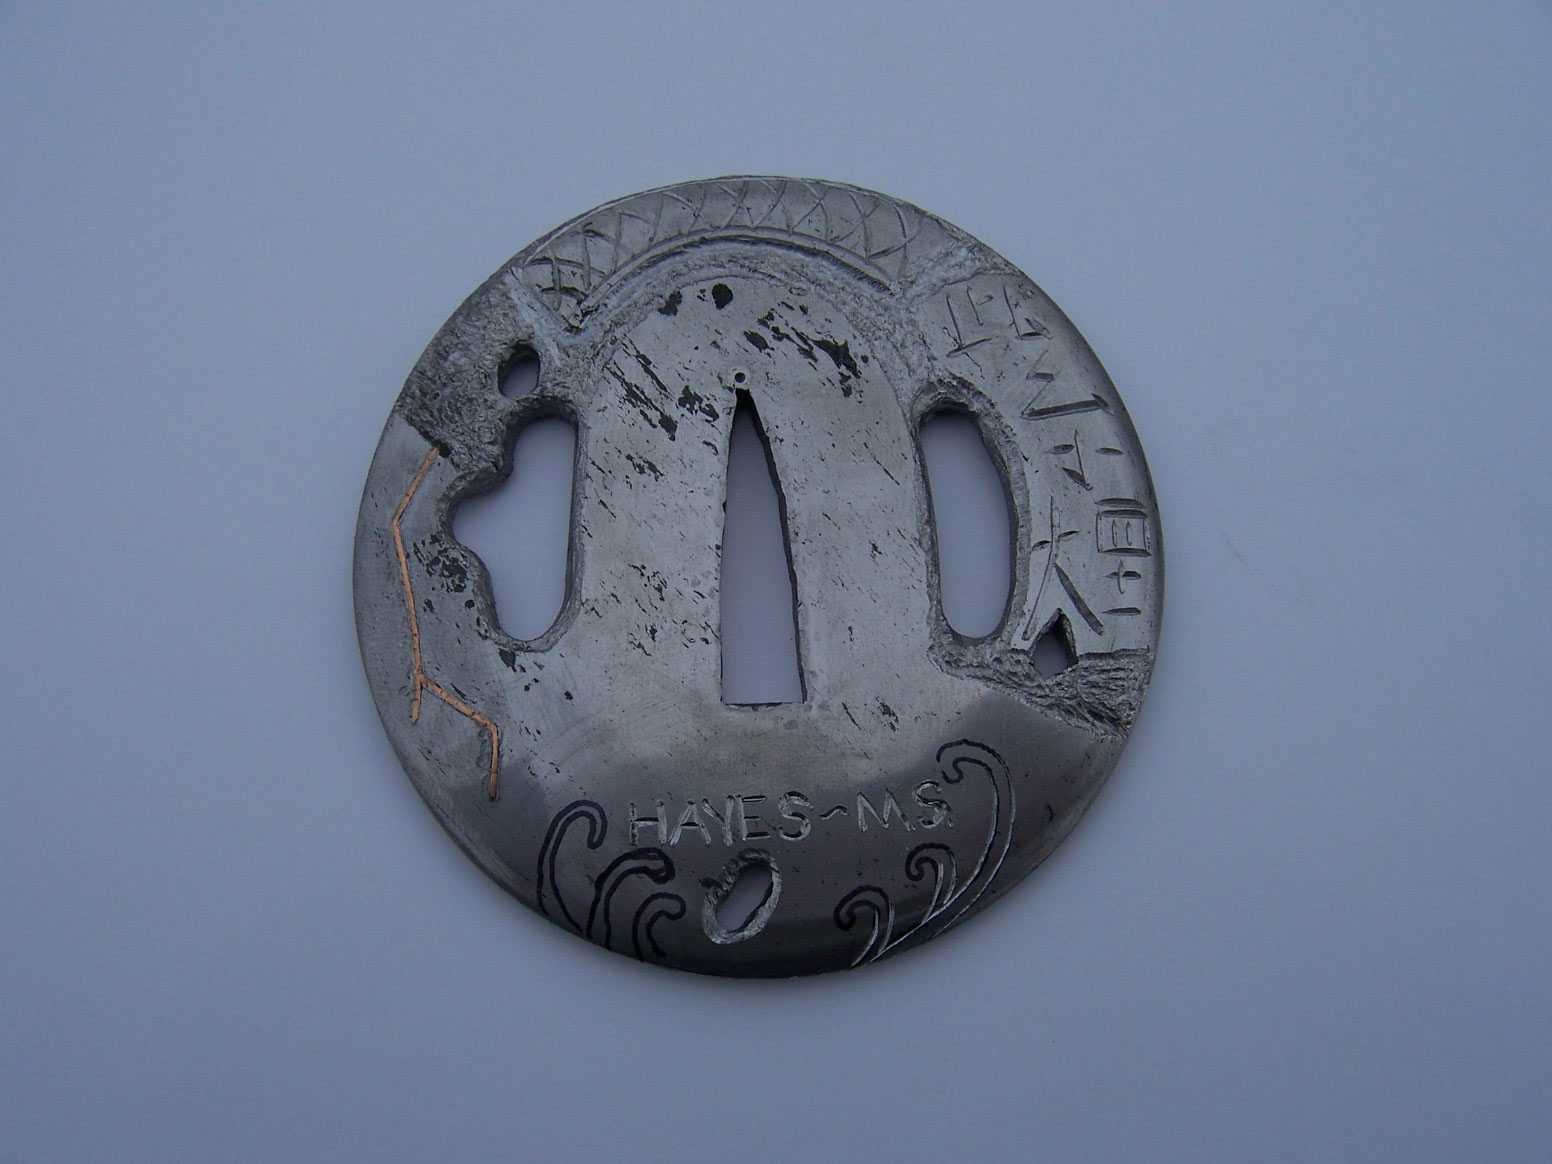
Photo 7: Carve the other side of the tsuba.
Wally Hayes tsuba
Photo 8: Blue the tsuba with cold gun blue.
Wally Hayes tsuba
Photo 9: Polished, waxed and finished, the tsuba is ready for mounting.

Keep Learning About Making Swords 

Learn swordmaking

Advertisement

Must Read Articles

Read this before you make a knife

Knifemaking 101 – Read This Before You Make a Knife

  by Wayne Goddard My experience has taught me that there's nothing like digging in and getting started. I've often said the hardest part of the...
how to forge damascus steel

How to Forge Damascus

Advertisement
Advertisement