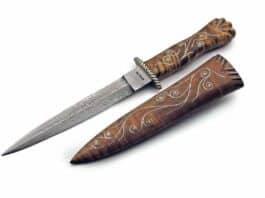
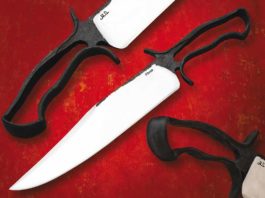
Knifemaking is the building of a knife, which includes the blade, handle and other accouterments. Blades are made by either removing metal from a steel blank via a grinder – known as stock removal – and the forging to shape of hot steel into a blade in the process known as bladesmithing. Other parts, including bolsters, guards, pommels, etc., are needed to complete the finished knife.
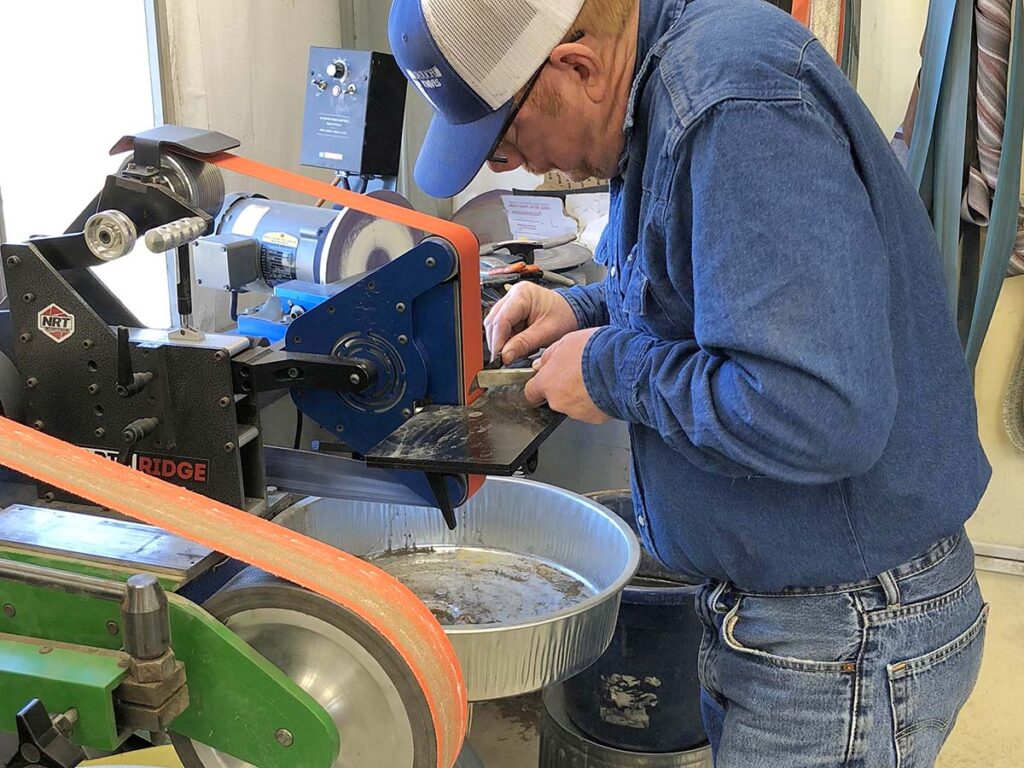
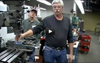
This demonstration on the selection and use of milling vises is by Dale Schafer, Machine/Tool Technology Instructor at the Washburn Institute of Technology. This was one of the demonstrations at the 3rd Heartland Hammer-In in Topeka, Kansas sponsored by the American Bladesmith Society and hosted by the Kansas Custom Knife Makers Association.
For more about knifemaking, be sure to pick up a copy of BLADE’s Guide to Making Knives. This second edition shows step-by-step the tools and techniques for making a knife.
What to look for in a custom hunting knife and some sharp examples.
For outdoorsmen, a knife of some kind is almost a constant companion. Most carry a knife that falls into the category of a hunter.
The Merriam-Webster Dictionary defines hunting knife as a large, stout knife used to skin and process game. When I started judging custom knife competitions at knife shows 30 years ago, the category with the greatest number of entries was always the hunter. Why? Because there are so many interpretations of what a hunting knife is. Often the judges refer to their own experience using knives in the category. Entries generally range in blade length from 2.5 to 5 inches. I have seen knives entered in the category with 10-inch blades.
Blade Lengths
Blade lengths are often designed to process a particular bird or animal. Smaller blades in the 2.5-to-3-inch range are primarily used for dressing birds. The short blade length allows the hunter to quickly extract the bird’s breast meat. The most common blade length is 4 to 4.5 inches, a length that will dress out most game hunted regularly in North America. The dropped hunter/drop-point hunter designed by BLADE Magazine Cutlery Hall-Of-Fame® member Bob Loveless (page 26) is the world’s most copied hunting knife. The standard Loveless drop point features a 4-inch blade.
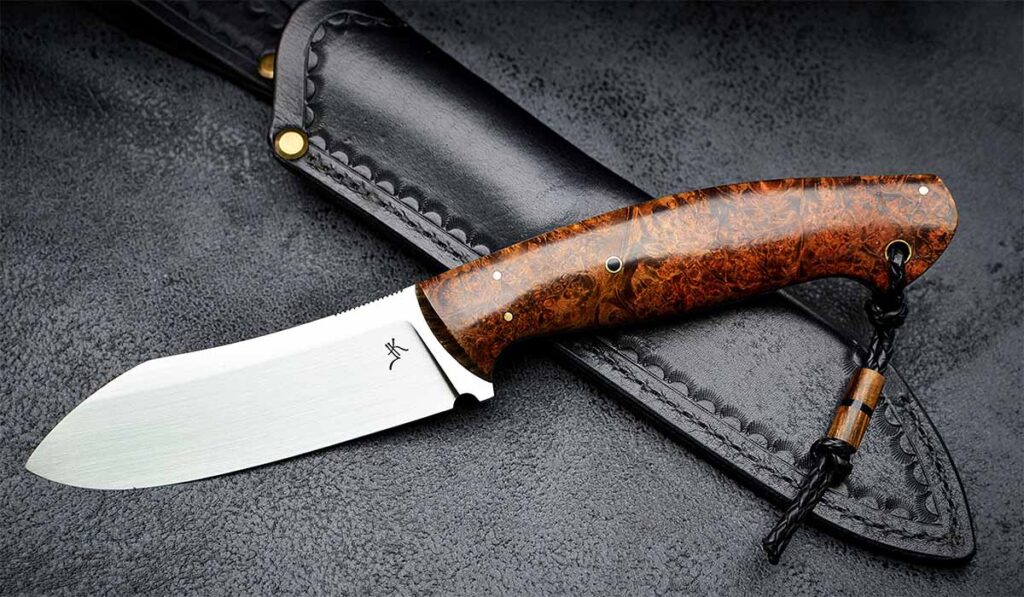
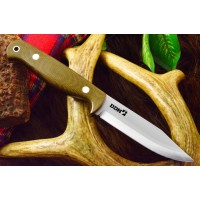
One of the more popular skinner designs is the Nessmuk, praised for its all-around versatility in the field. Luk Kuberski’s Nessmuk Hunter features Sleipner stainless blade steel with an impeccable satin finish and a mesmerizing handle of maple ash burl. (Luk Kuberski image)
Nessmuk Skinner Maker: Luk Kuberski Blade Length: 4.75” Blade Steel: Sleipner stainless Blade Finish: Satin Blade Style: Drop point Handle Material: Ash maple burl Overall Length: 8.6” Sheath: Leather pouch/belt model by the maker Author’s Comments: Full-tang construction; excellent balance and handle ergonomics; serrated thumb ramp enhances control Maker’s price for a similar knife: $350
When dressing out larger game such as moose or elk, many hunters prefer a longer blade because of the animal’s size. Why is the 5-inch blade the limit? The idea behind the hunting knife is to dress out the animal without losing control and cutting into the animal’s vital areas. Going much past a 5-inch blade can affect the average hunter’s ability to control the cutting edge.
Blade Steels
Materials for hunting knife blades are primarily stainless and carbon steels, though damascus has been gaining in popularity in recent years. The environment the hunters will be in and their skill level at resharpening a blade will enter into the choice of steel.
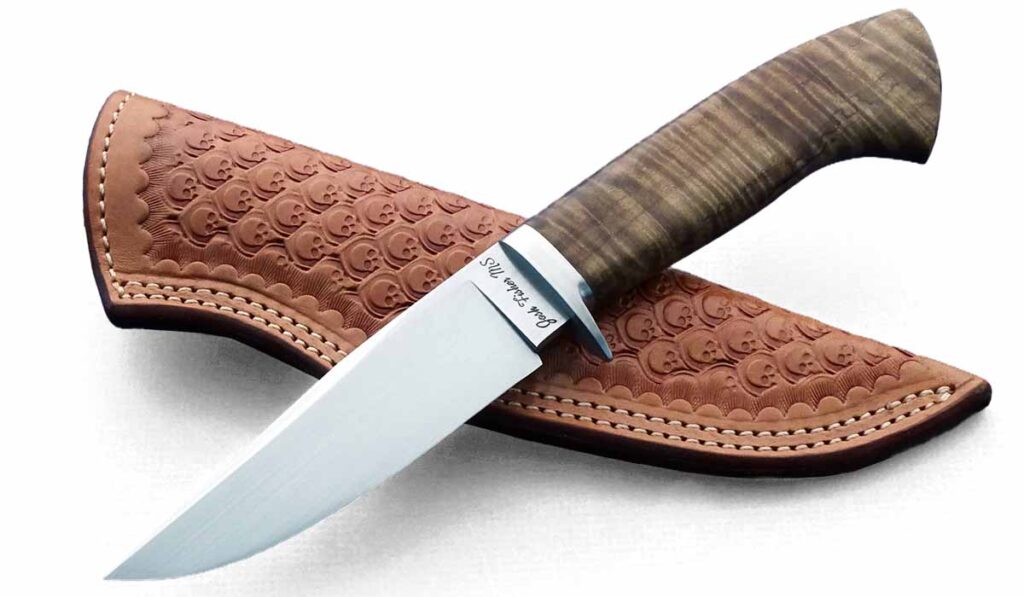
Wood is a popular handle material for custom hunting knives. Josh Fisher opts for curly maple on his drop-point hunter. And how about those skulls on the tooled-leather sheath by Bob Bobbert? (Robertson’s Custom Cutlery image)
Drop-Point Hunter Maker: Josh Fisher Blade Length: 4.5” Blade Material: 1084 carbon steel Blade Style: Drop point Guard Material: Stainless steel Handle Material: Curly maple Overall Length: 9” Sheath: Tooled-leather pouch/belt model in a skull motif by Bob Bobbert Author’s Comments: Excellent handle ergonomics and balance; Josh is an ABS master smith Maker’s list price for a similar knife: $625
Each steel has its advantage(s) concerning rust resistance, ease of sharpening and edge holding. Carbon steels such as 1084, 5160 and 52100 provide an extremely keen edge and can be easily resharpened. They do, however, require more corrosion maintenance. Stainless steels such as 440C, ATS-34 and CPM 154 make up the bulk of stainless steels used on custom hunters. These can be reasonably simple to sharpen and more forgiving regarding corrosion.
Whichever steel you choose, the blade should be cleaned after use and a light coat of oil should be applied. It is best not to store your knife long-term in a leather sheath, as the tannic acid found in the leather can rust your blade. Additionally, leather does hold moisture, which can hasten the rusting process of the steel. It is best to store knives in something other than their leather sheaths.
Handle Materials
A wide variety of handle materials are used for hunting knives. A favorite among makers and outdoorsmen is Sambar stag, either in its natural color or dyed to create amber stag. Stag is favored not only for its looks but because its contours provide an excellent gripping surface, even when wet. Another handle material gaining favor is elk and much for the same reasons. Two advantages of elk are it can be found in larger sizes and is less expensive.
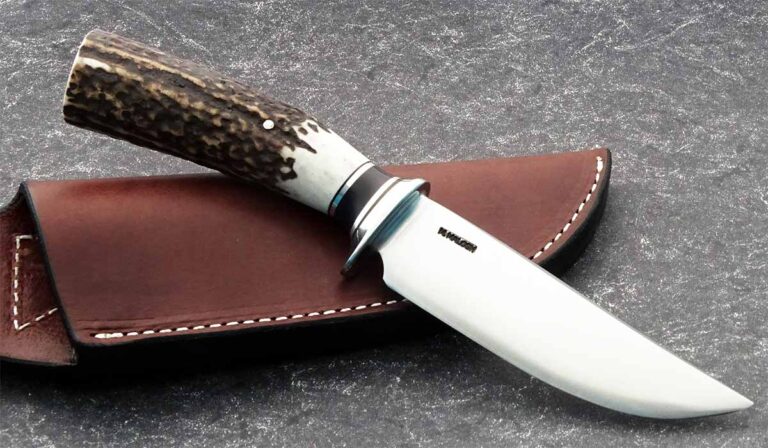
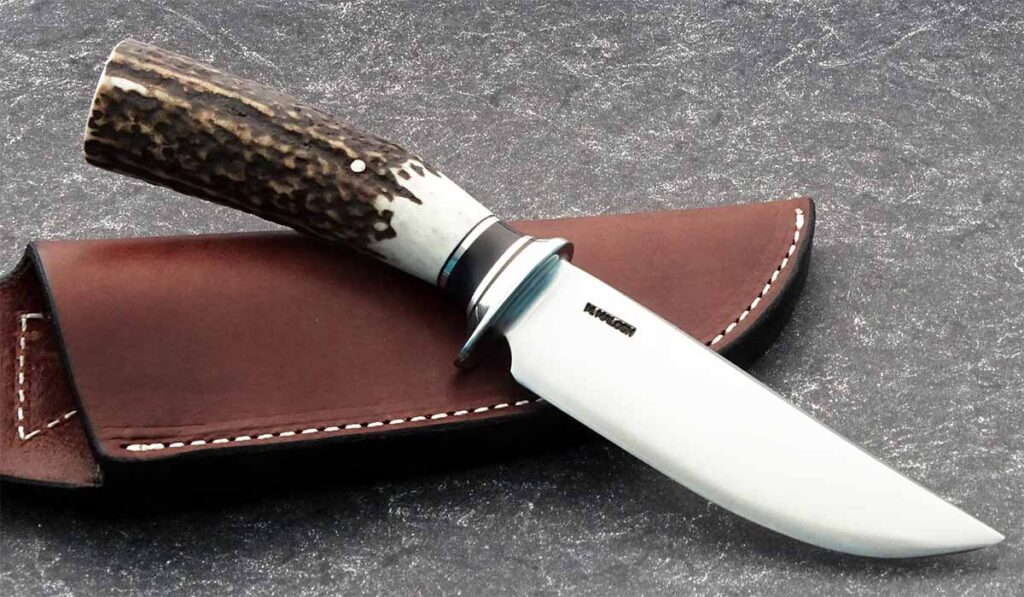
Sambar stag and elk are favored for their looks and because they provide an excellent gripping surface, even when wet. Mike Malosh’s Elk Hunter 23 custom hunting knife features elk scales. (Robertson’s Custom Cutlery image)
Elk Hunter 23 Maker: Mike Malosh Blade Length: 47/8” Blade Material: W-2 tool steel Blade Finish: Satin Guard Material: Stainless steel Handle Material: Elk w/black Micarta® and stainless steel spacers Overall Length: 9.5” Sheath: Leather pouch/belt model by the maker Author’s Comments: This knife is built for serious work; excellent balance and handle ergonomics Maker’s price for a similar knife: $395
Desert ironwood, curly koa, California buckeye burl and curly maple are among various kinds of popular handle woods used for hunters. Other popular materials are synthetics such as G-10 and Micarta®. The main advantage of these materials is that, for the most part, they are impervious to the elements. As such, they tend not to shrink and crack as some natural handle materials can do over time.
Guards
Guards are made primarily from either 304 or 416 stainless steel. If the knife features a hidden tang design, the joint between the guard and the blade should be soldered. Sealing the guard helps keep the moisture away from hidden tangs. Because their softness makes them prone to damage, along with their additional maintenance requirements, brass and nickel silver generally are not used for guards.
Blade Styles
The drop-point hunter is the most commonly made hunting knife. The drop-point blade maintains its thickness along the spine and then gently slopes to the point. Generally, the drop point is slightly thicker than other hunting blade patterns at the point. The blade thickness provides the drop point the versatility not only to skin but to disjoint and pry. These advantages can be critical to the hunter when dressing larger game.
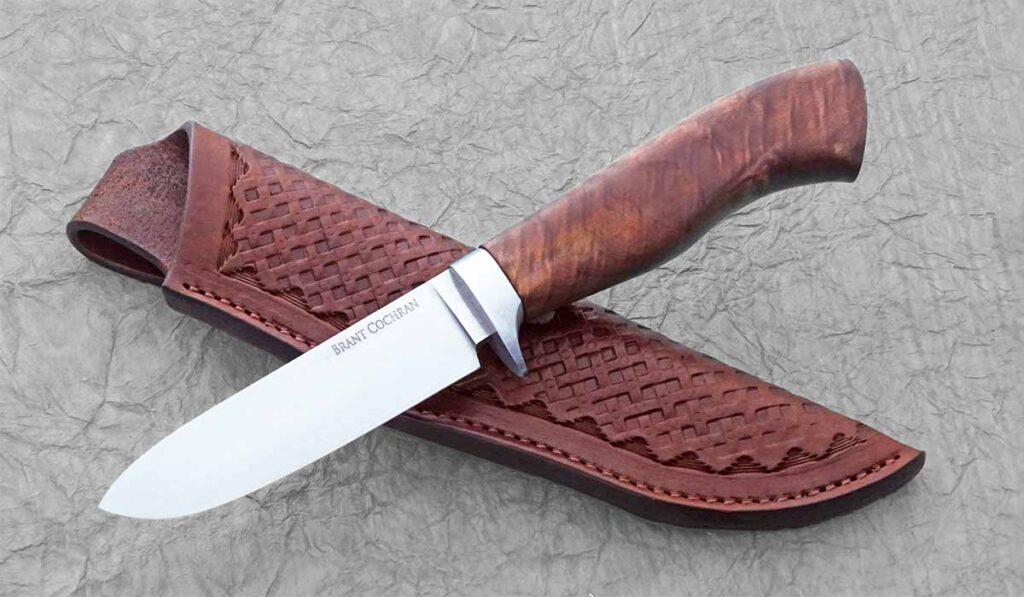
The slightly raised blade spine/hump extends the curved part of the semi-skinner blade for skinning while maintaining the drop point to avoid puncturing the abdominal cavity. Brant Cochran covers the pattern in a sturdy lightweight version of 80CrV2 carbon steel and walnut in his custom hunting knife. (Robertson’s Custom Cutlery image)
Semi-Skinner Maker: Brant Cochran Blade Length: 4.25” Blade Material: 80CrV2 carbon steel Blade Finish: Satin Guard Material: Stainless steel Handle Material: Walnut Overall Length: 9” Sheath: Tooled-leather pouch/belt model by the maker Author’s Comments: 80CrV2 is a carbon steel that is both tough and provides outstanding edge retention; excellent balance and handle ergonomics; sturdy lightweight knife, perfect for your next hunt; Brant is an ABS journeyman smith Maker’s price for a similar knife: $300
The idea of a skinner is basically to remove the skin/fur from the game. The skinning blade shape features a slightly thinner blade and edge meant for a specific purpose. The skinner is designed for elongated cuts and better control of the blade, ensuring the game’s fur maintains its integrity. While primarily intended to remove the fur, a knife with a skinner blade can be used to dress game out, too. One of the more popular skinner designs is the Nessmuk, praised for its all-around versatility in the field.
The semi-skinner blade is the middle ground between the drop-point and skinner blades. The slightly raised blade spine/hump extends the curved part of the blade for skinning while maintaining the drop point to avoid puncturing the abdominal cavity, which could taint the meat of the animal.
Conclusion
Picking the right edged companion for your time in the field should require some research. As noted, hunting knives come in various shapes and sizes. This variety enables you to choose the right size, steel and handle material necessary to get the job done. It would benefit you greatly to hold the knife in your hand, primarily for sizing. You must always be able to control the blade’s edge.
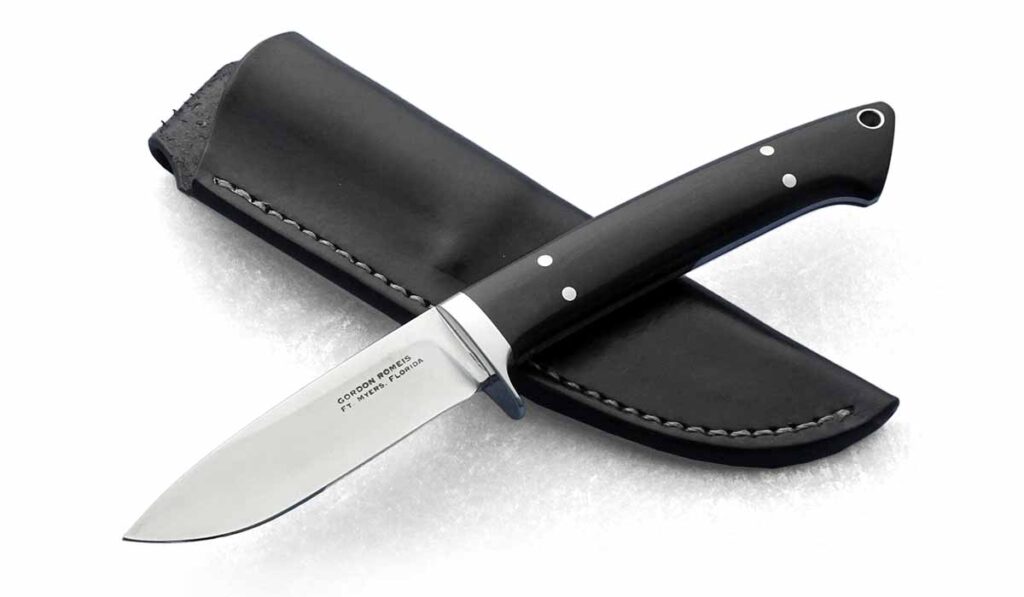
The drop-point hunter is the most commonly made hunting knife. A George Romeis drop point features CPM 154 stainless blade steel and a black G-10 handle. (Robertson’s Custom Cutlery image)
Drop-Point Hunter Maker: George Romeis Blade Length: 3.5” Blade Steel: CPM 154 stainless Blade Finish: Satin Guard Material: Stainless steel Handle Material: Black G-10 w/stainless-steel-lined thong hole Overall Length: 8” Sheath: Leather pouch/belt model by the maker Author’s Comments: Full-tapered tang, excellent balance, very comfortable in the hand Maker’s price for a similar knife: $300
Remember, the rifle or bow harvests the game but the knife creates what becomes dinner and the trophy.
These slip joint knives overcome the mechanical challenges of the style to qualify as works of art.
The slip joint is the most recognized of any folding knife design. Variations on the theme continue to guide the custom knifemaker and the consumer through a journey of creativity and craftsmanship that is indeed endless.
The latest slip joints are true to this standard and don’t disappoint in looks or legs—easy on the eyes while walking and talking at the same time. They complement their makers’ personalities and demonstrate their skill sets in fit and finish, as well as mechanics. They provide pure inspiration for collectors and buyers alike, setting their own standard of excellence.
Standley Caldwell Five-Blade Cattle Knife
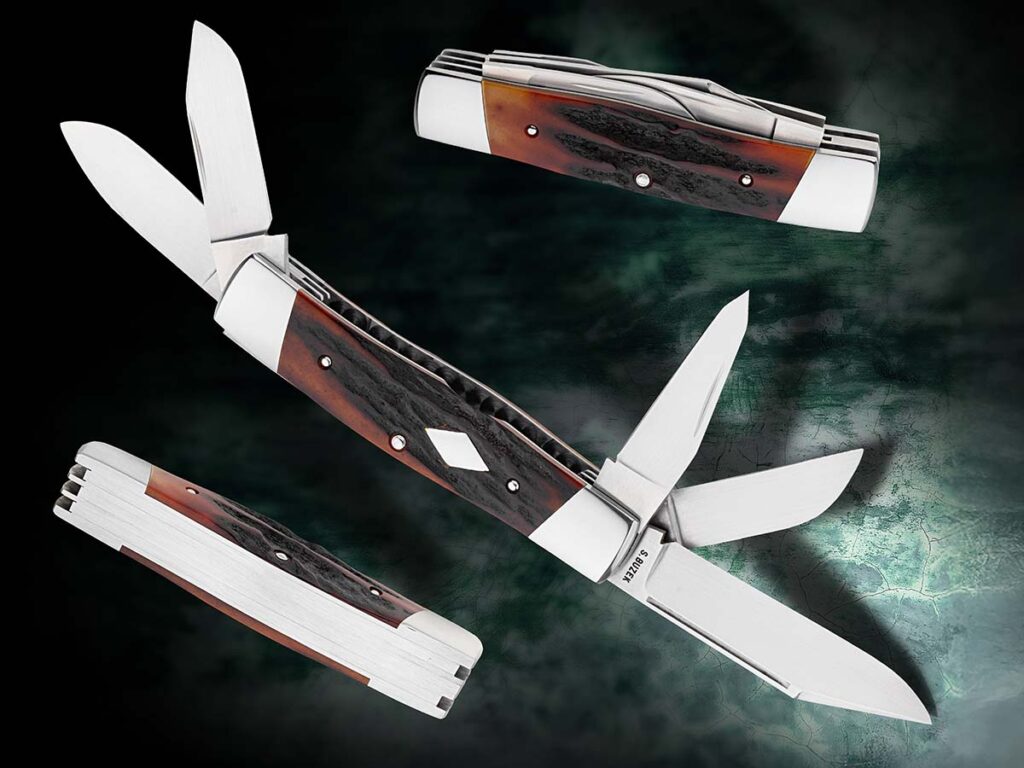
“The five-blade cattle knife is a very difficult build,” Stanley Burzek confesses. Not only are aesthetics at play, but mechanical aspects, such as the blades clearing frame and timed right, not to mention executing multiple grinds. Tackling more complex slip joints has been a natural progression for Stanley. The Texas maker began with single- up to three-blade stockmen but saw the more difficult projects as pushing his craftmanship to the next level. (Jocelyn Frasier image)
A slip joint maker for 18 years, Stanley Buzek of Caldwell, Texas, brought a beautiful five-blade cattle knife to life recently. Featuring a CPM 154 hollow ground blade with 416 stainless integral bolsters and liner, along with stag handle scales, the knife was a particular challenge.
“The five-blade cattle knife is a very difficult build, getting all the blades timed and working properly with everything flush in all positions,” Stanley explained, “and getting the blades to clear inside the frame in such a small area. The multiple offset grinds and the dagger grind of the awl blade make it especially challenging.”
Tackling the cattleman works right into the increasingly difficult projects Stanley has pitted himself against—even if it was a daunting proposition. “The five-blade was just a natural progression from the single-blade trapper, two-blade, three-bladed Stockman, and so on, to push myself to the next level of knifemaking,” he confided. “Actually, the hardest part was just getting over my fear of screwing it up and getting started on the build. It is an intimidating knife to build, having to pack so much into such a small area that you can paralyze yourself with the fear of getting started.”
Buzek got the pattern for the five-blade from Tim Robertson. He drew inspiration from the work of Tony Bose, whom he credits with bringing the pattern back. He has also seen photos of Reese Bose’s take on the pattern.
“I have received help from many great makers through the years,” Stanley reflected. “Bill Ruple and Rusty Preston were a huge help, and the South Texas Slip Joint School that I went to back in 2011 really increased my knowledge in how slip joints actually work. Right now, a lot of credit goes to Tim Robertson for pushing me and helping me with problems and us bouncing ideas off each other.”
Buzek makes all his slip joints with integral liners and bolsters accompanied by jeweling on the interior. He prefers slanted bolsters while gravitating toward natural handle materials such as jigged bone, mammoth and stag. “I think the single-blade slip joint will be the most popular for a long time for ease of carry and ease of build in the custom world,” he predicted. “Multi-blades, though not as popular, will push makers to step outside their comfort zone and show collectors and the general public alike the technicality and perfection and precision at which some of these pieces are made and will help makers improve their overall methods.”
Ted Friesenhahn Two-Blade Trapper
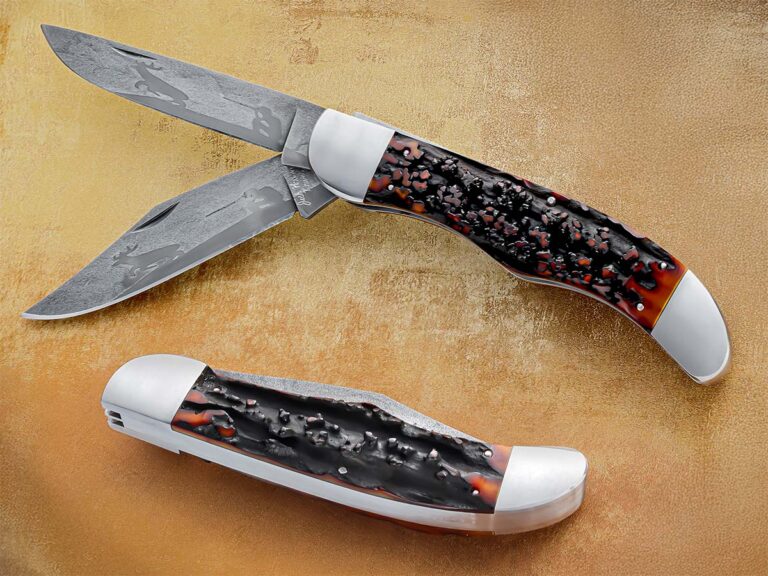
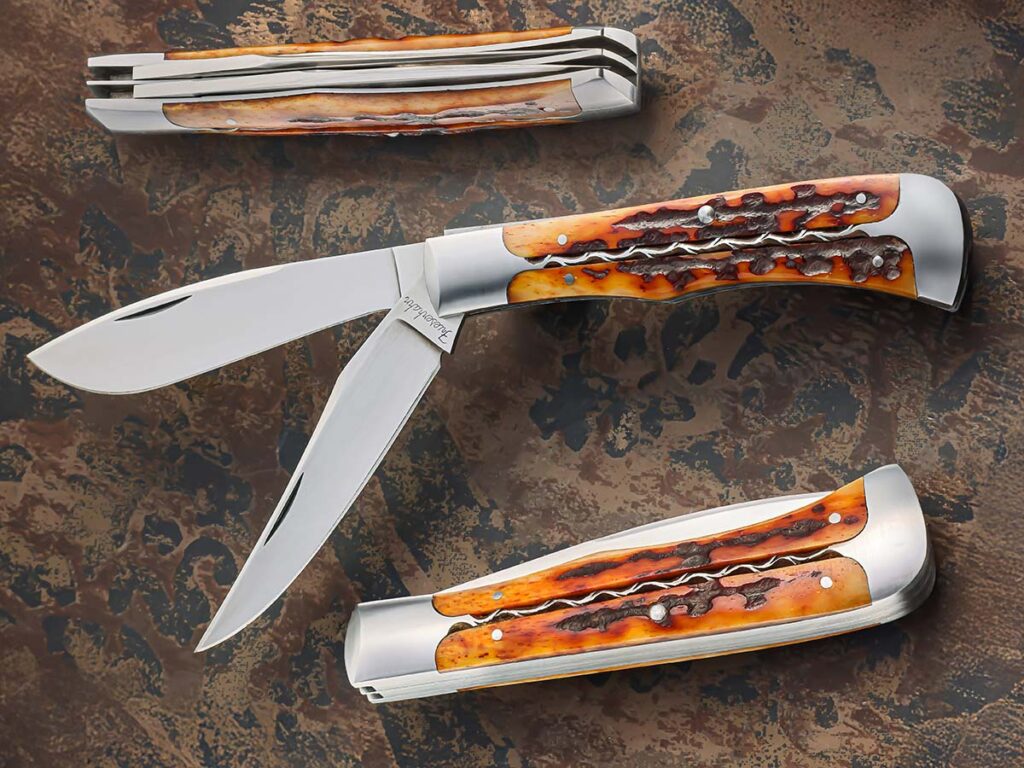
Like most custom makers, the most challenging aspect of the slip joint for Friesenhahn is getting the rise and fall of the blade correct. Add in embellishments, like the delicate vine filework down the center of his trapper’s handle, and the project becomes a taxing undertaking. (SharpByCoop image)
When Ted Friesenhahn took up the task of making his two-bladed trapper, he chose to make the second blade a “simmy” skinner. “This is the most popular slip joint, especially in Texas,” said the resident of Seguin, who has been a toolmaker since the age of 18. “I’ve worked in several different tool shops and have had the pleasure of teaching mill classes at hammer-ins.”
For his trapper, Ted chose a hollow ground blade of CPM 154 with a 416 stainless steel frame and bolster and a jigged bone handle. He added, “All of my knives have integral liners, and in this knife, the center is left standing. I have had this idea in my head for a while before I finally did it. I wanted something different and to be able to embellish it, so I chose to do vine filework.”
The most difficult aspect of the slip joint for Friesenhahn is common to most custom knifemakers—getting the rise and fall of the blade correct and flushed at closed, half stop, and open positions. “Of course, the walk and talk are key after all that fit and finish,” he said. “My first knife was an Old Timer Stockman that I had when I was growing up in the country. I have always carried a pocketknife, so like most makers and knife enthusiasts in this area, I had heard of Bill Ruple.
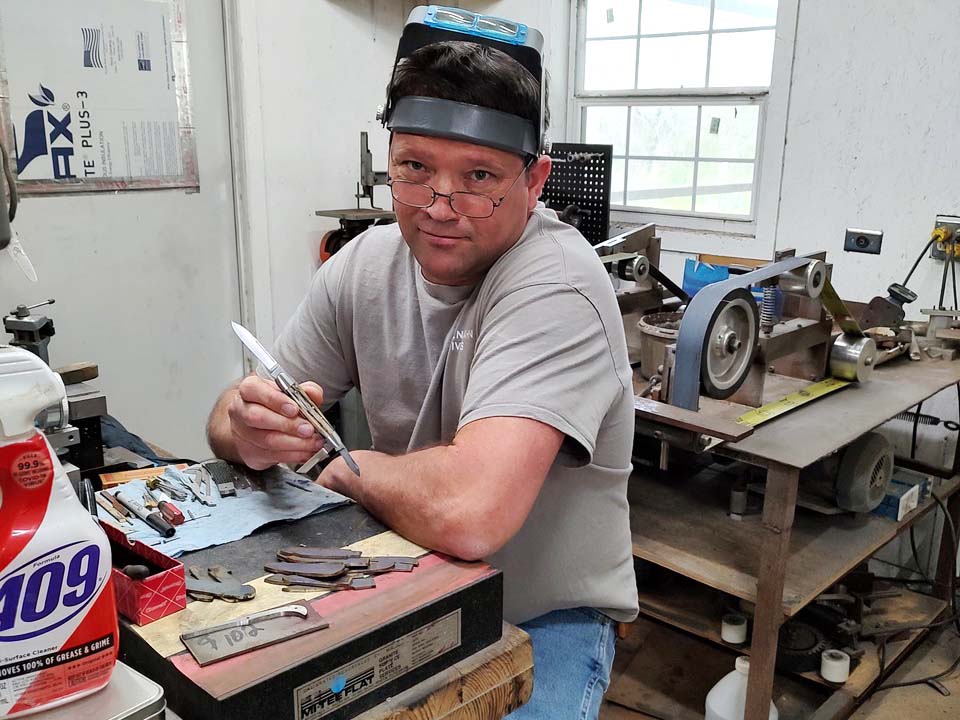
Ted Friesenhahn in his shop.
“Many years ago now, Johnny Stout and [ABS master smith and BLADE Magazine Cutlery Hall of Fame® member] Harvey Dean put on a hammer-in at Johnny’s shop in New Braunfels, Texas, where I first met Bill Ruple,” Ted continued. “He was teaching the slip joint classes, and he had a jig he came up with to measure the rise and fall of the blade and spring. It came to be called the Ruple jig … I still use this jig on every knife I build.”
Interestingly, Friesenhahn sees variations on patterns as emerging in popularity. “The current direction is in patterns being turned into different patterns,” he said, “in multi-blades like the stockman lockback whittler and sowbelly whittler. There seems to be a craze with the whittler, and of course, I have one of these variations in the works.”
Bill Burke Single-Blade Trapper
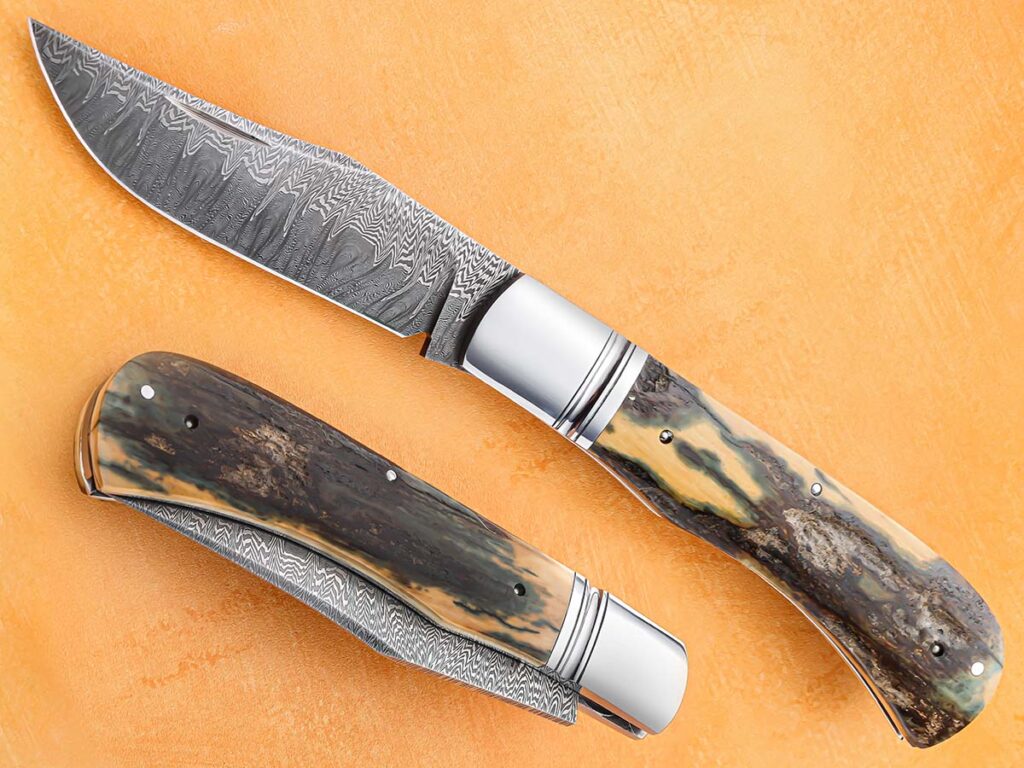
“This knife came about as a class demo for slip joint folders that I taught at Jim Poor’s Flatland Forge in Tuscola, Texas,” said Bill Burke of his single blade trapper, with a 3-inch stainless damascus blade and blacklip mother-of-pearl handle scale. (SharpByCoop image)
Master smith Bill Burke of Boise, Idaho, recently produced a handsome single-blade trapper with a hollow ground 3-inch blade of stainless damascus steel, blacklip mother-of-pearl handle scales, and 416 stainless integral bolster and liner.
“This knife came about as a class demo for slip joint folders that I taught at Jim Poor’s Flatland Forge in Tuscola, Texas,” said Bill. “The pattern for the class was the ever-popular large single-blade trapper. I added my personal preferences of filework and bolster fluting to this knife, as well as incorporating a piece of Jim Poor’s waterfall pattern damascus into the blade. The only guide I had was a pattern drawn on a piece of paper and e-mailed to me by Luke Swenson.”
Burke has found the most challenging aspect of the slip joint to be mechanical, sharing that observation with other makers. “The most difficult part of any slip joint, at least for me, is getting the timing right so that the spring is level with the frame/liners in all three positions, closed, half stop and open, while also keeping the end of the spring even with the end of the tang in the closed position,” he commented.
“I made my first slip joint folder in about 2001,” Burke continued. “It was a large trapper like this knife. I traced a friend’s knife on a piece of paper and used calipers to measure the dimensions of the tang. This knife was made because I had carried a slip joint pocketknife with me since I was about 5 years old. I can remember sharpening a pencil for a first grade teacher with my pocketknife.
“Over the years, I continued to make slip joints, and they did get better,” he observed. “But I always struggled with the spring timing. Fast-forward 16 years, and a friend of mine from Australia, [journeyman smith] Bruce Barnett, and I went to visit the maestro of the South Texas Slip Joint Cartel, Bill Ruple. We were at Bill’s shop for four days making slip joints. While there, Bill taught me the proper use of the Ruple jig, that little contraption he had put together to make timing of a slip joint something of a science instead of a swag. This little bit of knowledge changed my slip joints from being functional to well-working tools that I am proud of. Bill Ruple and Luke Swenson continue to motivate me to make better slip joint knives.”
As a master smith and forger of knives, Burke sometimes takes on that dimension completing the slip joint. “The only challenge is forging the steel, whether damascus, carbon or stainless, which is not commonly forged,” he advised. “Most people who do forge do not actually forge folder blades but instead forge the steel and then stock remove the blade from the forged steel. There are some who will forge damascus folder blades to get a specific pattern of damascus to follow the curve of the blade shape. This can be seen in the knives made by Owen Wood, Tim Foster, [master smith] Mike Quesenberry and a few others.
“I have forged san mai and damascus folder blades to shape when circumstances made it necessary but do not commonly do so,” Burke concluded. “The challenge making a slip joint knife from forged materials in my opinion is no different than doing stock removal with the possible exception of san mai blades and springs where careful attention has to be paid to ensure the hard core of blade and spring line up precisely so the components stay in alignment, keeping the spring from wandering off to one side of the blade. If this happens and is not corrected, eventually the bolsters will be forced apart and the spring will continue to wear on one side of the blade making the knife useless.”
Bubba Crouch Single-Blade Trapper
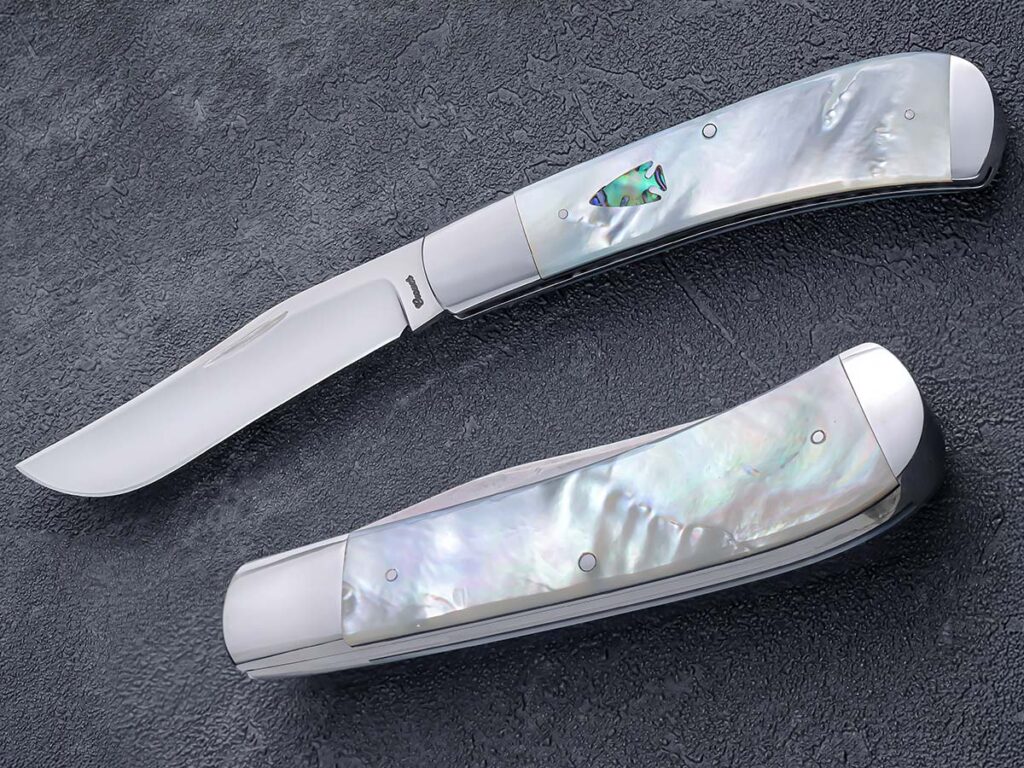
Bubba Crouch points to the influence of Slip Joint Cartel icon Bill Ruple in his career. More than anything, Ruple taught him to “make the next knife better than the last one.” Crouch’s pearl-handled trapper demonstrates that the knifemaker has taken this lesson to heart. The natural scale presented concerns in chipping, shattering, and even burning. (SharpByCoop image)
Bubba Crouch has been making knives in Pleasanton, Texas, since 2001 and lives just down the road from his friend and mentor Bill Ruple. While Ruple is the leader of the South Texas Slip Joint Cartel, Crouch is a founding member and revels in the lively exchange of ideas and the friendly banter that it provides.
Ruple’s influence is pervasive among slip joint makers, and Crouch is no different. “Bill taught me everything I know about knives,” commented Bubba. “I guess the most important thing he has taught me is to make the next knife better than the last one. That is hard to do!”
Recently, Crouch completed and sold the featured single-blade trapper to a resident of Philadelphia. His available knives sold out in two days during the last 10-day Las Vegas show, and the demand for his work is on the rise. This particular trapper features a 3¾-inch hollow-ground blade of CPM 154 stainless steel, an integral 416 stainless steel frame, and handle scales of pearl with an abalone arrowhead inlay.
“I do all 416 integrals,” Bubba noted. “So, I mill my liners instead of spot welding or soldering, and I have had a lot more luck keeping them flat and even. That makes a better knife, I think, and the integral frame prevents issues with warping and that type of thing.”
The biggest challenge in creating this trapper came with working in pearl, a natural material that presents concerns in chipping, shattering, and even burning. When working with the pearl, Bubba uses a thin liner material glued to the surface to stabilize it, and with the final grind, he removes the liner material while shaping the pearl to fit the handle space.
Bubba Crouch at his grinds a blade.
“If you look at the pearl on some knives, you can see a yellow edge from the heat sometimes,” he said. “I fit the pearl in the handle and then remove it, shaping it to the bolster to avoid the heat before putting it back in. When I’m sanding the pearl, I wet sand, and when I drill, I squirt water on it after starting the hole.”
The abalone inlay gives Bubba’s trapper a distinctive flair, and the process of inserting it is relatively simple. “I have a pantograph machine and use templates to cut the abalone and cut the pocket for it in the pearl,” he said. “You’ve got to be careful and don’t want to pop it in and out too many times. I drill a hole through the pocket that is pretty small and comes out the liner to test fit.”
Crouch enjoys building what he likes, and for now, that is the single- and two-blade slip joint. Multi-blades don’t have great appeal. “My clientele is the everyday carry guy,” he concluded. “So, I build those knives. I don’t see the slip joint market getting soft. It’s traditional and will stay stable. It’s what your grandpa and your dad carried, and as long as there are memories like that, there will always be a market for the slip joint.”
Demand doesn’t seem to waver with the slip joint, and today’s makers are eager to oblige the marketplace.
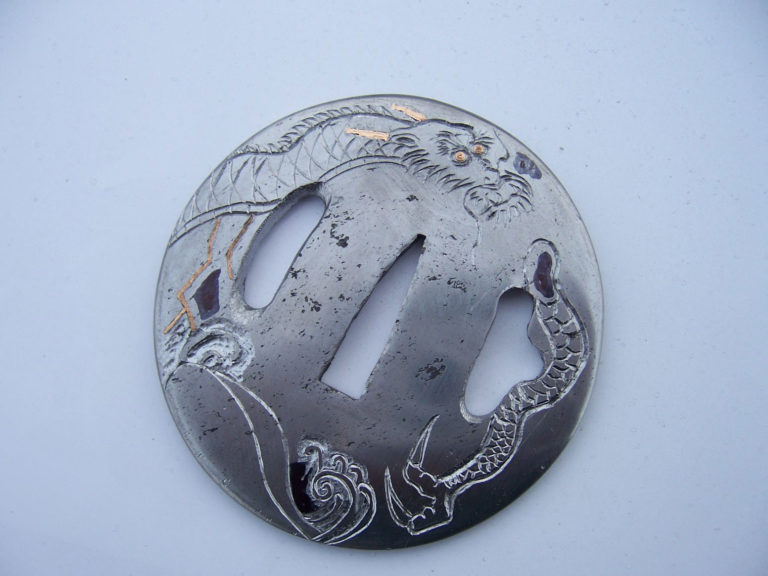
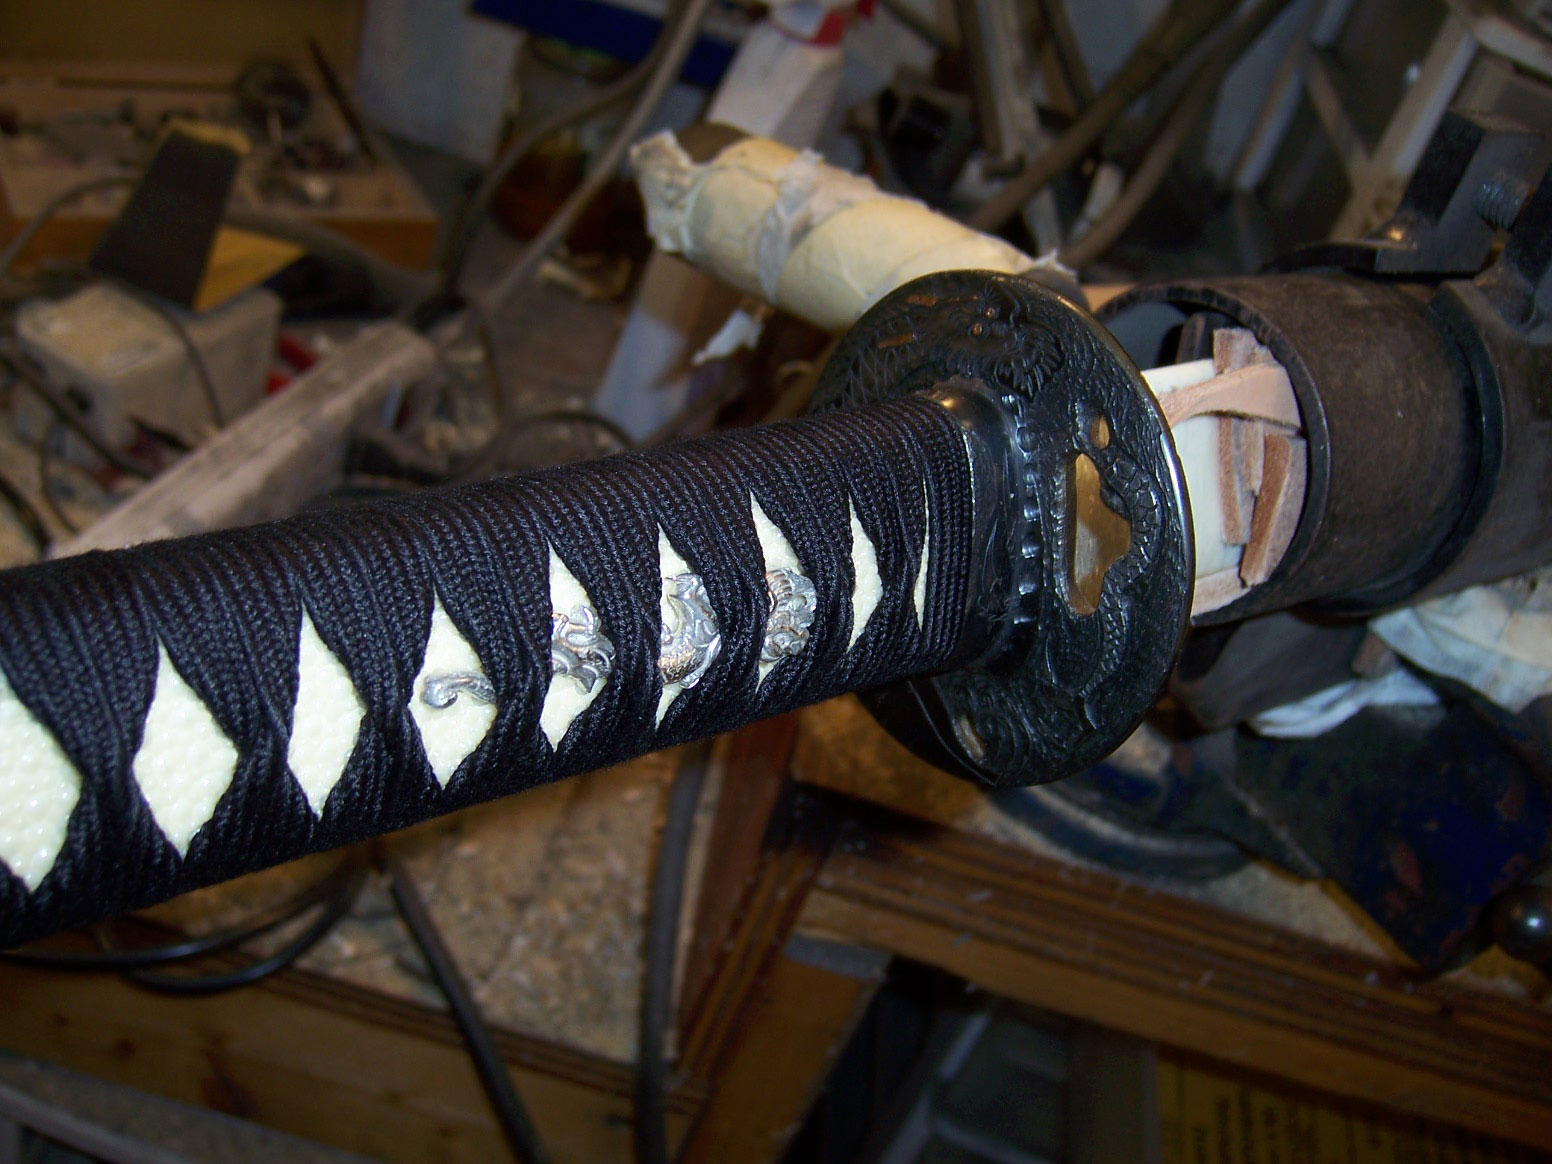
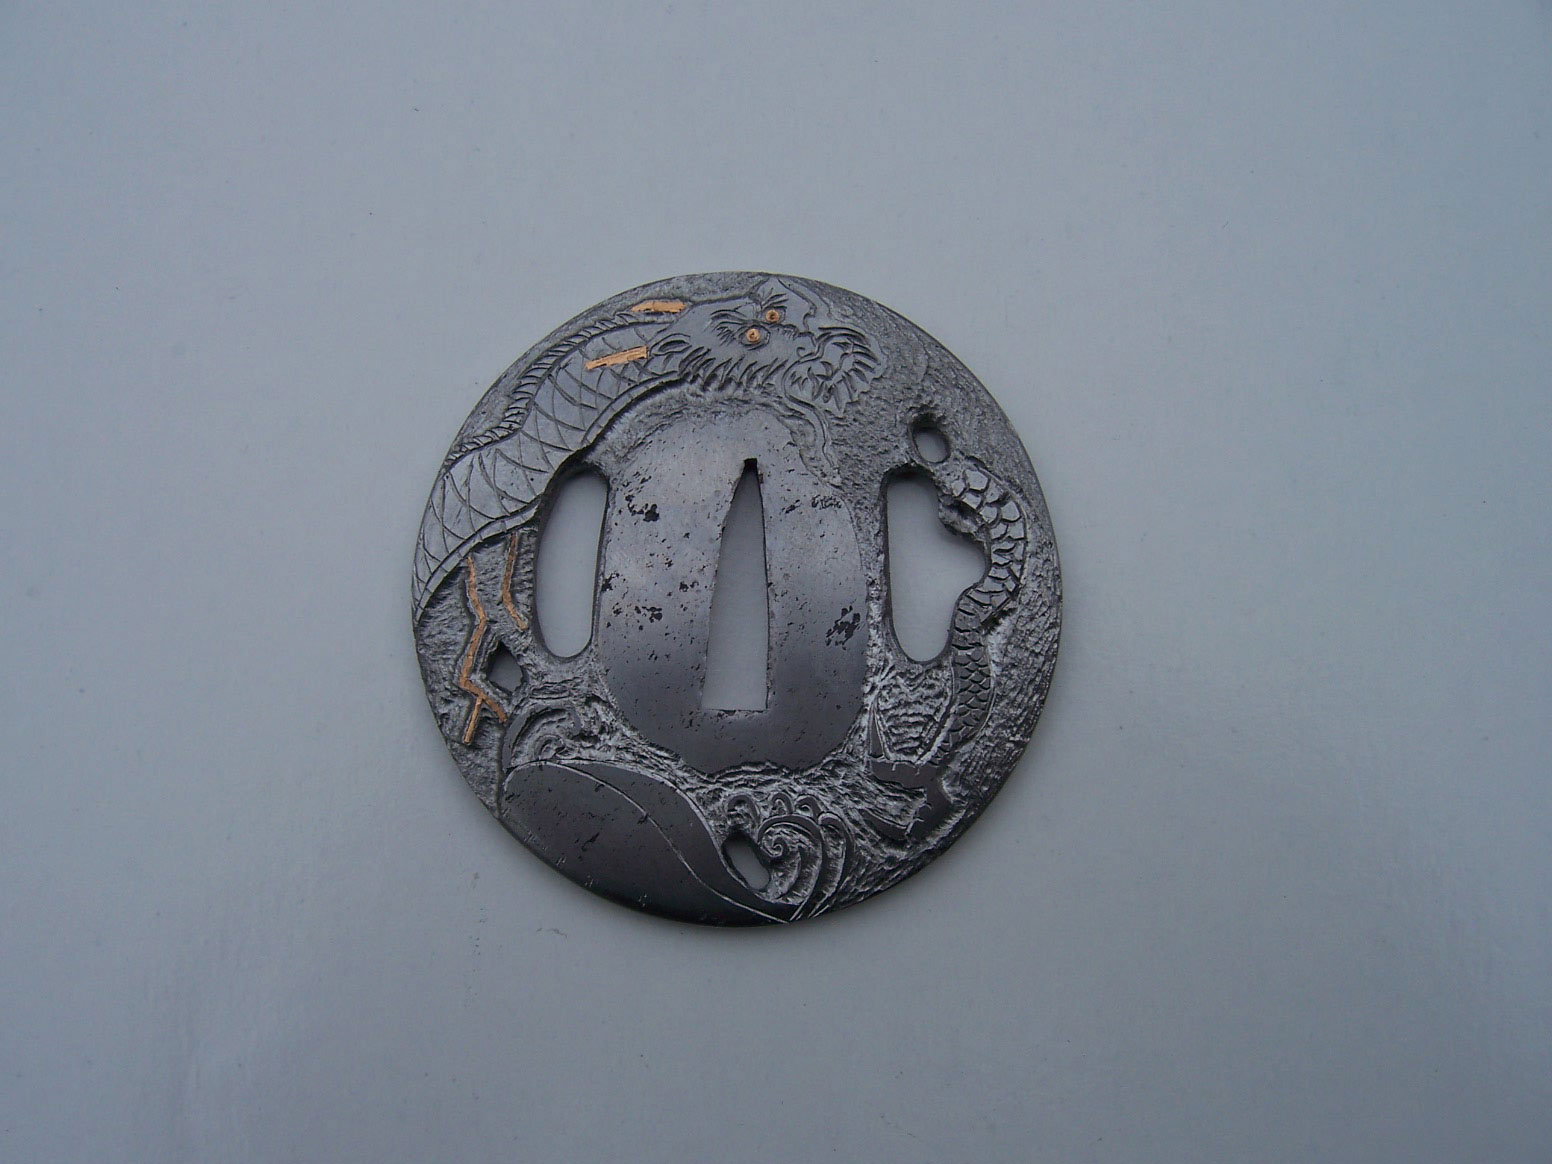
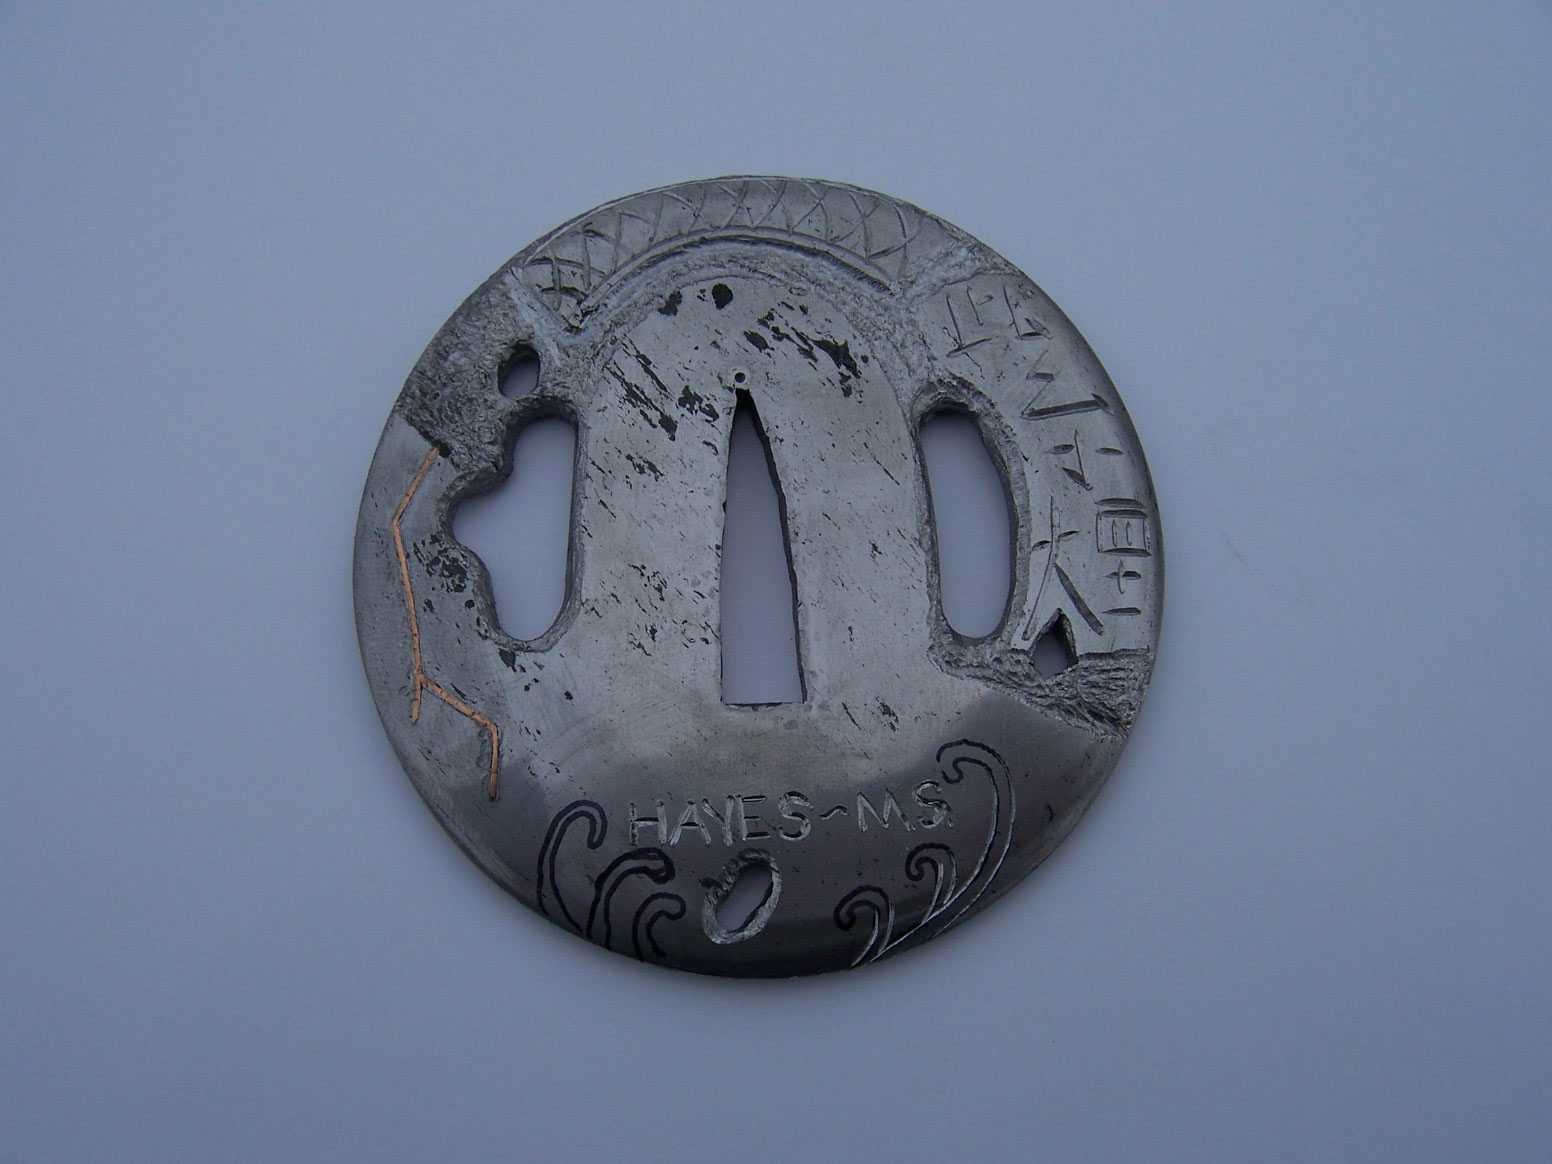
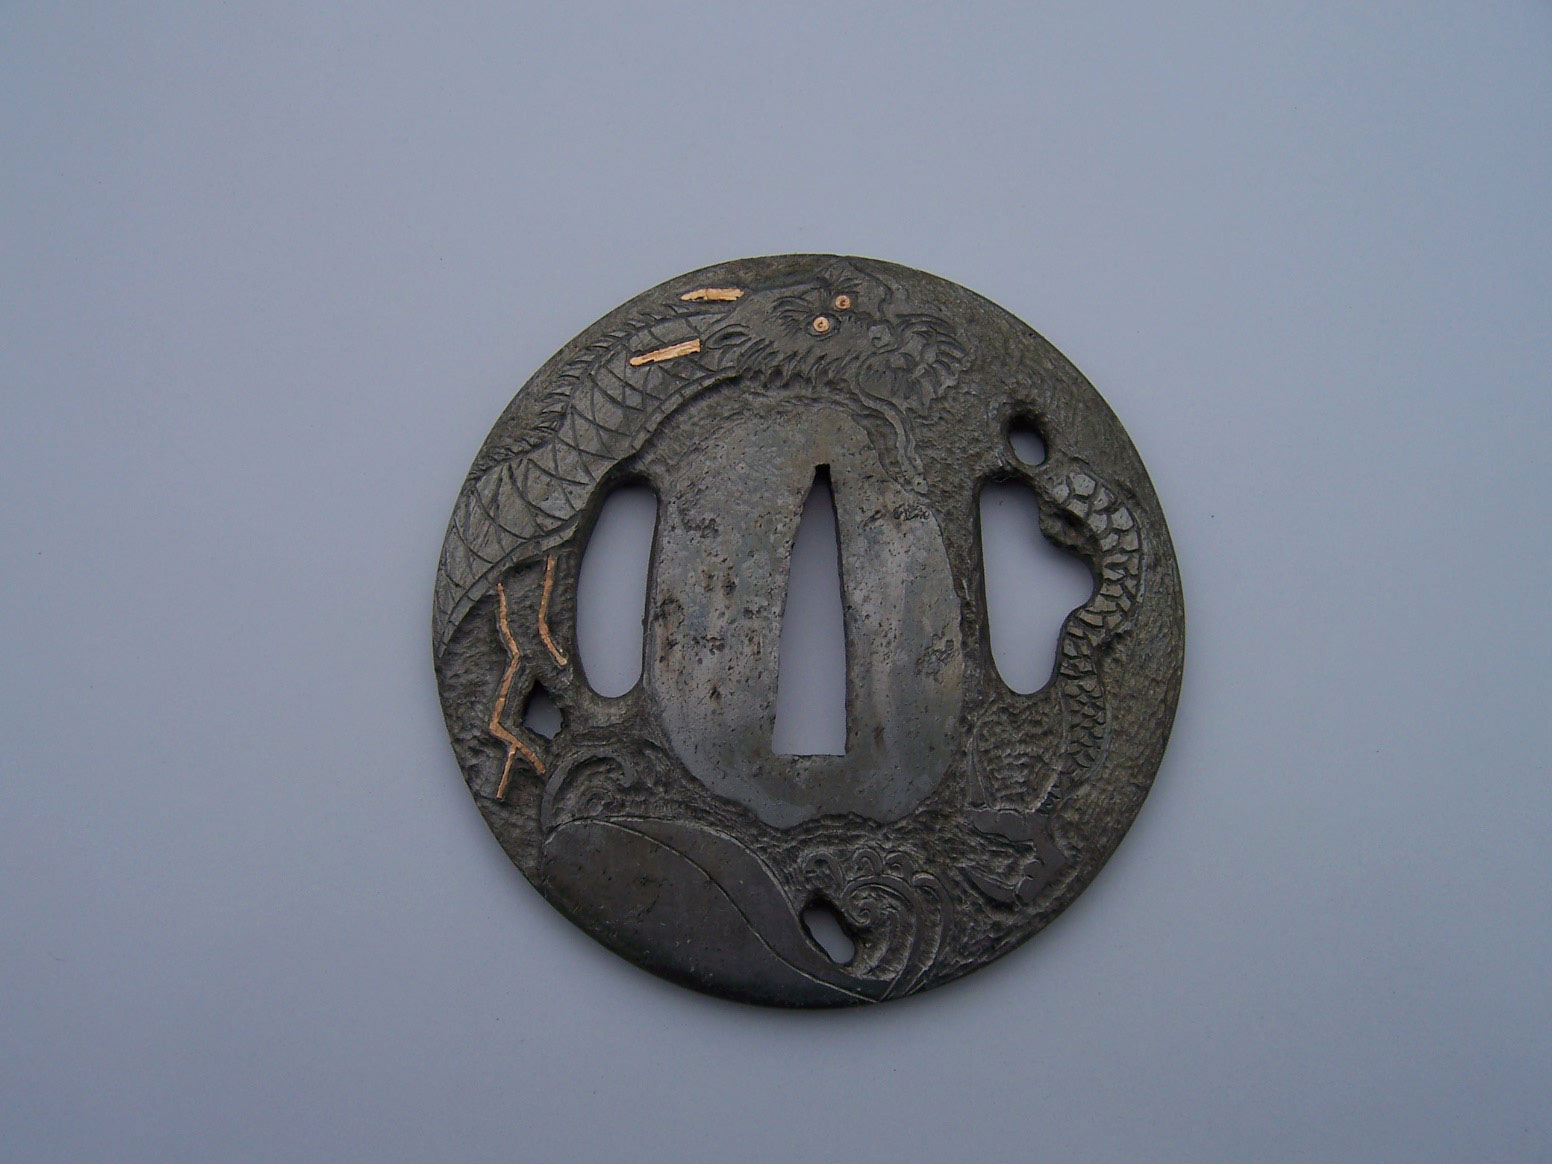
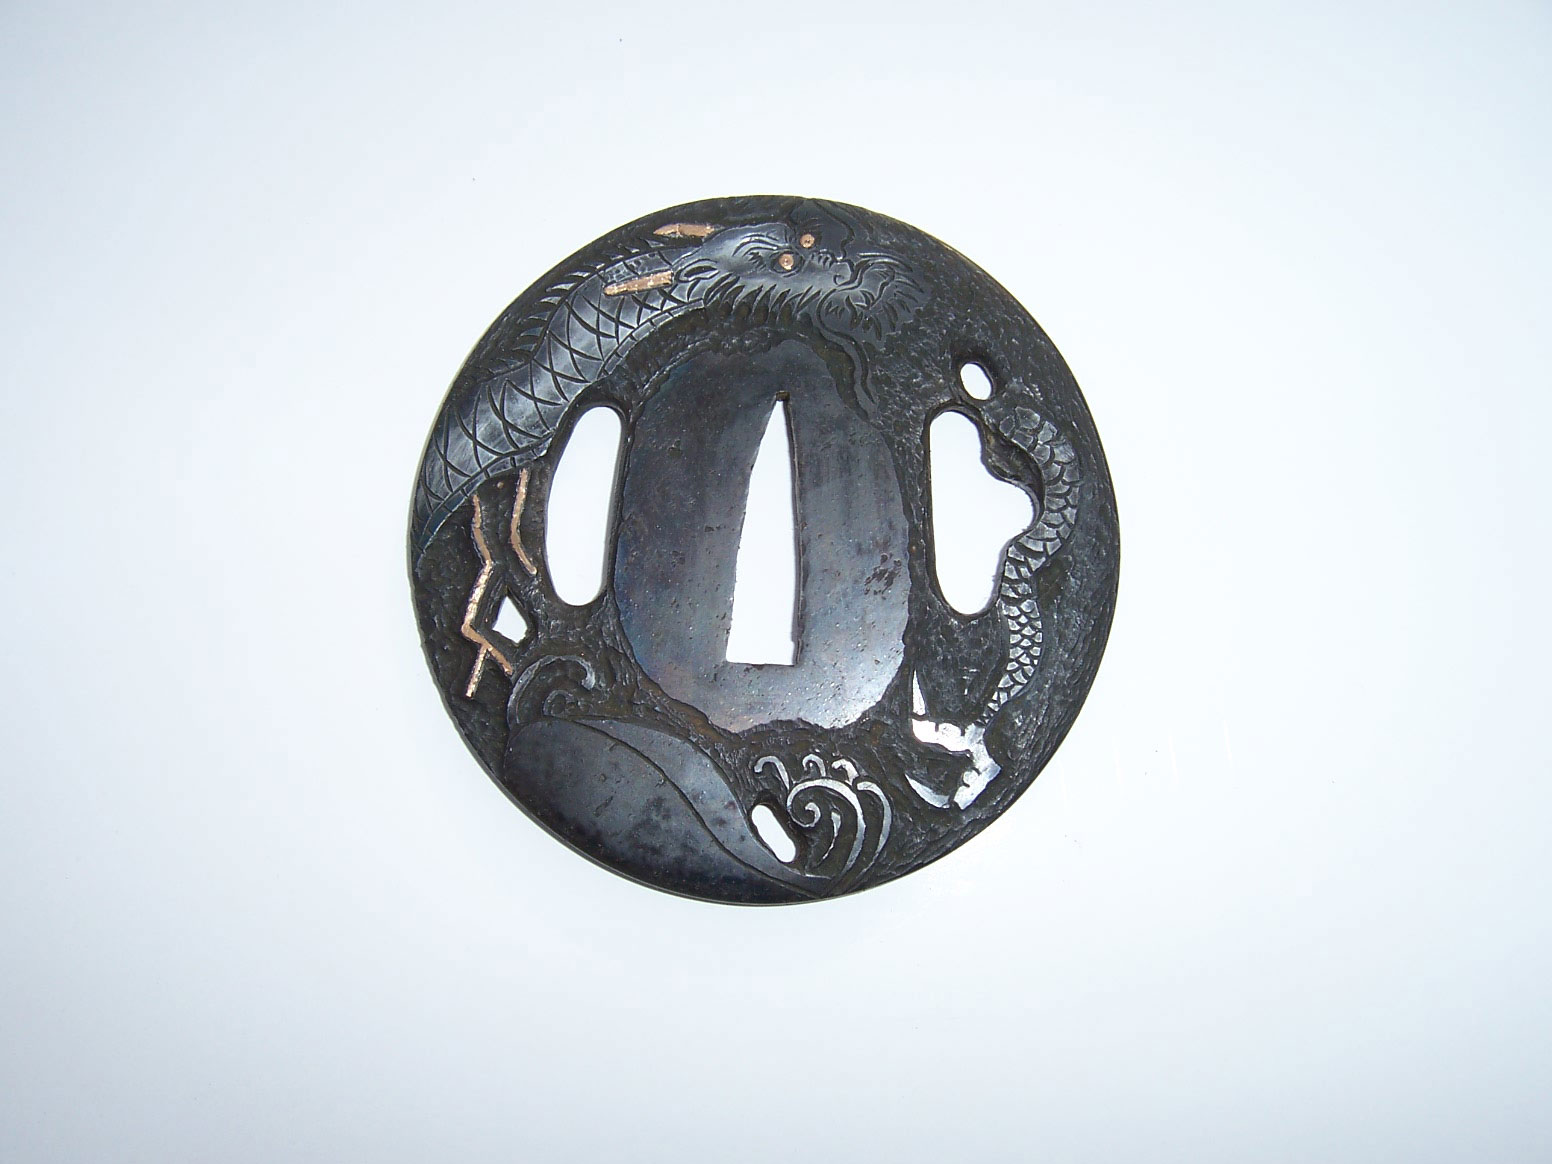
The tsuba the author made for this story appears on a katana he said he made for Axl Rose of Guns ‘N Roses fame. All photos via the author.
Making a “tsuba,” Japanese for “guard,” is one of my favorite steps in sword making. You have a chance to build something as simple or as complicated and artistic as you like.
I first started making the tsuba (pronounced SUE-ba) way too thick and heavy, and learned over the years how to refine all of my sword parts. I hope this overview helps shed some light on the subject and gives you some ideas.
I have made tsuba from damascus, mild steel, high-carbon steel and antique wrought iron. Many traditional tsuba were made from folded Japanese steel called “tamahagane.” I used wrought iron for this demonstration.
Step One: Thin it Out
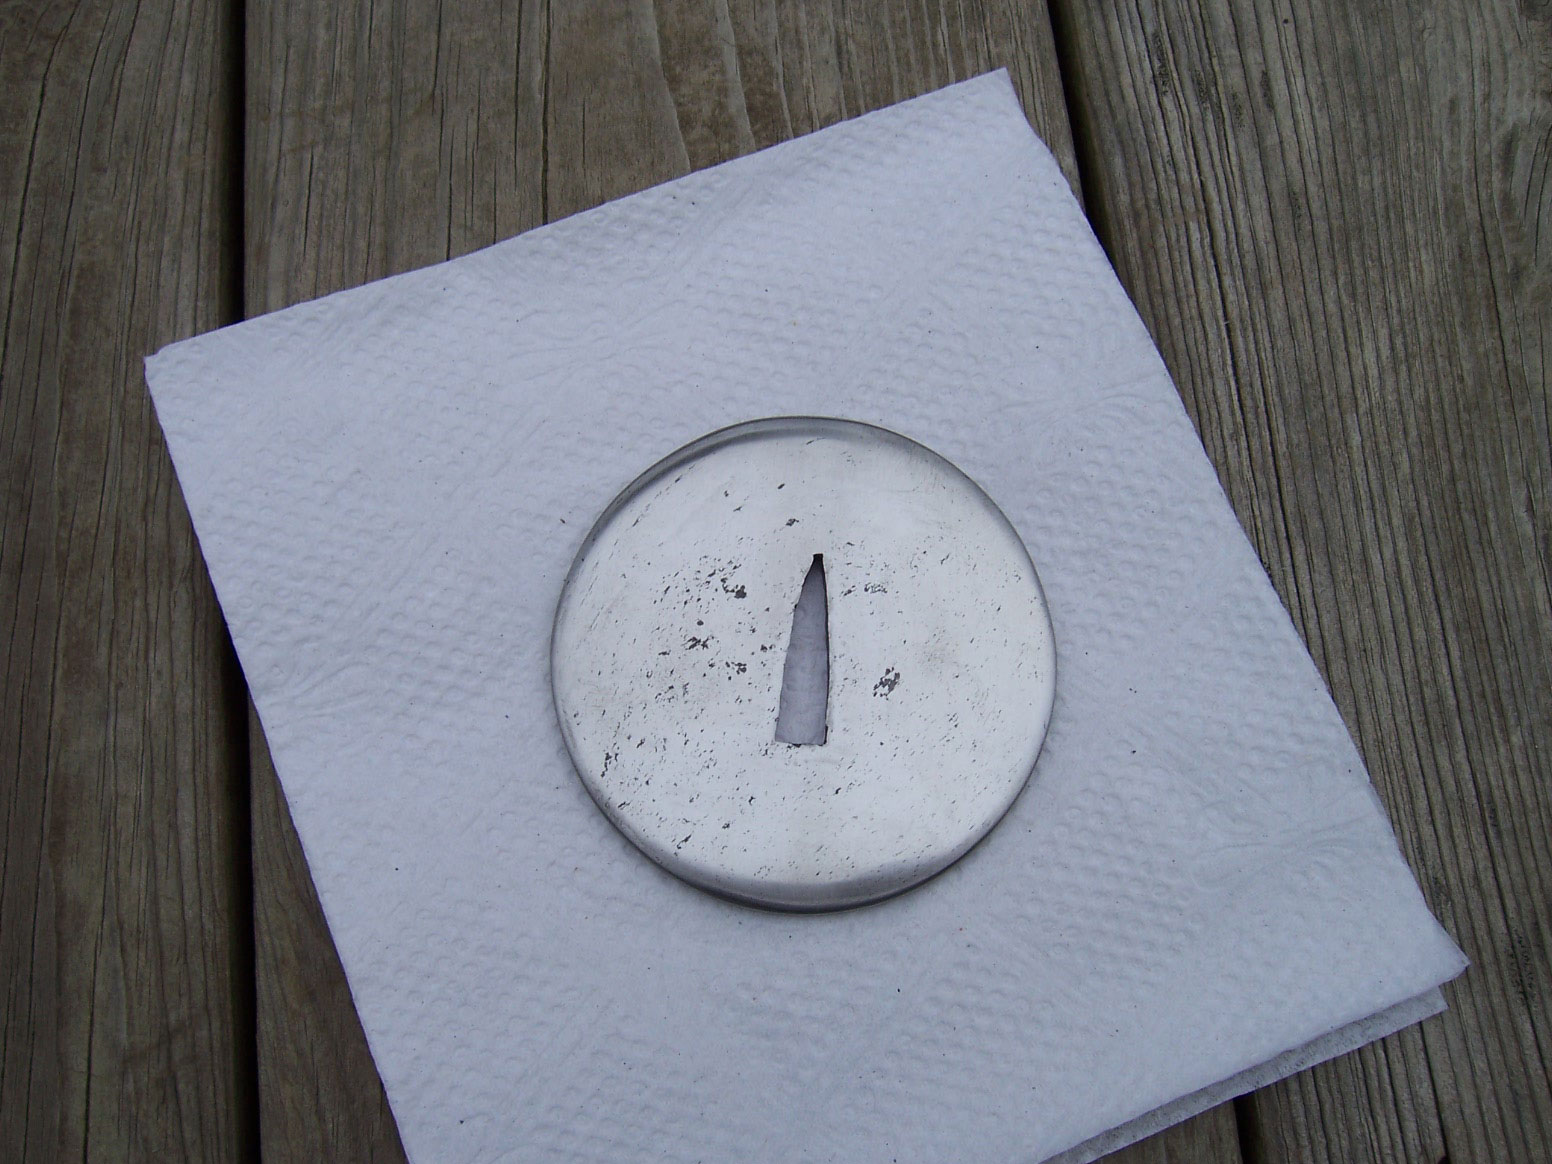
Photo 1: Wrought iron forged out and rough cut round for the tsuba.
To begin, cut 3.5 inches of steel from an old wagon wheel. Forge it thinner and wider, and taper the edges thinner all the way around (Photo 1). If you leave the center a little thicker and taper the edges, it looks more balanced and is lighter. Wrought iron is soft and forges out easily and is simple to cut, sand, file and drill. Using the spray from a can of WD-40™, trace around your steel. Cut it out on a band saw and grind the shape round. Sand the tapers even, gradually progressing to finer-grit belts.
Photo 2: Sand the tsuba and start cutting the holes.
Before polishing, I drill the holes (Photo 2). I use a Dremel cut-off wheel to cut out the webbing between the holes. You can also try a jeweler’s saw. I use both.
Employing needle files, make the tang hole big enough to slide up to the “sepa” (washer) on the sword. At this point I polish the tsuba to an 800-grit finish.
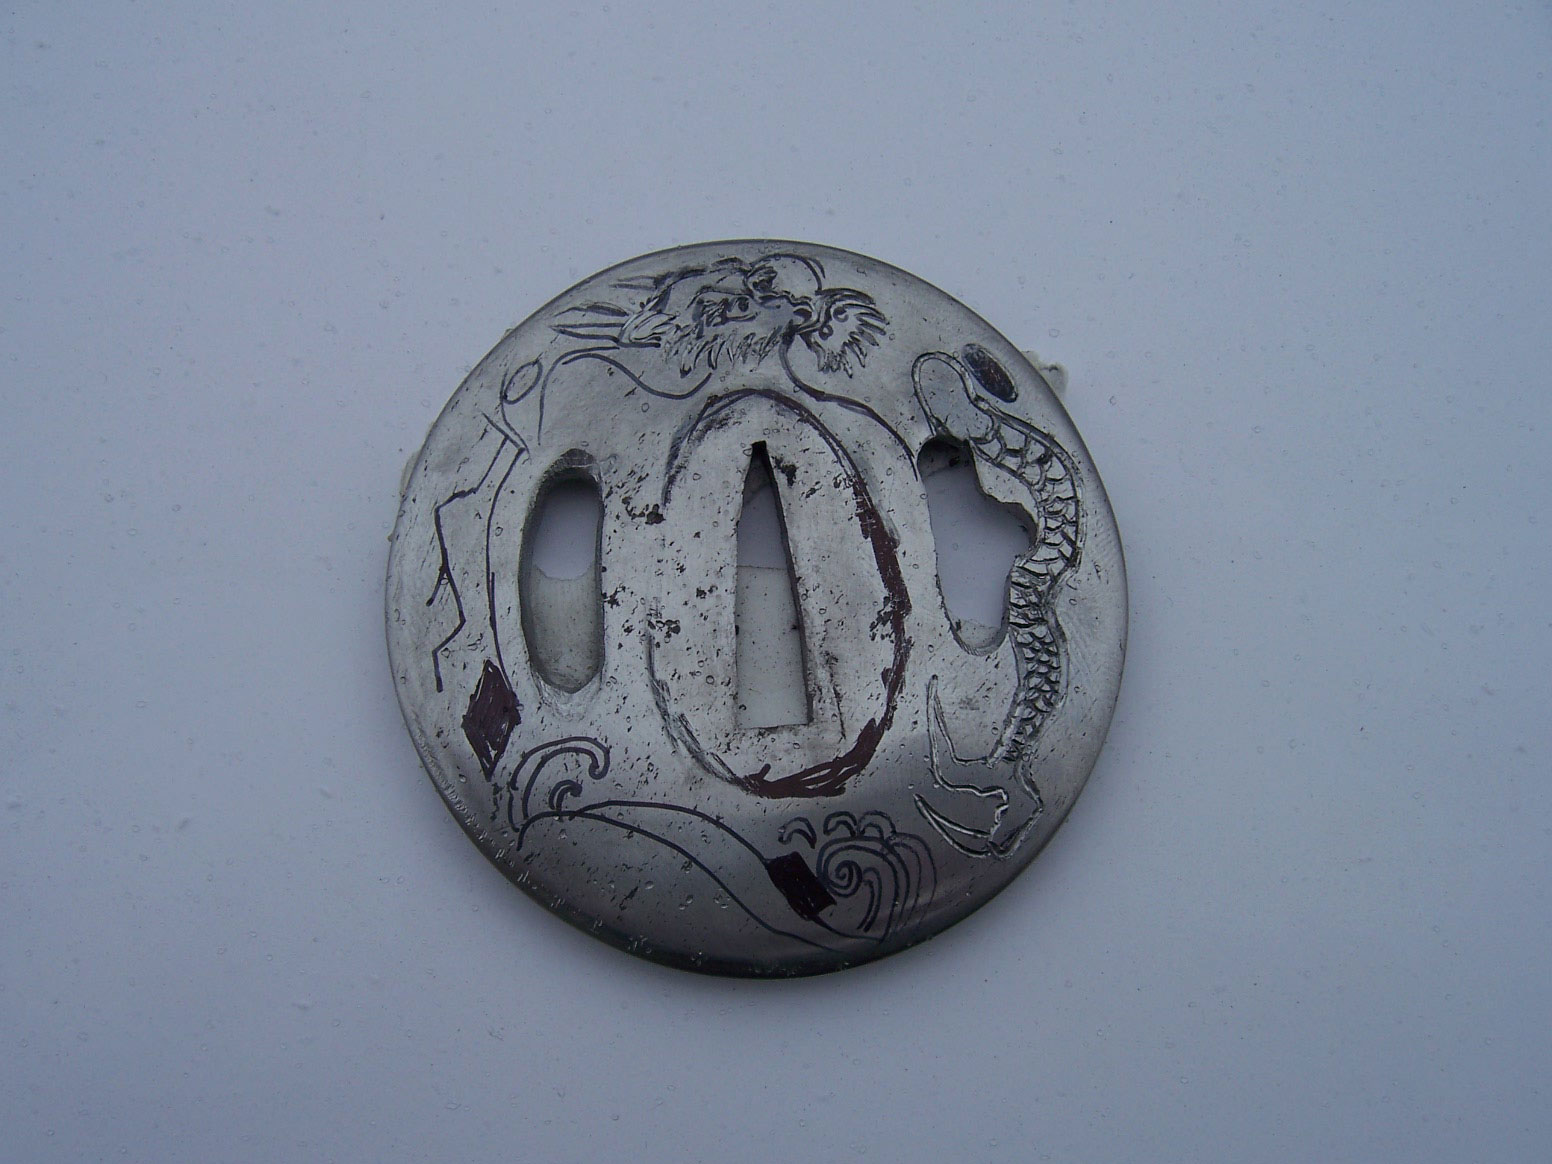
Photo 3: Draw the design with a Sharpie® and start engraving.
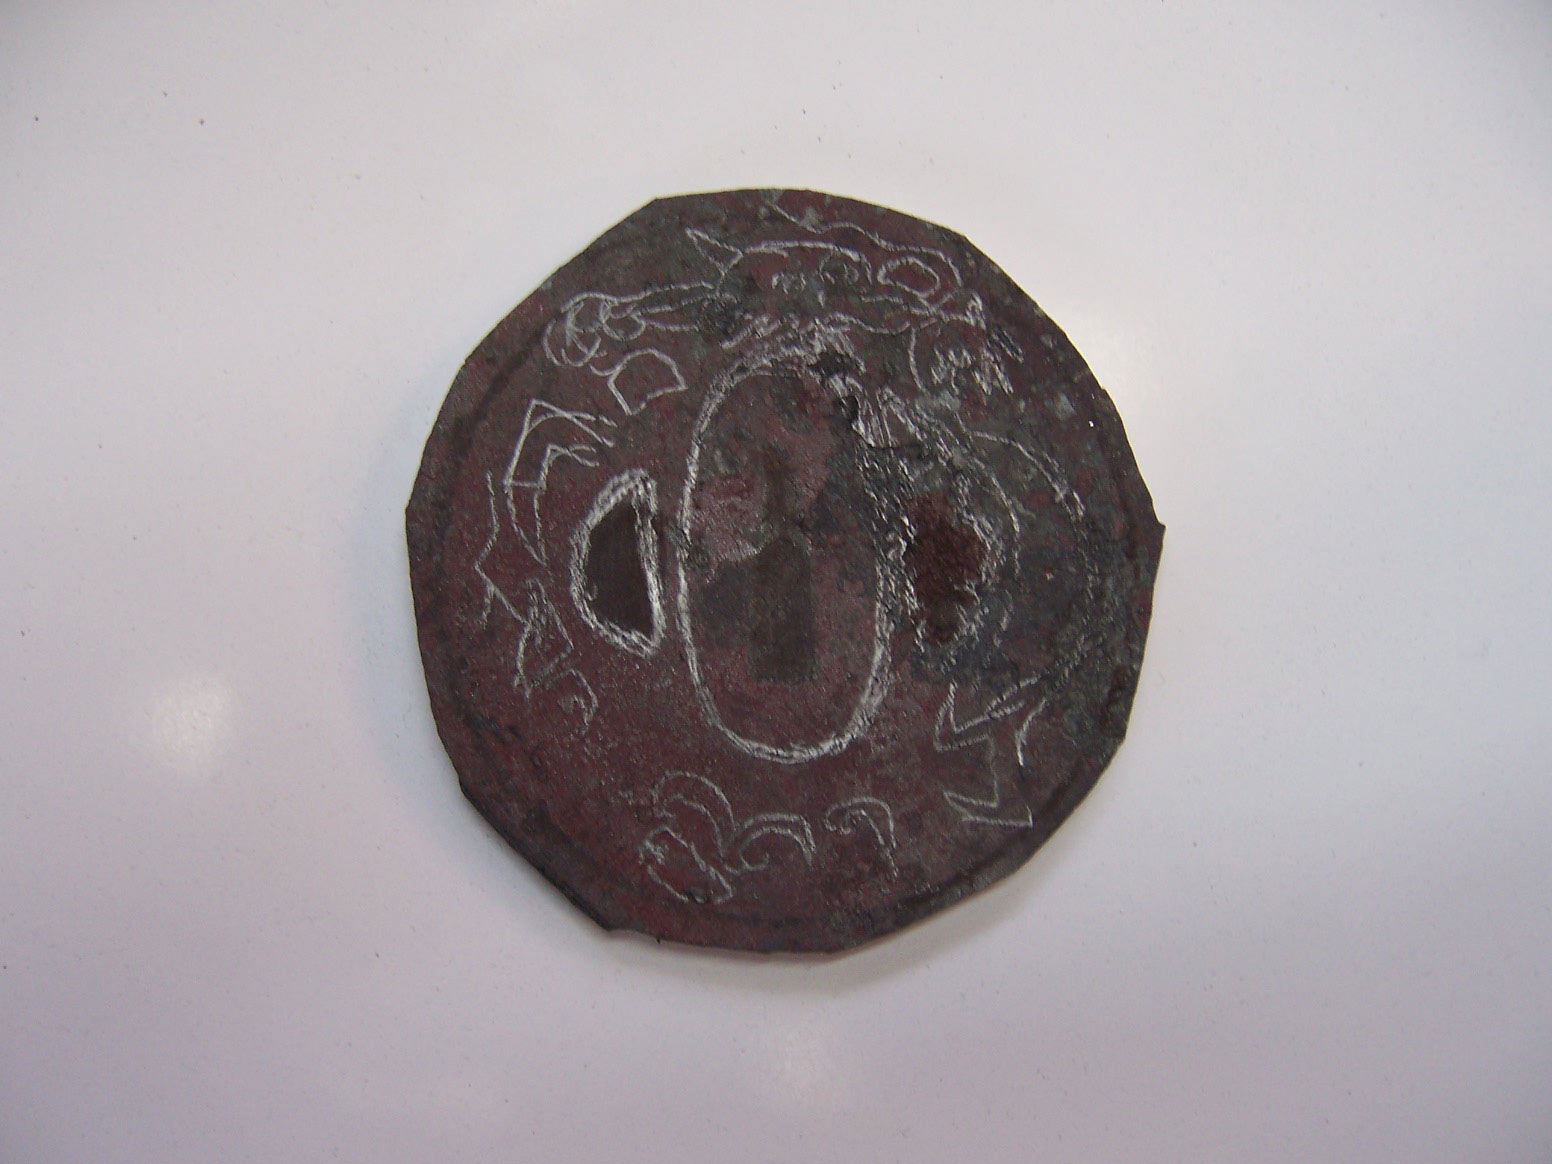
Depending on how detailed the engraving is, I draw my design on or transfer the design onto the tsuba (Photo 3). This one I drew the design on with a Sharpie® marker. I printed out some of my favorite design pictures to use as a reference.
Engraving and Etching
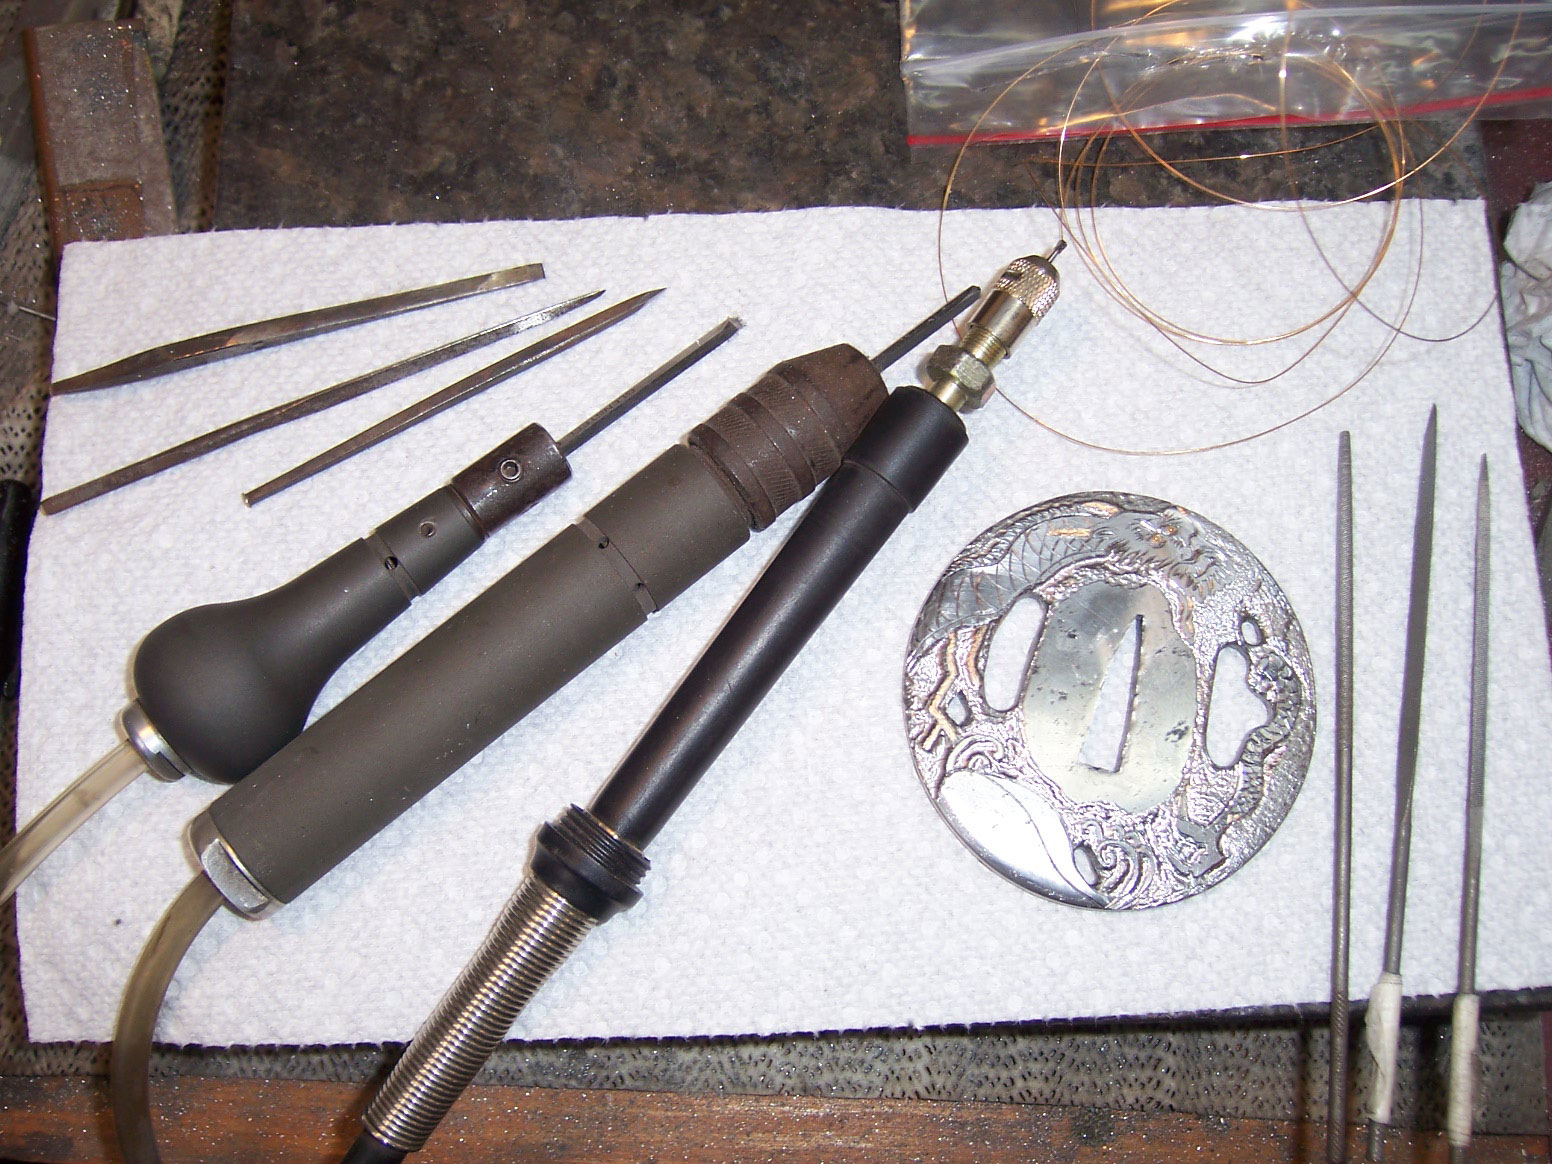
Photo 4: Tools of the trade: gravers, chisels, and high-speed air and Dremel® tools.
Now the fun begins: engraving the lines. I use square gravers from GRS and from engraver Steve Lindsey. The new gravers both work great and Steve’s Carbalt gravers got me back into engraving. The tips of standard high-carbon gravers break too often. The new gravers last a long time and take a real beating. I use a Dremel Tool and a high-speed air hand grinder to texture the background (Photo 4).
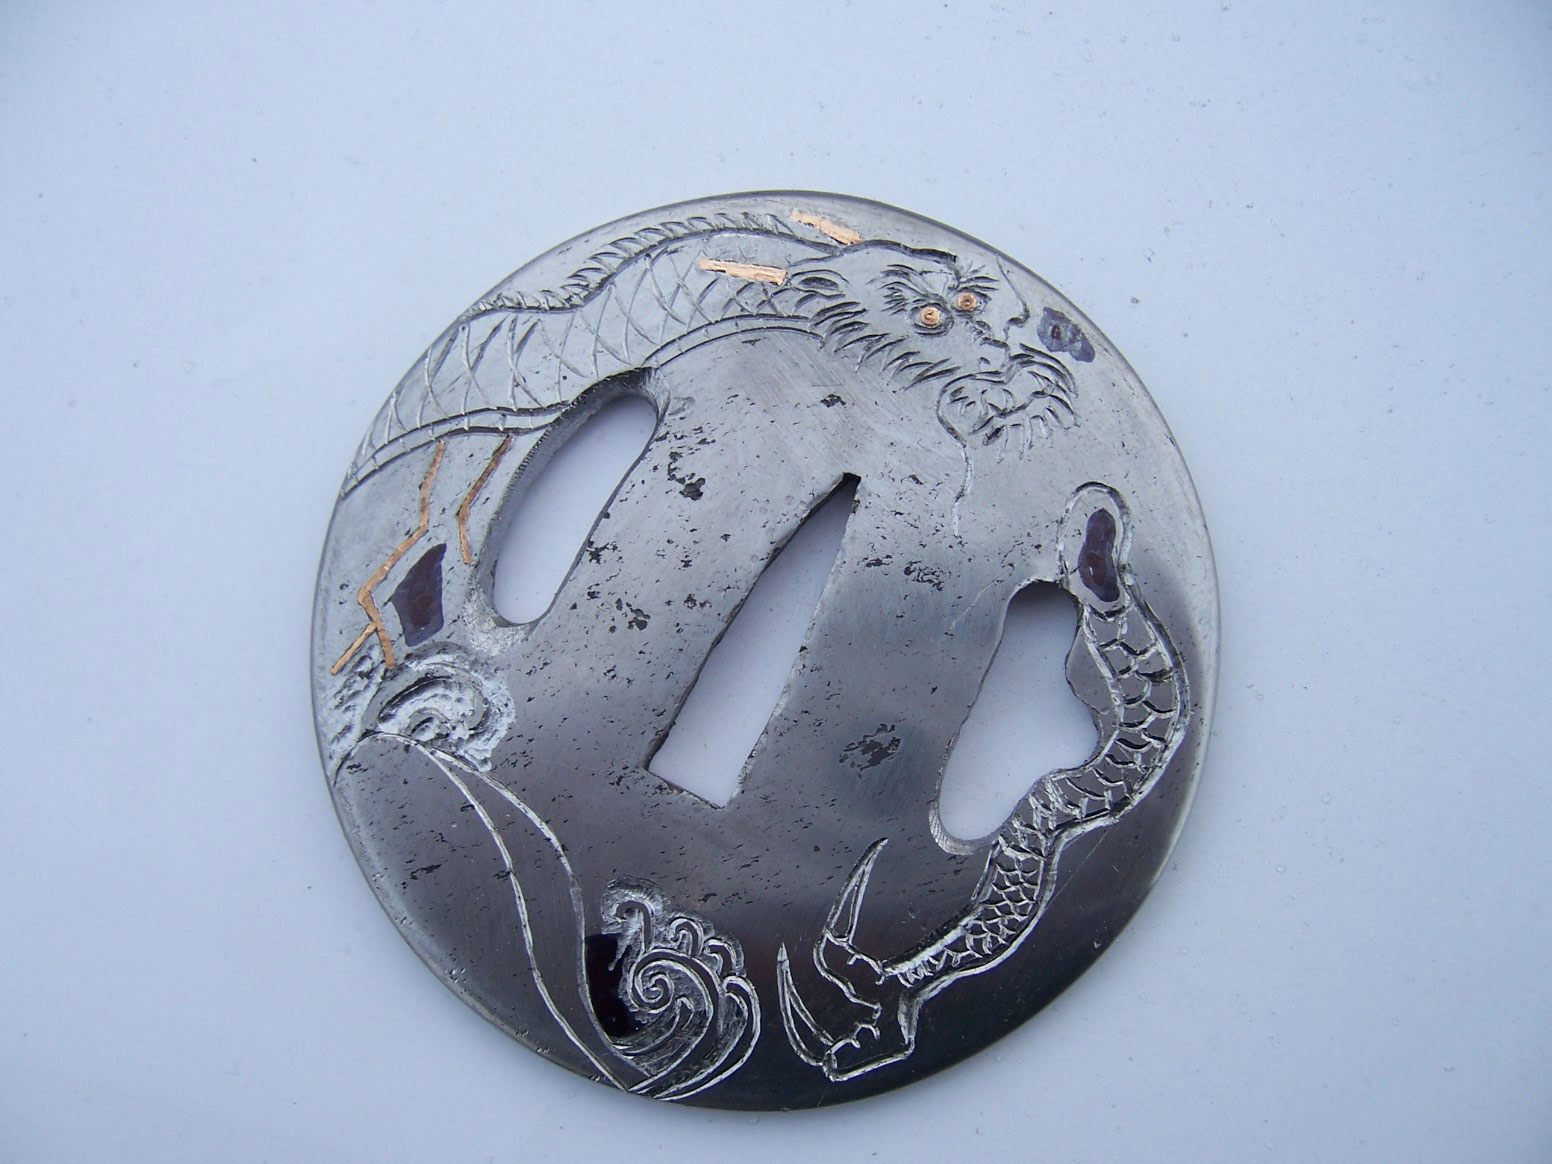
Photo 5: Inlay the gold into the tsuba.
If you practice it a lot, gold inlay is easy (Photo 5). First, cut your line with a square graver, then take a small flat chisel and tap it perpendicular along the line to undercut the groove. Raise some burrs along the bottom of the groove, then tap in the 24k-gold wire.
Photo 6: Texture and carve the background.
After engraving, I etch the tsuba in acid. This brings out the pattern in the wrought iron and resembles damascus somewhat. It gives an old look and feel to the piece. I mix four parts distilled water to one part muriatic acid or ferric chloride. I neutralize the etched steel with Windex® and then lube with WD-40. To bring out the highlights on the engraving, I use a small Cratex® rubber wheel and polish the surface by hand.
When done, I apply Renaissance Wax to keep the tsuba from rusting.
Photo 7: Carve the other side of the tsuba.
Photo 8: Blue the tsuba with cold gun blue.
Photo 9: Polished, waxed and finished, the tsuba is ready for mounting.
From left, the ball bearing slides into the channel formed by the blade and the handle as the Spyderco Polliwog is closed. The ball bearing self-adjusts when the knife is opened and/or closed. (David Jung photo)
The idea of a ball bearing used as a knife lock may seem like a contradiction. Ball bearings are designed to keep things in motion, not freeze them in place. However, it is the shape of the ball bearing that gives the Spyderco Ball Bearing Lock some of its greatest strengths.
Since variations on knife shapes and handle materials are harder to patent, that leaves lock designs. Borrowing such a design involves paying a royalty. Devising your own lock negates paying the royalty but involves many hours of research, design and testing.
The Ball Bearing Lock and the evolutionary caged Ball Bearing Lock comprise Spyderco’s attempt to develop a robust lock that meets martial blade craft (MBC) standards without being too bulky or hard to open or close. The hardened ball bearing, which is the main element, is allowed to rotate freely throughout its travel. Because it will always be in a different position, wear and tear is greatly reduced. Another benefit is the lock continually self-adjusts with each use. Because of its design, it can be operated on either side of the handle. An additional benefit is the lock is hard to accidentally disengage, which adds to its safety.
One look at the Ball Bearing Lock reveals the creative thought process required in its creation. “The design objective,” Glesser noted, “was to have a fairly simple, very strong, very reliable folding knife lock.”
How It Works
When the knife is closed, the ball bearing sits in a slightly curved channel. The channel provides the track for the ball bearing, which is pushed toward the blade due to pressure from a small shaft surrounded by a coil spring. Opposite the slightly curved ramp is the other side of the channel, which is formed by the knife blade.
As the blade pivots, the ball bearing pushes past the resistance of the closed position detent and follows a circular path until the knife approaches the open position. When the knife is nearly open, the blade channel drops away, allowing the ball bearing to push out into the channel formed at the top of the blade. Throughout the travel, the ball bearing rolls unobstructed with the outward spring pressure, providing the resistance to allow the blade to swing freely. In the open position, the pressure to close is surmounted by the ball bearing locking in place, on top by the liner and below by the blade. When the user removes the outward spring pressure by pulling back on the ball bearing, the blade can be pivoted to the closed position. The hardened ball bearing is unyielding under normal use. In the case of the newer models, a cage of a durable proprietary polymer blend surrounds and centers a smaller ball bearing. The lock action is the same.
The Knives
The Ball Bearing Lock debuted in 2002 on Spyderco’s World Trade Center (WTC) Knife, a non-profit fundraiser for victims of 9/11. On the WTC knife and the follow-up D’Allara knife, Spyderco used FRN (fiberglass-reinforced nylon) handles. The FRN made for a fairly thick, though comfortable, knife. Subsequent knives with the Ball Bearing Lock, including the Polliwog, Phoenix and Dodo, used such “flat” handle materials as stainless steel and G-10, which addressed the thickness concerns.
The first-generation version had a large, hardened ball bearing. Some seemed concerned it took two fingers to easily slide the ball bearing back in its channel. Eric Glesser, Sal’s son, designed the newer version, which addressed the concern by making the ball bearing smaller and enclosing it in the cage that has more grip and a much thinner profile.
The original Ball Bearing Lock was visibly different than any other lock, and some of the first models using it did not look traditional. Eric’s Polliwog design allows the ball-bearing channel to be open when the knife is closed, making it appear the ball bearing could slip out. Eric’s Dodo design features an ergonomic handle. It is scheduled to return in Spyderco’s carbon fiber and orange G-10 “Sprint Run” versions. The Phoenix, designed by knifemaker Howard Viele, also used the larger Ball Bearing Lock.
The P’Kal has the caged Ball Bearing Lock, The knife is based on an edged martial arts technique from the Philippines, which involves an “ice-pick” grip with corresponding downward pulling thrusts. Lock strength is crucial in knives used in the martial arts, so the P’Kal needs the MBC-rated lock.
The knife that has received the most attention of the caged series is the Manix 2. The original Manix knives featured a massive, heavy-duty design. By moving to the caged version of the Ball Bearing Lock, Spyderco changed the Manix in a positive way for everyday carry.
Use & Maintenance
The Ball Bearing Lock takes some getting used to if you are accustomed to LinerLocks™ or traditional lockbacks. Opening is the same as with other Spyderco knives via the blade hole. The difference is in closing. While it is possible to unlock the blade using one side of the lock, the best way is to pull the lock cage back with the thumb and index finger until it releases. Once the lock disengages, the blade can be pivoted closed. “People either like it or they don’t,” Sal observed. “They like the smooth action. They like the strong lock-up. We wanted it functional and easy to open, but I guess ‘not too easy’ would be one way of saying it.”
Among the advantages of having an exposed lock is ease of cleaning. “We usually just rinse them out and add a drop of oil here and there,” Sal said. “We’ve never had an issue with the spring. These coil springs go a long time, so really there is not much maintenance, other than occasional oil.”
The Ball Bearing Lock is one of many locks on the market. Others that share similar characteristics include the Bolt Action Lock designed by Cutlery Hall-Of-Famer Blackie Collins, and the Axis lock designed by Bill McHenry and Jason Williams and found on several Benchmade folders.
“I think all locks compete and have advantages and disadvantages, so I don’t know that one would be better than another,” Sal opined. “Most locks will either slide or rotate; I guess [the Ball Bearing Lock] would be considered sliding, although it is more rolling than sliding that is the action of the lock.”
Hence, the Ball Bearing Lock takes the contradictory rolling motion of a ball bearing and the sliding of a piston into a channel to lock two pieces of metal into one. It is a contradiction that works.—by David Jung
For more information on the Ball Bearing Lock and the Spyderco knives that have it, contact Spyderco, attn: J. Laituri, 820 Spyderco Way, Golden, CO 80403 800.525.7770 www.spyderco.com,[email protected].
Know the keys to the best handle design to enhance your knife’s performance and safe use. Following are seven:
1) According to ABS journeyman smith Dan Farr, the size of your hand is a key to arriving at the best handle for you. Longer hands require a larger handle diameter and thicker hands a smaller diameter. Wearing gloves works best with a longer and thinner handle. Remember that an eighth-inch difference in handle diameter means approximately a 3/8-inch difference in circumference.
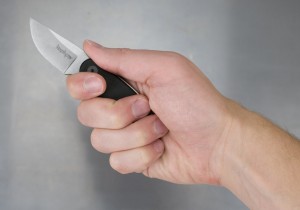
Know seven keys to top handle design. The knife is the Kershaw Mini Skinner. (Kershaw photo)
2) As for handle material, most synthetics tend to be stable, durable and often require no protective finish. Wood is strong for its weight, finishes well and adds beauty. Stag is somewhat limited in shape and size, but has good texture and adds traditional looks.
3) Contoured and formed grips are great if they fit your hand, but the more form fit the handle, the fewer people it fits. Finger grooves are an example. They are nice if they fit your fingers, horrible if they do not. Handles with a single finger groove for the index finger will generally be versatile enough to fit many hand sizes.
4) Round handles have no natural indexing for the blade edge (natural indexing refers to the ability to know where the edge is by how the handle feels in your hand rather than having to look at the edge to know where it is). Oval handles are much more useful. They index the edge to the handle and add the ability to use twisting force.
5) Curving the butt of the handle down—also known as the dropped handle—will improve purchase.
6) A palm swell allows a relaxed, comfortable handhold. It keeps your hand in the same place on the handle, provides a natural pivot point and helps with retention.
7) Guards are important safety features. A guard should blend with the contours of the grip and be strong, though in proportion to the rest of the knife.
A Knife Handle That Really Sticks With You
This Deer & Deer Hunting Drop Point Knife is a great example of a knife that gets its handle right. This hard-working hunting knife was made exclusively by the American Knife Company for BLADE‘s sister brand, Deer & Deer Hunting, and is a great pick for hunters and collectors alike.
The rich tradition of knifemaking is full of rewards, but it demands respect. The ways a knife shop can inflict bodily harm are endless. That’s why BLADE asked knifemakers to share some of the worst accidents in their shops. Hopefully, others can learn how to avoid making the same mistakes.
Stay safe!
“Like a Missile Straight at My Right Shin”
Lesson: Save sharpening for the last steps of making a knife.
There’s a reason sharpening should ALWAYS be the last thing you do on any knife before it leaves the shop.
A few years back I was working on a large Bowie. The customer requested a sharp, full convex edge on the clip/swedge area. Against my better judgement, I got in a hurry and sharpened this swedge as soon as the knife was back from heat treat…with a lot of work left to perform with this razor sharp edge on the clip.
Somehow I managed to let the tip of the knife bite into a cork belt which caught it and ripped it out of my hands and sent it like a missile straight at my right shin. Since that top edge was sharp it cut through my boot and buried itself about 3/4-inches into my leg. It filled my boot with blood and ended all work for a couple days.
If I hadn’t been wearing boots or if both edges had been sharpened, I’m sure it would’ve exited the backside of my ankle and possibly crippled me, or worse. It was a lesson that reinforced a very basic rule of our craft and I don’t think I’ll ever forget it.
The buffer is the silent sleepy monster that can lull you into a wheelchair for life or just take it from you in the blink of an eye.
When I started making knives about six years ago, I had this cheap Ryobi buffer that I spent like $40 on. Thank God I did, because if it would’ve been stronger, I’d probably not be here right now. That thing ripped a fully sharpened drop-point hunter right out of my hands and spun it around to to the ground with the tip hitting first.
I was sitting down in front of the buffer, and the knife went right through my legs. Stupid hurts, and that was as stupid as it gets.
I still probably I don’t realize how close I was to death. It scared the s*** out of me, enough so as to never use the buffer facing in front of me ever again. I stick to the side now, and am always alert with the door locked so no one can come in to distract me.
I love making knives and every thing about it, except for the buffing and polishing.
“All the Skin and Part of the Finger Nail was Ground Off”
Lesson: Wear gloves while using a grinder.
While rough grinding a blade on my 2×72 belt grinder, I was pressing pretty hard against a 36-grit belt. At the time, I thought to myself, I need to stop and grab a pair of leather gloves.”
Sure enough, the blade slips, and I drove my finger in to the belt. It was only a split second, and I jerked back instantly. It was still enough time for 36-grit traveling at 1,750 rpm to do the job. All the skin and part of the finger nail was ground off.
I always say I put a little blood into every knife, usually when hand finishing, but dang this one was to excess. Lesson learned. I now keep a dedicated pair of gloves by the grinder when performing heavy roughing.
I was forging and tried to use a pair of tongs that didn’t grip the work well enough. This knocked the piece I was holding loose. The blade dropped right in the gap between my work boot and my ankle.
By the time I could get it knocked out of my boot and my foot in the water bucket, I had a perfect, knife-shaped burn on my ankle.
Lessons learned. Don’t forge in shorts. Either use tongs that hold well, forge from barstock, or weld short pieces of blade steel to a rebar handle.
Last winter, I got up before daylight with a plan to forge a couple skinners. It was extremely cold out, and I have no heat in my shop. So I lit the forge, which is pretty cold-natured due to its size. It has a small doorway in the rear that I keep blocked off with a fire brick.
Well, the fire brick fell off onto the ground at some point, and the forge was shooting flames out the rear. I fumbled around sleepily and walked behind the forge to get my gloves and glasses put on. Unbeknown to me, the flames were reaching the back of my coveralls. I started smelling something burning and immediately felt the heat.
I had caught my butt cheeks on fire.
So I sprinted through the door like a battering ram and did a flying back smacker into a couple inches of snow we had gotten through the night. I hadn’t felt pain back there like that since I was a kid when I sprayed my dad with a water hose while he was finishing concrete.
The coveralls were toast. There was a fist-sized hole in them that left me with two, half dollar-sized blisters and a hairless rear end like the bear on “The Great Outdoors.”
Complacency is the number one cause of accidents on job sites. Working around a 2,000-degree forge is no different.



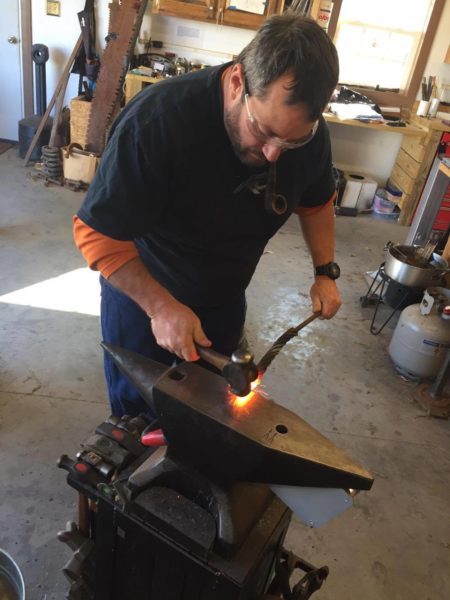

 For more about knifemaking, be sure to pick up a copy of BLADE’s Guide to Making Knives. This second edition shows step-by-step the tools and techniques for making a knife.