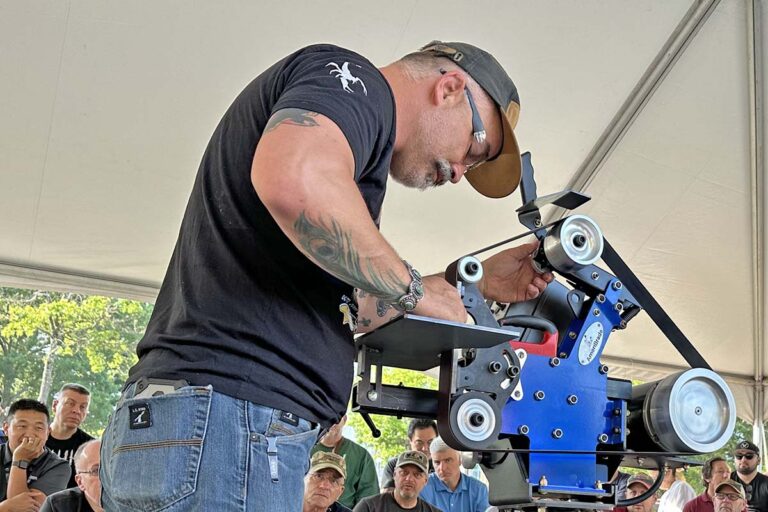
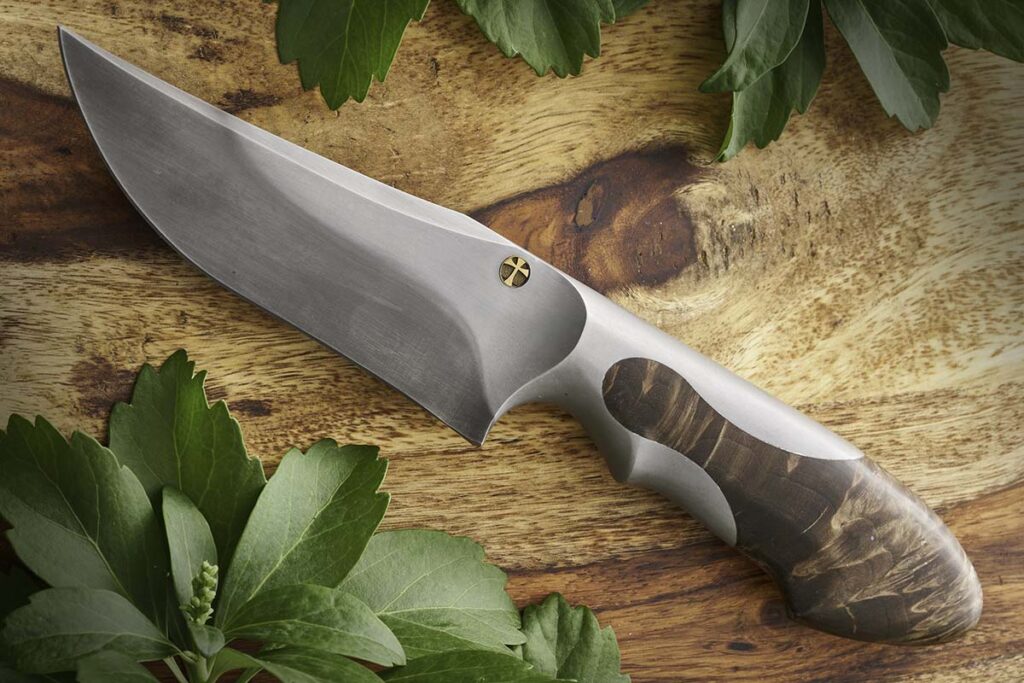
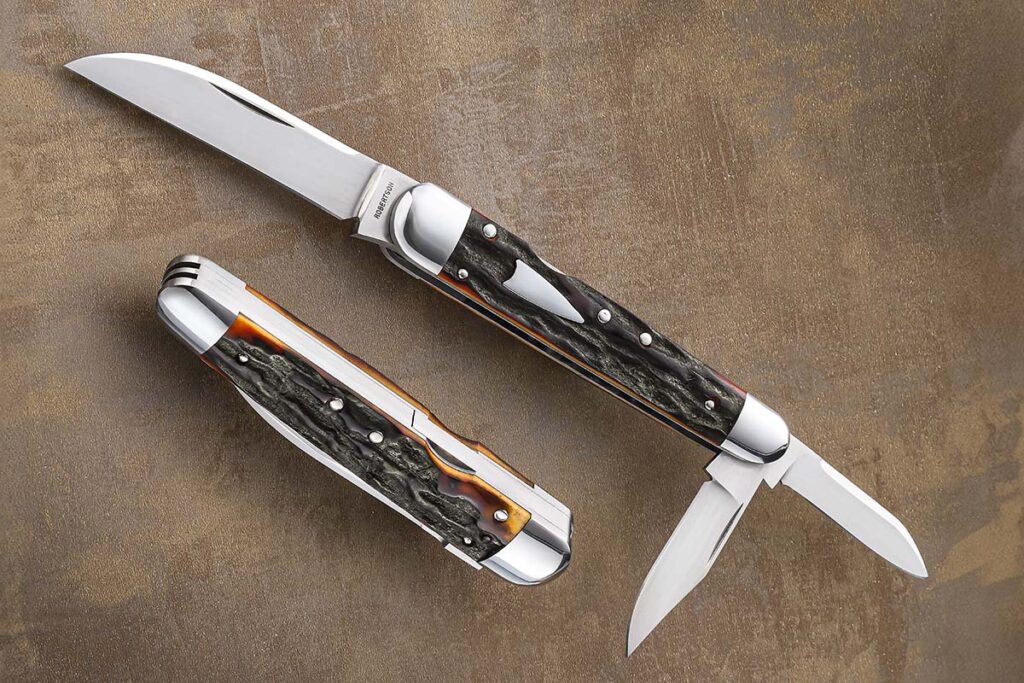
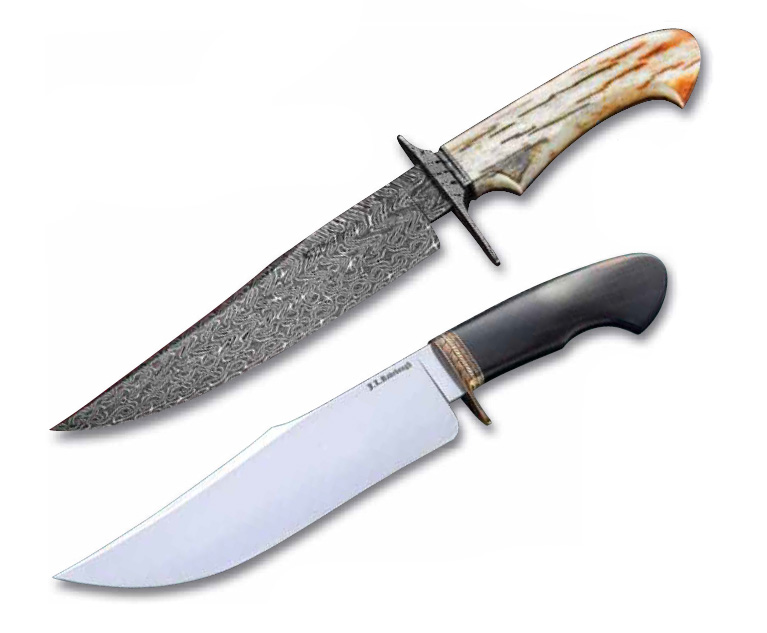
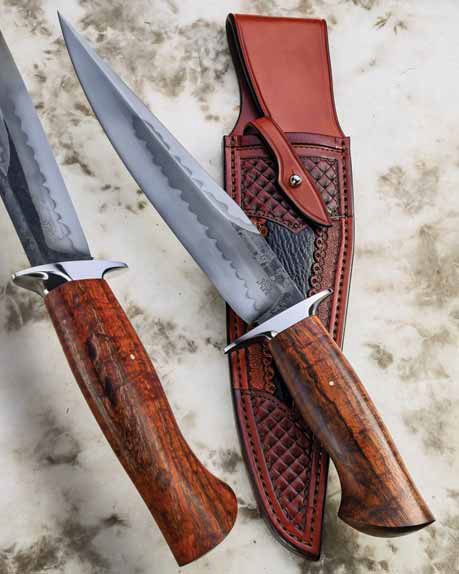
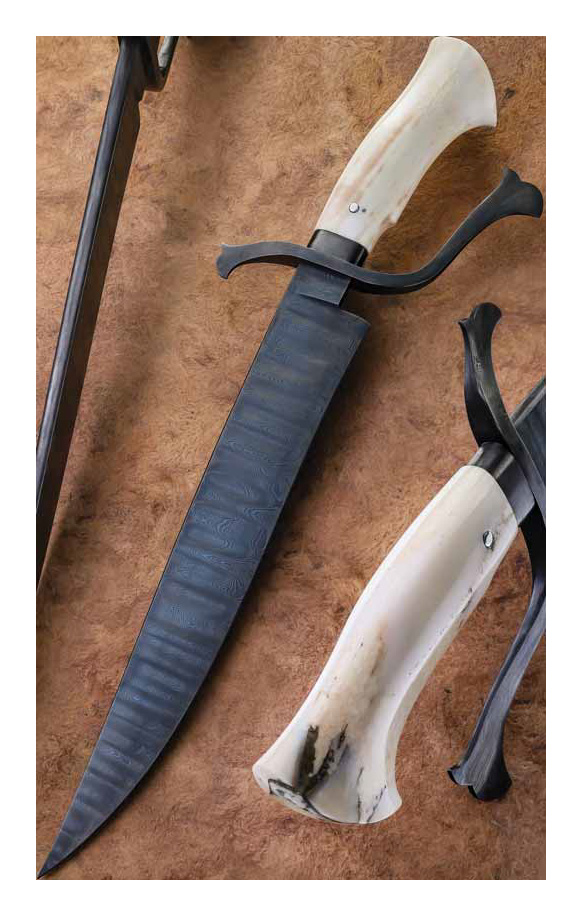
Knifemaking is the building of a knife, which includes the blade, handle and other accouterments. Blades are made by either removing metal from a steel blank via a grinder – known as stock removal – and the forging to shape of hot steel into a blade in the process known as bladesmithing. Other parts, including bolsters, guards, pommels, etc., are needed to complete the finished knife.
Ben Seward’s breacher SWAT Axe salutes officer’s 21 years of police service
When ABS journeyman smith Ben Seward went to make his first axe, he didn’t settle for something easy—he went the whole hog on a special breaching model as a retirement gift for a 21-year law enforcement veteran.
Sgt. Magnus Gervol retired from the Whatcom County, Washington Sheriffs Office after a career that included 15 years on the SWAT team and 14 years as a sniper.
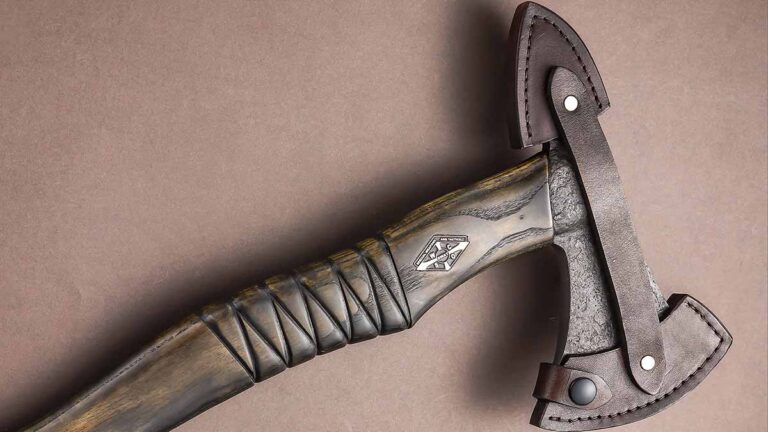
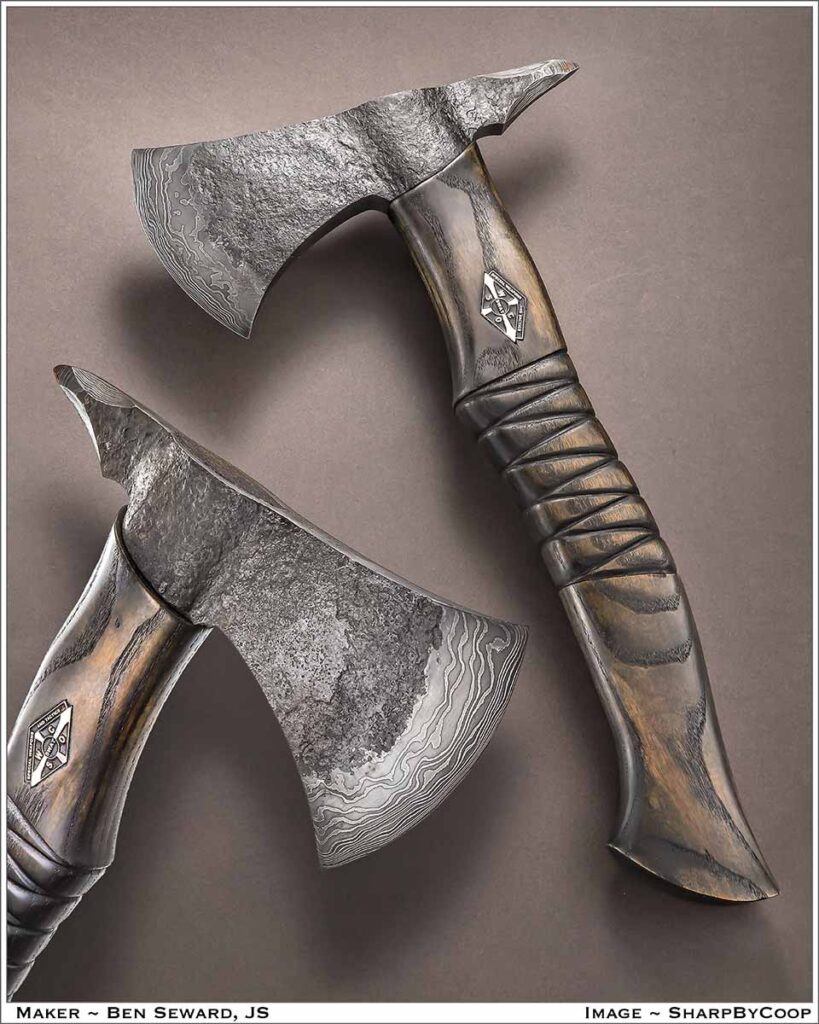
Members of the Sheriffs Office contacted Ben, who forged the axe from the barrel of a Remington 700 SPS tactical sniper rifle. The idea was to make a tactical axe with a beard and a tomahawk spike. The handle is Ozark white oak. Ben’s dad, David, who specializes in sheaths, made the leather sheath.
Ben forge welded the rifle barrel into a bar and layered it up with other carbon steels. He forged the two flats of the head roughly into a triangle and pieced in the bit for the cutting edge. All of the head, including the edge and spike, is forged of the same damascus.
SWAT Axe Specs Maker: Ben Seward Head Size: 7.75” Bit Size: 3.5” Head/Bit Material: Damascus forged from the barrel of a sniper rifle and 1080 carbon and 15N20 nickel-alloy steels; includes a rough-forged finish Handle: Ozark white oak Handel Length : 14” Maker’s Price For A Similar Breaching Axe (excluding the steel from the sniper rifle): $1,500
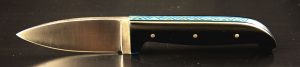
Smyth Knives’ Flat-Grind Utility Knife is made using O1 tool steel, black G10 scales, and blue liners. The blade is 3 inches, and the knife is 7.5 inches overall.
Irishman Paddy Smyth of Smyth Knives in County Roscommon, Ireland, sells 90 percent of his knives through his website to customers in the USA. The other 10 percent are purchased through The Quiet Cailin Studios in Cong, County Mayo, where “The Quiet Man,” starring John Wayne and Maureen O’Hara, was filmed. Some even incorporate ancient bog oak.
Irish Eyes Will Smile Over Smyth Knives
But it was another movie that sparked a love of knives in Paddy growing up. He watched wide-eyed as the work of Gil Hibben’s was deftly wielded in “Rambo III.” It is “my favorite knife of all time, so I have huge respect for [Hibben’s] work,” Paddy commented. He had a week-long visit last year from Jeff Knox, who trained with Hibben in the US. “He has been a great help to me also with advice and sourcing materials as its hugely difficult to get materials in Ireland,” Paddy added.
Paddy Smyth lives in County Roscommon in Ireland and undoubtedly with a name like Smyth has knifemaking in his blood.
He also mentioned that Walter Sorrells’ YouTube channel has been helpful and inspirational.
However, Paddy is a self-taught knifemaker and much of his learning has been by trial and error over the years. “I continue to learn,” he noted. He was trained as a chef and butcher and always had a keen interest in hunting, so he was intrigued by what made a high-quality knife. “So, I basically decided to have a go at knifemaking and caught the knifemaking bug,” he said.
Paddy concentrates on compact pocket and neck knives, bushcrafting and hunting/skinning knives. He makes specialty chef knives to order to client specifications. His favorite steels are O1 an Niolox stainless. He appreciates the consistent finish and heat treat he gets using these steels.
He likes three grinds: Scandi for his bushcrafting blades because it’s easy to maintain an edge; and flat and hollow, according to customer preference, because they both work well for his hunting and skinning blades. For bushcrafters, he chops and batons wood to test for toughness, and then fine-carves paper to verify sharpness. Cutting heavy cardboard with its abrasive quality helps him get a feel for how long his blades will stay sharp. He does ensure his flat- and hollow-ground blades can handle the detailed work of skinning and boning.
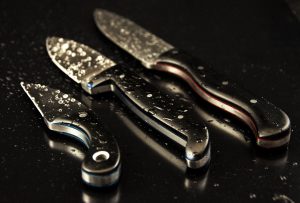
The Claw by Smyth Knives, left, is 5.25 inches long, with a 2.2-inch cutting blade. It’s perfect for close skinning/boning/gutting with complete one-finger control.
“My favorite handle material is ancient Irish bog oak, which can be up to 10,000 years old. It finishes really well and has beautiful character and history,” Paddy explained. “It’s very difficult to work with as it’s so hard it’s almost fossilized. And it’s becoming harder to find good pieces. It’s very hard on machinery and tools, but the work is worth the finished product.”
There are no knife shows currently in Ireland, so Paddy sells his work online at www.smythknives.com. Prices range from 90 to 500 Euros plus shipping with discounts for repeat customers. Also, check out the boutique artisan gallery in County Mayo where Smyth Knives are also sold on Facebook. Smyth Knives on Facebook and @smythknives on Instagram are chock full of additional photos and videos. You can call Paddy at 00353 87 6281252.
All Smyth Knives are completely handmade and heat-treated in house. Leatherwork is specific to each knife, so no two creations are the same. Paddy is a retail manager for an oil company based in the west of Ireland. He lives in Roscommontown with his wife, Edel, and their three boys, Shane, Darragh and Cian.
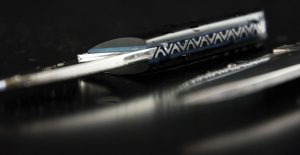
The ornate file work on the spine of this knife by Paddy Smyth in County Roscommon, Ireland, is reminiscent of a Celtic pattern.
“When I started making knives, I realized I had found something incredibly natural to me, as if I was meant to do this or was maybe in my blood, as my family name is Smyth,” Paddy noted. “I’m completely at peace when I’m in the workshop.”
The CRKT Homefront is the 2017 BLADE Show knife. Be sure to get yours now.
CRKT and Ken Onion took home the Most Innovative Imported Design award at the 2016 BLADE Show for the groundbreaking Homefront. Now the Homefront is the official knife of the 2017 BLADE Show. This is a limited run of 300, so hurry! And at $70 you’ll be saving almost 30 percent.
Get your bachelor’s of state-of-the-art degree at the 11th Annual BLADE University.
The state-of-the-art in all things knife, including the latest in mosaic damascus steel, knife and handle design, and how to sharpen, make a lockback whittler, run a knife business and more will be the focus of the 11th Annual BLADE University.
Held in conjunction with the 43rd Annual BLADE Show June 7-9 at the Cobb Galleria Centre in Atlanta, BLADE University will be sponsored by Work Sharp. Classes begin Thursday, June 6, and will run through Friday, June 7, and Saturday, June 8.
While most courses will be taught in the Cobb Galleria, some also will convene under the tent in The Courtyard, aka the parking lot of the show’s host hotel, the Renaissance Atlanta Waverly.
BLADE University gathers some of the world’s best knifemakers, bladesmiths and other cutlery and steel professionals to teach a wide range of subjects for the knife user, knifemaker, knife hobbyist, knife entrepreneur, knife designer, and knife aficionado and novice alike. If you love knives or are just beginning to, BLADE University has a topic for you. The complete course schedule, with subjects, teachers, times and venues:
The Art of Selling at a BLADE Show, Tom Krein, 4 to 5 p.m., Room 104—A long-time maker of custom utilitarian fixed blades and folders, Tom Krein will outline exactly what a knifemaker who is serious about selling knives should do and how he/she should behave behind a knife show exhibitor table. Proper table etiquette and sales and customer relations strategies are just some of the subjects Tom will cover. The class will be held the day before the BLADE Show begins so attendees can put some of Tom’s recommendations into practice during the main event Friday through Sunday.
FRIDAY, JUNE 7
ABS journeyman smith Henning Wilkinson makes impeccable keyhole knife handles like this one. Join him for his class Metal and Wood Fitting Techniques for Keyhole Handles Friday at 2 p.m. (Eric Eggly/PointSeven knife image)
Fundamentals of Grinding, AmeriBrade and guest grinders, 8 to 9:30 a.m., The Courtyard—AmeriBrade and guest makers will provide a general overview on grinds, techniques and different equipment. The class will be interactive and the team will answer questions and demonstrate suggestions for common issues.
How to Run a Small Successful Knifemaking Business, Bob Kramer, 10 to 11:30 a.m., Room 103—Learn the do’s and don’ts of making the most out of your knifemaking business. ABS master smith Bob Kramer has 30 years of experience and says he’s still learning!
Thermal Cycle Steel for High Performance, Larrin Thomas, 10:30 to 11:30 a.m., Room 104—There are many different recommendations for how to heat treat steel after forging, but what is best? Can normalizing and grain-refining cycles really improve properties when compared with steel from the factory? Should stock-removal makers bother with thermal cycling? How do you thermal cycle stainless steels after forging them? Is it thermocycling or thermal cycling? Join Larrin Thomas, designer of CPM MagnaCut stainless steel, creator of the website Knife Steel Nerds, and author of Knife Engineering: Steel, Heat Treating, and Geometry, as he answers these questions and more.
Symmetrical Quillon Dagger 101, Neels Van Den Berg, 1 to 2 p.m., Room 107—Join ABS master smith Neels Van Den Berg from Black Dragon Forge for a discussion and walkthrough of making a symmetrical quillon dagger. He will cover design, proportions, aesthetics, materials, fluting and finally the entire manufacturing process, sharing useful tips and tricks to save you time, money and frustration.
Intro to Power Forging, panel of forging authorities, 1:30 to 2:30 p.m., Room 103—Bring your forging questions to our group of expert panelists including Logan Gillihan, Will Stelter, Salem Straub, Charlie Ellis and Brian House.
Metal and Wood Fitting Techniques for Keyhole Handles, Henning Wilkinson, 2 to 3 p.m., Room 113—An ABS journeyman smith and member of the Knifemakers’ Guild of South Africa, Henning Wilkinson will outline the correct techniques for fitting metal and wood in the construction of the keyhole integral knife handle. Henning will show you how to eliminate the gaps between materials that results in the proper fit and finish collectors and those who judge knife competitions look for in an award-winning keyhole-handle knife.
Hands on Sharpening, the team at Work Sharp, 3:30 to 4:30 p.m., Room 113—What happens when a knife gets dull? How do you know when to sharpen it? Bring your own knife or borrow a demo model and learn the progression of shaping a bevel, sharpening and edge maintenance from the team at Work Sharp. You will get hands-on practice and experience sharpening your blade using a variety of sharpeners and abrasives, from whetstones to belts.
Originality: Experimentation, Innovation and Ingenuity, Lucas Cao, 4:30 to 5:30 p.m., Room 107—Why are some people more creative than others? Can creativity be learned? Lucas Cao, founder of Squid Industries, explores tools and techniques that anyone can apply to become more original.
Tim Robertson won Best Locking Folder at BLADE Show West ’22 for his lockback whittler and will cover how to make this most difficult pocketknife of all to build in his class Saturday at 9:45 a.m. (SharpByCoop image)
Elevating Your Handle Appearance: Spine Filework, Handle Shapes and Pin Placement, Kyle Daily, 8:30 to 9:30 a.m., Room 113—Enhance the appearance of your knife with distinctive features that go far beyond standard production models. Knifemaker Kyle Daily from KHDaily Knives guides you through the intricate art of filework on the spine, while also sharing insights into handle design and the pin placement on your handle. Discover Kyle’s preferred files and specialized equipment for crafting his five most popular filework patterns, ensuring your knife not only looks exceptional but also feels comfortable and functional. From laying out your pattern to a step-by-step tutorial, this class provides the essential knowledge to achieve a professional and eye-catching finish. A Q&A session at the end will ensure you leave with the skills and knowledge to take your knifemaking to the next level.
Insert Welding with Bob Kramer, 9:30 to 11 a.m., Room 104—Understand how to forge weld inserts with high precision and control to create realistic depictions of animals and patterns in this BLADE University offering. This will be an exclusive opportunity to experience the technique that Bob Kramer created with fellow ABS master smith Tom Ferry and shared with the masses.
How to Make the Most Difficult Pocketknife, Tim Robertson, 9:45 to 10:45 a.m., Room 107—An award-winning maker of slipjoints and a charter member of the South Texas Slipjoint Cartel, Tim Robertson will address perhaps the most difficult pocketknife to build: the lockback whittler. He will outline what makes the classic slipjoint/lockback folder so demanding to make, with a major focus on backspring design and function, the two areas of the knife that work against each other. He also will cover the correct sequence of parts preparation and the proper order of construction steps that reduces mistakes and helps ensure a successfully completed knife.
The Process Is the Product, TJ Schwarz, 11 a.m. to 12 p.m., Room 113—TJ Schwarz is the founder of Schwarz Knives, an Idaho-based manufacturer of premium outdoor fixed blades. He has over a decade of freelance knife design experience with many models in circulation, a patent, and two BLADE Show awards to show for it. Schwarz will share his insights on how to create a successful knife business, including the key point of understanding actually what it is that you’re selling.
Let the Pros Critique Your Knife, 2:15 to 3:15 p.m., Room 114—Award-winning knifemakers David Carver, Enrique Pena and Luke Swenson and ABS master smiths Bob Kramer and Jim Rodebaugh will share decades of knowledge and experience to critique the knife you made. They will go over every square inch of it and tell you what’s good, what’s not and how to make it better. Bring one knife only. Questions from attendees will be entertained throughout.
Hands on Sharpening, the team at Work Sharp, 2:15 to 3:15 p.m., Room 113—What happens when a knife gets dull? How do you know when to sharpen it? Bring your own knife or borrow a demo model and learn the progression of shaping a bevel, sharpening and edge maintenance from the team at Work Sharp at this BLADE University class. You will get hands-on practice and experience sharpening your blade using a variety of sharpeners and abrasives, from whetstones to belts.
Making Scissors in a Knife Workshop, Grace Horne, 2:30 to 3:30 p.m., Room 107—Have you ever thought about making scissors but don’t know where to start? If you’re curious about scissors or just want to expand your knowledge, this session is for you. Whether you want to have a go at restoring old scissors or forging your own from scratch, the basic information is the same—and it’s notoriously poorly documented. Dr. Grace Horne will give a whirlwind tour through the early history of scissors, describe methods of producing the blanks, give inside information on the twist and the curve, and highlight critical areas to consider. Most importantly, she will describe her method of scissors making that requires no specialized tools or equipment.
Pattern Welding Panel, 4 to 5 p.m., Room 104—Salem Straub, Mareko Maumasi, Charlie Ellis, Josh Prince and Will Stelter will explain how they created their collaborative Consortium billet, including each of the steps that went into creating this wild mosaic billet, and then open up to general questions about damascus forging and pattern development.
The Three-Layer Construction Of San-Mai Results In Sharp, Durable, Beautiful Blades
San-mai is an ancient blade construction technique that originated in Japan around 1300 A.D. Those who continue to use the technique harken back to those early days of craftsmanship and take pride in their finished product, a combination of the old and new that presents a dazzling aesthetic in three layers combining tensile strength and edge holding in a working knife blade.
“San-mai is a Japanese term describing a knife composed of three layers of steel that are forge welded together and ideally unite some different properties of the used steels within one knife,” explained Benjamin Kamon of Korneuberg, Austria. “Or, it serves another purpose as, for example, to ‘save up’ rare high-carbon steel used in the middle for the edge, which is what I believe started it originally.”
Jeremy Bartlett of Parkersburg, West Virginia, agrees. “Traditionally, two softer metal outer jackets and one high carbon core steel for the edge are used,” he said. “The main reason to use san-mai is so you have a soft steel jacket and a high-carbon core cutting edge. This will make the knife very durable with a great edge.”
The san-mai process is similar to the layering of damascus, a.k.a. pattern-welded steel, but retains a methodology all its own. In damascus, the layering and relayering of component steels typically result in numerous layers in the billet, while the object of damascus forging is often to create a pattern in the steel itself, along with the enhancement of blade performance.
“San-mai ends up taking much less time to make [than damascus],” added Noah Vachon of Mistissini, Quebec, Canada. “For one thing, you’re starting with fewer layers—three instead of 15 or 20 in my case. That’s fewer surfaces to grind clean when prepping the billet material. Also, unlike making pattern-welded steel, there’s no need to restack or further manipulate the billet. One thing that is a bit trickier is the core material has to be kept centered. I try to work a blade evenly from both sides when forging san-mai. With damascus, this is less of an issue.”
How To Make A Knife With The San-Mai Technique
Curt Zimmerman of Longview, Texas, uses two methods of san-mai construction. “I make it with a laminate billet and sandwich my core material between it, or I will use a canister. For the core I use 1084 because it is the most forgiving steel that I have been using as far as heat treating and workability. For the jacket or laminate billets I use 1080, 15N20 and pure nickel shim material because it is readily available and easy to work with. For the material in canister, anything from chainsaw chains to fishhooks, ball bearings, scrap damascus or other stuff lying around the shop will work. I like this because it’s great to experiment with.”
The texture on the san-mai blade of Benjamin Kamon’s chef’s knife is what he calls denty. “The technical term would probably be tsuchime,” Benjamin noted. “The denty serves the purpose of benefiting food release as the texture in the blade will produce small air pockets between the blade and foods that like to stick.” (SharpByCoop image)
Zimmerman showcases his san-mai talent in a beautiful fixed-blade fighter with a ball-bearing san-mai blade and an ancient walrus ivory handle. With inch lengths of nine for the blade and 14.5 overall, the fighter flaunts contrast between light and dark. The san-mai blade’s distinctive pattern and the integrity of the cutting edge are well defined.
“The most visible sign of a well-made san-mai is the center core showing equally on both sides,” Zimmerman observed. “I’ve only been building knives for about a year, and it has become a true passion of mine.”
Vachon is familiar with 1084 and 1095 carbon steels for the core of his san-mai blades and intends to branch out to 26C3 and White Paper #1. “I try to choose materials that play well with each other,” he commented, “that is, that bond easily and move at comparable rates when worked.
“I’ve been using 410 stainless for the jacket. It stays bright when etched, which gives a nice visual contrast with the darker core, and the carbon migration that goes on where the layers meet can be very attractive. A stainless jacket with a carbon core is sort of the best of both worlds in terms of function. Antique wrought iron is also a fascinating and beautiful jacket material that tells a great story.”
When Noah completed a breathtaking chef’s knife with a 10.25-inch blade and overall length of 16.2 inches, he knew he had done something special—a tour de force in his cutlery journey.
“This knife is the culmination of all the skills I’ve learned during my career as a maker, with a cherry on top,” he related, “everything I learned from cabinetmaking and lutherie*, as well as the years studying ergonomics as an industrial designer.” The knife combines the san-mai blade of antique wrought iron and 15N20 and 1095 core with a handle of stabilized redwood burl and denim. A copper Micarta® bolster completes the package.
“This knife was forged from my first- ever house-made billet of wrought-iron san-mai,” Vachon recalled. “The iron is from a piece I brought home from the New England School of Metalwork in Maine. The outer layer visible near the spine is the wrought iron. It’s full of impurities from the way it was manufactured over 100 years ago, and that gives it loads of character. The next layer that looks brighter than the rest is the 15N20. It has nickel in it and that prevents it from etching darkly. The layer at the edge is the core material. Having five layers would usually be referred to as go-mai I suppose, but it’s the same idea.”
Kamon identifies a departure from the time-honored in his san-mai construction. “The biggest difference to traditional san-mai is probably that my outside layers are made from stainless steel instead of mild steel, which is mostly used in traditional san-mai,” he noted. “The advantage of stainless steel is exactly that. It’s stainless but with that comes also the visual advantage of a strong contrast after etching the finished blade as the stainless steel stays silver, shining while the cutting layer gets very dark. The cutting layer is from a tungsten-alloyed high carbon steel called 1.2519 that is not stainless, and the reason for its etching quite strongly in an acid such as instant coffee or ferric chloride.”
Benjamin’s chef’s knife with a 10-inch blade of seven-layer stainless steel with the 1.2519 cutting edge presents a dazzling effect. At 15 inches overall, this issue’s cover knife features a handle of ringed gidgee wood and a bolster of dark gray titanium.
“Behind the edge is the darkly etched cutting layer,” he related. “After that is the nickel layer that prevents carbon from diffusing into the outer jacket layers of the blade. After the nickel there is a thin layer of high-carbon manganese-alloyed steel. This steel only serves a visual purpose and produces a slightly cloudy and dark faded effect in the stainless steel jacket. Last but not least, there is the outer layer of stainless steel in a shiny silver color.
“My years spent learning to forge and my countless failures have eventually led to this first—but not last—house-forged wrought iron san-mai blade,” noted maker Noah Vachon. “It’s long and tall, thick at the ricasso and thin at the tip, and feels just right. (Caleb Royer knife image)
“The texture on the blade is what I call denty, my brand for it. The technical term would probably be tsuchime. The denty serves the purpose of benefiting food release as the texture in the blade will produce small air pockets between the blade and foods that like to stick. It also makes a given blade lighter in weight compared to the same blade without texture.”
Delam Safeguards
One of the biggest challenges in constructing san-mai is the potential delamination of the steels—when the layers literally start separating from each other—during the forging process. Bartlett has devised techniques to help guard against that.
“When delamination happens, not only is the structure and durability of the blade compromised,” Jeremy reasoned, “but now you also have a void where contaminants can enter and cause the blade to rust from the inside out. The key to not having any delaminations in your san-mai billet is to take your time and make sure your mating surfaces are clean. Also, you need to make sure that you have no oxygen getting into your billet while heating in the forge. Check for small pin holes in your MIG welds all around the billet. I’ve tried using flux core to weld around the billet, but now I use only MIG wire with argon/CO2 gas. The last thing is to make sure that you don’t try and draw the billet out too much at one time. The jacket [sides] material and the core material will want to move at different rates because of the different makeup of the steels.”
Bartlett’s 15.25-inch fighter with a 9.25-inch blade of 416 stainless clad around a 1095 core, and a handle of curly koa wood with black G-10 spacer presents a highly contrasted look.
“You can see a total of three distinct areas on the blade,” he said. “The black area down to the edge is the core steel. Moving toward the spine, the next area will be the carbon migration area. This is where during the forging process some carbon leaves the core steel and migrates to the low carbon stainless jacket. This leaves a distinct crystal-like line between the two layers. The carbon leaving the core steel only affects the area where it meets with the stainless. No carbon is leaving the edge, where you need all of it for a good blade. The third area of the blade is the stainless jacket material. This area will be shiny and mostly free of any effect from the etching process. You will sometimes see, as in this case, a ghost hamon that will follow the peaks and valleys of the san-mai pattern in the blade.”
What Does San-Mai Look Like?
The look of high quality san-mai is readily apparent. The finest san-mai exhibits core steel that is centered in the billet along with the presence of the carbon migration line in the blade. In poorly made san-mai, the jacket steel approaches the edge of the blade too closely. After sharpening a few times, the soft jacket steel may run directly into the cutting edge, rendering the blade less than useful.
The watchful eye, the practiced hand and the awareness of control in each stage of construction will bring san-mai to life and perpetuate this centuries-old artistry of form and function beautifully.
*Lutherie is the construction and repair of stringed instruments that have a neck and a sound box.
The short answer: A handle design favored by custom knifemakers that resembles a bird’s head with a short beak at the butt of the handle.
Given the practicality and curves of the bird’s-beak handle, it is small wonder that it is quite the popular grip among today’s knifemakers. In fact, the design resembling a bird’s head with a short beak at the butt of the handle has appeared in many cultures over many centuries.
Tad Lynch indicated that crafting a good bird’s-beak design requires practice and the courage to push things. His Irish Traveler Fighter features a handle of koa, a 9-inch blade of W2 tool steel with hamon and is 14 inches overall. His list price for a similar knife starts at $1,100. (SharpByCoop knife image)
“You see it in different variations on Persian daggers and swords,” said North Carolina knifemaker Ken Hall. “Also, some kukris have the ‘hook’ in the handle. In American knives you see it in some of the Buck knife designs.”
When the ABS journeyman smith with 11 years of experience is not forging in the Smoky Mountains, he raises honeybees, hikes and teaches others the craft. He made a bowie in January in preparation for an ABS master smith test that had to be pushed back because of a bicycle accident.
While many makers make a bird’s-beak handle with a dense hardwood, Paul DiStefano took a risk on a material that has a reputation of being temperamental: ancient walrus ivory. Blade length and material: 12 inches and 500 layers of 1095 carbon and 15N20 nickel alloy steels. His list price for a similar knife: $1,800. (SharpByCoop knife image)
He picked the bird’s-beak handle design because it pairs well with large knives, especially those with recurve or clip-point blades. A big block of wood large enough to develop the butt’s shape is one of the best material sizes for the design, Hall explained.
“The bird’s beak provides a more controlled grip for the hand,” he noted. “The contour snugs around the little finger, keeping the knife from slipping forward while in use.”
The result, combined with a balanced knife, is a tool that feels like an extension of the hand.
So, you’re going to build a power hammer… now’s the time to consider where to get your parts.
The first thing you’ll have to decide is which style of power hammer you will build. There are as many designs as there are folks who build hammers, but they fall into two basic categories: helve hammers and linkage hammers.
Power Hammer Styles
Linkage Hammer
At the basic level, a helve hammer has an arm that moves up and down on a fulcrum to move the hammer head up and down. A linkage hammer uses a wheel, tire or disk that rotates and uses the rotation to move the hammer head up and down. The Little Giant power hammer design uses a linkage, as does the commonly home-built tire hammer.
The Little Giant power hammer design uses a linkage, as does the commonly home-built tire hammer. ABS master smith/BLADE® field editor Joe Szilaski pounds away with his 50-pound Little Giant. (Lori Szilaski image)
Helve Hammer
I chose to build an Appalachian-style spring helve hammer because I had access to a variety of leaf springs, and because the design is more intuitive and less mechanically precise. I figured correctly that I could build a helve hammer design from scratch, but that a tire hammer had some engineering points that would be difficult for me to figure out. If you have access to uniform steel sizes or must buy your steel, I suggest a tire hammer. I had good scrap steel and didn’t want to buy much.
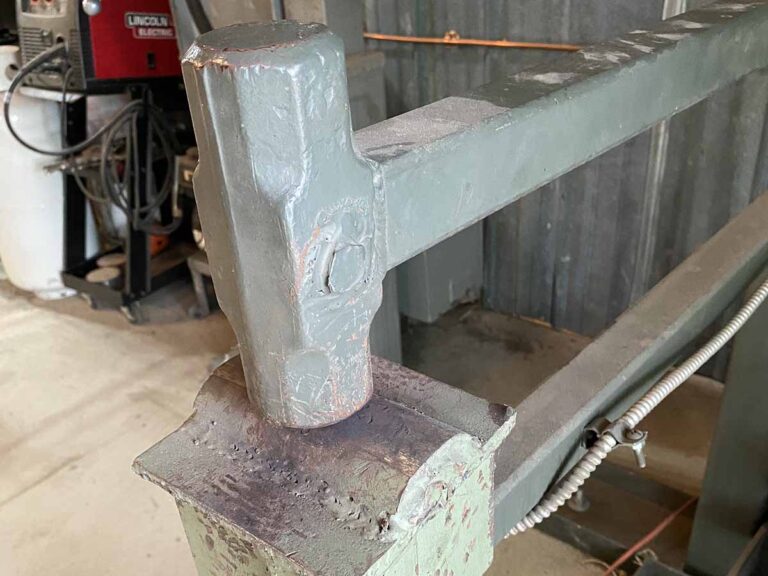
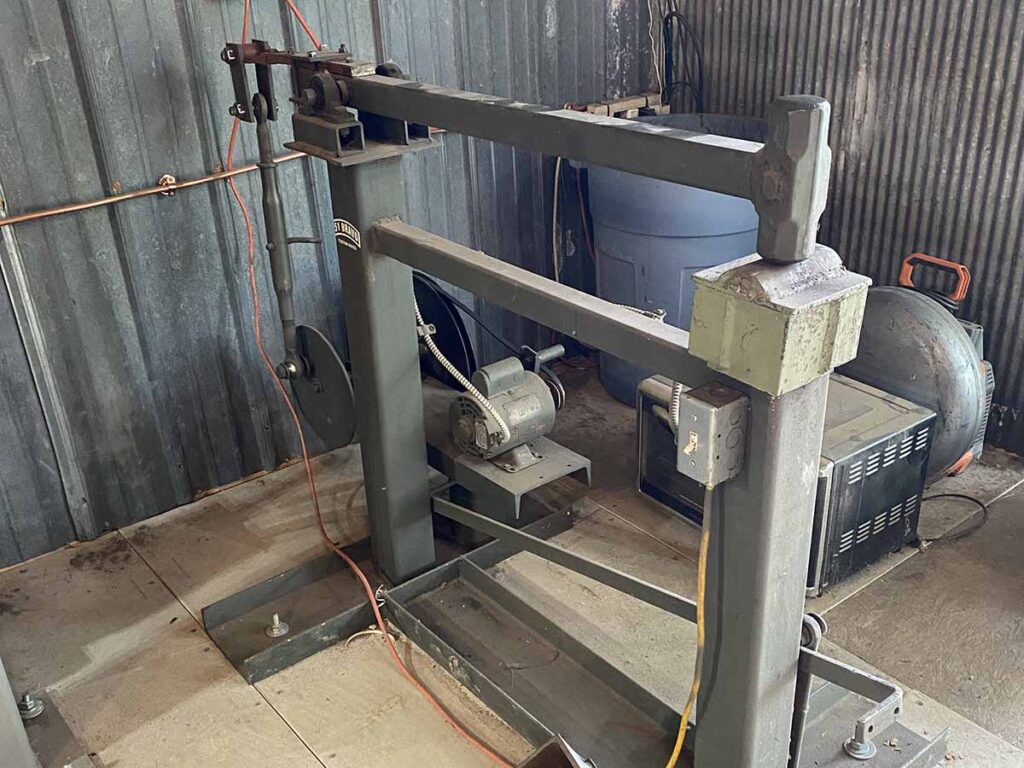
I’m focusing on the upright, heavier, more efficient metal-moving machines. Even so, it’s worth mentioning the smaller, simpler but less efficient helve hammers. I came across a good example in the shop of Shawn Moulenbelt, a Michigan bladesmith who was on season seven of Forged in Fire. His hammer used various sizes of hollow square tubing, a sledgehammer head and a half-horsepower motor. He used a slack belt clutch and interchangeable die plates. His hammer was built by Rusty Glovebox on YouTube and is a solid DIY (do-it-yourself) design.
Bladesmith Shawn Moulenbelt’s helve hammer uses various sizes of hollow square tubing, a sledgehammer head and a half-horsepower motor. On the upside, these hammers are quick and fairly straightforward to build. On the downside, they’re not all that great at their one job: moving metal. Even so, a similar light use-DIY power hammer is much more efficient than your arm, and much less likely to get tired.
On the upside, helve hammers are quick and fairly straightforward to build. On the downside, they’re not all that great at their one job: moving metal. Even so, a similar light use-DIY power hammer is much more efficient than your arm, and much less likely to get tired. In my mind, if you have the time and skill to build a small hammer, you can just as easily build a bigger one. Even so, the small helve hammers may be just the ticket for your shop.
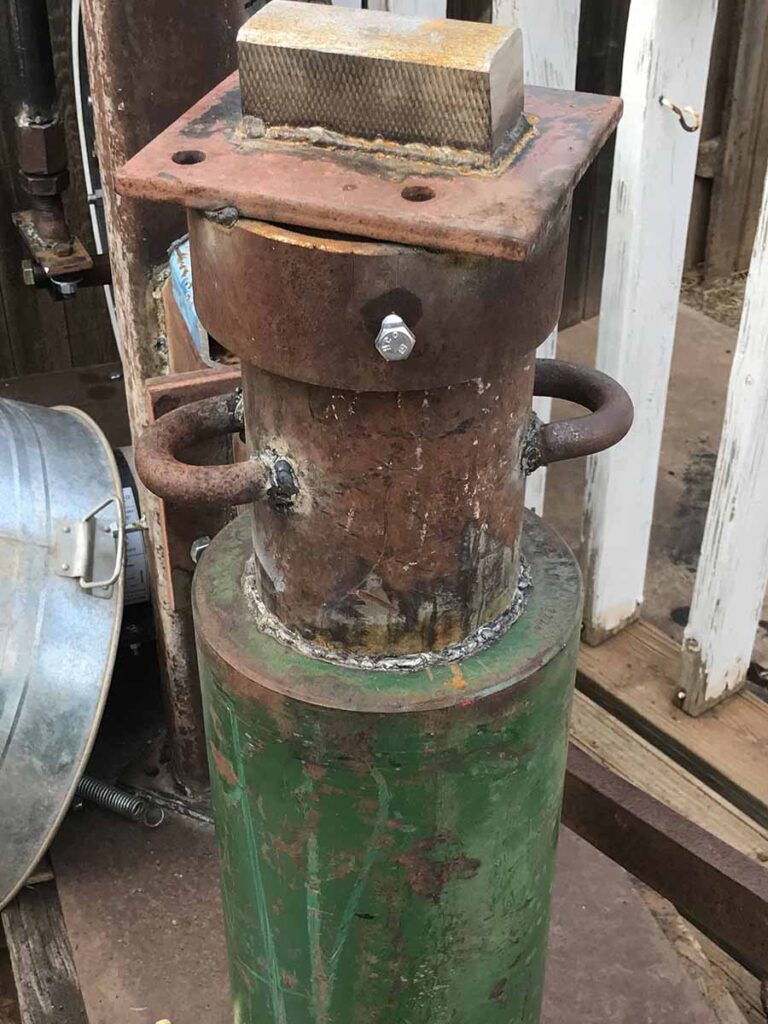
The author’s home-built hammer combines a 5-inch piece of round stock with a heavy sleeve from a “mud pump” to make an anvil that weighs around 400 pounds.
Resourcing An Anvil
There are many different things that can make a suitable anvil for a power hammer and many more things that cannot. What you are looking for in an anvil is a solid piece of steel that weighs anywhere from 150 to 600-800 pounds, which can be difficult to acquire.
Sometimes you can find solid square or round bar steel. Some folks recommend railroad axles. Others suggest forklift tines welded together. I’ve seen sections of a 2-inch square bar welded together into a solid 6×6. I’ve seen pieces of 1-inch plate welded where the hammer strikes the ends. Whatever you can find needs to be solid or able to be welded into a solid, single, massive piece, and your welder has to have the power to stick it all together. My hammer is built on a 32-inch piece of 5-inch round bar welded inside a mud pump sleeve that has a 5-inch bore. The total weight of my anvil is around 400 pounds.
What Not To Use
Don’t be tempted to think you can get a piece of something hollow like pipe or square tubing and fill it up and make a suitable anvil. Each stroke of your hammer pounds the steel in-between the hammer head and your anvil, pushing your anvil toward the ground. If you have any movement, vibration or give in your anvil, the force is absorbed by the movement and not efficiently transferred to your workpiece.
Anvil To Hammer Head Ratio
When you finally locate this difficult-to-find thing, it won’t likely be the size or shape you want. My anvil was round, which doesn’t easily weld to square tubing, for example. I had to deal with it. As noted, my anvil was around 400 pounds total weight. Yours may be more or less. You should design your hammer with a minimum 1:10 head-to-anvil ratio. Since I had a 400-pound anvil, I built a 40-pound head. If all you can find is a 200-pound hunk of steel for your anvil, you should stick to a 20-pound head or so. Design your hammer around your anvil, as the anvil is the hardest part to find. Alternatively, find the weight you need for the anvil and use the tire hammer plans.
Another consideration is the base for your hammer. I’d recommend the thickest steel plate you can find, mounted on the firmest foundation you can muster. If I could have built on 1-inch plate and bolted it to a 24-inch-deep concrete pad set into a concrete shop floor, I’d have done it. I had to make do with what I could find in my “free” scrapyard, and deal with the limitations of my shop setting.
Power Hammer Center Post
For any hammer you need a center post. The post should be heavy enough to withstand the extreme forces involved in rocking a spring arm or linkage with a heavy hammer on one end. I used a piece of 4-inch tubing with half-inch walls. Others have used thinner-walled but larger cross-section square or rectangular tubing, heavy walled pipe or sections of I beam. The tire hammer plans call for a 6-foot-long piece of quarter-inch wall and 5-inch square tubing.
Final Cut
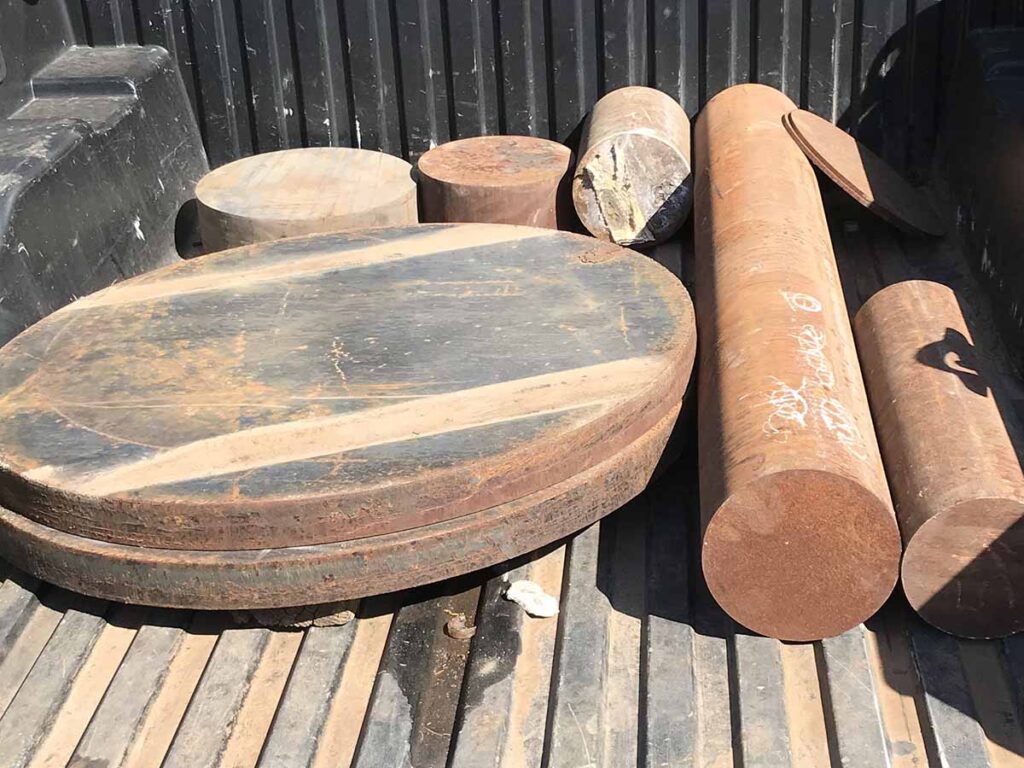
Another consideration is the base for your hammer. The author scored some 2-inch-thick, 30-inch-round, 300-pound base plates out of the “drop” pile at a local steel distributor, along with several other potential anvils.
My power hammer has become an essential tool in my shop, to the point that I sometimes wonder how I ever lived without it. I have only begun to explore its full potential. I built it for my appearance on Forged in Fire, where I was fortunate to make the final. I was able to come home and use my hammer to build my final edged piece for FIF. I lost the contest but ultimately still have a power hammer, and I can still take pride in the fact I built it myself from little more than a pile of junk.
It may take you a few months to gather all the primary parts, or you may get lucky and find them all in one place. Next month’s article will focus on building considerations for a spring helve hammer, and later we’ll discuss the Clay Spencer DIY tire hammer.
As with most things knife, one type never fits all.
BY MIKE HASKEW BLADE® FIELD EDITOR
Finding the best blade grind for the job at hand has become the subject of some debate, but most knife users agree that certain grinds are better suited for certain functions. Combinations of steel, knife design and use influence the choice of grind.
“I’m a proponent of the right grind for the right job,” related author/knifemaker Abe Elias. “In small bushcraft knives, a thin, flat grind and a saber grind are hard to beat. It makes sense that clear cuts are best flat edged. Carving chisels have rounded convex edges to go into wood and take small cuts and come out.”
An inappropriate grind may produce drag, a ragged or erratic cut, and generally poor results. “For overall working of wood and good, straight, controlled cuts, you want a knife grind to ride flat against the surface so it cuts past certain levels and growth lines, riding flat on the wood between growth lines,” Elias added. “It’s just physics. That’s all, and nobody can really argue it.”
One of the most popular grinds for bushcraft knives is the scandi grind, and Elias describes it as a perfectly flat grind with no secondary bevel, starting at the shoulder with an angle that is perfectly flat and straight to zero.
One of the most popular grinds for bushcraft knives is the scandi grind. Abe Elias describes it as a perfectly flat grind with no secondary bevel, starting at the shoulder with an angle that is perfectly flat and straight to zero. He used it on the blade of his Woodcrafter model. (Abe Elias image)
“Scandi grinds will go on any steel you want, but there are limitations to them because of the shoulder,” he noted. “It doesn’t tend to go through soft surfaces well, such as processing meat. When the knife enters a malleable surface, it creates too much drag on the blade. Like anything else, the thinner it is the easier it enters into other masses. We run into problems when custom makers make them and factories produce them without following the golden rule of proportion. The angle should be proportional to the thickness of the steel and the design of the knife itself.”
CONVEX MODIFIED
Influenced heavily by BLADE Magazine Cutlery Hall-Of-Fame® member Bill Moran, Bill Bagwell, and Don Hastings, ABS master smith Jim Crowell recognized early in his knifemaking career that the intent was to make a full convex grind from the spine of the blade to the cutting edge. He has adapted those original lessons through the years.
“I’ve found that it’s the edge that needs to be convex, not necessarily the whole cross section of the blade,” Jim noted. “Consequently, I have now, for many years, ground my blades flat from spine to cutting edge, stopping short of going to zero and then rolling the cutting edge on convexly. The trick is to get the geometry correct for the thickness the edge was ground to prior to sharpening in conjunction with the type and heat treat of the steel used.”
Crowell says he believes the convex grind is best for knives in the field, including bowies, fighters, and fillet knives. He uses the convex grind almost exclusively and indicates it allows for an uninterrupted transition from the cutting edge to the full thickness of the spine of the knife. No matter how thick or thin the spine of the knife, with convex geometry it will have the least amount of resistance when cutting through an object.
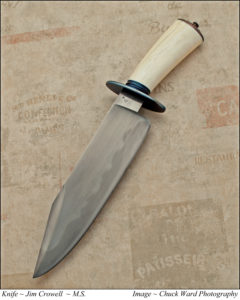
ABS master smith Jim Crowell has ground his blades in a modification of the convex style for many years, grinding them flat from the spine to the edge, stopping just short of a 0-degree angle, and then rolling the edge in a convex shape. His 15.5-inch bowie features W2 tool steel and walrus ivory. (Chuck Ward knife image)
As for sharpness, Jim gives the nod to the scandi grind. However, he believes that when the cutting edge is, in fact, the grind line as well, the edge itself is more fragile in comparison to other grinds.
“Scandi grinds are great,” he said, “and useful for a lot of small chores. Then there are special-purpose applications like some sushi knives that have specialized grinds. Still, for day in and day out I like and recommend the flat, convex grind.”
COMFORT MATTERS
Knifemakers tend to use the grinds they are comfortable with and which they believe fill the bill for the types of knives they make. The degree of difficulty associated with a particular grind lies more in the experience of the maker than in the grind itself.
“The hardest grind is the one you do not regularly do, and the easiest would be the one you do all the time,” Crowell reasoned. “When I started, I used to hollow grind stock removal blades. You could lay everything out and follow the lines—it is still hard though. When I started forging it was really hard because there were no layout lines to follow, and all the scale and hammer marks made it hard to tell what I was doing. Daggers are generally acknowledged to be more difficult. Some of the Russian and Persian stuff with a ‘T’ spine or center ridge would be tough.”
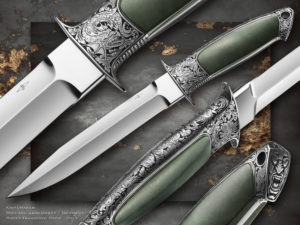
According to Jim Crowell, the dagger blade pattern generally is acknowledged to be more difficult to grind than most. Michael Jankowsky ground the blade to a double edge on his “Thor” model in Elmax steel and Siberian jade inlay. The engraving is by Kati Mau.(Francesco Pachi image)
“The hardest grind is the one you do not regularly do, and the easiest would be the one you do all the time.”—Jim Crowell
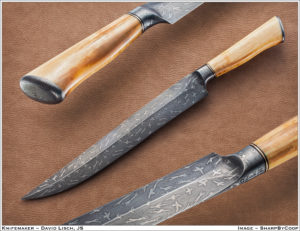
ABS journeyman smith David Lisch—shown grinding the blade of a custom collaboration knife to raise money for the African Wildlife Foundation in its fight to protect elephants from poachers—applied a Persian grind to his 16-inch integral fighter in Thunderbird damascus and walrus ivory. (SharpByCoop.com knife image; image of Lisch courtesy of Mark Knapp)
FACTORY APPROACH
Knife manufacturers gear their grinds for prospective use as well. Hollow grinds are usually the most efficient for manufacturing because both sides of the blade are ground at the same time. Flat grinds are ground one side at a time, and precise machining and good tooling create the even grinds for which manufacturers are known. Convex grinds are usually finished by hand, and such work is the province of a skilled custom maker.
“Hollow grinds are great for slicing,” commented Jim MacNair, new product coordinator and senior designer at KAI-USA Kershaw, “and they create a nice, thin edge geometry, and the panel of the grind stays thinner as you sharpen away the blade over time. These blades will feel very sharp because the grind scoops away more material and makes the blade thinner overall.
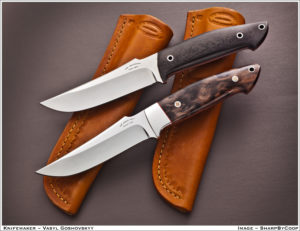
The hollow grind is great for slicing and feels very sharp because it scoops away more material and makes the blade thinner overall. Vasyl Goshovsky employs a hollow grind on his working knife’s 4.5-inch blade of N690Co stainless steel. (SharpByCoop.com image)
“The most obvious benefit of the flat grind is strength and toughness. The wheel is grinding a flat surface rather than a concave one like a hollow grind, and it removes less material from the blade. That added material makes the blade thicker and stronger.”
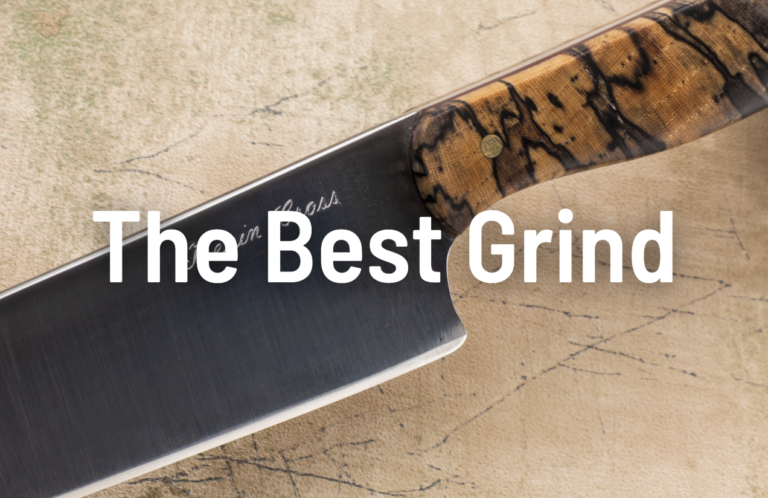
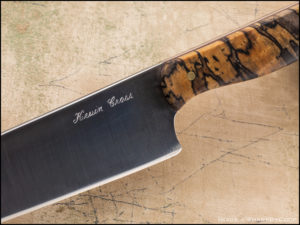
The most obvious benefit of the flat grind is strength and toughness, according to Jim MacNair. Kevin Cross flat ground the 52100 blade of his kitchen knife. The handle is spalted hickory. (SharpByCoop.com images)
MacNair sees compound grinds emerging in the custom market, including blades that feature a combination of flat- and hollow-ground bevels. These are often done to create a “cool” look, and the maker is also providing the best of both cutting options: a thin, hollow-ground edge for slicing and a thick, flat-ground tip for toughness.
Innovation continues to find its way into new and user-friendly blade grinds, while the emphasis on the job to be done is at the center of the decision. Putting the proper edge on the blade for cutting, slicing, skinning, chopping or any other task will always be primary.
SWORD GRINDS HOSTETTER’s WAY
Swordsmith Wally Hostetter focuses on Japanese blades and tailors the grind of each to its anticipated function. He forges the blades and sets up the edge geometry with hand filing.
“A lot of guys do hollow or flat grinds with a machine, but what I do has to be done by hand,” Wally explained. “I hand polish to the cutting edge, and there is no micro-bevel. Some have an appleseed [convex] edge—niku is the Japanese term—and some have the edge slightly rolled in for better cutting. For cutting heavy stuff, the niku comes to a finite edge but runs farther up the blade. There are many subtleties to it.”
According to Hostetter, other Japanese grinds, such as that found on the tanto, are fine and done to a thin edge because they are not intended for hard striking against surfaces. He uses 1095 carbon steel primarily and decides on the appropriate grind based on both the use of the blade and the historical time period that is being replicated.




![A TOPS Knives Tom Brown Tracker was lost during an IED explosion in Iraq. The soldier involved returned later to where the explosion occurred and recovered the knife, quite a bit worse from wear, from a local who had found it. “We swapped the soldier a new one and still have that knife [above] here today,” the company’s Craig Powell said.](https://blademag.com/wp-content/uploads/Warrenty-7-265x198.jpg "Knife Warranty Claims: The Good, Bad And Ugly")