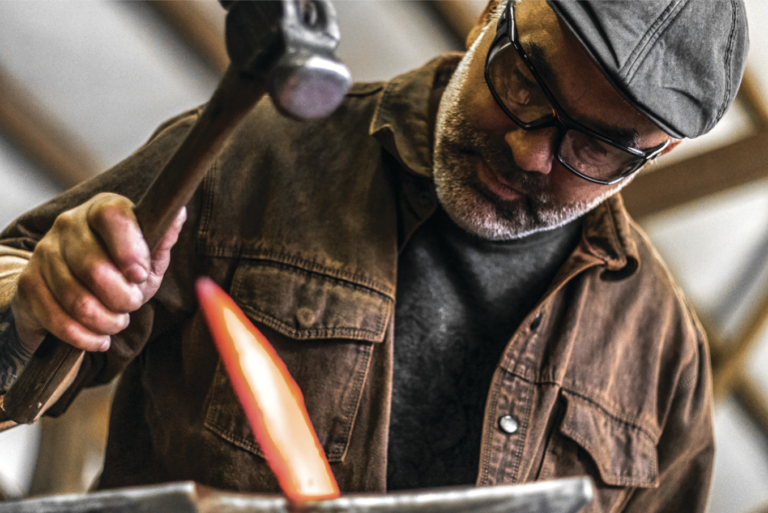
Knifemaking is the building of a knife, which includes the blade, handle and other accouterments. Blades are made by either removing metal from a steel blank via a grinder – known as stock removal – and the forging to shape of hot steel into a blade in the process known as bladesmithing. Other parts, including bolsters, guards, pommels, etc., are needed to complete the finished knife.
Because my work is so complicated, my first step is to draw and refine everything on paper, working out all of the issues in terms of design and proportions. Once this is done, I make about six Xerox copies of the drawing that will be cut and pasted to material as needed.
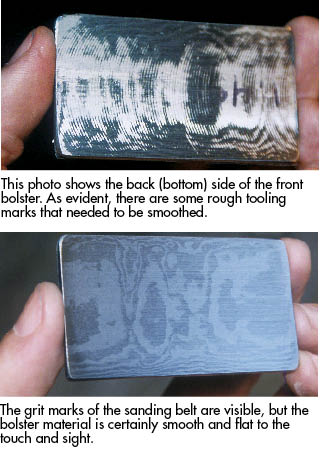
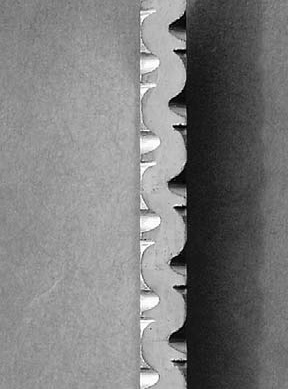
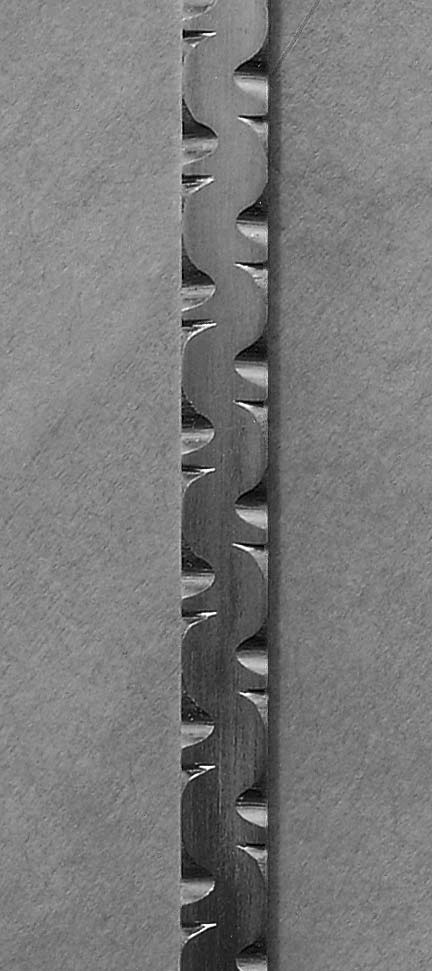
In the case of these bolsters, I had Timascus on hand already. It came precision-milled from the supplier in a 1/8-inch thickness. However, as you can see in the accompanying photo, there are some rough tooling marks that should be eliminated. The smoother the contact surfaces are to other contact surfaces, the tighter the overall fit of the knife parts. It is important and critical, to me anyway, that components be “air tight,” and that there are absolutely no visual gaps between materials.
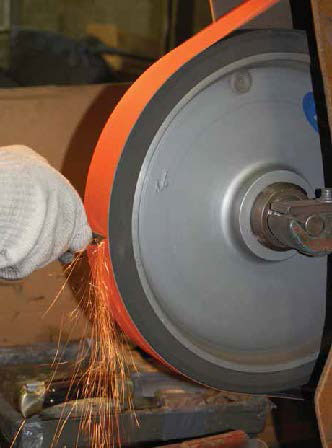
I hand sand the flats. Even though I am technically using the 4-inch-by-36-inch belt sander, I am not turning it on, as that would be a bit too aggressive in this case. The piece is small and would be hard to hold against a moving belt. It could easily get away from me, which could damage the piece and/or my hands! I simply hand sand it with even pressure on a 320-grit sanding belt.
I’m not trying, in particular, to remove thickness, only to eliminate the slightly irregular tool marks. This takes a bit of elbow grease, especially with the material being titanium. I just want to smooth out the surface. I have carefully cut out the bolster section from my overall drawing and double-stick taped this shape down to the topside of the raw material that I want to be my front bolster.
As you can see in the accompanying photo, I have smoothed the surface. You can see the grit marks of the sanding belt, but the bolster material is certainly smooth and flat to the touch and sight. The process is repeated for both bolsters.
There are different definitions of a full-time maker. My definition is that of a maker whose sole source of income comes from the making and selling of his/her knives. This is no easy task.
In fact, by my estimate, less than 2 percent of the makers worldwide fit into this category. The reason the number is so low is it is very difficult to depend on knifemaking as your sole source of income.
#1 – Treat Your Knifemaking Business Like a Business
Fisk’s advice is to take college courses on business management, accounting and marketing prior to going full time. McIntyre agrees. He recommends putting as much effort into learning to run a small business as you do into making knives.
I recommend adding a certified public accountant (CPA) to your knifemaking team. In addition to handling your books, a CPA can recommend which type of business entity you should form. Perhaps the CPA’s best skill: tax planning.
#2 – Invest in Equipment
What kind of equipment? As Winkler noted, he and his partner, Karen Shook, “invest money in new equipment that will make our work better and more efficient.”
#3 – Find Your Niche
This is where your marketing plan comes into play. The objective is to optimize how you introduce your knives to potential buyers. At a minimum, your plan should address how you will make the most of attending knife shows, advertising in print and on the internet, and the potential of working with a dealer and/or purveyor.
#4 – Communication Matters
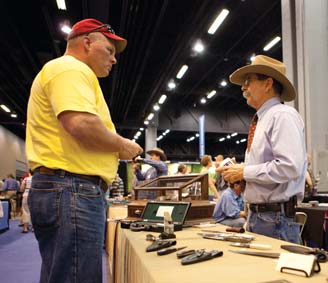
You must build time for interaction with your clients into your schedule. A basic rule of thumb: No customers, no business. The late John White (right) talks knives with a client during a past BLADE Show. (Point Seven photo)
For Hanson, it is one of the most important aspects of being a full-time maker.
“I answer phone calls and e-mails very quickly, and deliver on time or contact clients and let them know why there is a delay,” he stressed. “I listen to my clients.”
#5 – Create a Competitive Advantage
What separates you from your competitors? Winkler said adding Shook and her period style of sheathmaking to his operation years ago gave him a competitive advantage at the time.
“She brought a lot of business skills and makes sheaths that really put our work in a whole new league,” he observed.
More times than not your competitive advantage will come from being the first to adopt a new steel, handle material, design element, etc. You should incorporate such use of new materials or techniques into your business plan.
#6 – Delegate
No matter what their level of expertise, most makers realize they cannot do it all by themselves, though some try. Successful businessmen understand that utilizing the expertise of others frees them up to do the things they do best.
Enthusiasm and loving what you do are important factors in becoming a successful full-time knifemaker. However, understanding and implementing basic business concepts are equally important to building and maintaining a long-term, successful enterprise.
Final Words of Wisdom
Winkler may have summed it up best.
“I suspect very few makers are at [the full-time] level, as it’s the most difficult to survive in. It does not make your work more sought after. It does not put you in any kind of ‘exclusive club.’ But,” he observed, “if a maker can handle the pressure, it can be very rewarding mentally and somewhat rewarding financially.”
Taking great photographs of knives is no easy task—unless you’re a professional, in which case you can stop reading. Essentially, you’re taking a highly detailed shot of something that fills the entire frame, not something small like a bee in the center of a background of blurred petals, but a long, thin item that needs to be in focus from point to butt. But there’s so much more. Every line must be fully revealed and a depth established to convey thickness or thinness. I know close to zero about the mechanics of the art. There are plenty of videos and online courses out there that’ll give you the science of the “study of light.” They can speak to you of aperture, ISO and shutter speed in infinite combinations. All I know is a good photo when I see one, and how I have tried to improve my own photography. Here are the 6 things BLADE looks for in a knife photo. It’ll be up to you to make it happen. Why? Because there are “5 Ways To Get Your Knives Featured In BLADE” and you want to be ready.
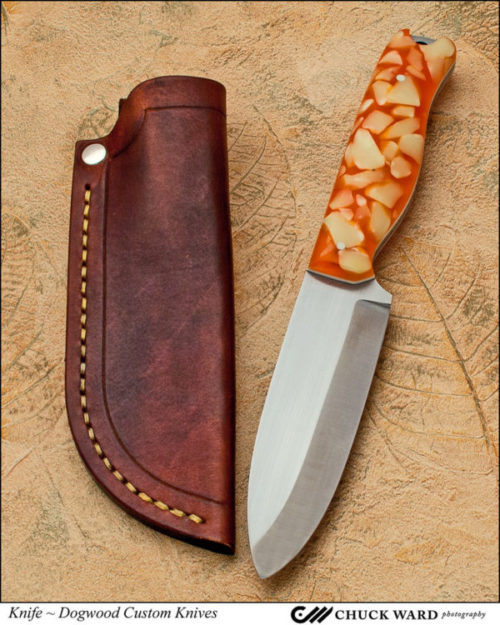
Dan Eastland of Dogwood Custom Knives used professional photographer Chuck Ward to take this exquisite image of his Hawkins knife. Chuck will be the official photographer at the 2017 BLADE Show. Contact www.dogwoodcustomknives.com for more about this outdoorsman’s knife.
Hire A Professional
Knife manufacturers, like good real estate agents, know that great photos will close a sale. They understand that the investment in a professional photographer pays off. When BLADE asks for a photo of their latest release, for example, some even allow high-resolution downloads right from the consumer website without having to go through a media relations person. That can be a time-saver at deadline. I’ve even experienced a large company resubmitting photos with even better ones. There’s nothing that says a one-man-show can’t learn from that level of perfectionism. It’s the same effort you put into crafting your knives.
Hiring a professional photographer will cost you some money, and it’s worth every penny. But like all professionals, some are more versed in what we’re trying to accomplish than others. A portraitist, wedding photographer or photojournalist may or may not be able to give you the results you’re looking for. You want to make sure you chose someone who can show you a portfolio of knives, guns, tools or similar items that looks…well…perfect.
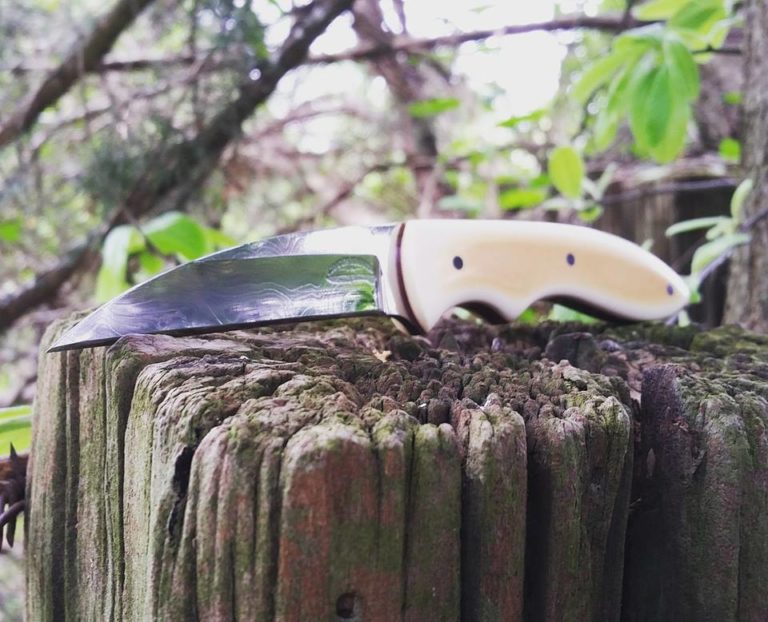
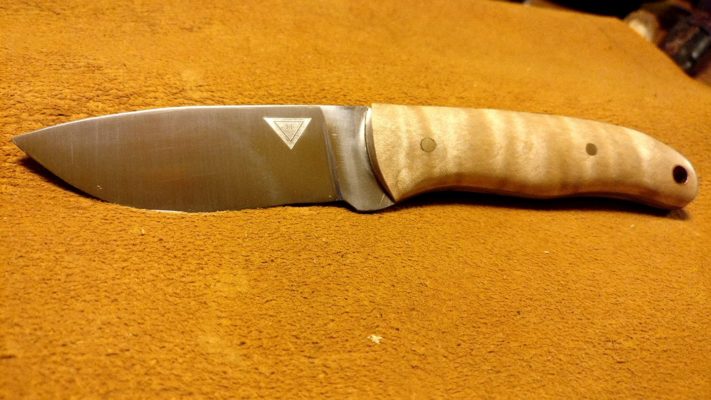
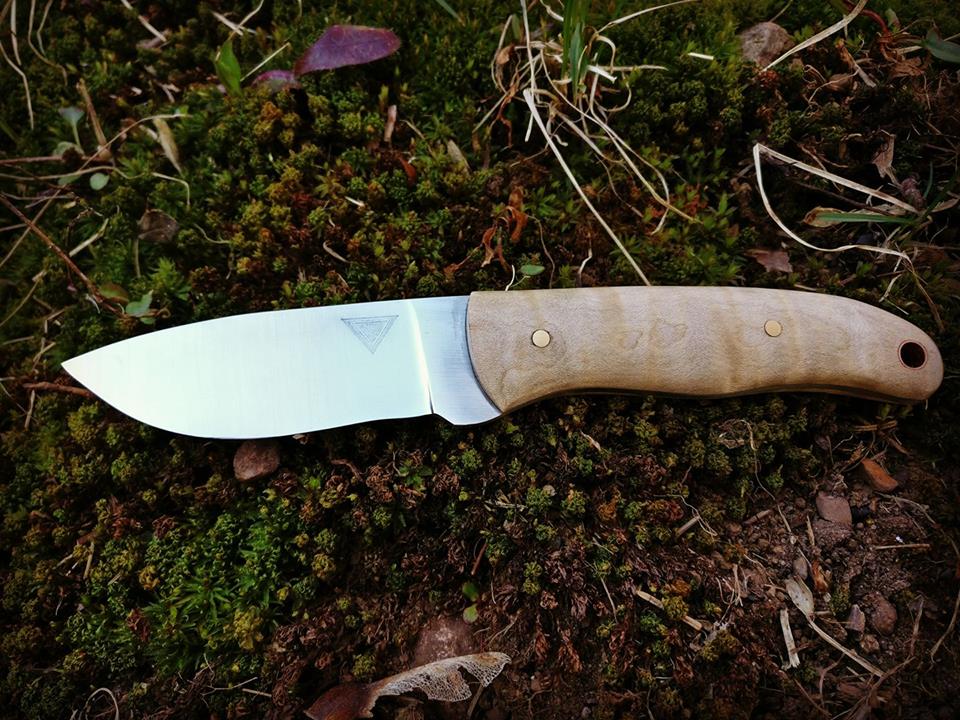
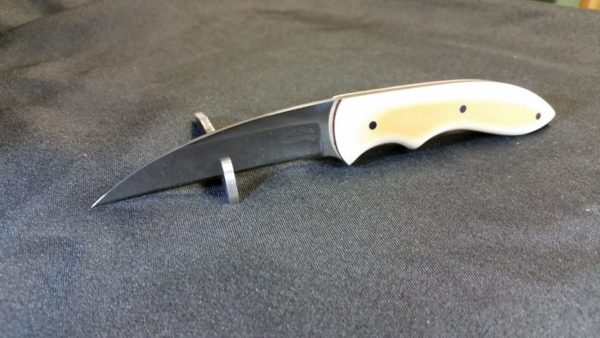
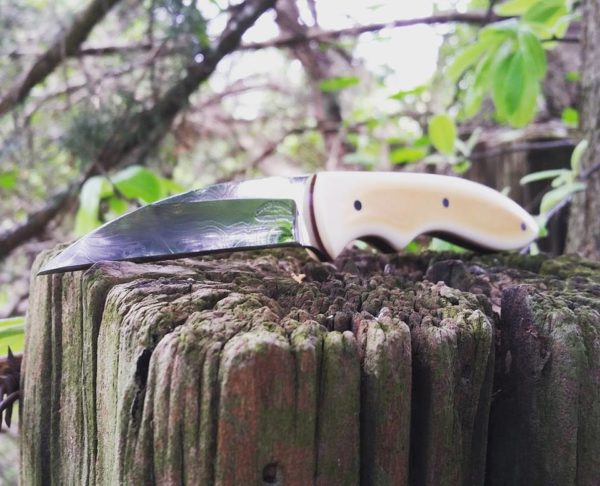
The handle on Tim Tracey’s everyday performer doesn’t stand out as much as it could against the similarly colored background. The caramel color ends up saturating everything in the photo. Also, although the focus on the blade is crisp, the topline on the handle is a touch soft.Tim Tracey took his knife outside and got not only a good image of the blade and handle, but good contrast and a better depiction of the piece’s fullness. The recurved blade is made of 1095 steel and sports exhibition grade curly maple scales. Makers list price: $220. Contact [email protected], Timtraceyknives.com on Facebook or @TimmTracey on Instagram.
You will want two kinds of photos. Photos for your website and social media will create an emotion, an atmosphere. Instagram is full of examples of survival, bushcrafting and hunting knives being photographed outdoors and tactical knives being shot in gritty workshops or light-painted in darkness. Makers create everyday carry still lifes with folders, wallets and watches. Typical? Sure, but each one tells a story that has been told a thousand times before in a slightly different way. Nobody reads just one novel, and nobody looks at just one knife photo. They are all beautiful in their own way. The other kind of photos you will need are those of just the knife itself on a simple background, what is often referred to as glamour or beauty shot.
The question you have to ask yourself is: Are you willing to put as much study and effort into your photography as you are your knifemaking? Answer honestly. There’s no shame in shelling out cash for stunning work. Fill your website with those choice images and have them on hand for BLADE, and then you can practice your own photography skills for social media. Even on social media, though, take the time to post only your best images. Plenty of knife-related Facebook Groups out there are looking for banner photography and have to reject knifes they’d like to showcase because the image is, say, out of focus.
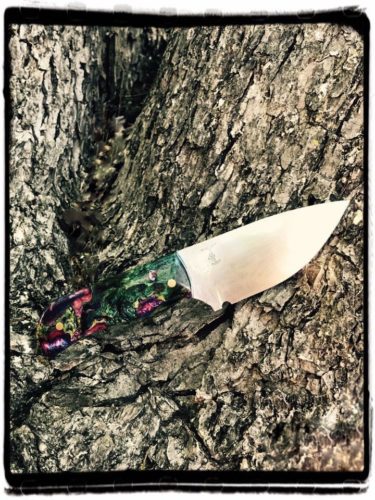
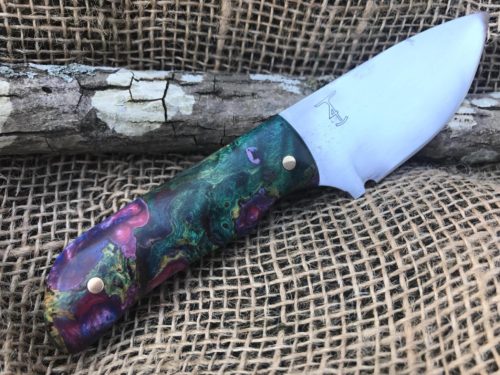
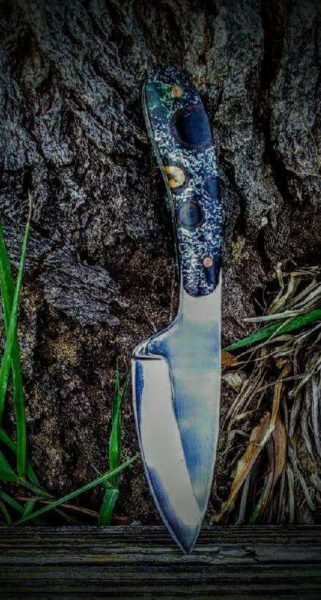
Although this image clearly shows the blade on this skinner by Bobby Toerck, the multicolored handle gets lost in the textured bark.In this image, the handle on Bobby Toerck’s drop-point skinner is nicely contrasted against the still-textured, but now single-colored burlap. And the 80CrV2 blade still looks terrific. The handle is triple-dyed box elder burl by Terry Dunn. Maker’s list price: $175 with Kydex sheath. Contact T4 Custom Knives on Facebook or call 903-812-1173.
Do-It-Yourself
Let’s say you can’t justify the expenditure at this point in your knifemaking journey. Or, more likely, by the very nature of your interest in crafting, you’re determined to take quality photos of your knives yourself. You think, How hard can it be? Very. It can be very challenging to produce the kind of photos needed for a glossy magazine.
“Real” Camera Vs. Camera Phone
You can take the cost of a few sessions with a photographer and buy yourself a decent camera, for starters. Keep in mind, however, that lenses that come with a camera are usually not very good. Be prepared to buy a decent mid-range lens at a minimum.
In this vertical image of a horizontal knife, the butt is cut off. There is also glare on the handle and the blade looks dull. Will Thompson decided to get some help for the reshoot.Even though Will Thompson’s handle has to work to stand out against the tree bark, it succeeds. The pattern is now discernible and the blade looks great. This drop-point finger skinner is made of 1095 steel and the Plantstone (stabilized pine branches with aluminum flakes) scales are from Robert Belcher. Maker’s list price: $75. Contact [email protected] or on Facebook at Dusty’s Cutlery.
Then again, there are some excellent photos being taken with newer camera phones. Do NOT attempt this with an older model. You will only frustrate us both because they do not allow for high enough resolution of the images. Be sure if you submit a photo from your phone that you email it at its largest size. If there are settings on your phone that need to be changed to allow for taking photos at higher resolution, then you’ll need to set those accordingly. Those settings will apply only to photos you take going forward; you cannot retroactively apply them to photos already taken. Whether you use your phone or a “real” camera, the same fundamentals of photography apply.
Tip: If you smoke or if you have your phone in your shop, there could be resin or dust on your lens. You’ll want to clean that—gently—before you begin.
Be sure to take great photos of all your work before they are sold, and to back them up, either in the cloud, through an online backup service or on a thumb-drive.
6 Things BLADE Looks For In A Knife Photo
Focus
The entire knife must be in focus, from point to butt. Are there some artsy shots of crystal clear blades and blurred handles or vice versa? Sure, but that’s not what we’re looking for in print. Online, we’re more open to considering some of those shots, provided we have some conventional full-focus shots to accompany the story as well.
If you are taking what we call a “using” shot where you’re photographing the knife in use for an online story or if we are working on a story together for print, be aware of where your camera is focusing. I have seen crystal clear shots of a leaves on the ground while the knife and the hand it’s in are both blurry. Focus is probably the single most important aspect of a good photo.
Contrast
Be aware of the color of your background. A grey knife on gray pavement, a black knife on a blackened tree stump, camouflage your knife. It’s like a silver or gray car against gray pavement on a gray winter day—you can’t see it. No contrast. This applies to multicolored handles against multicolored backgrounds as well.
In this image of Andrew Griggs’ knife, the blade looks dull and the focus on the handle is somewhat soft. Also, if this image were being used for a BLADE Magazine section that required a cutaway, the prop would be in the way of the blade.Andrew Griggs got outside to reshoot his knife. Now you can see the pattern-welded steel! The Southern Comfort gentleman’s fixed blade has a Vintage Paper Micarta handle. Maker’s list price: $300 with leather sheath. Contact Griggs Knives on Facebook.
Composition
For two of BLADE’s sections, “What’s New” and “Knifemaker Showcase,” only cutaway images of the knife are used. (See the “5 Ways To Get Your Knives Featured In BLADE.”) This means that you don’t need to worry about the background at all. In fact, white paper is fine, but watch for any shadows. It’s fine to have a slight shadow, provided the lines of the knife are clearly visible. If the edge or spine of your knife bleeds into the shadow to the point where you can’t tell where the knife starts and the shadow ends, that’ll need to be reshot. Our designers need to able to see those lines.
Mood images are fine for both a feature in print and for online stories. Feel free to get as creative as you want, but ensure that the knife is the main attraction. Photographing knives is one of those times when the rule of thirds really isn’t applicable. The knife is the main attraction and we’re not going for proportional sharing with a background. If the image you’re submitting for consideration is for a section of the magazine that uses cutaways and there’s moss or grass, fabric or fur encroaching on the blade itself, that’ll impede the designers in their work.
Make sure no part of the knife is cut off, and don’t crowd the point or butt. If you place the knife in a stand and that stand encroaches on the knife, it can’t be used for a cutaway, but it could possibly still be used for an online story or in print.
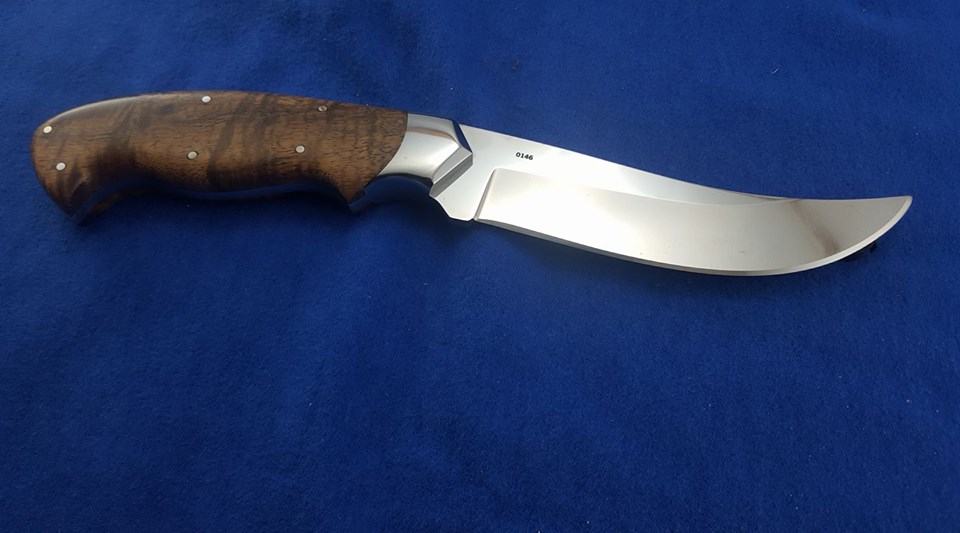
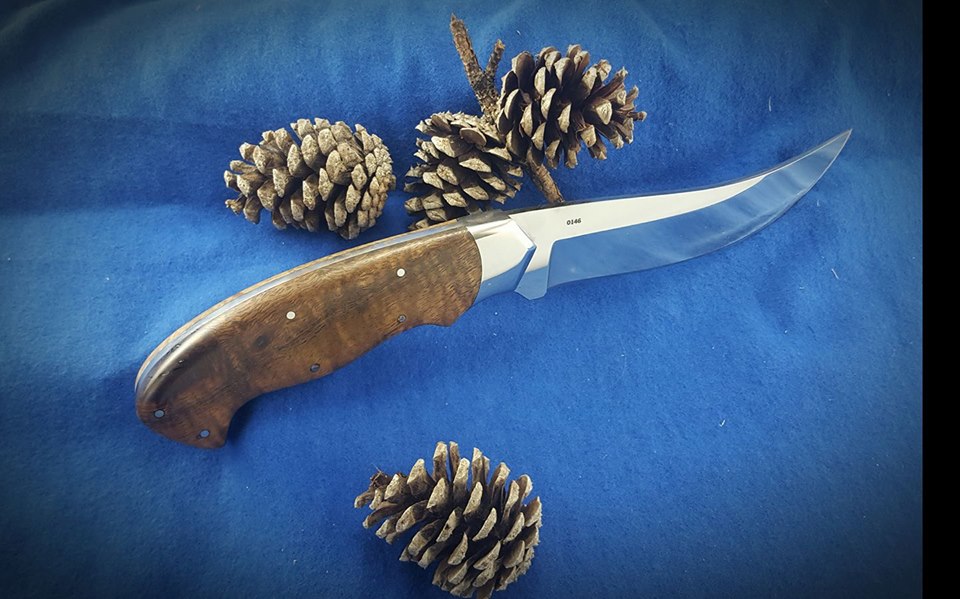
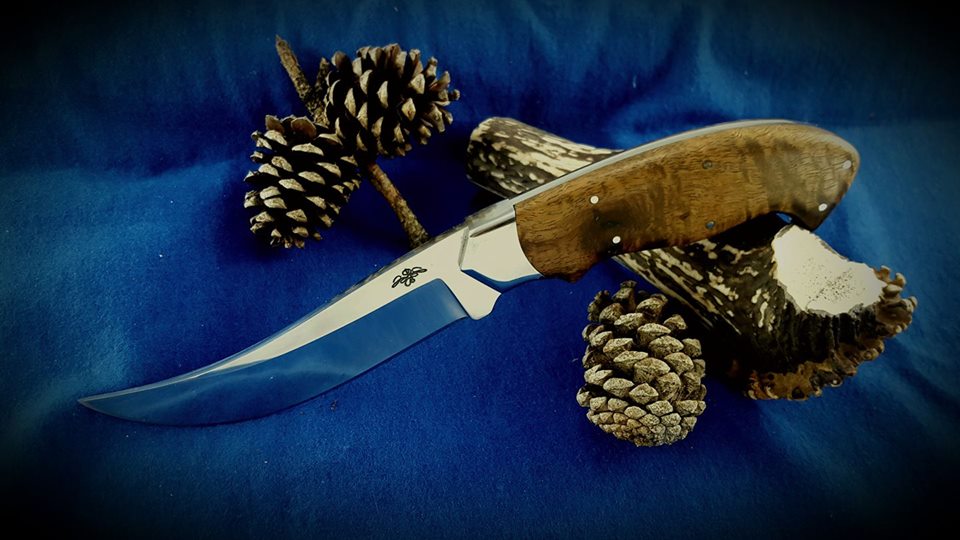
Devin Bliss has taken a very good photograph here. However, there is shadow at the handle, which would make it challenging for the designers to see where to make the cutaway image for inclusion in say, BLADE’s “What’s New” or “Knifemaker Showcase” sections.In Devin Bliss’s second attempt, the handle is more visible, but looks less rich in the harsher lighting. The inclusion of the pinecones makes a nice vignette without encroaching on any line of the knife, so it could still be used for a cutaway or as is. As a side note: Artists will tell you that the eye finds odd numbers more pleasing. I did not tell Devin that. I simply told him the truth: He had surpassed my level of being able to offer suggestions for improvement. He contacted another knifemaker for guidance.At this point, knifemaker Devin Bliss has reached a level of photography that serves his knives well. What did he do? “I changed the direction, propped up the handle onto the antler, moved the lighting around and used a foil reflector to get…a bit more light on the handle and a white reflector to mask off some glare on the blade and bolster.” This modified pronghorn is made of CTS-XHP steel with a curly koa handle. Maker’s list price $300 with stamped leather sheath. Contact [email protected], 903-736-3052 or on Facebook at DB Custom Knives.
Depth and Angles
In layman’s terms, you need to ensure your knives don’t look flat. You’re trying to capture something that’s three-dimensional in a two-dimensional medium. This is where some knives can look disproportionate because you’re focusing on the handle and the blade is in the fuzzy background, so to speak. A shallow depth of field is fine as long as your knife is standing out crisply from point to butt.
Finding the right angle will also help prevent your knife from looking flat. Prop up your knife somehow. Even just leaning it against a pebble allows you to move and capture the thickness or thinness of the piece. Laying it on your hand can work as long as your flesh doesn’t obstruct any of the knife’s lines.
Tip: Take dozens of photos from many different angles and distances and pick the best one of the bunch. If you don’t nail it, don’t compromise, don’t settle, get back there and take dozens more. Pros will take hundreds of impressions to deliver 30. Seriously. Take more shots. No, more. Get a ladder and shoot down, circle your quarry and shoot multiple shots from each hour of the clock, and get down and shoot at eye level. Shoot at morning, noon and night, but mostly late afternoon, to see how different types of sunlight affect your knife images. It’s what the pros did when they were starting out. Now, after years of experience, they can judge the sun’s angle and know how to get what they need.
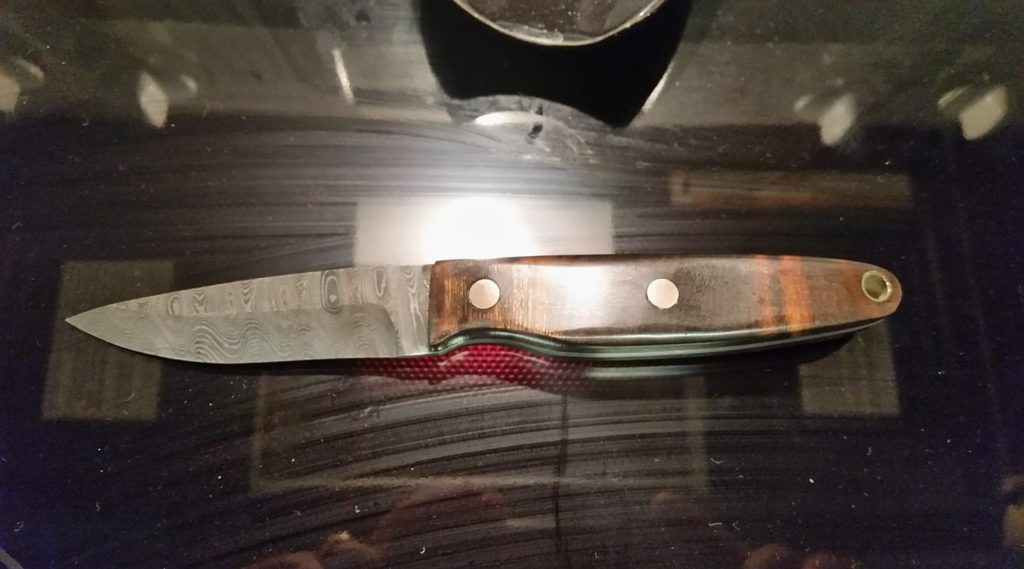
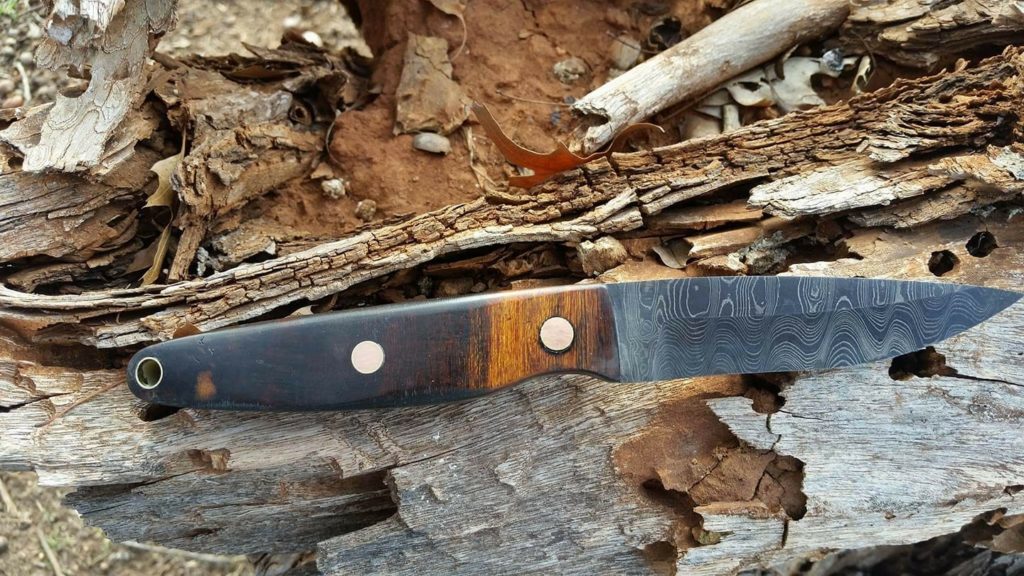
Charles Hawkins has a hard time taking a bad photo, but he pulled out all the stops on this one. That is a stovetop background, complete with streaks and a red glow. The glare on the handle deadens the handle and the pattern in the steel also appears dull. Note the photographer’s hands reflected on the cooktop. Analyze the entire photograph closely.Charles Hawkins took his knife outdoors, and now the focus is as sharp as can be. The background adds interest while still allowing for plenty of contrast. The 3.5-inch blade is made of pattern-welded steel from Alabama Damascus Steel. The handle is ironwood. Maker’s list price: $300. Contact www.hawkcustomknives.com.
Lighting
Natural light is easiest for the amateur to master. A cloudy day is good to reduce blade glare but sometimes it will dull colors. Try a sunny day, but shoot in the shade. Avoid glare on either the handle or the blade whether you’re shooting indoors or out. You also don’t want dappled light coming through the leaves of a tree to interfere with the hamon, for example, so try to find a solid overhang. You also don’t want reflection to make your blade look different than it is in reality.
Indoor lighting is infinitely more challenging. Low light, fluorescent light, light-painting in a dark room—they all have the potential to become “noisy,” grainy, soft. I will leave it to the articles and videos you’re going to pour over to explain why, but trust me, it’s not easy. Sometimes, in light-painting for example, the pins might absorb all the light and they take over the picture. Or the handle’s too dark, or the handle’s visible, but the blade looks dull. Changing the countless variables on this project will help you get the right shot out of your many attempts. It can help to take notes so you know what you’ve tried and whether or not it worked.
Avoid using the flash inside your camera. It will only give you an overlit image that makes your work look flat. An external flash, shot off a wall or ceiling or even a white T-shirt, or an extra light diffused with a white paper bag, may help, but now your knifemaking shop has turned into a spaceship and you’re behind in your orders.
Specs
Images need to be 300 dpi for print with the photo at least 8 inches on the longest side, preferably 10. The image size should be at the very least 600 KB. It’s not that we’ll run it that large, but we need to have the option to do so, especially if we’re doing a cutaway and the knife doesn’t fill the frame.
We prefer .jpg format, and that you attach the image file rather than dragging it into the email. Sometimes that can make a difference in resolution quality, though it admittedly shouldn’t. Also, for similar reasons, submit originals and not versions scraped from Facebook or other social media platform, even for online stories.
Remember, it’s all about the knife here at BLADE. Oh, and makers and manufacturers, too. But without a fantastic photo of a knife as a starting point, how are we ever going to get to know you better?
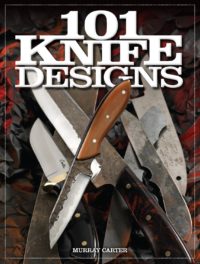
“101 Knife Designs” is not only filled with great comparisons of blade designs and design theory, but offers terrific examples of exceptional knife photography by Hiro Soga.
Knifemakers of all skill levels will enjoy comparing knife designs in this book by Murray Carter. The photographs by Hiro Soga are exquisite! There is even a discussion on the theory of knife design to help you better understand your craft. Save 35 percent off the cover cost of $29.99 for a total of $19.99.
THOSE WHO KNOW DISSECT TV’S LONG-RUNNING FORGED IN FIRE
Bladesmithing enjoys the same treatment as motorcycle building got in the mid- 2000s—that is, it has become a well-established reality show competition on cable television. Such treatment has ups and downs regarding its effect on the knife industry. Be that as it may, History Channel’s hit show, Forged in Fire, has been on the air for seven seasons, which proves its staying power.
FIF is characterized as both inspirational and gimmicky depending on who you ask. And ask we did—two contestants, a former FIF guest judge and a member of the board of directors of the American Bladesmith Society—with the goal of shedding light on where the hit show lands on the spectrum between the two.
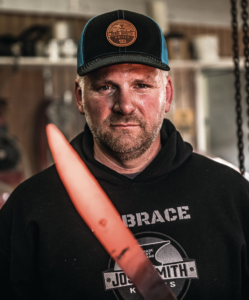
At 19, Josh Smith was the youngest smith to ever achieve ABS master smith status when he did so in 2000. He has appeared on two episodes of FIF. (Brandon Horoho mage)
The long-running TV competition undoubtedly has been an asset to the forging community. For starters, it has introduced the general viewing public to a cast of characters that constitutes a realistic cross section of the knifemaking community. While its list of participants is far from a comprehensive Who’s Who of bladesmiths, one would be hard-pressed to spend more than an hour at the next BLADE Show without encountering a first- person recollection of pounding steel on the small screen.
More important is the awareness such publicity has brought to the craft, according to J.W. Randall, veteran ABS master smith and winner of FIF’s 2017 international championship (season four, episode 19). “It’s brought the public’s awareness around to hand- crafted items, and that’s a good thing,” Randall observed. “It appeals to a lot of people because it’s an old craft, and it’s been brought back, in a sense.”
Indeed, the fiery furnaces easily translate into a burning interest among many of the show’s viewers. For them, witnessing the process of manipulating steel into a knife, sword or axe using fire, a hammer and other assorted machinery and instruments, while facing the adversity of time constraints and random surprises, is at once exciting and inspiring.
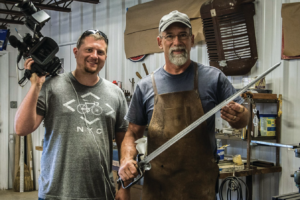
ABS master smith J.W. Randall holds his spadroon sword, the one he made to win the International Competition episode of FIF. At left is “Dan the cameraman.” (Tammy Randall image)
“The men and women who compete on this show are engaging in an arena of gladiators,” described ABS master smith Jason Knight, B.R. Hughes Award winner and guest FIF judge during portions of seasons three and four. He agreed that the show’s primary value lies in inspiring its audience to appreciate, and perhaps pursue, a craft that ties together history, art, science and technology from an ancient world. “It’s important in our culture,” Knight added. “People like me hold fast to it, and I want to share it as art.”
Such interest has had a measurable effect on ABS membership, according to ABS journeyman smith, board member and treasurer, Bill Wiggins. “I don’t know what to call it,” he pondered. “It’s not a spike—I’d call it a steady rise in membership since the show started.”
An ABS journeyman smith and treasurer of the ABS, Bill Wiggins said the ABS has enjoyed a steady rise in membership ever since FIF’s debut episode seven years ago. (image courtesy of Bill Wiggins)
He added that the ABS has also seen a lot more turnover lately, with people joining up for a year only to never be heard from again. “We’re still gaining members, though,” he allowed. “There’s good and bad, but the good outweighs the bad.”
“The bad” is definitely part of the mix, according to the story’s sources who were contestants. Though none had the proverbial sour grapes about their FIF experience, the recurring caveat was that good television producers have one goal in mind, which is producing good television—and that doesn’t necessarily translate into total satisfaction for the contestants.
One way to achieve “good television” is to introduce drama. Thankfully, according to Josh Smith, a two- time FIF contestant and the youngest person ever to earn an ABS master smith stamp at 19 in 2000, it didn’t include any typical reality-show-style infighting on the set.
“Everybody needs to realize that they’re trying to make an entertaining TV show, and I think they do a good job,” Smith explained. “The clock provides the drama that they need instead of drama between the contestants.” He added that Mareko Maumasi, his competitor and winner of the “Judges’ Pick” special episode (season four, episode one), is now a good friend. “We didn’t have to become enemies!” Josh emphasized.
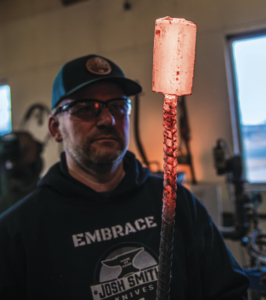
Unanimously, those interviewed who appeared on FIF maintained that the contestants should be better paid. “If you’re not sure if you do that show that you’ll be able to make your house payment, don’t do it,” advised Josh Smith, here admiring a red-hot billet in his shop.
TIME TELLS
Regarding the clock, each bladesmith is presented with strict time constraints— typically three hours to forge, grind and heat treat a blade, followed by a round of judging. In a second round, they have three hours to finish and handle the blade, followed by another round of judging.
“Three hours is a totally unrealistic timeframe,” Randall said. “That’s what makes the show interesting. Everything is stacked against you from the front, and that’s just a critical-thinking-and-an- overcoming-adversity deal. If you realize you’re backed into a corner, you have to adjust and come up with something to overcome it to gather yourself some time back on that clock.”
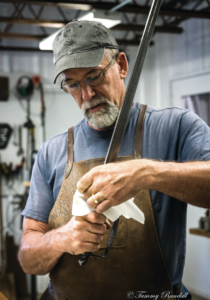
J.W. wipes down the spadroon sword in his shop. Of FIF he said, “It’s brought the pub- lic’s awareness around to hand-crafted items, and that’s a good thing.” (Tammy Randall image)
“A lot of these contestants have no experience, and it’s very entertaining to watch someone who doesn’t know what they’re doing get out there and forge a blade with unknown material,” Knight added. “It’s like throwing them to the beasts. It’s very gladiatorial and can be catastrophic. A lot of people will win by default because competitors will push themselves to the edge or get a bad choice in some garbage materials.”
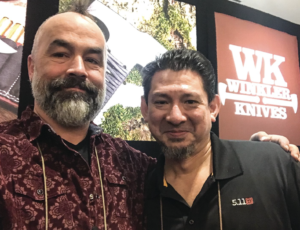
Jason (left) and his fellow FIF judge, Doug Marcaida, deliver looks that “will keal” at the Winkler Knives booth during the 2018 SHOT Show. (image courtesy of Shelly Knight)
He emphasized that the use of questionable materials adds a dramatic challenge to the mix, and during his time as a judge, Knight would advise the show’s producers on what to make available. “They have no idea about metallurgy, chemistry, physics or any science,” he remembered. “Their job is to produce content, and they have license to do whatever they want because it is entertainment. It’s good television but it’s not good bladesmithing.”
During a third portion of the show, makers have five days, or 40 hours, at their home shop to produce another more elaborate project.
Knight likened the whole production to a television game show made to entertain rather than inform viewers of the actual forging process. “You shouldn’t watch Forged in Fire with an expectation of learning how to forge blades,” he said. “That isn’t what the show is about.”
He should know, as he said he and his wife, Shelly, created the original premise. Before Forged in Fire was ever conceived, Battle of the Bladesmiths began as an ABS competition. “In 2010, Bill Wiggins asked ‘Hey, what could we do at a hammer-in that would be more fun?’” Knight recalled. “Shelly got the idea from Iron Chef. She said ‘What if you did a competition where you have unknown materials, a limited amount of time and you have to make a knife that works?’”
“You shouldn’t watch Forged in Fire with an expectation of learning how to forge blades,” said Jason Knight, here in his FIF garb during a forging demo in Johnson City, Tennessee. “That isn’t what the show is about.” (Shelly Knight image)
Big recurve blades are one of Jason’s specialties. He said he and his wife, Shelly, created the original premise for FIF: the Battle of the Bladesmiths, the first of which was held in 2010 during an ABS hammer-in at Haywood Community College in Clyde, North Carolina. (Matt Cohen/2020 Knight Forge Studio image)
“Jason approached me about doing Battle of the Bladesmiths at the Haywood Hammer-In,” at Haywood Community College in Clyde, North Carolina, Wiggins confirmed. “He won the first one, and since then it has become a yearly event.”
Flash forward to 2014. Knight also competed in and won the first-ever, never-aired pilot episode of Forged in Fire. “I’m glad to have been a part of the founding legacy that no one knows about,” he laughed, adding that he also advised the content producers on 12 of the episodes but remains unlisted as a creator. “I wouldn’t do the show again unless they paid me what I want to get paid,” he added. “What I want to do is what I’m doing. What I want that show to be, it can’t be.”
Smith, who competed on the show twice (including season three, episode five) but never won, said if he could change something about the show, it would be an opportunity to explain the knife project to the judges. “Instead of just handing the sword over to the judges, give me two minutes to talk about it,” he said. “I would have educated those guys about details that otherwise they wouldn’t notice with a cursory glance. I think it would have made a difference.”
He feels like he got a raw deal with his Kora Sword, in which his mosaic damascus was oriented so the pattern lined up, made with all take- down construction and blind-pinned together. “It’s a lot of stuff that no one on TV knew,” he noted. To his credit, changing the rules to allow non-winners to get their knives back was a prerequisite for his return to the show.
Randall said editing was an aspect that bothered him. “I want to be represented for who I am. I don’t want television to modify me and make me be somebody that I’m not,” he said, referring to being “bleeped” twice during his episode when he did not use profanity. “I don’t want to be seen by the world as that guy. That’s not who I am and what I want to represent, and it bothered me.
J.W. and Argentina’s Guillermo Mendoza (left), the two contestants in FIF’s Inter- national Competition, enjoy a reunion at a past BLADE Show. (Tammy Randall image)
“And more so in my closing remarks,” Randall added regarding the editing. “I gave God the credit and the glory at the end of this deal, and I also gave our military a bunch of credit for providing the freedom that we should never take for granted. That all got omitted. Represent people accurately for who they are and what they are.”
MORE JACK
Unanimously, those interviewed who appeared on FIF maintained that the contestants should be better paid. The $10,000 prize, which is only administered to the winner, isn’t enough compared to the month it takes the maker away from his or her work. For non-winners, it is a big financial hit to walk away with nothing. “If you’re not sure if you do that show that you’ll be able to make your house payment, don’t do it,” Smith advised.
“It’s like rolling the dice,” Randall proclaimed. “For me, it’ll take $25,000 to get me back. They’re cutting a fat hog, partner. That producer is making money hand over fist. They asked me to come back and I told them I’m not leaving my shop for 10 grand when I can make more money staying in my shop. Why would I roll the dice and potentially come up empty and lose a month of income?”
Overall, each source in the article was gracious in his comments about Forged in Fire, often reiterating that the drawbacks are tied into the fact that it is a television show. The point is to be entertaining, and it comes at the expense of some grievances about how it should be produced. They unanimously agreed that the most important effect is that it has enlightened and inspired millions of people regarding the craft of forging and knifemaking.
For the latest knives, knife news, trends and more visit blademag.com, BLADE®’s popular Instagram page @blade_ magazine, and on Facebook and Twitter.
Avoiding safety complications in a knifemaker’s shop is essential. BLADE® polled some key players in the knife supply industry to see if there are any trends in motion in the area of shop safety. While everyone can agree that common sense is a good thing, and that certain stand-by items as fire extinguishers and safety glasses will always be among knife shop essentials, there has been somewhat of an evolution in this area.
Respirators for Knifemakers
“I think the biggest advance is really progress in bringing safety awareness to the knifemaking community,” observed Shanna Kemp, marketing manager at Jantz Supply. “For example, we see a marked increase in the use of respirators as makers come to understand that breathing in even small amounts of wood dust might not seem like a big deal, but over time it can really affect your lungs.”
She added that some woods, such as ebony, release small amounts of arsenic, so an increase in awareness of the dangers of particulates and resins is a good trend.
Dealing with Dust in the Knife Shop
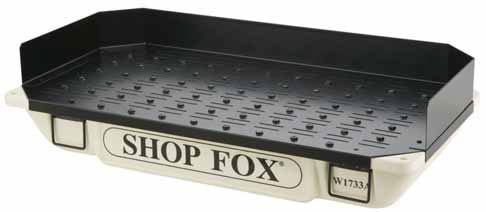
A new addition to the line of Jantz safety products is the Benchtop Downdraft Sanding Table. The 20 x 40-inch dust collection system is about 6 inches tall and connects to the maker’s vacuum system to help capture dust.
A new addition to the line of Jantz safety products is the Benchtop Downdraft Sanding Table. The 20 x 40-inch dust-collection system is about 6 inches tall and connects to the maker’s vacuum system to help capture dust.
“I feel like everyone is more conscious of their health these days than they used to be,” agreed Shannon Edgington of Knife and Gun Finishing Supplies. She said that while there isn’t anything new or cutting edge in her inventory, she definitely agreed that particulate concerns have become more of an issue.
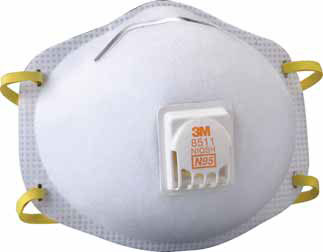
One budget solution K&G offers is the 3M N95 Respirator for Vapors that features the Cool Flow Exhalation Valve that reduces heat build-up inside the respirator.
Respirators That Don’t Need Replacing Often
The 3M Particulate Respirator N95 8511 is approved for at least 95 percent filtration efficiency against certain non-oil-based particles. Braided headbands in a two-strap design with dual point attachment help provide a secure seal. An adjustable M-noseclip reduces potential for eyewear fogging.
As buyers jump from budget-friendly dust masks to the newer, more effective respirators, they don’t have to be replaced as often.
“The technology has definitely come along so that people don’t have to replace as much,” she said. “It’s not like the old paper respirators that people are constantly replacing, which don’t filter out that much anyway.”
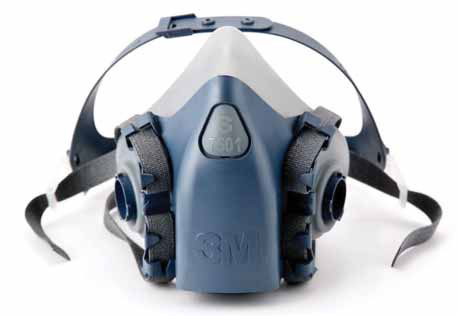
K&G and Jantz both offer the 3M 7500 Series Half-Face Respirator Mask, which features a better seal around the nose and mouth, and replaceable filter canisters for a better level of protection.
Best Respirators for Beards
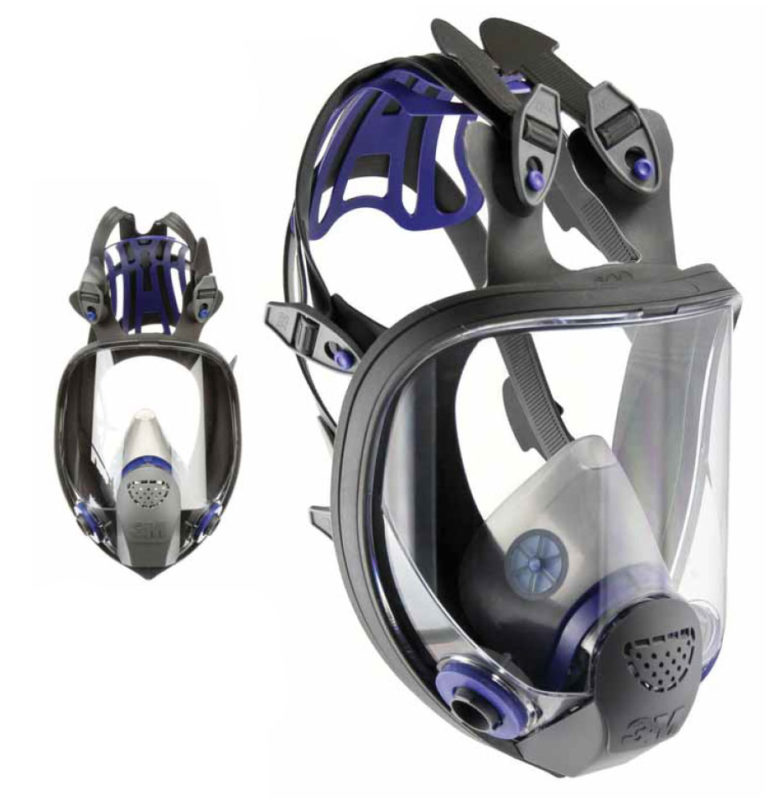
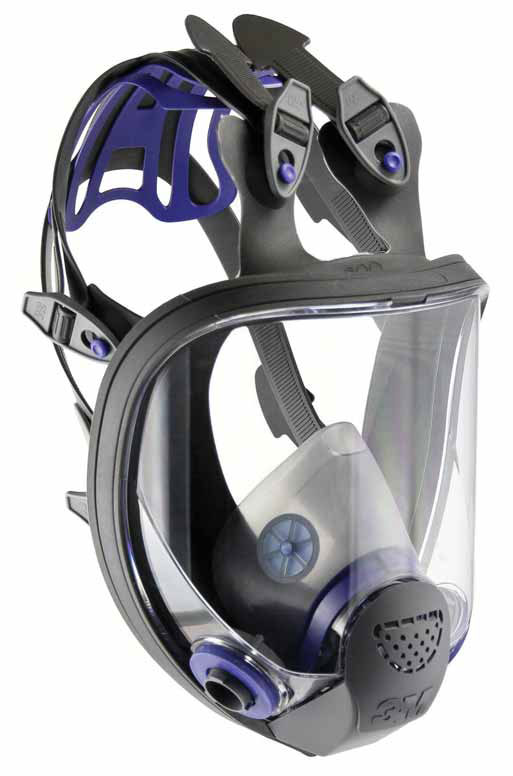
According to Jeff Mutz of Tru-Grit, the 3M Ultimate FX Full Facepiece Respirator works very well for knifemakers with facial hair. He said a lot of bearded makers have trouble getting a good, tight fit with a regular dust mask, or even the half-face respirator. The 3M Ultimate FX isn’t foolproof but it keeps out a lot more particles than the others, he noted.
In the area of high-end respirators, Jeff Mutz, product consultant at Tru-Grit, has high praise for one particular model that he said solves a couple of problems for contemporary knifemakers. For starters, he noted that the concept of “form follows function” even applies to current personal fashion trends.
“One thing I was impressed with,” Mutz said of the 3M Ultimate FX Full Facepiece Respirator, “is that it works a lot better for guys with facial hair, which is a big thing these days. I’ve seen more and more guys using the full-face respirator, so it’s apparently becoming a popular thing.”
He recalled that a lot of guys who visit his shop have longer and/or larger beards, and he noticed they have trouble getting a good, tight fit with a regular dust mask, or even the half-face respirator. The 3M Ultimate FX isn’t fool proof for those who choose to wear beards, he admitted, but the full face piece keeps out a lot more particles than the others.
“Of course, they say to create a seal you’ve got to shave off the beard, but a lot of guys aren’t willing to do that,” Mutz laughed. “So this is the next best thing.”
He recalled a conversation with Scott Sharpe, owner of Tru-Grit, about the younger generation, which seems more conscientious about safety. Scott said that when younger guys walk into his shop while he’s grinding, often they will pull their shirts up over their noses out of concern for what could end up in their lungs.
Field of View and Safety Glasses
K&G and Jantz both offer the 3M 7500 Series Half-Face Respirator, which features a better seal around the nose and mouth and replaceable filter canisters for a better level of protection.
Another good thing about the 3M Ultimate FX Full Facepiece Respirator is a better field of view. Mutz said when he wears a half-face respirator and safety glasses, the glasses interfere with the nose piece because they are not designed to work well together.
“I’ve noticed that the best way to solve that is to tuck the safety glasses under the half-face respirator, which is worse because you’re inhaling even more dust,” he explained. “With the full face, you get a large field of view and you don’t have to worry about the safety glasses interfering.”
Hand Protection Tape
Jeff Mutz recommends that if you wear hand protection, especially gloves, choose Kevlar rather than cloth or rawhide because the properties of the latter don’t play well with heat and moisture, which are both aspects of grinding in the shop. (Buck image)
Kemp said a lot of people may be surprised by two of Jantz’s best-selling safety supplies: two types of tape. The first is basic 3M Blue Masking Tape, which is used to cover the blade edge to avoid cuts from sharp edges. She added that a bandage wrap by Guard-Tex called Self Adhering Safety Tape is also popular in the area of hand protection. It is used to protect skin when grinding, sanding or polishing, while also not being as restrictive as full gloves.
However, in the area of hand protection Mutz warns against the inevitable trade-offs. He recommends that if you wear hand protection, especially gloves, choose Kevlar rather than cloth or rawhide because the properties of the latter don’t play well with heat and moisture, which are both aspects of grinding in the shop.
Mutz recalled when, years ago, he tried grinding while wearing gloves and noticed the gloves got wet when he dipped the blade into a bucket of water to cool it. The heat from the blade quickly transferred through the water into one of his hands.
“I couldn’t get my glove off quick enough,” he remembered. “I’ve rubbed my hand against a 36-grit belt before and that doesn’t feel good either. It’s kind of a double-edged sword.”
Another problem he pointed out was that makers should want to feel the steel. If it is getting warm, be aware of it and cool it off before the heat compromises the structure of the material.
Learn more about how to make knives with BLADE’s essential book.
“Especially once it’s been heat treated,” he stressed. “You don’t want to soften the steel.”
Mutz teaches knifemaking classes and discusses safety with his students. He stressed that he’s pro safety, of course, but as far as hand protection goes he’s probably not the best guy to consult.
“If you look on Tru-Grit’s website we’ve got this thing called Alligator Skin, which is a protective tape. Then you’ve got the finger guards that are made out of canvas. I’m not going to tell my students not to wear them, but these are the things you’ve got to look out for,” he concluded.
Safety in the Knife Shop is Serious Business
Safety is and should be a concern for those who spend long hours in a knife shop, and all three sources for this story agreed that common sense is the foundation, which, Edgington laughed, “over the years hasn’t always been in great supply!”
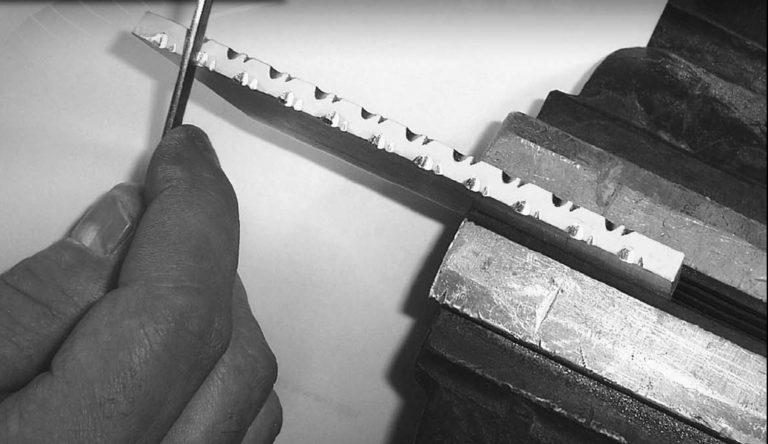
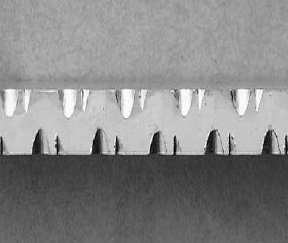
Vine filework is my favorite style of filework. If you break it down into baby steps, it is quite easy to do.
The materials you will need are a Sharpie® marker, a vise, and a 5/32-inch round file and a small triangle file. You can use a bigger round file on thick blade material or a smaller round file when engraving liners or thin blades.
The triangle file is ground safe (sanded) on two sides to produce one corner that is sharper than the other two corners. This provides a left and right safe side for opening up your vine file cuts, and for giving them sharp points as well.
STEP 1
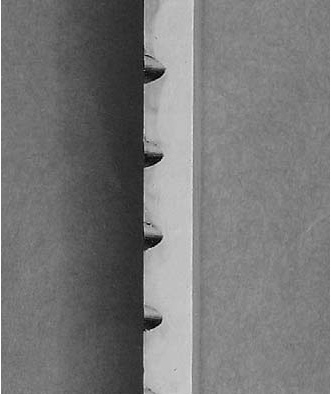
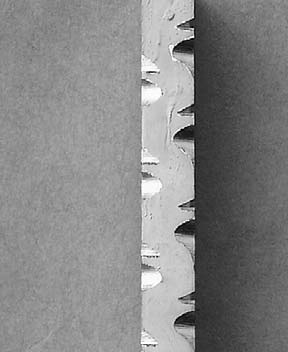
Using your Sharpie® marker, lay out half-round marks approximately 5/16 inch apart down one side of the blade spine. (Though not shown here, be sure to secure the blade in a vise.) (Hayes photo)
Step 2
File the marked side with the round file at a 45-degree angle. File into the spine, stopping just short of the middle of the blade. (Hayes photo)
Step 3
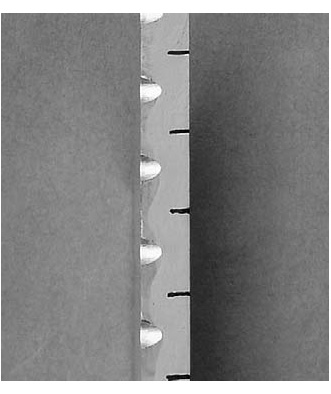
Using the marker, put marks down the other side of the blade spine in-between the notches. (Hayes photo)
Step 4
File in another row of half-round notches on the “new” side. Remember to keep the file at approximately a 45-degree angle and stop filing just short of the center of the blade. (Hayes photo)
Step 5
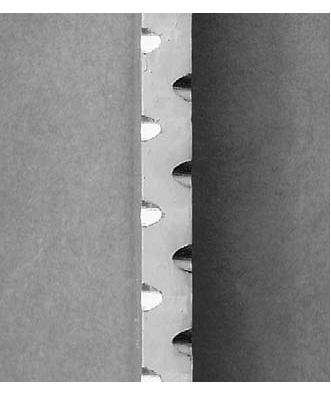
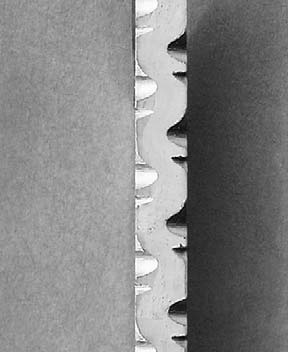
Next, take your triangle file and place it beside one of the notches. I leave about a sixteenth of an inch between the half-round notch and the triangle I am going to cut.
Before you cut, make sure you have a safe (sanded) side of your file closest to the notch you are cutting beside. Tilt the file so the cut closest to the notch is perpendicular (90 degrees to the blade). This gives you a straight line into your cut and an angle coming back out of the cut.
In other words, you want this “V” notch to be straight on one side and angled on the other. (Hayes photo)
Step 6
Turn the blade around in the vise and cut “V” notches in front of the other half-round notches. (Hayes photo)
Step 7
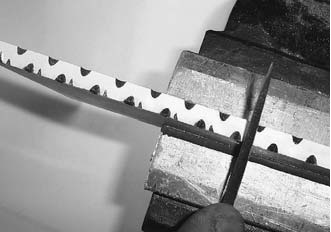
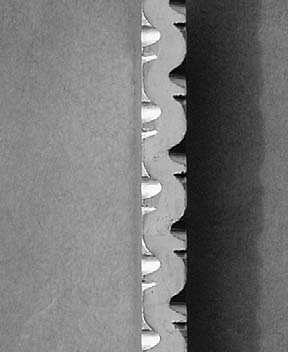
Take the triangle file and file the corner of each half-round notch, producing a gentle curve opening up one side of the half-round notch. (Hayes photo)
Step 8
Open up the other sides of the half-round notches. In both cases, they are in front of the “V” notches. This is how I remember so I do not get mixed up. (Hayes photo)
Step 9
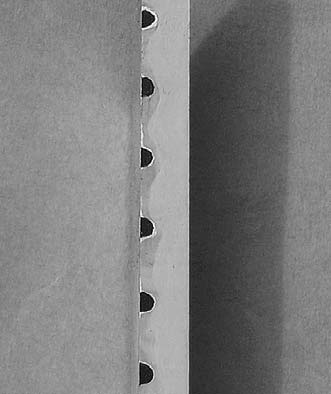
Now let’s move on to the “V” notches. Open up one side of the blade spine first. File the “V” notch to produce an even arc to the edge of the blade spine. If you do not twist the file in your hand as you file, you will get a flat spot. GO SLOW AND EASY. (Hayes photo)
Step 10
Turn the blade around and open up the “V” notches on the other side of the spine. Remember the “V” notch is opened on one side only, behind the halfround notch. The safe 90-degree side is not touched. (Hayes photo)
Step 11
Take the sharp safe-sided angle of the triangle file and file into each point of the “V” notch. File it to a sharp, crisp point. (Hayes photo)
Step 12 (Final)
For the 12th and final step, go over the entire fileworked area with fine sandpaper. Increase 3-inch strips of 320-grit sandpaper and put the paper over the round file and triangle file to back up the paper. Do not push too hard and tilt the wrap away from the safe sides so you do not round safe (square) the corners of the filework.
Is a U.S. Army Ranger made or is he born? Is it the training he receives that makes him a Ranger, or is there some innate quality in him that draws him to Ranger training in the first place? If you tell former U.S. Army Ranger Sergeant Kyle Gahagan (pronounced guh-HAY-gan) that he doesn’t have the proper credentials for full-time employment with your company, he’ll proceed to acquire three doctorates. If you were to suggest that he not go to work at the auto-body shop if the pain in his right arm is so bad that he cannot hold a toothbrush, he’ll go anyway and tape a hammer to his forearm. If you crush his 10-year-old spirit by telling him that the knife he spent hours making is no good and throwing it on the ground, he will one day use that craft to not only heal himself from the emotional ravages of war, but to help heal other veterans as well. Never tell an Army Ranger he cannot make a knife.
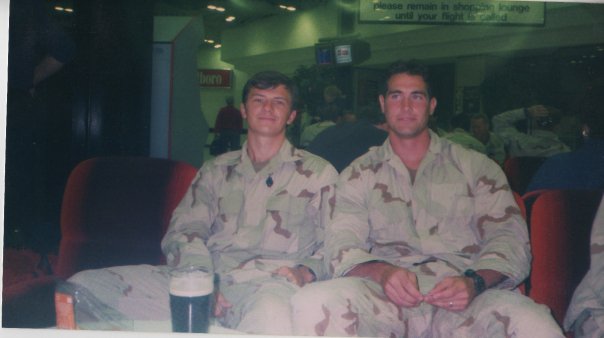
U.S. Army Ranger Sergeant Kyle Gahagan, right, pauses for a drink with Chris Hickox after his first tour in Afghanistan. Kyle is using blacksmithing to help counsel veterans as they find new missions in life.
Kyle doesn’t remember a time when he didn’t want to be a soldier. As a boy, he would dress the part and play army for hours. He came from a military family with a grandfather who served in the U.S. Navy during World War II and a father who retired as a full Colonel after a near-three-decade career in the Army’s Armor branch. Kyle was born in Colorado and lived in Kentucky and Germany, but from ages 8 to 11 the family lived in Savannah, Georgia. He would see the then-black-bereted Rangers of the 1st Ranger Battalion, who were stationed at Hunter Army Airfield in Savannah, and he knew that’s what he wanted to be. “I thought they were the coolest guys on the whole planet,” he said.
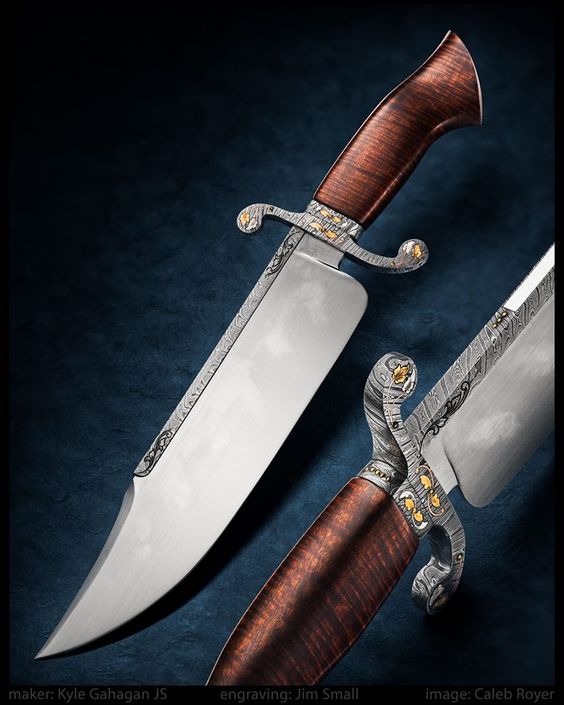
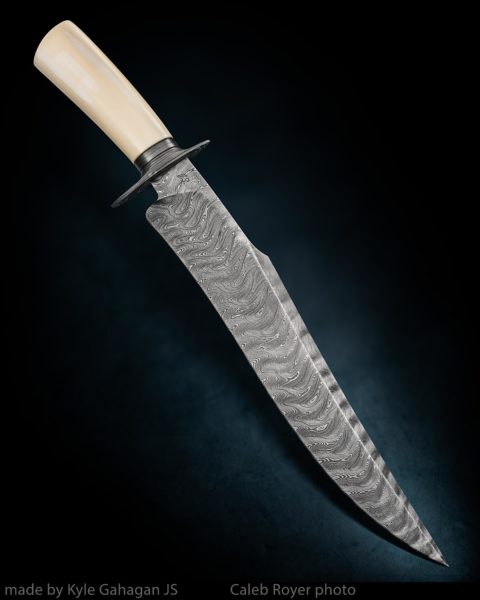
Growing up Kyle remembers a giant-to-him W. R. Case & Sons bowie on display above the mantle. He was not allowed to touch it, but he spent many hours studying it. When he became a knifemaker the only thing he wanted to make was big bowies. Only now he was bigger and so his bowies kept getting larger to recapture the proportion of his boyhood fascination with the big bowie. “I had to scale that back a bit,” he says with a laugh. This one has a 12.5-inch blade of forge-welded 1075 annd 15N20 steels with a fossil walrus ivory handle. Maker’s list price: $3200. Contacts for Gahagan Knives are listed at the bottom of this article.
Kyle got his first knife from his maternal grandfather when he was 5. It was a little Old Timer pocketknife to go with the shotgun he got for deer hunting. “I hunted with my grandfather until he couldn’t hunt anymore,” he said. His father transferred back to German, so Kyle saw him infrequently. It was his grandfather who spent time with the hyperactive boy, teaching him how to hunt and build things, how to work with his hands. At 10 his grandfather handed him a piece of aluminum and told him to go make something with it. It was his first attempt at making a knife. Although not an easy material to be cutting and grinding on, he crafted something resembling a knife. There was no heat treating involved, he said with a rare chuckle.
As Kyle learned more, he once spent a long time forging a knife. He hammered painstakingly to forge-weld steel for the blade. He made a wooden sheath, carefully lining up the wood grain. “I was so proud of that knife,” he said. He took it to an area knifemaker. That maker couldn’t stop telling him how bad it was. He threw it on the ground. “It crushed me,” Kyle said. “I didn’t make another knife for about 20 years.” He didn’t even tell his grandfather what had happened. “I think he thought I just grew out of my interest in it.”
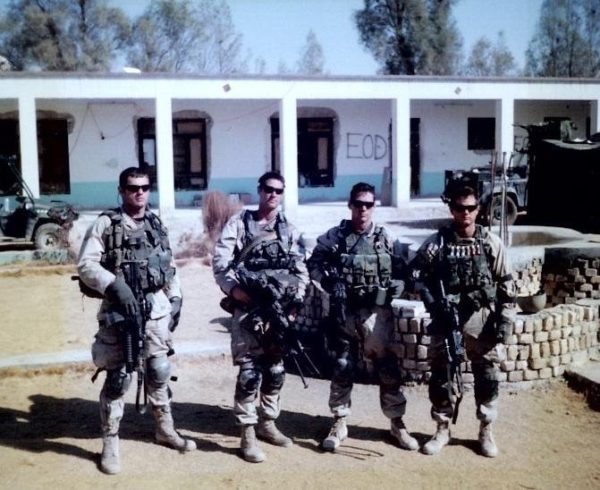
U.S. Army Ranger Kyle Gahagan, second from left, was deployed twice to Afghanistan. This was taken in Kandahar before a mission on his first tour.
In 1999 at the age of 19, Kyle enlisted in the Army with a Ranger contract. He was engaged when he went in and was married in between basic training and Airborne school. He went into the Ranger Indoctrination Program and Ranger school and was assigned to his boyhood heroes’ unit, 1st Battalion, 75th Ranger Regiment. But then 9/11 hit and he was being deployed back to back. He did two deployments in Afghanistan and two in Iraq, but because they blend into what amounted to nearly three years of being gone, he can’t quite recall the order. He was a SAW gunner in Afghanistan, he led a team for a while, and in Iraq, he was an S3, which organized training operations in the rear and coordinated missions during combat.
During one training session, Kyle was giving a private a block of instruction on the M203 grenade launcher. It hit a buried mortar not 15 meters away. They were able to determine that the grenade had not had sufficient time to arm itself, so the mine had caused most of the damage. Kyle received shrapnel wounds to his face, chin, neck and right leg. In a parachute training jump Kyle got his right arm entangled in his rigging, which led to a torn tendon and debilitating tendinitis. His unit was involved in the Jessica Lynch rescue, but the mission that had the most impact on Kyle was the Ranger rescue of a Navy SEAL team on the third day of Operation Anaconda, a sweep of al Qaeda and Taliban forces in the Shahikot Valley of Eastern Afghanistan.
Although not on the mission, Kyle lost three friends on the firefight atop Takur Ghar Mountain: Rangers Marc Anderson, Bradley Crose (with whom Kyle attended paramedic school) and Mathew Commons. You can read about the harrowing battle for Roberts Ridge in Sean Naylor’s “Not A Good Day to Die, The Untold Story of Operation Anaconda” and in Malcolm MacPherson’s “Roberts Ridge, A Story Of Courage And Sacrifice On Takur Ghar Mountain, Afghanistan.” Kyle can go for days without thinking about his brother Rangers, but then something in life will remind him that they’re not here to live their lives.
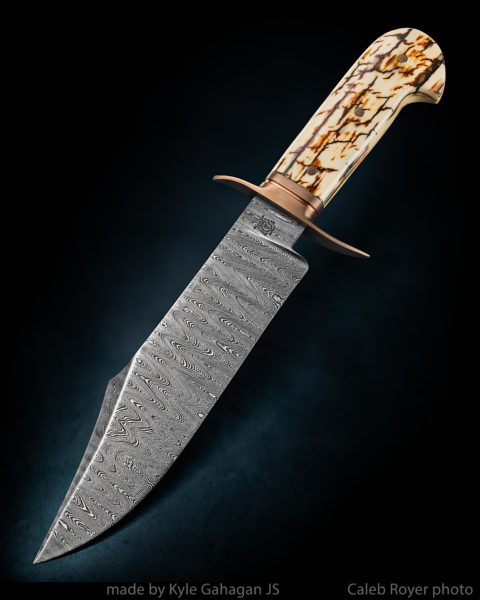
This Gahagan Knives bowie has a 10.5-inch blade made of forge-welded 1075 and 15N20 steels. The handle is mammoth ivory with a bronze guard. Maker’s list price: $3000. Contacts are listed at the bottom of this article.
Kyle would have stayed in the Army, but after seeing his parents divorce and his father remarry two more times, he knew he didn’t want to lose his wife over his career choice. He felt it wasn’t fair to Dana, so he transitioned out in 2004. Their daughter, Zoe, was born right after Kyle got out, and their son, David, was born in 2011. At first Kyle wasn’t sure what he wanted to do. He worked in an autobody shop, but when the pain in his right arm, exacerbated by a bone spur on his clavicle, got so bad he could barely function, he knew he had to find other work. “On my last day, the pain was so bad I couldn’t hold a hammer—I couldn’t hold a toothbrush.” He taped the hammer to his forearm and at the end of the day told his boss that he just couldn’t do the work anymore.
He was at the right place at the right time to land a job as an IT (information technology) contractor for Lowe’s, developing three data centers, one in Texas and two in North Carolina. When Kyle applied for full-time employment, the company told him it could not hire him because he lacked a degree. So, he went back to school. His mother was a teacher, so education has always been important to him. In the end, “100 percent and then some” in keeping with the Ranger creed, he came away with three doctorates, two in education and one in psychology.
Kyle Gahagan made this 10.5-inch blade with forge-welded 1075 and 15N20 steels. The guard uses the same steel, and the handle is ringed gidgee wood. Maker’s list price: $3500. Some Gahagan Knives pieces are available through https://exquisiteknives.com or you can contact Kyle via the methods listed at the bottom of this article.
During this time Kyle was an administrator to a local college, a school principal and eventually an acting superintendent. His frustration grew as he continually tried to hold students and parents to high standards. Kyle ensured that the children had what they needed to succeed, but if they didn’t follow the rules, they faced the consequences. He felt undermined, however, by a politically-correct environment in which his decisions were often overturned. Eventually, he just quit.
When Kyle was a school administrator, his chief financial officer asked him to make a knife he could give to his future brother-in-law as a wedding gift. Kyle was reconnected with that kid who had became engrossed in making the best knife he could make. “I enjoyed the process,” Kyle said. He began making knives “as a hobby.” Although he may not have recognized it at the time, that sounds like too casual an approach for a craft that would end up tying his love of knifemaking, education, psychology and his warrior brethren together, giving him a new mission in life.
In 2013 Nate Bocker began Resilience Forge in Virginia. Nate served in the Army with the 249th Engineer Battalion. The active-duty sergeant sought a way to help the wounded warrior community. He thought by teaching veterans the skill of bladesmithing they could hammer out some of the issues associated with post-traumatic stress disorder, receive appropriate physical therapy for some injuries and have the foundation of a new skill they could expand into a trade if they so chose. Nate’s first student christened the program Blade Therapy. Kyle then launched Resilience Forge North Carolina and began implementing standard operating procedures so that the non-profit could expand nationally. No matter where a veteran attended, they’d know that the program would be the same.
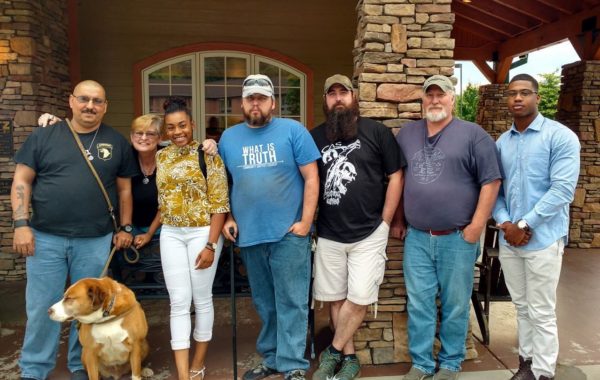
The Department of Defense made a video of ABS journeyman smith and former Army Ranger Kyle Gahagan, third from right, to celebrate the work he’s done in helping veterans. You can watch it below.
The irony is that there is no structure to the program. Veterans when they’re transitioning from active duty or medical care into civilian life don’t have a schedule. “My door is always open,” Kyle said. All a veteran has to do is call ahead and he is there to provide counselling in the active environment of the forge. “Sitting on a couch and talking doesn’t work with the military mindset. They want to be producing something,” he said. Lots can unfold in the course of making a knife in one of Kyle’s classes. Take the 96-year-old veteran who was on Omaha Beach on the D-Day Invasion of Normandy. “He couldn’t do much,” Kyle said, but it was only a couple of weeks after visiting Resilience Forge that the veteran’s wife called. “She said, ‘I don’t know what you did, but my husband is happier.’ He had opened up to her,” Kyle said. And now Kyle is happy too. He’s found his new mission.
He knows what it’s like to reach that point where it’s darkest. Where the trudging goes on incessantly, you feel miserable physically and mentally, you’re exhausted and there’s no clear purpose to your life. Irrespective of his constant advancements career-wise, Kyle knows the heartbreak of remembering lost buddies. Anderson had been a school teacher. “We all face it,” Kyle said. At one point the emotional and physical pain was so bad that he walked away from the one thing that could have ever compelled him to leave the Army: his marriage. That lasted six months. There is a point, even in knifemaking, when the challenges seem to go on for too long, when things don’t fall naturally into place, when braking the blade seems nobler than letting it crack under stress.
Kyle taps into each veteran’s ability to adapt and overcome. Even though he’s teaching a physical skill, he’s giving veterans back their confidence, their ability to overcome and adapt. He helps them find their flexibility, their resiliency, their ability to fight back and achieve self-sustainability again. He can’t tell the veteran what his new mission is, but he can guide and support him while he figures it out. And that knife that they thought they couldn’t finish becomes a token of what they’re capable of accomplishing.
DoD News In Focus: Taking the Edge Off
Kyle’s plans, not surprisingly, are big. He currently puts veterans up in area hotels. He’d like to get a camper that he could use to haul a mobile forge to VA hospitals. He could use it for sleeping on those trips and to accommodate veterans when they’re at Resilience Forge. The VA is now sending patients to him. He sees the program expanding across the country, and eventually, Dana leaving her insurance agent job and working with him. He hints at perhaps another doctorate, and in 2018 he’ll be testing for his American Bladesmith Society master smith rating in Kansas. He uses a power hammer when he’s forging his own knives, but he teaches by hand. He’s hoping to stave off another tendinitis surgery, but he can feel his tendinitis getting worse. Like many veterans, his battle for coverage continues. Even so, his mission is crystal clear, and he is happier than he’s ever been.
Donations and Inquiries
To make a donation to Resilience Forge North Carolina, you can access gahaganknives.com through Paypal, or you can mail a check made out to Joy To The World Foundation to Kyle at the address below. The Joy To The World Foundation provides administrative services, such as tax preparation, to non-profits.
You can read your digital issues of BLADE Magazine anywhere you have your phone, tablet or computer, and there’s no need to find storage for all your old issues.
If piling-up issues of magazines seems like a waste to you… If you feel like you don’t have time to read a magazine… If you like the stories we offer in BLADE, but want a more economical option, then a digital subscription is the answer. An annual subscription to BLADE is $17.98, $4 off the print price.