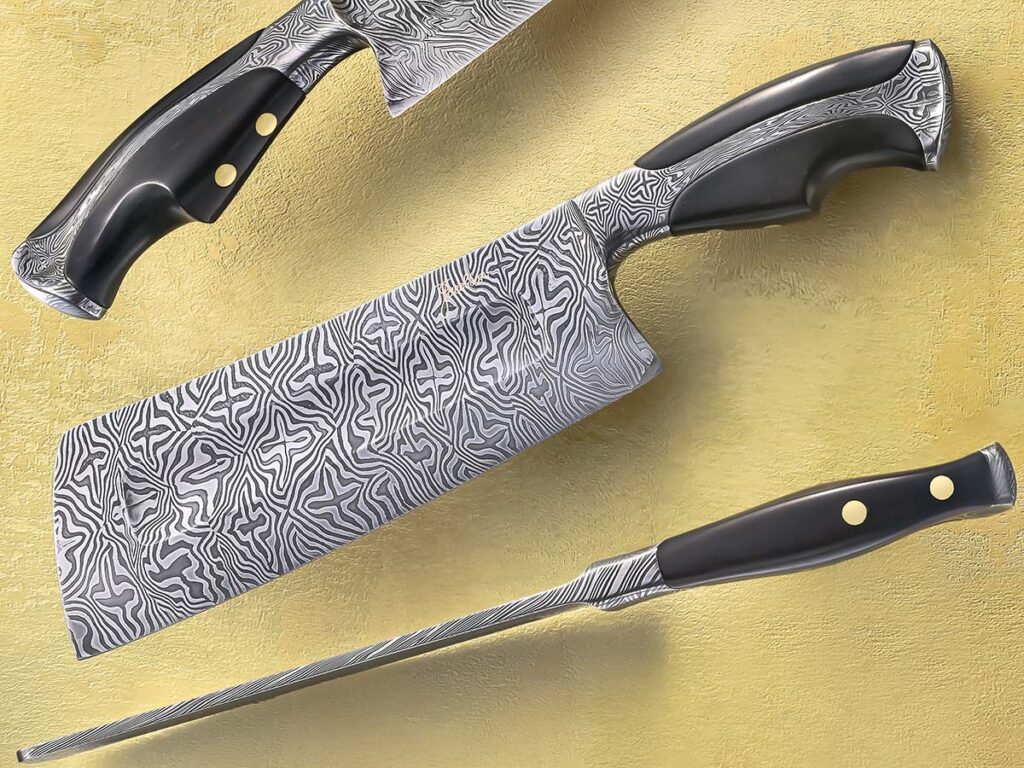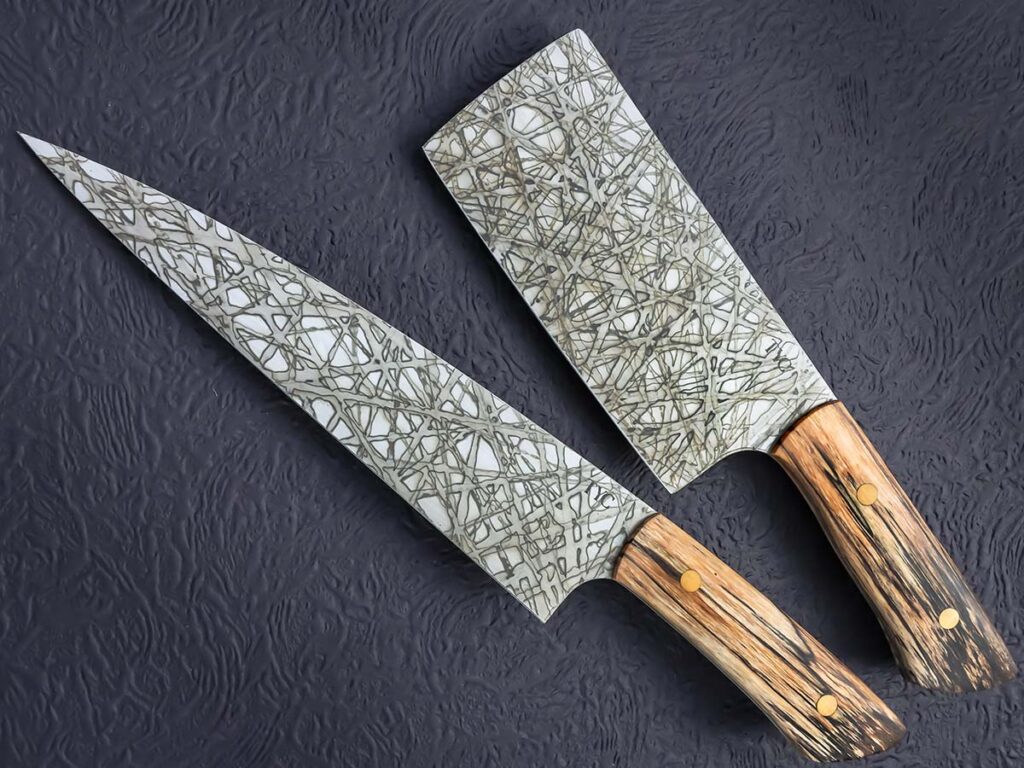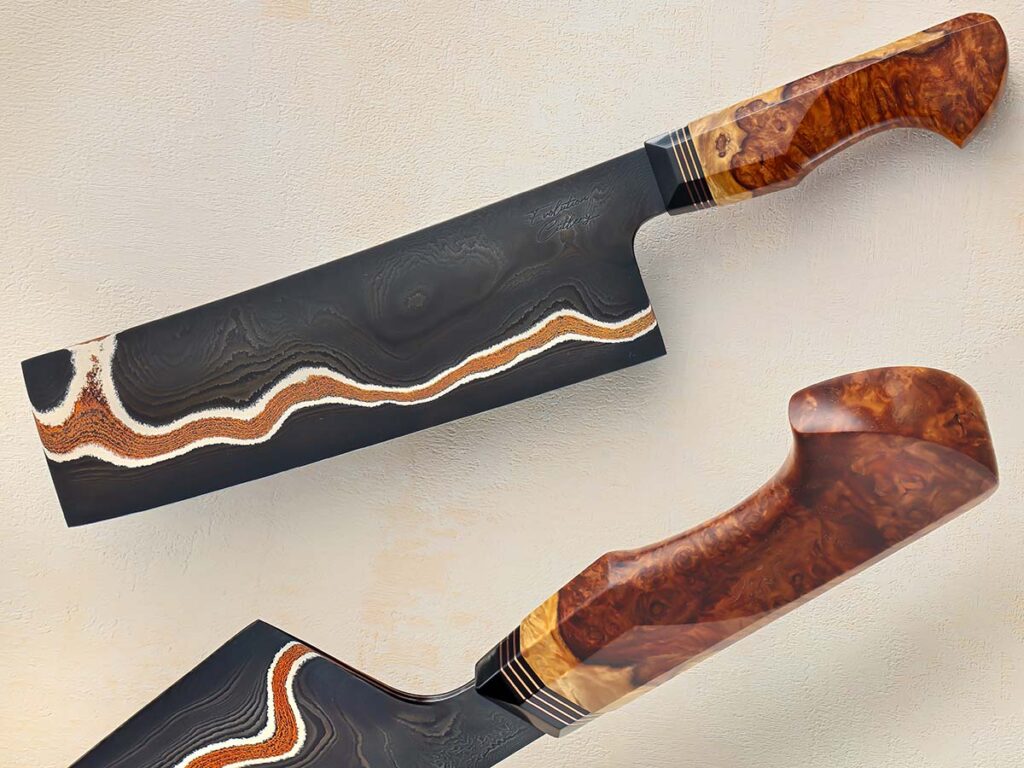
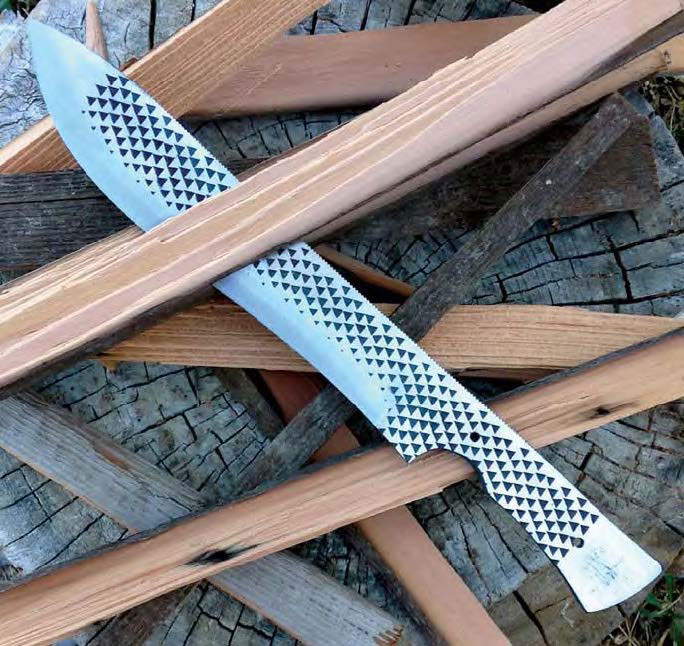
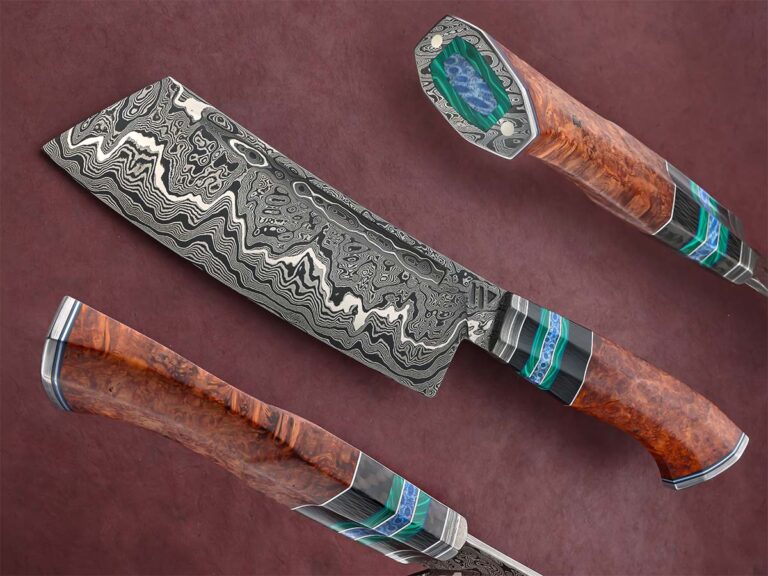
Knifemaking is the building of a knife, which includes the blade, handle and other accouterments. Blades are made by either removing metal from a steel blank via a grinder – known as stock removal – and the forging to shape of hot steel into a blade in the process known as bladesmithing. Other parts, including bolsters, guards, pommels, etc., are needed to complete the finished knife.
We Take A Look Inside The Shop Of ABS Master Smith Steve Schwarzer And See How He Makes His Mosaic Damascus Wonders
Of all the forgers of mosaic damascus in the knife industry, none stand out any more than American Bladesmith Society Master Smith Steve Schwarzer.
Steve began forging in the early 1970s. In 1981 he received his ABS master smith rating, his papers signed by none other than one of four ABS founders/BLADE Magazine Cutlery Hall-Of-Fame® member Bill Moran, and was officially recognized as an MS in 1983. Steve has an intense passion for forging mosaic damascus and his contribution to this steel niche over the decades has been immeasurable. Unselfish to the extreme, he has forged damascus for many custom makers and tutored many on forging and the making of pattern-welded steel over the years—which he continues to do to this day.
His awards over 50 years of knifemaking are too numerous to name, as have his appearances in BLADE®. BLADE is delighted to feature Steve once again, this time in a supersized edition of “Shop Dump” to give readers a deep dive into the equipment this modern-day master uses to achieve his magical works.
Inside Steve’s Shop
Steve rescued his Kent USA precision surface grinder from a knifemaker friend. In the process of retrieving it, Steve almost destroyed it while loading it. However, another friend restored it to better than new.
As you can imagine, Steve has acquired a lot of equipment over his many years of knifemaking and has honed his shop to perfection. We asked the artisan to give us an extended tour of his digs and he gladly obliged. He kicked the tour off with his forging hammer.
“The Chambersburg 2 Hammer was my first real game changer,” Steve notes. “I had owned several mechanical hammers before I found it. The control in forging set me apart from others. It also allowed me to work much larger masses of damascus. I have trained dozens of the current top makers pattern welding using this machine. I built my second shop around it. It’s now in my home shop.
“Next up is my custom-built 50-ton Coal Works computer-assisted C Frame press. This is a recent acquisition and is also a game changer for controlled forging. It has a return to 1/100 of an inch. Basically, it comes with millions of electronic stop blocks. It has the ability to swap dies to any configuration in minutes. I have built many presses over the years; this one has all the benefits and adaptability afforded by all the others combined. I worked very closely with the crew at Coal Iron to bring this beast to life. I’m still exploring its capabilities.”
Grinders are a must-have of any maker’s shop and Schwarzer has a passel of them.
“I own four Beaumont grinders—one for over 20 years—and they are great machines that track properly,” Steve states. “Three are 2×72 belt grinders, two with controllers. They’re constructed of steel, making it very easy to make tooling and various fixtures for any project. The disc grinder runs perfectly true, making grinding precision angles a breeze.”
Steve Schwarzer’s Forges
Steve’s ribbon burner is one of several forges in his shop. He designed it and a close friend built it. It’s purpose-built for working very large canister damascus.
Steve brings the heat to his steel with a forge of his design.
“My forge is one of several I run in my shop. It’s a ribbon burner designed by me and constructed by a close friend. It’s purpose-built for working very large canister damascus. I have built dozens of forges over the last 40 years. This is the latest version. My previous forges were all versions of a Don Fogg design.”
If you’ve read past installments of “Shop Dump,” you know it’s not at all uncommon for equipment to be passed down from one maker to the next. Such is the case with Steve’s mill and surface grinder.
“My Kent USA knee mill is my go-to for all precision drilling and milling. It was rescued from a retired knifemaker who took excellent care of it,” Steve relates. “It’s variable speed, making it handy for all types of tooling.
“I also rescued my Kent USA precision surface grinder from the same knifemaker. It had a history when I went to retrieve it. I made a rookie mistake loading it. Long story short, I, for all practical purposes, destroyed it. I broke about everything on it. I had in mind to scrap it. I called a friend who owns one and asked if he wanted it for parts. He said, ‘Let me look at it.’ I took it to his shop. He is a true wizard. He totally restored the machine I thought was lost to better than new. He also taught me how to properly grind with it. I will always be grateful.”
If walls could talk there is no telling how many amusing tales Schwarzer’s shop could tell.
“I have a shop full of machines, all with some story attached,” the affable bladesmith said. “My tool rack has dozens of hammers and tongs collected over 40 years. This is my happy place. I love teaching and sharing the stories with students and friends.”
For more information contact Steve Schwarzer through his website at steveschwarzer.com.
A Disciple Of Bill Ruple, Burt Flanagan Has Been Making Knives For Nearly A Decade And Crafts Some Of The Finest Slip Joints In The Lone Star State.
Burt Flanagan has been making knives part-time since 2015 and also is a member of the South Texas Slipjoint Cartel of understudies of Cutlery Hall-of-Famer Bill Ruple. Burt’s father was a knifemaker before him but due to extenuating circumstances—he lost his equipment in a robbery—he never achieved the heights he could have.
Flanagan’s mother passed away in 2014 and shortly thereafter a Fedex package from Burt’s father arrived at the door. Inside Burt was shocked to find a 2×72 grinder and called his dad to find out about the gift. His father told him his mother had always supported his interest in wanting to make knives, and through the proceeds from her life insurance policy he knew she’d want to help Burt get started.
In no time Flanagan was grinding away at becoming a highly respected knifemaker. He had a chance to meet Ruple at a Johnny Stout hammer-in in South Texas and—long story short—the legend invited him down to learn how to make slip joints. He did so with his dad in tow and the three have all been great friends since.
Burt also credits The Knifemakers’ Guild for its guidance and is now a member of the organization’s board of directors. When not making knives he works full time for Paragon Industries, makers of fine heat-treating ovens, as the company’s knife industry manager.
Inside Burt Flanagan’s Shop
Burt Flanagan caled down Tony Bose’s Back Pocket model, giving it a 3.25-inch blade of CPM 154 stainless steel and antique Westinghouse Micarta® scales with an abalone shield. (Mitchell Cohen knife image)
The shop tour begins with a piece of equipment Burt knows quite well.
“I am a very blessed man to have a career in the knife industry with Paragon Industries. I would never endorse something that I did not believe in,” Burt states. “My Paragon Pro will reach 1,000 degrees Fahrenheit in six minutes. You may think that’s not possible but it’s true. I will tell you that this is most likely the most important single piece of equipment in my shop because this is where it all starts. The heart of the blade is in the hardness, and my Paragon Pro is the ultimate. When I first got my Paragon oven it immediately cut my heat-treating time by two-thirds over a conventional brick-type oven that took over an hour to reach 1,925 degrees. This is to heat treat CPM 154 stainless steel, which I use pretty much exclusively for my blades, along with carbon steel damascus.
“An absolute must for a slip-joint maker is a surface grinder and I use a DoAll D-8. I was taught that two of the most important things in slip-joint making at a high level are for your parts to be flat and perpendicular. The D-8 takes care of the flat part of the equation. I surface grind my blades and springs to within one-half-of-one-thousandth of an inch with this machine. There are many different quality brands of surface grinders available from old to new. Mine happens to be an older model that has been restored and is in great condition. It weighs close to 5,000 pounds and is a hydraulic two-axis automatic beast that can get the job done.”
Big Tools For Big Jobs
Burt indicates the Moen Turbo Platen eliminates the belt-bump factor during grinding while also blowing a tremendous amount of air over the work, cutting down the heat on the blade big-time.
Next up Burt extols the virtues of his Oliver of Adrian drill point thinner machine.
“I’ve found it to be true that the first thing a dealer, collector or purveyor—as well as many knowledgeable customers—look at in a custom pocketknife is the nail nick. A proper nail nick, no matter what the method used, should have needle sharp points and be thin and consistent throughout. This machine is the beans as we say here in Texas,” Burt explains, “and allows the maker to properly place the nail nick just before assembly. It is equipped with a built-in diamond dresser with a lever that keeps the 5-inch stone sharp all the time. Although there are many ways to cut a nail nick, most makers say this machine arguably does the best job.
“As with a nail nick there are numerous ways to inlay a shield on a pocketknife. I believe the most versatile way is the pantograph. Mine is a Gorton P1-2 model, which has been restored to almost new condition by the pantograph guru, Tim Robertson. There are many different makes and models that work great. These machines are the predecessor to the CNC machines of today. Gorton machines were made from the mid-’60s up to the early ’90s. My machine was made in the mid-’80s. These machines are capable of doing so much more than just shields; it enables the maker to create just about anything your mind can imagine. I believe we are only beginning to explore what is possible with these machines in the knife world.”
Lastly, Burt highlights his Moen Turbo Platen.
“Jerry Moen continues to change knifemaking for the better,” Flanagan praises. “This great tool virtually takes away the belt-bump factor while blowing a tremendous amount of air over your work, cutting down the heat on your blade big-time. It also greatly reduces the amount of belts necessary to achieve the same finish. I actually use three-to-four grits to accomplish a mirror finish. An LED light kit makes it even better.”
Jantz is a crucial source for many who fashion knives.
For 58 years Jantz Knife Supply has met the needs of cutlery craftsmen of all stripes, from green behind the ears to on up in years, with everything needed to make knives. This includes specialty steels, handle components, sheath materials, hand tools and sanding supplies, as well as the heavy equipment for knifemaking.
What started as a small mom-and-pop gun supply outfit founded by Ken and Venice Jantz in 1966 is no less than a U.S.-based juggernaut in today’s cutlery industry. The Jantzes haven’t left their humble beginnings behind, though, so no customer job is too small for the venerable knifemaking supply company in the heartland of America, Davis, Oklahoma.
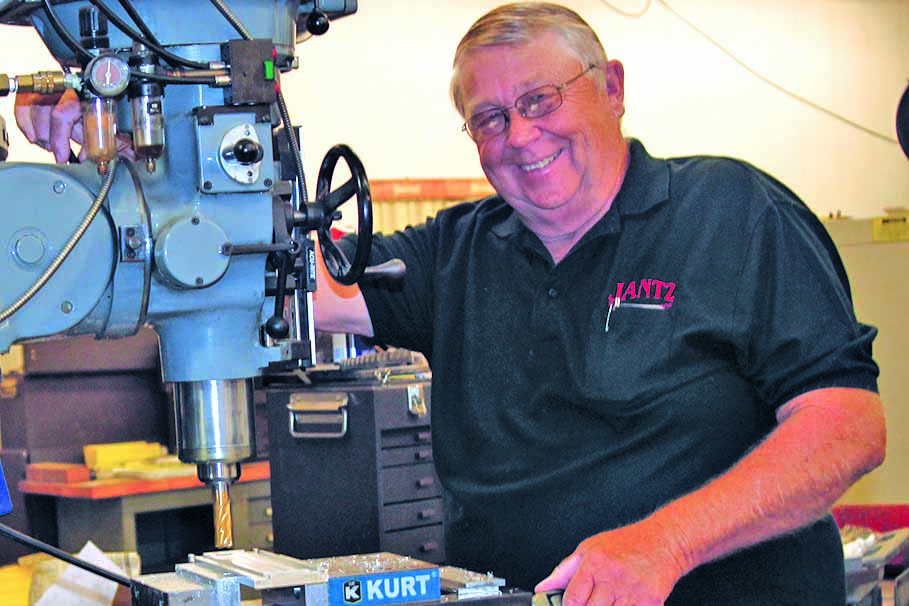
Company co-founder Ken Jantz works on a prototype for a new hollow-grinding fixture at the company facility.
Shanna Kemp oversees the marketing, financial and human resources for Jantz. She probably knows as well as anyone about the many specialty and other items available to the company’s legion of customers. “Our goal is to provide everything knifemakers could need for their project,” she begins, “whether you’re a beginner looking for a new hobby or a custom knifemaker stocking your shop to get ready for the BLADE Show. One thing we really love is creating fixtures and tools to make knifemaking more accessible for every skill level.”
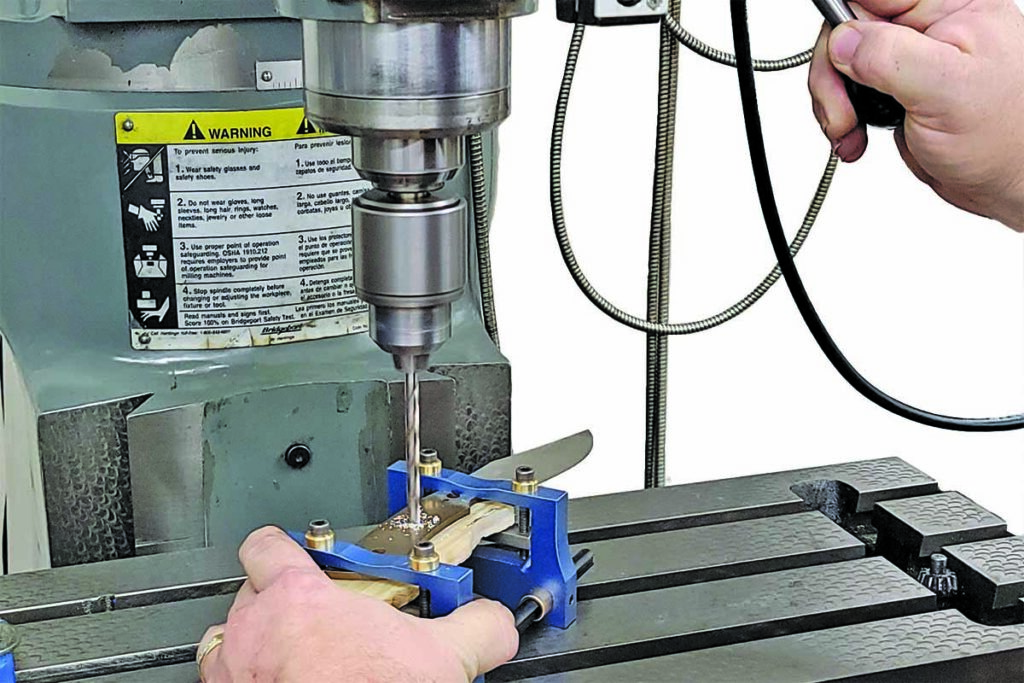
One of the company’s most popular new fixtures is the PDJ Knife Vise. “It’s handy for all levels of knifemakers as it allows you to drill perfectly perpendicular holes through your handle material” regardless of the material’s texture or unevenness, Shanna explains. Jantz stocks an abundance of parts for assembling and enhancing knives of all types. “Our most popular products are our Corby rivets, Loveless bolts and metal round and bar stock,” Shanna enumerates. “Our customers love the quality of our materials as we source directly from reputable mills with consistent quality and do our cutting and machining in house. One of our other popular products is our handcrafted mosaic pins. Each pin design is meticulously hand assembled right here in Davis, Oklahoma.”
Jantz Steel Stock
Jantz offers a range of knifemaking equipment. An example is the JS750 perpendicular vise with drill press.
An outstanding blade is the heart of any knife and Jantz offers all kinds of stainless and high carbon steels. “We carry a variety of knifemaking steels to suit both forging and stock removal,” she states. “1095 and 80CrV2 are very popular carbon steels and CPM 154 is our most popular stainless steel.” She added that the damascus forged by Brad Vice’s Alabama Damascus is very popular because of the quality and solid price point for the company’s patterned-welded steel.
“For Jantz, steel and other metals have always had a long lead time since we source from a variety of mills in the U.S., Germany, Sweden, Brazil and others,” Shanna observes. “We have strong relationships with our suppliers, and they have worked with us to keep material moving forward even when lead times began to exceed a year.”
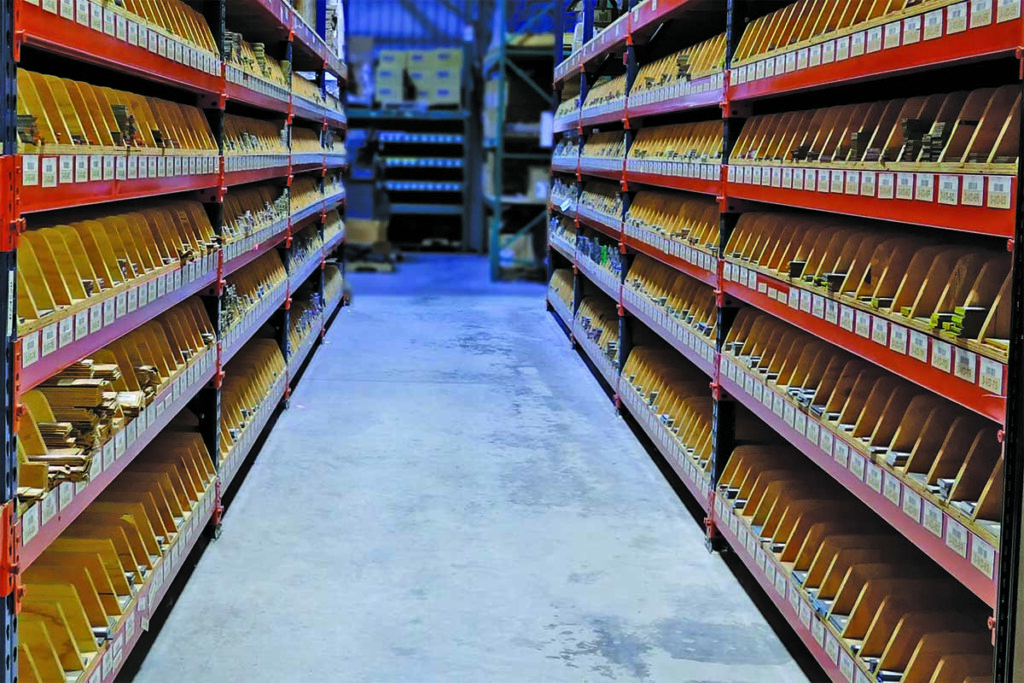
No matter the material, component or tool for knifemaking, Jantz probably has it somewhere in one of its well-stocked aisles.
Fixed blades will never go out of style, Shanna opines, and the Jantz business model caters to the mindset that drives the knives’ popularity. “We find that fixed-blade makers tend to use both stock removal and forging in their blade design and development,” she states. “The television series Forged in Fire certainly increased the popularity of forging, but we still see about the same divide between stock removal and forging. Fixed blades designed for hunting and survival are top sellers for our custom knifemakers as well as our hobbyists. There’s something special about using a knife in the field during hunting season that you made yourself that really resonates with the knifemaking crowd.”
When it comes to heat-treating ovens, Jantz recommends Paragon kilns above all others. “Not only do they make a quality oven,” Shanna assesses, “but they have a variety of ovens designed for beginners to pros. Their customer service is top notch and Burt Flanagan, who represents Paragon’s knifemaking ovens, is a custom knifemaker, so he truly understands what knifemakers need.”
Jantz-Made Blades
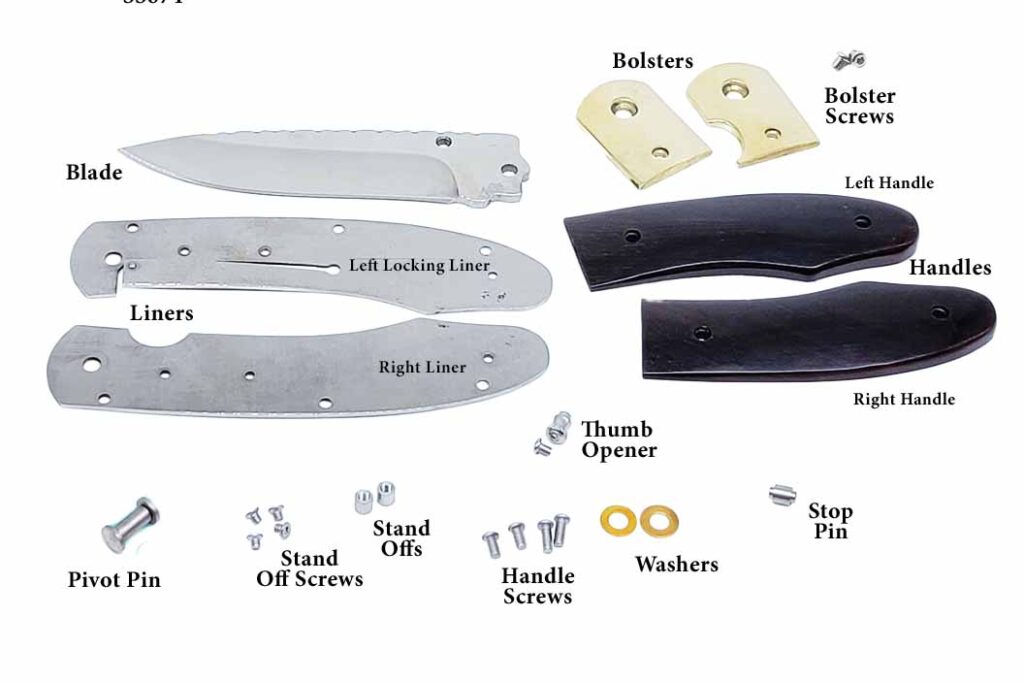
Knife assembly kits such as the Caballero are a great way to learn the ins-and-outs of folding knives. Jantz offers over a dozen knife genres, from traditional slip joints to modern tactical fare.
For those wanting to get their feet wet in the cutlery world, Jantz offers a cornucopia of pre-made blades for virtually any niche of the market, including household cutlery. According to Shanna, many custom makers order beautiful stainless damascus in various patterns from Damasteel for their kitchen knives. “Our Jantz-made line of household cutlery is especially popular with customers,” she adds. “Our santoku, cook’s and paring blades are favorites of makers using pre-shaped blades for project knifemaking. All the Jantz-made blades are manufactured in our facility.”
Jantz offers an abundance of both knife blades and knife kits. These are designed not only for the novice and hobbyist, but for those who want to tailor special knives for sale. The Jantz website offers links aplenty to a wide range of genres in both folders and fixed blades. Need a fixed-blade hunter in damascus? No problem. Like a kit to learn the ins-and-outs of folding knives? There are over a dozen styles available, from traditional slip joints to modern tactical fare.
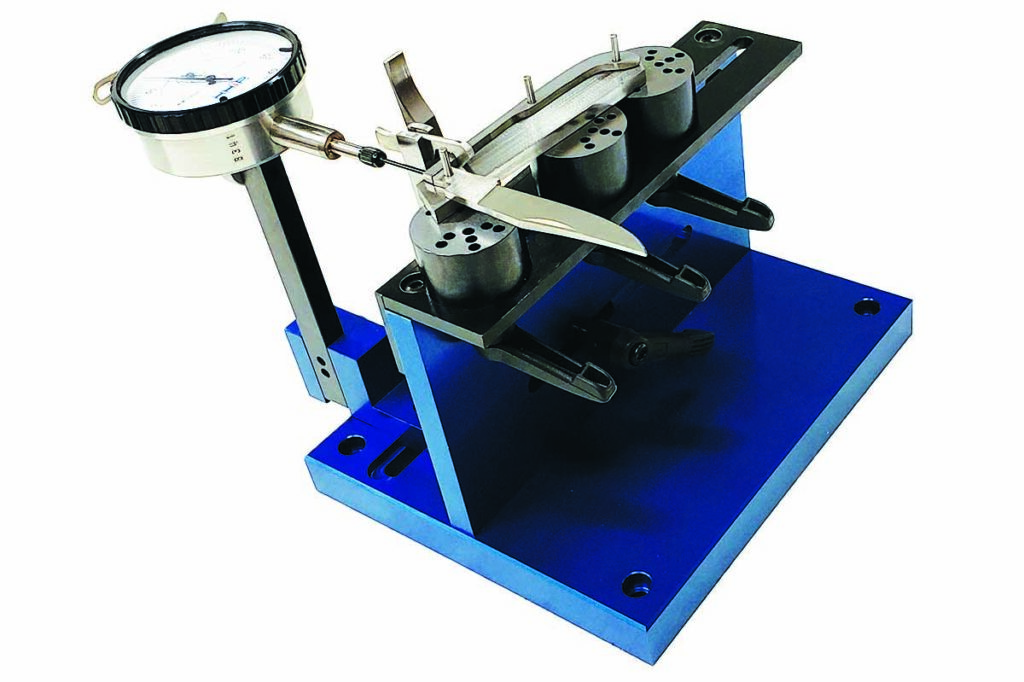
Providing fixtures such as the JS500 for slip joints that make knifemaking more accessible to hobbyists and makers of all levels is a specialty at Jantz Supply.
If there is an innovation on the horizon, Jantz Supply will be on top of it. “One of the many things we love about the knifemaking community is how open and sharing makers are with each other,” Shanna observes. “Want to learn something [another knifemaker] is doing? Just ask. You will rarely find someone not willing to share.”
That spirit and willingness to help is what has made Jantz an important part of the cutlery industry for going on six decades now.
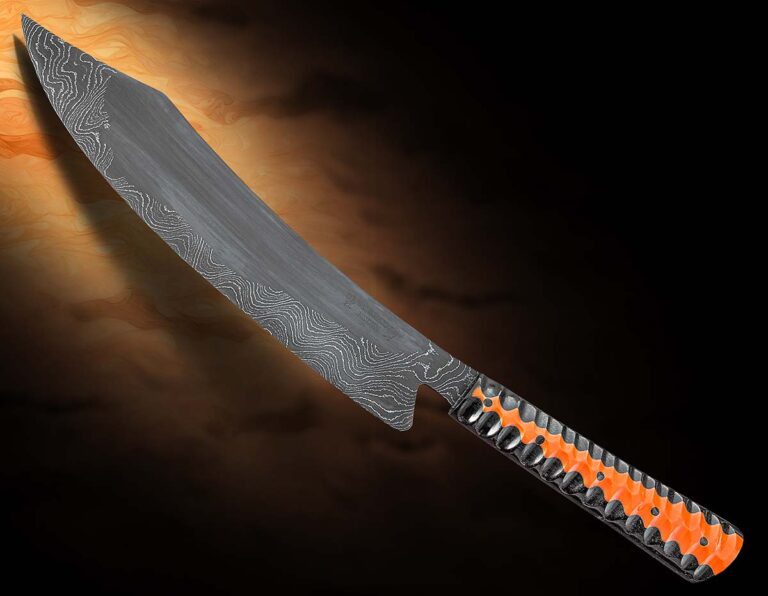
The Jose Santiago-Cummings BBQ Knife will rock your brisket.
Among Jose Santiago-Cummings’ growing ranks of customers are those he describes as “foodies,” and he built his second BBQ Knife expressly for them.
Not unlike a pirate boarding cutlass in appearance, the long, curved blade is designed for the rocking slices needed to cut meat and brisket. It’s similar to how a slicer is used as opposed to, for example, a nakiri for chop cuts.
Jose Santiago-Cummings
Jose, 62, used a cylindrical drum-sander-like attachment on a Ram tool to carve the grooves in the long, upswept handle. Jimmy Floyd forged the clip-point blade of damascus clad in wrought iron.
BBQ Knife Specs Maker: Jose Santiago-Cummings Blade length: 8.5” Blade steel: Damascus of 1084 carbon and 15N20 nickel-alloy steels clad in wrought iron Blade grind: Flat Handle: Black and orange G-10 resin Overall length: 13.25” Maker’s price for a similar knife: $450-$475
Tips on handle materials, shaping/layout, grooves and flutes.
A good knife requires a handle that not only feels right in the hand but also complements the blade’s intent. For daggers especially, few embellishments capture both technical skill and aesthetic elegance like a spiral-fluted handle paired with inlaid twisted wire.
Fluted, wire-inlaid handles trace their lineage to medieval Europe, where 9th-to-12th-century knives were often bound with spirals of wire for both decoration and basic grip enhancement. By the Renaissance, Italian and French artisans had refined this into a sophisticated embellishment. They carved shallow, evenly spaced flutes into hardwoods, stone, ivory or other materials, then inlaid twisted wire into the channels in a demonstration of their mastery of contrasting textures and precise tool control. The grooves not only trimmed handle weight for better balance but also improved the gripping surface so that daggers felt responsive and secure in the hand.
In modern times, this technique remains a key hurdle in the path to attaining the level of master smith from the American Bladesmith Society. Flawless execution of fluting and wire inlay is essential—each flute must be crisply defined and identical in depth and spacing. Each wire strand must be uniformly twisted and fitted without gaps.
When choosing your material for a fluted, wire-wrapped dagger handle, think beyond mere function. You’re going to put in a lot of time on this project, so use something nice.
In the following paragraphs, we’ll walk through choosing handle material, laying out the spirals precisely, and cutting the wire grooves and flutes.
Handle Material
When choosing your material for a fluted, wire-wrapped dagger handle, think beyond mere function. You’re going to put in a lot of time on this project, so use something nice. G-10 and Micarta® are outstanding materials from a purely functional perspective, but they lack the organic warmth and storytelling power found in natural materials. On the other hand, black Richlite and black or ivory-colored paper Micarta can be appealing and affordable substitutes to African blackwood or natural ivories.
Most hardwoods should be stabilized but the various rosewoods, desert ironwood, African blackwood and other similarly hard and dense woods can be used as they are. For collectors seeking rarities, ancient mammoth and walrus ivories are beautiful and carve cleanly, though they can crack if too much heat is allowed during shaping and can expand, contract or crack with changes in humidity. Mammoth ivory can also be difficult to find in large enough sizes without cracks.
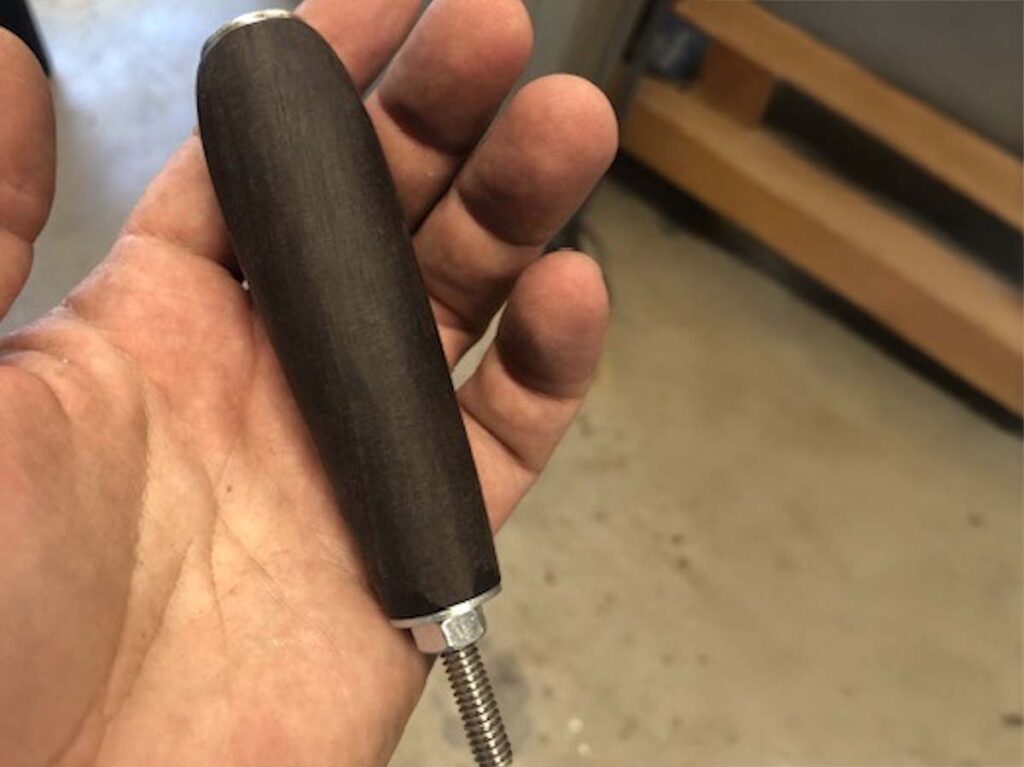
Both layout and shaping are made easier if the drilled handle is held between nuts on a long bolt or piece of threaded rod as a fixture.
Consider in advance what type of wire you’ll be using and choose the handle material accordingly. Silver and gold both look great against dark and light materials but consider matching the warmth of the color of gold with warmer-colored materials, and the cooler color of silver with lighter or cooler-colored materials. Think about chatoyance and orient your flutes to highlight the patterns under various types of light. The wires will be the visually dominant part of your completed handle, so the drama and color variation of certain burls and mammoth tooth will be outshone at best and visually distracting at worst.
Costs vary dramatically. Rare hardwoods and ancient ivories carry premium prices and should be ethically sourced. In contrast, G-10 or Micarta balance performance and cost-effectiveness but lack the luxury you’ll want in a signature piece. It’s a good idea to order materials for practice, especially if you’re planning to work with expensive ones. Antler, bone and paper Micarta all work similarly enough to ivory and the harder woods to be valuable for practice. Time spent in practice will not be wasted.
Layout & Shaping
You have carefully chosen the perfect material that fits your well-thought-out, cohesive vision for what impression or statement you want your knife to make, and now it’s time to lay the groundwork for some precision carving. While not strictly essential, it can be helpful to begin by squaring your blank on all faces—accurate squaring guarantees precise drilling and layout alignment for every step. The ends must be square to the tang slot and perfectly parallel to each other to ensure tight fit-up at the end. It will be harder to do this after you’ve shaped the handle, so do it before you start.
Gold and silver are the colors of choice for dagger handle wire wraps. ABS master smith J.W. Randall opts for the gold on the fluted handle of the warmer-colored mammoth ivory core of his art dagger. Overall length: 16 inches. (SharpByCoop image)
First, drill the tang hole. You can use a drill press but a lathe equipped with a four-jaw chuck to hold the squared blank makes it easier to ensure that the hole is dead-center and straight. Both layout and shaping are made easier if the drilled handle is held between nuts on a long bolt or piece of threaded rod as a fixture. With this in mind, it’s useful to drill a clean quarter-inch hole all the way through and save the broaching for the tang until later.
Shaping the handle profile requires some forethought into how it will mate up to the guard and pommel. The simplest transition is to make the ends of the handle and the fittings it meets round, but there are limitless options here. The handle itself doesn’t have to be round, and an oval cross-section makes it easier to index and orient the finished dagger in your hand. Assuming you’ve planned the design thoroughly before starting, shape your handle and sand it up to an even 200-to-300 grit. You’ll have some slips and scratches during the fluting process that you’ll have to sand out later, and your layout lines will be more durable on a rougher surface; there’s no need at this point to polish your handle to its final finish.
The next step is cutting the grooves for your wire, and the most important part of this process is accurate layout. There are a lot of ways to do this, but after trying most of them there is only one that has proven adequate. Luckily, it’s the easiest and the fastest method as well.
The most important part of cutting the grooves for your wire is accurate layout. Though it need not be fancy, a jig of some sort is essential here.
A jig of some sort is essential here, but it doesn’t have to be fancy. Fundamentally, all that is necessary is some means of indexing so that longitudinal lines are evenly spaced, some sort of rest or tool holder allowing the lines to be drawn perfectly straight down the length of your handle, and the ability to rotate your handle to draw evenly spaced lines around the circumference. The number of longitudinal lines is the same as your planned wire count. The number and spacing of circumferential lines around the handle determine your twist rate, and the number of resulting spaces should divide evenly into the wire count.
Once these lines are drawn, connect the corners of your resulting rectangles. Tracing each intersection gives you repeatable spiral guidelines for groove cutting and wire placement. Using a pencil is a good idea, but you can use ink if you’ve verified that it won’t permanently discolor your handle. This is the time for experimentation—you can draw new lines to test new twist rates, but once you start cutting, you’re committed.
Grooves & Flutes
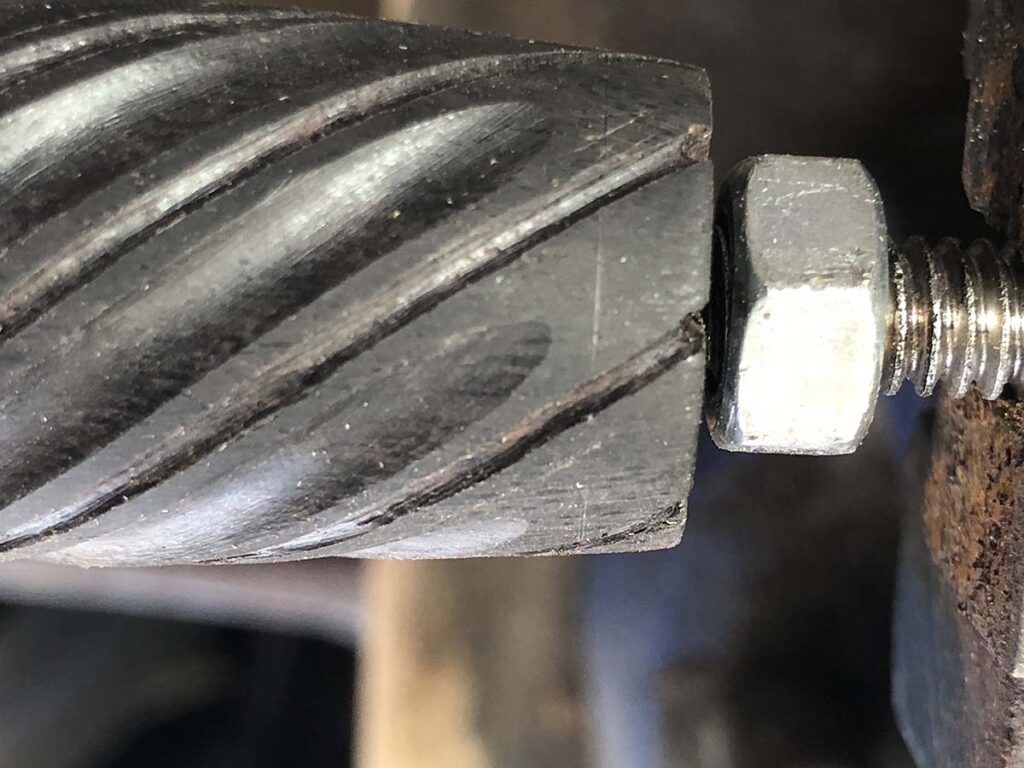
When you’re satisfied with the layout you can begin cutting the wire grooves. With your handle anchored by tightened nuts on a piece of threaded rod, clamp the rod in a vise and start by precisely scoring each guideline with a fine blade in a jeweler’s saw. If you leave the handle slightly loose, you can turn it with one hand while cutting with the other. A blade size of 1/0 is good for this step. Deeper cuts will make the next step easier, so go to the full depth of the blade or slightly beyond. Alternatively, use the corner of a fine triangle file to mark and deepen the lines precisely. In either case, if you have an OptiVisor or, even better, a microscope, this is the time to use it.
With your handle anchored by tightened nuts on a piece of threaded rod, clamp the rod in a vise and start by precisely scoring each guideline with a fine blade in a jeweler’s saw.
Once the line is scored, shape each scored wire groove line with an Olson #4 36 TPI spiral scroll saw blade in a jeweler’s saw. It doesn’t have to be this brand, but since I like my inlaid wire to be made up of two twisted 24g wires, this specific saw blade’s .041-inch diameter is a perfect match for the .040-inch diameter of the combined wire. The resulting half-round groove ensures a very snug fit. Cut carefully until the depth of your grooves reach about half the combined diameter of your twisted wire, in this case approximately 0.020 inch. A single untwisted scrap of your wire can serve as an impromptu depth gauge.
Once all the wire grooves are clean and complete, it’s time to carve the flutes themselves. Lay out flute edges with dividers. Adjust the dividers to the width you need, place one leg in the wire groove, and scribe marks with the other leg to keep the spacing even. Bulk material can be removed with a coarse round file before refining with finer round files to uniform depth and width. It simplifies matters greatly if you plan your groove size to correspond to the diameter of a standard-sized file, though this is not strictly necessary. Ensure all flutes stop at an identical distance from each end of the handle. Each groove ending should be shaped so that every ending is identical—this is the trickiest part.
When filing and finishing flutes, keep the ends identical in length and shape. Any variation will stand out.
If achieving consistent flute endings is the most difficult part, sanding and finishing the grooves is the most tedious. You can start with 220- or 320-grit paper wrapped around a file or rod of the right size. Progress through all the grits until you reach the desired level of finish, ensuring that you remove all scratches from the previous grit before moving to finer paper. Eight-hundred grit leaves a nice matte finish. If you plan to buff your handle to a high gloss, keep sanding up to 1500 or 2000. You can buff out 800-grit scratches, but not without compromising the crispness of the edges of your channels. When the grooves are done, sand the flats between them as well, using a hard backing block to keep the transition between lands and grooves nice and crisp. A lathe makes this last step very fast, but it can be done by hand as well.
With these steps complete, now is the time to broach the handle to fit the tang of your knife.
For Ages, The Hamon Has Fascinated Makers And Knife Users Alike. Finicky, Beautiful, And Historic, The Hamon Continues To Wow.
It stretches much if not most of the blade’s length, and when it appears it’s accompanied by an air of mystery, of the exotic. Its contours are created by the knifemaker, and it has always served as a focal point for function and aesthetics. But exactly what is it?
For ages, the hamon has fascinated craftsmen and cutlery users alike.
“Technically, the hamon is the differentiation line between the hardened martensitic edge and the ‘not hardened’ body of the blade,” explained ABS master smith Brion Tomberlin. “The term temper line has been around for years, and, in my opinion, is not correct. Temper refers to drawing back the hardness of the hard martensite after quenching to reduce brittleness and impart toughness. So, a hamon is not a line where temper starts and stops.”
Elaborated knifemaker Joel Mercier, “Tempering refers to the action of heating a quenched steel to a given temperature to remove the brittleness induced by the newly formed martensite, the hard steel molecules created when a steel is quenched. Untempered martensite is very hard but also brittle as glass. It is possible to temper various zones of a blade at different temperatures.”
The hamon is an indicator of the hardening difference between the edge and the softer areas of a blade. These areas are not developed during the making of the steel itself, and a hamon may be formed with stock removal or forged steel.
The hamon comes to life in the quenching process. By achieving different cooling rates, makers form various quantities of martensite, hence a varied hardening of the steel. The faster the steel cools, the higher the percentage of martensite.
The appearance of the hamon denotes a harder edge and a tougher spine in the blade, allowing for flexibility while preserving sharpness and cutting ability. “The hamon,” related knifemaker Johnny Raymer, “is the visual representation of the transition zone between the hardness levels in a differentially heat treated blade. A temper line is often visible within a hamon and is the boundary in which the most drastic change in hardness occurs.”
Along with the functional aspect of the hamon, there is an artful attractiveness. Raymer explains that the hamon extends beyond the temper line itself to the further reaches of the blade during the blending of hardness levels. Most often this is seen toward the edge, yielding a smoky appearance and becoming the hamon’s most artistic component.
How Do You Make A Hamon
Developing a hamon depends on controlling the cooling of the steel as necessary. The rate of cooling is typically determined with the use of clay or another suitable material.
“First, you need to consider your steel selection,” Tomberlin advised. “You need a steel that is low alloy and has a low manganese content. Manganese promotes deep hardening, and the more manganese you have in the steel, the less hamon formation will occur. The most common modern steels that fill the bill are 1095, W1, W2, and 1075, and before the steel is quenched a coating of clay of some sort is applied to the surface that you intend to be less hard. The clay slows down the cooling process in that area.”
Order: 210218_Joel_Mercier_001
Maker: Joel Mercier
Email: [email protected]
Phone: +1 08196905635
Knife Info: Maple sap sprout themed fighter
W2 steel blade, wrought guard and buttcap, copper fittings and curly maple.
Once a blade has been forged or stock removed, Tomberlin takes it to a 120-grit finish that will allow the clay to stick. He thoroughly cleans the blade to remove any oils and then applies the clay. He prefers satanite refractory mortar and learned to use it from now-retired ABS master smith Don Fogg years ago. However, fireplace mortar or certain types of cement, Rutland for example, will also work.
When a light coating of clay is applied, the maker can manipulate the pattern of the hamon. For quenching, Tomberlin uses Park’s 50 oil. Water is an alternative but it takes practice and may produce cracks. “It isn’t for the faint of heart,” he commented.
After quenching, a quick grind at 120 grit will reveal the hamon. Telltale signs that the process has gone awry include the absence of activity—a consequence of the blade being too hot at the moment of quenching. If the hamon runs off the edge of the blade or falls below the pattern of the clay, it indicates that the clay coating was too thick or the blade was not hot enough to perfect the process.
A fine example of a Tomberlin hamon is seen in his chef’s knife with a seven-inch W-2 blade, exhibition thuya wood burl handle, G-10 spacers, and silicon bronze accent. The hamon is subtle yet striking and reaches toward the blade edge in a stunning display.
Raymer adds that the temper line is the boundary of differential hardening, but also notes that it may be more visible in some cases than others.
“It is almost always unbroken, but as far as being clear and well defined, that is not always the case,” he observed. “Depending on the etching or polishing process you can get multiple results for the visual aspect of the hamon, as well as multiple temper lines depending on the hardened areas.
“Etching for a stark contrast with dark smoked or bled-out areas in the ashi* region of the hamon is very popular. But the hamon can also be given a frosted appearance with etching or simply polishing to give it a subtle ebb and flow that is only seen as the hamon catches light.
“As far as a well-shaped pattern, the hamon is very controllable by the artist crafting the blade,” Johnny maintained. “It could be as systematic or symmetrical or as organic and free as the craftsman desires. The most important objective, as with many aspects of knifemaking, is symmetry from one side of the blade to the next.”
Raymer reveals his skills with the creative hamon achieved on a 5.25-inch blade fashioned from 1095 steel accompanied by a magnificent 11-layer handle consisting of brass, G-10 spacers, Tasmanian blackwood and black ash burl. The overall length is 10 inches, and the knife is accompanied by a sheath in seven or eight-ounce leather with a multi-directional belt attachment.
Those who work in stock removal and wishing to try the hamon technique can take heart. “Forged blades and stock removal knives have the same potential for hamon activity in my opinion,” Johnny stated. “All knives become stock removal at some point. The heat treatment is the same for me in a stock removal knife as well as a forged knife.”
Mercier calls the maker’s manipulation of the hamon the most interesting part of the process. “I have yet to ‘crack the hamon code,’” he advised. “There are many variables at play here, all of which will dictate where and how the hamon will show. The geometry of the blade, the steel used, the type and thickness of the clay, the temperature of the steel, the type and temperature of the quenchant, a vertical or horizontal quench, and more.
“I don’t believe there are better shapes for a hamon. As for the location, I would say it depends on the type of blade and how crucial the hamon is. For example, a hamon is more of a question of aesthetics on a kitchen knife than it is on a weapon. A hamon done properly will show three zones very clearly—high, medium and low martensite areas—and it won’t get too close to the edge of the blade.”
Mercier showcases his hamon technique with a fighter sporting a W2 steel blade, wrought iron guard and buttcap, copper fittings, and curly maple handle. The hamon is well defined and distinctive, clearly marking the effects of the differential quenching process.
“A hamon has nothing to do with forging steel,” Joel agreed. “It all happens during quenching, no matter whether the blade is forged or done by stock removal. If the wavy line of the hamon drops down below or into the blade edge, it means that area will be softer and will compromise the edge performance. Many things can be responsible for this, such as a quenching temperature that is too low, clay that is too thick or too low on the blade, or a quenchant that is too slow. I believe the most common mistake new makers do is using too much clay.”
The Visual Beauty Of The Hamon
In the end, the development of the hamon primarily adds another dimension to the visual presentation of the knife. It certainly denotes a maker’s skill and attention to the need for a tough spine and an edge that maintains its sharpness without being too brittle.
The 1084 carbon steel blade of Adam Mille’s fighter comes complete with hamon. The handle is quilted big leaf maple burl. Overall length: 11.5 inches. (SharpByCoop image)
“Hamons themselves are just an aspect of art,” Raymer reasoned. “The process of differential hardening is beneficial in creating a blade that can take more impact like those seen in fighting knives or choppers, but still performs cutting tasks proficiently. This hardening method allows the knife to spring and/or bend without shattering and without reducing edge performance.”
The hamon, therefore, is representative of the highest performance in blade steel, a visual cue to the user to have confidence in the knife’s ability to undertake the task at hand.
*Ashi refers to the area of a hamon’s lines or shapes that descend toward the edge, and are created by thin strips of clay applied during the coating process.
A knifemaker and other knife pros take different approaches to the Ukraine-Russia conflict.
The ravages of war often have global impact—even when the fighting is half a world away and the devastation is seen through pictures and words rather than bullets and bombs. War, anywhere, tends to touch the lives and livelihoods of many.
The knife industry, both factory and custom, is no different. The war in Ukraine has brought devastation to the country, and its end was nowhere in sight as BLADE® was going to press. Ukrainian resistance is robust, probably in sharp contrast to the results anticipated when Russian President Vladimir Putin decided to invade his sovereign neighbor. While the resilient Ukrainians defend against such aggression, where and how does the knife industry feel the long reach of war?
Oleksii Nesterenko is a custom knifemaker. He is also Ukrainian.
“On February 24,” he commented, “Russia, with the support of Belarus, launched an open military attack on Ukraine. My city, Kyiv, was one of the main goals. After systematic rocket attacks on the city, my wife and children were forced to evacuate to Germany.”
At press time, Ukrainian knifemaker Oleksii Nesterenko had signed a contract as a territorial defense volunteer for Ukraine and had stopped making knives.
The war came home to Oleksii, and his life may very likely never be the same. He has responded to the call to defend his country. “I signed a contract for a territorial defense volunteer and stopped making knives,” he said. “As far as I know, the work of some knifemakers who work in the cities where there are no active hostilities has changed too. Many have abandoned the making of collectible knives and make simple, utilitarian knives and other devices for the military.”
Purveyor Dave Stark of Steel Addiction Custom Knives sells Oleksii’s work, and despite the fact there is a temporary suspension of custom pieces from the Ukrainian maker, Dave praises the quality of his knives.
“Oleksii’s fit and finish and his attention to detail are what set him apart from his peers,” Stark noted. “His choice of materials and the manner in which they are finished really make his work stand out. His hand-rubbed satin finish on his blades is some of the best I’ve seen. The knives feel great in the hand and mechanically are spot on. I would say his style is ‘dress tactical.’ He uses Damasteel’s pattern-welded steel, damascus, mother-of-pearl, mokuti, zircuti and zirconium.”
Perhaps current events will make Nesterenko’s knives even more highly sought after in the future. Meanwhile, he is consumed with the dirty business at hand.
“Now in the Kyiv region where I live, Russian troops are defeated and active hostilities have ceased,” Oleksii reported. “But I am still on duty at checkpoints and volunteer. We help the civilian population in the villages near the front. I think that in a few weeks I will have time to partially return to knifemaking.” While he is hopeful and actively involved in the defense of his country, Nesterenko has kept an eye on the conditions of the knife industry in Ukraine and anticipates some adaptations.
“Currently, there are no problems with the supply of materials for the production and shipment of knives abroad,” he advised, “so I look forward to returning to work. I am sure that a knifemaker can make a quality knife only if he uses it for its intended purpose. That’s why I used to make only EDC knives. Thanks to the war, I understand what requirements a tactical folding knife must meet. I have already drawn several designs and am waiting for the opportunity to get started.”
Changes in demand are not noticeable at this time, according to Oleksii, and orders are in the queue for delivery around the world into 2023. Still, he warned, “I think that the consequences of the war in Ukraine will affect the economies of many countries. And over time, that will affect collectors.”
Little Change
In much of the domestic knife industry, little in the way of change has occurred due to the war thus far. Custom knife purveyor Les Robertson said that by mid-April FedEx service to Ukraine had been suspended. Therefore, the volume of knives conventionally being sent to Ukraine has probably been curtailed, at least somewhat. Neighboring European Union countries are still moving mail into Ukraine.
Les Robertson
“No one is sending knives directly to anyone in Ukraine,” Les noted. He went on to comment that factory sales to “armchair warriors” may in fact tick upward as the war persists.
Purveyor Neil Ostroff of True North Knives agrees that the current custom knife market is maintaining its status quo. “In my opinion, as a dealer,” he commented, “we have no change from the customers concerning knives from either Ukraine—now on hold—or Russia. Several Ukrainian knifemakers have set up in Poland, and they do not want to be named.”
Still, Ostroff is somewhat insulated businesswise from the turmoil in Eastern Europe. “Going forward, I see no issues coming through, as there have been none so far,” he observed. “And most if not all of my clientele prefer to buy only USA-made items, which is what I prefer to supply as well.”
From the factory perspective, Joe Bradley, director of sales and marketing for KA-BAR, has noticed virtually no changes in activity. “The war in Ukraine hasn’t had any impact on us at all,” he remarked. “As far as production, and even consumption, the impact has been zero.”
Bradley added that supply and demand are in line. “We have not seen an increase. Currently, we are seeing the market being more impacted by inflation than anything else. I think most of the people, at least Westerners, in the Ukraine already had their supplies and as a result didn’t have a need to buy anything new. Production and logistics have been a problem since the start of COVID,” he observed, “and are just now starting to get back on track and return to a semblance of normalcy.”
KA-BAR has experienced no changes in product offerings or knife styles as a result of the war in Ukraine. However, Bradley offers one interesting point of view. “If anything, this war has shown the merits of what some might consider antiquated weaponry like the AK-47,” he pointed out. The AK-47 is perhaps the world’s most famous assault rifle, arising in the Soviet Union during the Cold War, experiencing authentic production models and knockoffs made in the millions, and arming military organizations around the world for well over half a century.
“Free The Oppressed”
Spartan Blades is located in Fayetteville, North Carolina, near the gates of Fort Bragg, home of the U.S. Army’s XVIII Airborne Corps and Special Operations Command. Spartan owners Curtis Iovito and Mark Carey, both Special Forces veterans, have seen a groundswell of support for Ukraine. Knife sales bear the unmistakable mark of the conflict.
According to Curtis Iovito of Spartan Blades, more military professionals and contractors buy the company’s Gold Line knives. An example is the Spartan-Harsey Dagger in a 6-inch blade of CPM S35VN stainless steel with a hollow grind. MSRP starts at $390. Bill Harsey is the designer.
“Most of the sales are to people here in the U.S. with notes that they are purchasing for folks in the Ukraine,” explained Curtis in acknowledging the market uptick. “Several orders have had short tags like ‘Free the Oppressed in the Ukraine’ or ‘Support the War against Russian Aggression.’ Because we are at Fort Bragg, we have several Special Mission units from friendly foreign countries drop by the shop to pick up knives for their use. While that isn’t uncommon, it’s happening more than usual. We’ve noticed during our discussions with them that things have a more serious tone.”
Others buying more knives from Spartan Blades include people from all walks of life and military involvement. Curtis said, “Our Gold Line knives are going to more of the military professionals and contractors, and our Silver- and Bronze-grade knives are selling to folks across the spectrum. Many of the knives bought are by civilians that later donate the knives to NGOs [non-governmental organizations] that ship in bulk to Ukraine.”
As far as production, it’s business as usual at Spartan Blades, a longtime producer of knives that go to war. There are a few new items on the horizon, and the owners expect business to be brisk in the days ahead.
Oleksii employs M390 stainless steel for the 3.75-inch blade and a handle of black and purple Fat carbon fiber for his Morph flipper folder. The bolster is Timascus™ and the pivot rings and back spacer are zirconium. Closed length: 8 5/8 inches. Retail price: $2,800. (Steel Addiction Custom Knives image)
“Honestly, the war in Ukraine hasn’t affected how we do things here at Spartan Blades,” Iovito asserted. “We’ve made knives through the last two decades for troops in both Afghanistan and Iraq, so things are kind of par for the course. “We have several new knives coming out around the end of this year,” he continued. “We had planned on releasing these later but have sped up because the price point and style match some of the requirements we have seen lately. They are being designed by William W. Harsey, Jr.—a fighter, a Nessmuk and a kukri blade. They will be in 1095 Cro-Van blade steel and made in conjunction with KA-BAR Knives. Pricing has not been determined yet, but we are shooting for a sub-$200 retail price. The first one produced will be a fighter later this year.”
Surveying the knife landscape today begs a few questions as Iovito and Carey plan for the future, uncertain as it may be.
“We have seen a slight increase in steel prices, but we haven’t raised our prices in over a decade,” Curtis stated. “We assume we will continue to see price increases soon in commercial, off-the–shelf parts but are keeping our fingers crossed. We believe we will see an increase in knife demand as it appears the conflict in Ukraine [will not end as soon as many thought it would].”
The war has had other effects, including dampening attendance at European trade shows.
“We were very surprised that most of the U.S. knife companies did not attend the IWA show* in Nuremberg, Germany, this year,” Curtis noted. “We even had people thanking us for attending, as you could tell they are counting on U.S. support even if it is just showing up to support them in spirit. There was definitely a new and urgent concern about military spending. The German government approached two companies that I know of and bought their whole inventory—cutting checks the same day!”
Curtis Iovito indicated Spartan’s affordable Silver- and Bronze-grade knives are selling well to people across the spectrum. One of the latest examples of a Silver-grade knife is the Alala in a 3.75-inch blade of Cro-Van carbon steel with a saber grind. MSRP: $159.
In wartime, uncertainty often reigns. However, awareness, preparation, and the desire to return to the shop are evidence that the ongoing conflict in Ukraine will influence the future of the entire knife industry for the foreseeable future.
*Held each spring, the IWA OutdoorClassics (iwa.info) is the European equivalent of the Shooting, Hunting, Outdoor, Trade (SHOT) Show stateside, and is a place where many new factory knives are debuted.