
Knifemaking

Knifemaking is the building of a knife, which includes the blade, handle and other accouterments. Blades are made by either removing metal from a steel blank via a grinder – known as stock removal – and the forging to shape of hot steel into a blade in the process known as bladesmithing. Other parts, including bolsters, guards, pommels, etc., are needed to complete the finished knife.

Featured Knives – – Knife Collecting – – Tactical Knives – – Survival Knives

Shop Dump: Salem Straub & Andreas Kalani

A Pair Of Gifted Knifemakers Show Off The Tools They Use To Turn Raw Steel Into Razor-Sharp Works Of Art.

Simply put, Salem Straub makes art and culinary knives of the highest order. He began forging in 2003 when a previous project introduced him to blacksmithing and, like so many knifemakers, once the bug bit there was no turning back. 

Twenty years later Salem is at the top of his game and all his work is sole authorship.  What’s more, he delighted many knife lovers by competing and winning in the second season of the History Channel’s popular reality show, Forged in Fire.

Award-winning bladesmith Salem Straub makes fine art folders, fixed blades and swords, and added culinary knives out of his passion for cooking.

Salem operates his custom cutlery business under the name Promethean Knives after a passage from noted British writer Zia Haider Rahman: “Is that not the Promethean fable, that the fire stolen from the gods will light men their way even while it burns their hands?” 

Salem built his reputation for making fine art folders and fixed blades, including swords, but he added culinary knives out of his passion for cooking, which in turn led to his winning the Best Integral Award at the 2019 Damasteel Chef Invitational. His forging specialty is extremely fine patterned damascus.

Inside Salem Straub’s Shop

Salem leads off his list of top tools with his bandsaw. 

“The Marvel Model 81 Hydraulic Vertical Bandsaw is the ideal saw for a dedicated pattern welder,” he begins. “It will easily handle all the normal operations that either a horizontal or vertical bandsaw can, but also affords the additional capability of ripping lengthwise with power feed, miter cuts, compound miter cuts and rips. Everything from the table vise to the saw feed and drive wheel is hydraulically powered, and a flood coolant system is integral to the design.”

Marvel vertical bandsaw
Straub’s Marvel Model 81 Hydraulic Vertical Bandsaw easily handles anything a horizontal or vertical bandsaw can, and affords the additional capability of ripping lengthwise with power feed, miter cuts, compound miter cuts and rips.

His lathe of choice is his Pratt & Whitney Model C Toolroom model. 

“It’s a bit larger than might be strictly necessary for knifemaking,” Salem notes, “but affords the ability to create parts for repair of, or modification to, other machines. It’s also very smooth, accurate and convenient for making and threading small knife parts to close tolerances. The P&W ‘C’ lathes are among the truly legendary lathes from the heyday of American machine tool manufacturing.”

His Abrasive Machine Tool Model 3B Surface Grinder features an 8×24-inch capacity automatic table with a magnetic chuck, a 2×72-inch-belt modification by Salem, and a 3-horsepower motor. 

“The table feeds are mechanically powered and relatively quiet and very reliable in operation,” he explains. “This machine is MVP in the shop, especially on many damascus production days. The belt modification allows for much faster removal of stock, making billet and tiling work much faster and more precise.

“Another piece of equipment I can’t do without is my Beaudry Champion #9 300-pound power hammer. I bought it from the late Larry Langdon, who gave me quite a deal as it needed lots of work to restore, and some difficult parts had to be made. After I took seven months to overhaul and install it, this hammer has become the cornerstone of my operations in making composite damascus billets and blades. The large flat die surfaces and excellent control make it ideal for forge welding, and it has plenty of power to forge large cross sections efficiently.”

Straub Knife
Straub’s chef’s knife sports a 9-inch blade of a stunning herringbone/mosaic composite damascus and a Japanese-style wa handle. (knife image by Abe Shaw of Eating Tools, Inc.)

Next up Straub extols the virtues of his rolling mill. 

“My 10-horsepower rolling mill with 6×6-inch rollers is probably a tertiary forging machine for most hot shops to have—after a hammer and press—but it’s very handy indeed for cleanly drawing billets to bar stock, welding san-mai, and sizing pattern elements before tiling or four-way welds and the like. It was built to spec by a fab shop for my friend Mike Blue, whom I bought it from. I consider it a very good working design, and for production damascus it’s a huge help.”

Last but not least, Salem mentions his 1960s-era Deckel GK21 Pantograph. 

“This is a machine quite unlike the others. Its use is quiet, contemplative, technical, and its mode of use is more artistic than one of brute force. The GK21 is a machine that pretty much defines its class—very smooth to operate and fascinating in its potential. I’ve been learning to use it for a few years and so far I’ve been mostly doing inlays for handle work, but I’m branching out into engraving designs onto handles with it, too. I look forward to decades of finding out new cool ways to use it.”

Andreas Kalani

Andreas Kalani
Andreas Kalani specializes in mainstream and culinary fixed blades and also folders.

Andreas Kalani spent 30 years in the corporate world, but once he discovered knifemaking he knew he’d found his calling. Now, nearly 10 years after leaving his former occupation, the Iranian-American is a full-fledged U.S. citizen grinding steel and making the knives of his dreams.

Kalani is an American Bladesmith Society apprentice smith currently working on his journeyman smith designation on the way to his ultimate goal of master smith. The versatile maker builds fixed blades—both mainstream and culinary—and folders. 

Among those pieces are some top-shelf art knives. Meanwhile, he also makes a point of offering affordable fare for his customers. He markets his cutlery under the AK Custom Knives label and also instructs budding makers with a separate division called AK University. Needless to say, Andreas keeps himself busy with a full plate of cutlery interests.

Inside Andreas Kalani’s Shop

He leads off his knifemaking go-to equipment with a lightweight wonder. 

“One of the most valuable tools in my shop is my Dremel 4000 Rotary Tool,” he reveals. “I use Dremel for engraving, polishing, sanding, cutting and much more. Dremel was my shop’s first official tool before I became a knifemaker. I used to make small and miniature swords and knives for my wire sculpture, and I could grind and shape the blades and handles with my Dremel tool. You can use various tips and bits for multiple uses such as carbide tips for steel and alloys or diamond tips for clay, woods and other materials. The possibilities are endless and you can be super creative with this tool; you can either mount it on the table, make a stand for it, or get an extra pen cable to do much more.”

Next on his list is his Evenheat Kiln. 

Everheat Kiln
Andreas not only uses his Evenheat Kiln for heat treating his blades but also for lost-wax processing.

“It is generally used for the blade heat treatment to have better steel structure and accurate Rockwell hardness,” he states. “However, sometimes I use it for lost-wax processing as well. Before I got the kiln I had to send out all of my blades for professional heat treatment and it was time-consuming and costly, especially when I wanted to work on one custom project. Therefore, I had to get my own. With this kiln in the shop I can now heat treat various steels from high carbon to stainless, and know I have a good grain structure and a suitable heat treatment. An Evenheat kiln is one of the must-have tools for any knifemaker in the shop.”

According to Andreas, finishing tools play multiple roles in his operation. 

“They are the most used on every project in my shop,” he observes. “From the finishing stones to G-10 sanding blocks, I use them for various sanding and polishing. Gesswein® EDM Blue Stones are made from premium aluminum oxide. EDM Blue is a more complex formulation of EDM stones specially designed to handle the high-speed back-and-forth motion of a profiler or ultrasonic machines, and are superior for polishing the most challenging scales. The stones are designed for use on hard surfaces at high speed and hold their shape very well.”

For the sanding blocks, Andreas created different G-10 paddles for such various uses as flat, concave or convex sanding. 

“I add additional leather or plastic backing to each paddle to have more give on a harder surface when sanding,” he notes. “By combining these tools, I can achieve a beautiful finish on all of my blades.”

The Milwaukee Portable Bandsaw 6232-20 is another must-have machine in his shop. 

“It’s precise when you want precision cuts or to create an intricate geometry—for example, when you want to make a guard for a knife, you can outline your guard on whatever [steel/alloy] you use and then quickly cut it to the shape. Afterward, you can go straight to the grinder to shape the final form,” he states. “You can purchase different types and styles of the blade for this machine to have a better cut and precision for other materials. It’s portable and I purchased a stand for it separately, which is made specifically for this machine by SWAG Off Road.”

Another invaluable tool in Kalani’s shop is the 25-gallon Sandblaster cabinet, which helps remove material, clean, and applies the final finish to blades. 

Kalani knife
Kalani’s14.5-inch Lagertha Middle-East chef’s knife features a blade of 1095 carbon steel with an electro-pattern mirror polish. The Natural Galaxy handle is a combo of Middle Eastern turquoise and flowers. (SharpByCoop knife image)

“You can achieve different results on other materials using various media types from the walnut shell, glass bead, aluminum oxide, steel bead and so on,” Andreas explains. “There’s a learning curve and trial and error at the beginning. For example, if you want to sandblast titanium and be able to anodize it, you cannot blast it with aluminum oxide or steel media. The pressure will infuse the titanium and prevent it from anodizing. Based on my trial and error I found out that glass beads not only give a good matte surface to titanium but also keep it clean—­­and I am able to anodize it.”

He calls the 2×72 TW90 Grinder “the mother of all the machines in the shop.” It has a multi-position setup and various speeds, giving him limitless capability for different styles and types of grinding. 

“I own at least five other attachments for this machine, including an 8-inch wheel, a 4-inch wheel, a modular switchable small wheel, a surface grinding attachment, plus flat and slack-belt platen,” Andreas observes. “One best modification I applied to it was adding an earth magnet on my work rest to use for different sizes and styles of work. It’s helpful for a different kind of grinding. For example, if you want to grind a sword, you need a more extensive work rest to run your blade over it, and this is super helpful.”

Read More

6 Things BLADE Looks For In A Knife Photo

Taking great photographs of knives is no easy task—unless you’re a professional, in which case you can stop reading. Essentially, you’re taking a highly detailed shot of something that fills the entire frame, not something small like a bee in the center of a background of blurred petals, but a long, thin item that needs to be in focus from point to butt. But there’s so much more. Every line must be fully revealed and a depth established to convey thickness or thinness. I know close to zero about the mechanics of the art. There are plenty of videos and online courses out there that’ll give you the science of the “study of light.” They can speak to you of aperture, ISO and shutter speed in infinite combinations. All I know is a good photo when I see one, and how I have tried to improve my own photography. Here are the 6 things BLADE looks for in a knife photo. It’ll be up to you to make it happen. Why? Because there are “5 Ways To Get Your Knives Featured In BLADE” and you want to be ready.


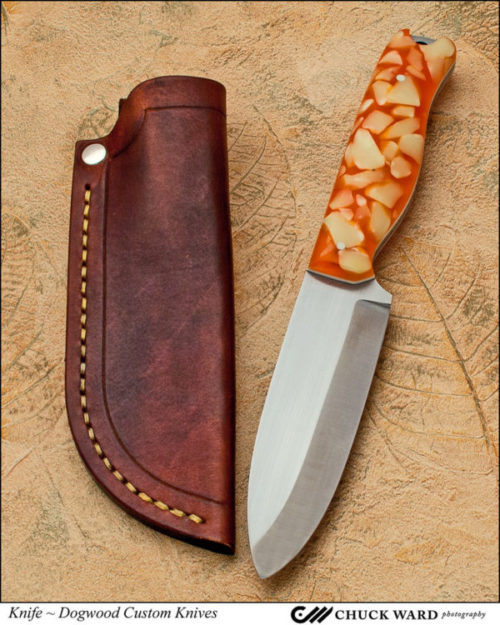
Dan Eastland of Dogwood Custom Knives hired Chuck Ward to take photos of his Hawkins outdoorsman's knife.
Dan Eastland of Dogwood Custom Knives used professional photographer Chuck Ward to take this exquisite image of his Hawkins knife. Chuck will be the official photographer at the 2017 BLADE Show. Contact www.dogwoodcustomknives.com for more about this outdoorsman’s knife.

Hire A Professional

Knife manufacturers, like good real estate agents, know that great photos will close a sale. They understand that the investment in a professional photographer pays off. When BLADE asks for a photo of their latest release, for example, some even allow high-resolution downloads right from the consumer website without having to go through a media relations person. That can be a time-saver at deadline. I’ve even experienced a large company resubmitting photos with even better ones. There’s nothing that says a one-man-show can’t learn from that level of perfectionism. It’s the same effort you put into crafting your knives.

Hiring a professional photographer will cost you some money, and it’s worth every penny. But like all professionals, some are more versed in what we’re trying to accomplish than others. A portraitist, wedding photographer or photojournalist may or may not be able to give you the results you’re looking for. You want to make sure you chose someone who can show you a portfolio of knives, guns, tools or similar items that looks…well…perfect.

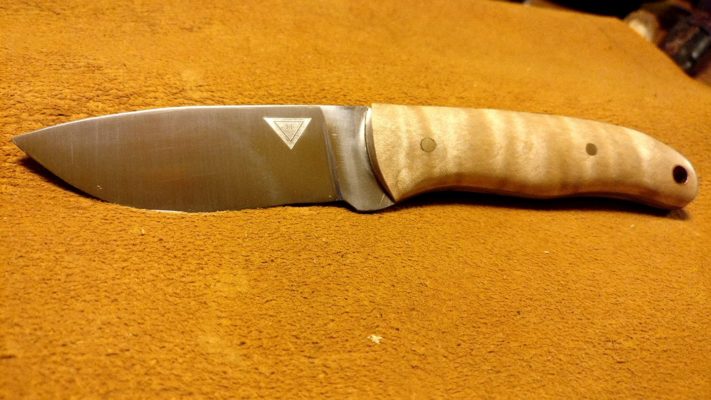
This image does not do justice to Tim Tracey's knife.
The handle on Tim Tracey’s everyday performer doesn’t stand out as much as it could against the similarly colored background. The caramel color ends up saturating everything in the photo. Also, although the focus on the blade is crisp, the topline on the handle is a touch soft.

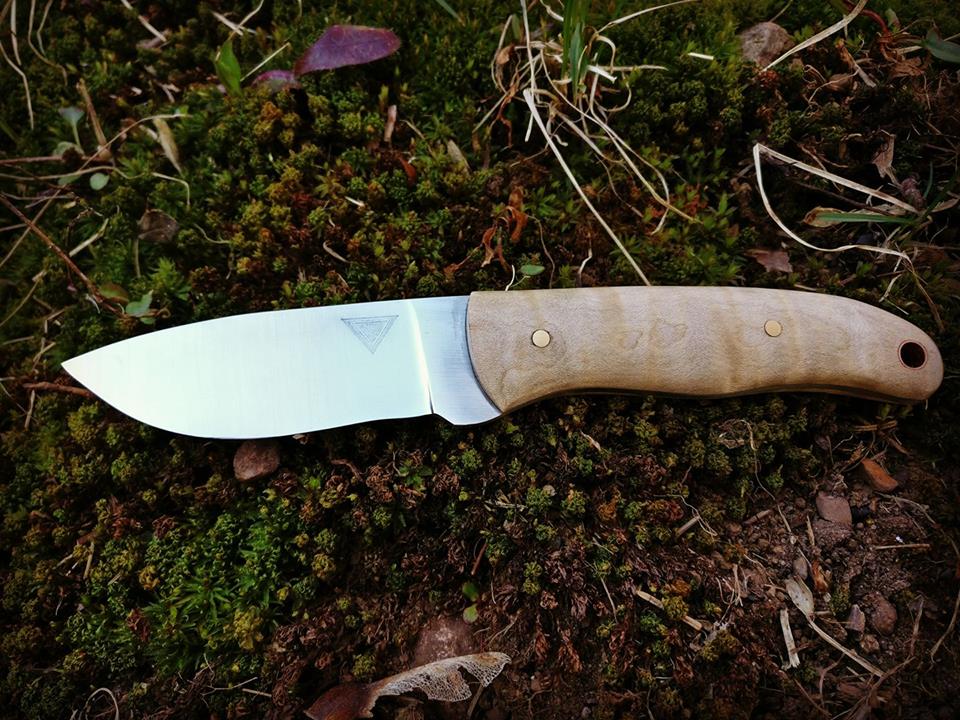
Tim Tracey's everyday performer looked better when he photographed it outside in shade with a contrasting background.
Tim Tracey took his knife outside and got not only a good image of the blade and handle, but good contrast and a better depiction of the piece’s fullness. The recurved blade is made of 1095 steel and sports exhibition grade curly maple scales. Makers list price: $220. Contact [email protected], Timtraceyknives.com on Facebook or @TimmTracey on Instagram.

You will want two kinds of photos. Photos for your website and social media will create an emotion, an atmosphere. Instagram is full of examples of survival, bushcrafting and hunting knives being photographed outdoors and tactical knives being shot in gritty workshops or light-painted in darkness. Makers create everyday carry still lifes with folders, wallets and watches. Typical? Sure, but each one tells a story that has been told a thousand times before in a slightly different way. Nobody reads just one novel, and nobody looks at just one knife photo. They are all beautiful in their own way. The other kind of photos you will need are those of just the knife itself on a simple background, what is often referred to as glamour or beauty shot.

The question you have to ask yourself is: Are you willing to put as much study and effort into your photography as you are your knifemaking? Answer honestly. There’s no shame in shelling out cash for stunning work. Fill your website with those choice images and have them on hand for BLADE, and then you can practice your own photography skills for social media. Even on social media, though, take the time to post only your best images. Plenty of knife-related Facebook Groups out there are looking for banner photography and have to reject knifes they’d like to showcase because the image is, say, out of focus.

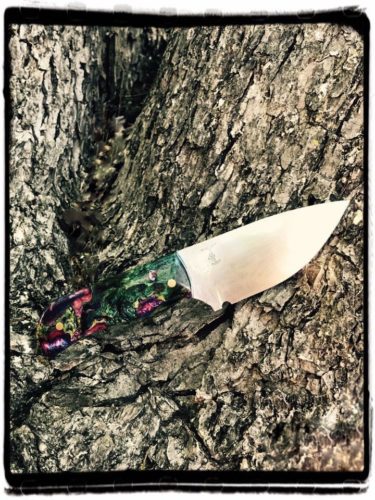
Bobby Toerck made this knife for his daughter on the occasion of her first deer.
Although this image clearly shows the blade on this skinner by Bobby Toerck, the multicolored handle gets lost in the textured bark.

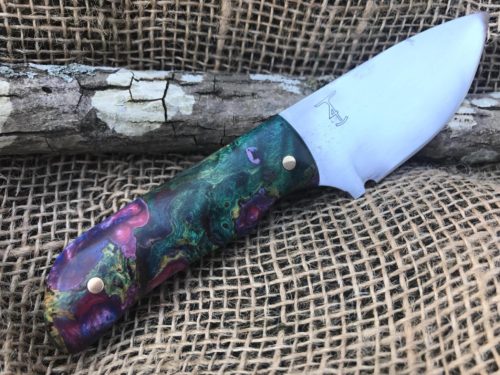
Bobby Toerck took many images of this knife before he nailed it. His effort paid off.
In this image, the handle on Bobby Toerck’s drop-point skinner is nicely contrasted against the still-textured, but now single-colored burlap. And the 80CrV2 blade still looks terrific. The handle is triple-dyed box elder burl by Terry Dunn. Maker’s list price: $175 with Kydex sheath. Contact T4 Custom Knives on Facebook or call 903-812-1173.

Do-It-Yourself

Let’s say you can’t justify the expenditure at this point in your knifemaking journey. Or, more likely, by the very nature of your interest in crafting, you’re determined to take quality photos of your knives yourself. You think, How hard can it be? Very. It can be very challenging to produce the kind of photos needed for a glossy magazine.

“Real” Camera Vs. Camera Phone

You can take the cost of a few sessions with a photographer and buy yourself a decent camera, for starters. Keep in mind, however, that lenses that come with a camera are usually not very good. Be prepared to buy a decent mid-range lens at a minimum.

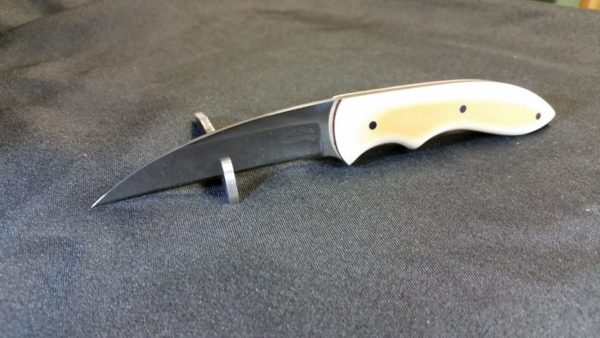
Will Thompson made a beautiful knife, but his photograph did not do it justice.
In this vertical image of a horizontal knife, the butt is cut off. There is also glare on the handle and the blade looks dull. Will Thompson decided to get some help for the reshoot.

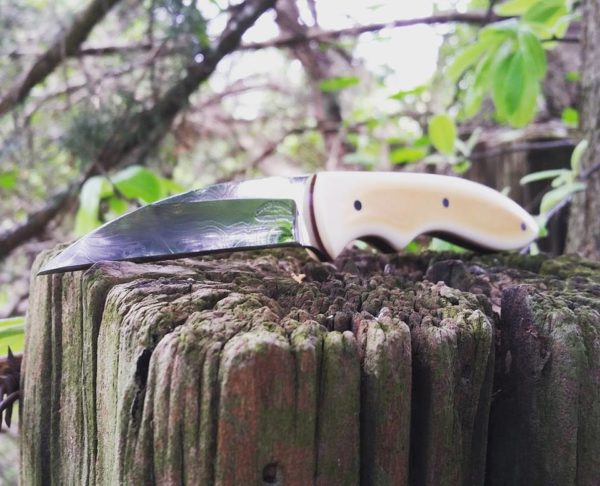
Will Thompson's finger skinner looks much better in this outdoor photograph.
Even though Will Thompson’s handle has to work to stand out against the tree bark, it succeeds. The pattern is now discernible and the blade looks great. This drop-point finger skinner is made of 1095 steel and the Plantstone (stabilized pine branches with aluminum flakes) scales are from Robert Belcher. Maker’s list price: $75. Contact [email protected] or on Facebook at Dusty’s Cutlery.

Then again, there are some excellent photos being taken with newer camera phones. Do NOT attempt this with an older model. You will only frustrate us both because they do not allow for high enough resolution of the images. Be sure if you submit a photo from your phone that you email it at its largest size. If there are settings on your phone that need to be changed to allow for taking photos at higher resolution, then you’ll need to set those accordingly. Those settings will apply only to photos you take going forward; you cannot retroactively apply them to photos already taken. Whether you use your phone or a “real” camera, the same fundamentals of photography apply.

Tip: If you smoke or if you have your phone in your shop, there could be resin or dust on your lens. You’ll want to clean that—gently—before you begin.

Be sure to take great photos of all your work before they are sold, and to back them up, either in the cloud, through an online backup service or on a thumb-drive.

6 Things BLADE Looks For In A Knife Photo

  1. Focus

The entire knife must be in focus, from point to butt. Are there some artsy shots of crystal clear blades and blurred handles or vice versa? Sure, but that’s not what we’re looking for in print. Online, we’re more open to considering some of those shots, provided we have some conventional full-focus shots to accompany the story as well.

If you are taking what we call a “using” shot where you’re photographing the knife in use for an online story or if we are working on a story together for print, be aware of where your camera is focusing. I have seen crystal clear shots of a leaves on the ground while the knife and the hand it’s in are both blurry. Focus is probably the single most important aspect of a good photo.

  1. Contrast

Be aware of the color of your background. A grey knife on gray pavement, a black knife on a blackened tree stump, camouflage your knife. It’s like a silver or gray car against gray pavement on a gray winter day—you can’t see it. No contrast. This applies to multicolored handles against multicolored backgrounds as well.

Andrew Griggs' indoor knife shot didn't make is knife sing.
In this image of Andrew Griggs’ knife, the blade looks dull and the focus on the handle is somewhat soft. Also, if this image were being used for a BLADE Magazine section that required a cutaway, the prop would be in the way of the blade.

Now you can see the pattern-welded steel used to make the blade in this Andrew Griggs' Southern Comfort model.
Andrew Griggs got outside to reshoot his knife. Now you can see the pattern-welded steel! The Southern Comfort gentleman’s fixed blade has a Vintage Paper Micarta handle. Maker’s list price: $300 with leather sheath. Contact Griggs Knives on Facebook.

  1. Composition

For two of BLADE’s sections, “What’s New” and “Knifemaker Showcase,” only cutaway images of the knife are used. (See the “5 Ways To Get Your Knives Featured In BLADE.”) This means that you don’t need to worry about the background at all. In fact, white paper is fine, but watch for any shadows. It’s fine to have a slight shadow, provided the lines of the knife are clearly visible. If the edge or spine of your knife bleeds into the shadow to the point where you can’t tell where the knife starts and the shadow ends, that’ll need to be reshot. Our designers need to able to see those lines.

Mood images are fine for both a feature in print and for online stories. Feel free to get as creative as you want, but ensure that the knife is the main attraction. Photographing knives is one of those times when the rule of thirds really isn’t applicable. The knife is the main attraction and we’re not going for proportional sharing with a background. If the image you’re submitting for consideration is for a section of the magazine that uses cutaways and there’s moss or grass, fabric or fur encroaching on the blade itself, that’ll impede the designers in their work.

Make sure no part of the knife is cut off, and don’t crowd the point or butt. If you place the knife in a stand and that stand encroaches on the knife, it can’t be used for a cutaway, but it could possibly still be used for an online story or in print.

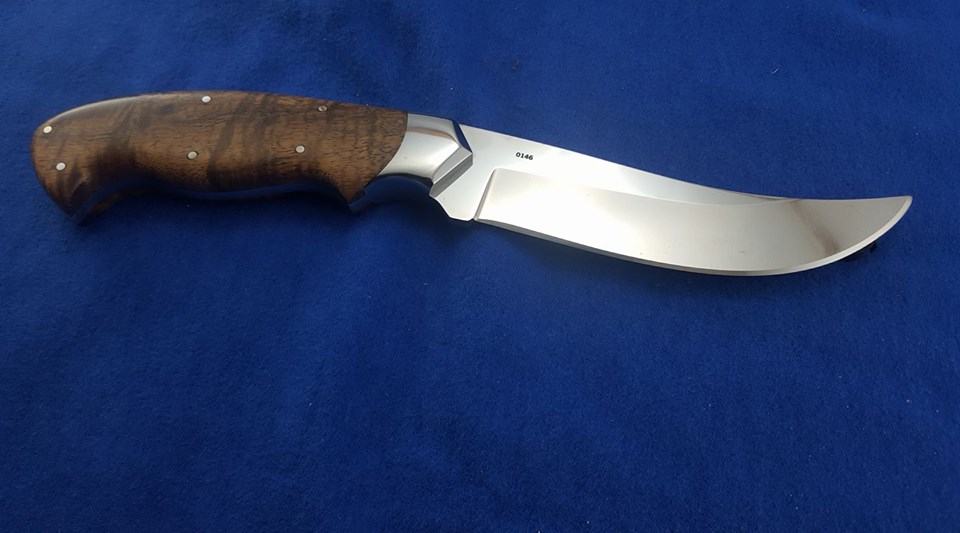
Devin Bliss is excelling at taking better images of his knives.
Devin Bliss has taken a very good photograph here. However, there is shadow at the handle, which would make it challenging for the designers to see where to make the cutaway image for inclusion in say, BLADE’s “What’s New” or “Knifemaker Showcase” sections.

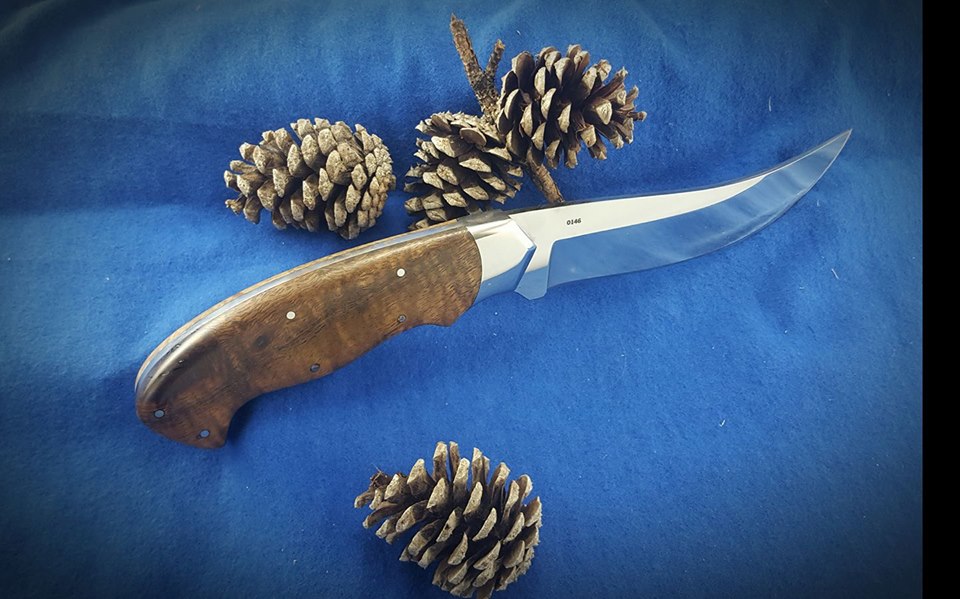
Devin Bliss's second attempt at photographing his knife was another step forward in his photographic journey.
In Devin Bliss’s second attempt, the handle is more visible, but looks less rich in the harsher lighting. The inclusion of the pinecones makes a nice vignette without encroaching on any line of the knife, so it could still be used for a cutaway or as is. As a side note: Artists will tell you that the eye finds odd numbers more pleasing. I did not tell Devin that. I simply told him the truth: He had surpassed my level of being able to offer suggestions for improvement. He contacted another knifemaker for guidance.

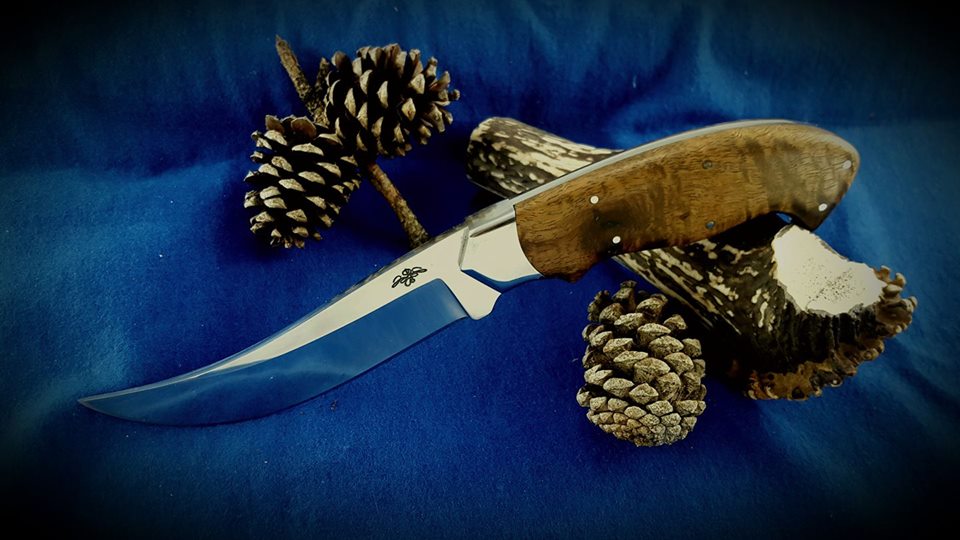
Devin Bliss's modified pronghorn is now elegantly displayed in an image that reflects all the best attributes of his knivemaking.
At this point, knifemaker Devin Bliss has reached a level of photography that serves his knives well. What did he do? “I changed the direction, propped up the handle onto the antler, moved the lighting around and used a foil reflector to get…a bit more light on the handle and a white reflector to mask off some glare on the blade and bolster.” This modified pronghorn is made of CTS-XHP steel with a curly koa handle. Maker’s list price $300 with stamped leather sheath. Contact [email protected], 903-736-3052 or on Facebook at DB Custom Knives.

  1. Depth and Angles

In layman’s terms, you need to ensure your knives don’t look flat. You’re trying to capture something that’s three-dimensional in a two-dimensional medium. This is where some knives can look disproportionate because you’re focusing on the handle and the blade is in the fuzzy background, so to speak. A shallow depth of field is fine as long as your knife is standing out crisply from point to butt.

Finding the right angle will also help prevent your knife from looking flat. Prop up your knife somehow. Even just leaning it against a pebble allows you to move and capture the thickness or thinness of the piece. Laying it on your hand can work as long as your flesh doesn’t obstruct any of the knife’s lines.

Tip: Take dozens of photos from many different angles and distances and pick the best one of the bunch. If you don’t nail it, don’t compromise, don’t settle, get back there and take dozens more. Pros will take hundreds of impressions to deliver 30. Seriously. Take more shots. No, more. Get a ladder and shoot down, circle your quarry and shoot multiple shots from each hour of the clock, and get down and shoot at eye level. Shoot at morning, noon and night, but mostly late afternoon, to see how different types of sunlight affect your knife images. It’s what the pros did when they were starting out. Now, after years of experience, they can judge the sun’s angle and know how to get what they need.

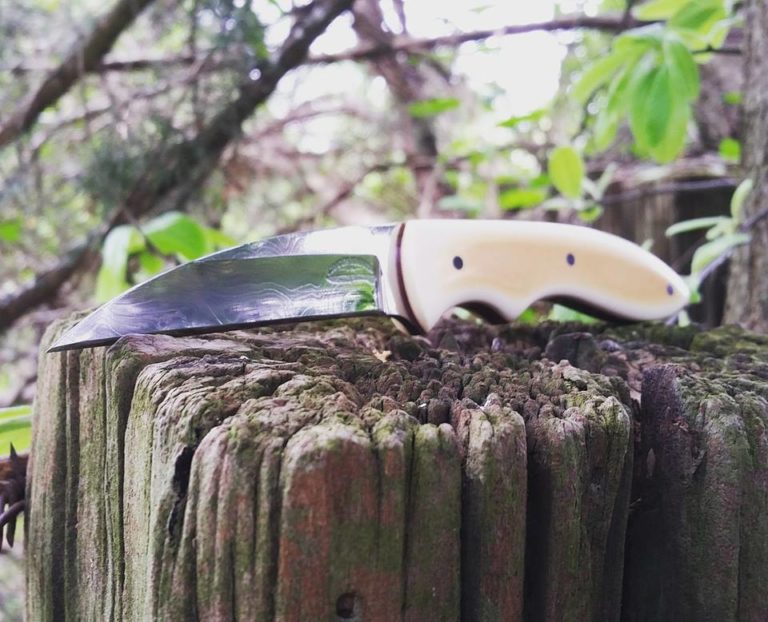
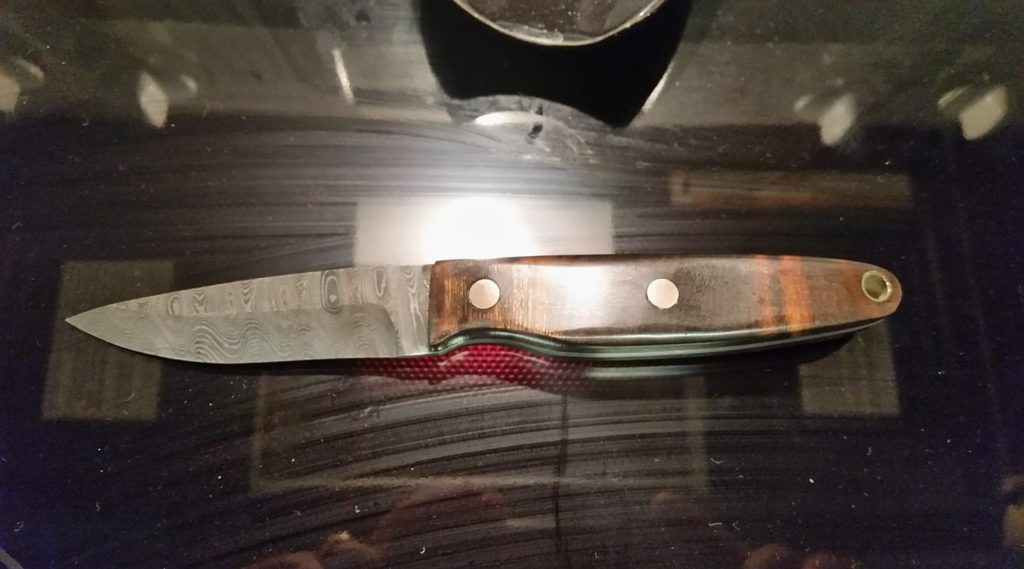
Charles Hawkins can be found on Facebook under Hawk Custom Knives.
Charles Hawkins has a hard time taking a bad photo, but he pulled out all the stops on this one. That is a stovetop background, complete with streaks and a red glow. The glare on the handle deadens the handle and the pattern in the steel also appears dull. Note the photographer’s hands reflected on the cooktop. Analyze the entire photograph closely.

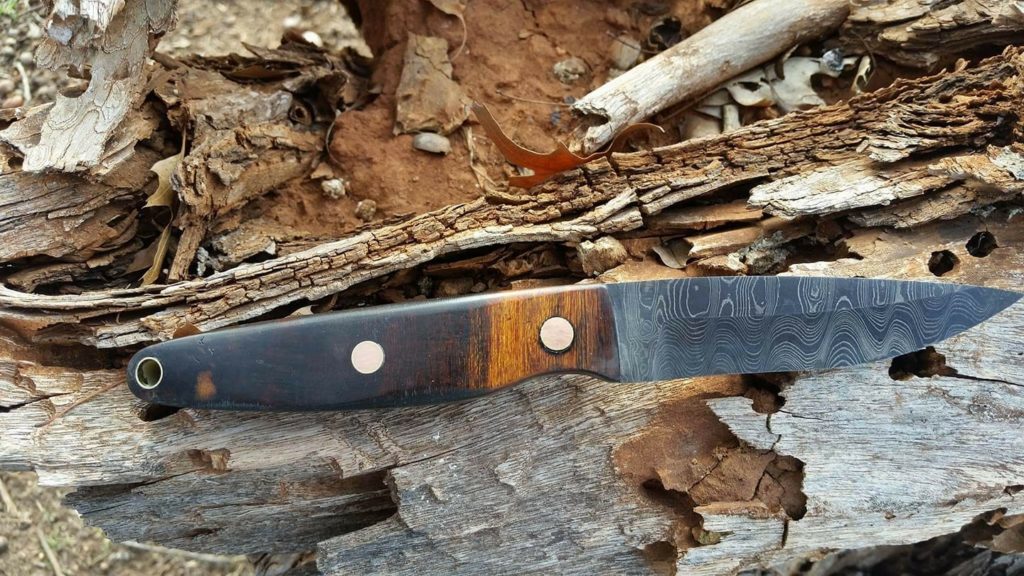
Hawk Custom Knives is where Charles Hawkins crafts his pieces.
Charles Hawkins took his knife outdoors, and now the focus is as sharp as can be. The background adds interest while still allowing for plenty of contrast. The 3.5-inch blade is made of pattern-welded steel from Alabama Damascus Steel. The handle is ironwood. Maker’s list price: $300. Contact www.hawkcustomknives.com.

  1. Lighting

Natural light is easiest for the amateur to master. A cloudy day is good to reduce blade glare but sometimes it will dull colors. Try a sunny day, but shoot in the shade. Avoid glare on either the handle or the blade whether you’re shooting indoors or out. You also don’t want dappled light coming through the leaves of a tree to interfere with the hamon, for example, so try to find a solid overhang. You also don’t want reflection to make your blade look different than it is in reality.

Indoor lighting is infinitely more challenging. Low light, fluorescent light, light-painting in a dark room—they all have the potential to become “noisy,” grainy, soft. I will leave it to the articles and videos you’re going to pour over to explain why, but trust me, it’s not easy. Sometimes, in light-painting for example, the pins might absorb all the light and they take over the picture. Or the handle’s too dark, or the handle’s visible, but the blade looks dull. Changing the countless variables on this project will help you get the right shot out of your many attempts. It can help to take notes so you know what you’ve tried and whether or not it worked.

Avoid using the flash inside your camera. It will only give you an overlit image that makes your work look flat. An external flash, shot off a wall or ceiling or even a white T-shirt, or an extra light diffused with a white paper bag, may help, but now your knifemaking shop has turned into a spaceship and you’re behind in your orders.

  1. Specs

Images need to be 300 dpi for print with the photo at least 8 inches on the longest side, preferably 10. The image size should be at the very least 600 KB. It’s not that we’ll run it that large, but we need to have the option to do so, especially if we’re doing a cutaway and the knife doesn’t fill the frame.

We prefer .jpg format, and that you attach the image file rather than dragging it into the email. Sometimes that can make a difference in resolution quality, though it admittedly shouldn’t. Also, for similar reasons, submit originals and not versions scraped from Facebook or other social media platform, even for online stories.

Remember, it’s all about the knife here at BLADE. Oh, and makers and manufacturers, too. But without a fantastic photo of a knife as a starting point, how are we ever going to get to know you better?

Photos may be submitted for consideration in private message to “Erin at BLADE” on Facebook or via email to [email protected]. To learn more about how your photos could be published through BLADE, read “5 Ways To Get Your Knives Featured In BLADE.”

‘101 Knife Designs’ Will Inspire Even Seasoned Knifemakers

Hiro Soga, renowned Japanese knife photographer, took the photos that illustrate "101 Knife Designs," a must-read on the theory of blade design.
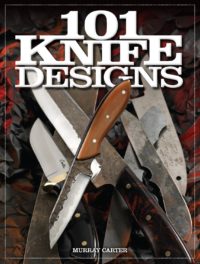
“101 Knife Designs” is not only filled with great comparisons of blade designs and design theory, but offers terrific examples of exceptional knife photography by Hiro Soga.

Knifemakers of all skill levels will enjoy comparing knife designs in this book by Murray Carter. The photographs by Hiro Soga are exquisite! There is even a discussion on the theory of knife design to help you better understand your craft. Save 35 percent off the cover cost of $29.99 for a total of $19.99.


Shop Dump: TOMMY “BUBBA” CROUCH

0

Part of the Texas Slipjoint Cartel, Bubba Crouch shares the tools with witch he crafts his creations.

Tommy “Bubba” Crouch is a Texan through and through. In fact, he lives only minutes from Cutlery Hall-Of-Famer Bill Ruple, who has mentored more slip-joint knifemakers than a little bit. Crouch is one of those pupils and was also the spark in naming a merry band of talented custom makers who studied under Ruple the South Texas Slipjoint Cartel.

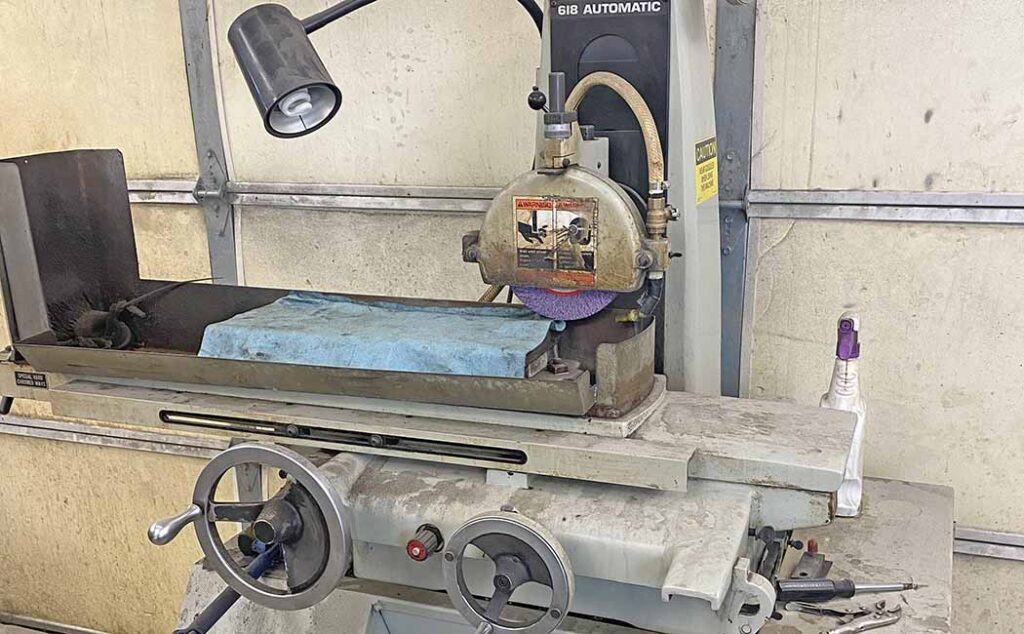
Harig 618 automatic surface grinder
Crouch employs his Harig 618 automatic surface grinder for bringing parts to thicknesses pre-heat treat and for clean-up post-heat treat.

“Bill Ruple and I were sitting around one day in his shop and we were just talking about knives and such,” Bubba recalls. “We were talking about our bladesmithing friends in the Montana Mafia, so we came up with the name South Texas Slipjoint Cartel. It was mainly just to mess with our Montana knifemaking friends who’d formed such a group. We decided to make it an LLC. Our group has done many donation knives for charity events. It mainly consists of friends sharing techniques and better ways to do things. I have been blessed to have Bill Ruple five miles away and he has helped me tremendously. Other members sharing their knowledge have also been something that helped me personally.”

It can be truly said that Bubba is all cowboy and all hat. He grew up ranching, spent time on the competitive roping circuit, and even had a stint driving a cattle truck. He took up knifemaking in 2009 and credits his apprenticeship under Ruple as the key to where he is today.

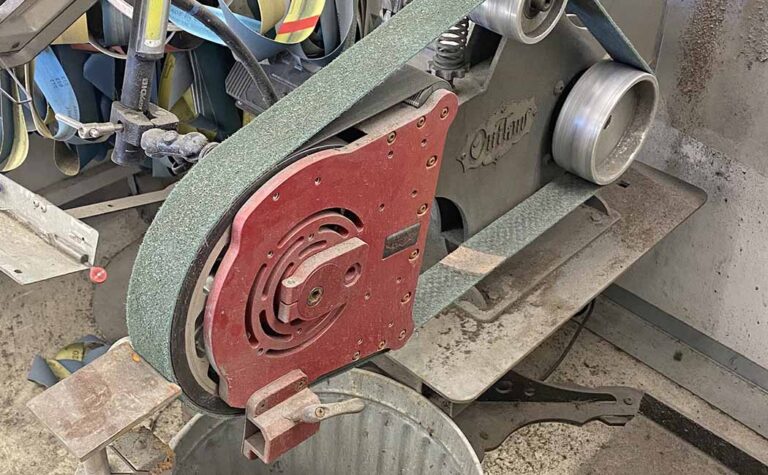
Moen platen
Bubba uses The Outlaw grinder with the Moen platen (above) for grinding blades exclusively. “Both work well together,” he observes.

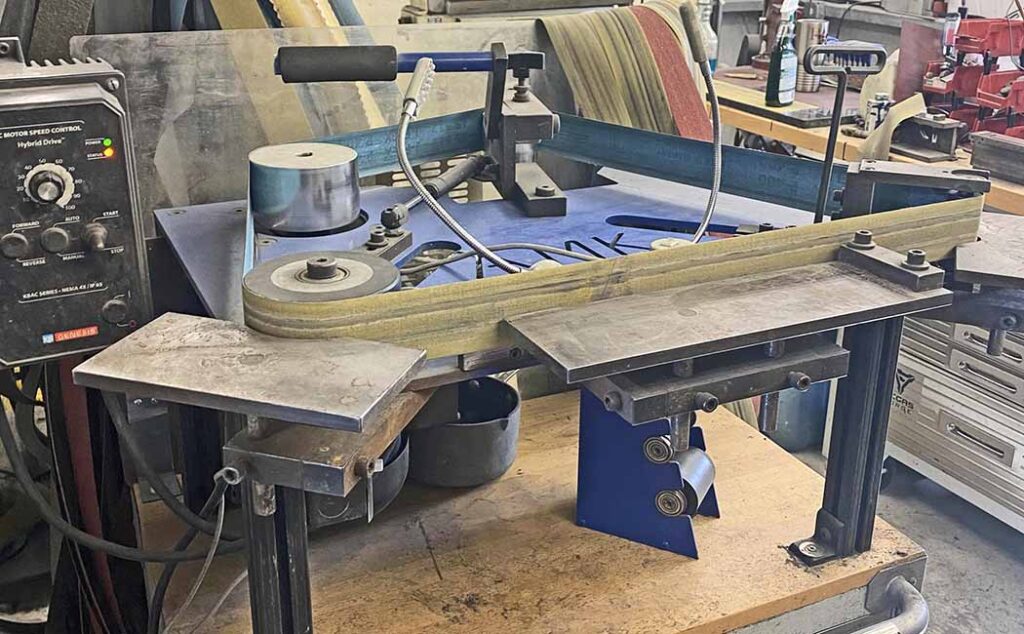
First Crouch calls out his milling machine. “The Bridgeport Mill is an adjustable speed head that I use for milling integrals, liners, relieving liners and spinning center handle pins,” he notes. As for shop grinders, he has a plethora. “My automatic surface grinder is a Harig 618. This machine I use for bringing parts to thicknesses pre-heat treat and for clean up after heat treat. The Outlaw grinder with the Moen platen is used for grinding blades only. Both work well together,” he observes. “The Northridge grinder I use for roughing out and shaping parts.

“My green grinder is made by Enrique Pena and is a great piece of equipment. The wheel and platen flip around and the back side can be used as a loose belt. The horizontal grinder is an AMK and is a necessity for making slip joints, in my opinion.”

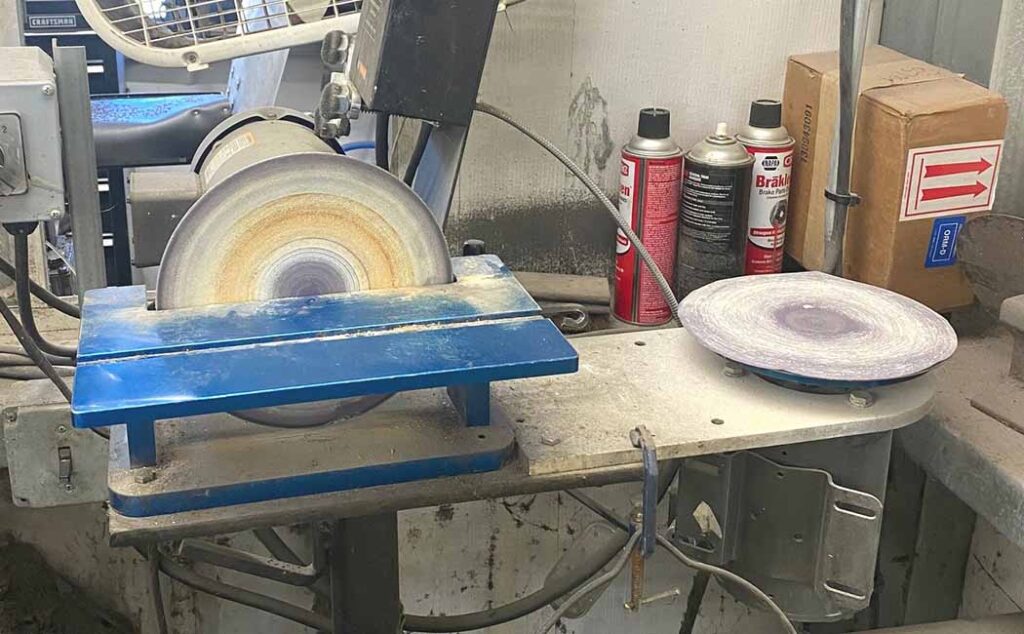
disc grinder setup
For his main disc grinder setup, Crouch uses a Hardcore model for cutting blade tangs and fitting handle material into the liners. The flat disc is homemade for thinning and flattening handle material.

Last but not least on the grinder front Bubba lists his disc grinders. “My main disc setup came from Hardcore and is used on cutting in the tang on the blade and for fitting handle material into the liners,” Bubba explains. “The flat disc is homemade and used for thinning and flattening handle material.”

Bubba Crouch
Bubba Crouch

He has two ovens for heat treating. “My heat-treat ovens are both newer models. The Paragon Pro is a great oven that gets to tip really quickly,” he notes. “The Evenheat has been a great addition and is very accurate.”

Bubba also keeps two pantographs in his shop. “The first is an Alexander 1B that I use for inlays and cutting shields. It’s an older machine from the early 1880s,” he states. “The second pantograph is a Gorton P1-2. I use this machine for engraving my name into the blades.”

He also keeps another specialty machine for shop duty. “The Oliver drill point thinner has been converted with a table and a cupped stone to cut nail nicks in the blades,” Crouch advises, wrapping up with something no maker can do without: “The workbench came from Sam’s Wholesale Club and I have three of them—very well built for the money.”

Check Out More Shop Dumps:

What Are The Best Blade Steels?

Follow the maker's steel recommendations.
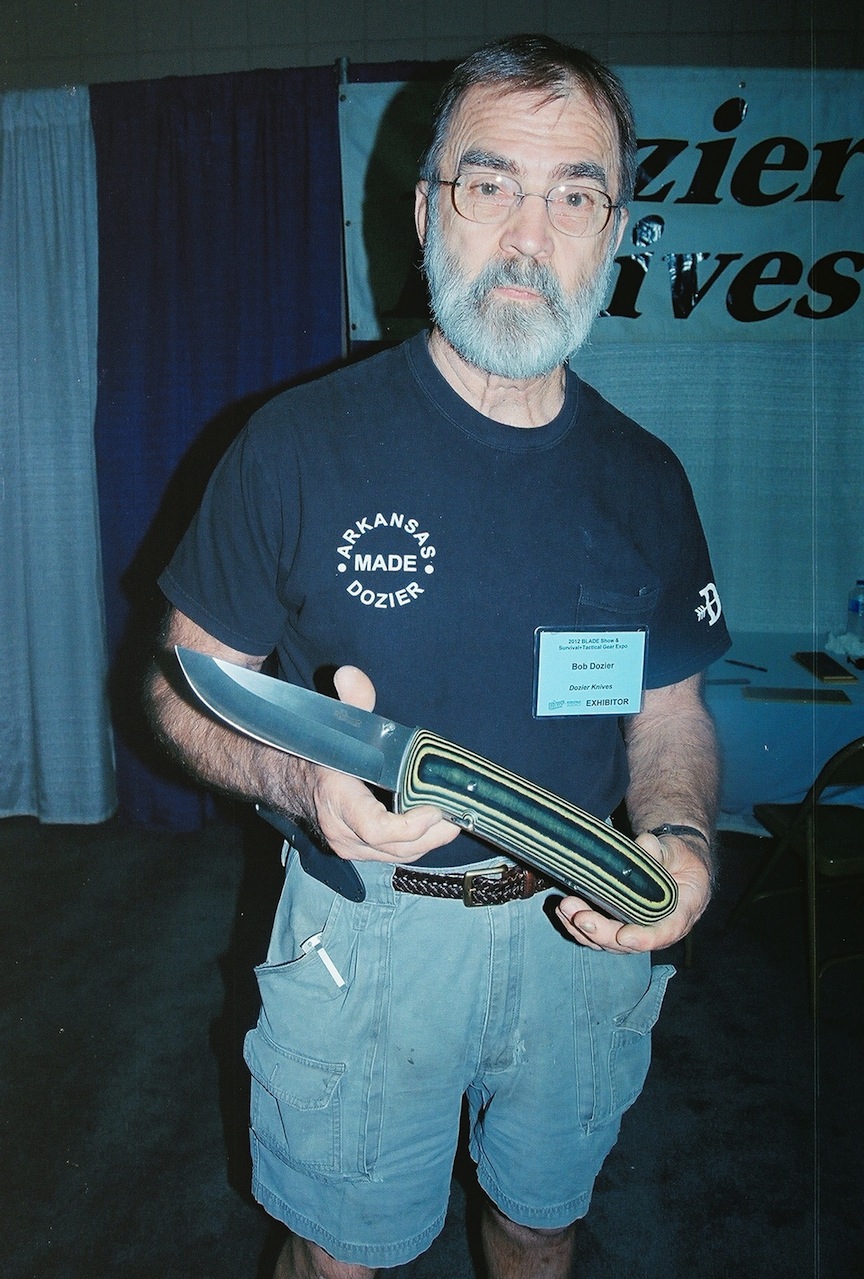
Ask the maker what blade steel he recommends. Bob Dozier holds one of his giant trappers.

A question we often hear is What are the best blade steels? A better way to approach the question is to determine what jobs the knife will be asked to perform.

Do you need a hunting knife or an everyday carry knife? A kitchen knife or a camp knife/chopper? There are others. The type of knife and how it will be used often will dictate the type of steel.

Say you need a hunting knife. Rather than ask what kind of blade steel will be best for it, research the websites of companies or makers who specialize in hunting knives. Such companies and makers will offer hunting knives not only with the steels that they find best for hunting knife purposes, but also with the edge geometries that the companies and makers feel they are most accomplished at making/offering.

Edge geometry refers to the blade’s grind and edge. If the grind and/or edge is too thick or otherwise not formed properly, it doesn’t matter how good the steel is—the knife will not cut well. As for the grind itself, there are many—hollow, flat, convex, chisel, etc., and combinations thereof. Usually the companies or makers employ the grinds they are best at. In cases where you have the option of picking the grind from a custom knifemaker, ask him which grind he’s best at and go with it.

Another important factor is the heat treatment of the steel. In fact, a low-grade steel heat treated properly often will outperform a high-grade steel with a substandard heat treatment.

In addition to the type of steel, ask how it is heat treated. While many makers are adept at heat treating their blades, many simply ship their blades off to professional heat treaters who specialize in the process. Blades heat treated by the pros usually will be heat treated properly and according to industry standards.

High-grade steels such as CPM S35VN, ZDP-189 and others are cutting tigers but can be difficult to sharpen and are more expensive. Lower-grade steels such as 440A, 5160 and others, all things being equal (including proper heat treatment and edge geometry), may not perform as well or hold an edge as long, but are usually easier to sharpen and will do most everyday cutting jobs that most people require. And, knives with such steels should be less expensive. In the case of 5160, while it is not a stainless steel, if you clean it and dry it off after each use, you should not have a problem with corrosion. The same is true with most non-stainless steel knives. Meanwhile, it’s not a bad idea to clean and dry off stainless steel knives after use as well. They can corrode, too—it’s just that they corrode less, as their name indicates.

Bottom line: Tell the company and maker what you plan to do with the knife. They make knives for a living and usually will be able to fit you with the proper knife and suitable blade steel for your needs.


The latest issue of BLADE is on newsstands now!Recommended:

Stay abreast of the latest developments on this and many more knife rights issues with a subscription to BLADE.

A Day At The New England Bladesmithing Symposium

Knifemakers From Around North America Came To Auburn, Maine For The 2022 New England Bladesmithing Symposium

The 12th annual New England Bladesmithing Symposium brought nearly 100 knifemakers and enthusiasts together for the first hammer-in since 2019.

The event ran from July 15-17 in Auburn, Maine at the New England School of Metalwork and featured classes and workshops galore. Throughout the weekend there was something to scratch any itch you may have had about knives.

Master Smith Lin Rhea presented a tutorial on how to make his dynamic X-Rhea knife. There were workshops on everything from how to build out your knifemaking business to forging recurves. 

It was a brutally hot Saturday in the Pine Tree State, yet it didn’t dampen spirits, particularly for the main event– the Battle of the Bladesmiths. The 2-hour competition to pushed four makers to their limits, and drew the largest crowds and interest.

Learning From The Best

The classroom at the NESM is covered wall to wall with tools and other metalwork made by past students just like this.

During the afternoon I was able to drop into a few of the classes. The one I got the most out of was led by Master Smith Christoph Deringer. 

Derringer class about the anatomy of the knife was a joy, particularly the care he gave answering questions. His wry sense of humor even out, like when he called flux a crutch pertaining to forge welds. In that particular case, he suggested simply listening to the metal and letting it guide you when you forge weld, no flux is needed.

He taught everyone a neat trick for adding patina to a blade, as well. The crux, you hang the knife above a piece of heated copper. Heating the copper causes it to emit gasses that rise up and patina the blade to an almost bronze color.

A Successful Weekend

It was a big weekend for the school, gathering makers from the Northeast, Eastern Canada, and even as far west as California. For NESM director Dereck Glaser, it was a successful weekend, particularly given the COVID-related lapse in the symposium the past few years.

“The school, in general, draws from around New England,” Glaser said. “I’m excited to see more Canadians here, to be honest. We can’t forget we have a whole other country on our border. I can’t be pulling students out of the Atlantic Ocean so Canada’s a really good option.”

It’s important for anyone with even a passing interest in knifemaking to visit their local school and learn. Not only can you save yourself toil and trouble, but supporting the broader community of makers helps it survive and thrive even in the lean times.

Journeyman smith Mace Vitale runs a workshop on handle shaping.

“It saves exponentially the number of years,” Glaser said. “Indebting yourself to a week and about $600 could potentially save you 3-5 years of trial and error on your own. The amount of compressed skill and support you get in 4-5 days of a course, answering those questions that’ll take 3-5 years to figure out on your own.”

Glaser said that even with the uncertain economy, he believes the future of the school and knifemaking is bright because the passion is boundless.

“The fiscal issues we’re having is making it rough. It’s 90+ percent an enthusiast kind of hobby and craft for most people,” Glaser said. “Where inflation and cost of living’s gone, everyone’s seeing a toll in the crafts. We’re even seeing it in the welding, which is an employment-based skill. But on a whole, I  think the energy is still there. The love for it is greater than ever. A lot of people did a lot of things to better themselves in it through the pandemic, so I think coming out on the other end I think people are kind of stronger.”

The Passion For Knives

A nice bit of camraderie. Two of the battle contestants Leo Potter (in the hat) and Jeremy Yelle share a fun moment ahead of the contest.

As informative and enlightening as the classes were the attendee’s conversations. Everyone was excited, whether it was to learn from a particular smith, show off a piece they made, or for the battle at night, everyone was open and welcoming.

A Previous winner of the Battle of the Bladesmiths, Emiliano Carrillo (owner of Sun and Stars Forge), was particularly poetic in what he said about the process of making his own steel.

“When I started the smelt earlier in the day the sand runs through my fingers, and by the time the day’s done it’s a lump of material that can be turned into something,” the owner of Massachusetts-based Sun and Stars Forge said. “It goes from being this throwaway material to something that’s actually useful. I think that’s crazy. It really is alchemy to me. It’s addictive. You do it and it works and you do it again and again and it breaks your heart, and then you have some successes.”

The day ended with the battle. Four young smiths were tasked with turning a one-foot bar of 1084 into a complete knife in just two hours. You can read all about the contest here.

In total, the symposium was absolutely worth the trip and should be on your checklist if you’re a serious maker in the Northeast U.S. or Eastern Canada.

To learn more about the New England School of Metalwork, click here.

Read More

MagnaMax and Pop’s ProCut: The Next Super Steels?

Specially engineered for knife blades, the two alloys are at the cutting edge of metallurgy.

Editor’s note: The genius behind MagnaCut—arguably today’s most popular blade steel for both custom and factory knives—the author has helped create two new blade materials that he fully expects to meet with wide-ranging acceptance as well. Following is his story on his latest voyage into his favorite subject.

I pitched the idea of MagnaCut steel to Crucible Steel and Niagara Specialty Metals in 2019. I said I had an idea for a steel that would match the best of the non-stainless powder-metallurgy steels in terms of wear resistance and toughness. This would be a big deal because there has been a longstanding gulf between the performance of carbon steels and stainless steels. My team and I successfully turned the idea into MagnaCut, released in 2021, which had a microstructure like a non-stainless steel while being stainless—offering the best properties of both.

I intentionally sought balanced properties with MagnaCut so it was both tough and wear-resistant, similar to non-stainless grades such as CPM 4V, CPM CruWear and Vanadis 4 Extra. Knife enthusiasts, especially those into folders, often seek higher-wear-resistance steels for maximum edge retention. Instead, I tried to push for a more balanced set of properties so knife buyers could see the benefits of having high toughness in addition to good wear resistance. This can allow knives to be made with thinner edges for better cutting ability, because toughness helps thinner edges resist chipping. In my edge retention tests with the CATRA (Cutlery Allied Trades Research Association) edge testing machine, thinner edges with smaller angles lead to larger differences in edge retention than the steel choice, or even the heat treatment! It seems many knife buyers have seen the light as MagnaCut has gained quite a bit of popularity since its release.

MagnaMax Steel

Nonetheless, I also knew knife enthusiasts would ask for something more wear-resistant. The folder crowd is not as worried about toughness and are seemingly always asking for greater wear resistance and edge retention. However, when the wear resistance gets too high, the steel becomes “unbalanced,” and the toughness becomes a significant issue. I see images of broken folders semi-regularly from the most extreme wear-resistance grades.

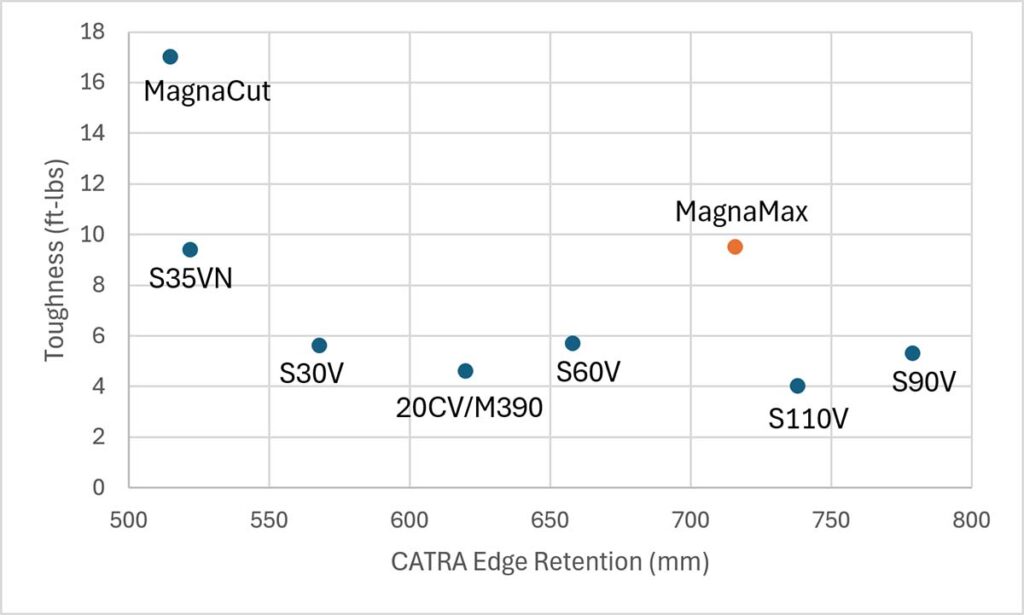
MagnaMax shares the same high corrosion resistance and good hardness potential as MagnaCut, but has higher wear resistance at the cost of some toughness. Because MagnaMax shares a similar microstructure to non-stainless steels, its toughness level for that high wear resistance is excellent.

The “sweet spot” for higher-wear-resistance products seems to be in the family of non-stainless alloys such as CPM 10V, Vanadis 8 and K390. In particular, K390 has been building in popularity through Spyderco knives in recent years for its excellent combination of properties. I had actually proposed to Crucible and Niagara way back in 2019 that, after we were successful with MagnaCut, I had another idea I was calling stainless 10V at the time.

This led to a new product called MagnaMax, a higher-wear-resistance steel in the same family as MagnaCut. It shares the same high corrosion resistance and good hardness potential as MagnaCut, but has higher wear resistance at the cost of some toughness. Because it shares a similar microstructure to non-stainless steels, its toughness level for that high wear resistance is excellent.

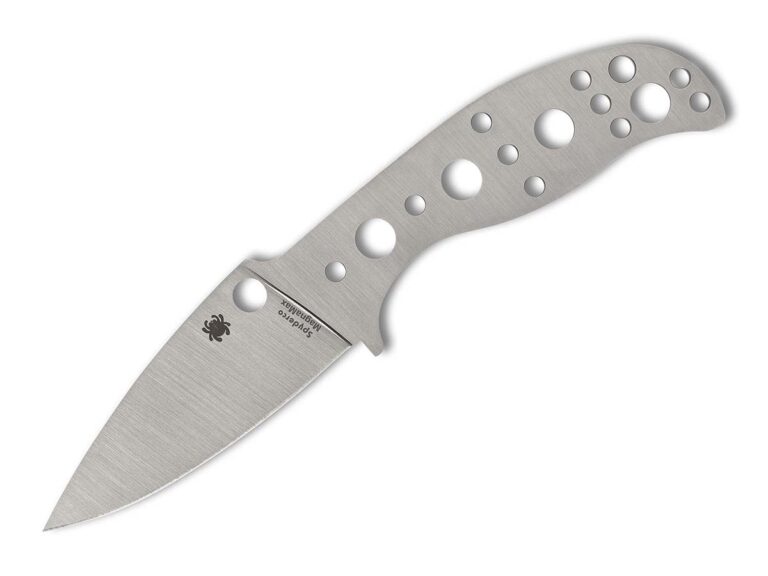
Two of the highest-toughness stainless powder-metallurgy steels before MagnaCut were CPM S35VN and CPM 154. MagnaMax matches the toughness of those grades while being much more wear-resistant. In recent years, one of the more popular folding knife steels has been M390, and MagnaMax has over twice the toughness and substantially higher slicing edge retention. Spyderco used the second prototype heat of MagnaMax in a series of its Mule series knives intended for enthusiasts to try out different steels. A Spyderco Forum member known as vivi said he cut 325 gallons worth of cardboard strips with one of these knives. He reported, “Even without adding the numbers up, I can say this steel has the best edge retention of any steel I’ve tried.”

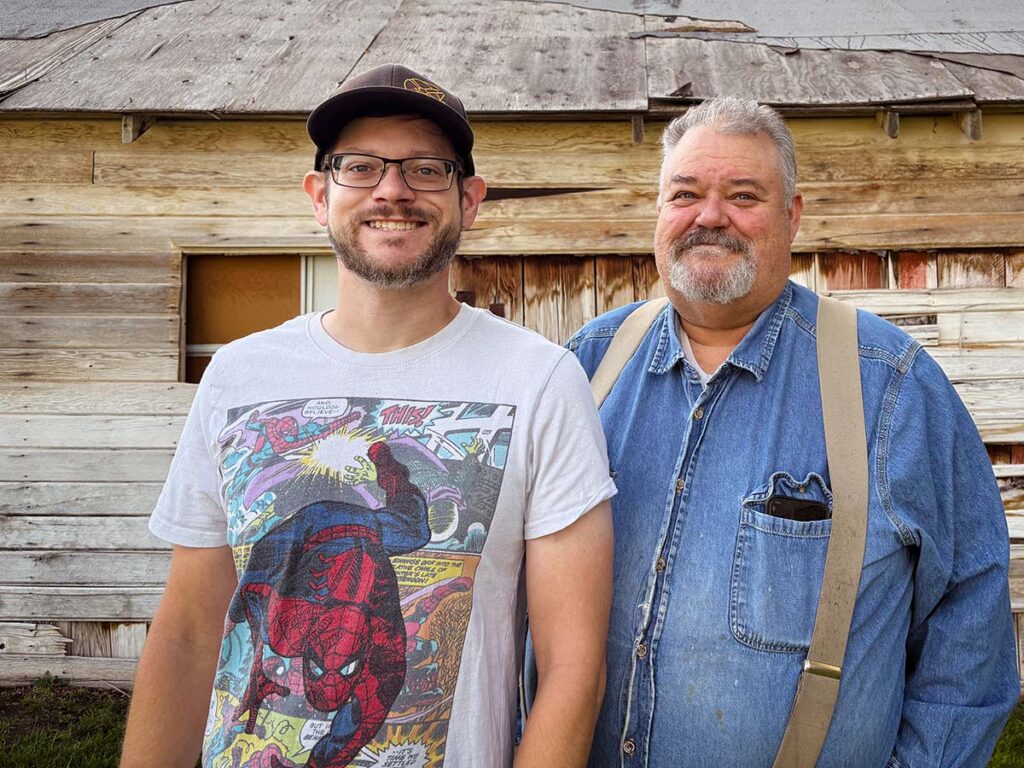
The author (left) and his father, BLADE Magazine Cutlery Hall-of-Fame® member Devin “Hoss” Thomas.

The development of MagnaMax was not without its issues, however. The first two test heats of the steel were made by Crucible, a longstanding U.S.-based steel company that unfortunately went out of business in 2025. Crucible is the company behind many of the industry’s leading knife steels like 154CM, S30V, S35VN and 3V. Crucible is the company that invented powder metallurgy itself, a significant innovation providing the excellent properties of all the “CPM” (Crucible Particle Metallurgy) grades. Crucible went under basically right while it was making the second test heat of MagnaMax. A couple of slabs were even recovered from a pile of scrap after the company was dismantled so my team could test it. We made the first test heat of MagnaMax back in March 2023, and we are just now approaching the product’s wide release.

Niagara Specialty Metals (NSM), the company that hot rolls, anneals and distributes the majority of the leading steel grades, has played a key role in keeping these steels alive. Crucible relied on NSM for hot rolling the high-end, complex grades, as it is the only facility in the United States capable of processing them.

Niagara had already assumed an active role in the knife industry many years before, taking over the distribution of blade steels over a decade ago after Crucible’s first bankruptcy in 2009. It pushed for new grades like CPM S45VN, and without NSM, I’m not sure MagnaCut would ever have been made. Niagara is working with other suppliers of powder-metallurgy steel, including Carpenter and Erasteel, to ensure these grades remain available. My team has been working closely with these partners on the development of MagnaMax, but that also means we almost had to start over after Crucible’s unfortunate demise. The good news is I have been testing MagnaMax made by Erasteel, and the properties look excellent, at least as good as the Crucible-made material. And it’s actually looking a little better.

Pop’s ProCut Steel

Perhaps sometimes I get carried away working on new knife steels that push the boundaries for wear resistance. Some knifemakers are looking for simpler grades that are easy to forge, grind and finish.

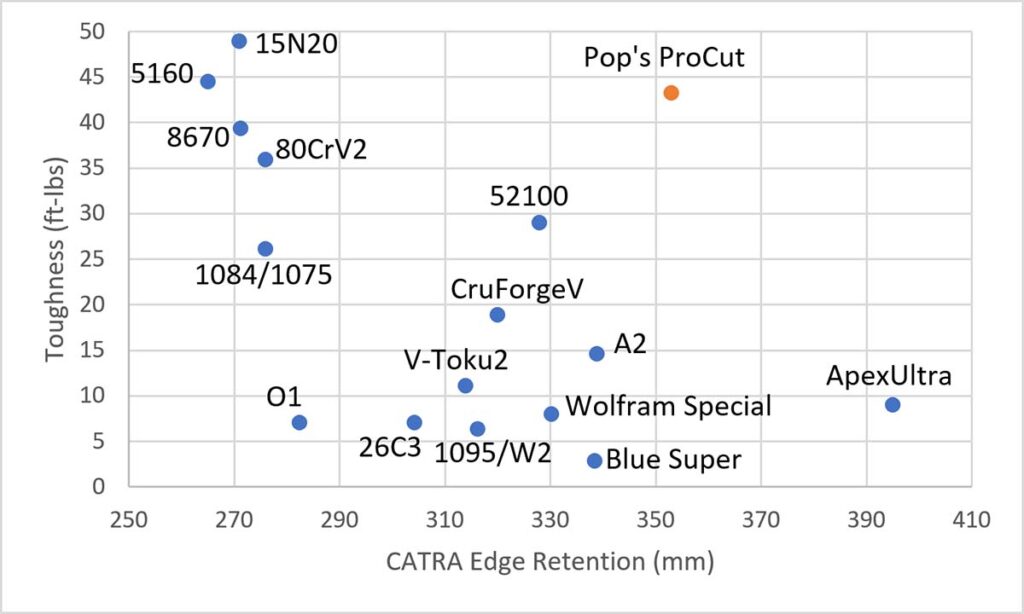
Pop’s ProCut’s toughness matched that of steels like 8670 and 5160, known for their excellent toughness. The edge retention was better than the majority of forgeable grades outside of ApexUltra, a high-performance forging grade.

Joey Berry of Pop’s Knife Supply contacted me in March 2024 asking for an improved version of Pop’s most popular grade, 80CrV2, which is known for being very easy to work, high in toughness and low in cost. I told Joey I would need to think about it because I had no idea off the top of my head what version of 80CrV2 would fill the niche of bladesmiths who want something inexpensive and easy to work. However, I have always enjoyed working with Pop’s Knife Supply, so I gave some serious thought to what kind of steel would be ideal for Joey’s request.

Pop’s is growing rapidly and has been a big supporter of mine, selling copies of my books—Knife Engineering and The Story of Knife Steel. It has been expanding its steel offerings and its steel education base to better serve customers, and I knew a steel along these lines would be a good fit for it. One of the trade-offs with knife steel design is when you add some elements like vanadium in significant amounts, things like forgeability and finishability go down. How could I make something new and exciting without pushing so much it becomes difficult for knifemakers to work with?

I thought about how high-nickel steels like 15N20, L6 and 8670 are known for their excellent toughness—at the top of my charts—but also have very limited wear resistance. I also knew some relatively rare steels like Blue #1, V-Toku2 and Wolfram Special have small additions of tungsten and vanadium for wear resistance. In grades with higher amounts of those elements, I start to see complaints from makers about the difficulty of working with them, though they seem to be at a place where they hit the right balance before forging and hand sanding become issues. These tungsten-vanadium steels are relatively challenging to find, often expensive when you do, and their toughness is much lower than the high nickel grades. As a result, the idea was to combine the high nickel approach for toughness with the controlled additions of tungsten and vanadium for wear resistance.

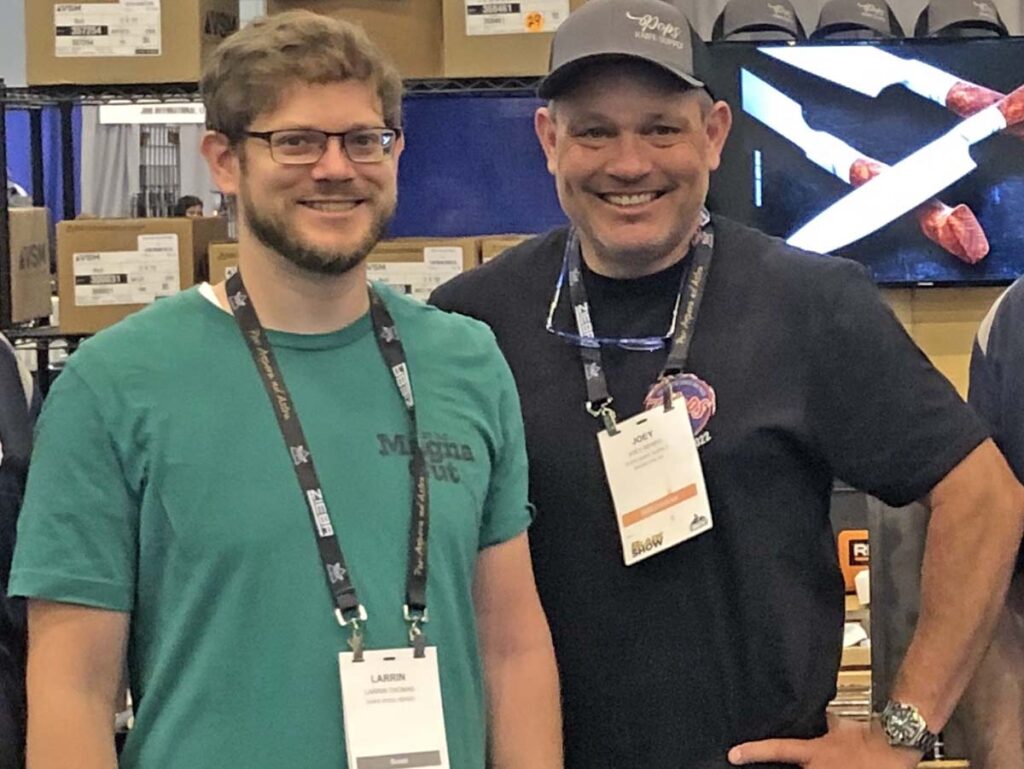
The author (left) and Joey Berry of Pop’s Knife Supply.

Another major factor for this development was the ease of heat treating. Often, steels like 1084 are recommended to novice makers for heat treating in a forge because it is dead simple to harden—just heat it to nonmagnetic and dunk it in oil. However, these grades are also very easy to overheat; they come out hard, but the toughness is greatly reduced. Only a few seconds in a forge past nonmagnetic can lead to a reduction in toughness.

On the flip side are grades like 80CrV2 that have chromium and vanadium additions to limit grain growth, so overheating isn’t as much of an issue. But the chromium also means you must heat past nonmagnetic and hold it there to ensure the carbides dissolve. The chromium slows everything down. However, I thought if we kept the chromium content very low the new steel could still be quenched from nonmagnetic and achieve full hardness, while the tungsten and vanadium additions would create tiny carbides that “pin” the grain boundaries so overheating and grain growth are not issues. This would make the easiest-to-heat-treat knife steel ever. Just heat it past nonmagnetic and quench it, and you will get high hardness and toughness every time.

My team and I got a steel company to agree to try the composition I proposed and waited (im)patiently for the steel to arrive. This was a major investment for Pop’s Knife Supply, and there was no guarantee the new steel would work just because it sounded good on paper. Fortunately, however, when we tested the steel, its toughness matched steels like 8670 and 5160, known for their excellent toughness. The edge retention was better than the majority of forgeable grades outside of ApexUltra, a high-performance forging grade I developed with makers Marco Guldimann and Tobias Hangler. And in testing the heat-treating range, we found it could be quenched anywhere from 1400°F up to 1750°F—over 300°F! This met our target of making a steel that is easy to heat treat.

Reports from makers have been very positive for Pop’s ProCut. They have praised the ease of working as well as the tested performance. Dawson Knives related: “We found it to be an excellent steel that 1) Offers a razor-sharp edge on par or better than other modern steels; 2) Holds that edge cut after cut; 3) Displays excellent lateral strength (it flexed close to 20 degrees in either direction and returned to true); and 4) Extreme impact resistance (edge resisted chipping, cracking or rolling when driven into a piece of steel Unistrut with a sledge hammer). We are able to get our edge hardness to Rockwell C of 62-63 and still retain superb flexibility.”

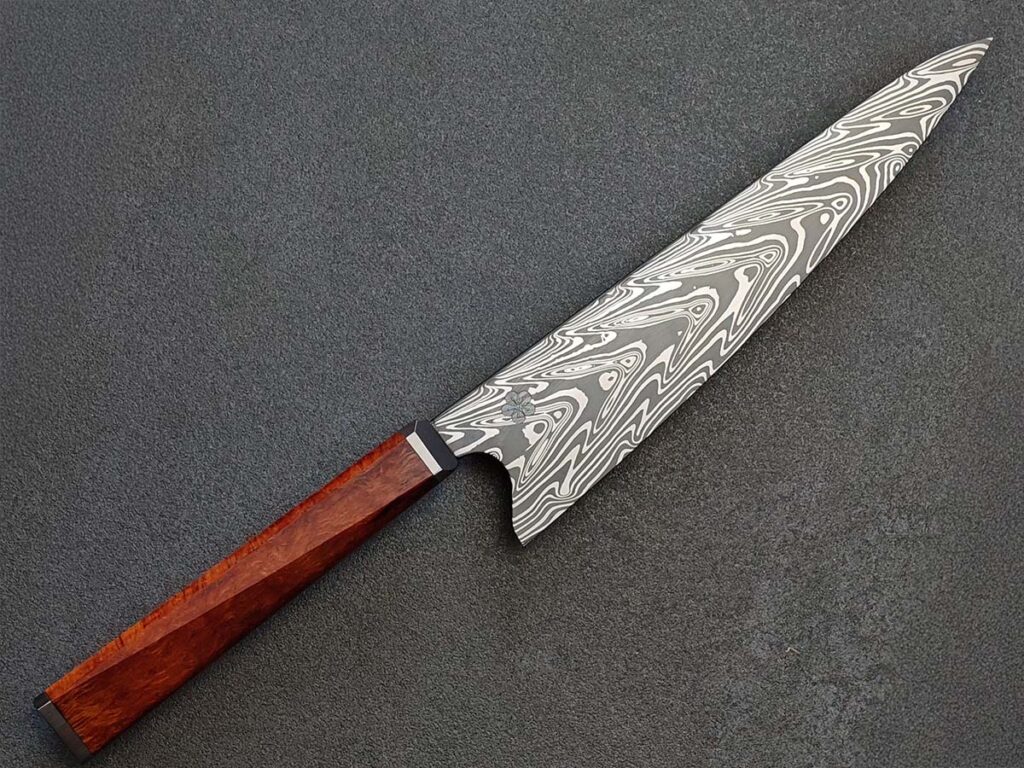
Kurt Glatt forged Pop’s ProCut and ApexUltra steels for the damascus blade of his chef’s knife.

Another exciting aspect of ProCut is the high nickel content (2 percent like 15N20) allows it to be used in pattern-welded damascus as a “bright” layer. This gives a new, higher-edge retention steel for use in damascus. As noted, previous high nickel grades have very low wear resistance. It can even be used in combination with other high-wear-resistance grades to make superior edge-retention damascus. I have seen a couple of knives using both ProCut and ApexUltra for some excellent-looking and performing damascus.

More To Come?

I’m constantly working on new ideas, though it’s hard to predict which projects will pan out or when they’ll be released. It’s been incredibly rewarding to see the steels I’ve developed used by top knifemakers and major knife companies, and to hear from end users who genuinely love them. When my dad, BLADE Magazine Cutlery Hall-of-Fame® member Devin “Hoss” Thomas, took me to my first knife show as a teenager, I never would have thought I would be working on such cool stuff.

More On Knife Steel:

American Bladesmith Society Announces 2014 Hammer-In Schedule

One of the things that makes the knife industry such a pleasure to be involved with is artisans, bladesmiths and knifemakers in general sharing their knowledge, teaching people their craft and passing down the handcraft from generation to generation. 2

Some of the best at this are the members of the American Bladesmith Society, as well, of course, as those in the Knifemakers’ Guild and countless other knife clubs and organizations. The ABS claims to have had record attendance at its hammer-ins across the country in 2013, and has already announced its 2014 Hammer-In Schedule. Click here for a Complete Knifemaking Collection of books and digital downloads to get you started in your knifemaking endeavors. And without further ado:

ABS Hammer In Schedule for 2014

March 7, 8, and 9, 2014
Spring Great Smoky Mountain Hammer-In
Haywood Community College, Clyde, North Carolina
ABS Contact – Bill Wiggins (828) 226-2551 or Email [email protected]

April 26 and 27, 2014
Spring Piney Woods Hammer In
Texarkana College – Moran School of Bladesmithing, Washington, Arkansas
ABS Contact – BR Hughes (903) 838-0134 or Email [email protected]

June 2014
ABS Youth Hammer-In
Smoky Mountain Knife Works, Sevierville, Tennessee
ABS Contact – Houston Price (865) 397-0053 or Email [email protected]

July 11, 12, and 13, 2014
New England Hammer-In
New England School of Metalwork, Auburn, Maine
ABS Contact – Mace Vitale (203) 457-5591 or Email [email protected]

August 22, 23, and 24, 2014
Mid America Hammer-In
Miami County Fairgrounds, Troy, Ohio
ABS Contact – Butch Sheely (419) 832-5801 or Email [email protected]

September 13 and 14, 2014
Fall Piney Woods Hammer-In
Texarkana College – Moran School of Bladesmithing, Washington, Arkansas
ABS Contact – BR Hughes (903) 838-0134 or Email [email protected]

October 4 and 5, 2014
Heartland Hammer-In
Washburn Institute of Technology, Topeka, Kansas
ABS Contact – Steve Culver (785) 484-0146 or Email [email protected]

October 2014
California Hammer-In
College of the Sequoias, Tulare, California
ABS Contact – Mike Vagnino (559) 636-0501 or Email [email protected]

October 18 and 19, 2014
Smoky Mountain Fall Hammer-In
Haywood Community College, Clyde, North Carolina
ABS Contact – Bill Wiggins (828) 226-2551 or Email [email protected]

Advertisement

Must Read Articles

Read this before you make a knife

Knifemaking 101 – Read This Before You Make a Knife

  by Wayne Goddard My experience has taught me that there's nothing like digging in and getting started. I've often said the hardest part of the...
how to forge damascus steel

How to Forge Damascus

Advertisement
Advertisement