Knifemaking

Knifemaking is the building of a knife, which includes the blade, handle and other accouterments. Blades are made by either removing metal from a steel blank via a grinder – known as stock removal – and the forging to shape of hot steel into a blade in the process known as bladesmithing. Other parts, including bolsters, guards, pommels, etc., are needed to complete the finished knife.

Featured Knives – – Knife Collecting – – Tactical Knives – – Survival Knives

Keepin’ Those Day Jobs: Knifemaking Side Hustle

0

For Many Makers, Knifemaking Isn’t A Full-Time Job. Here’s How Some Fill Their Days When They Aren’t Sharpening Steel.

One of the more memorable henchmen of the James Bond series is the stout little fellow Odd Job, played in Goldfinger by Harold Sakata, and a popular character in the Nintendo series of Bond video games. He has a hat with a razor-sharp brim that decapitates a marble statue in the movie and guarantees an instant kill in the game.

He’s a master of body paint, a capable golf caddy, and can crush a golf ball with his bare hands. He’s a chauffeur capable of skilled pursuit and evasion in the inevitable Bond car chases. In the end, this man of many talents meets an untimely death by electrocution in the vault at Fort Knox.

Many who make knives choose not to make it a full-time career but a mega-hobby or part-time job instead. There are many of us, both known and unknown, who work “regular” and “boring” jobs to fund our knife passion. Though I write and make knives, I’m a behavior analyst in my day job. My brother Travis is a knifemaker and accountant—boring! I bet you’ll be surprised at some of the unusual talents that support some knifemakers in the daytime so they can pursue their blade craft on nights and weekends.

Michael Quesenberry

ABS master smith Michael Quesenberry is well known for his intricate integrals, precise damascus and meticulous attention to every detail. He’s a professional engineer in his day job but not one of the calculator-and-pocket-protector types; he drives a train. He’s been a full-time locomotive engineer for the past 27 years with the Union Pacific Railroad. Meanwhile, whenever knifemaking starts coming with medical, dental and 401(k), he promises to switch careers.

Ricky Bob Menefee

Ricky Bob Menefee describes himself as a “dog catcher.” For the past 24 years he’s been a full-time trapper for the U.S. Department of Agriculture. Sometimes his job is predator control, setting foot traps, snares or poison for calf-eating coyotes or lamb-snatching bobcats. Other times he hunts crop-destroying wild hogs via a helicopter or uses dynamite to blast out beaver dams.

“I’ve been lucky my whole life,” Ricky says. “The only thing I’ve ever done was hunt, fish and make knives. Knives have allowed me not to have to find a ‘real job’ because my federal job has good benefits to go along with bad pay.” Ricky specializes in fixed blades and slip joints well suited to outdoor tasks, and his tiny tapered tangs are legendary.

Jason Floyd

Jason Floyd describes himself as a “professional grass grower” after 20 years in the golf course business. The damascus and cocobolo knife is one he made in an integral construction. The Mickey Mouse golf towel is a memento from his grandfather.

After 20 years in the golf course business, Jason Floyd says he’s a “professional grass grower.” He started as a turf expert and ended up as a golf course superintendent. Now he works as a forge and blacksmithing tool fabricator for Well Shod Farrier Supply and supplements his income with knifemaking. He says knifemaking is better than watching the grass grow. Jason specializes in forged and damascus fixed blades.

Kelly Kring

I learned a new word from Kelly Kring, who used to work as a “diener” or autopsy technician. He was responsible for moving and cleaning bodies, assisting the pathologist with autopsies and collecting evidence. After that he became an occupational therapy technician in a hospital burn unit. Now he describes himself as “a full-time blacksmith who happens to teach smithing classes at a local college.” He says, “I’ve made knives for many, many people, but don’t call myself a knifemaker.” Kelly is well known in blacksmith circles for being an excellent hands-on instructor.

John Thunert

All the bugs and creepy-crawly varmints better watch out for John Thunert, a self-described “killer for hire.” John works full time as an exterminator. When the pandemic shut down his business, knifemaking took up the slack. John is a Forged in Fire runner-up from season six, episode 18, and has been making knives for four years. “I’ve gotten bored with the other hobbies I’ve been proficient in. Knifemaking and the challenges it presents should see me through another 20 years,” he observes, “and I still won’t accomplish all the things I want to do.” John prefers making fixed blades and forges his own damascus and san-mai.

Josh Howard

Josh Howard makes robots for the Polaris factory and also enjoys his Chambersburg power hammer.

Many knifemakers know how to weld. Josh Howard of Deerlick Ridge Forge can beat that—he teaches robots how to weld. In the daytime, he works for Polaris Industries in the factory where they manufacture the four-wheeled side-by-side Ranger robots and the three-wheeled go-fast Slingshots. 

He writes the programs that drive the automated welding robots, placing precise welds at critical structural points on the vehicles as they are assembled. Josh is a Forged in Fire competitor from season six and specializes in damascus kitchen and hunting knives. He says “Deerlick” is the name of the creek down the hill from his shop, and that nobody actually licks the deer.

Jason Wilder

The apostle Paul was a tent maker and did enough of that work over the years to support his ministry. Jason Wilder is a Church of Christ minister and supplements his work with knifemaking. After all, the Bible does say “the Word of God is sharper than a two-edged sword.” Jason admits that he may occasionally carry a sidearm and a knife in the pulpit and on pastoral hospital visits. 

“Nobody goes into church work or knifemaking to get rich, but my family gets by on the combination of the two,” he notes. “My ministry schedule allows me to make knives, and my knifemaking supports my vocation as a minister.” Jason makes Sunday-go-to-meeting-quality fixed blades, both forged and stock removal.

Terry Vandeventer

In addition to forging impressive fixed blades, ABS master smith Terry Vandeventer is an expert snake handler. Terry has enjoyed a long career as a professional herpetologist, an expert in reptiles and amphibians. He started out with snakes as a zookeeper, and eventually built a business breeding rare and unusual snakes for zoos. 

While he says he’s past his prime in the snake business, he still has “only” about 75 snakes in his current lab. Terry continues to make knives as a source of stress relief, and says “When the knife business gets stressful, it doesn’t serve its purpose for me.” I don’t know about you, but I’d find the North American pit viper collection a bit more stressful than knifemaking.

Bryan Borton

Bryan Borton has spent nearly 30 years in the concrete-sculpture-casting business with his wife Kristy. Bryan crafted this fileworked hunter with stainless bolsters laser engraved by Tyler Poor.

Where do birdbaths come from, anyway? Besides, were birds dirty before people started making birdbaths? Do baby birds prefer baths and older birds prefer showers? My friend Bryan Borton has spent nearly 30 years in the concrete-sculpture-casting business with his wife Kristy. He claims to have made thousands of concrete birdbaths, and his most unusual casting jobs include giant mushrooms, his brother-in-law’s headstone, and some great big soda bottle replicas. 

He began making knives seven years ago, learning first from me and then from Travis Payne and some members of the Texas Knifemakers’ Guild. His knives are popular among the rodeo and ranching crowd, as you might suspect given his West Texas location.

Robert George

Robert George is an electrical engineer. Boring, right? Not at all. Robert was the chief architect at AMD (Advanced Micro Devices) for the computer chips used in the Playstation 4, PS4 Pro and PS5 video games. 

If you’re a gamer, you’ve probably used his work and didn’t know it. Robert describes himself as a “100 percent bladesmith” because he enjoys the artistic expression of forging close to the final shape. He studied with ABS master smiths Jim Crowell, Timothy Potier and J.R. Cook at the Bill Moran School of Bladesmithing in 2010 and has been passionate about knives ever since.

The List Goes On And On

There are some lists that will always be incomplete, and this is certainly one destined for deficiency. I didn’t have time or space to include BLADE Magazine Cutlery Hall-Of-Fame® member James Batson the rocket scientist, Les Adams the bomb squad technician, Jeremy Spake, who builds armatures for stop-motion animation films, or Grace Horne, who builds custom lingerie. I

 also left out a bunch of knifemakers with exotic hobbies like ABS master smith Jordan LaMothe, who performs in musicals, Ryan Breuer, who does ballroom dancing contests, and I’m sure I left out plenty of great stories about people I haven’t met yet.

You and I may have different vocations from each other, and surely don’t have the same jobs as some of these knifemakers. Even so, one thing that joins us all together is our appreciation for knives. Handmade or user grade, for display or cosplay, for vegetable cutting or whitetail gutting, our love of knives brings all of us together in our occupational diversity.

Read More

Cool Customs: Isaiah Schroeder’s Gyuto

Isaiah Schroeder’s Gyuto Comes In A Spectacular Damascus Pattern And Showcases The Maker’s Skill.

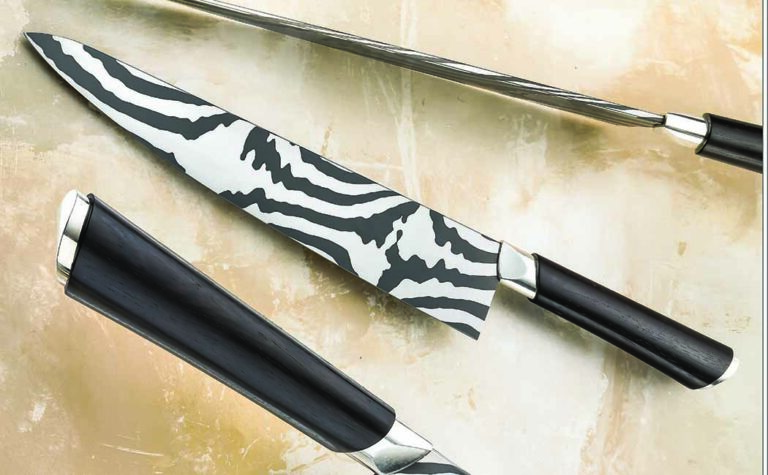
Isaiah Schroeder considers his gyuto the best knife he’s made, and the blade’s electrifying stainless damascus pattern and the ergonomic handle make it hard to argue the point.

Of the blade Isaiah said, “It’s a pretty simple pattern, one I’ve done in carbon steel quite a bit. A low-layer lazy twist is what I call it.” It consists of only 11 or so alternating layers that he twists three or four times. “That’s pretty much all it is,” he observed. “I love the way it turns out with the bold layer lines and everything. It looks kind of topographical and I always like that.” The darker steel is AEB-L stainless and the lighter parts are 154CM stainless.

He said the convex blade grind works great for food release. He is especially proud of the look and feel of his thin handle design that includes silver fittings done in the lost-wax-casting method. Combined with the 1/8-inch-thick blade, he said it’s, “Thin to win for a kitchen knife.”

A full-time knifemaker based in Madison, Wisconsin, Schroeder makes kitchen knives of all types in the Japanese style including a sujihiki, a long knife made for fine slicing of meats, fish, and precisely cutting through sinew. He also makes a petty knife as well in damascus. 

Gyuto Knife Specs
Pattern: Gyuto Japanese chef’s knife
Blade length: 9.44 inches
Blade material: Low-layer lazy twist damascus of AEB-L and 154CM stainless steels
Blade grind: Convex
Handle material: African blackwood
Fittings: Fine silver (2 ozs. worth)
Overall length: 14.44 inches
Maker’s price for a similar knife: $2,000
Knife to know: Isaiah is a full-time knifemaker

Read More

How To Build An Appalachian Spring Helve Hammer

0

The Appalachian spring helve hammer, including springs, hammer head/tup and more.

Some people find great joy in precision and following rules and plans. For those of you who do, this is probably not your power hammer series. I enjoy the creativity of making a thing from scratch. It’s not the precision that turns my crank, it’s that eureka moment of, “It works!”

In this installment I’ll talk through the process of building a junkyard hammer in the Appalachian style. Junkyard refers to the DIY-type build made with what you can find. Appalachian refers to a common design that uses a spring helve. The most popular earlier Appalachian hammer designs were called the “Rusty” and the “Dusty.”

Rocker-Arm Springs

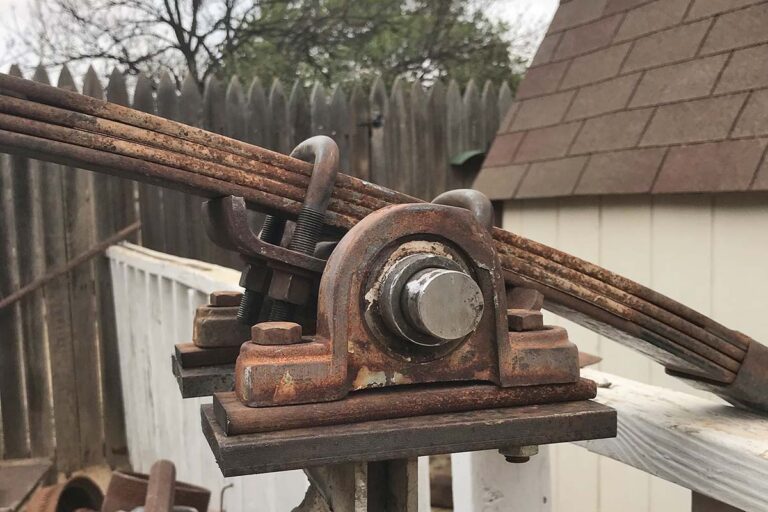
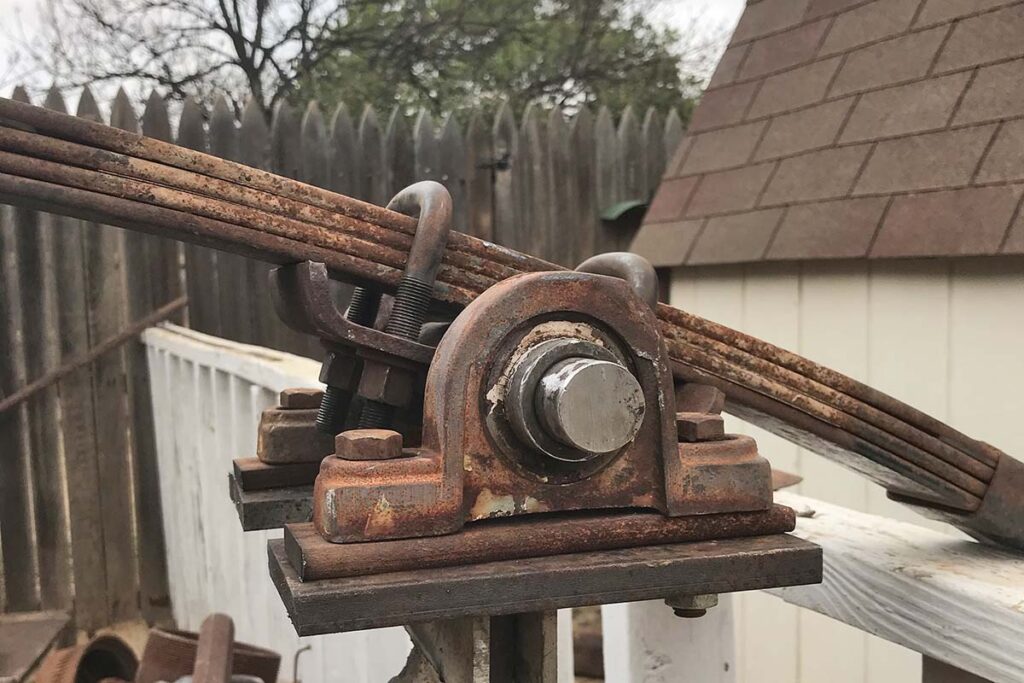
I used a set of leaf springs for my rocker arm. The arm is also called a helve. When it comes to selecting your springs, if you have several to choose from, choose a sufficiently stiff set. If you have the choice between sets that are more curved vs. those that are straighter, choose the straighter ones. If you have the choice between sets that are longer or shorter in overall length, either one will work, but you’ll have to consider whichever length you choose as you lay out the distance between the center post, the anvil and the drive wheel. The length of your spring pack coupled with your stroke length will impact the speed at which your hammer will safely run. The spring action and whip action of the spring set during cycling increase head speed at contact, which improves performance.

leaf springs for the rocker arm a power hammer.
The author used a set of leaf springs for the rocker arm of his power hammer. The arm is also called a helve.

Your spring set needs to swivel or rock on top of your center post. I built my hammer with the springs riding on top of the shaft, and the shaft riding in pillow block bearings. Others are built with flange bearings, and others with the shaft above the springs. Any configuration is fine provided you have the clearance you need for the springs to rock back and forth as the hammer operates. 

Your spring set will need a swivel on the end where it connects to the pitman arm (the rod that connects the spring arm to the drive wheel). Like the top pivot, there are as many different designs as there are guys building hammers.

The end of the spring set near the hammer head needs to be connected in a way where the arc of the spring travel is converted into direct linear up and down energy. Again, there are multiple ways to accomplish this. I went with a set of rollers on the hammer head, and the spring rides in and out on the rollers as it arcs up and down. I have seen designs with toggle linkage as well. 

Hammer Head And Tup

The entire assembly that makes up the hammer head is called the tup. When a smith says he has a 25-pound power hammer, he’s referring to the tup weight. You are looking for a tup weight that is roughly 1/10 of your anvil weight. I built my hammer with a piece of 2-inch-solid-square stock long enough to make a 40-pound tup. For heads that weigh less, you can use a piece of solid stock for the contact area, and tubing or pipe to make up the extra length you need. While a solid anvil is critical to the function of the hammer, the hammer head itself only needs to be solid on the striking end to properly transfer the force.

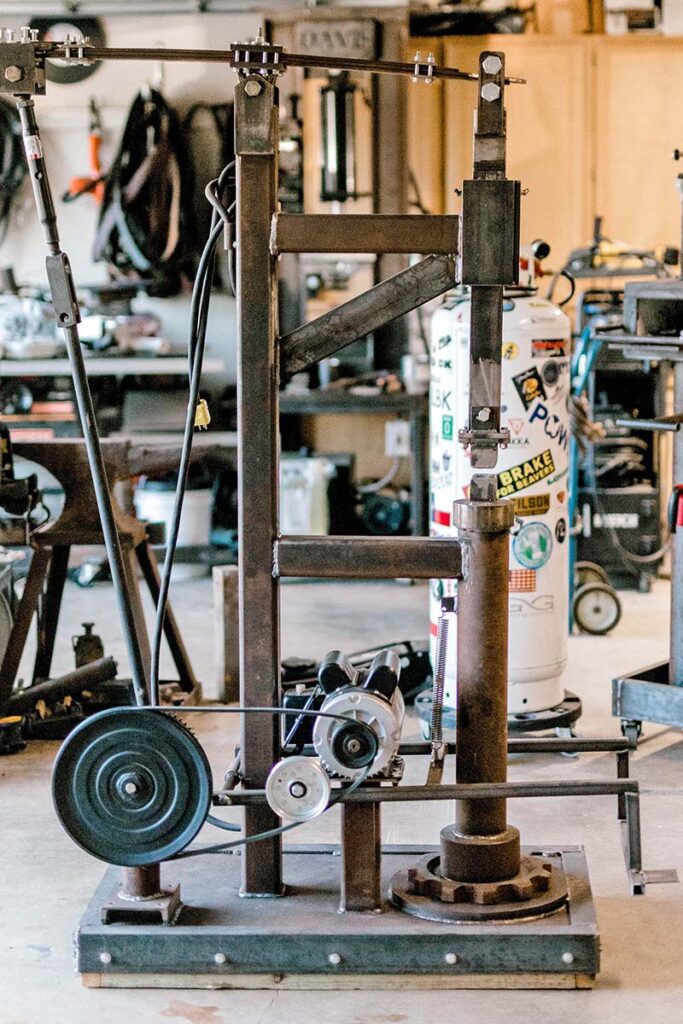
The DIY spring helve hammer built freestyle by Doug Davis
The DIY spring helve hammer built freestyle by Doug Davis of Lubbock, Texas, is shown in both instances here from the pulley side.

The tup rides up and down in a set of guides. You’re converting an arcing spring movement into a linear up-and-down hammer movement. One consideration is that your guides need to account for lateral movement in all four directions. The simplest way is for the guide to completely enclose the hammer shaft. Contact surfaces between the hammer head and guide should be lubricated, and steel on steel is not advised. Bearing surfaces should be made of UMHW (Ultra High Molecular Weight Polyethylene) plastic or of bronze. These surfaces benefit from a degree of adjustability to make sure that the hammer head is aligned properly with the anvil. 

I used set screws and a UMHW plastic cutting board on my hammer, with lithium grease as well. My hammer runs well with fresh grease and less well without. I grease the hammer shaft at the beginning of every forging session. The vertical position and length of your guides should accommodate the various stroke lengths of your hammer. You don’t want the hammer head hitting the bottom of the guide on the upstroke, nor the spring connector hitting the top of the guide on the downstroke.

Pitman Arm

A stiff arm connects the spring pack to the rotating wheel, converting the rotary action of the flywheel to a straight up-and-down rocking motion. This arm is called a pitman arm. It is adjustable for length, as the dimension will ultimately be changed as you tune your hammer by trial and error, or as you adjust your hammer to accommodate varying thicknesses of stock, or the use of swages, or top and bottom tools. I used a toggle linkage on the top and for the bottom of the arm I used large bolts welded to a piece of plate, which I then bolted to the hub of the tire used for a clutch. This is another area where your available parts and mechanical experience will dictate your design.

Read More On Knife Steel:

Winkler Knives Overcoming Hurricane Helene

0

The Tar Heel Hurricane turned lives upside down, but North Carolina knifemaker Winkler Knives has proven resilient.

Hurricane Helene devastated parts of Western North Carolina, East Tennessee and other states this past fall. Among those damaged was the Winkler Knives shop in Blowing Rock, North Carolina.

Daniel Winkler estimated the monetary loss to his business from $500,000 to $600,000, though the biggest setback was the death of one of the company’s long-time employees, Steve Limbacher.

“He could not handle the stress and his heart just gave out,” Winkler wrote. “Steve is missed every day at Winkler Knives.”

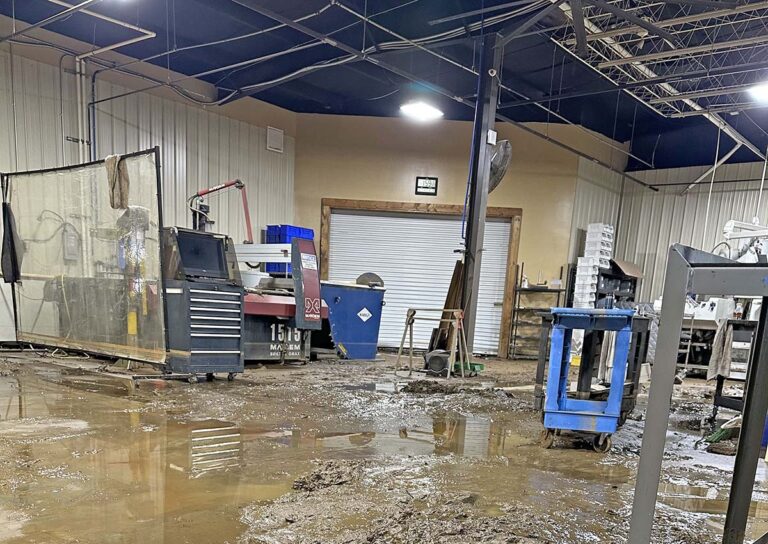
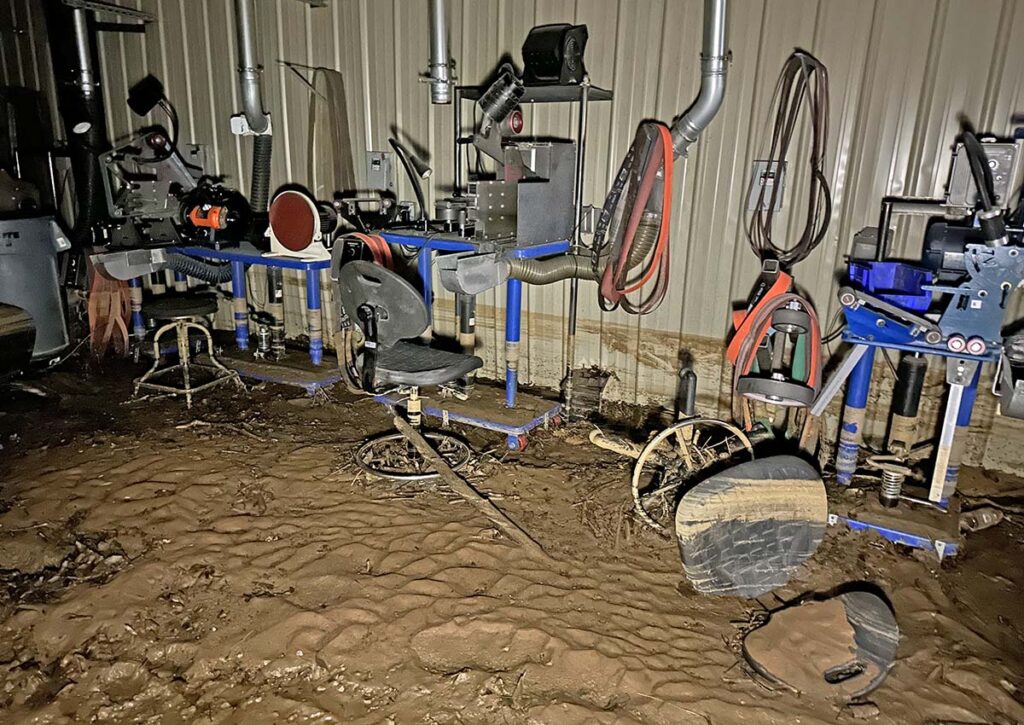
Up to 15 inches of water flowed through the Winkler shop from a creek adjacent to the structure, leaving behind one to 6 inches of mud. The company lost several machines, computers, printers, cabinets and shelves, carts and other daily use tools. Materials for handles, sheaths and other shop supplies were destroyed. Four large garage doors were damaged, as was all the flooring in the office and breakroom. All the office doors were lost.

Winkler Knives
One to 6 inches of mud were left at Winkler Knives factory requiring a extensive cleanup process.

For cleanup the Winklers bought a track hoe, dump truck and small skid steer, and also numerous hoses, pressure washers, wet vacuums, mops and scrubbers. In all, it took the full staff 2 ½ weeks to clean up the mess.
“However, compared to others in our area, we were just inconvenienced,” Daniel noted.

“Many others were devastated with lost buildings, vehicles and many lives. We are truly blessed.”

To aid those in one of the most severely damaged areas in North Carolina, through its fundraising efforts Winkler Knives presented a check for $13,018.75 to the Mitchelle County Development Foundation. The company also raised money for its own recovery efforts via tent sales of Winkler knives, tomahawks, axes and sheaths at Winkler Knives Actual on Nov. 30 and Dec. 2.

More On Winkler Knives:

Dagger Design: Fundamentals Of Dagger Construction

From maintaining symmetry to adding fullers, we break down the intricate process of making a dagger design into a physical knife.

A dagger is not a kitchen knife in disguise. It is a purpose-built instrument of thrust and that purpose demands precision at every stage of construction. Small errors that might pass unnoticed in a hunter or utility knife compound on the exacting canvas of the dagger. A centerline that begins drifting by a fraction at the ricasso becomes an off-center tip, an uncentered bevel a blade that twists, the result a thrust off target. The difference between success and failure is geometry, and nowhere does geometry matter more than in the making of a dagger.

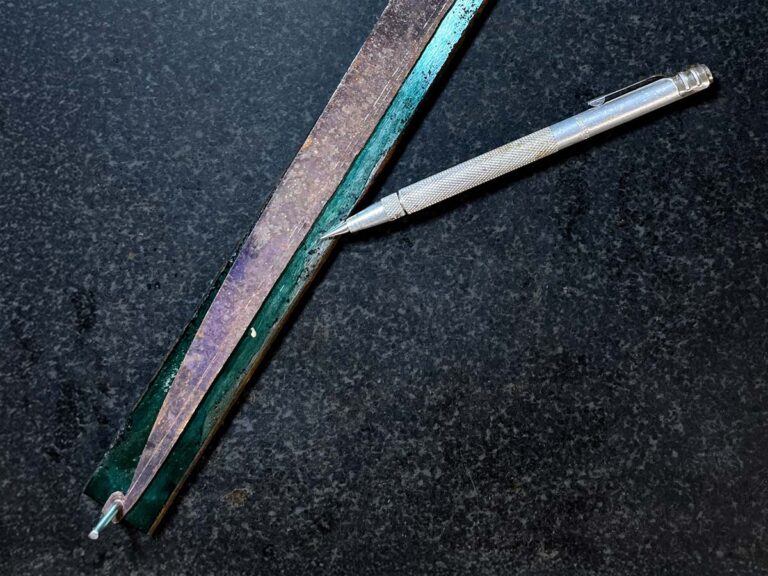
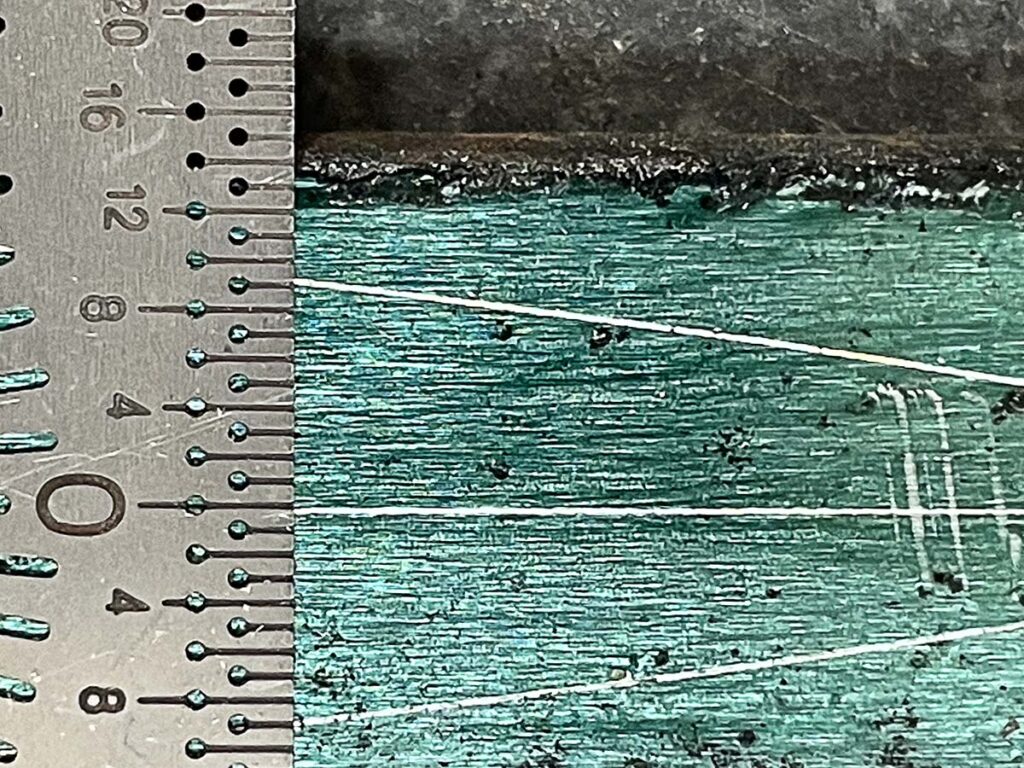
The process begins with detailed design and planning. The execution begins with precise layout. The central axis is the spine on which the whole piece will rest, and without it symmetry is impossible—the whole blade will stand or fall on getting this right. There are some tricks that will help ensure success.

Dagger Half Template

The Line That Rules Them All. A cleanly scribed centerline on both edge and flats sets the maker up for successful layout. A centering ruler can be a useful tool to check this.

Once you have determined the blade profile, preferably in some physical form like a drawing, make a template so it can be accurately transferred to steel. Here’s the thing, though: you only need half. A template representing only half of the blade profile will allow you to use it for each edge, ensuring perfect symmetry. Include the tang on your profile, not just the blade.

If you’re careful, your half template can be held on your blade stock aligned on a scribed center line and scribed on each side. If you’re less careful, oversize your blade stock and template so you can drill holes for alignment pins in the end of each that is outside the final profile. Using these holes to align the half template for marking each edge is the most precise way to lay out a symmetrical profile. If the stock is oversized, you’ll grind off the alignment holes when grinding the profile.

Planning Plunge Lines

Once you’ve accurately laid the profile out on the blade stock, take the time to scribe in the planned plunge lines on the blade flats and the edge. Sweeping, curved plunges are more visually appealing and careful layout will help ensure that your vision becomes reality. These lines are not decorative. They are the stops, targets if you will, that prevent the grind from slowly creeping toward the ricasso with each grinding pass.

Grinding the Plunges. Gradual, sweeping plunges are much more appealing to the eye than straight ones. Draw them in and grind to the drawing. This is more easily done on a wheel than with a flat platen but can be accomplished either way.

When it comes to grinding these sweeping plunges, hollow grinding on a wheel is easier than flat grinding on a platen—it’s easier to grind a curve with a curve—but by all means use a flat platen if that’s what you have. If you’re already grinding on a wheel, a 1-inch-wide wheel with a 1-inch belt will be an easier path to success than the standard 2-inch wheel and belt.

Sweeping plunges also will result in a thicker edge toward the ricasso. This is fine—you shouldn’t try to sharpen this part as doing so most likely will ruin all your careful design work. Will the unsharpened part of the edge impair the stabbing function? Perhaps, but only a little. Though it pains a serious knife person to admit it, most handmade modern daggers are for show. In most societies stabbing others is frowned on, and if you’re going to all this effort, choosing to focus on aesthetics is a good bet. However, if your dagger will be deployed in combat, ignore the aesthetics, grind sharper plunges and take the edge all the way to the ricasso.

Dagger Grinding And Stock Removal

Grinding and stock removal are the way to go for daggers. This is admittedly a hot take but in a game where winning is determined by symmetry, forging introduces unnecessary variables and distorts the base stock, making accurate layout more complicated—not impossible, just not as easy. There is little to gain by forging unless the steel itself or the situation requires it, or if you simply like doing it that way. If you want a damascus pattern to taper toward the tip, or if you’re making a dagger for American Bladesmith Society testing, by all means forge. It’s an impressive skill set. If you want to make the best dagger possible with an eye toward efficiency, and thereby your profit margins, grind it. Stock removal is the more predictable path, and predictability is the soul of symmetry. Every forged blade is a stock removal blade before it’s completed; don’t get hung up on this unless you have reason to.

Delicacy Of The Dagger Tip

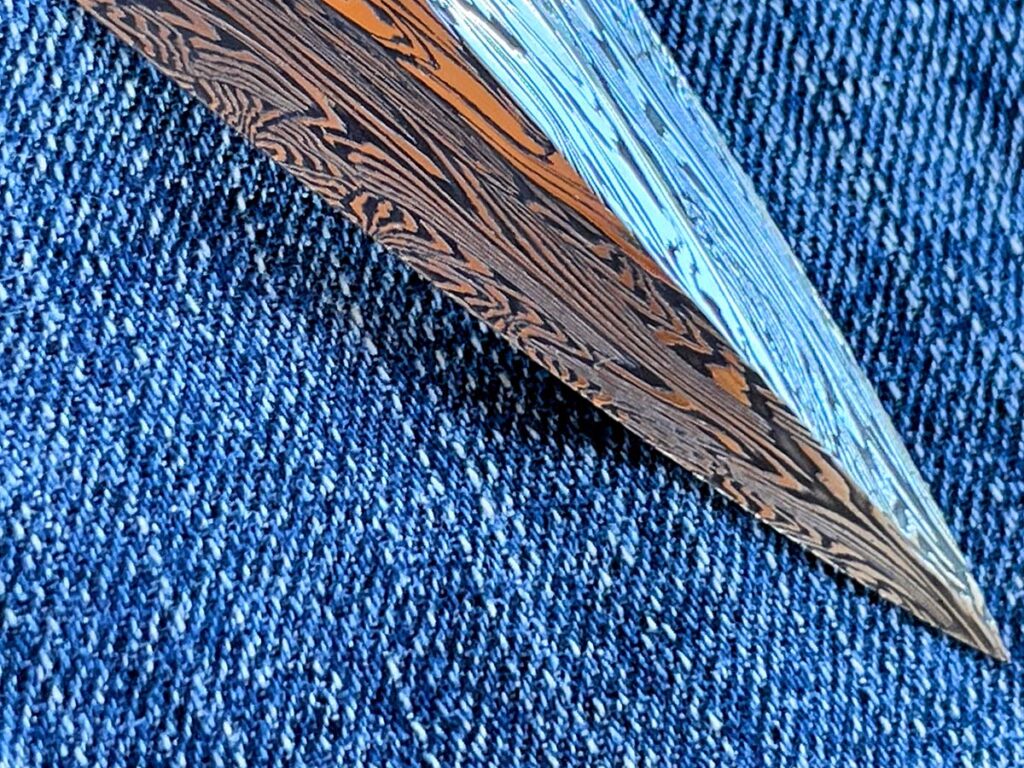
Forged for Continuity. An intricately patterned damascus dagger by Gregory Verizhnikov shows why sometimes forging is worth it—forging through the tip preserves the pattern’s flow.

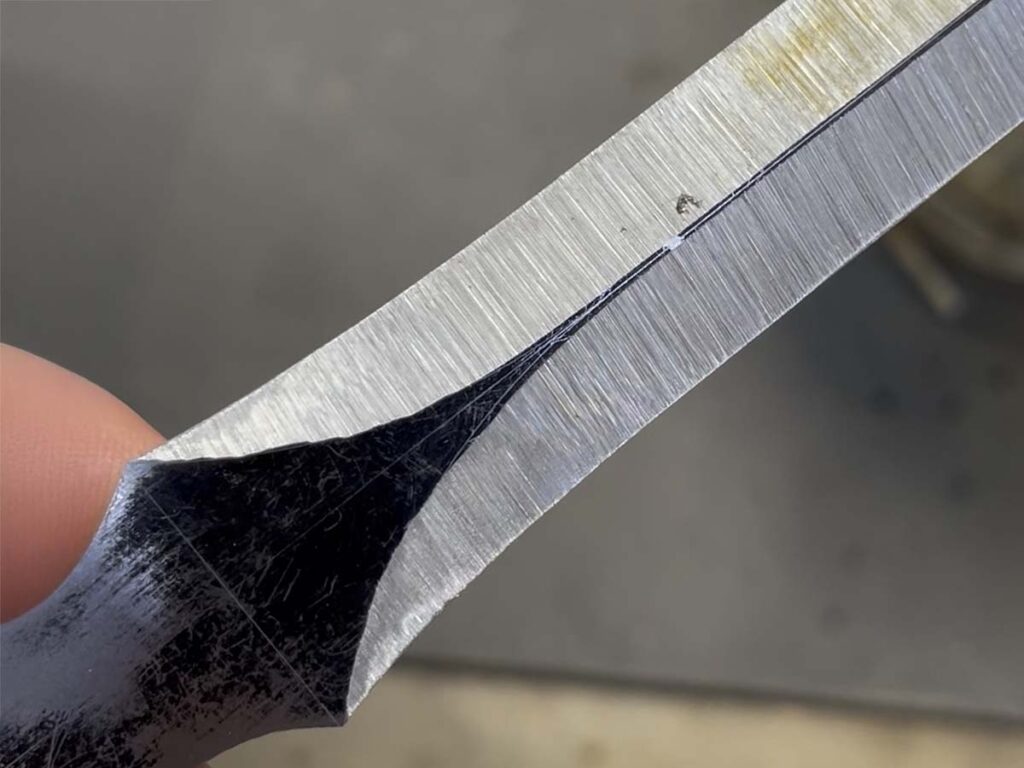
Where the mass of the ricasso anchors the entire weapon and provides strength at the critical juncture of guard and tang, the tip, by contrast, demands delicacy. Once your profile is carefully ground to shape and you turn to grinding the bevels, grind the tip first. More specifically, grind it at a steeper angle than you plan for the main bevels, and try not to cross the centerline even at that obtuse degree, except at the very end. After that, leave it alone.

Grind the main bevels like you normally would, paying perhaps more attention than usual to your scribed lines, and try to avoid that last inch toward the tip until everything else is pretty much done. This seems a bit odd at first, but consider that the final inch must maintain its thickness in order to be strong enough to pierce effectively without deformation or fracture. If you do it right, you’ll end up with a bevel at the transition. Some makers polish the transition so it remains crisp, while others blend it smooth while polishing. Either way, it should be deliberate. Neglect this and the point will be too thin.

When To Add Fullers

Lay Out Everything. Scribe curved plunge lines on the flats and edge mark exactly where each bevel begins and ends.

Fullers, if they are to be included, should be cut early while the blank still has parallel flats. Attempting them later invites misalignment, or at the least inserts a potentially unnecessary level of difficulty. Better machinists than this writer/dagger enthusiast will likely have little difficulty either way, but life has enough complications of its own without inviting them into play.

Dagger Balance

Balance matters as much as steel. A well-made dagger should balance at or just ahead of the guard, a neutral point where the hand feels neither burdened nor abandoned. This can be tested with nothing more elaborate than a rod beneath the mostly assembled knife, shifting it until it rests level. It’s really just as easy to adjust weight distribution by feel, removing or adding weight to the component parts until it feels right. Don’t forget to consider the added weight of your epoxy. When balance is right, the blade becomes an extension of the wrist, alive and responsive.

Tang & Spacers

How Not to Do It. This dagger blade poorly ground by the author clearly demonstrates that the easy way out usually leads back in. Off-center bevels and an off-center tip are predictable results of poor initial layout.

Even the tang deserves forethought. When profiling the blade blank, leaving the tang longer than necessary provides room for correction and fitting, and a threaded end can serve as both a work-holding aid during construction and a permanent anchor if a pommel or nut will close the assembly.

Spacers, fitted between guard and handle and again between handle and pommel, make alignment easier and allow pins to register each component precisely during glue-up. They’re also relatively easy targets for weight adjustment when working on overall balance. These details are seldom glamorous but are what let the final assembly come together without struggle.

Embellishments

What results from this attention is not decoration but readiness. The embellishments will come later… the fluted handles and twisted wires and all the flourishes that mark the master’s hand. But none of that matters if the design is poor, the execution haphazard, the details unconsidered.

More On Daggers:

Secrets Of The Shop: Fisk and Sibert

0

Mortised handles and excellent accidents.

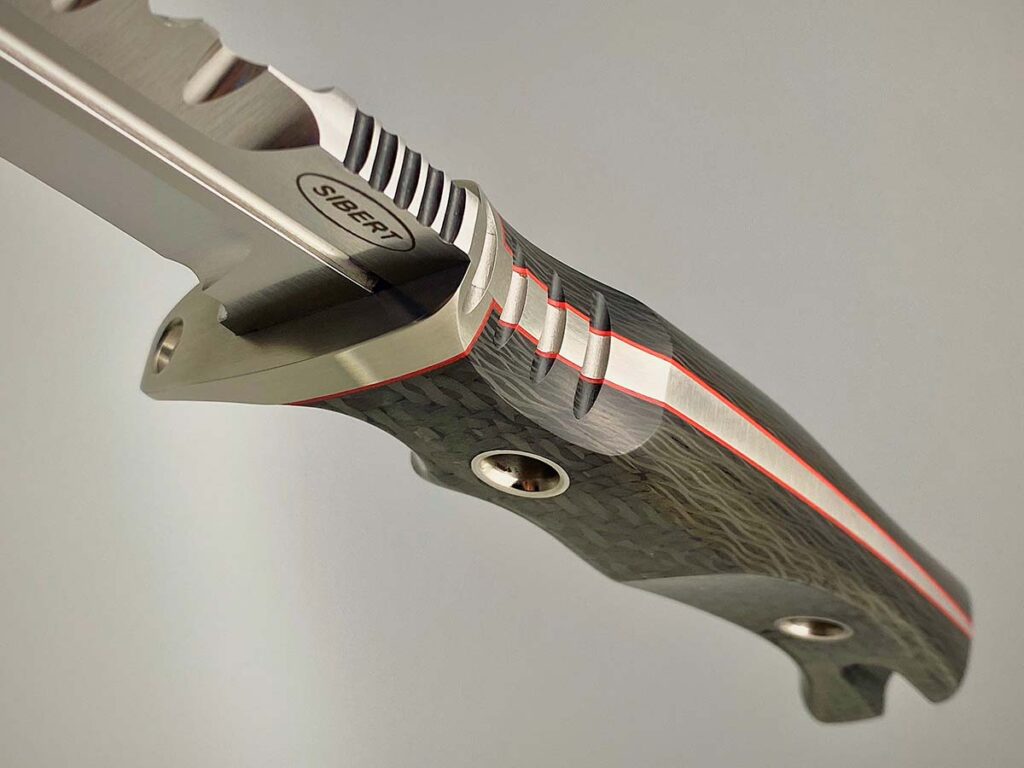
This issue highlights the expertise of the national living treasures, Jerry Fisk and tactical maker Shane Sibert. Their insights focus on the construction of mortised-style handles and the professional mindset required for success.

Getting A Handle

A trailblazer and visionary since becoming the 17th ABS master smith in 1989, Fisk’s philosophy centers on the idea that a knife isn’t just an art piece; it is a tool that must survive the most extreme (and sometimes bizarre) conditions.

To this mindset, the mortised handle has served him well, consisting of two flush-matching scales equally inletted to create a tight pocket for a hidden tang, then positioned directly against the guard. He mechanically secures the scales by pins or screws with epoxy. Fisk prefers this method because it offers the profile of a full-tang knife incorporating a narrow-tang guard.

  • Precision Prep: Grinding a tang taper aids in fitting the slip-on guard. Radiusing blade corners and edges prevents stress fractures in the handle. Fisk routs cavities along the tang outline to a depth of 0.004 inch beyond half the tang’s thickness.
  • The Dovetail Secret: Using a Dremel to undercut the inner corners of the handle cavities creates a “mechanical lock” for epoxy, strengthening the bond significantly like an internal pillar.
  • Mechanical Retention: Fisk advocates for screws over pins to provide superior clamping force.
  • Minimal Epoxy: Epoxy should act as a sealer and secondary bond, not as a structural gap-filler. Using as little epoxy as possible is key.
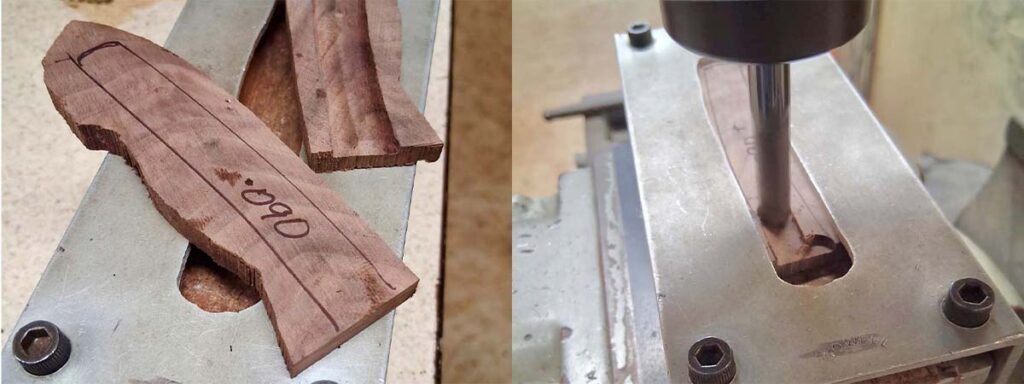
According to the columnist, Fisk prefers a mortised handle consisting of two flush matching scales, equally inletted for a tight hidden tang. No easy task. Not only does it require precise placement of the tang outline (left) on the scale, but exacting router work (right). (Images courtesy of Jerry Fisk)

Destruction Testing

Fisk’s designs are forged through failure. After a customer drove a cement mixer over his knives—finding that only the mortised handles survived versus narrow tang—the value of testing was clear: If you don’t test, you won’t know your knife’s limits. In his first year, Fisk sacrificed 54 knives to find their failure points. And he continues to utilize a panel of professionals (trappers, police and military) to vet designs for real-world skinning, tactical and survival use.

Press Fit Guards

Fisk treats the guard as a structural component rather than just decorative. In turn, he goes the extra mile in their construction. Despite having a milling machine, he file fits the guard slot by feel—practiced precision to ensure a seamless transition. He believes retention should never rely on solder or epoxy—these seal but do not hold. Fisk hammers the guard into place using a slotted Micarta block to ensure a true mechanical fit. And he uses JB Weld to seal seams, noting its robustness and machinability compared to standard epoxies.

Business Of Bladesmithing

Fisk warns that many makers fail by focusing 100 percent on the steel while ignoring the sale. To be a full-time maker, you must understand how to move product. Fisk emphasizes that marketing is often the missing element in a maker’s strategy. Without it, you risk becoming the primary collector of your own work.

At shows, you are the brand ambassador for your knives. Stand up and make eye contact. Sitting down signals a lack of energy. Further, your attire and interaction should reflect the quality of your blades. Buyers are purchasing you as much as they are the knife.

For Jerry Fisk, his philosophy as to why he makes knives captures the legacy of a master smith—every hammer blow is a permanent record of existence. A well-crafted knife serves as a testament to the maker’s life and skill, surviving long after they are gone.

Technical Signature Features

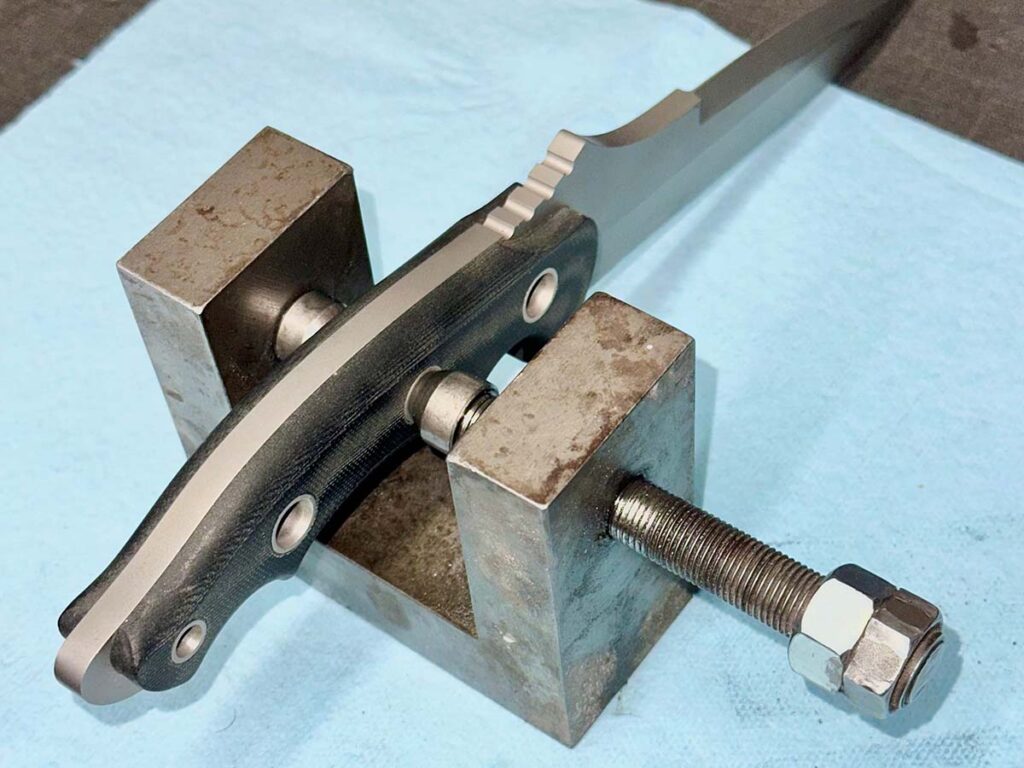
Sibert came up with a custom jig (left) to compress and flare 3/8-inch Grade 2 seamless titanium tubing on mortised scales. (Image courtesy Shane Sibert)

Shane Sibert has been a full-time maker since 1994, building innovative fixed-blade and folder designs for hostile environments.

Inspired by my use of 3/8-inch tubing as a signature design element in my SEALTAC™ fighting knives, Shane wanted to do a similar feature—but with a different twist: a mortised-style handle with flared 3/8-inch Grade 2 seamless titanium tubing.

  • The Problem: Straight-walled tubing can allow for handle-scale separation over time.
  • The Preparation: Use a single-flute tapered reamer to create a shallow flare in the handle material.
  • The Solution: Use a custom jig to compress and flare the extended tubing into that taper to create a mechanical rivet effect that sandwiches the mortised scales to the tang.

Accidental Pivot Accent

A hallmark of many of Sibert’s knives—fixed and folder—is an accent fuller (right) running into the handle. This causes an issue with fixed-blade knives, one he cures with a bit of JB weld to cover up the gap. (Image courtesy Shane Sibert)

Born from a mistake (drilling a pivot screw head hole too large), Shane pivoted by creating ½- to 5/8-inch bottoming pocket inlays around it. For aesthetics, he uses contrasting materials around the pivot-pin head. Further, he uses a decorative blind pivot screw on the obversed side with an embedded disc of color, hiding the mechanical nature of the fastener.

Famed sole-authorship folder maker Harvey McBurnett once said, “Knifemaking is the fine art of camouflage,” when amending such mistakes. Shane did so in a creative way, born out of necessity.

Another example of this is Shane adds accent fuller grooves on both folders and fixed blades that extend back underneath the handle or guard. The challenge is on fixed blades, where this creates a gap where the guard meets the fuller. His fix is to use black JB Weld epoxy to seal the transition, ensuring a seamless look that maintains the illusion that the fuller vanishes into the hilt.

Getting Off The Ground

Sibert has a grounded, no-nonsense perspective on entering the craft. He suggests that new makers don’t over-invest in high-end machinery immediately. Instead, focus on development and growth first. They also need to get ready for the grind; knifemaking is dirty, repetitive and requires immense discipline. It isn’t always “glamorous” shop work. Dedication is non-negotiable. If you want to be good, you have to be obsessed with the details. And starting out, keep your day job! The pressure to pay rent often stifles the creativity needed to make world-class blades.

Shane is old school with modern touches in his approach to knifemaking. That is the basis for the beauty in his knives.

Read More:

How To: Forge Beveling & Blade Tipping

Forge Beveling & Blade Tipping Are Necessary Skills For Any Fledgling Knifesmith To Learn. Here’s The Skinny On Both.


Forged Knifemaking
This article is an excerpt from Forged: Making A Knife With Traditional Blacksmith Skills available at ShopBlade.com.

TIP: The most important principle in this section is to overlap hammer blows. The right edge of your previous hammer blow becomes the center point of your next hammer blow.

Forge-beveling allows a consistent pushing of the hot steel in all directions at each blow. The physics are consistent, predictable, and reliable. At each strike, the force of the rounding hammerhead pushes the bottom half of the blade and the spine in opposite directions. The tip-to-choil forces are contained for the most part by the blade’s mass.

It’s much like when the smith makes breakfast sausage patties. Imagine pushing the center of that sausage patty down with the heel of your hand (hammer) against the counter (anvil). The patty spreads out in all directions with a dimple in the center, the same as the steel.  With repeated overlapping blows the bevel thins and widens downward as the spine stretches upward. The resulting geometry is a thinning and reshaping of the blade between the cheek line and the cutting edge.  A bevel is forged and formed with your rounding hammer, anvil and blacksmith’s eye.

Once forge-beveling is mastered you can actually form a hollow “grind” by hollow forging (another lesson, another book).

NOTE: Look at a knife with the pommel to the left and the point to the right, cutting edge down and spine up. For reference and description, this is the right side of the blade.

This is the right side (i.e. right-hand side) of the knife blade.
This is the right side (i.e. right-hand side) of the knife blade

Setting the Bevel

The forge-beveling procedure is advanced forging. Beveling with a hammer is a blacksmith secret used by few these days. Learn this method and you will certainly be connected to the smiths of old.

This forge-beveling procedure takes me six heats or more, at minimum; three on each side. Theoretically, one heat per line, three lines per side (explained below in Half, Fourth, Eighth). Make these passes down the bottom half of the blade traveling its full length. Because you might be a beginner it may take many more passes than six.

You may need more heats due to being hammer shy or because of rookie hesitation. You may start and stop frequently due to under-heating, overheating, dropped blades, re-positioning your piece or “Where’s my hammer?”.  All of those are OK. We all do them.

Half, Fourth, Eighth

Let’s go through the forge-beveling principle. First think of cross-section geometry. Develop a visual in your brain of the relative distance from the center point of the hammer face to the bottom one-half of your blade as you travel along its length from ricasso to tip.

Do this by visualizing one-half, one-fourth, and one-eighth. If we were to saw a blade vertically in half and view its cross-section, we would see that its shape is thickest at the top, along its spine. It holds that dimension down to the cheek (about the halfway point) and then dramatically loses thickness as it approaches the cutting edge. This is the bevel. Your bevel. Think halfway from cheek line to cutting edge. This is the 1/2 line.

This traditional way to set this bevel can only be acquired with dozens of latitudinal hammer strikes passing from left to right at those three descending levels: 1/2, 1/4, 1/8. Remember one-half, one-fourth, one-eighth.

Note and maintain a mental image of the three all important forge lines.

NOTE: This 1/2, 1/4, 1/8 business does not mean fractional inches. The fractions refer to the position of your hammer’s center face on the horizontal bar (i.e. halfway, a quarter of the way, and an eighth of the way from the edge to the cheek).

Remember this is a theoretical thing becoming a real thing. The blade is 1-inch wide, and the face of a 2.5-pound rounding hammer is about 1.5 inches. Think exact center of a hammer face on those latitudinal forging lines. 

TIP: See the author setting the bevel on YouTube. Search for: Paul White FORGED.

Try not to strike above the imaginary cheek line that runs about halfway between the spine and edge. Your hammer passes will form the cheek line. The final cheek line usually falls well above the halfway point because maintaining that line exactly in the center is almost impossible with a round hammer face, your billet bouncing around on the anvil, and you’re trying to hit on exact points. However, the primary objective is to maintain the original thickness in the spine (1/8-inch) as far down to that halfway line as possible. 

Blade Tipping

Each pass will require a slight upward tipping of the spine to acquire about a 10° to 12° angle to be set in the bevel as you hammer. It takes a simple inward twisting of the wrist to keep the blade from resting flat on the anvil face. It must be done at each horizontal pass. This smartly places just the right amount of bevel angle. After a few passes, the blade will “find” that angle as you place it down.

After a complete pass from choil to tip on the right side of the blade, flip the piece over, tip to 10° to 12°, place at the top of the anvil, and do the left side. This is the place to use your indexing skills. It takes most smiths some time and practice to fully master this concept. I’ll go over this beveling thing a couple more times. Read this whole section and look at the drawings and photos several times before doing this.

TIP: Sometimes it takes fewer total passes than I indicate in this book. This is due to the individual smith’s power and/or heat control and/or blade position and/or hammer penetration and/or steel composition. There are lots of variables. If your blade is almost straight after fewer than the recommended strikes or passes, back off on the heat and/or reduce the power or reduce the passes. If you place blows beyond what is needed, the blade will curve upward.  Usually, fewer strikes per pass will be necessary as the beveling chore proceeds.  This happens because the smith usually increases his or her power and confidence as time at the anvil is increased. Also, the bevel becomes thinner with repeated heats requiring less steel to be moved.

The forging sequence is as follows. Take a heat. Place the blade at the bottom of the anvil. Tip to 12°. Place overlapping blows down the blade on the right side at the 1/2 line. Take a heat. Flip to the left side of the blade at the top of the anvil. Tip to 12°. Forge down the left side at the 1/2 line at the top of the anvil. Take a heat. Flip to bottom. Tip. Place blows down the right side of the blade at the 1/4 line. Heat.  Flip. Tip, down the left side at the 1/4 line at the top. Take a heat. Flip. Tip and down the 1/8 line on the right side. Heat. Flip. Tip. Then down the left side at the 1/8 line. Your blade should be nearly straight after three or five passes and however many heats as needed.

By hammering in this 1/2, 1/4, 1/8 method you will “set the bevel” of your knife in the traditional way, FORGING! Ninety-three percent of all bladesmiths set their bevels at the grinder.  I have met only a handful of smiths that do this the old way. You’ll be the only blacksmith in the surrounding ten counties that sets the bevel with your three-pound hammer!

Do not strike randomly up and down the blade or space-out (i.e. not overlap) your blows and expect anything good to happen.

BLACKSMITH SECRET: To gauge forging heat have a wooden box close by and away from any direct light. Hold your blade in the box to see the true forging heat. Even when hot the “red” is sometimes difficult to see in a lighted room. However, the red will show in the shade of your box. This means you are above forging heat and will thus avoid potential edge cracks. Remember this is high carbon steel and your working parameters are narrower. Iron can be worked over a greater temperature without damage.  At the end of each forging and before you lose forging heat in your blade use the last few seconds to straighten and align your work. Make all lines right with the world. 

The successful counter-bend is placed at the “bottom” of the anvil with the choil just at the anvil’s corner next to the table. Several hammer blows are placed at the halfway point/line and then the hammer travels down the blade to the smith’s right.

You can buy Forged: Making A Knife With Traditional Blacksmith Skills here

Advertisement

Must Read Articles

Read this before you make a knife

Knifemaking 101 – Read This Before You Make a Knife

  by Wayne Goddard My experience has taught me that there's nothing like digging in and getting started. I've often said the hardest part of the...
how to forge damascus steel

How to Forge Damascus

Advertisement
Advertisement